Tier cakes don’t have to be intimidating! I’m going to show you step by step how to assemble a tier cake by layering cake and fillings, creating a support structure, stacking cakes on top of each other, and adding final touches. If you prefer to watch a video of this tutorial, scroll to the bottom of the page.
Layer your cakes
I like to start with my top tiers so that they have time to set before stacking them. You’ll need a cake board the same size as each cake, so my 6” cake will sit on a 6” cake board. Pipe or spread a dollop of frosting onto the cake board to attach your first layer of cake.

Pipe or spread filling onto the cake layer and then press your next cake layer on top. Continue alternating cake layers and filling. Make sure layers are level by trimming the tops with a serrated knife before you assemble the cake.

It’s really important that the sides of the cake are straight, so that it’s not leaning over to one side. As you place each cake layer down onto the cake, spin it around on your

I like to press down on my cake after adding each layer to push out any filling that would otherwise ooze out later under the weight of the frosting. After assembling the cake I chill it in the fridge for an hour or the freezer for half and hour, while I assemble the next cake.

You can build the bottom tier straight onto the board you’re going to use to display the cake, which should be at least 4 inches bigger than the bottom cake. This one is 8 inches bigger – it’s a 12” board with an 8” cake.

For the bottom tier you’ll need a cake drum, which is a thicker and stronger than standard cake boards. This sturdy cake drum will be able to hold the heavy cake on top of it. The higher tiers don’t need to support any weight because you’re going to build a support structure to do that, so the cake boards for those cakes are just thin cardboard rounds with a greaseproof lining. I buy these ones.

As with any cake, make sure the cake layers are level and sitting straight on top of each other so that the sides of the cake are straight. Chill this cake while you frost your other cake.

Frost your cakes
Since you assembled this smaller cake on a cake baord the same size as the cake, you’ll need a bigger board to frost this cake unless you want to frost it right on the

Frost your cake with a crumb coat, which is a very thin layer of frosting to trap in any crumbs that come off the cake, so that they don’t get into the final coat of frosting.

It’s easiest to frost a cold cake because it’s firmer and less crumbly than when it’s at room temperature. Also, by chilling the cake before frosting it, the filling will set and hold the layers in place so that nothing moves around while you’re frosting. The crumb coat doesn’t need to be perfect but aim for straight sides and a level top on the cake.

Cover the rest of your cakes with crumb coats and then final coats of frosting, getting the sides as straight as you can and using an

I have very detailed tutorials on how to get smooth frosting and 5 tips for textured frosting using a cake comb. You can add decorations to your cakes at this point or after assembling them and I’ll show you both options later in this video.

Create your support
To stack a tier cake you need a support structure to hold the weight of each cake, and you can do this with boba straws or with dowels made with wood or plastic. Push your first support into the bottom tier of cake, pushing it all the way down until you hit the board at the bottom.

Pinch it where it meets the top of the cake and pull it back out and then cut it where you pinched it, so that it’s exactly the same height as the frosted cake. I should mention that you can insert the supports before or after chilling your cake. If the cake is chilled you’ll need to push harder but the advantage is that if you accidentally bump the frosting, you won’t damage it because it will be firm.

Then line the rest of your supports up against the first one and cut them so that they’re all the same size (or mark with pen first). I like to use boba straws because they’re thicker and wider than normal straws so they’re very strong, but they’re also very easy to cut with scissors.

Take a cake board the same size as the next cake and line it up in the middle of the bottom cake and trace around it with a knife to leave a circle drawn in the frosting on the top of your biggest cake.

Push your first support back into the hole you made earlier and then push the rest into the cake. I use a support in the middle of the cake for 10” cakes or bigger, and sometimes for 8 inch cakes but it’s not really necessary for smaller cakes.

Then you need 4 more supports placed around the cake in a square formation, keeping them 2 inches apart from each other and at least an inch within the circle you drew onto the cake.

When you push the supports into the cake, push them in just a little bit and then lean down to look at them from the side to make sure they’re standing up straight, not leaning to one side, so that they’re as supportive as possible.

Remember to push them all the way down until they hit the cake board. You can use the handle of your

Stack your cakes
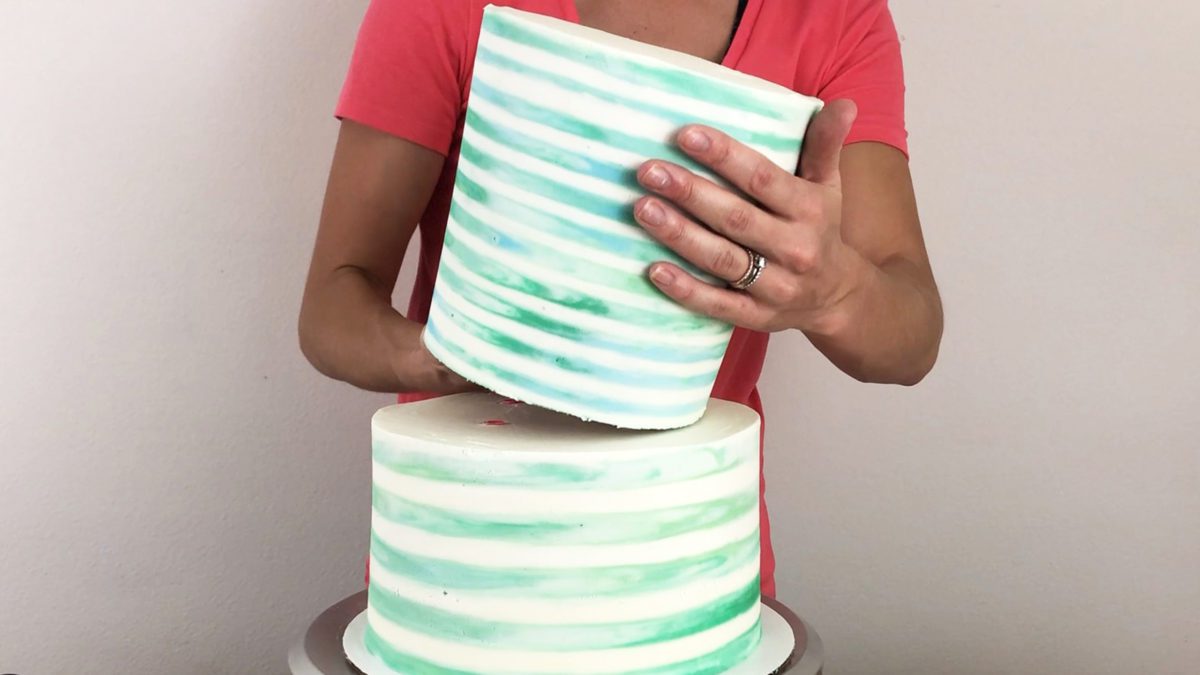
When you’re ready to stack your cake, take your next cake out of the fridge and slide your

The frosting will be hard since it’s cold so your

While holding the cake with one hand, pull off the roll of masking tape from underneath, if you used one to attach this small cake board to a larger cake board while you frosted the cake. You can pick it up like this because the frosting has been chilled and set so it’s firm.

Spread some fresh buttercream in the middle of the cake to make it sticky. Then lower it onto the bottom cake and line it up in the middle of the cake so it’s centered.

Repeat for another cake if you’re making a three tier cake, tracing onto the second tier around a cake board the same size as the next cake. Instead of a cake baord, you can trace around the cake pan you baked the cake in.

Push a support straw or dowel to measure the height of the second cake and then use that one to cut equal sized supports. This is a 6” cake and it will have a 4” cake on top so I’m just using 4 supports with no central support because the next cake is so small.

Lift the small cake off it’s board, using your

Spread some fresh buttercream on the top of the cake below, and then place the top cake on it. It’s essential that the top tier has been properly chilled so that you can separate the frosting from the board you decorated the cake on and then lift up the cake and lower it onto the cake below it and if necessary, move it around to sit where you want it to.

Cover your seams
To tidy up the joins where each cake rests on the cake below it, put some buttercream in a piping bag. You’ll need a round tip or you can just cut the tip off the end of the piping bag for the buttercream to come out of. You’ll also need a frosting smoother for this – any material, as long as it has a straight edge.

Pipe buttercream all around the bottom of one of the cakes, resting the bag down so that it’s touching the cake below to completely cover up the join between the two tiers.

Then use your frosting smoother to scrape around the cake, resting it down so that you’re going all the way down to the bottom and scraping a few times to smooth the frosting. You’ll take off all of the excess that’s sticking out from the sides of the cake but you’ll push the buttercream into the gaps in between the tiers to fill them in so that the bottom of the cake is neat and smooth. I’ll show you some variations of this in a moment.

Tidying up the join between the tiers will give you a perfect blank canvas snd when you’ve finished, just choose the prettiest side to be the front of your cake and start decorating!

I have hundreds of cake decorating techniques to choose from on my online cake school and I share a new cake decorating tutorial on my YouTube channel every week so subscribe to that for lots of ideas!

If you use colours in your final coat of frosting you can tidy up the joins between tiers in the same way. You can do this even for patterned or decorated cakes, like this striped buttercream cake.

After stacking your cakes, pipe frosting around the join of the cakes. For the top tier, the frosting at the bottom of the cake is white, so I’m piping on white buttercream and smoothing that to cover the gap between the top and bottom tier.

If the bottom had been one of the green watercolor stripes, I would have saved some of those colors of buttercream to do the touch up, piping or spreading them around the join of the cakes and then scraping around with a frosting smoother.

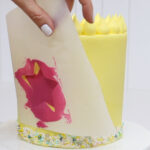
Add decorations
I like to add decorations after stacking my tier cakes so that I can see how everything lines up and how the sizing looks in reality before scaling my decorations. That also gives me the chance to decide which is the prettiest side so that can be the front and then I choose the placement of my decorations.

For some decorations, for example textured frosting or other decorations on the cake, you might choose to assemble the cake first and then add the decorations, so that it’s easier to lower the top tiers onto the cake without damaging the frosting or decorations.

But if you want to decorate and then stack the cake, a cake lifter is really helpful. After you put the supports into the bottom cake and spread on some fresh buttercream to make it sticky, slide the cake lifter underneath the top cake so that you can lift it and then lower it onto the bottom cake without holding onto the sides of cake.

You can push it off the cake lifter using an

For this ombre cake I’m going to use another type of piping to cover the join of the two tiers. I show how to achieve this pretty ombre frosting in my free online course on 10 Frosting Techniques.

After stacking the cakes using the same method as for the other cakes, I’m going to cover the join between the two tiers. I’ve put leftover orange buttercream (the same colour I used to frost the top of the bottom tier and the bottom of the top tier) into a piping bag is fitted with a small round tip, a Wilton #8.

I’m piping a beaded border by squeezing out little blobs of buttercream all the way around the cake to cover any gaps or visible cake board at the bottom of the top tier. When the cake is smooth and neat I’ll choose my favourite side for the front and then cover it with decorations.

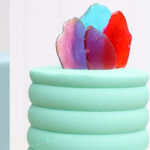
When buttercream frosting has set, like it has on this cake, it isn’t sticky anymore. To attach fondant decorations you can brush the back of the decorations with a tiny bit of water to make it sticky and then press them into the cake.

There’s no limit to the piping techniques you can use to cover the joins between tiers. For this cake I’m using an open star tip, a 4B by Wilton, for wavy piping. I cover all sorts of piping in my course on 10 Cake Decorating Techniques.

For the opposite of tier cakes, check out my tutorial on how to make mini cakes!

Here’s the video version of this tutorial:


Hi
This is really useful as I’m still learning. I literally can’t get over how you’re holding the sides of the cake. Are they frozen? Or is this a special kind of frosting. I have tried with buttercream, but although it sets, its not hard enough to handle in that way. I’d appreciate your suggestions.
Thanks
Tee
It's my 4 Minute Buttercream and the cake has been in the fridge for at least an hour to set firmly enough to be able to lift it 🙂
I’m doing a 6in bottom tier and a 4 inch top tier. Do I keep the 4 inch cake board under the 4 inch tier when I place it onto the 6in tier?
Yes! Sorry that wasn't clear! The supports will hold up the board - if you don't use a board, the top cake will sink down into the supports
Can you share your 4 min buttercream frosting recipe
When stacking a two tiered cake, do you also have to put a wooden dowel down the center? It's my first wedding cake and I will be delivering it. Thank you!
What a detailed explanation. Hats off to you. So impressed 👏
So happy it was useful!