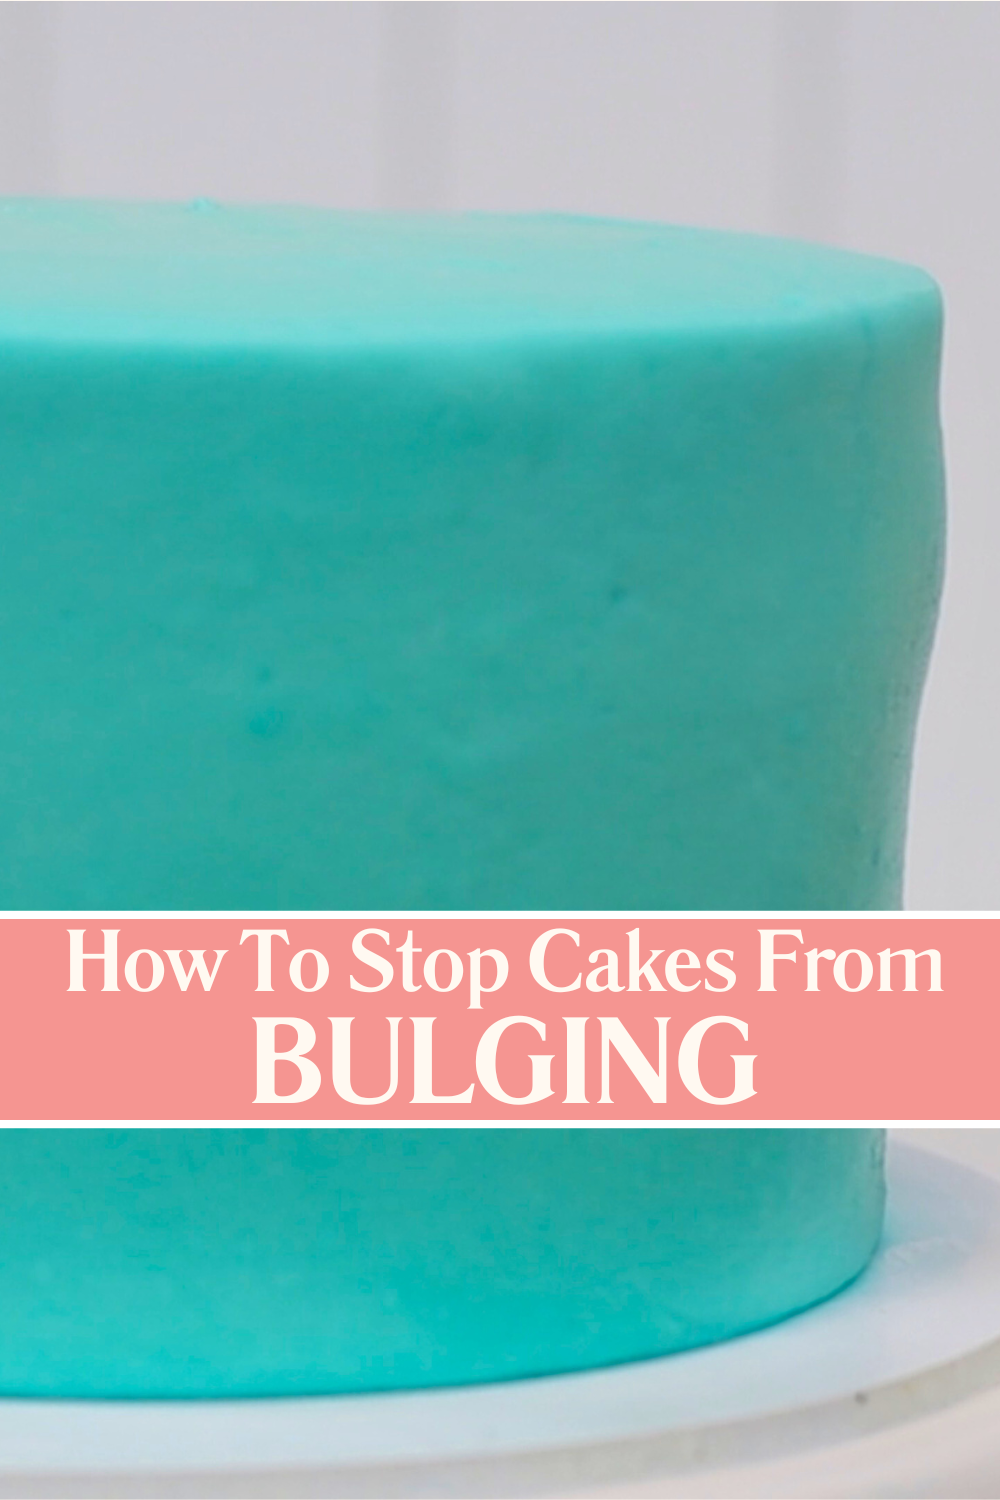
Buttercream bulging can spoil even the neatest frosting, leaving visible bumps between your layers and pushing out through the frosting. It’s a common issue in cake decorating but with some simple tips and tricks it’s easy to prevent bulges under frosting. In this tutorial I’ll explain what causes these bulges, when they’re most likely to appear, and the simple steps you can take to avoid them.
Buttercream bulges usually show up as rounded bumps around the sides of your cake, just underneath the frosting. These are most common after stacking cake layers with soft or runny fillings like jam, caramel, or lemon curd. As you continue to assemble your cake, the weight from the upper layers pushes down and the filling has nowhere to go except sideways. That’s how you end up with those unwanted cake bulges under frosting.
The best way to stop filling from oozing out of your cake is to start with a buttercream dam. This is a ring of stiff buttercream piped around the edge of each cake layer before adding the filling. It acts as a wall to hold your filling securely in place. This is especially helpful when using looser fillings like curds or sauces that don’t hold their shape well. A buttercream dam keeps everything contained so it doesn’t leak out and cause bulges.
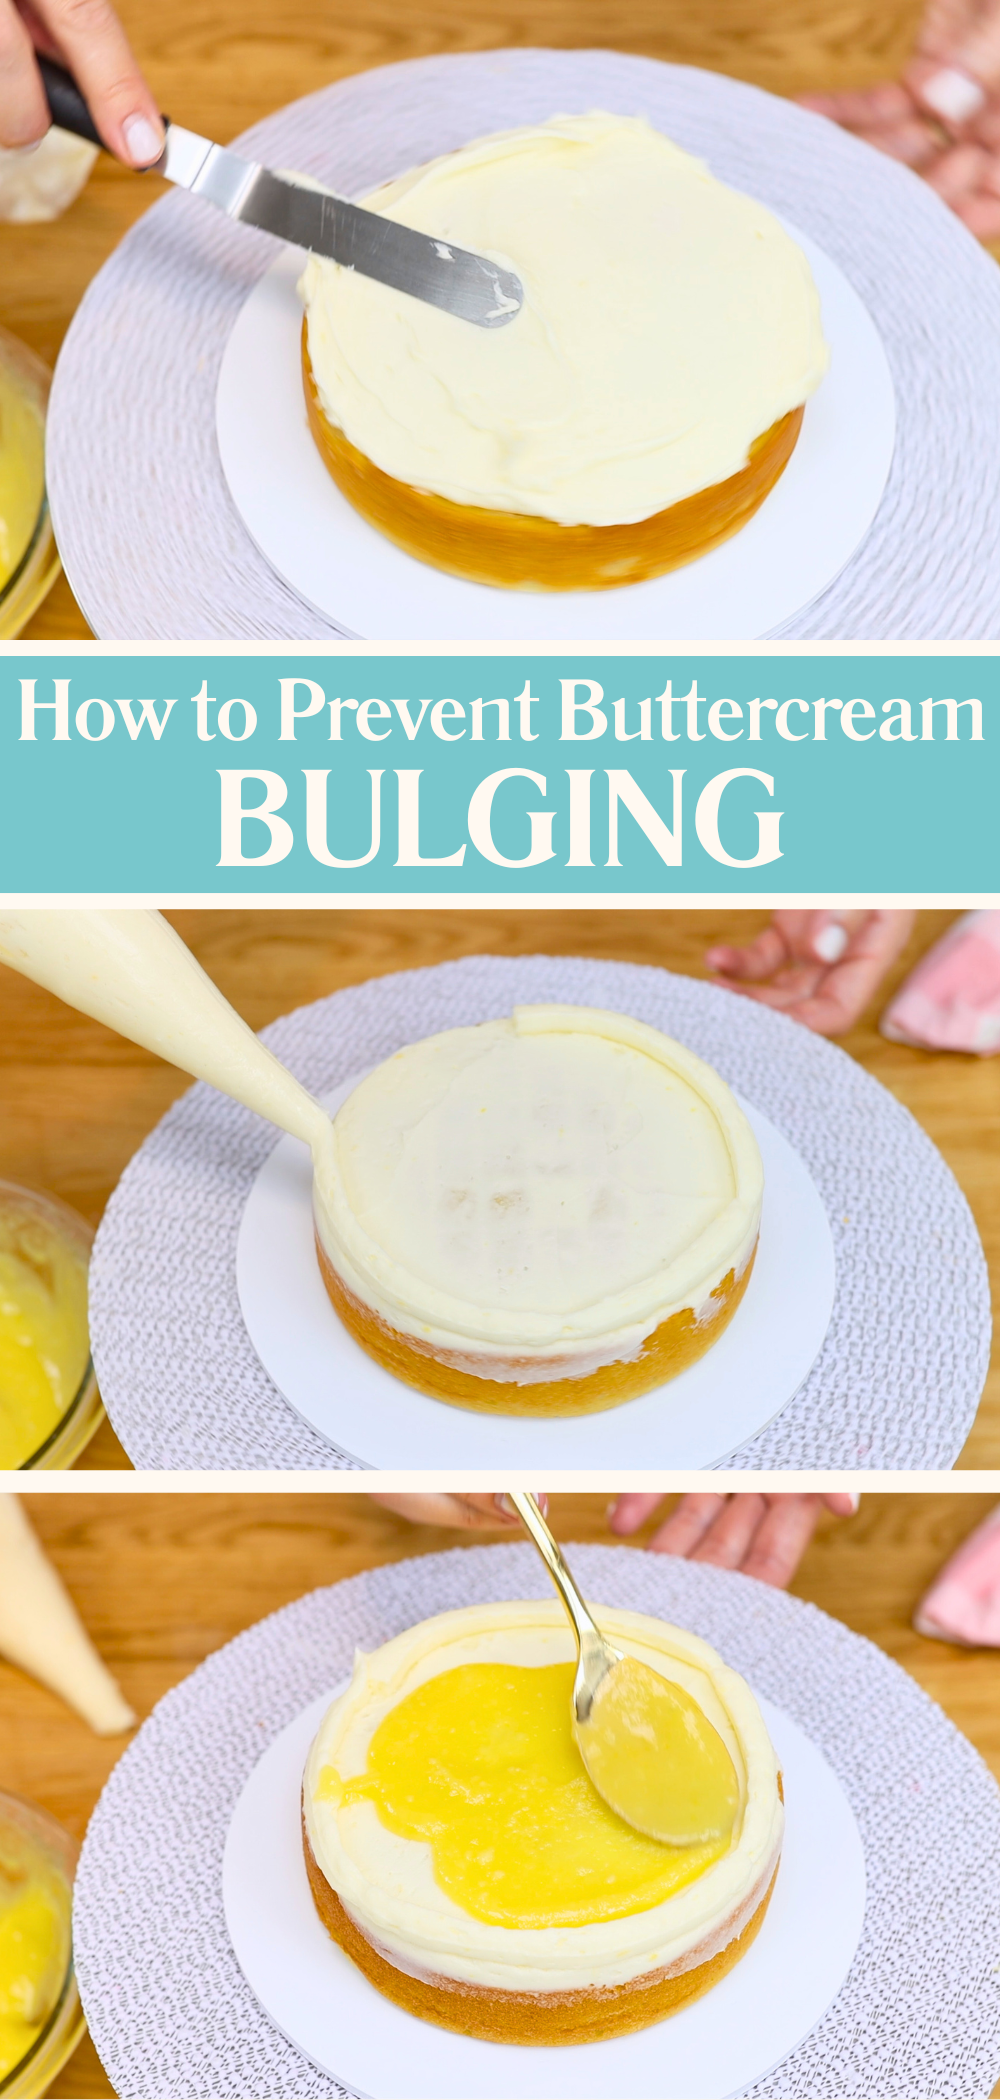
Here are my tips for successful buttercream dams that prevent buttercream bulging. First, your dam needs to be taller than your filling. If the filling comes right up to the top of the dam then as soon as you press the next cake layer down, it’ll squeeze the filling over the top of the wall. Once that happens, the filling starts creeping outward and eventually forms bulges under the frosting.
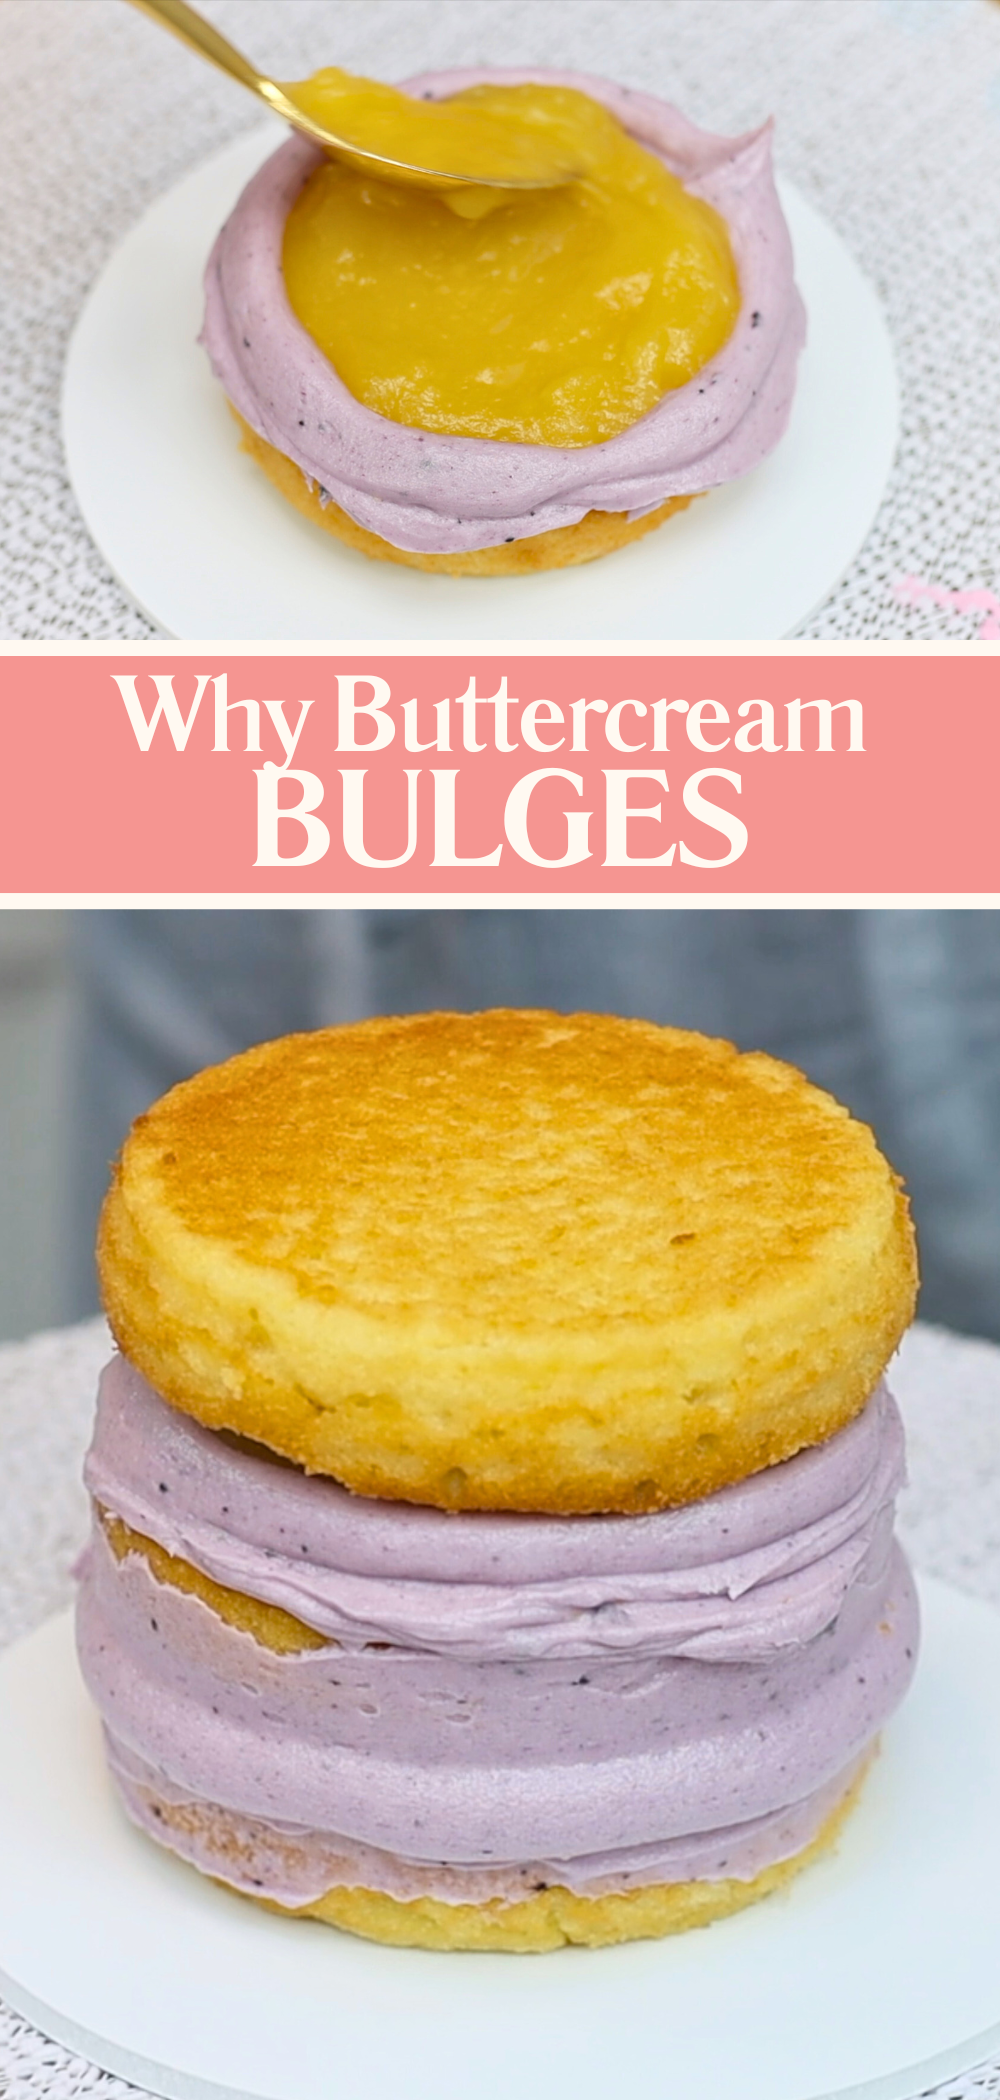
Secondly, make sure the buttercream you use for the dam is firm enough. If it’s soft like whipped cream or mousse, it won’t hold up under the weight of the cake. A stiff consistency is key here – check out my tutorial on buttercream consistency for more details on this.
As you build your cake, take your time with each step to make sure each layer is level and straight. This helps avoid extra pressure in certain spots that could cause bulges later. Pipe your buttercream dam around the edge of each cake layer and spoon in your filling so it stays well below the height of the dam. Gently press down on the next cake layer to check that the filling doesn’t spill out. Repeat until your cake is fully stacked.
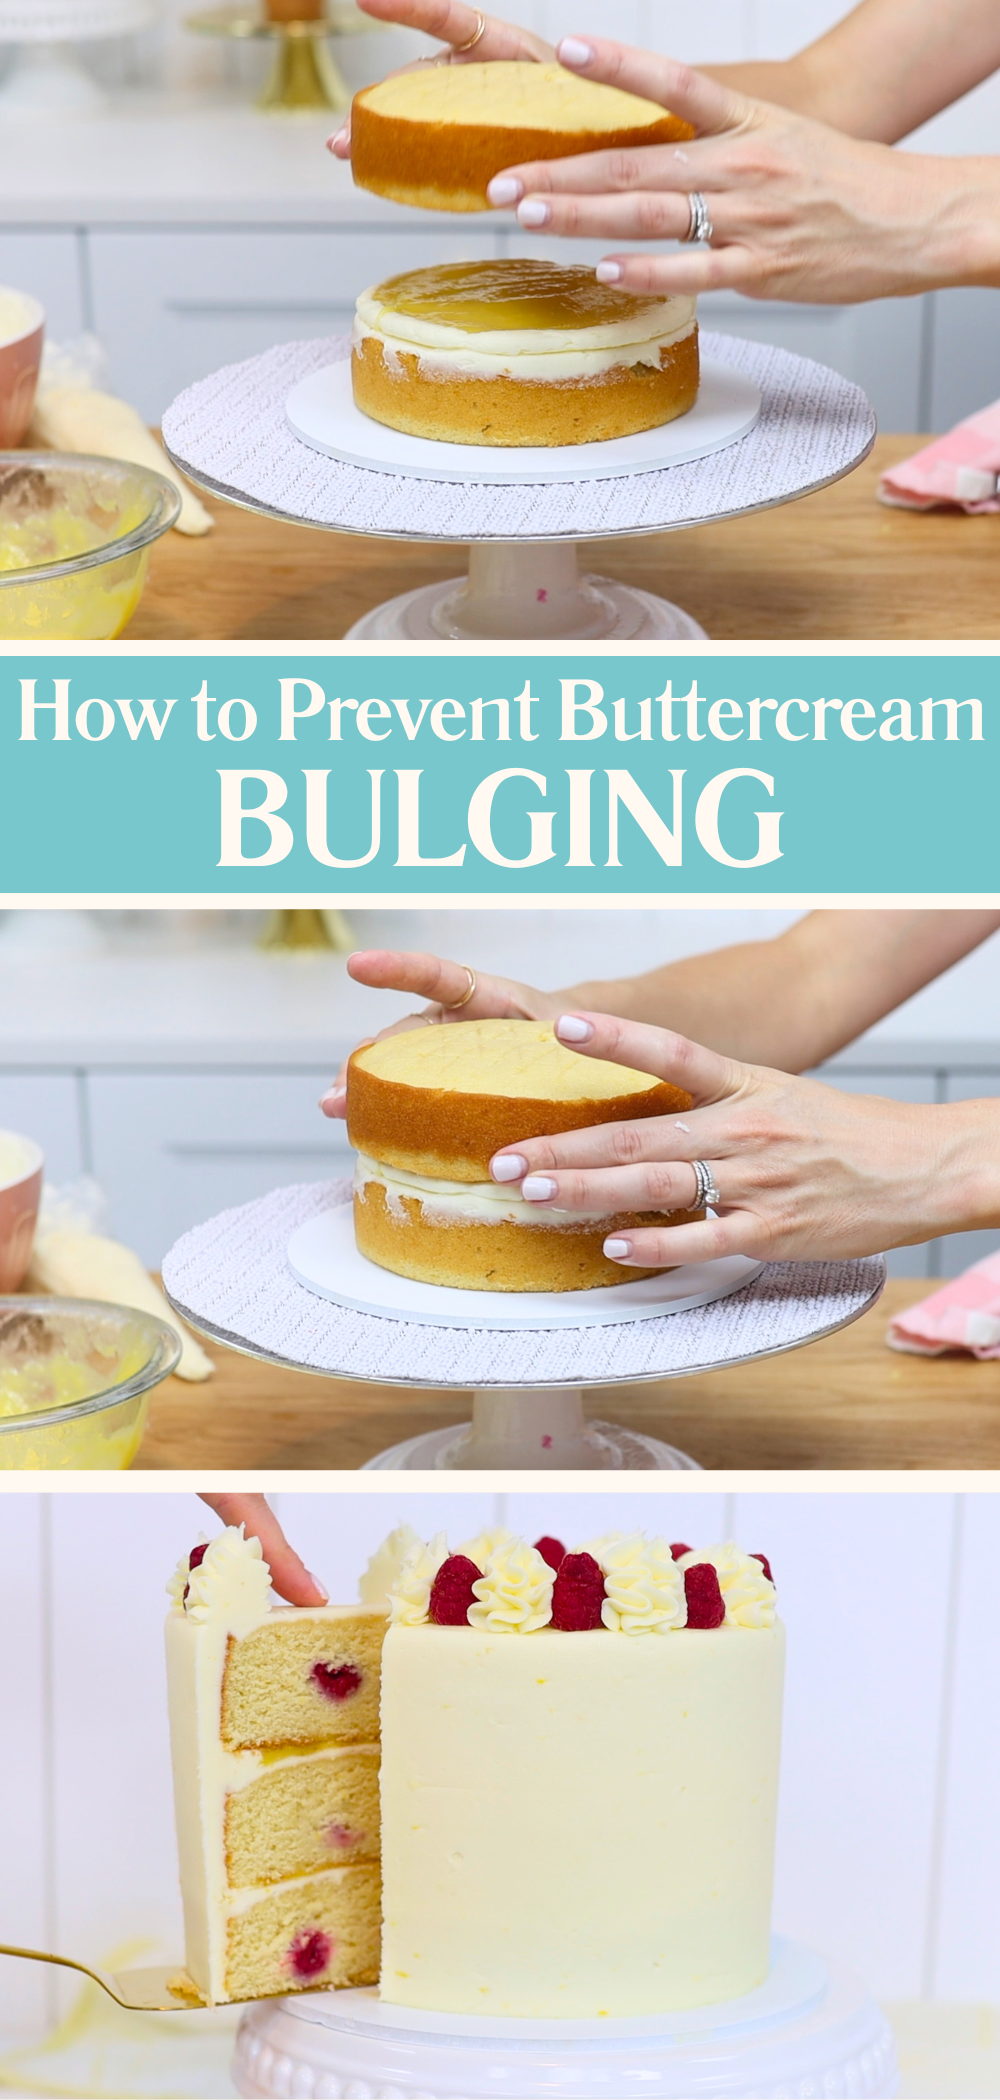
Even if your buttercream dams are tall and strong, they’re still soft when freshly piped. Don't move straight on to frosting your cake while everything is still at room temperature. If you do, the pressure of smoothing your crumb coat or final coat can nudge the cake layers sideways, leaving gaps where the filling can creep out.
That’s why chilling your cake before frosting is such an important step to prevent bulging. Once your cake is stacked, place it in the fridge for about an hour or the freezer for 30 minutes. This firms up the buttercream dams and the cake layers so that everything stays in place when you start frosting.
Sometimes no matter how careful you are, you’ll still spot a bulge sneaking out. Don’t worry! It's not too late to fix it. First, spin the cake to check that it's still stacked straight. If it’s leaning to one side, gently nudge it back into place with a spatula or palette knife. This can realign the layers and reduce some of the pressure that’s forcing the filling out.
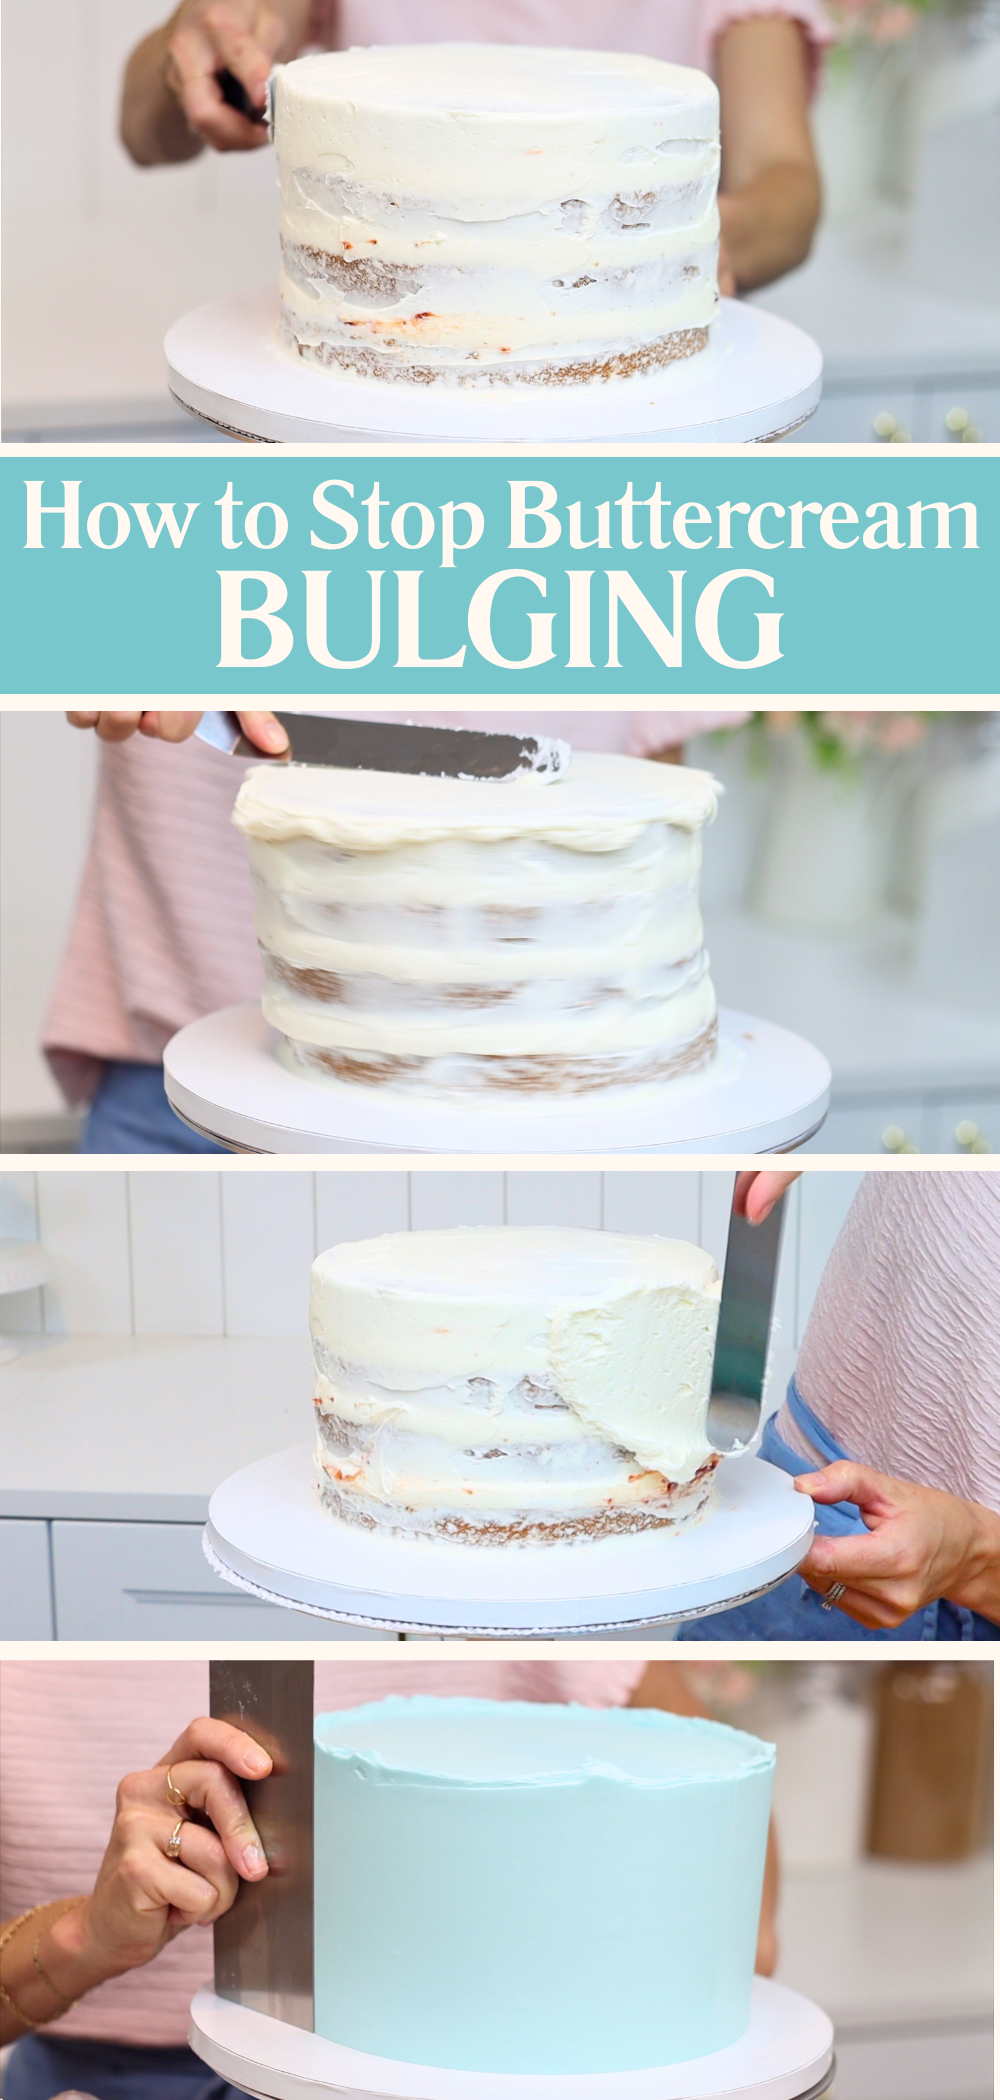
Next, put the cake in the fridge or freezer again. Give it time to set so the buttercream dam and filling firm up and stay in place. Then, spread on the crumb coat. Or, if you had already done the crumb coat when you noticed the bulges, add another layer of frosting now that the cake is chilled. This layer of buttercream helps trap any filling that may have escaped and gives you a clean base to work from. After chilling the crumb coat for about 15 minutes you can move on to your final coat of frosting.
With just a few simple techniques – using a buttercream dam, keeping your filling low, stacking cake layers evenly, and chilling the cake at key points – you can avoid frosting bulges and keep your cakes smooth. So next time you find yourself wondering, “Why is my buttercream bulging?”, you’ll not only know the answer, but exactly how to fix and prevent it.
When you're ready to take your cakes to the next level, visit my online cake school. You'll find courses to learn step-by-step techniques and designs made for cake decorators with any level of experience!
You can also watch a video of this tutorial on Why Is My Buttercream Bulging:
Have you ever found the perfect cake recipe but it’s written for the wrong size pan? Maybe it’s a 6 inch cake recipe and you want to make an 8 inch cake, a batch of cupcakes, a sheet cake or even cute little mini cakes instead. That’s where cake recipe conversions come in. Once you know how to scale recipes up or down, you can bake any size cake you like without wasting ingredients or ending up with too much batter.
In this guide I’ll walk you through how to convert cake recipes for different pan sizes, how to adjust baking times, and how to work out exactly how much buttercream you’ll need, too.
Let’s start with an example. Imagine you’ve got a recipe for a 6 inch cake with three layers. That same recipe can be used to make other sizes of cake:
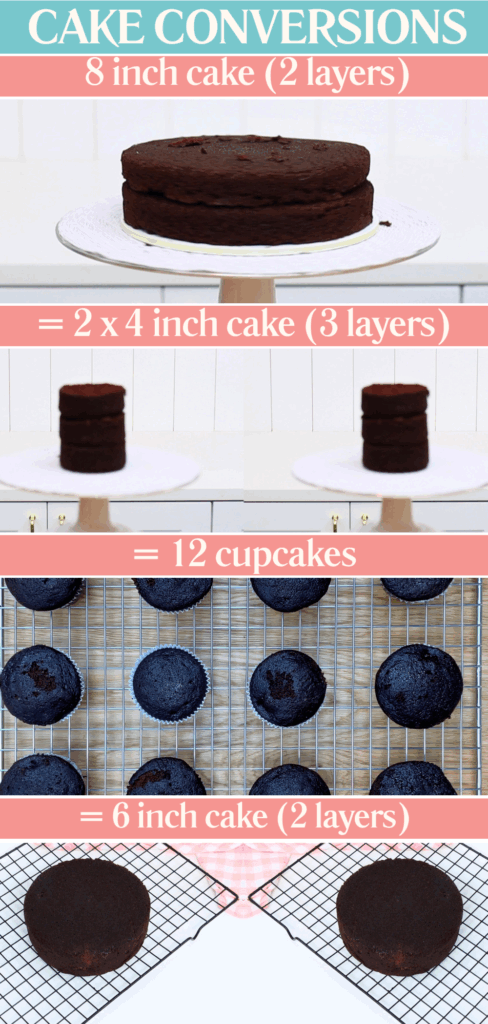
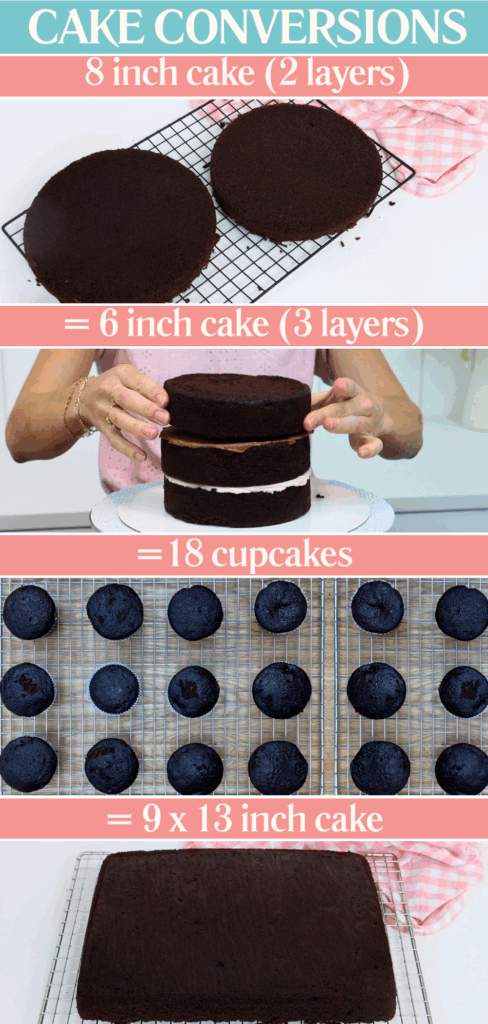
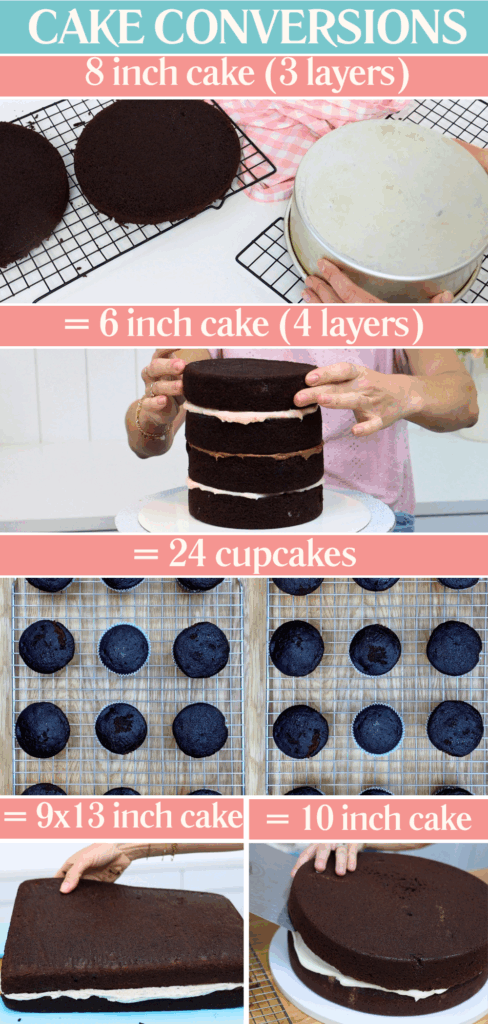
The secret to cake recipe conversions is understanding the volume of the different pans. You don’t need to do complicated equations yourself though – I’ve put together a simple chart that shows how many cupcakes are equivalent to different sizes of cake. Keep this handy and you’ll be able to adjust any recipe without any guesswork.
| Cupcakes | 4 inch cake(s) | 6 inch cake | 8 inch cake | Other | |
| 12 cupcakes | x 2 (3 layers) | x 1 (2 layers) | x 1 (2 layers) | 6x9 inch* | |
| 18 cupcakes | x 3 (3 layers) | x 1 (3 layers) | x 1 (2-3 layers) | 9x13 inch sheet cake | |
| 24 cupcakes | x 4 (3 layers) | x 1 (4 layers) | x 1 (3 layers) | 9x13 inch (2 layers) or 1 x 10" cake |
* You can use this batter to make a mini sheet cake or for a very thin 9x13 inch quarter sheet cake. Turn a thin sheet cake into a layered cake by cutting it in half and stacking, or cut out two identical numbers to make a number cake like this:
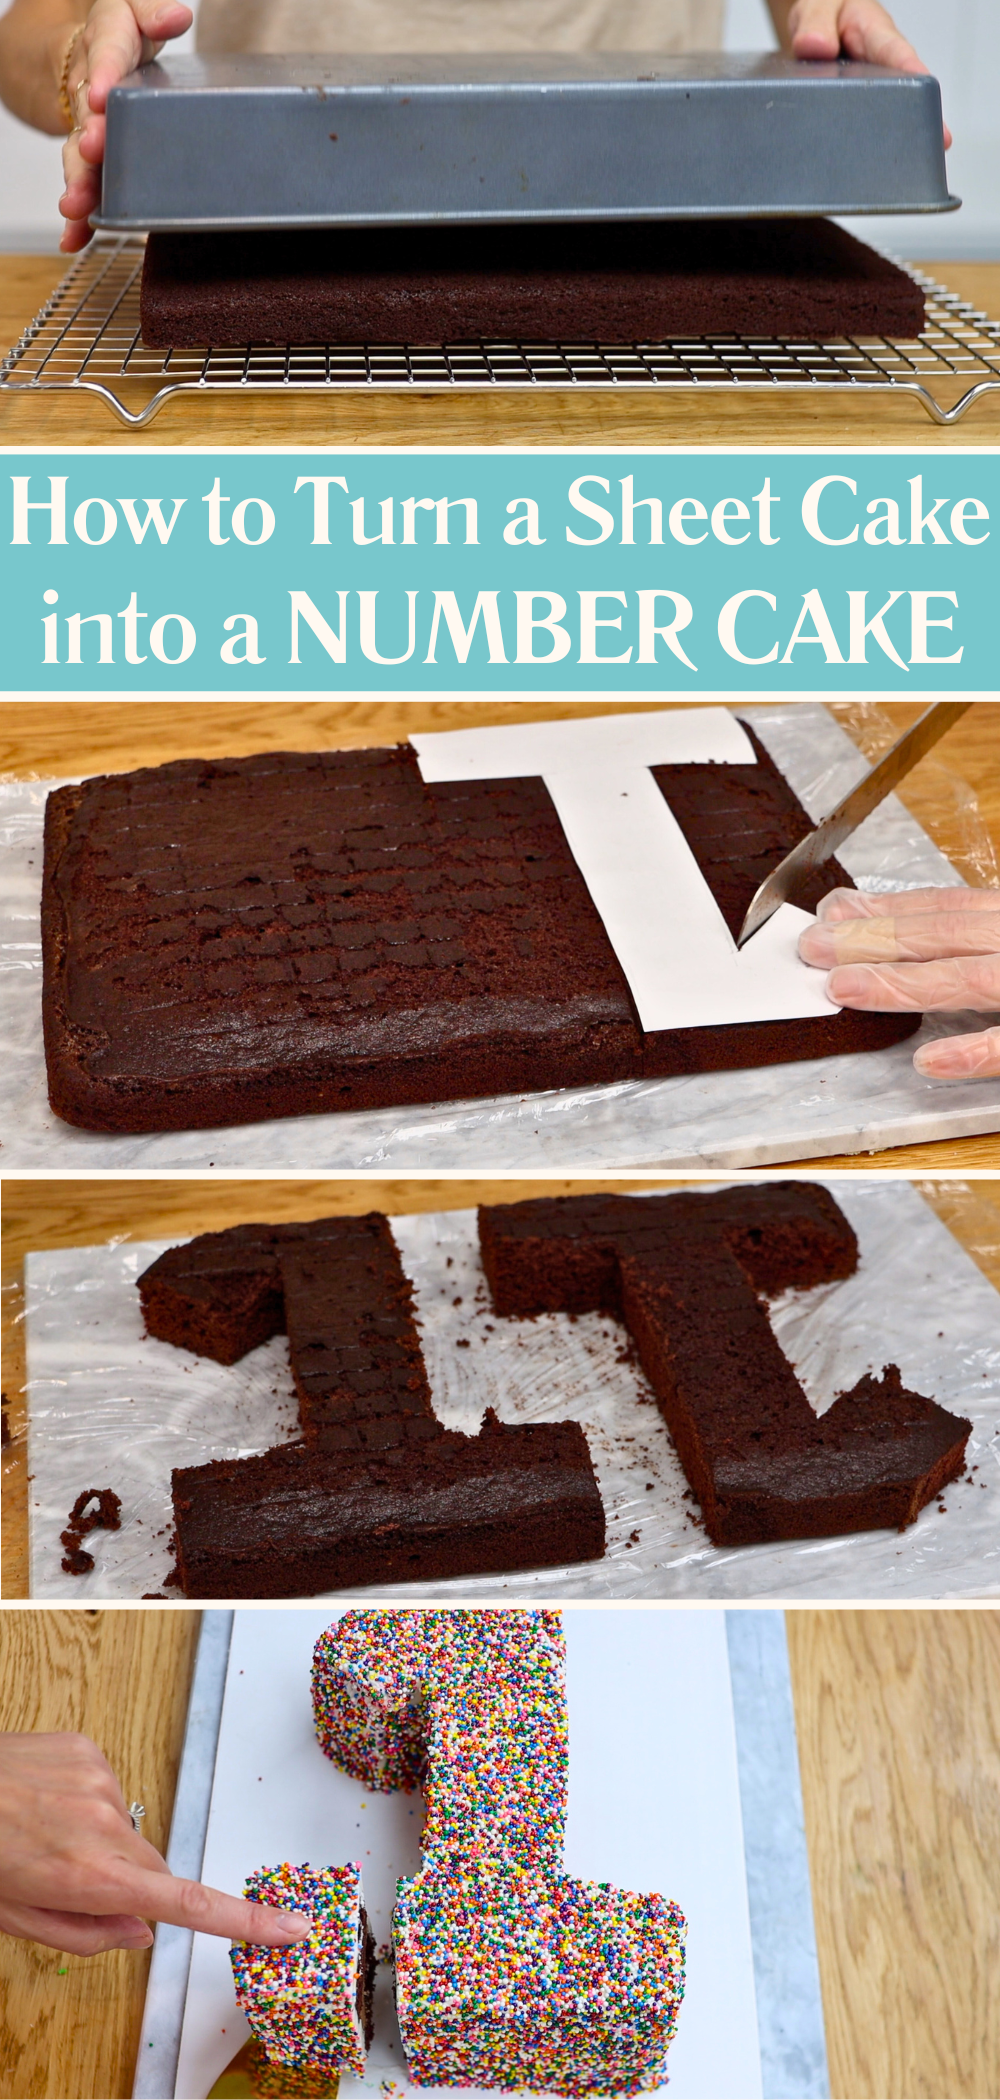
Once you’ve worked out which pan you’re using, you’ll need to tweak your baking time. This part is simple:
For deeper cakes, it’s also a good idea to lower your oven temperature to 10°C or 15°F less than the original recipe. This helps the cake bake evenly all the way through without the outside burning.
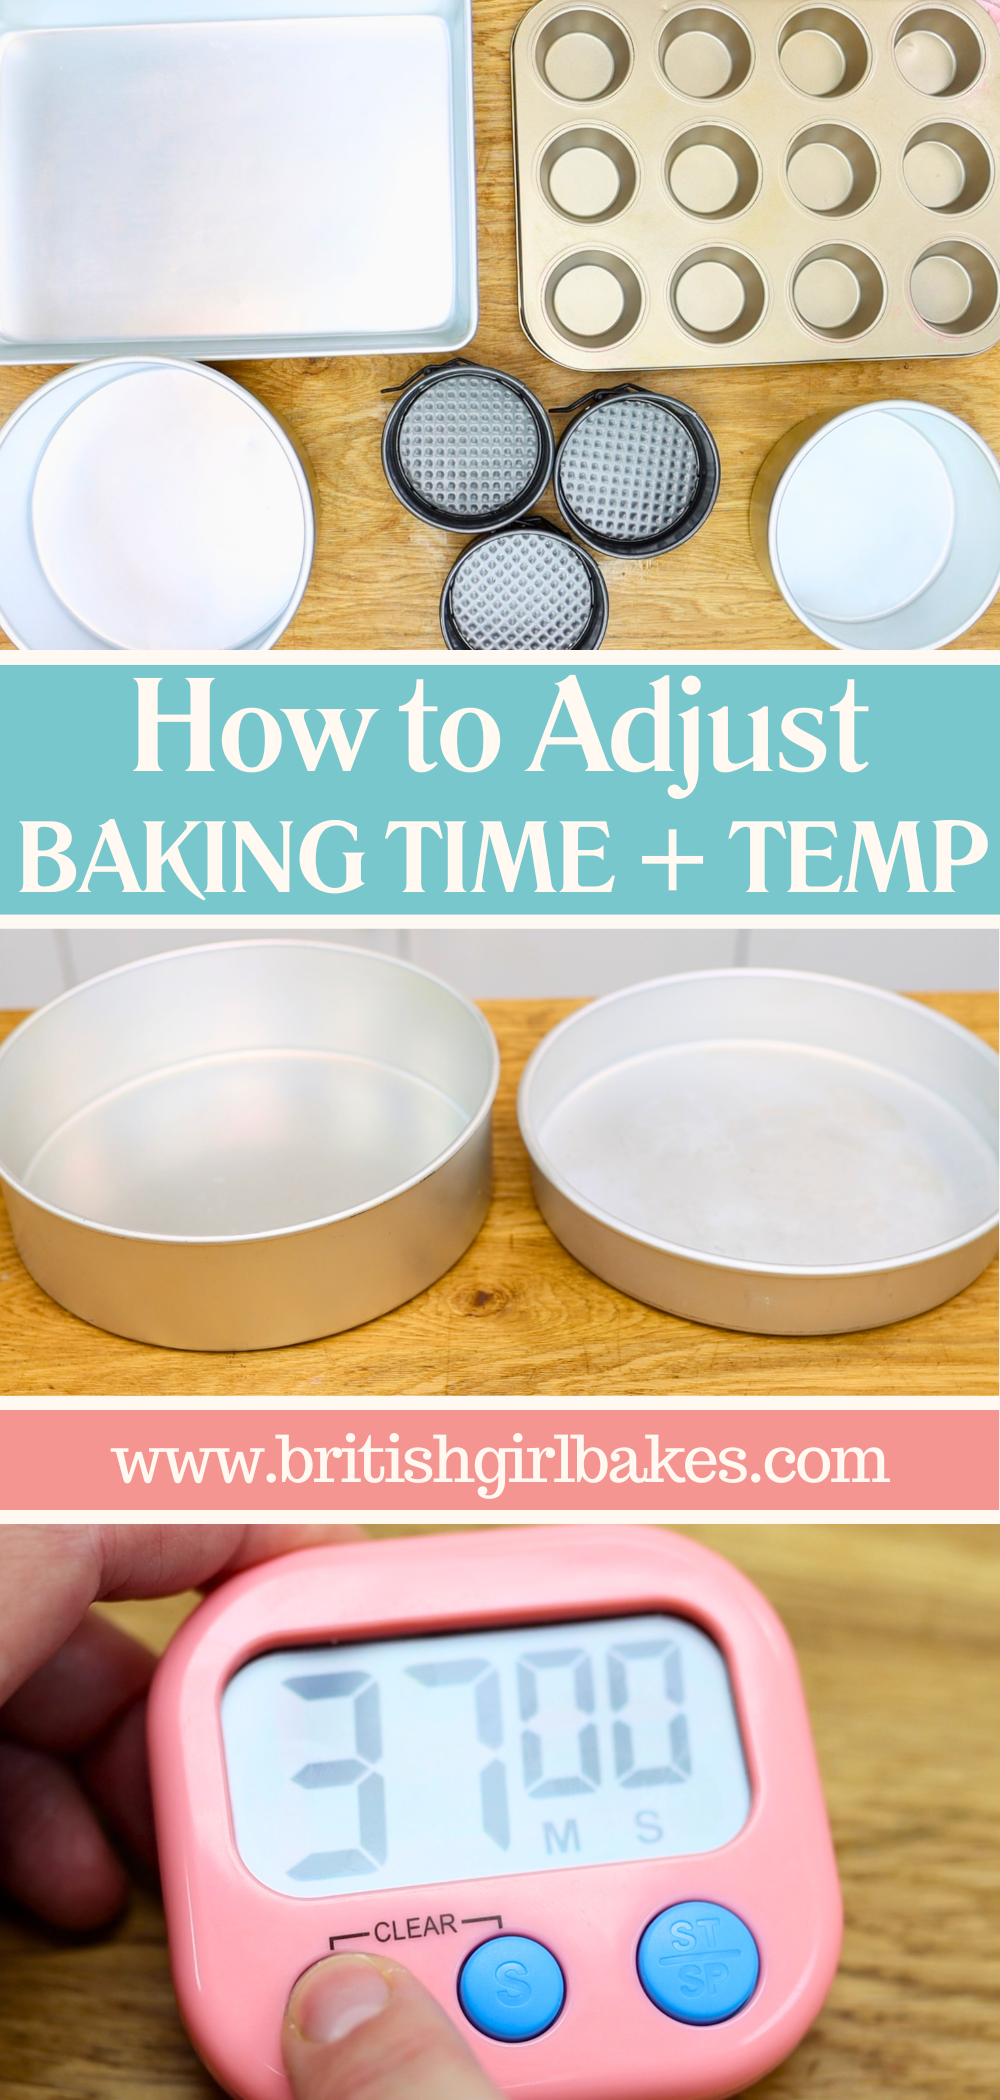
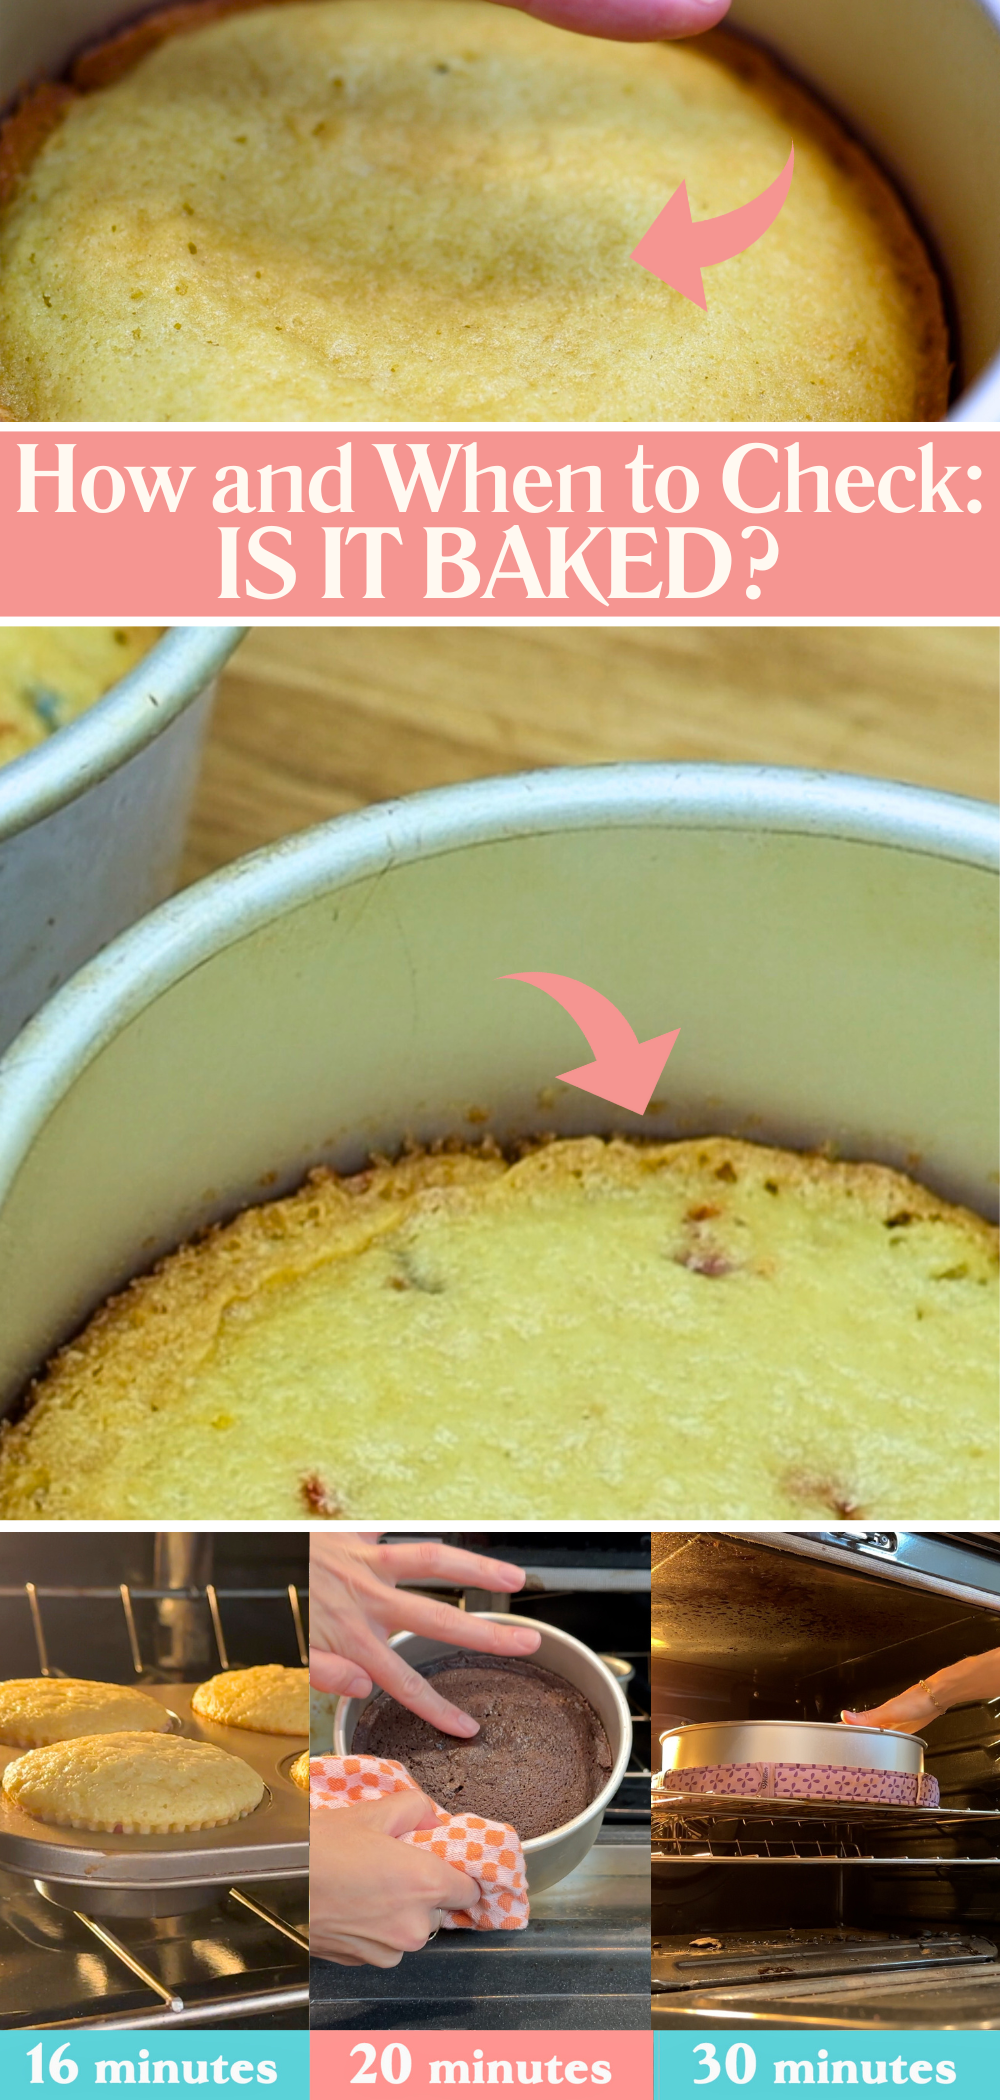
It’s always better to check early rather than risk an overbaked cake. For cupcakes, I start checking at around 16 minutes. For small or shallow cakes, I check from 20 minutes, and for wide or tall cakes I start checking from about 30 minutes. Press the top of the cake gently: if it springs back, it’s ready, but if your fingerprint stays, give it a few more minutes. The edges should also just start to pull away from the pan when it’s fully baked.
Running out of buttercream halfway through decorating is incredibly frustrating. Cake recipe conversions aren’t just about the cake batter – you’ll need to scale your buttercream too.
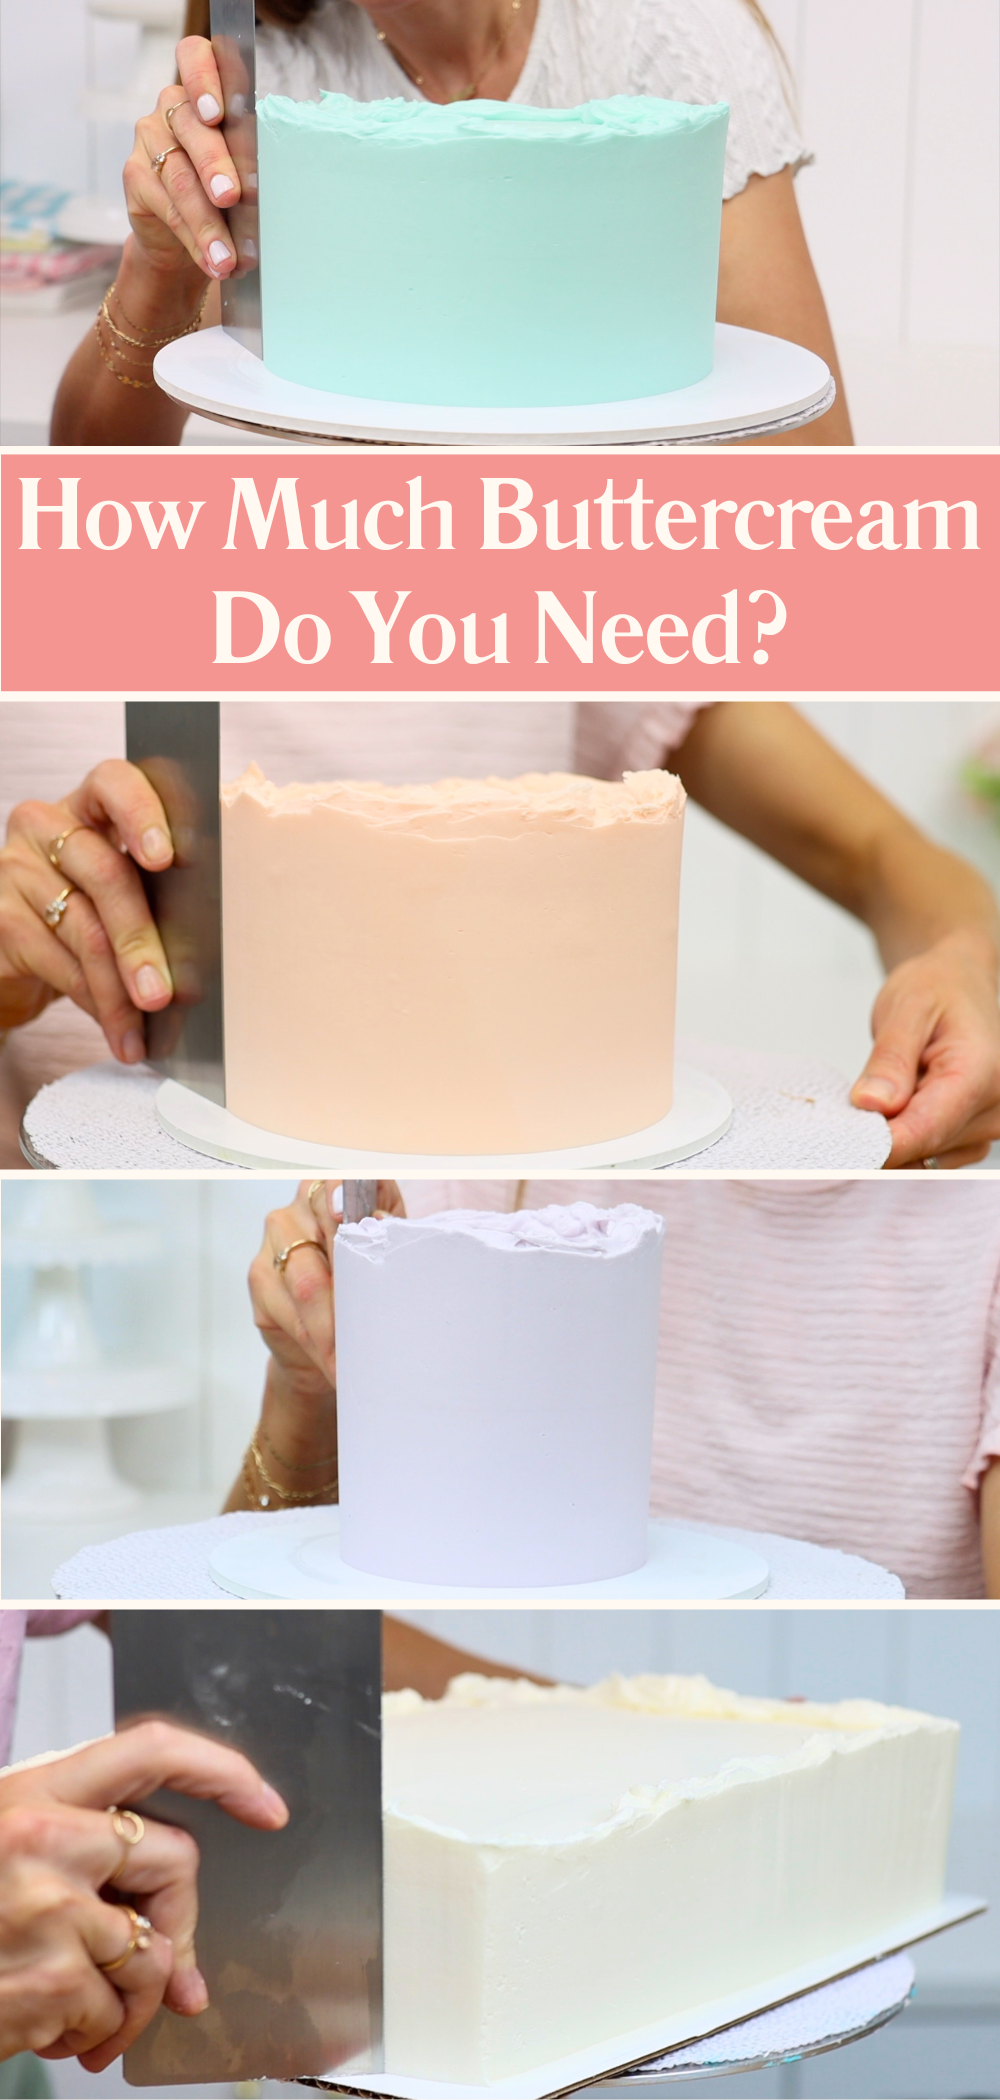
Here’s a simple guide based on my 4 Minute Buttercream, which makes about 6 cups of frosting (1.5kg). That’s enough to fill and frost an 8 inch cake with three layers. You'll see the ingredient measurements listed for each batch and below that, what you can frost with that buttercream.
| 6 cups of buttercream (1 batch) | approx. 3 1/2 cups of buttercream | approx. 1 3/4 cups of buttercream | ||
| Butter | 2 1/2 cups 5 sticks 568 g | 1 1/2 cups 3 sticks 339 g | 3/4 cup 1 1/2 sticks 170 g | |
| Powdered Sugar | 7 1/2 cups 2 lb 907 g | 4 1/2 cups 1 lb 3 oz 545 g | 2 1/4 cups 9 1/2 oz 272g | |
| Salt | 1/2 teaspoon | 1/4 teaspoon | 1/8 teaspoon | |
| Vanilla | 1/2 tablespoon | 1 teaspoon | 1/2 teaspoon | |
| Cream / Milk | 3 tablespoons | 2 tablespoons | 1 tablespoon | |
| Frosts which cake? | 8 inch (2-3 layers) or 9x13 inch (2 layers) | 6 inch (2-3 layers) or 9x13 inch (1 layer) | 4 inch (2-3 layers) | |
| Frosts how many cupcakes? | 24-36 cupcakes | approx. 18 cupcakes | approx. 9 cupcakes |
Cake recipe conversions open up so many possibilities! You can now make your favourite recipe in any size or shape of cake and with the right amount of buttercream, too. Whether you’re scaling up for a big party cake, scaling down for a smaller gathering, or turning a layered cake recipe into cupcakes, you’ll have the confidence to get it right every time.
I’d love to know what you’re converting next! Please share it in the comments below. And if you want to take your baking and decorating even further, visit my cake school for online courses and memberships where you can learn hundreds of cake decorating techniques and designs.
You can also watch a video of this tutorial on cake recipe conversions:
Buttercream is a dream to work with, until it isn’t. In this tutorial I'll cover 10 common buttercream problems including cracking, melting, turning yellow, and bursting out of piping bags. With my tips and tricks you'll learn how to troubleshoot every single one and how to fix it so your buttercream is smooth, stable, and perfect for frosting, piping, flavouring, or freezing. I'll be using my 4 Minute Buttercream for all of my examples 🙂
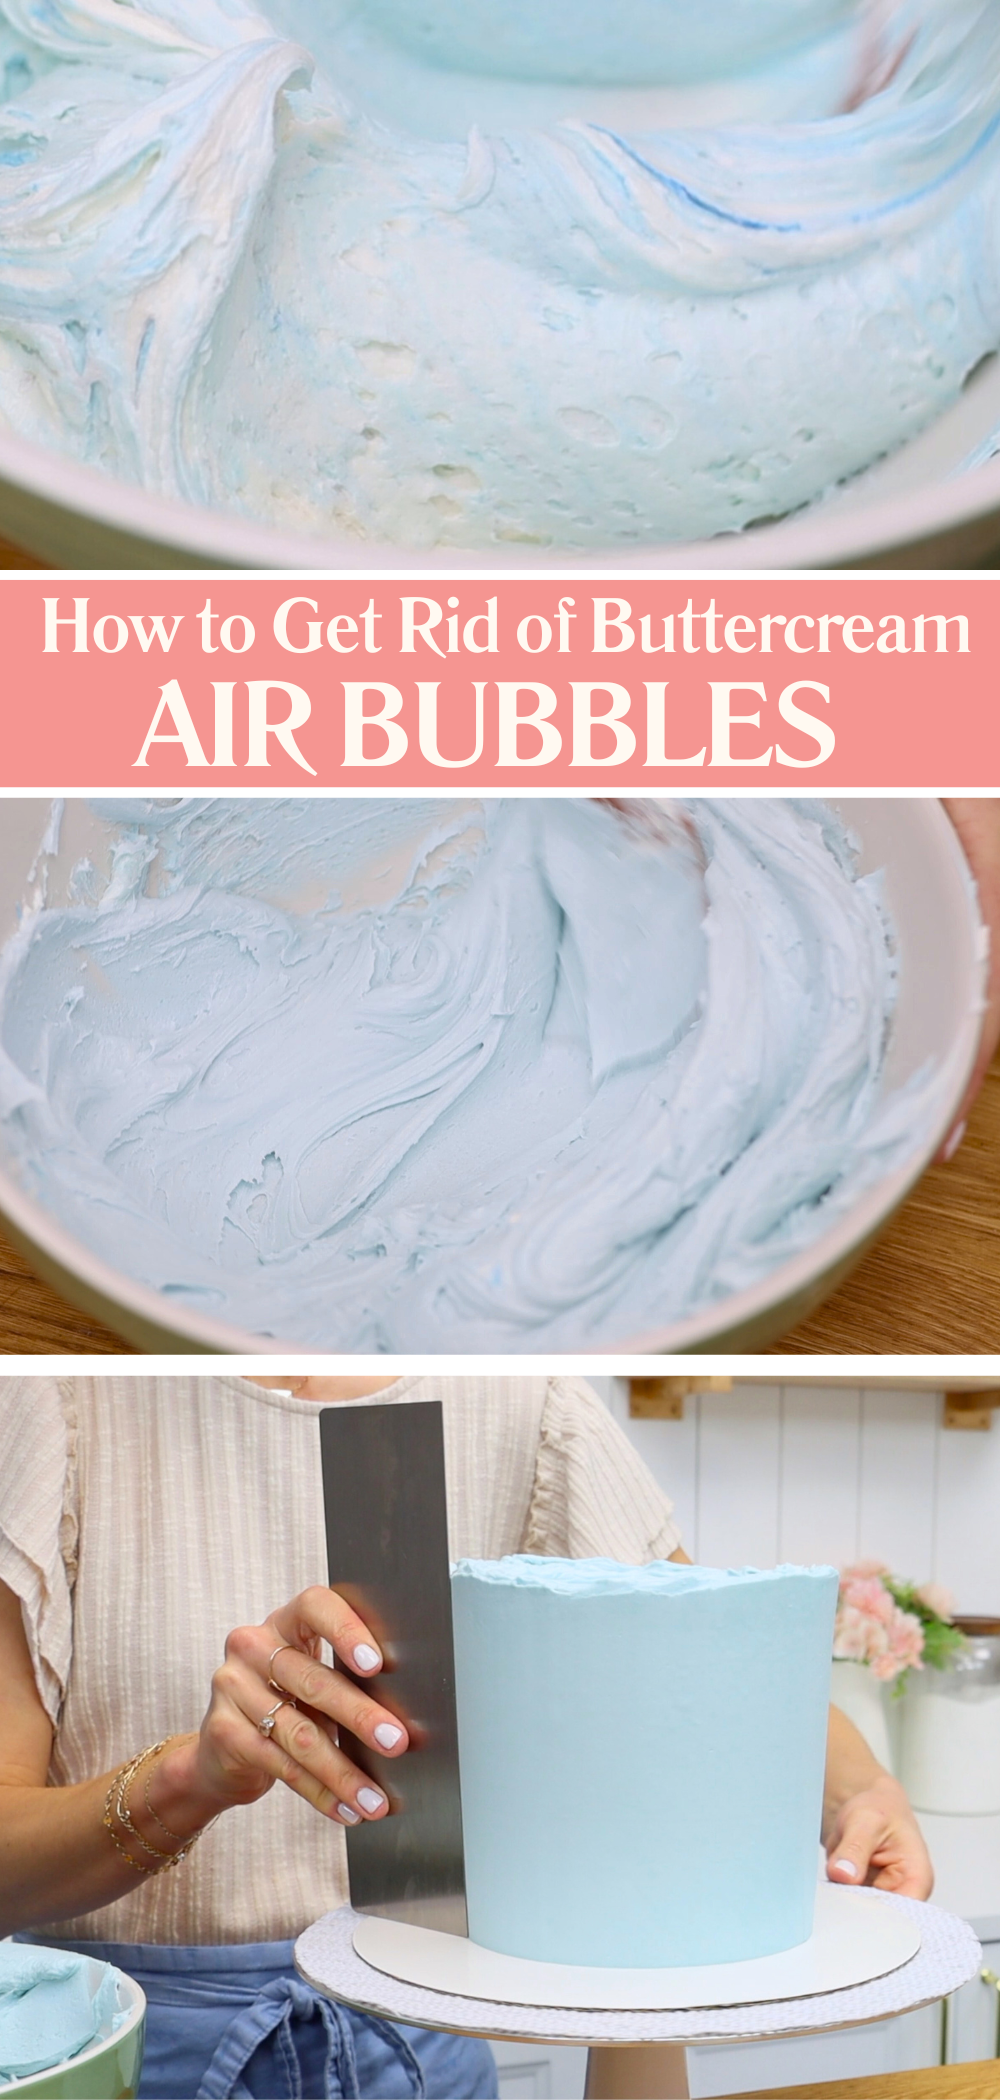
Air bubbles happen when too much air gets mixed into your buttercream. This usually happens when mixing on high speed or if your buttercream rests for too long. Air bubbles also appear after chilling buttercream, when it returns to room temperature. If your buttercream looks spongey, it probably has air bubbles trapped inside.
To avoid this, always mix your buttercream on the lowest speed possible. Use a paddle attachment or beater instead of a whisk, since a whisk will beat in more air. But if the bubbles are already there you can stir them out. Use a spatula to stir aggressively, knocking the buttercream against the sides of the bowl to knock the air out. This really helps if your buttercream has been sitting for a while or has just come out of the fridge.
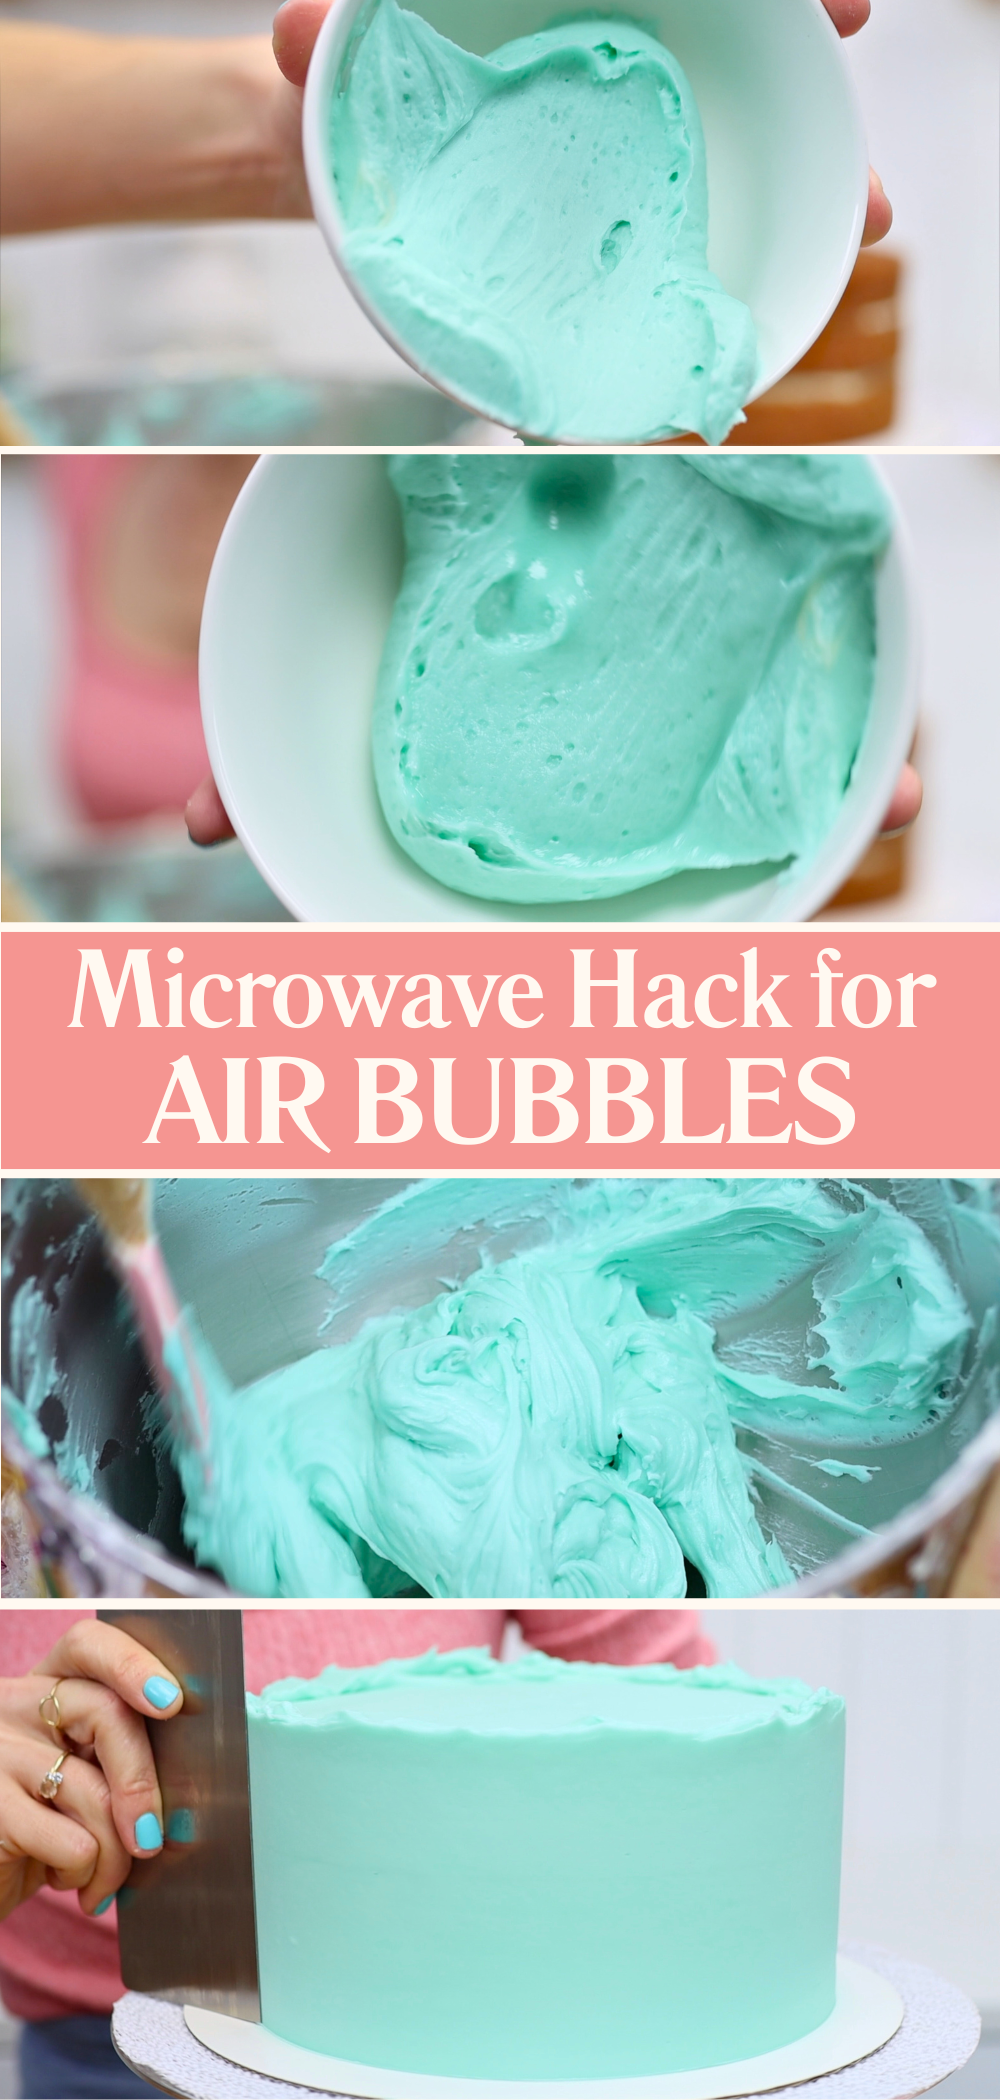
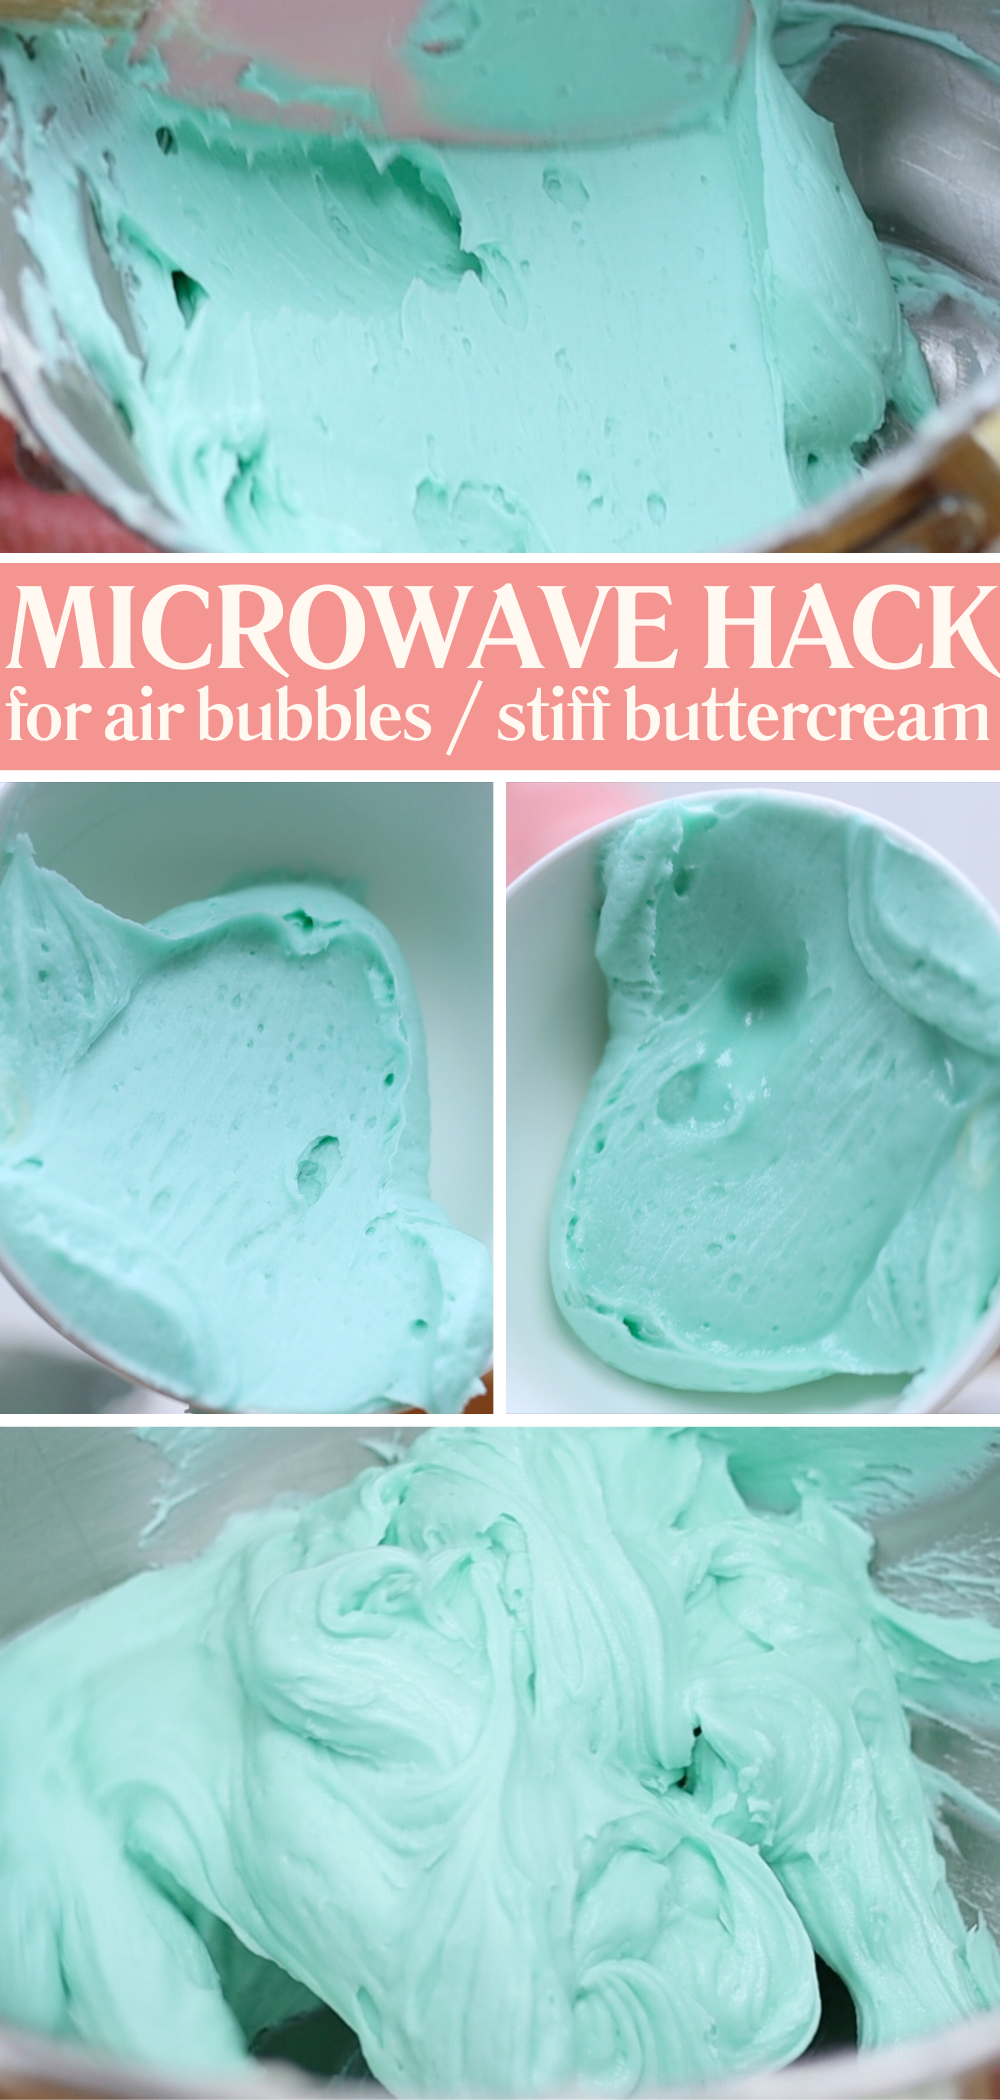
Use one of my favourite buttercream hacks for really stubborn air bubbles. Scoop out about a third of your buttercream and microwave it for just 10 seconds. Then stir it back into the rest. This melts just enough of the buttercream to mix everything together smoothly, giving you the perfect texture with no air bubbles.
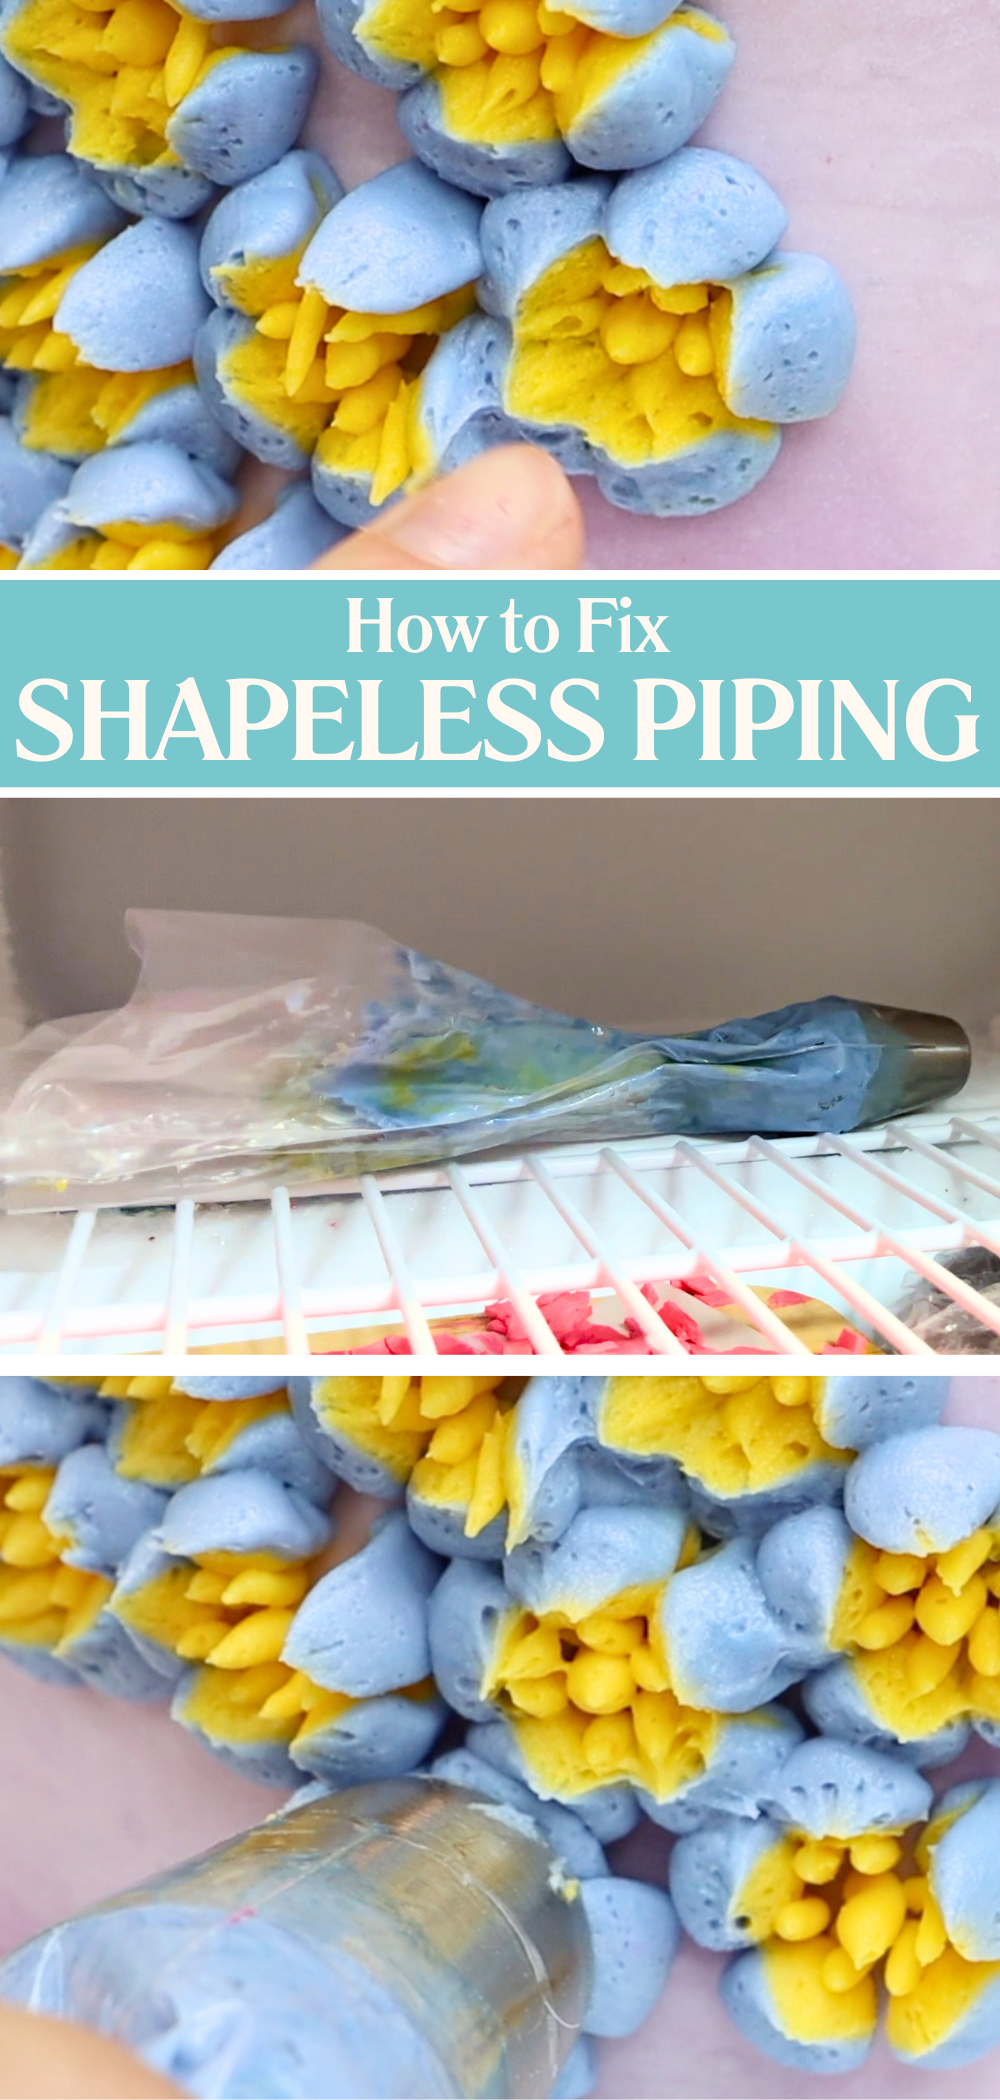
If your piping looked great at first but then starts to droop or lose its shape, it’s probably because of your hands. Their warmth while you're squeezing the piping bag can soften the buttercream as it starts to melt. This is especially common with flowers and detailed decorations that take a while to pipe and really need to hold their shape!
The fix is simple: put your piping bag in the freezer for one minute. Just one. Any longer and the buttercream will freeze against the metal piping tip, making it too hard to pipe. After a minute, your buttercream will be firmer and you’ll get clean, crisp piping again. Use it with any piping tips, even Russian Tips - get my tips for those in this tutorial.
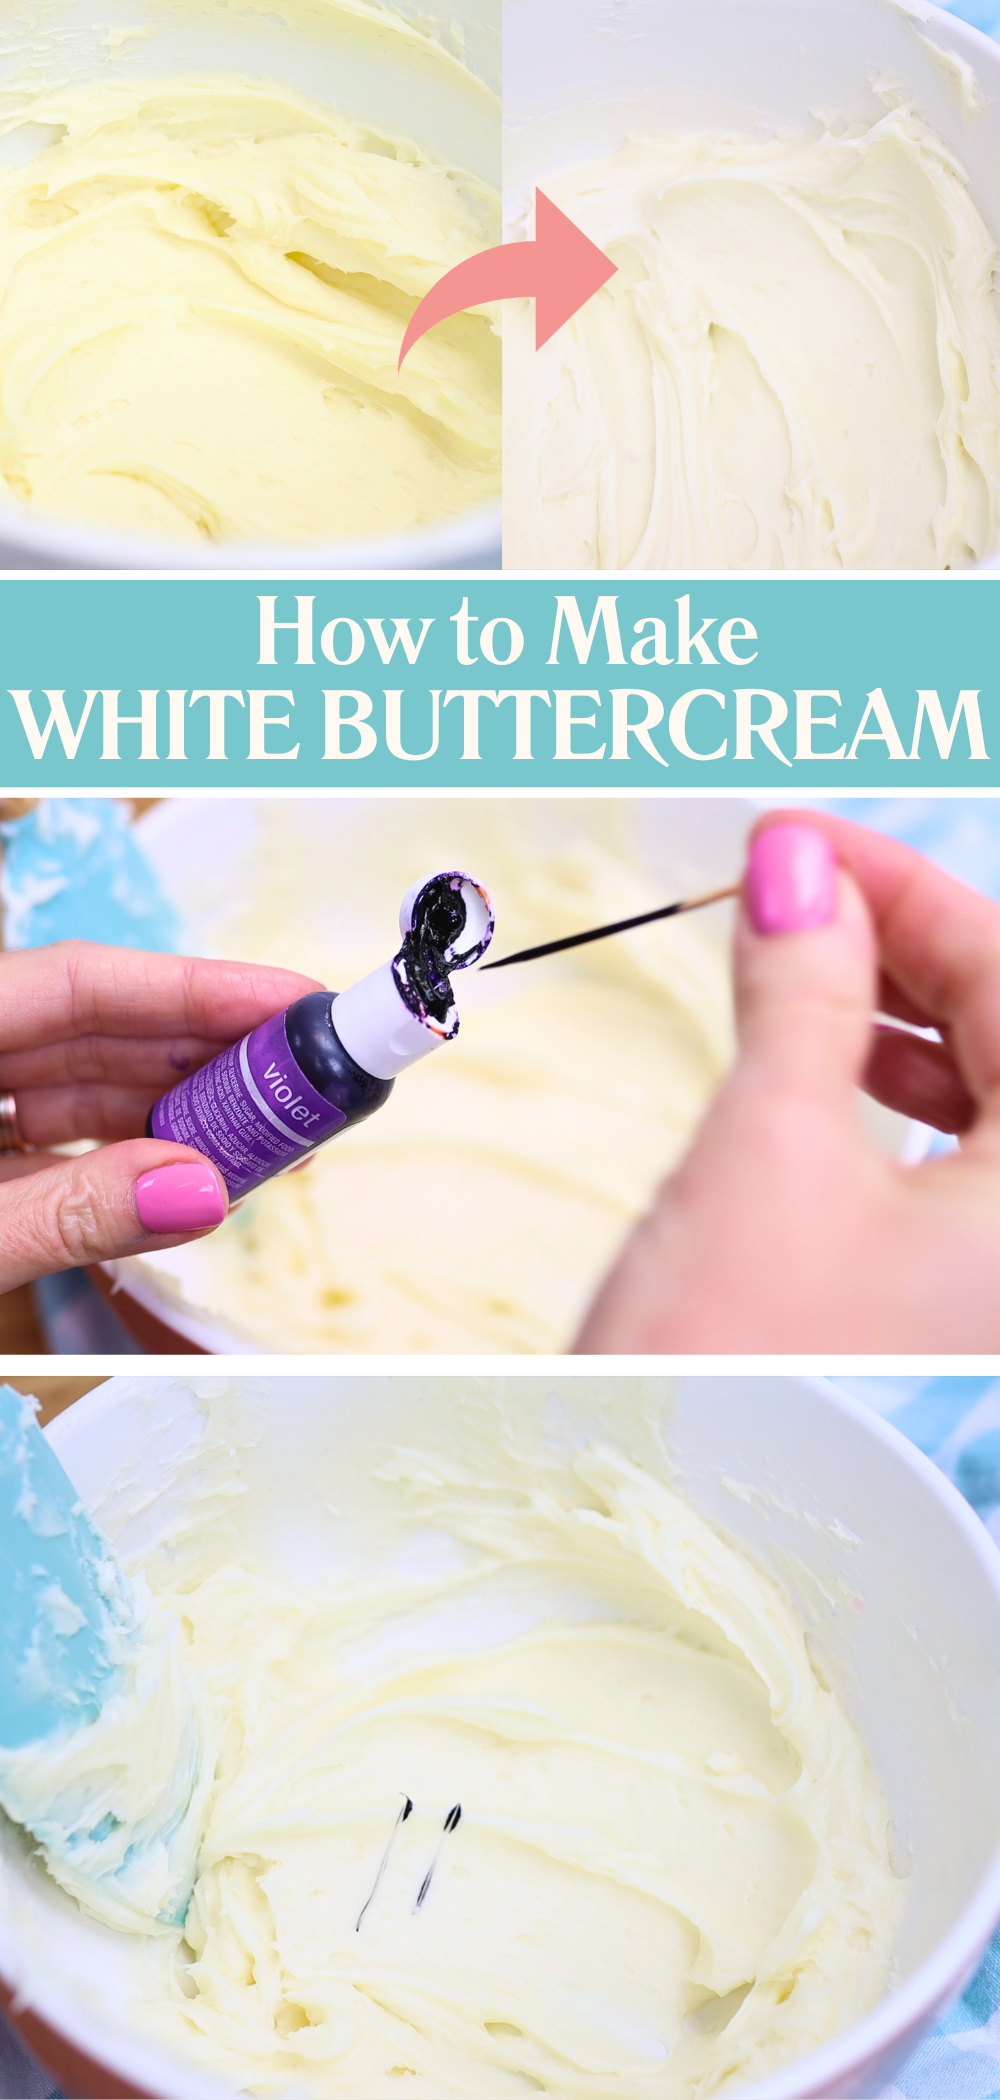
Butter is naturally yellow so if you’re making an all-butter buttercream, it will have a yellow tint. That’s fine for some cakes but not if you’re aiming for a bright white frosting.
Here’s a clever colour trick: add violet! Take a toothpick, dip it into violet gel food colouring, and swipe just a tiny amount through your buttercream. Violet cancels out yellow and when you've mixed it in, you’ll end up with a bright white buttercream. This is so useful for wedding cakes! Make sure you use a toothpick instead of adding a full drop of violet to prevent turning the buttercream purple.
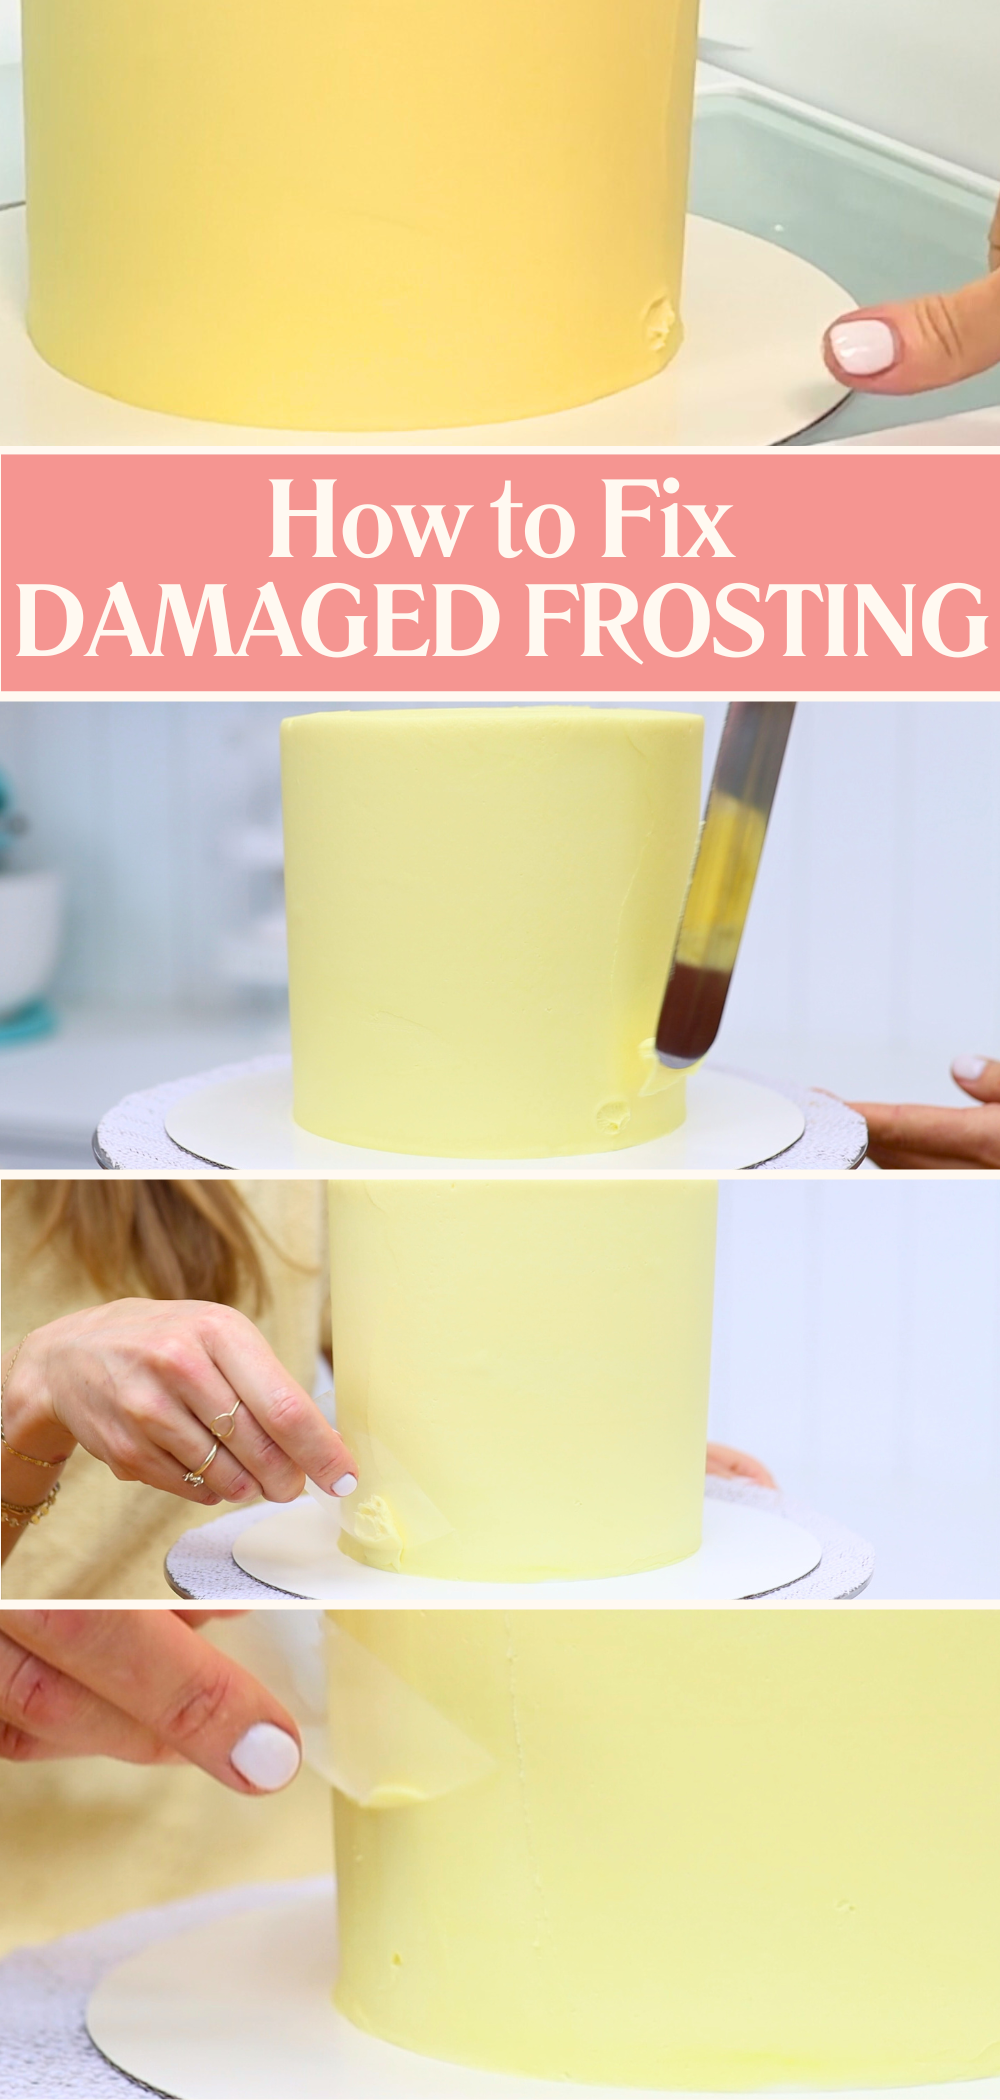
You’ve spent ages smoothing your cake and it’s looking flawless… until someone (maybe you!) accidentally pokes it. It’s one of the most annoying buttercream problems but it’s surprisingly easy to fix.
Whether the frosting is still soft or it's already set, spread a small amount of fresh buttercream over the dent. To smooth it, use a small piece of acetate. This is flexible plastic used for cake decorating and it comes in sheets or rolls. Cut a small square, about 3 inches or 10cm, and gently scrape over the damaged area. It’ll follow the curve of the cake and blend the repair seamlessly into the rest of the frosting. The dent will disappear like it never happened.
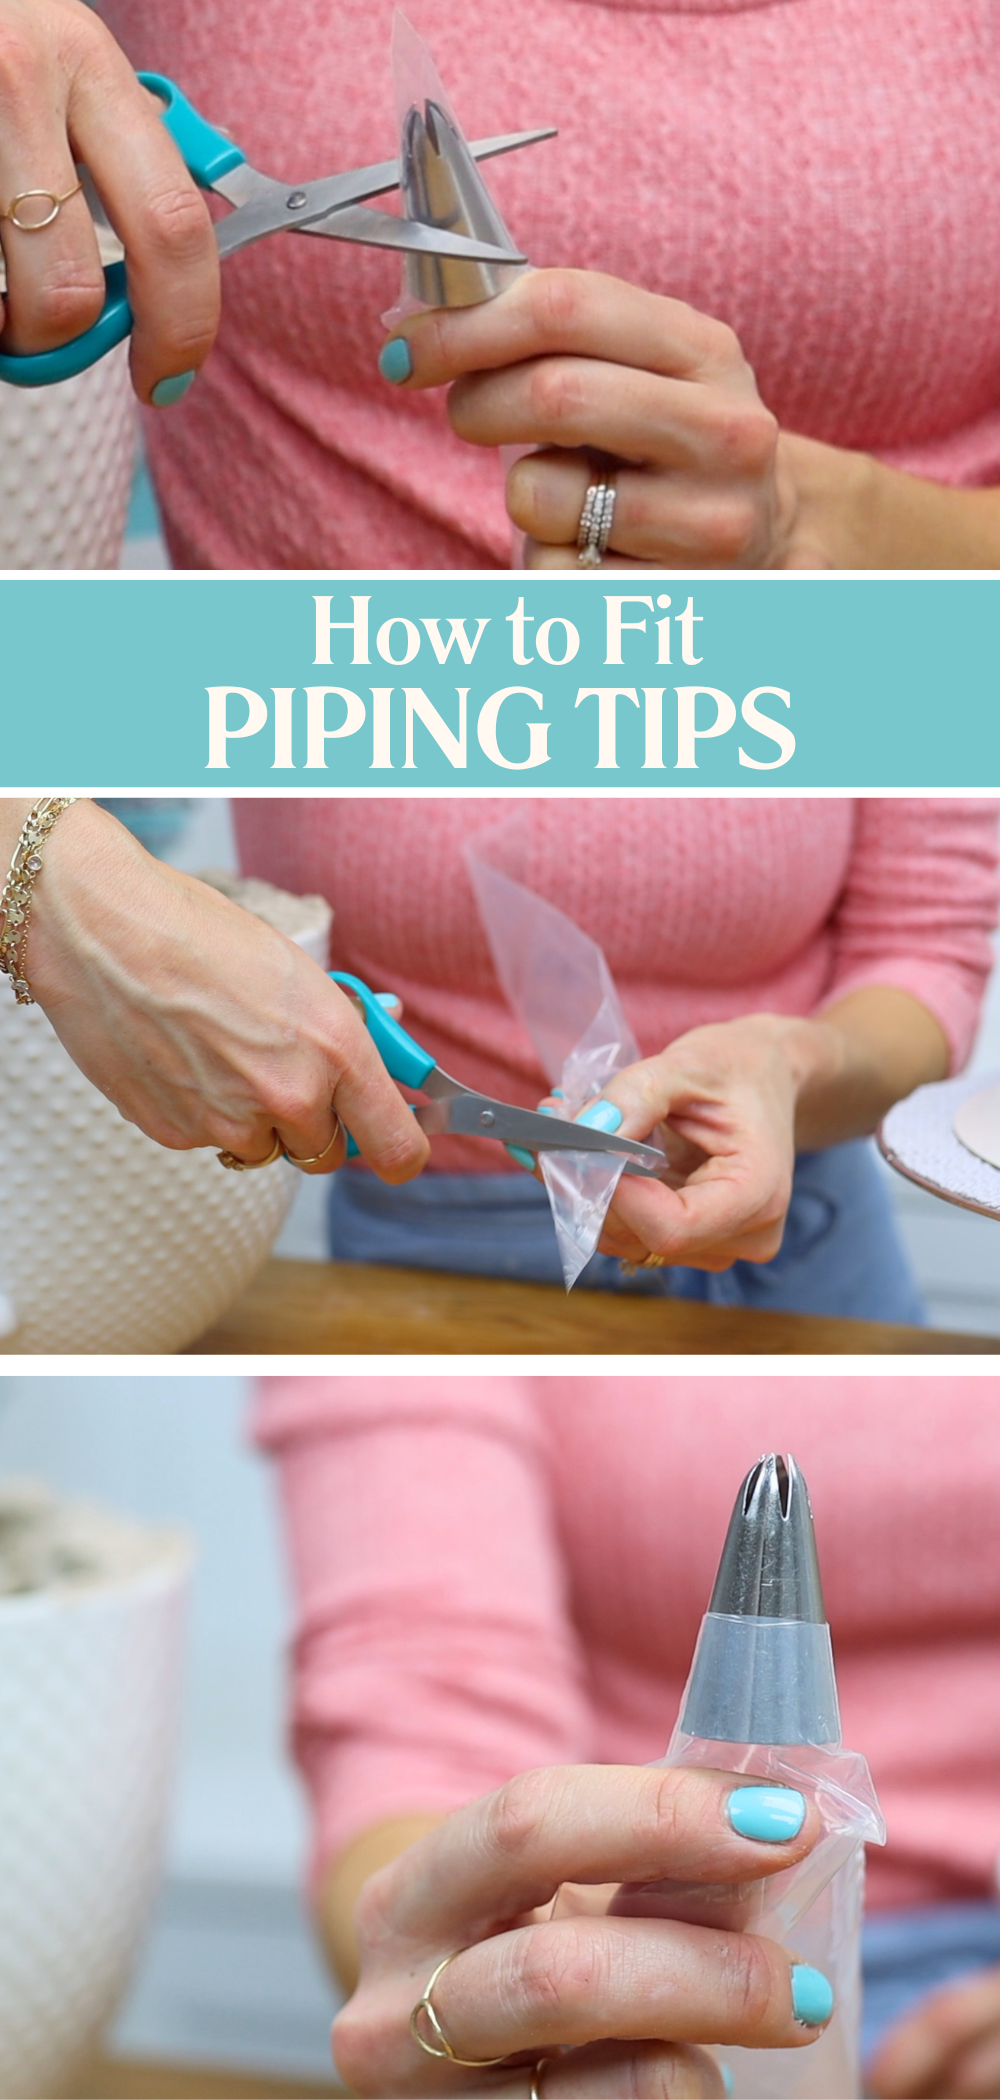
If your piping bag bursts or the tip pops out mid-way through decorating, it’s probably because of how the piping tip was fitted. Disposable piping bags are sealed at the tip so they need to be cut properly to hold piping tips securely.
To prevent bursting bags, drop your piping tip into the bag and push it down to the end. Then score a line halfway up the piping tip with scissors and slide the tip out. Cut along the line you just made and then push the piping tip back down into place. Now the bag will hold it snugly and the tip won’t pop out no matter how much pressure you apply.
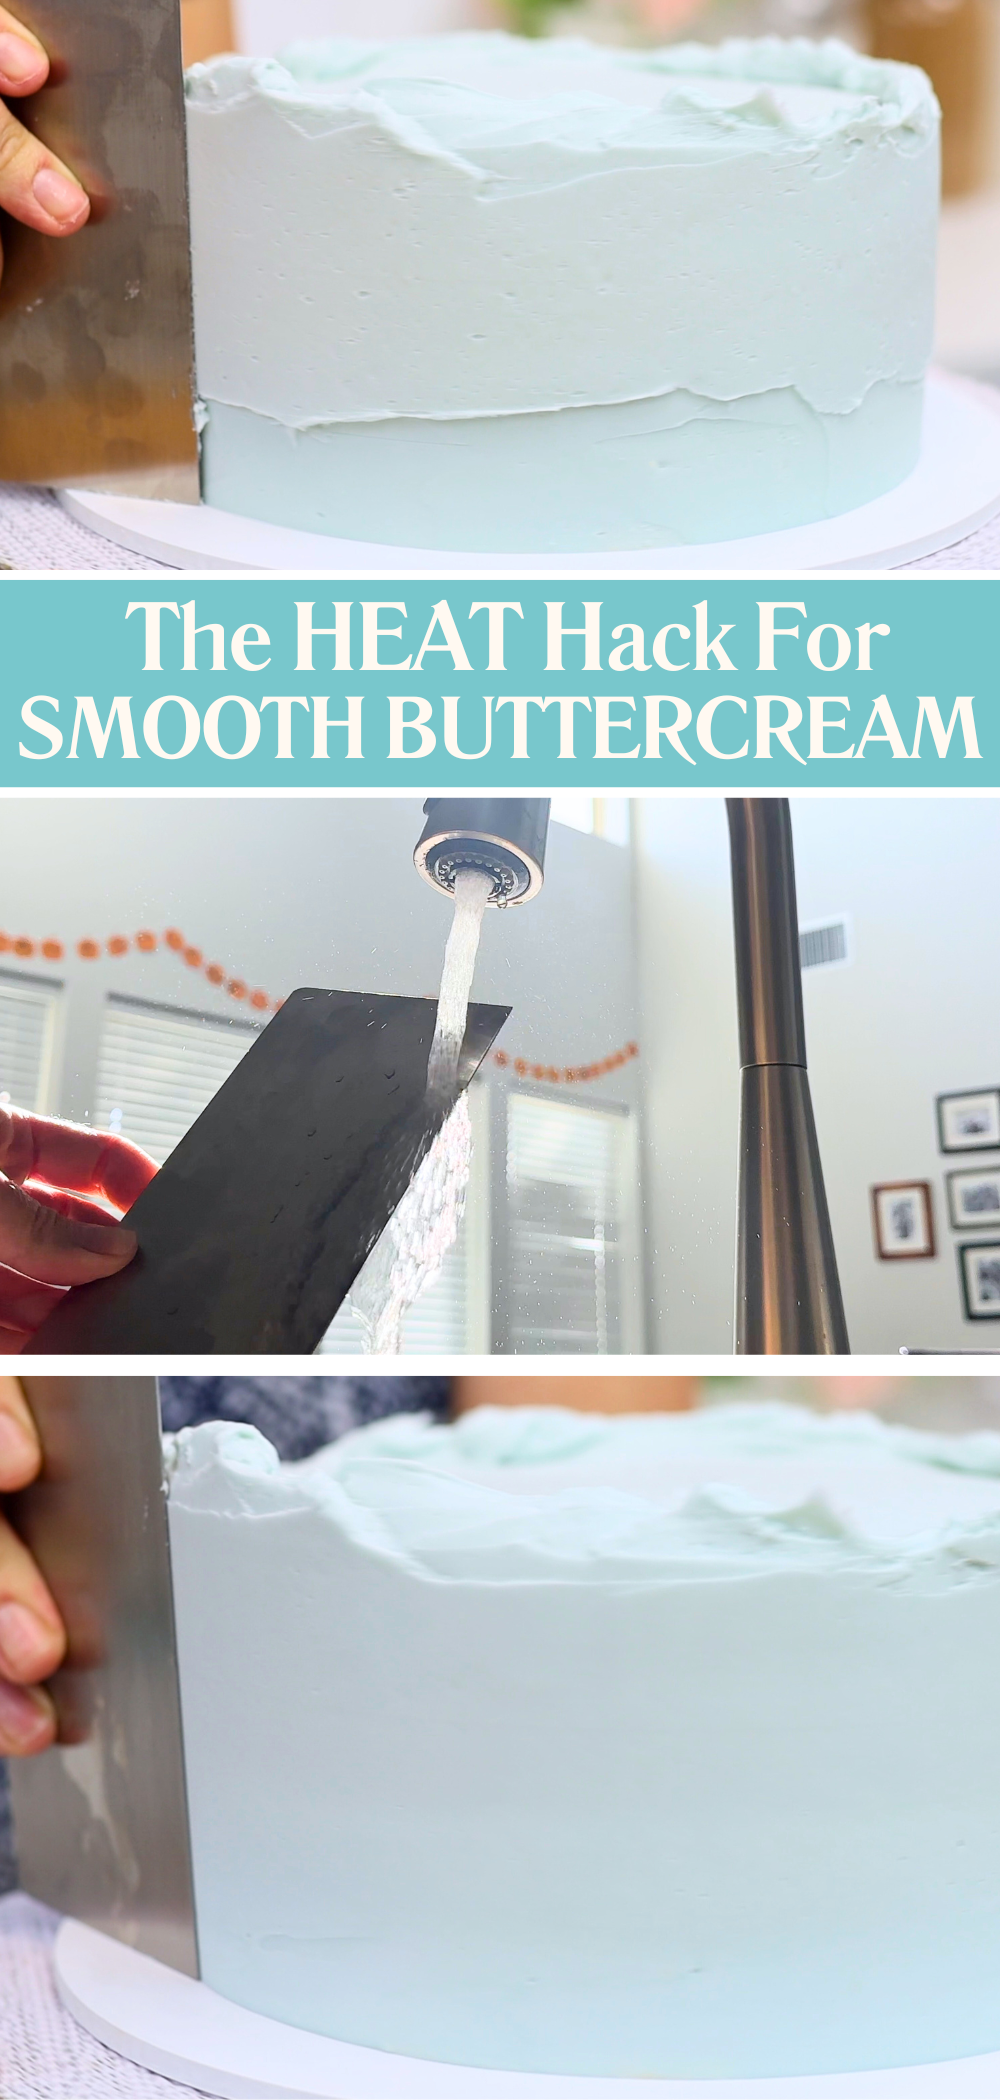
Sometimes buttercream just refuses to get smooth, no matter how many times you scrape around the cake. If your frosting has shallow imperfections or little ridges that won’t go away, use heat to fix it!
Switch to a metal cake scraper and warm it up using a blowtorch, hairdryer, or hot water. Dry it completely so it’s warm and dry, not hot or wet. Now scrape gently around the cake. The warmth will melt the outer surface of the buttercream as you go, filling in imperfections and leaving behind a super smooth finish.
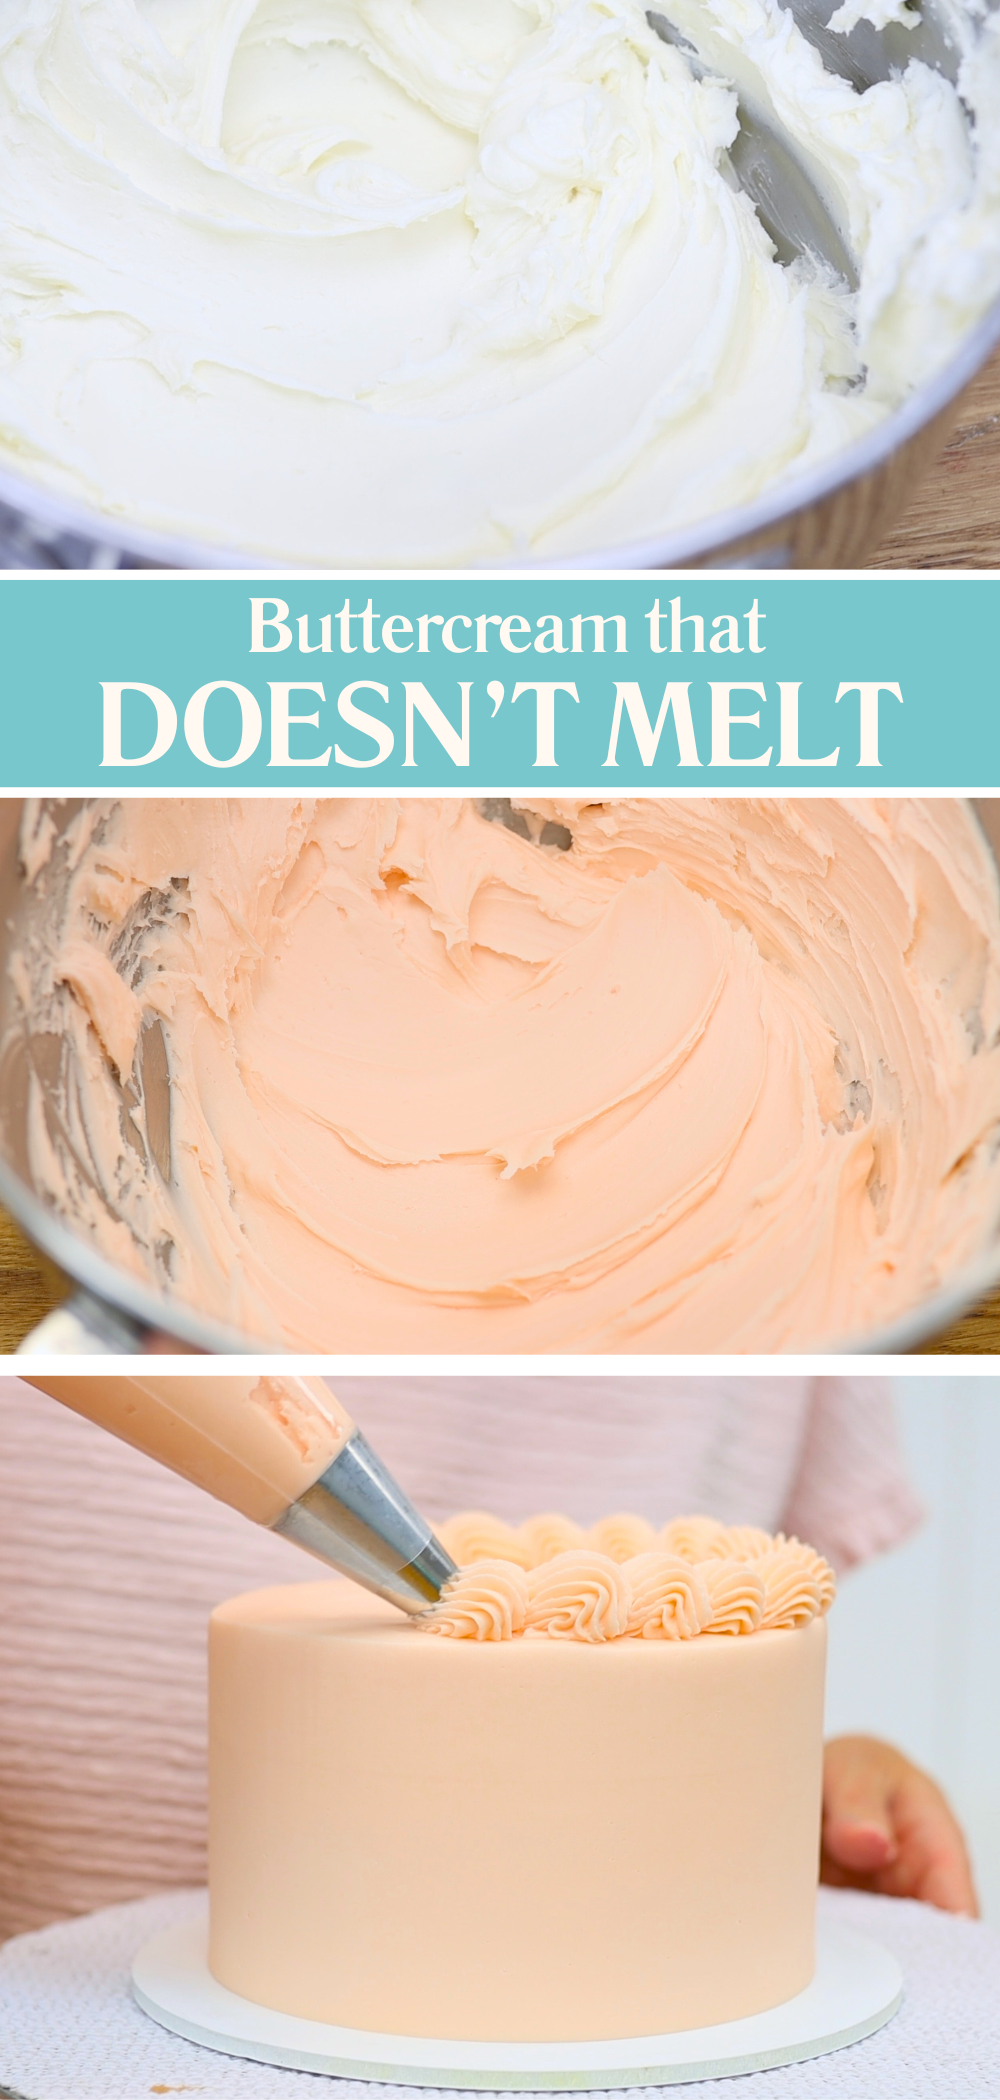
If your buttercream melts or slides off the cake, you’re probably working in a hot kitchen or the cake is outside in warm weather. Just like butter melts, all-butter buttercream melts quickly in the heat.
A great way to prevent buttercream from melting is to swap half the butter in your recipe for vegetable shortening. This has different brand names in different countries, like Crisco or Trex. It’s much more stable than butter and won’t melt as quickly.
To keep the same buttery flavour, add half a teaspoon of clear vanilla extract, which gives your buttercream that rich, buttery taste without the sharpness of shortening. You can still tint it, pipe it, and smooth it just like you would with traditional buttercream but it’ll hold up much better outdoors.
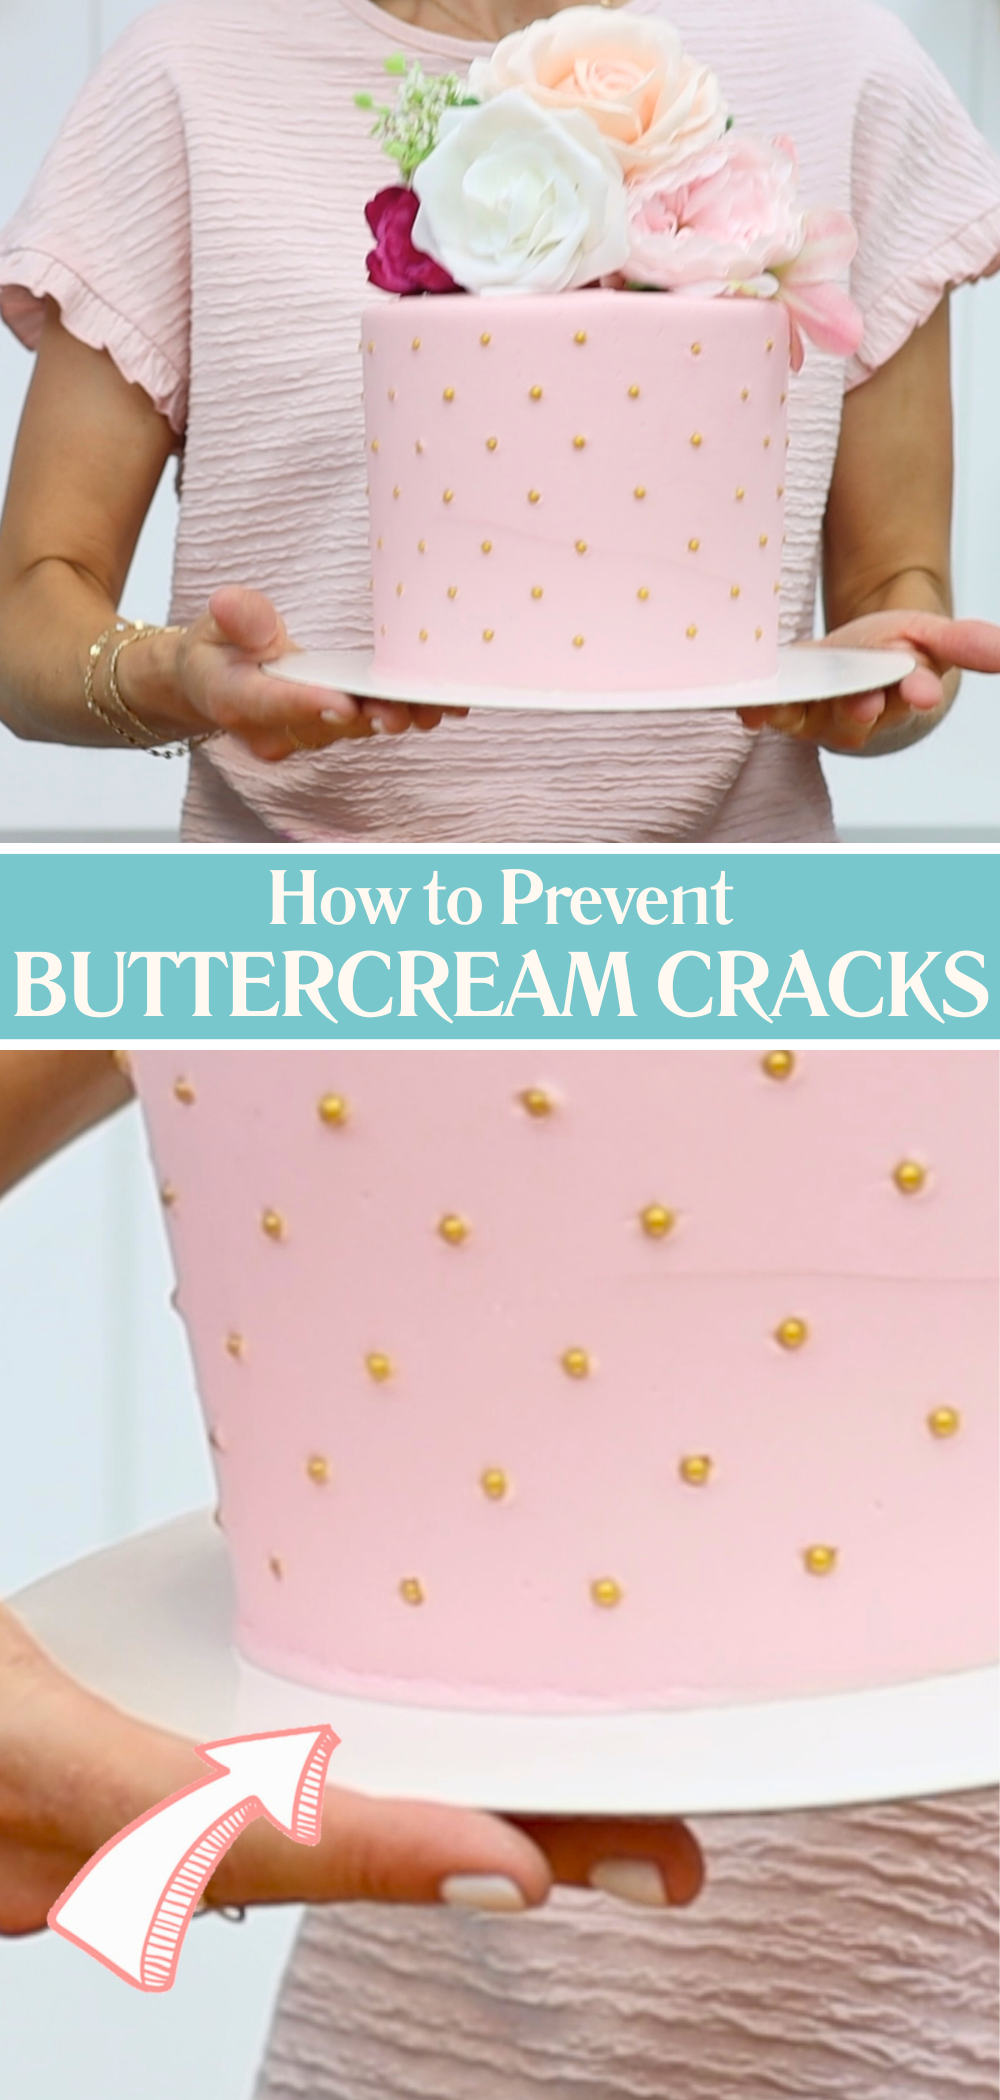
Buttercream cracks when it sets and then gets moved. You’ll often see small cracks appear around the bottom edge of the cake, which are caused by the board bending under the cake’s weight. This can be especially noticeable if you’re using a thin cake board.
To prevent cracks, always support your cake board by holding it underneath with one hand, especially if it’s a large or heavy cake. Even better, use a thicker, sturdy cake board that won’t flex. Once your frosting is set, you want the whole cake to stay still to avoid any shifting or cracking.
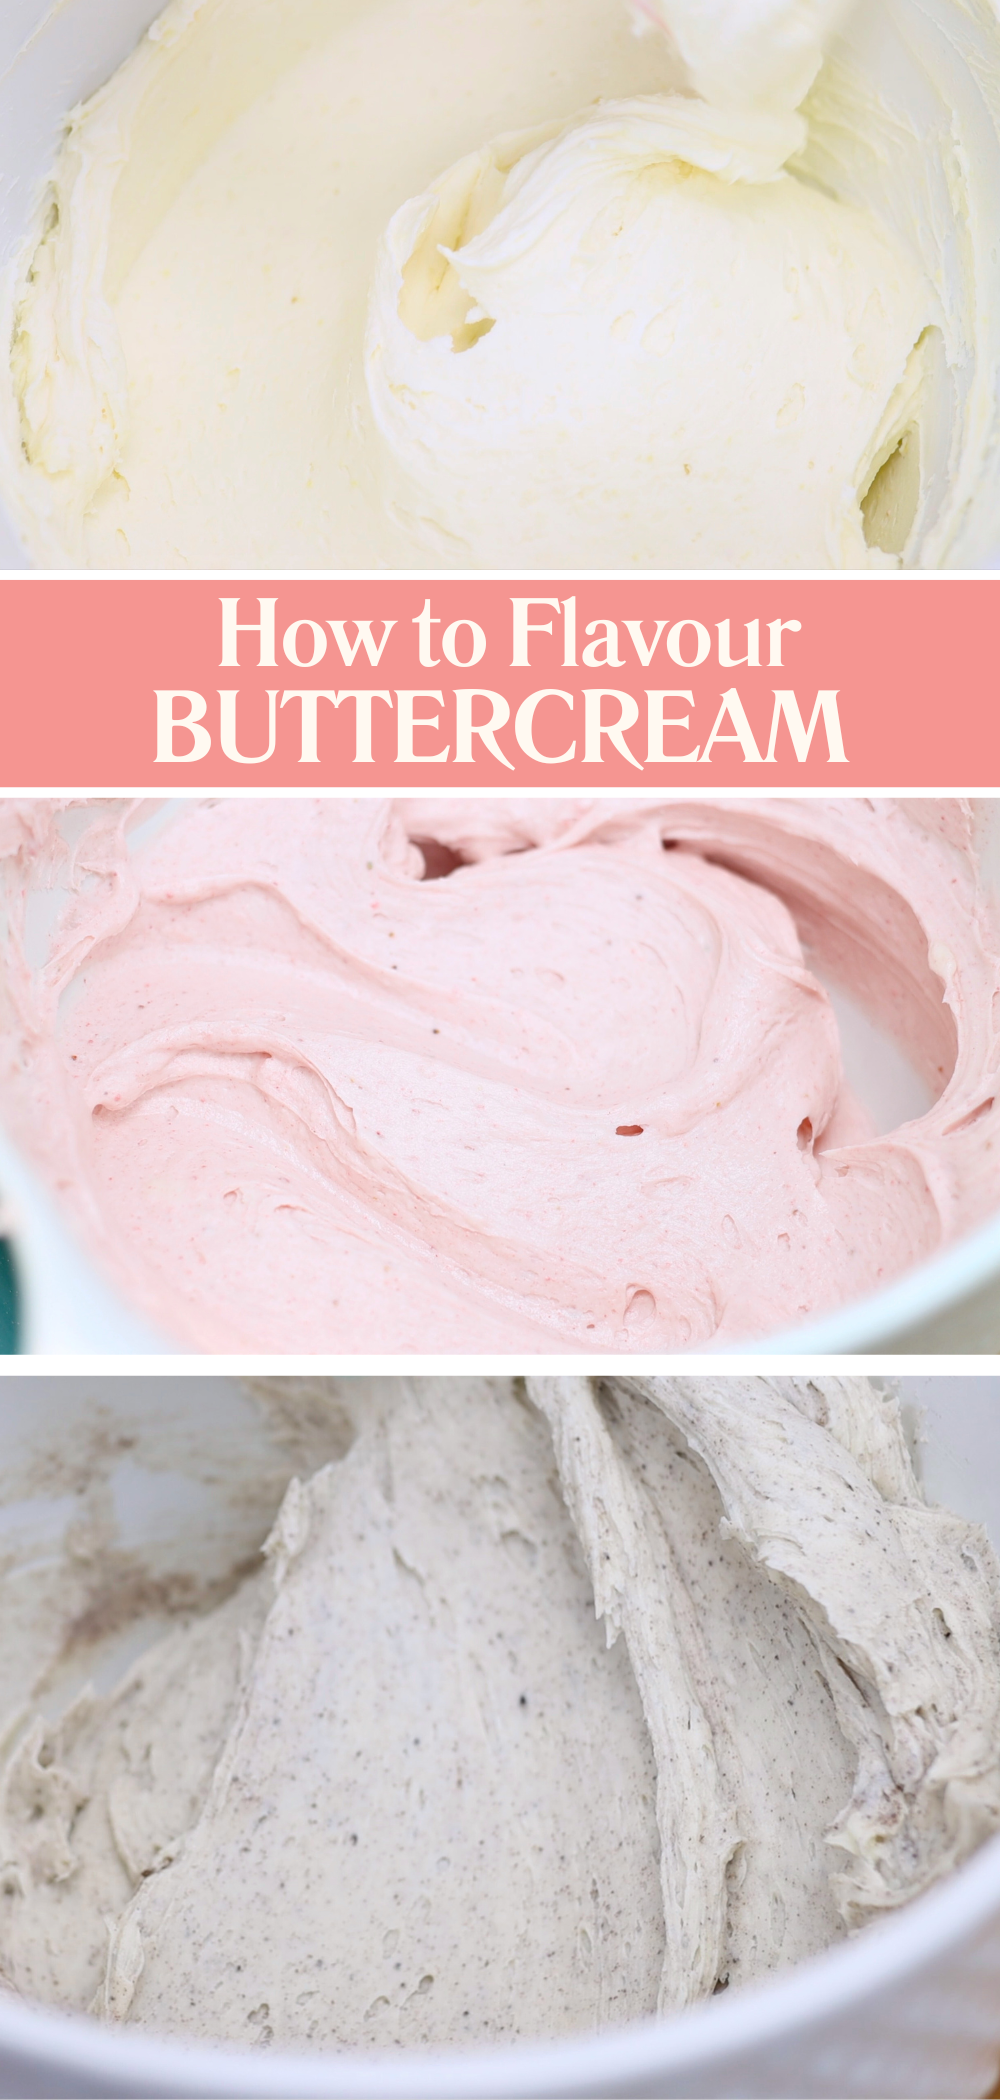
You can absolutely flavour buttercream with all sorts of ingredients! The key is to balance the amount of liquid you add. For anything runnier than buttercream like lemon curd, Nutella, peanut butter or cream cheese, add it one spoonful at a time. Stir and check the consistency after each spoonful so your buttercream doesn’t get too runny.
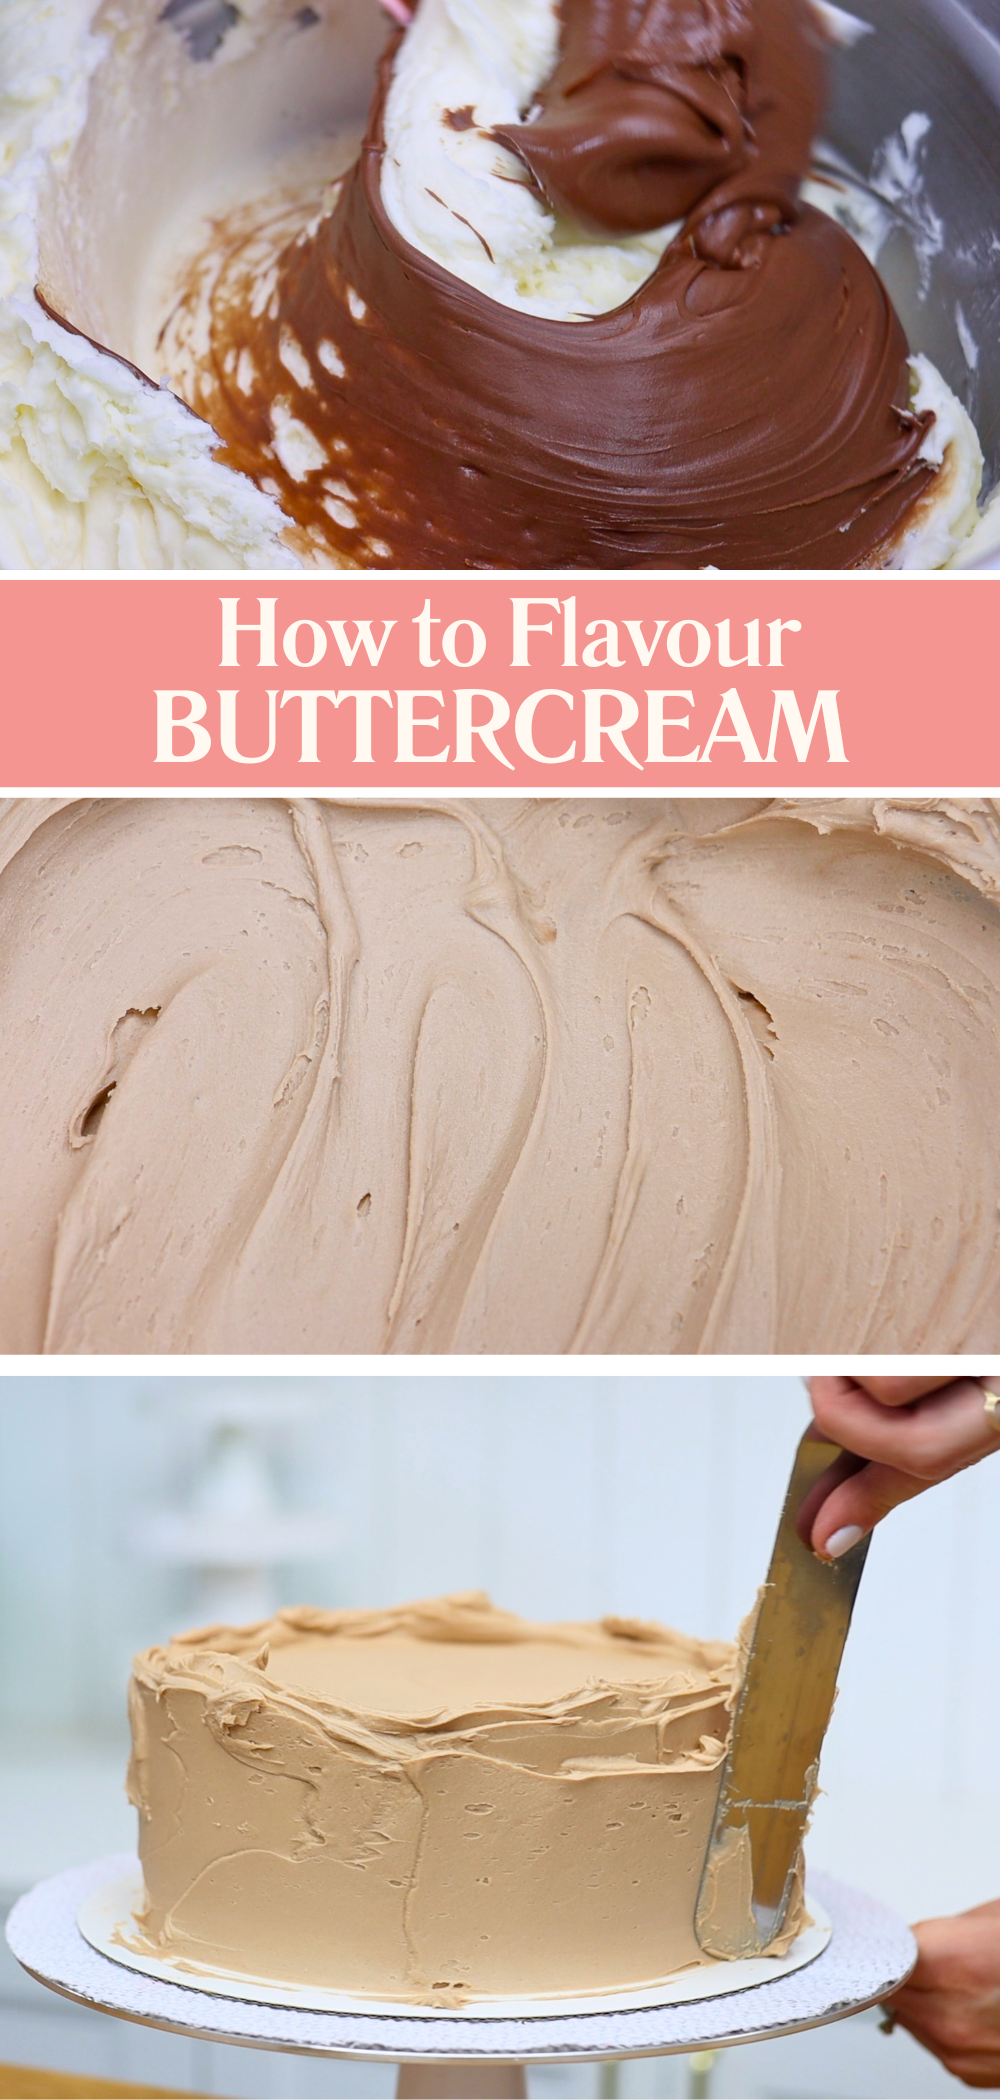
You're looking for a texture that’s still firm enough to hold its shape but soft enough to spread easily. If you want intense flavour without adding moisture, try using freeze-dried fruit powders like strawberry or pineapple instead of purées or juices. They add a lot of flavour without affecting the texture at all.
I wish I had known earlier in my cake career that you can freeze buttercream in multiple ways. Whether you’ve got leftovers or you're planning ahead for a cake order, freezing is a great option.
You can freeze buttercream on its own in an airtight container or ziplock bag. Or freeze it already spread between cake layers by wrapping the whole cake tightly in cling film (plastic wrap). You can even freeze an entire frosted cake or even a cake decorated with piping or other buttercream details! To do this, place the cake in the freezer uncovered for about an hour until the buttercream is firm. Then wrap it securely in two layers of plastic wrap and return it to the freezer.
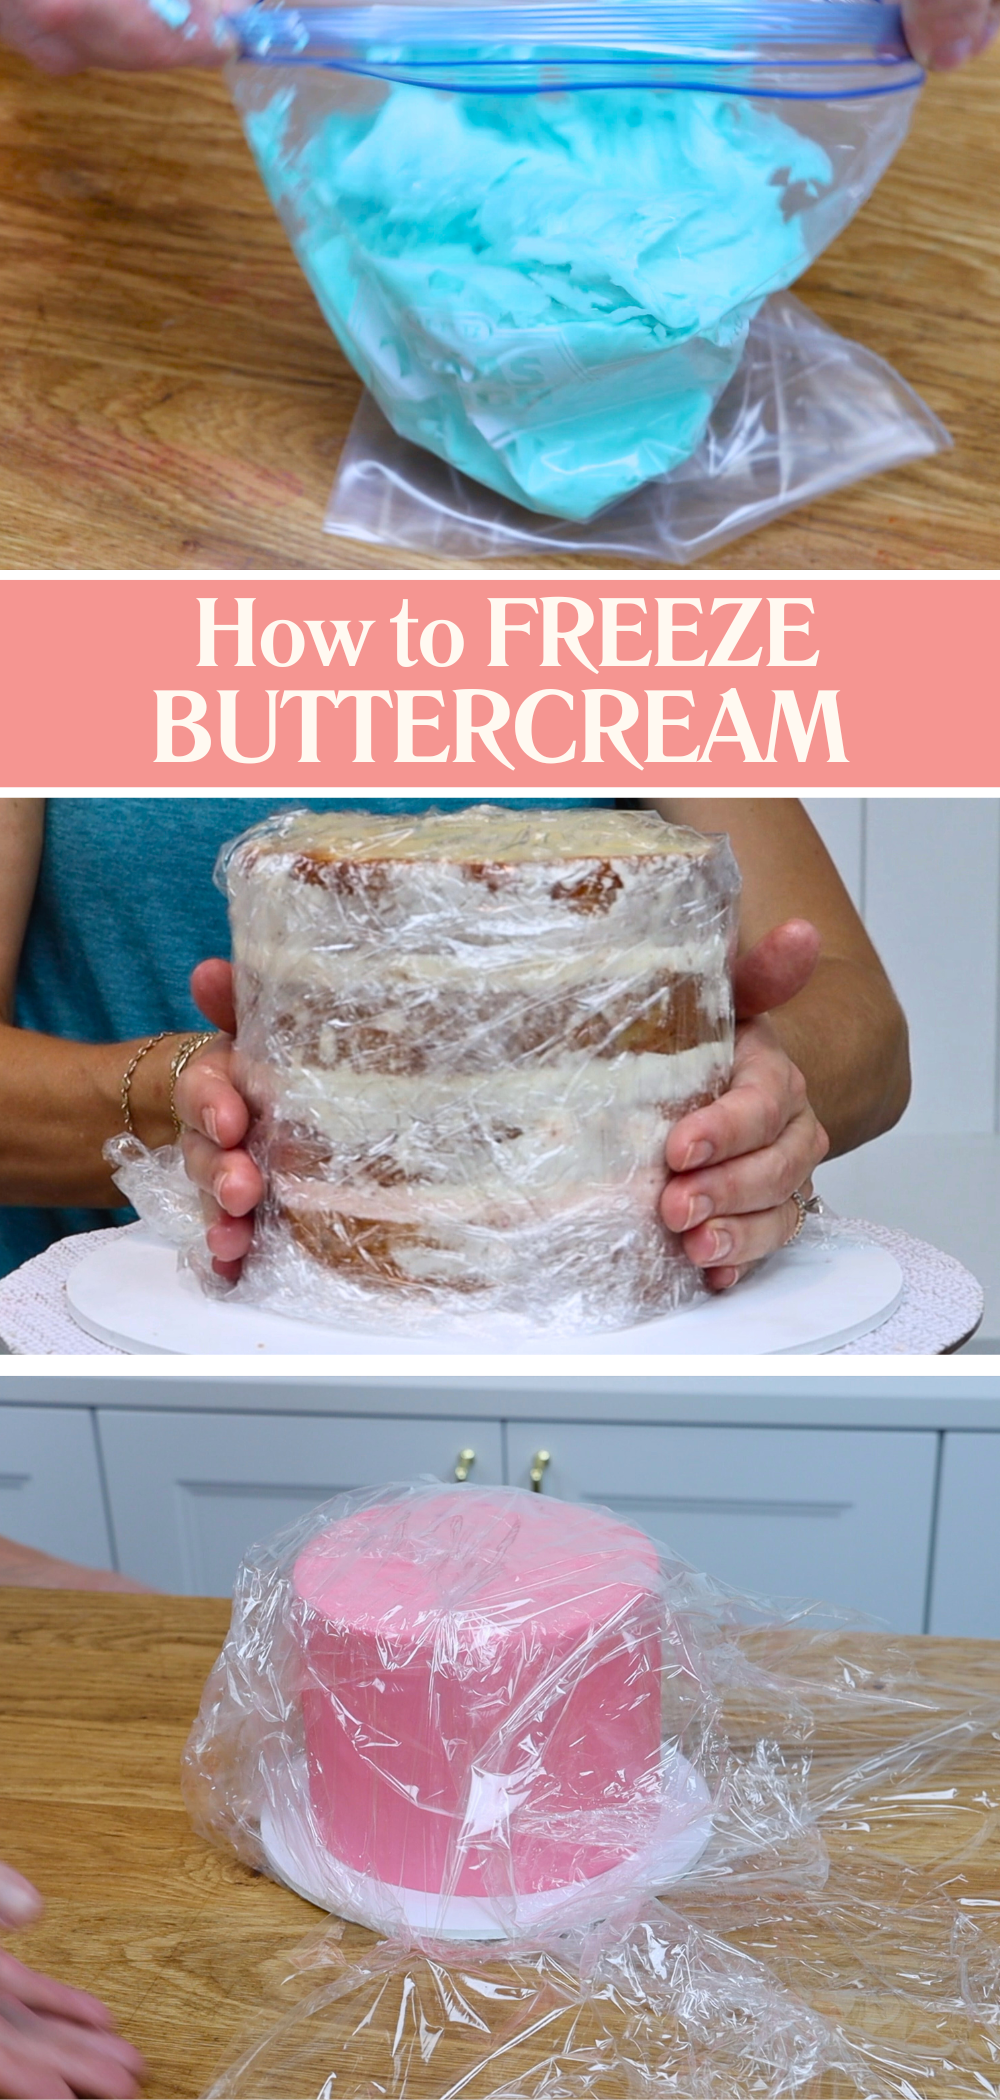
When you’re ready to use or serve your buttercream cake, transfer it to the fridge the night before and then to room temperature a few hours before serving. Unwrap it as soon as you take it out of the fridge, before the buttercream softens so the plastic doesn’t damage your decorations. Cakes always taste best at room temperature so after taking it out of the fridge, wait at least 2 hours before serving.
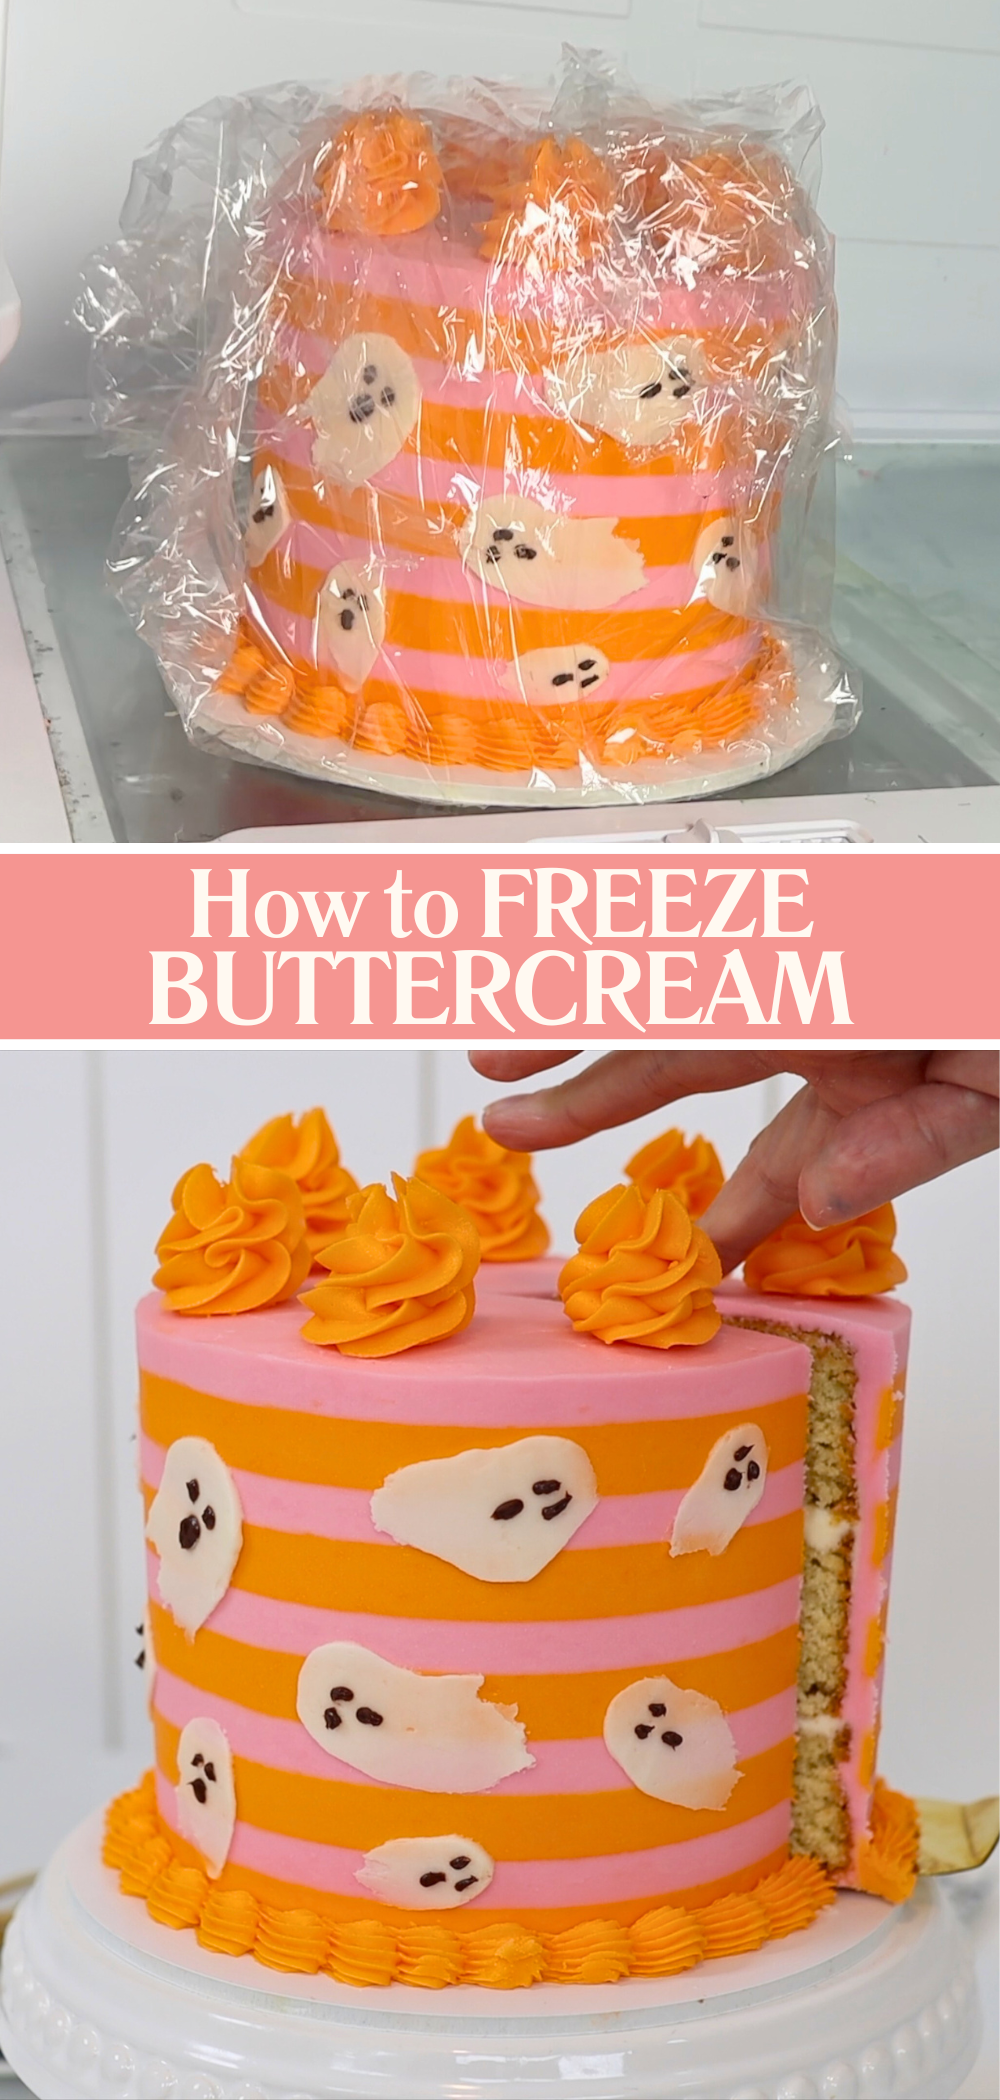
Buttercream can be tricky but with these quick fixes you’ll be able to troubleshoot any issue that comes your way.
To learn even more about buttercream (including how to make it flawlessly, colour it, flavour it, pipe it, frost with it and more) check out my online course The Basics of Buttercream. You'll find that and all of my other online courses on my cake school. I hope to see you there!
You can also watch a video of this tutorial on how to fix 10 buttercream problems:
Whether you're selling cakes from home or running a full bakery, of course you'd like to earn more for the time, energy and love you pour into every cake. The good news? You don’t need to work twice as hard to make twice as much. Here are 10 simple ways to make more money selling cakes without burning out and I’ve used all of these strategies myself throughout my cake career, from baking in my kitchen at home to running a busy storefront and helping others grow their cake businesses.
Ready to grow your cake business? Here are 10 tried-and-tested cake business tips to help you increase your prices, sell more cakes, and create extra income streams with your cake skills.
Let’s start with how to make more money for what you’re already doing. To raise your prices strategically, increase the value of what you offer.
One of the easiest ways to do this is through customization. You can charge more when you offer personalized cakes, from names or messages on the cake to specific colour themes or designs for birthdays, baby showers, weddings and other special occasions. As your skills improve, you can offer more advanced styles like sculpted or 3D cakes, double barrel tiers, fondant designs or on-trend looks like vintage piping or comic-style cakes. These extra touches let you increase cake prices compared to offering standard menu options.
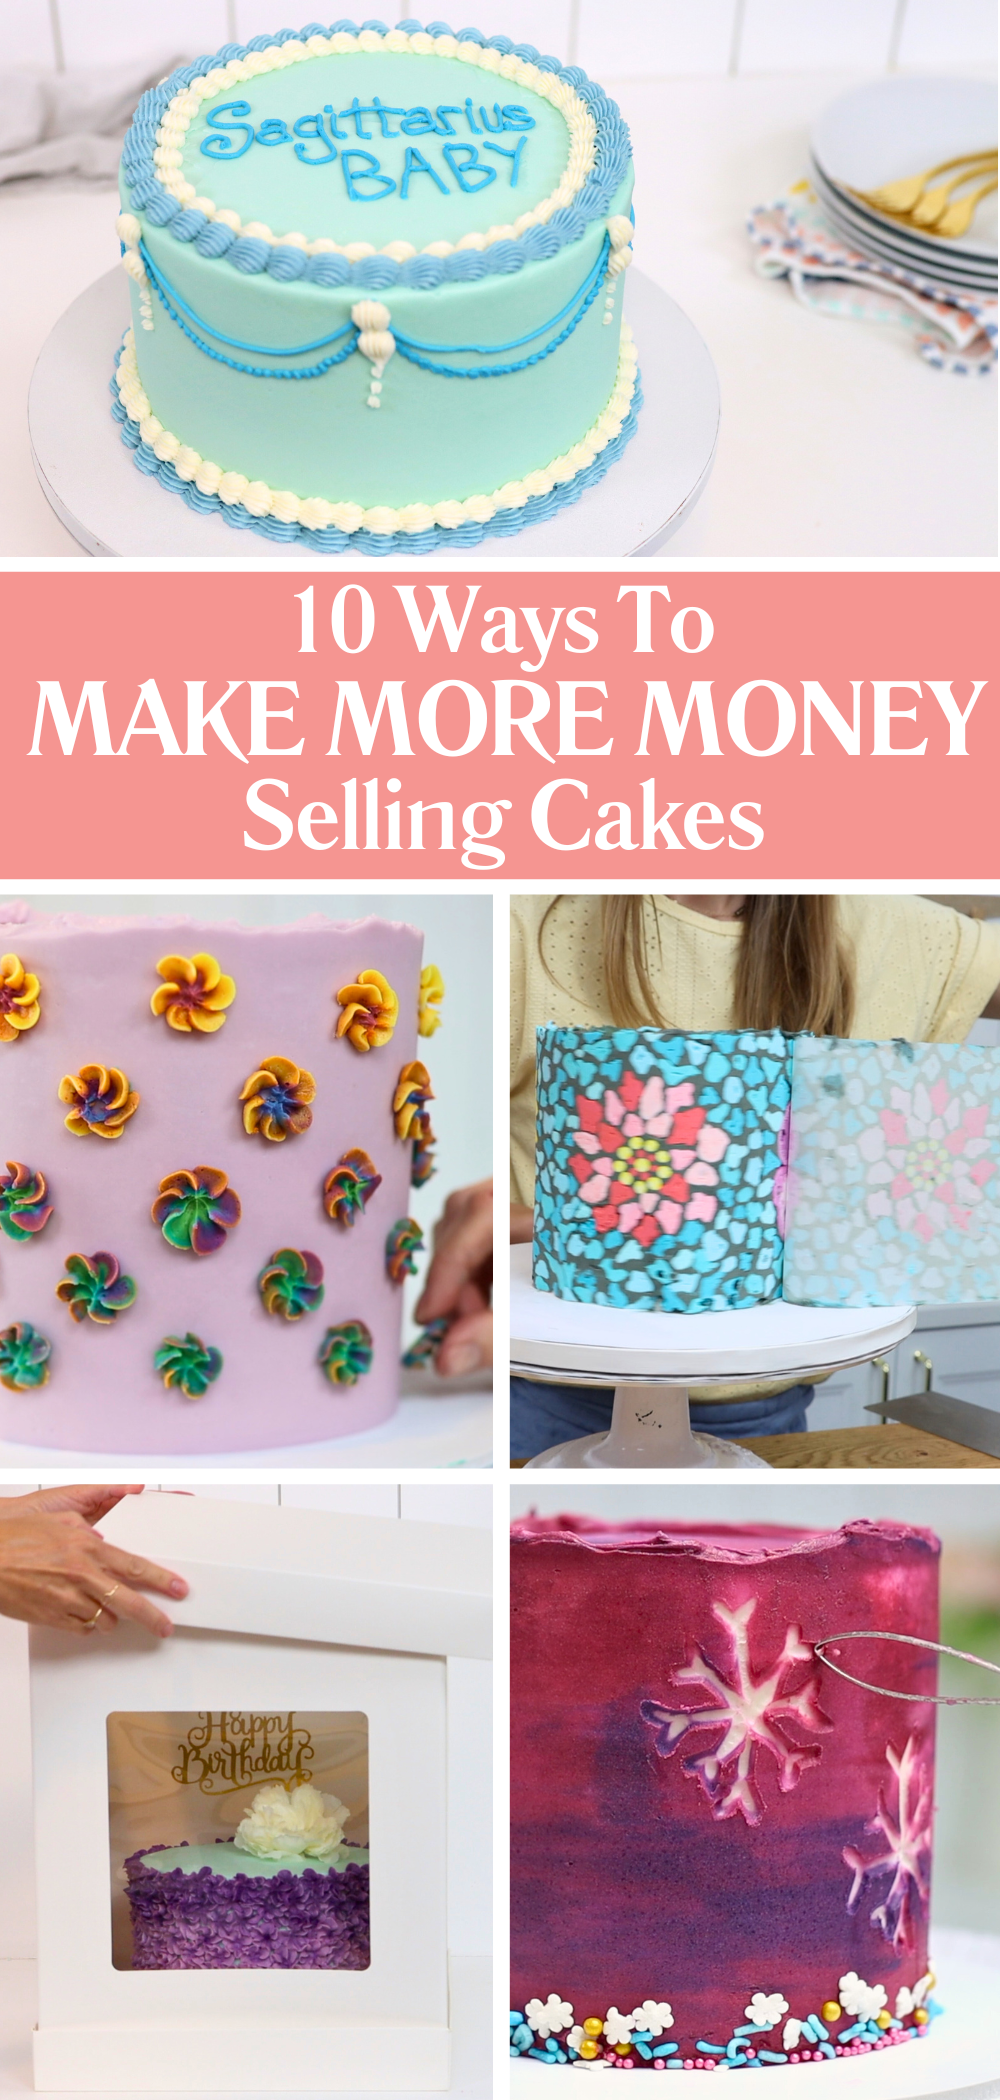
Next, set yourself apart with something unique. When your cakes look and taste just like everyone else’s, you have to compete on price and that often means lowering it. But if you can offer something others can’t, like rare flavour combinations, fast delivery, or early adoption of trending styles, your prices can go up instead of down. For example, remember the striped cakes of 2019, comic cakes in 2022, or the recent wave of zodiac-themed vintage cakes? Being the only person in your area to offer something unique gives you a huge advantage.
Of course, if you want to start offering more detailed or elaborate designs, that might mean improving your cake decorating skills. My online cake school is here to help with that! I teach hundreds of cake decorating techniques and designs in my online courses and you can try everything with a free 7-day trial of my AYCC membership. It’s the easiest way to gain confidence and watch your cakes (and your cake prices) improve.
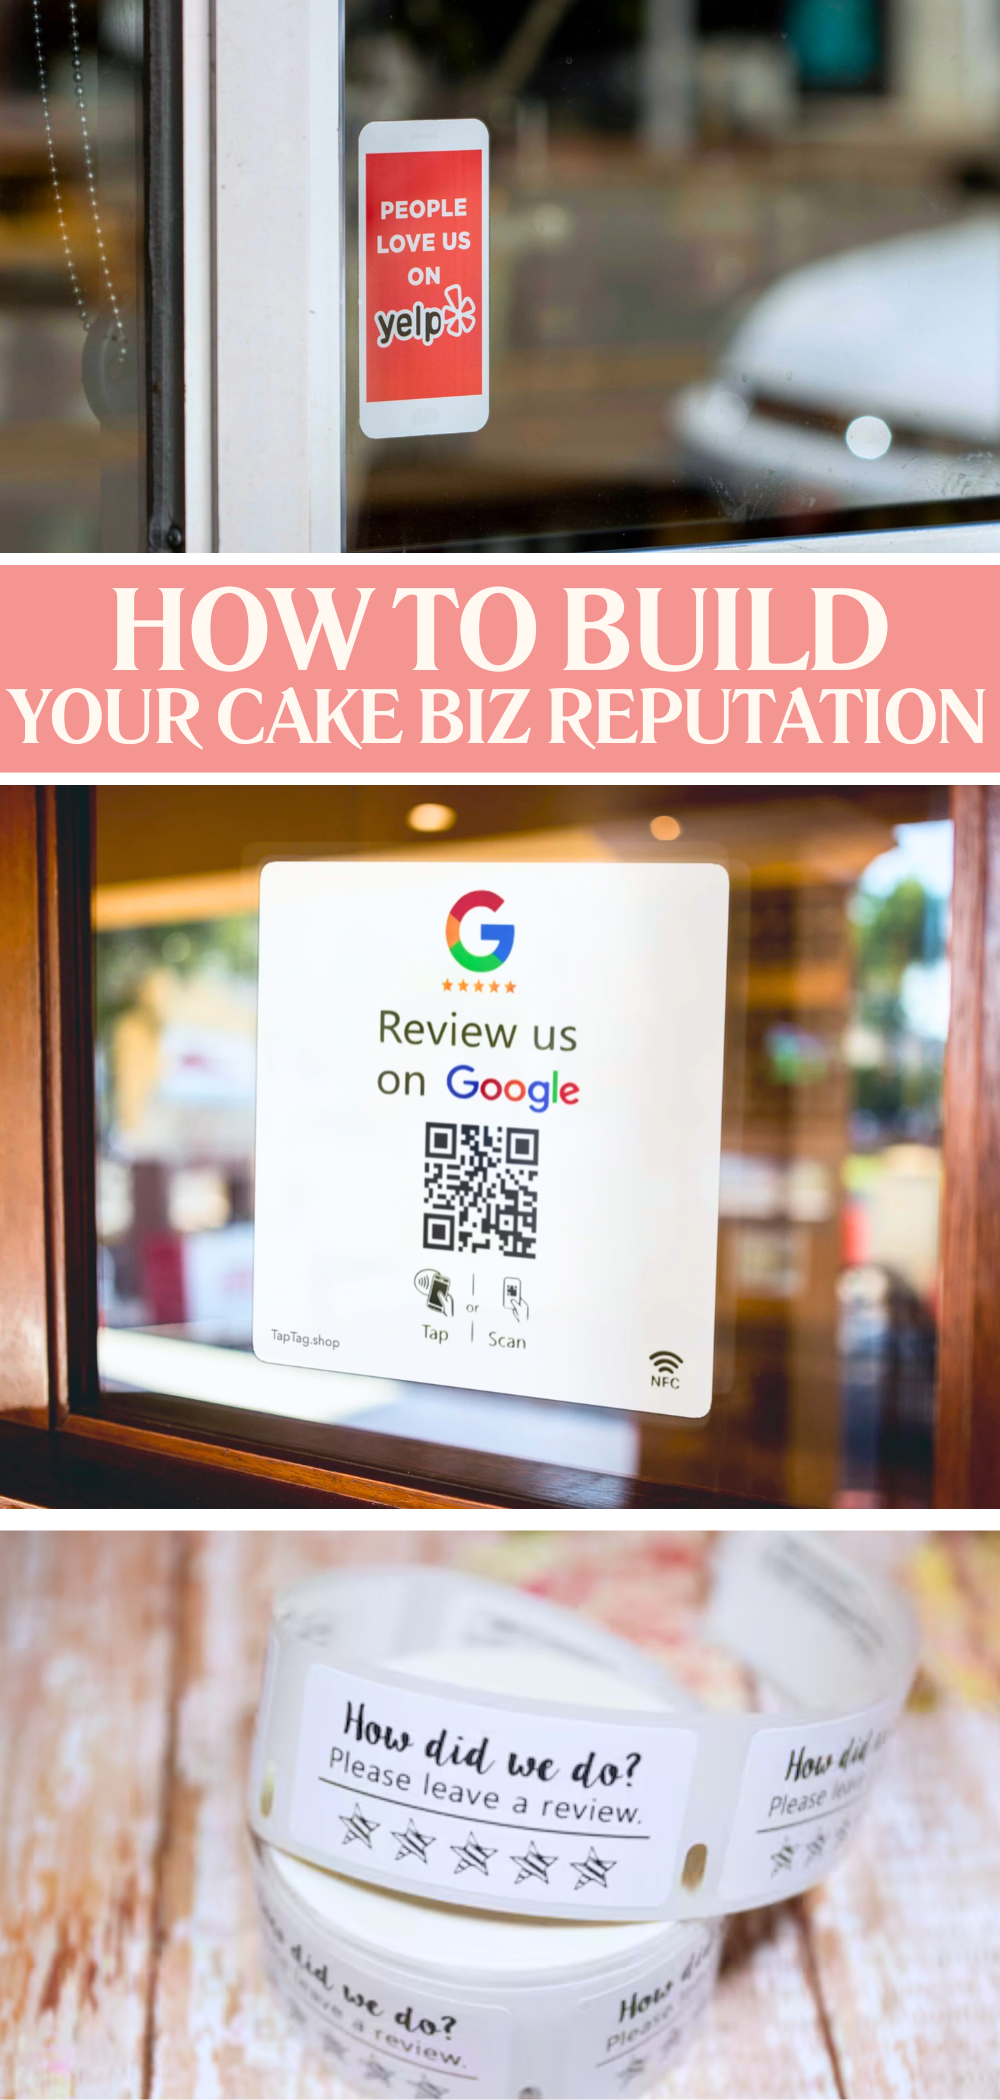
Don’t underestimate the power of your reputation. Encourage reviews on platforms like Google and Yelp with signs in your shop or stickers on your boxes. Be quick, helpful, and friendly when replying to messages and grow a presence on social media to show potential customers that others already love your cakes. Social proof builds trust and people are willing to pay more when they feel confident in what they’re buying.
Let’s talk about how to sell more cakes without lowering your prices. Yes, dropping your prices could bring in more orders but that just means working harder for the same money. Instead, try these strategies to bring in more sales without reducing prices.
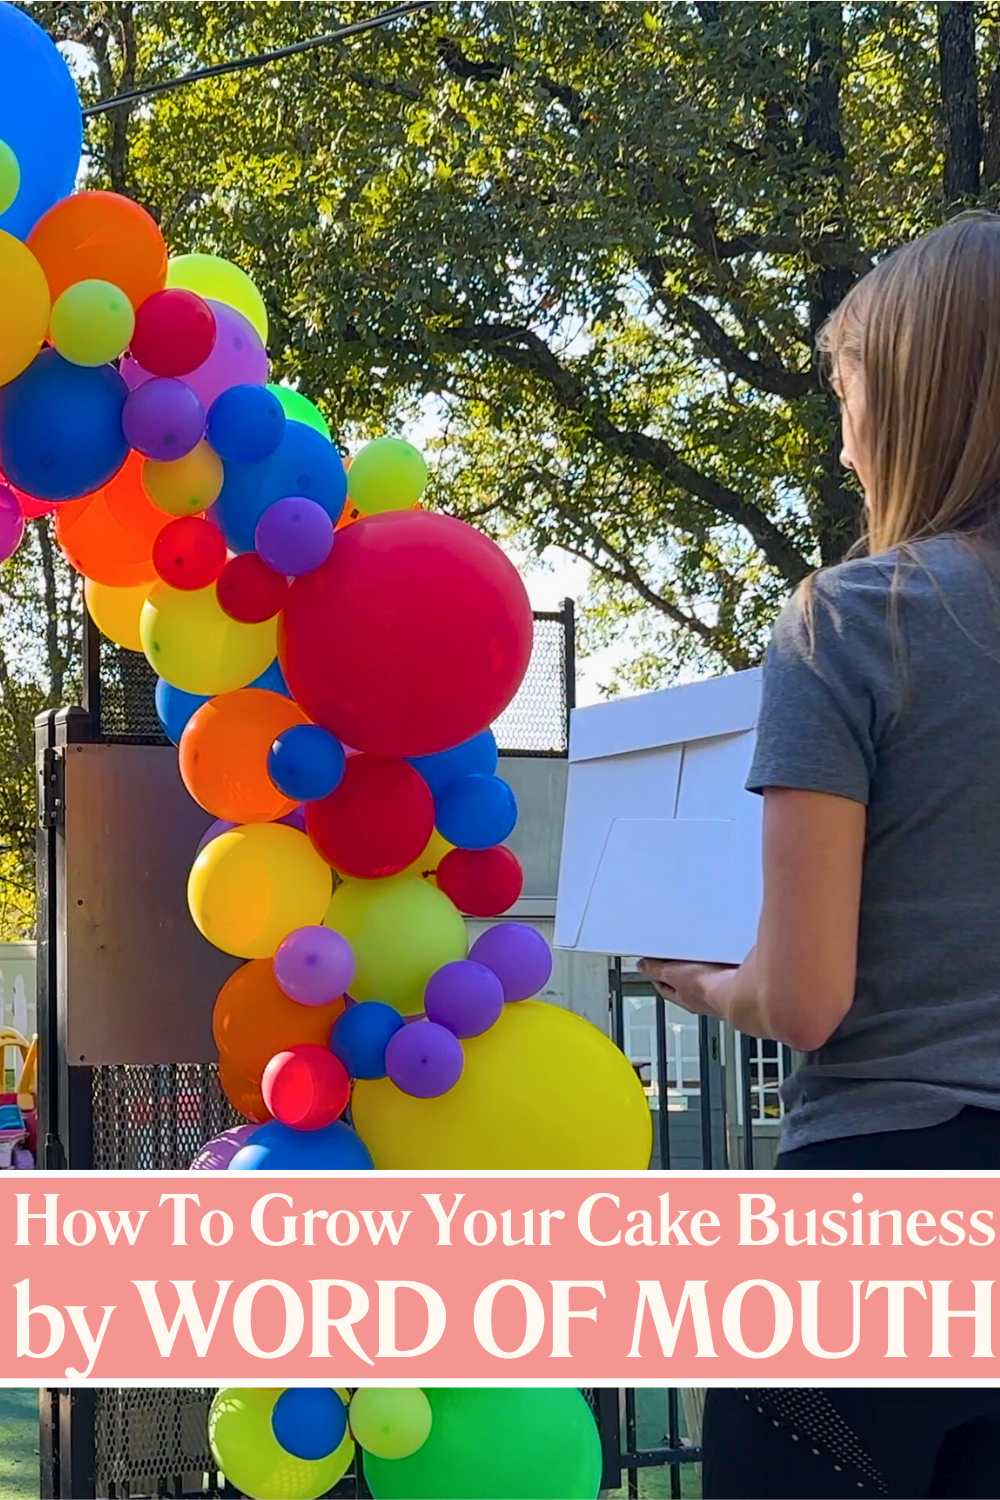
Word of mouth is free and incredibly effective. Take cakes to events, give them as gifts, or offer one as a prize for a local competition. Reach out to newspapers, magazines, blogs or local online communities to share your story or see if they’d feature your work. I started this way when I ran my home cake business and it really worked! Within a year I had more orders than I could handle and opened a storefront. Check out this tutorial on 10 things I wish I'd known when I first started making cakes!
If you’re into social media, start thinking about content creation. Sharing photos and videos of your cakes can bring in new customers while also growing your audience. Use location tags so locals can find you and post popular themes like Minnie Mouse or Mario cakes so potential customers see something they’d love to order. This is just scratching the surface! Content creation for bakers involves lighting, setup, strategy, editing, and much more. I teach all of this inside Creator Academy - join the waitlist now if you’re curious about building a cake business through content.
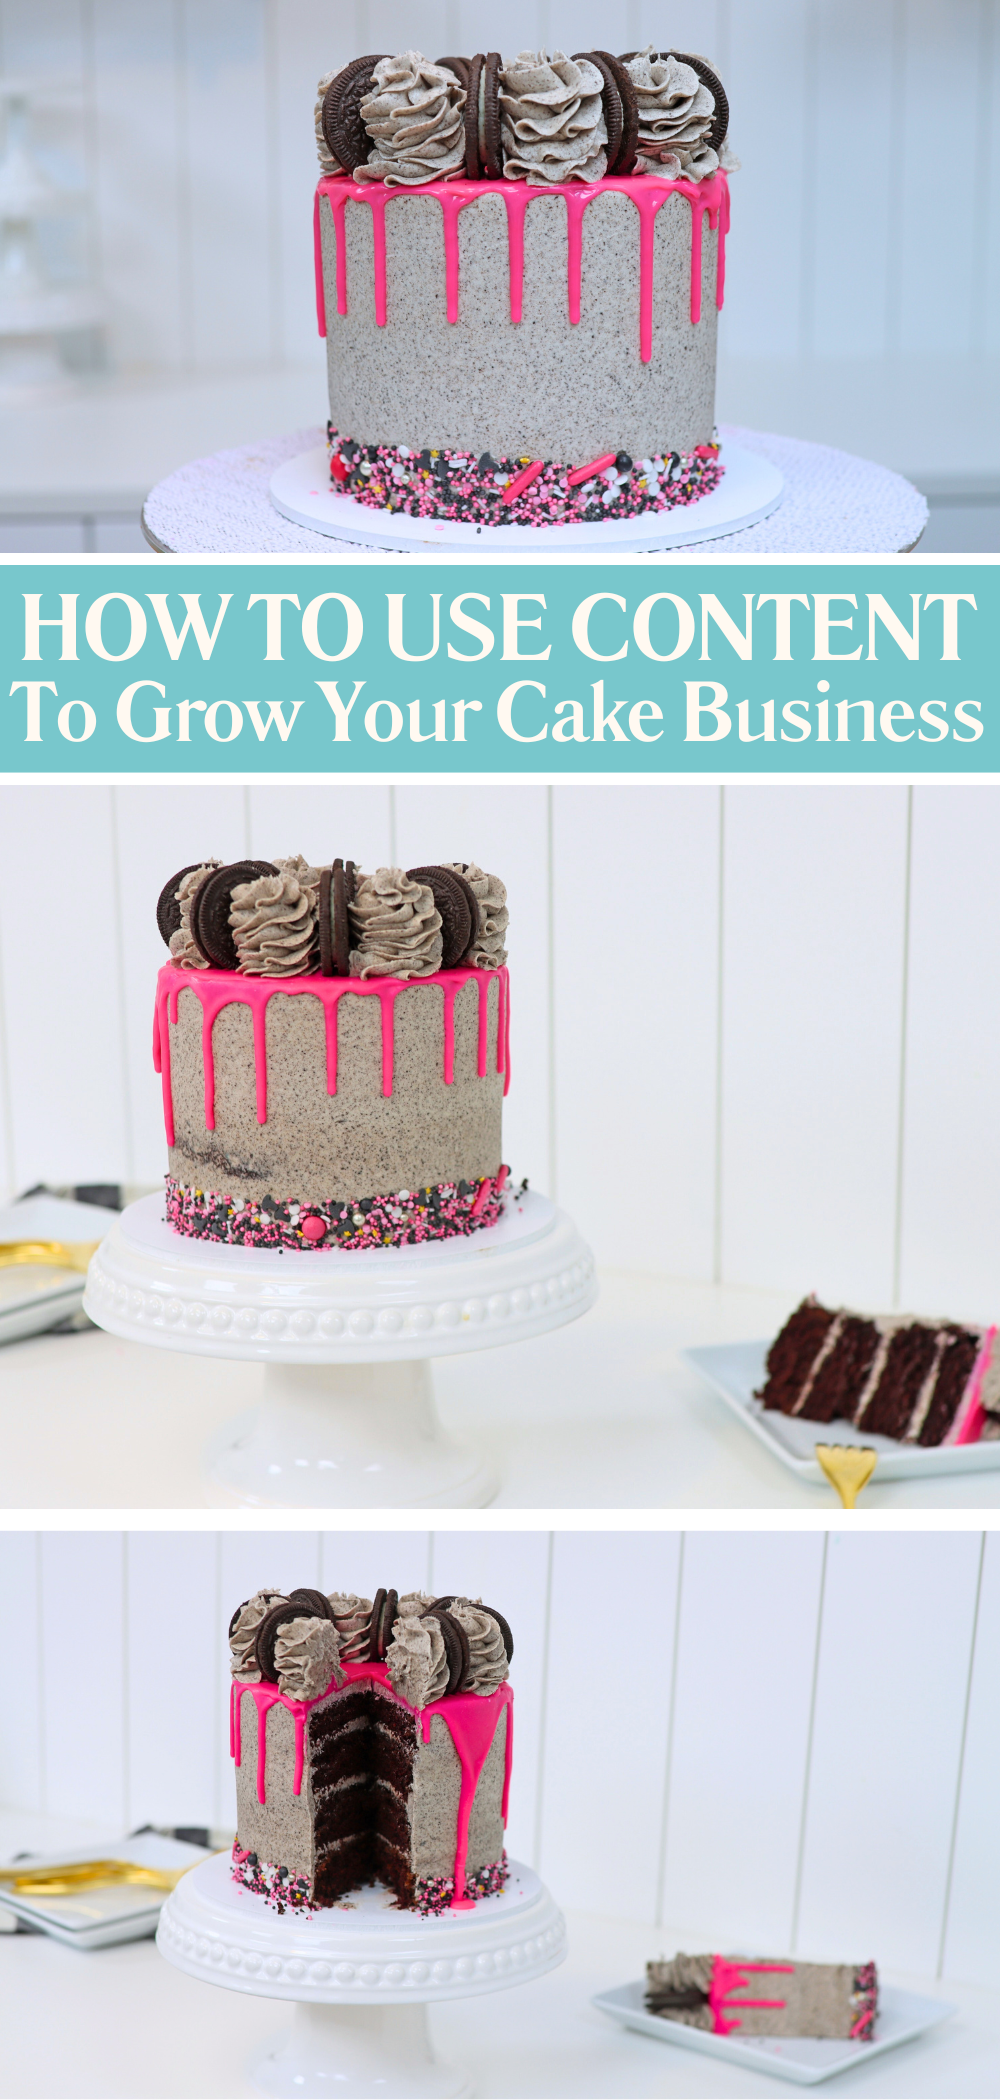
Networking is another brilliant way to grow. Partner with non-competing businesses like an ice cream shop, florist, or balloon decorator. Recommend each other to customers and create packages or cross-promotions to boost each other’s sales. You’ll be surprised how fast this kind of collaboration can grow your customer base.
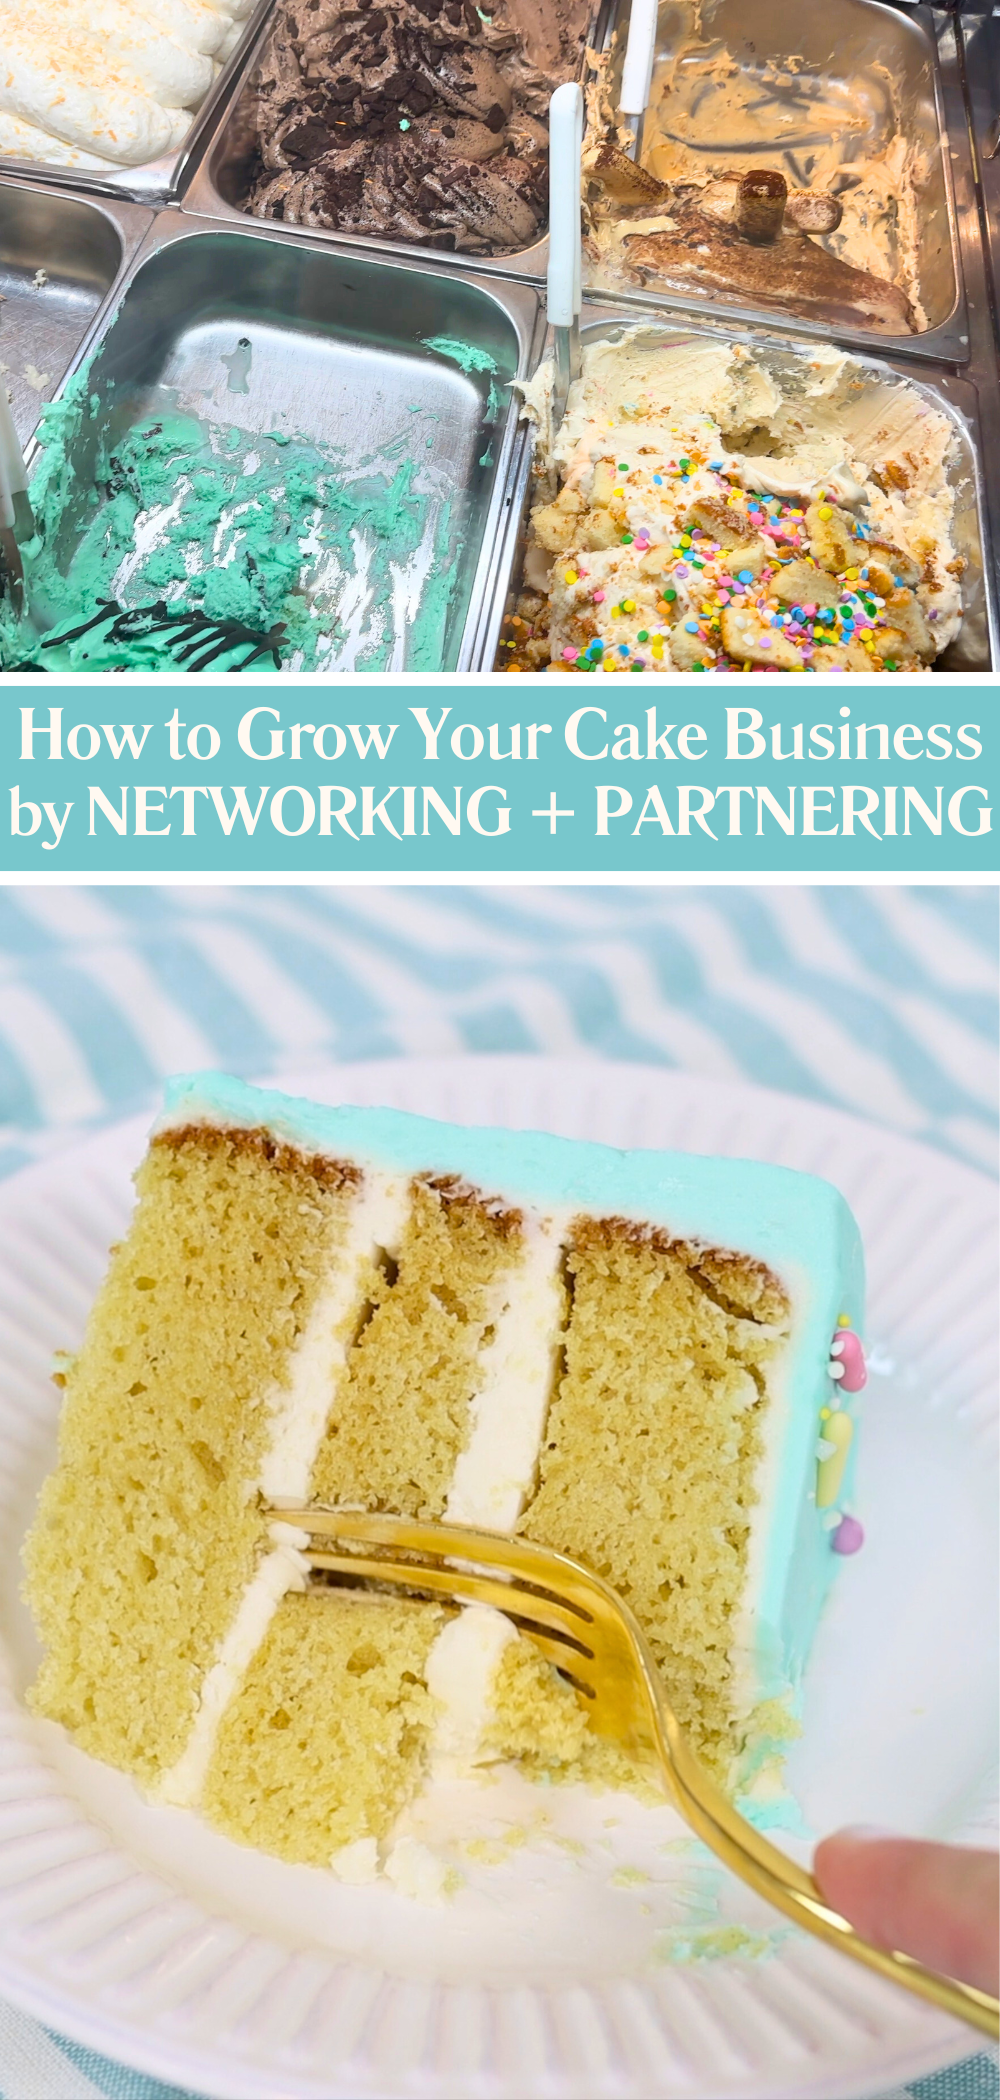
Upselling is a quick way to make more from each customer. Offer matching cupcakes at a discount when someone orders a cake. Suggest a birthday smash cake alongside an order of cupcakes. And you can upsell decorations on cakes like cake toppers, custom characters, or adding an extra tier. The more you offer, the more you can earn from each order without finding a brand new customer every time.
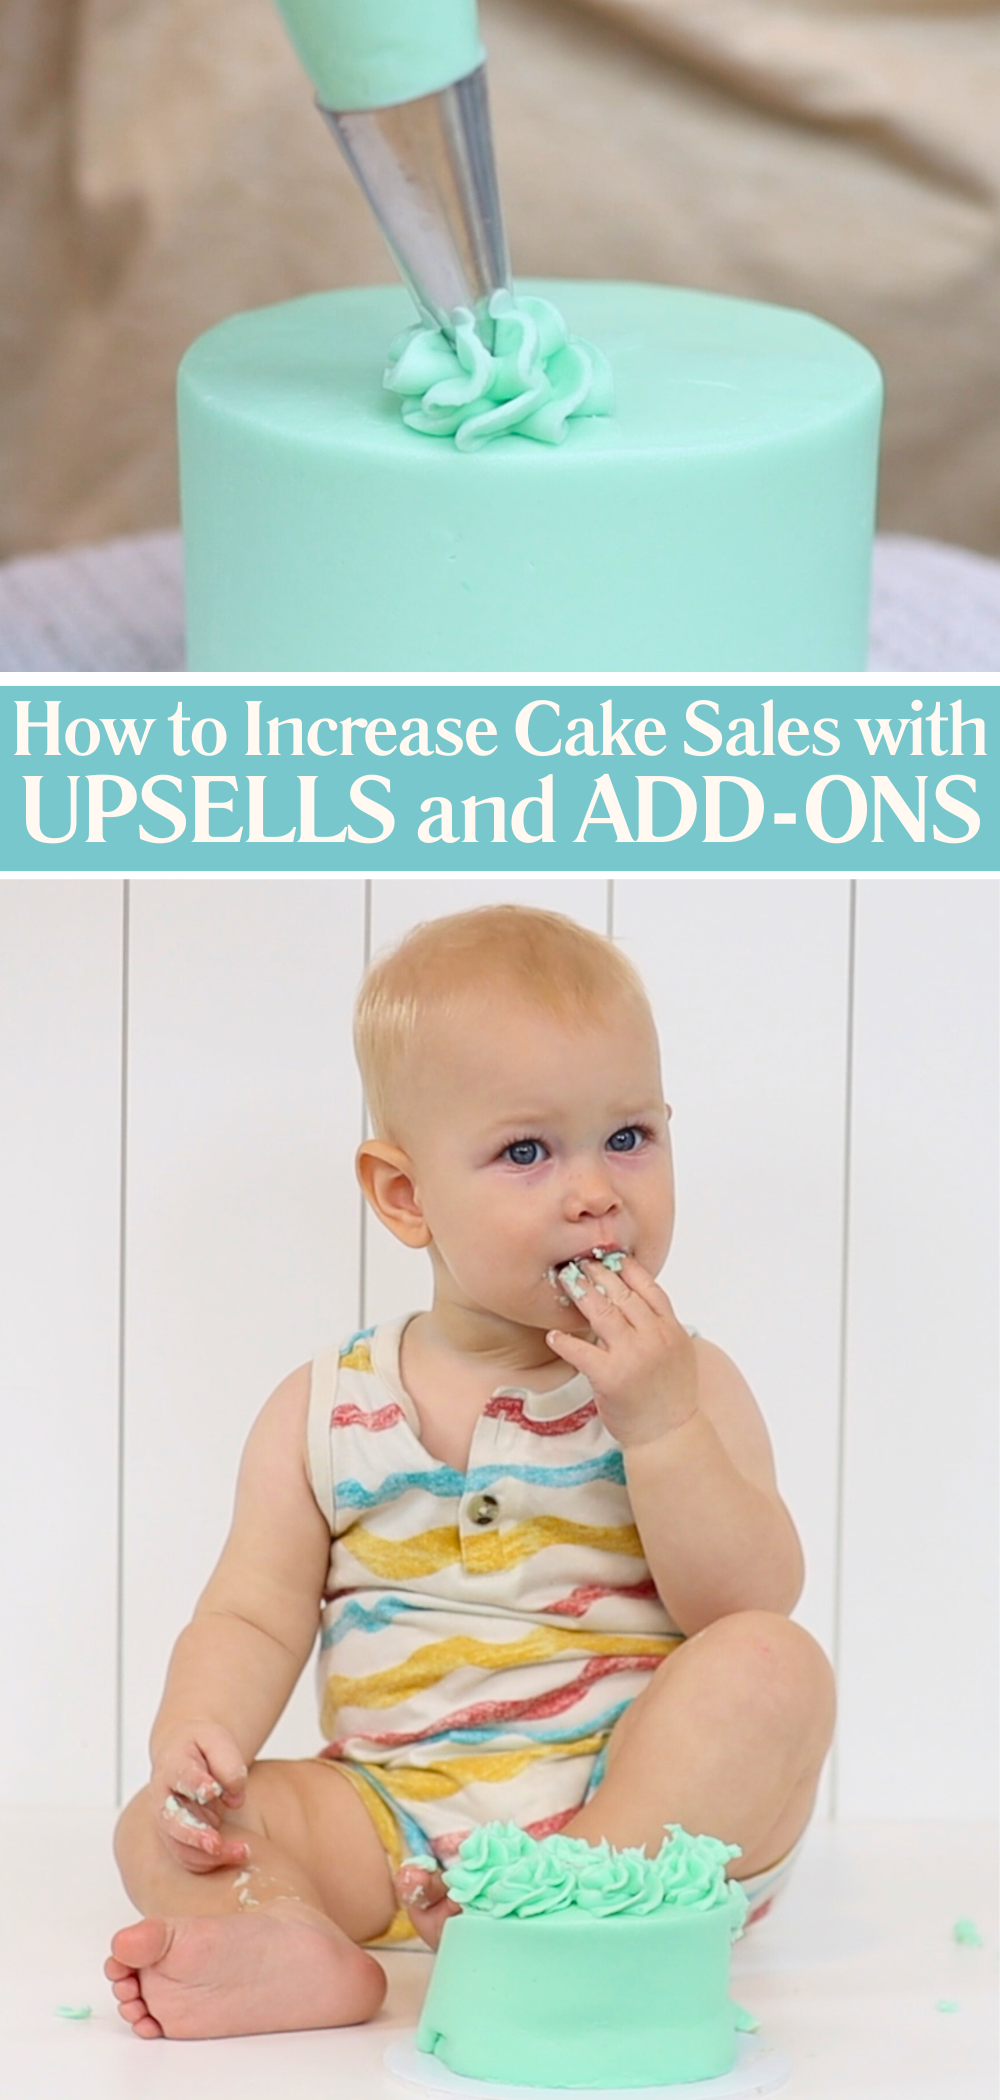
Selling cakes isn’t the only way to make money as a baker. If you’ve built up skills decorating cakes, you can use those in other ways to create income streams that complement your business.
Teaching is one of my favourite examples of how to make more money selling cakes. Host in-person cake decorating classes in your kitchen or at a local venue. Offer online classes on platforms like Zoom. You can teach a specific technique, recipe or full cake design. People love learning from someone with hands-on experience, especially if they've eaten your cakes or seen them on social media.
Photos, videos and blogs can all bring in money if you share them in the right places. You can earn through platforms like YouTube, Instagram, Facebook or even your own website. If you’re already decorating cakes and sharing photos, why not turn those posts into profit? It can be more lucrative than cake sales and you don’t have to choose between the two, you can do both!
I teach everything you need to know to turn your cakes into content in my content creator course. Join the waitlist now and get notified when it becomes available later this year!


There are so many ways to grow a cake business, from increasing cake prices to upselling, marketing, teaching and content creation. You don’t have to do all of them at once but each one will take you closer to the income and lifestyle you want from your baking. I hope these cake business tips help you earn more from your cakes while doing what you love. Ask me any questions in the comments!
You can also watch a video of this tutorial on how to make more money selling cakes:
From making edible toppers to painting and stamping, there are so many creative things to do with buttercream! In this tutorial I’m sharing 10 fun and unexpected buttercream decorating techniques to inspire your next cake design. I'll be using my 4 Minute Buttercream for all of the techniques in this tutorial.
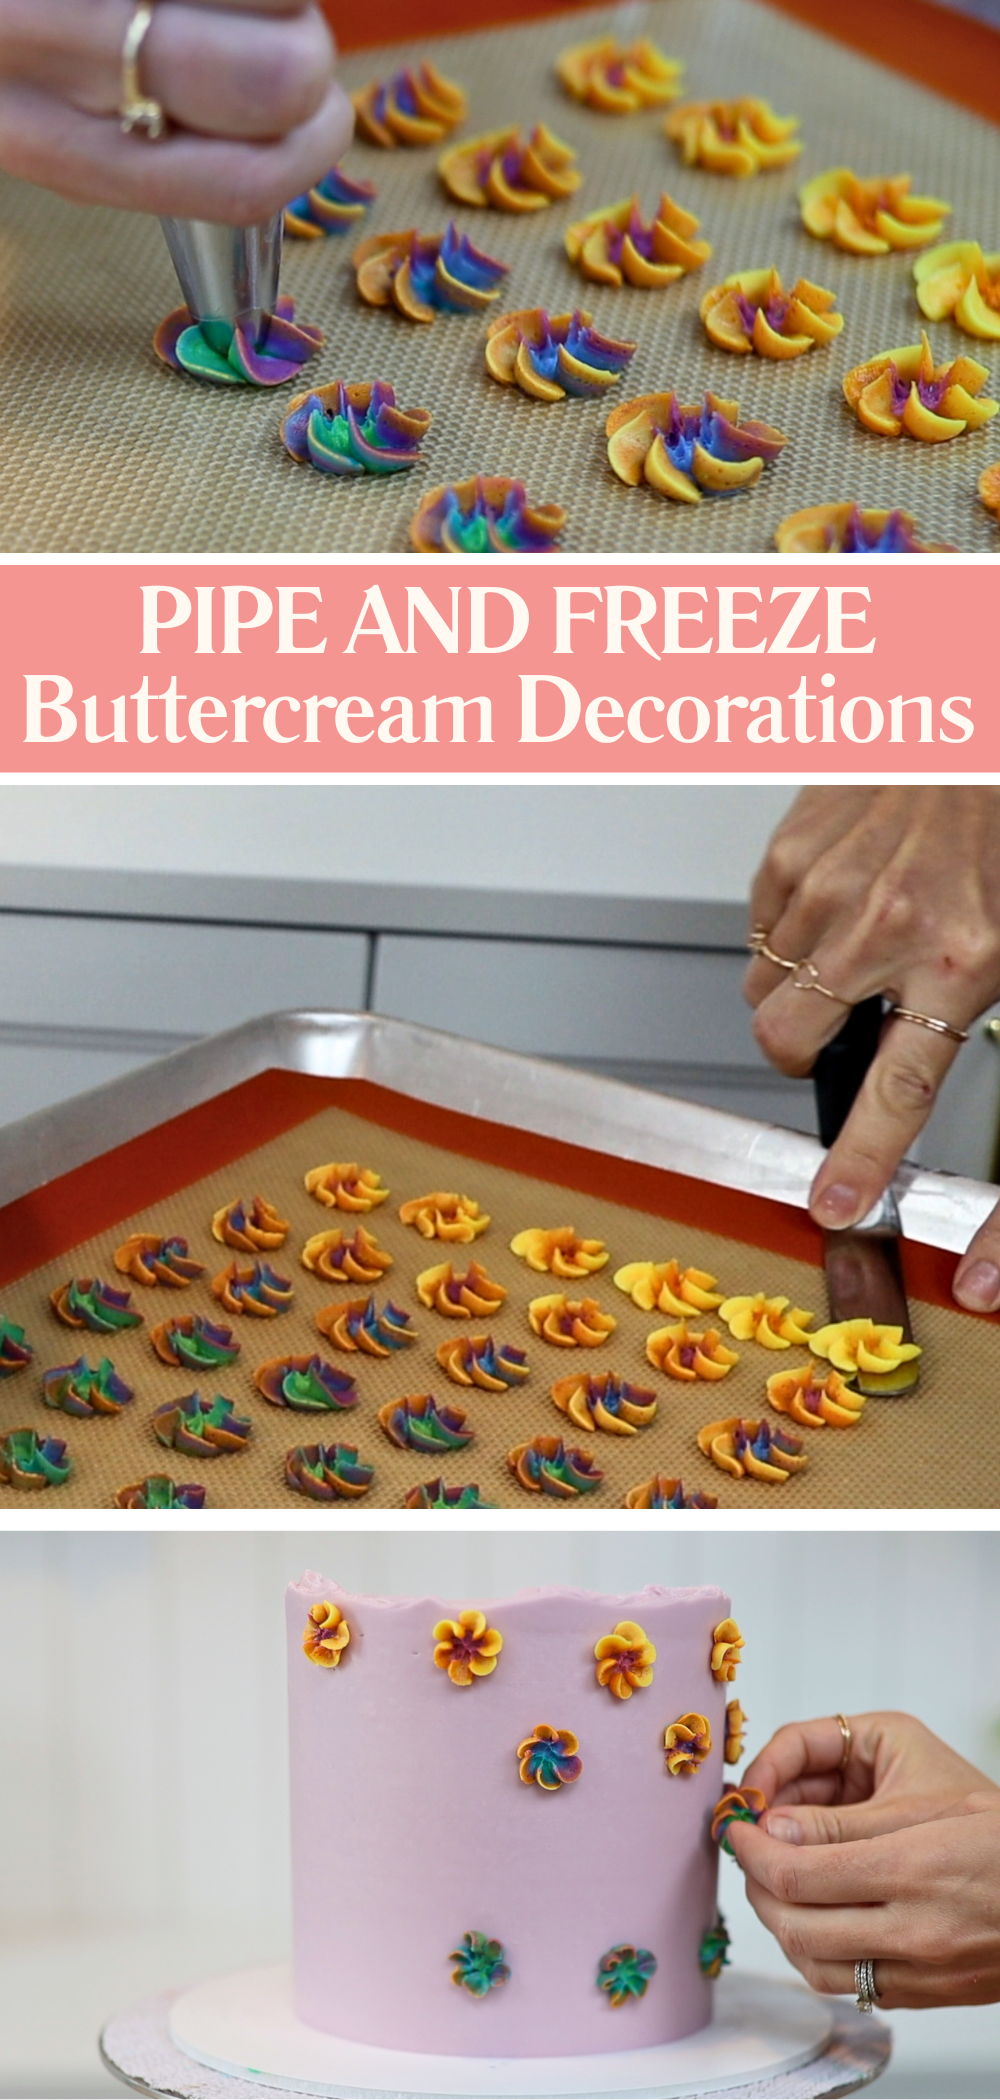
Buttercream has a unique quality that makes it perfect for this first trick. When it’s cold, it firms up enough to hold its shape. This means one of the things you can do with buttercream is pipe and then freeze it to create decorations you can handle like fondant. Pipe onto a tray lined with parchment paper or a silicone mat to make them easy to move later. Then pop the tray into the freezer for 10 minutes to freeze the buttercream. Once the shapes are frozen, you can pick them up and press them straight onto a cake. If your cake has already chilled and the frosting has set, use a dab of fresh buttercream as glue to attach the frozen pieces. This technique is much easier than working with fondant and it looks just as pretty.
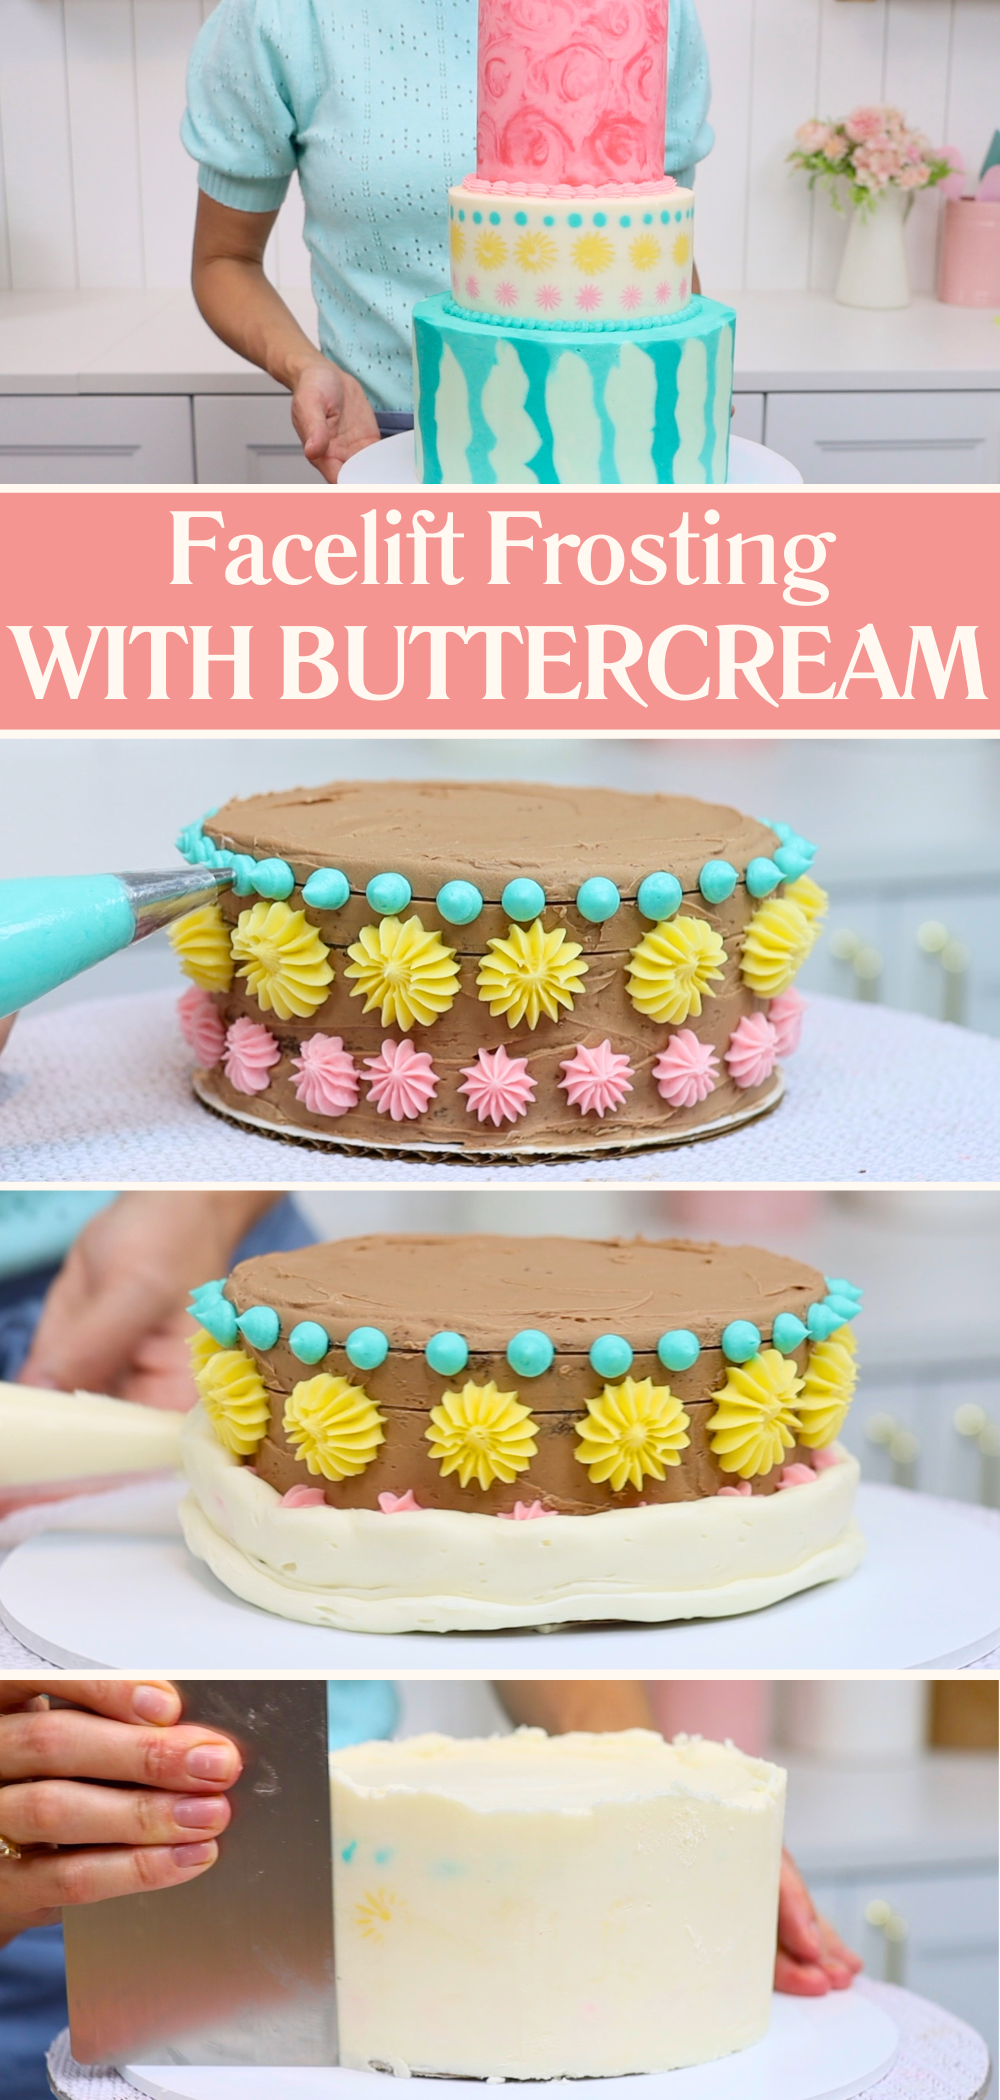
Another buttercream technique that’s fun to experiment with is facelift frosting. I came up with this a few years ago and it’s still one of my favourite ways to get a flat, colourful pattern on a buttercream cake.
You start by piping a design onto a crumb-coated cake and then freeze it so the piped buttercream sets firm. Frost over the top and freeze again for 20 minutes to firm up the outer layer. Then take a warm cake comb and scrape around the cake several times. You can warm the comb by holding it under running water or dip it into a pan of hot water. If you have a metal cake comb, use a blowtorch or a hair dryer to heat the edge of it.
As you scrape the top layers of frosting off, the colourful design underneath is revealed. Unlike typical piped buttercream decorations, the details will be completely flush with the surface of the cake. This technique creates such a unique effect!
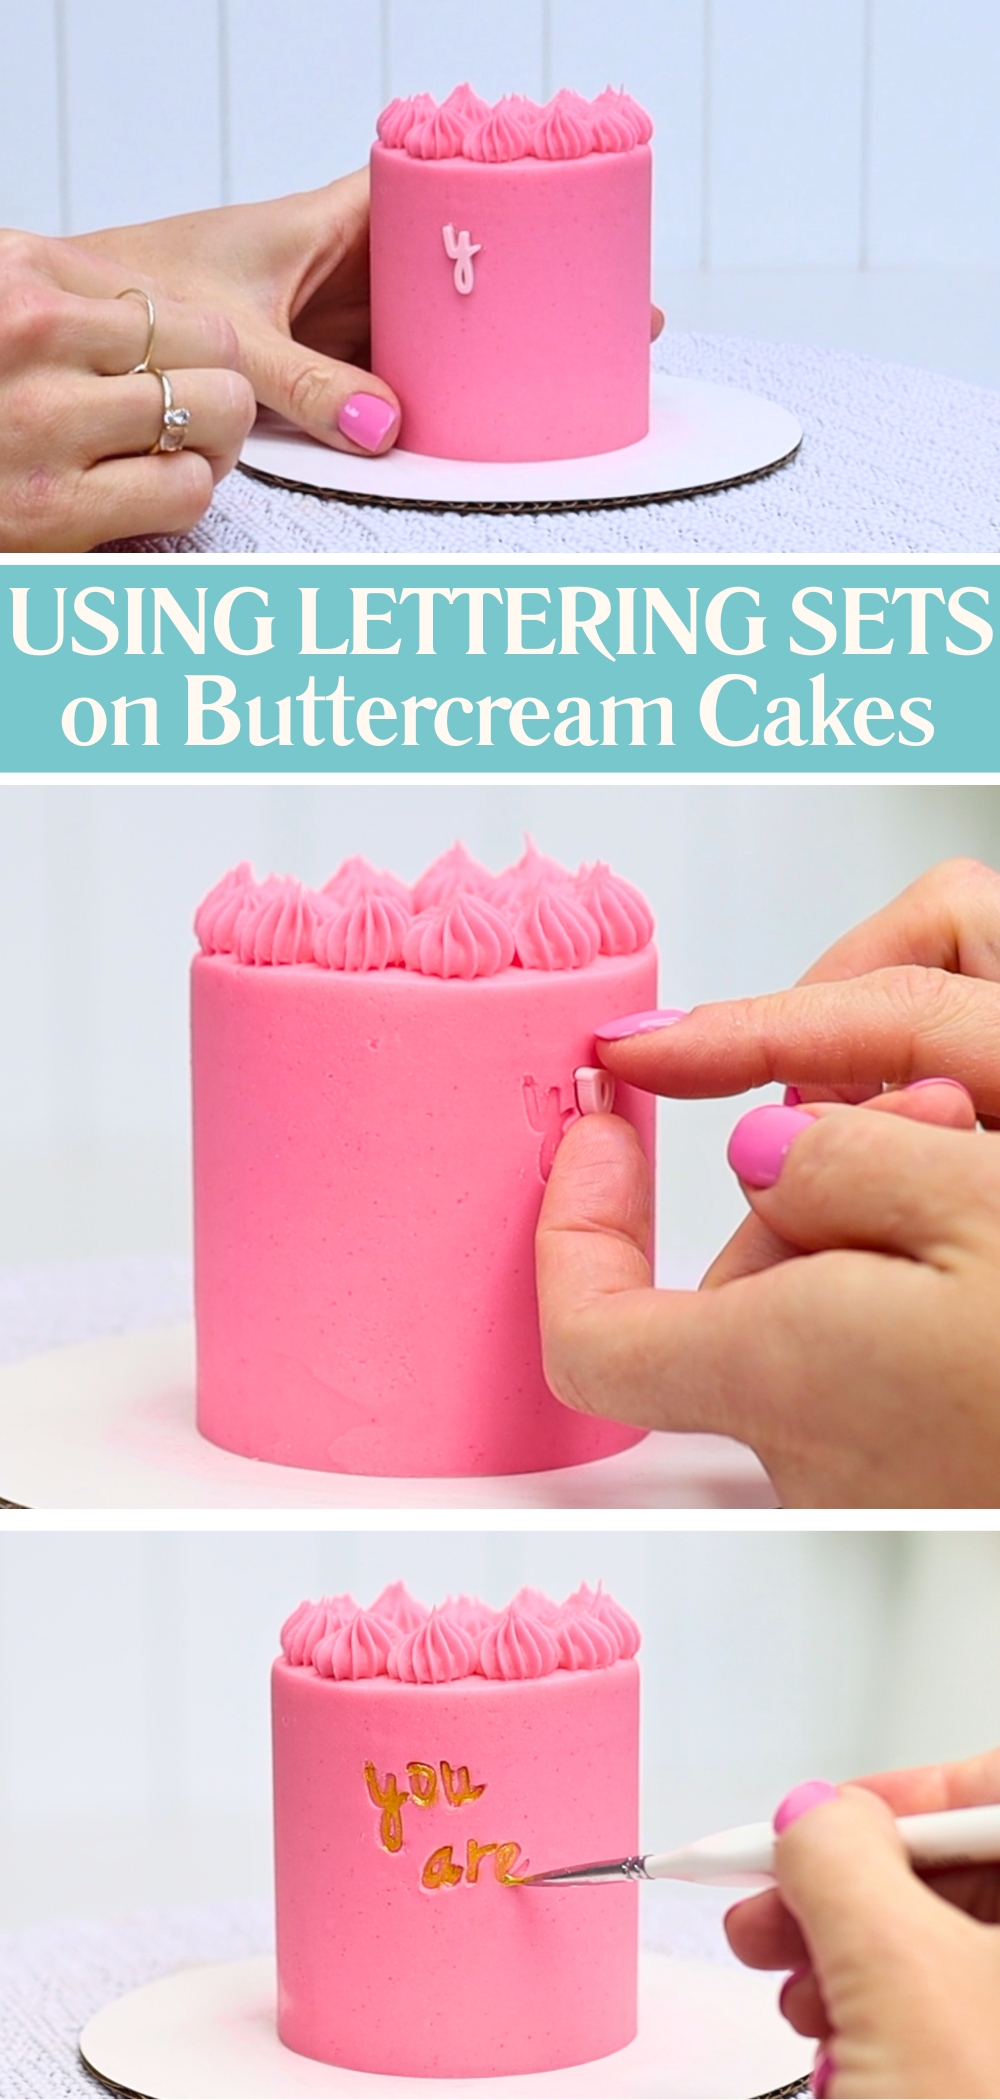
For messages on buttercream cakes, you can definitely pipe them but it takes practice to make them neat. Here’s a cleaner and more precise option: lettering sets. First, chill the cake for at least an hour and then let it sit at room temperature for 30 minutes. Now the buttercream frosting will be softened but still firm instead of sticky. Press each letter gently into the surface of the cake to leave an imprint. Make sure to press all over the letter so it stamps in evenly. Then lift the letters away to reveal a neat message. You can leave it as it is or paint inside the letters using edible metallic paint and a fine brush. If you don’t have store-bought paint, mix vodka with edible gold luster dust for a DIY version.
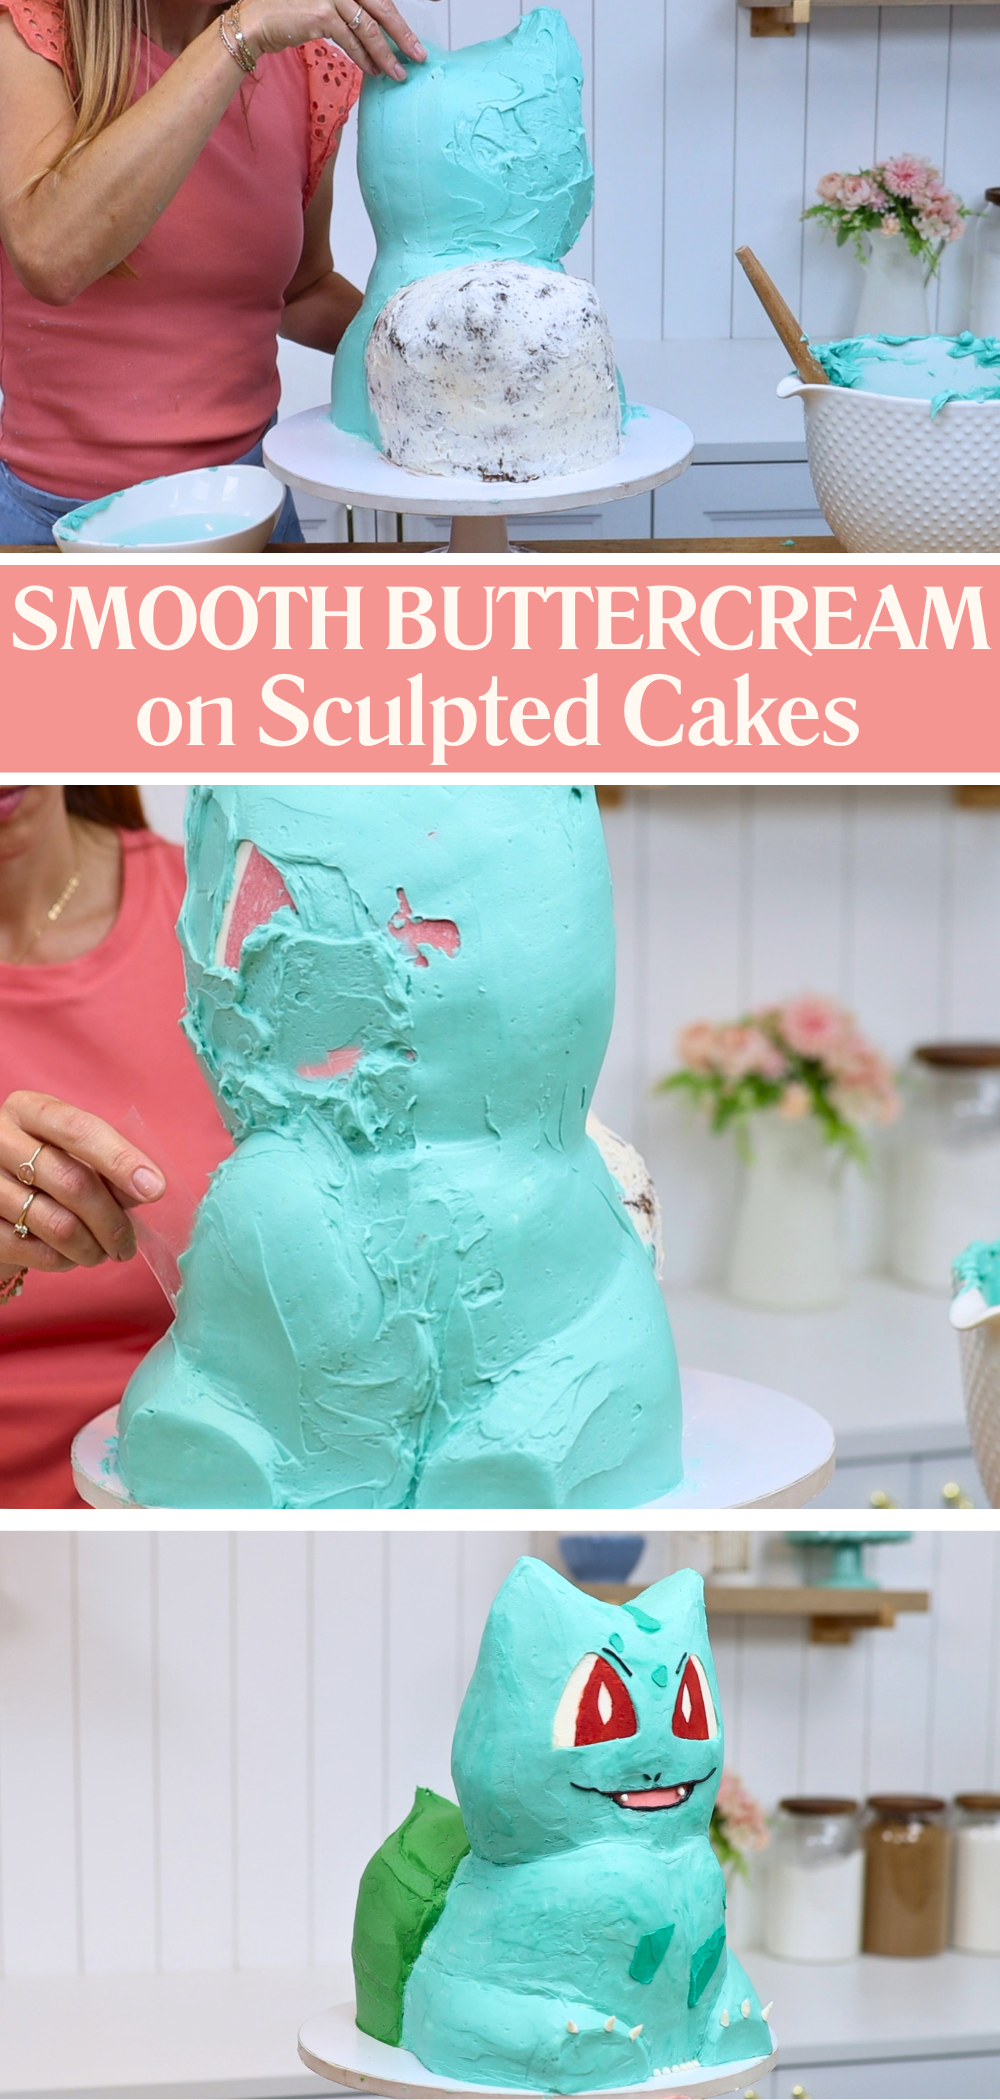
Buttercream can be used for sculpted cakes that look like they’re covered in fondant. The secret is acetate. This flexible plastic sheet wraps around curved edges to smooth buttercream without leaving lines behind like a regular scraper does. It’s especially helpful for shaping characters or rounded cakes, like this Bulbasaur cake! If your buttercream starts to set or show air bubbles as you work, dip the acetate in warm water. Dry it off and the warmth of the plastic will smooth the buttercream more easily.
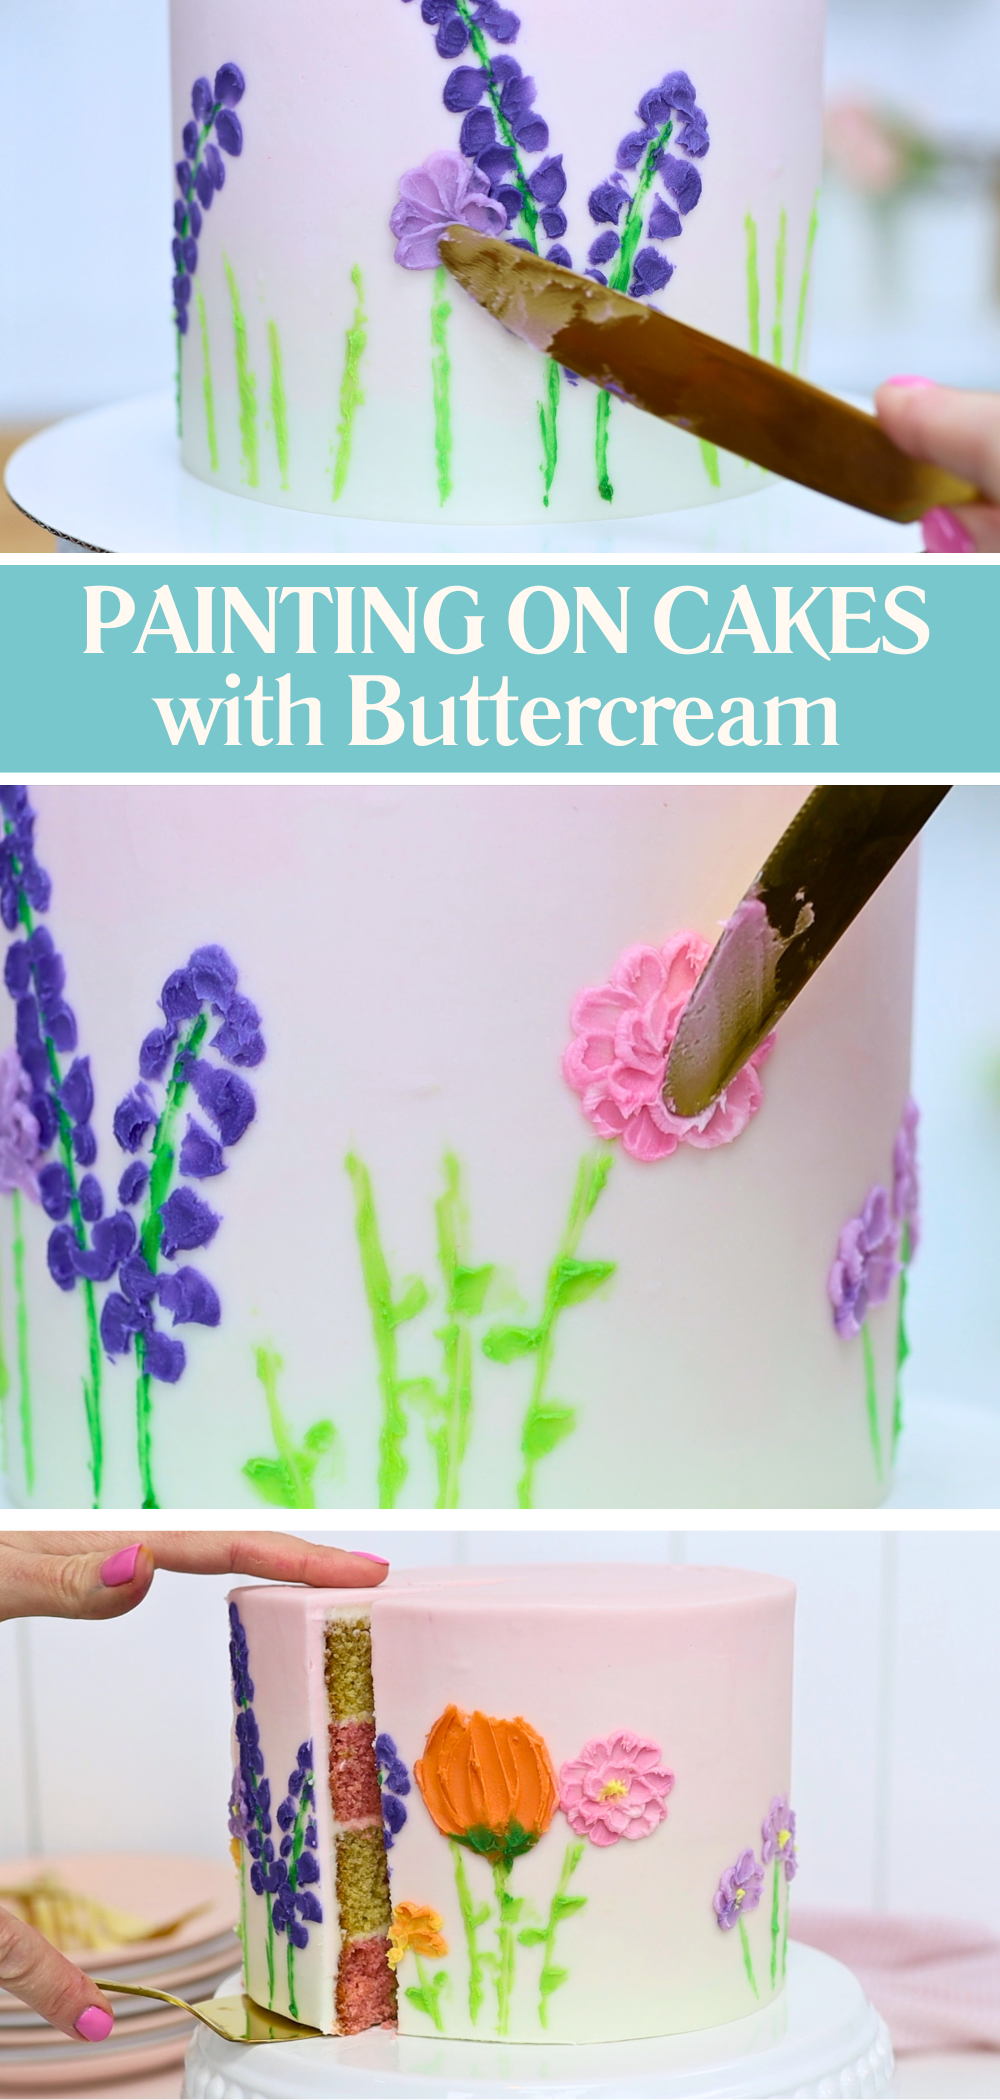
Painting is another creative thing to do with buttercream. Chill your cake first, so the frosting is firm and will hold its shape as you paint. Tint small amounts of buttercream with gel colours and use a utensil to apply it. A palette knife is a popular choice but you can even paint with a knife, fork, and spoon! The buttercream consistency needs to be quite runny or loose for this technique. I love painting flowers because the shapes are simple and easily recognizable, even if you haven't had much practice painting! You only need a small amount of buttercream on your utensil to paint each shape. Make sure the cake stays cold and firm and if it starts to soften, put it back into the fridge for 15 minutes.
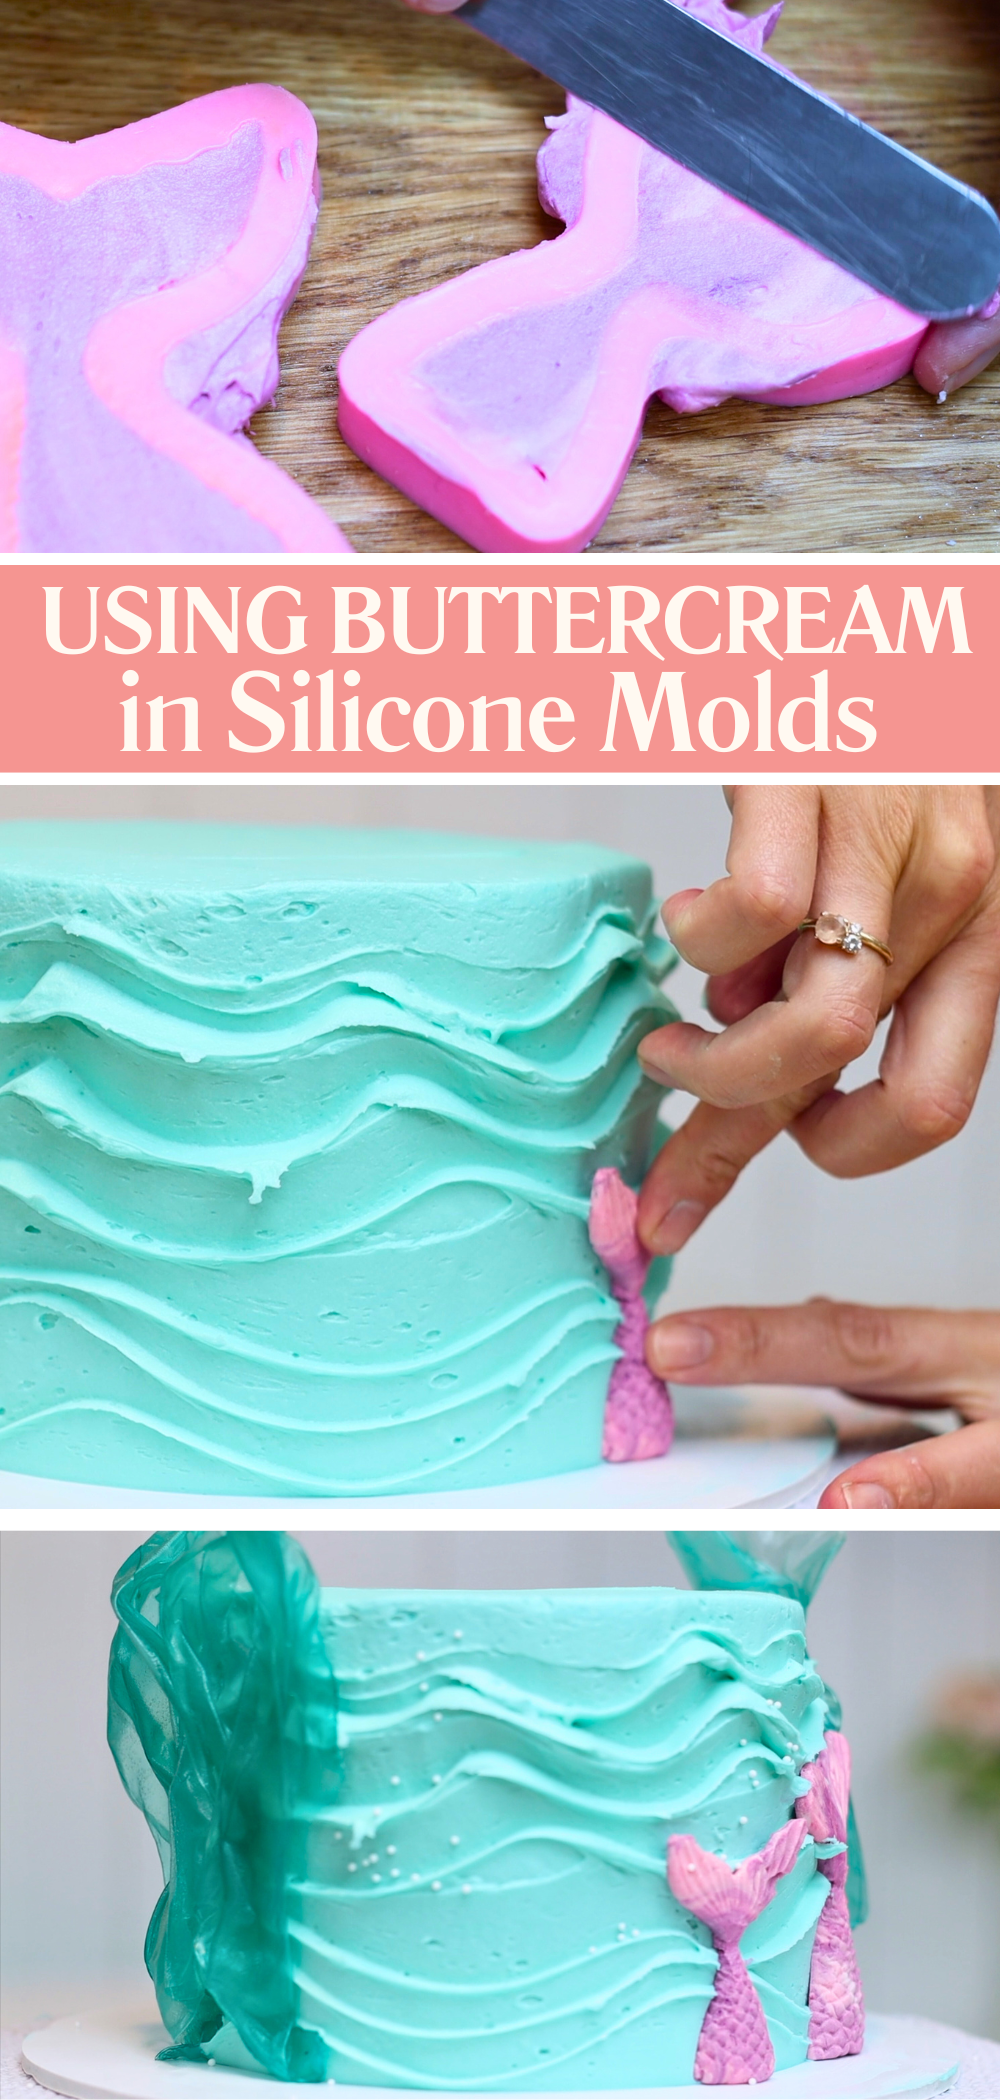
You can make beautiful cake toppers with buttercream using silicone molds. Instead of fondant or chocolate, spoon buttercream into your molds. Press it down firmly to fill every detail and smooth the surface flat. Freeze the molds for at least 30 minutes so the buttercream is completely solid and then gently peel the silicone away to release the shapes. Work quickly because they’ll soften fast as they warm up! If anything breaks, just press the pieces gently back together and they’ll stick as the buttercream warms up. Press them directly onto the cake for soft, colourful decorations that are completely edible.
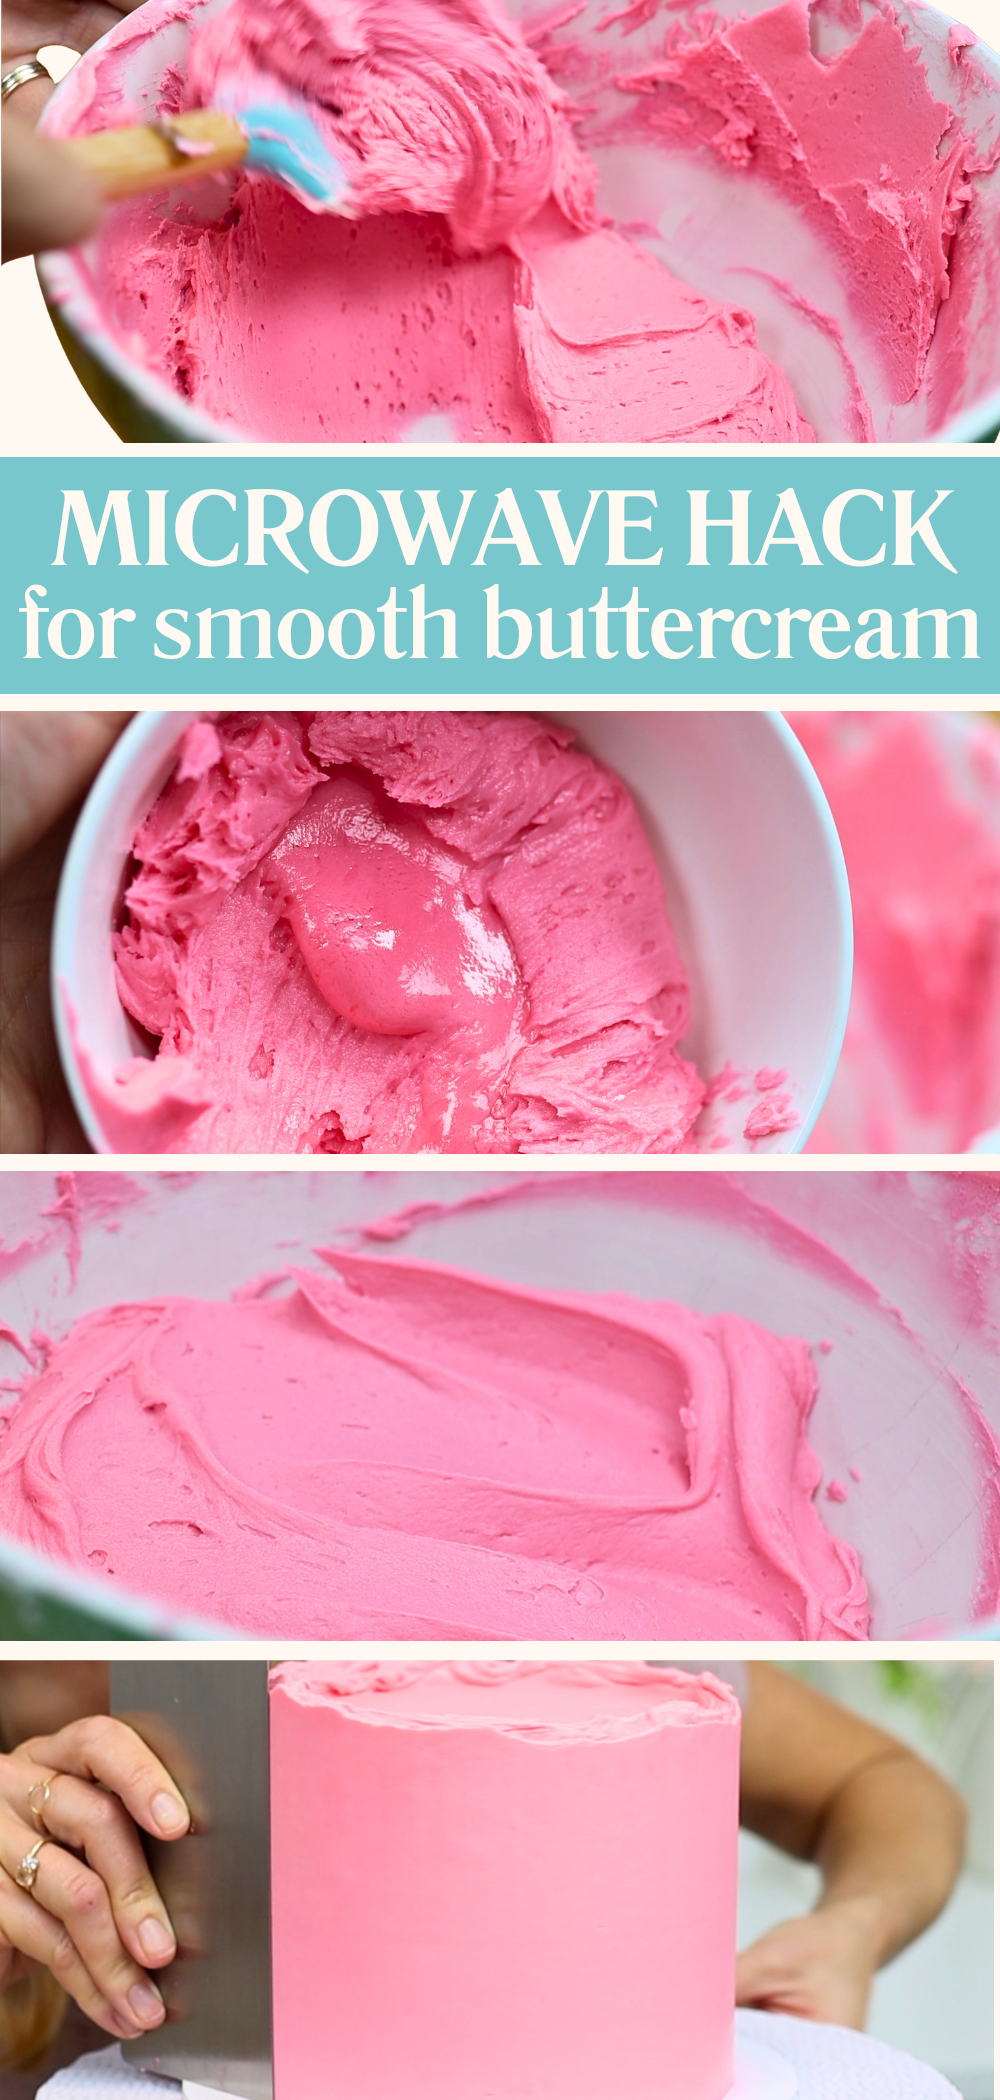
Buttercream melts when it’s warm, which might sound like a problem but actually makes it super useful for smoothing frosting. If your buttercream is too stiff or full of air bubbles, try this easy hack! Scoop out about a third and microwave it for 10 seconds. Then stir it back into the rest of the bowl. The melted buttercream will loosen the consistency and help knock out stubborn air bubbles. Now it will be easier to spread and smooth onto your cake!
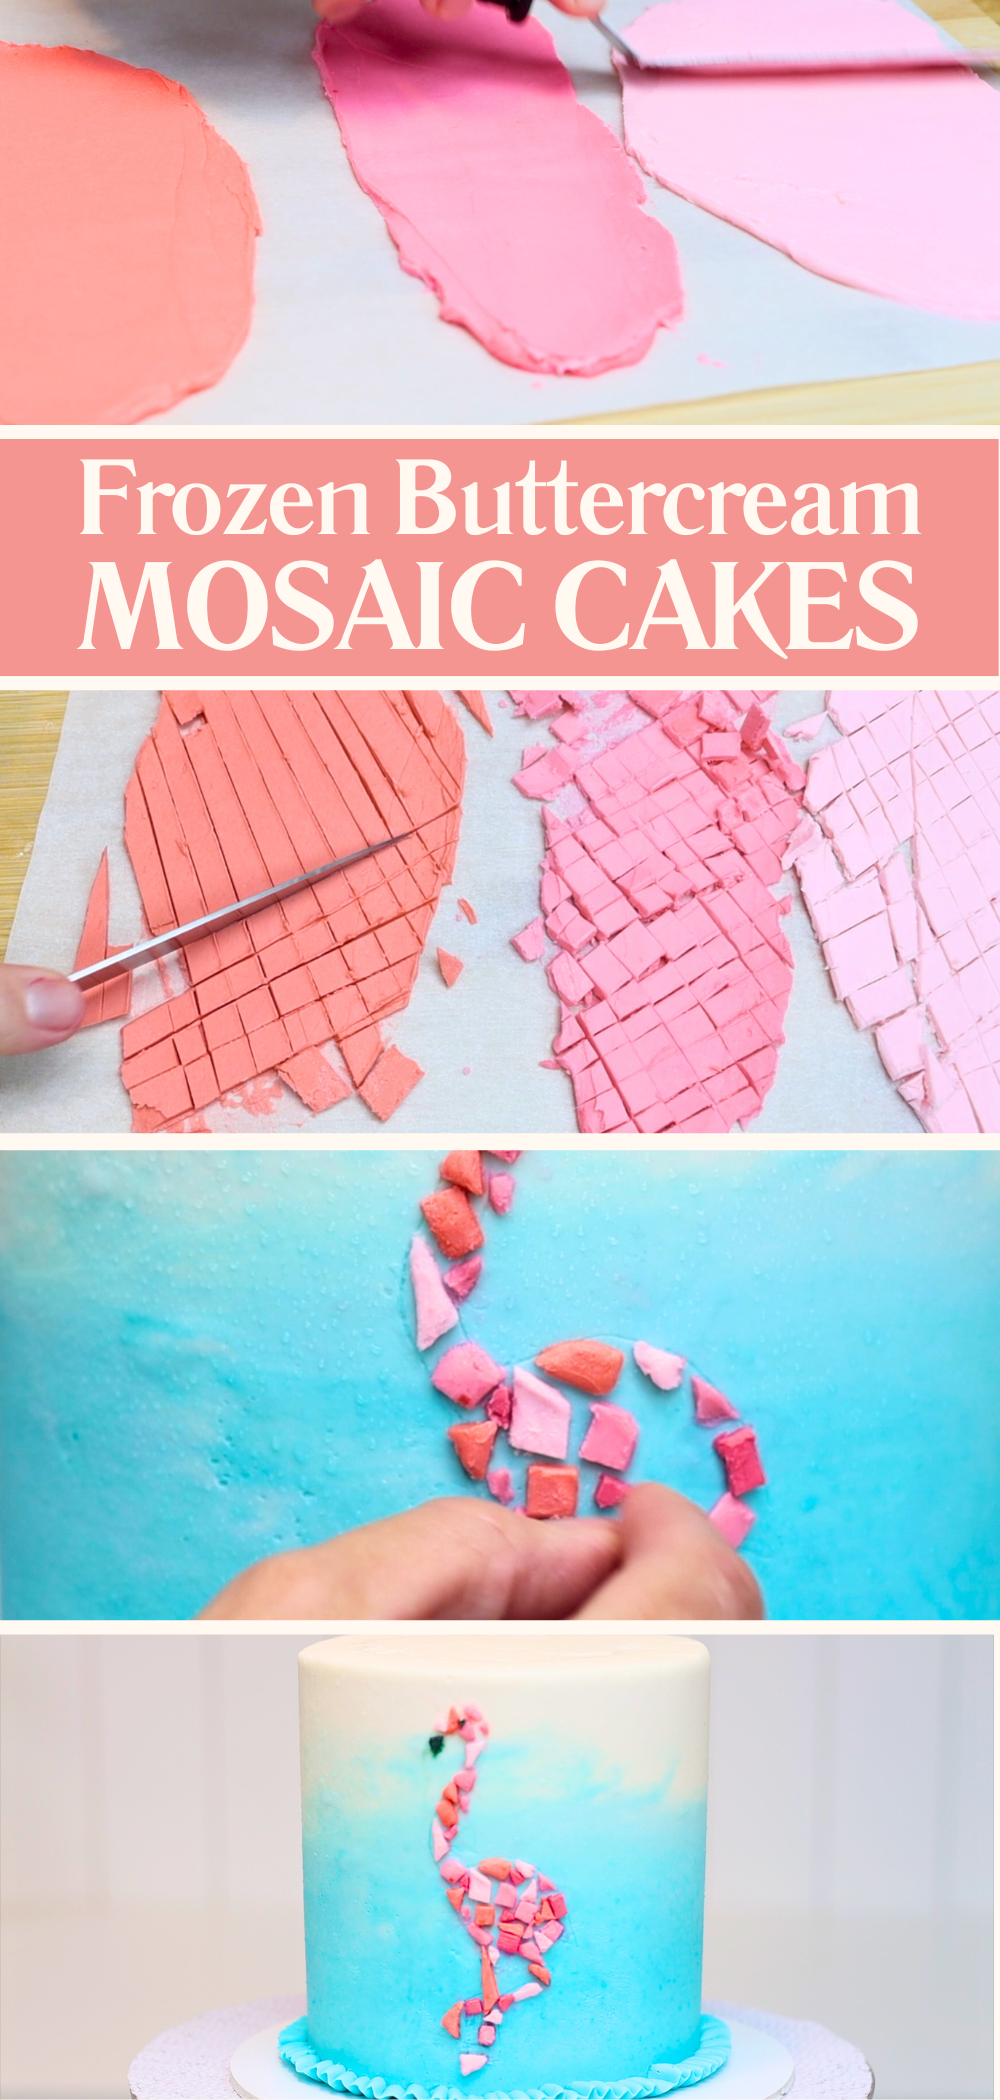
Another fun thing to do with buttercream is turn it into edible mosaic tiles. Spread different colours of buttercream onto a piece of parchment paper and freeze it until the buttercream is firm. Then use a sharp knife to cut it into small triangles. Draw a shape on your cake with a toothpick to use as a guide as you attach your buttercream tiles. Now press the frozen tiles onto the cake to fill in your shape like a mosaic. Decorating takes a while so it's best to freeze two trays of tiles and rotate them. This way you’re always working with cold, firm buttercream.
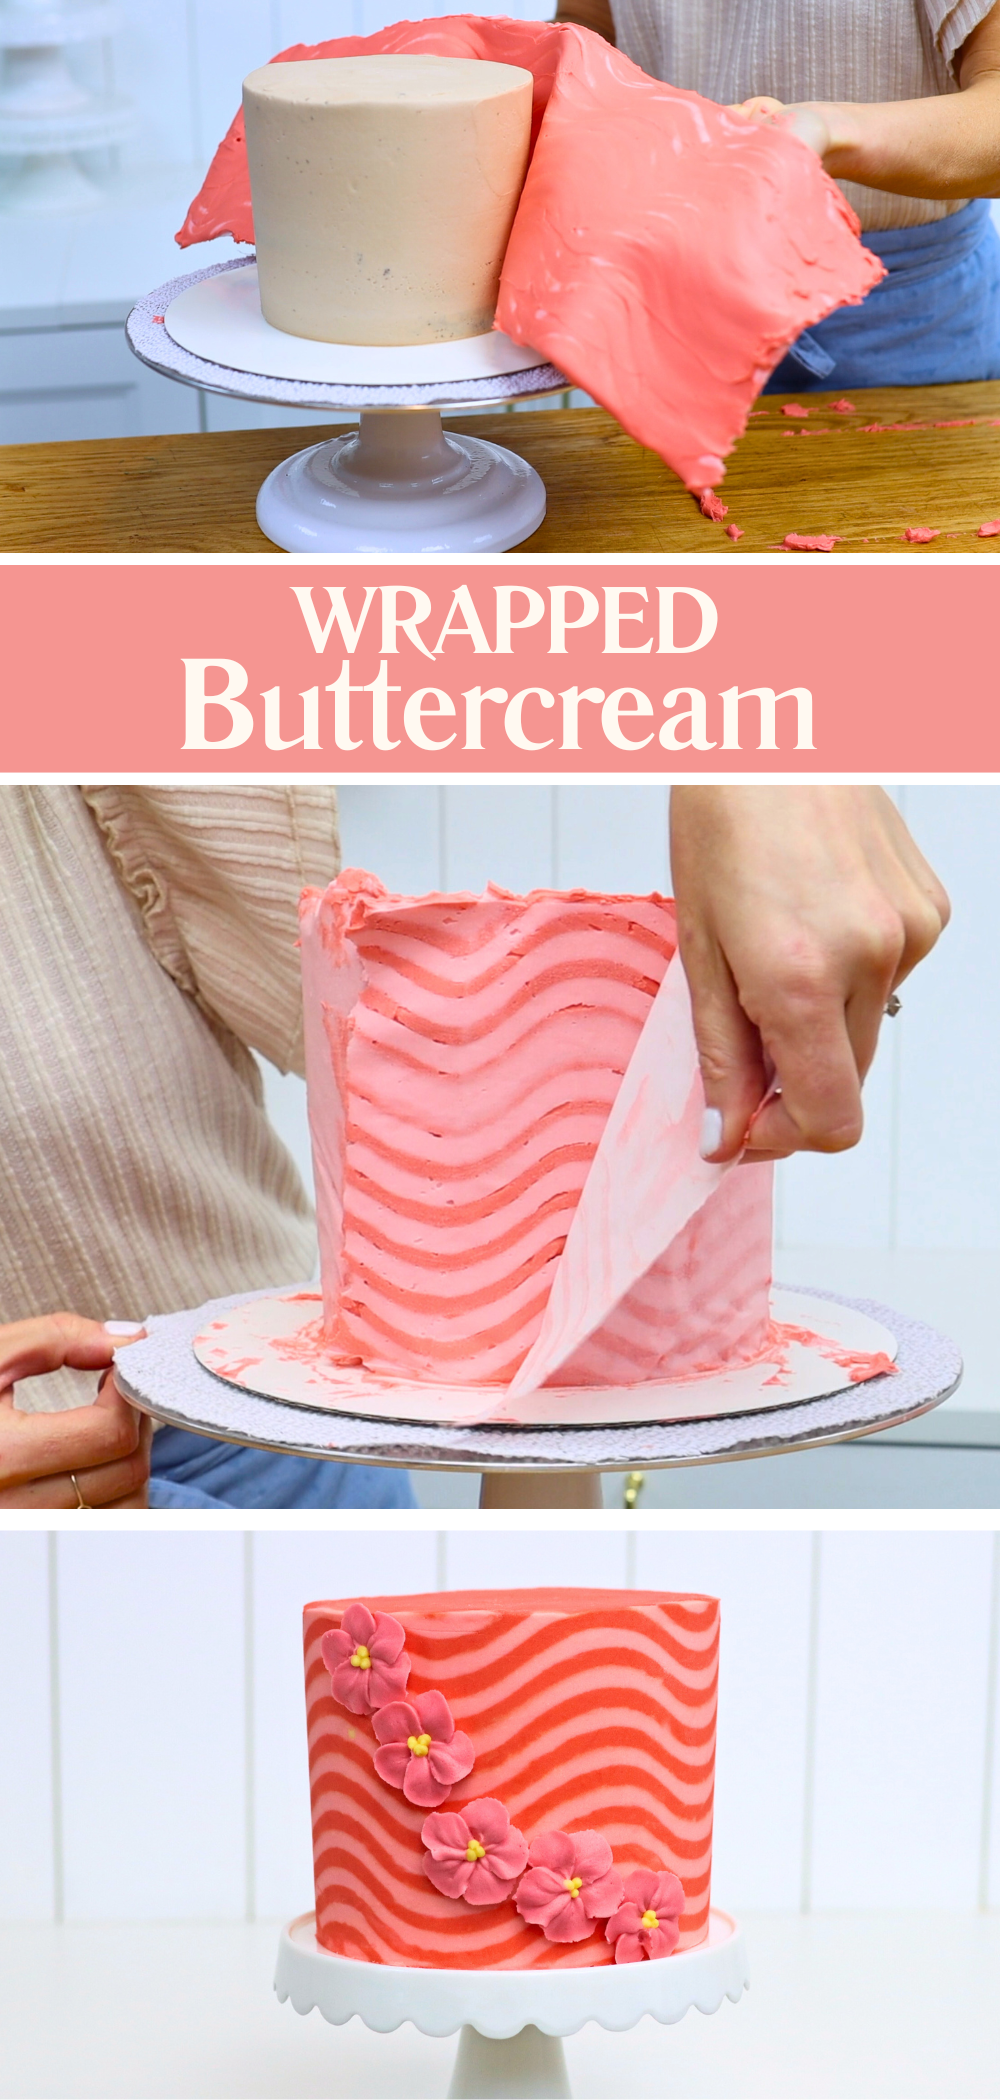
Buttercream wraps are a clever way to create patterns around a cake, like these wavy stripes. First, spread or pipe your coloured buttercream pattern onto parchment paper and wrap it around your cake. Then put the cake into the fridge for about an hour, until the buttercream is cold and firm. Peel the parchment paper off to reveal the design underneath, which will stay attached to the cake. You’ll probably need to do a few touch-ups to fix any gaps or smudges, by spreading more buttercream over those areas and scraping with a warm cake comb. I teach this full technique in detail in my online course on 10 Cake Decorating Techniques.
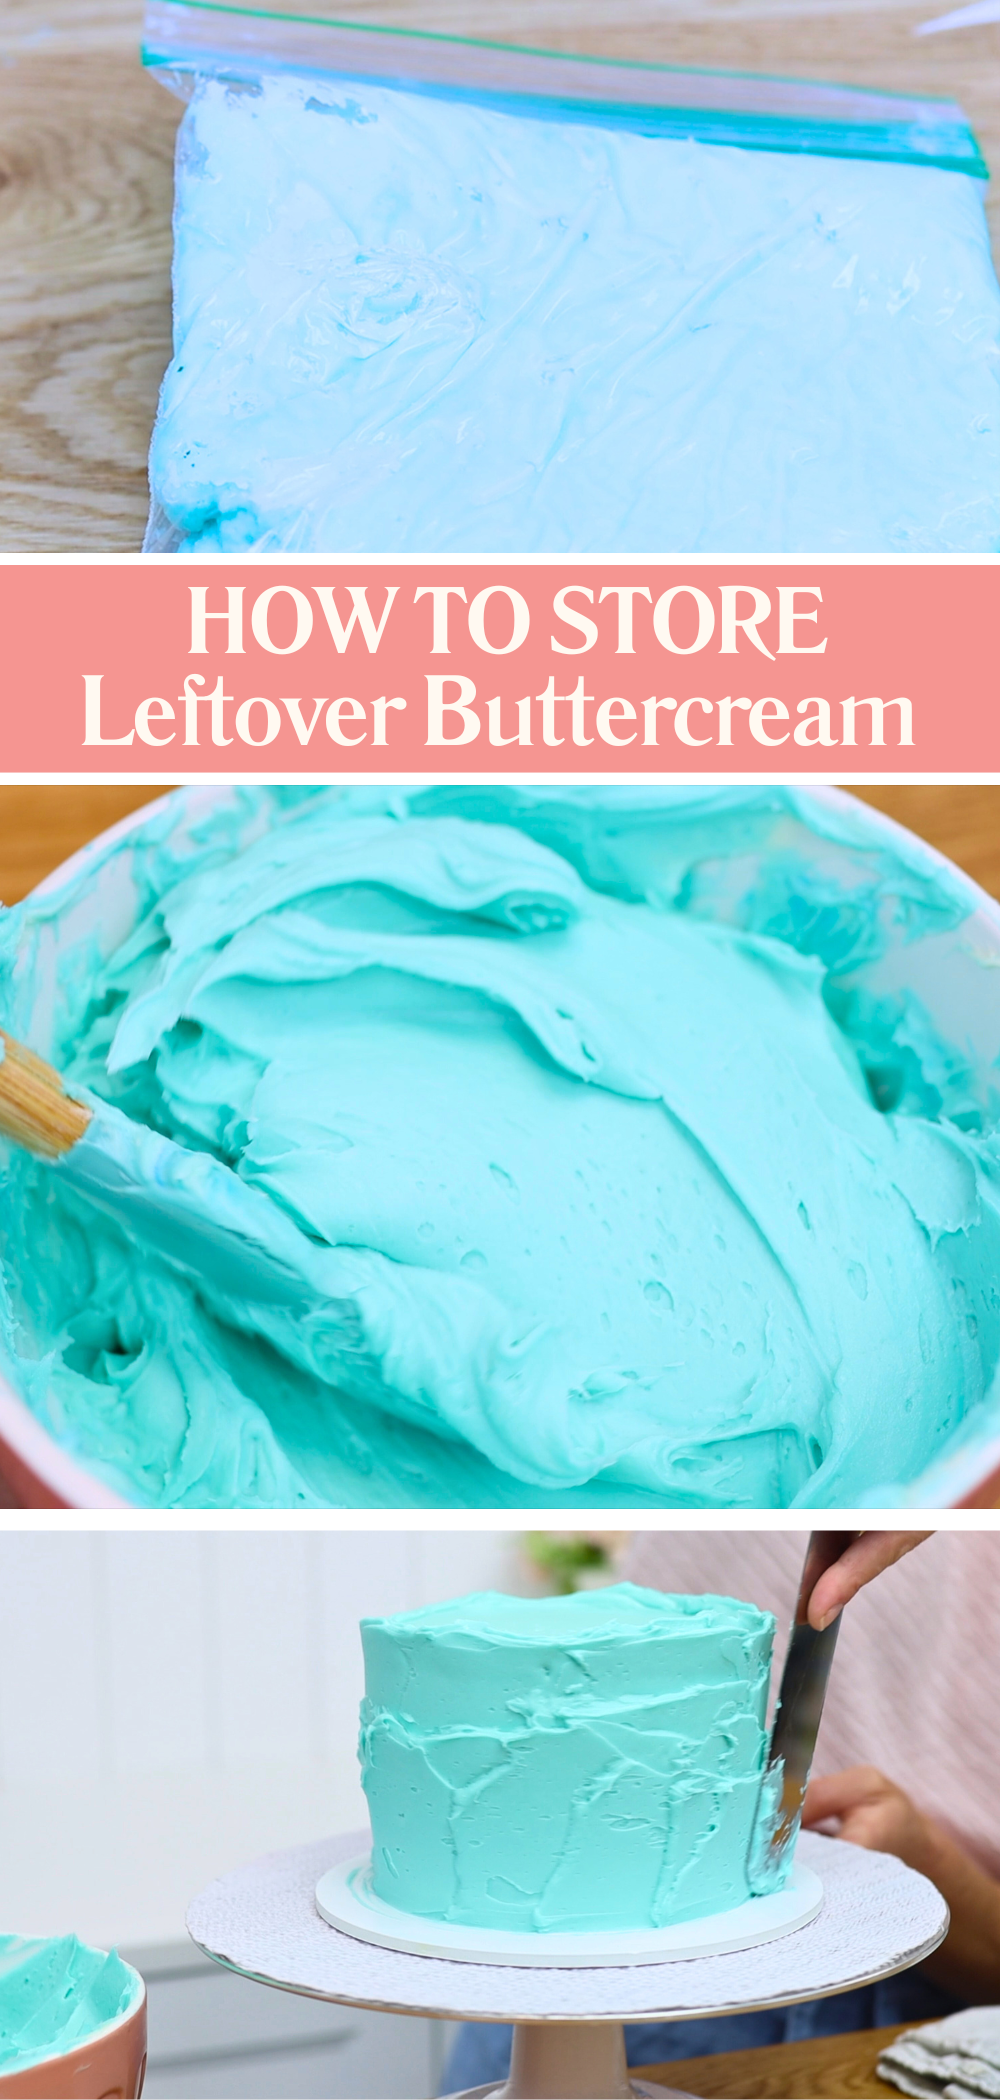
Finally, one of the most practical things to do with buttercream: freeze your leftovers. If you have extra buttercream in any colour, pop it into a ziplock bag or airtight container and freeze it for up to a month. To use it again, take it out the night before and let it come to room temperature. Once it’s soft you can re-tint it if needed and stir it well to knock out any air bubbles. This saves so much time on your next cake!
With all these fun and clever things to do with buttercream, it’s easy to see why it’s such a popular choice for cake decorating. What will you try next? Tell me in the comments! And visit my cake school to learn hundreds more cake decorating techniques and designs.
You can also watch a video of this tutorial on 10 things to do with buttercream:
Cake boxes can be surprisingly expensive, especially buying them in different sizes to fit every cake you make. From mini cakes to towering tiered cakes, it feels like you need a whole room full of boxes! But what if I told you that you only need one size cake box for nearly every cake you’ll make? These cake box hacks will save you money and free up storage space.
In this tutorial I’ll show you how to transport cakes safely and professionally using just one kind of cake box. Whether you're delivering a mini cake or a tall two-tier wedding cake, try these simple tricks!
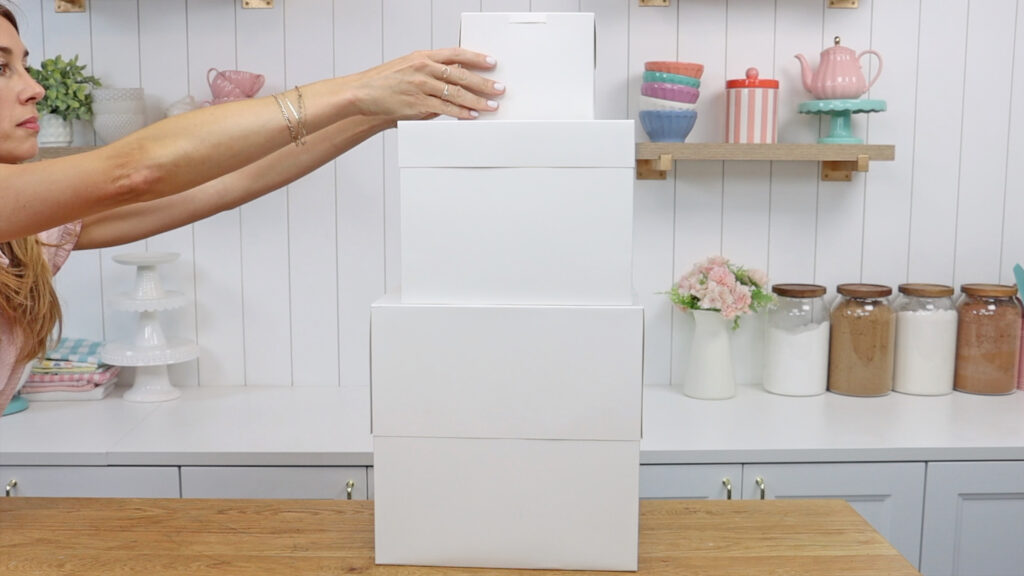
It might seem like a mini cake needs a mini box and a tall cake needs a really tall one. But actually, a standard 10 inch cake box can be used for all kinds of cakes. That’s the size I use for everything from 4-inch mini cakes to tall, double-barrelled and tiered cakes.
Why 10 inches? Because most of my cakes are made with 8-inch cake layers and I place them on 10-inch cake boards. When the board fits snugly into the cake box, it won't slide around when you transport it.
Here’s how to use that same 10-inch box for cakes of all sizes and shapes, without your cakes getting damaged during delivery.
Mini cakes are adorable and trendy and perfect for small celebrations. But mini cake boxes? Difficult to find and not very practical if you’re trying to save money and space.
Here's how to make a mini cake fit securely in a standard cake box.
Let’s say you’ve made a little 4-inch cake on a 6-inch board. Placing that into a 10-inch box sounds like a disaster waiting to happen, right? It would slide all over the place during transport – definitely not how to transport cakes safely!
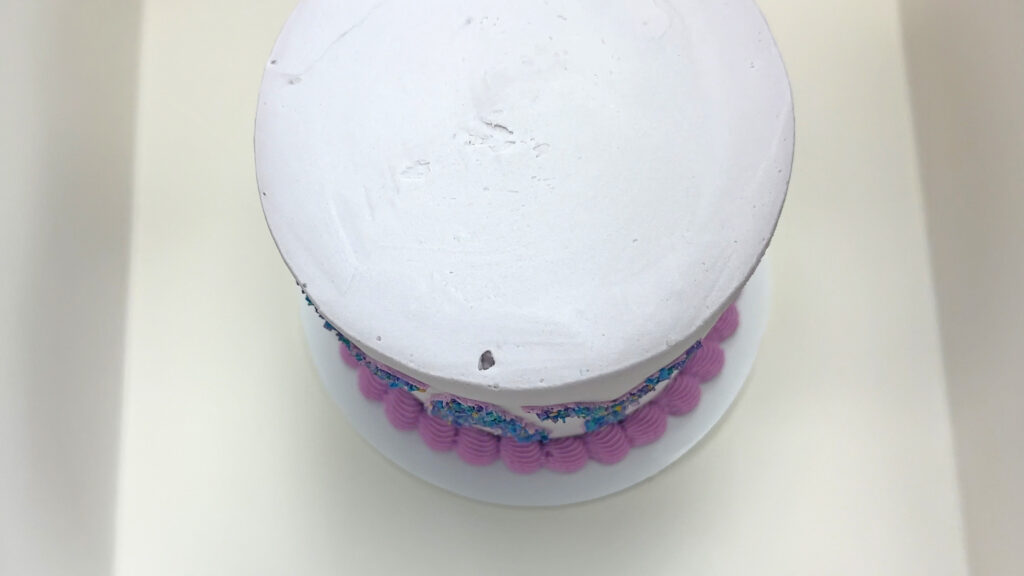
The trick is to secure the mini cake inside the big box:
Now your mini cake won't budge, even on the bumpiest car ride.
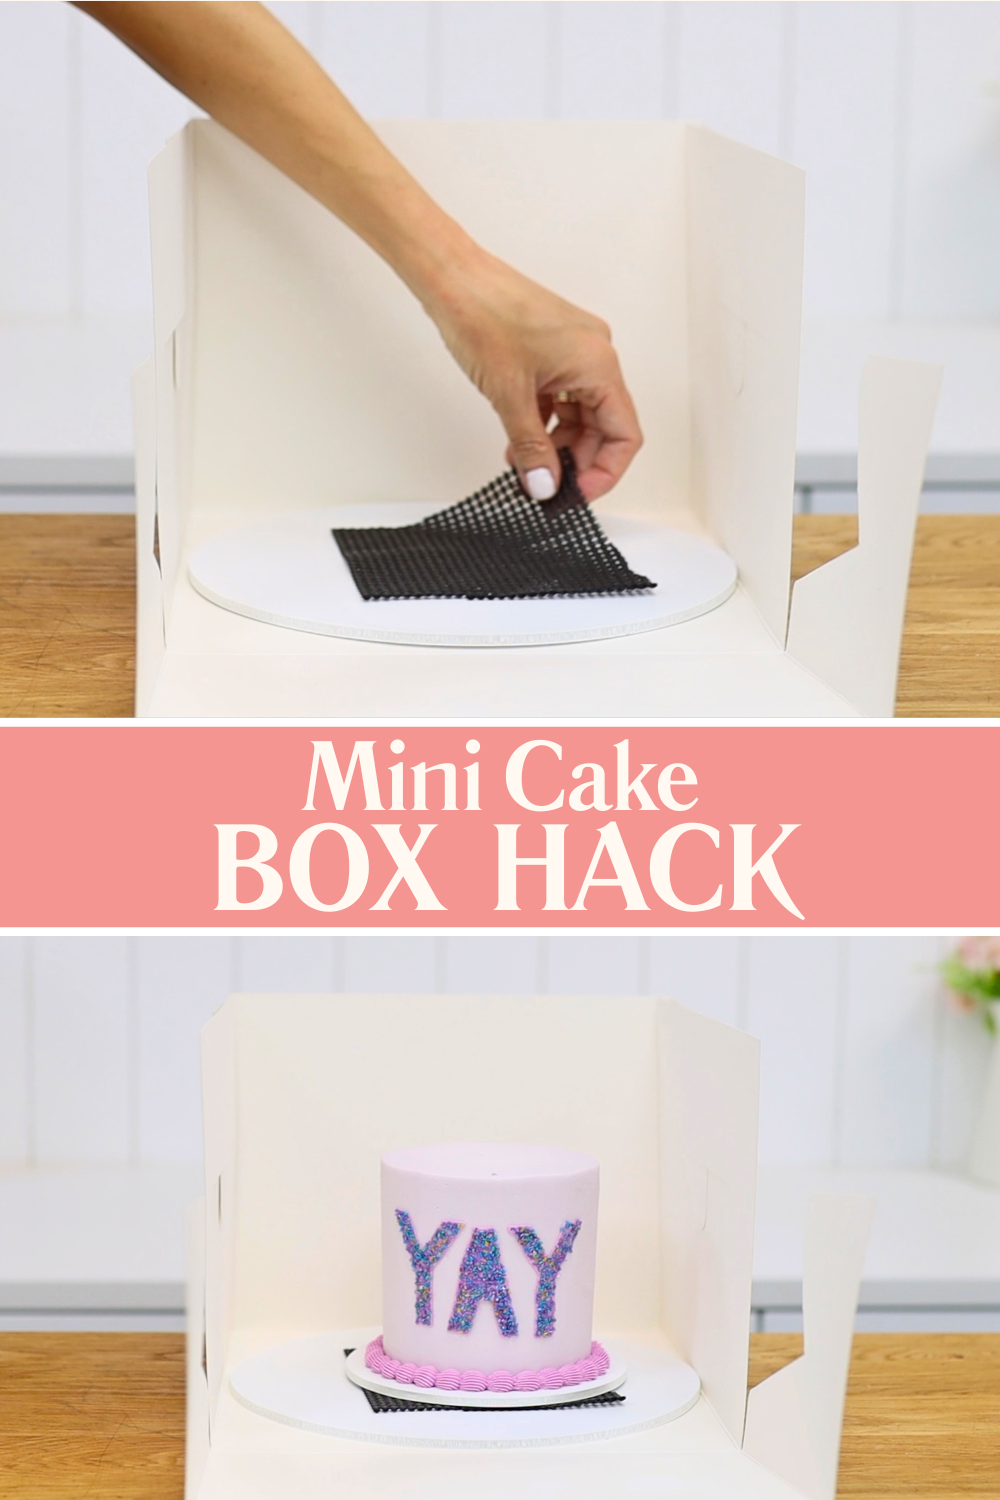
Tip: Always transport cakes on a flat surface like the boot of your car (trunk) or in the footwell in front of the passenger seat. Don't place it on a seat if you can avoid it because the angle can cause the cake to slip.
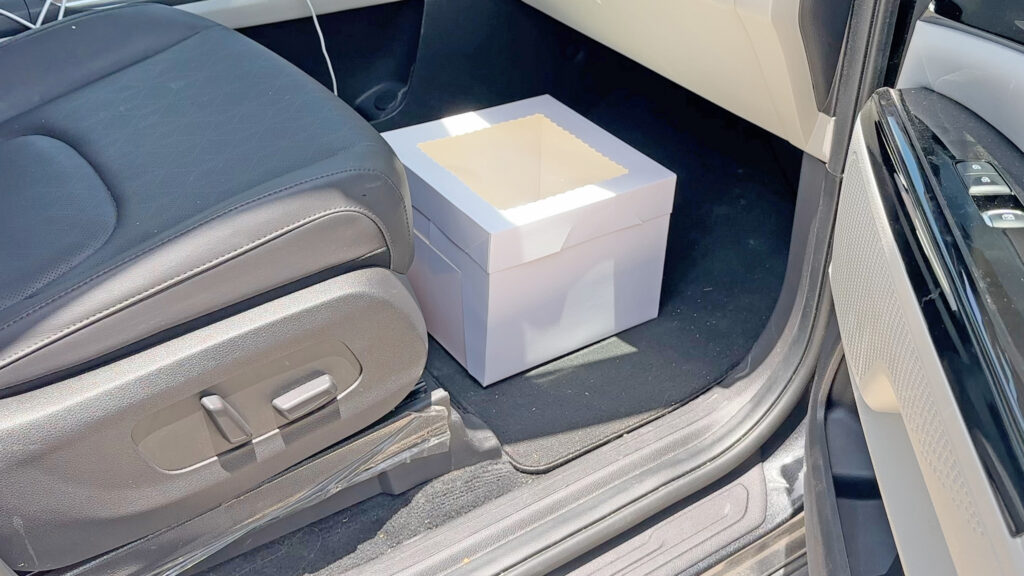
Now for tall cakes, double-barrel cakes, tier cakes, and cakes with toppers that can’t be added later. Most cake boxes are about 8 inches tall, which is fine for single-tier cakes. But if your cake is taller or tiered, the lid will press down on the top of the cake.
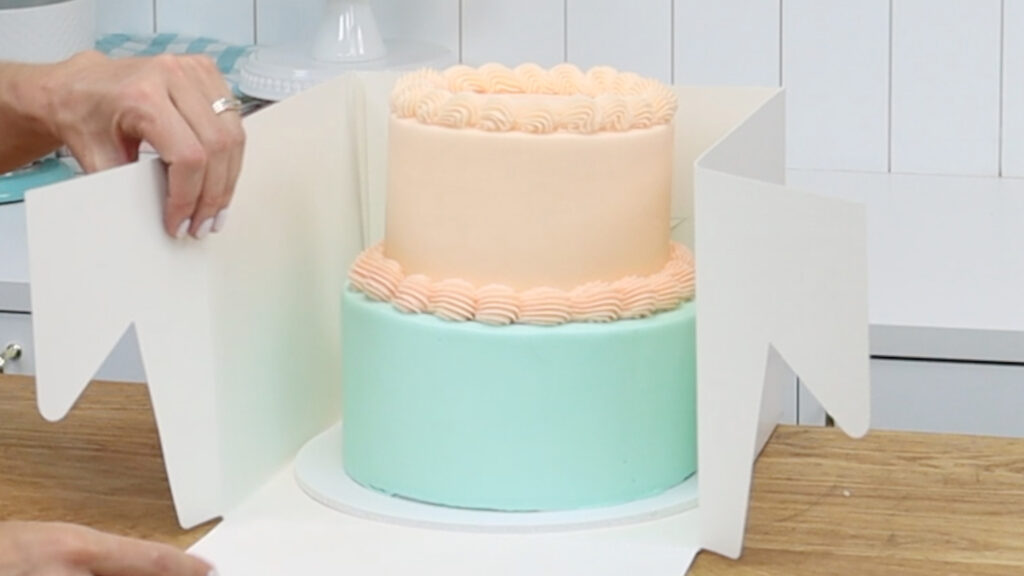
Here’s a genius cake box hack that takes less than a minute:
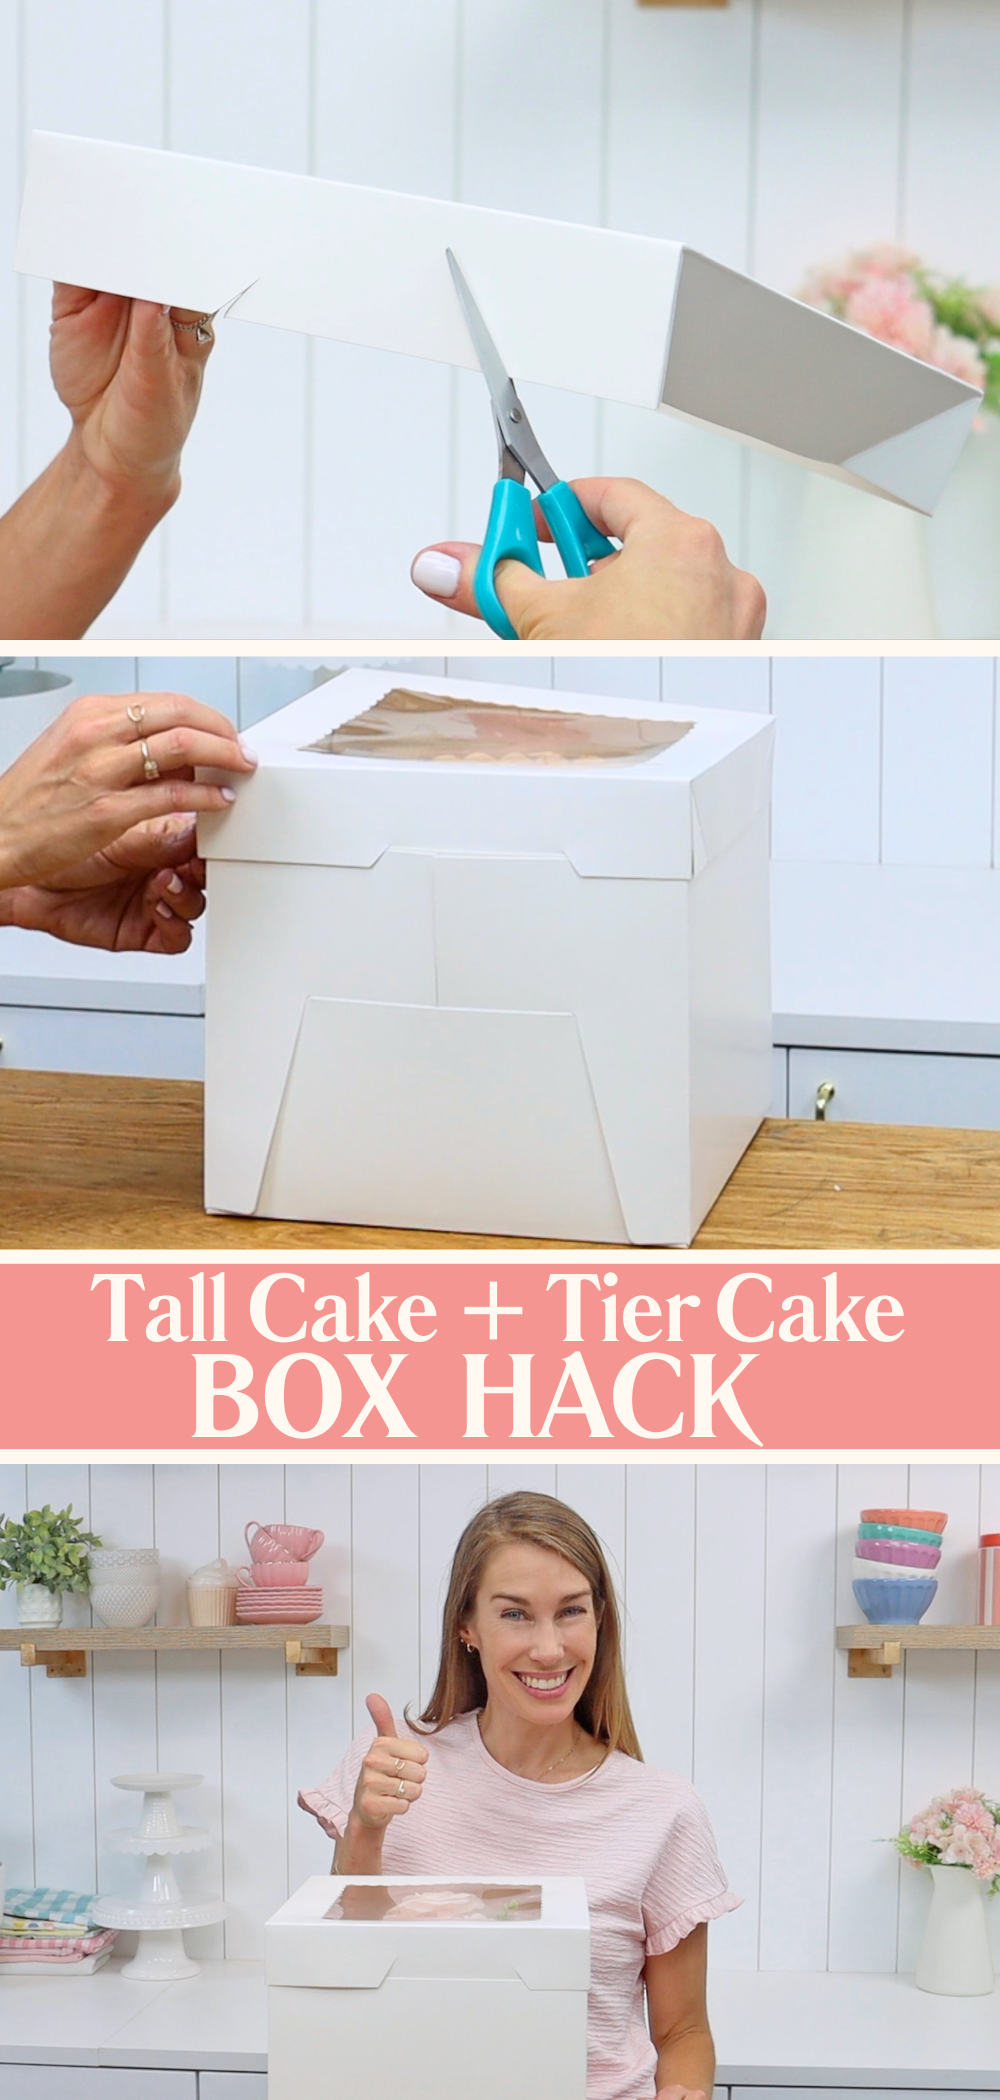
I’ve used this tall cake box hack to transport two-tier cakes, cakes with tall toppers, and double-barrel cakes. No custom boxes needed!
Whether you’re making cakes professionally or just as a hobby, these cake packaging tips will make your life much easier:
It’s easy to feel overwhelmed by all the different tools and packaging supplies for cake decorating. But honestly, you don’t need dozens of box sizes cluttering up your kitchen or cake studio. With these simple but game-changing cake box hacks you can deliver cakes of all shapes and sizes using just one kind of box.
If you found these tips helpful you'll love the online courses on my cake school. I'd love to help you grow your skills and confidence with cake decorating!
You can also watch a video of this tutorial on cake box hacks to save money:
If you’ve ever baked a cake and ended up with a domed top, you know the frustration! Trimming and levelling it before stacking layers wastes cake and makes your layers shorter. That’s where baking strips for cakes come in. These simple tools help you bake tall, flat cake layers every time so you can skip the trimming, save time, and get professional-looking results straight from the oven.
Baking strips are long strips of fabric with loops at one end. They're designed to wrap around the outside of your cake pans. When soaked in water before baking, they keep the outer edge of the cake tin cooler for longer. This means the cake bakes more evenly from the outside in, preventing domed cakes.
The process is simple but there are a few important cake baking tips to follow to get the best results.
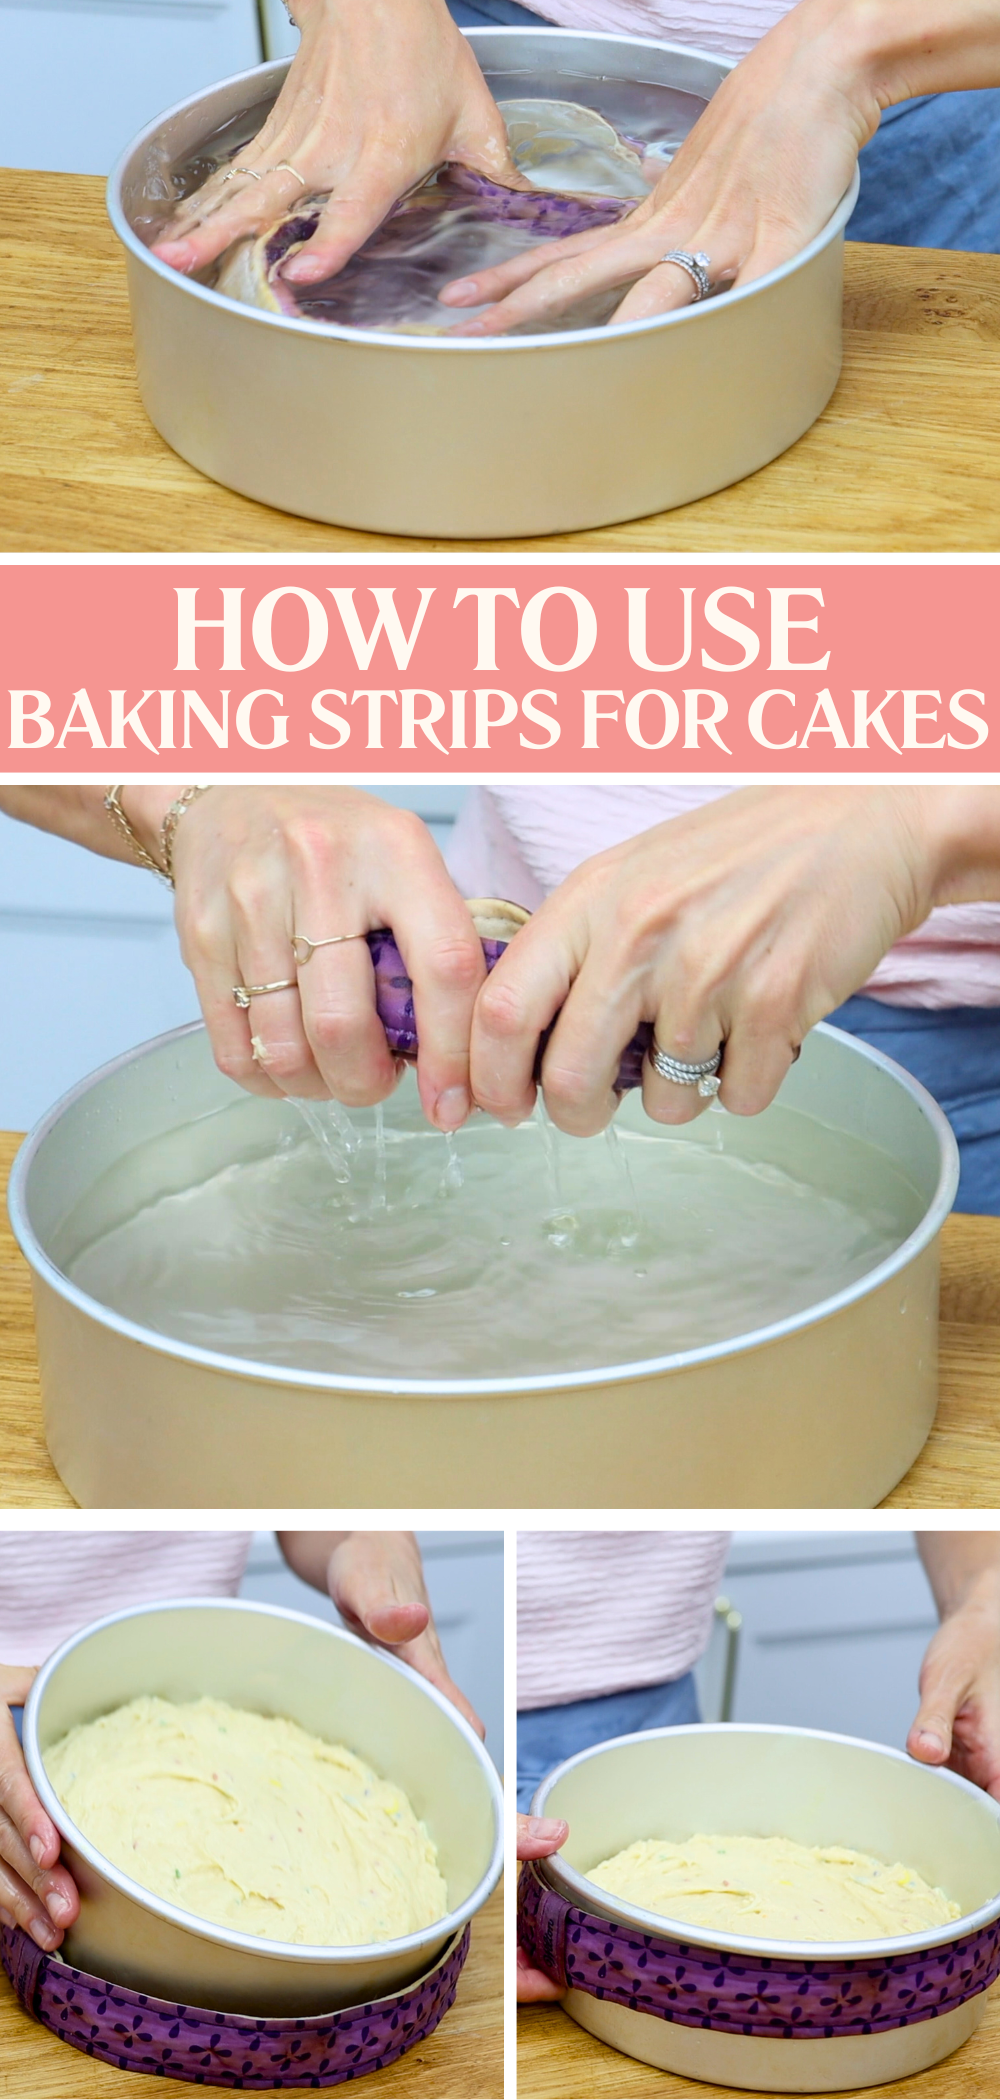
First, fit your baking strip around your cake pan. Thread the end through both loops and pull it tight. Using both loops is essential! The second loop keeps the end of the strip up so it doesn't touch the hot metal of the oven and catch fire. Slide that loop all the way to the end to hold it in place.
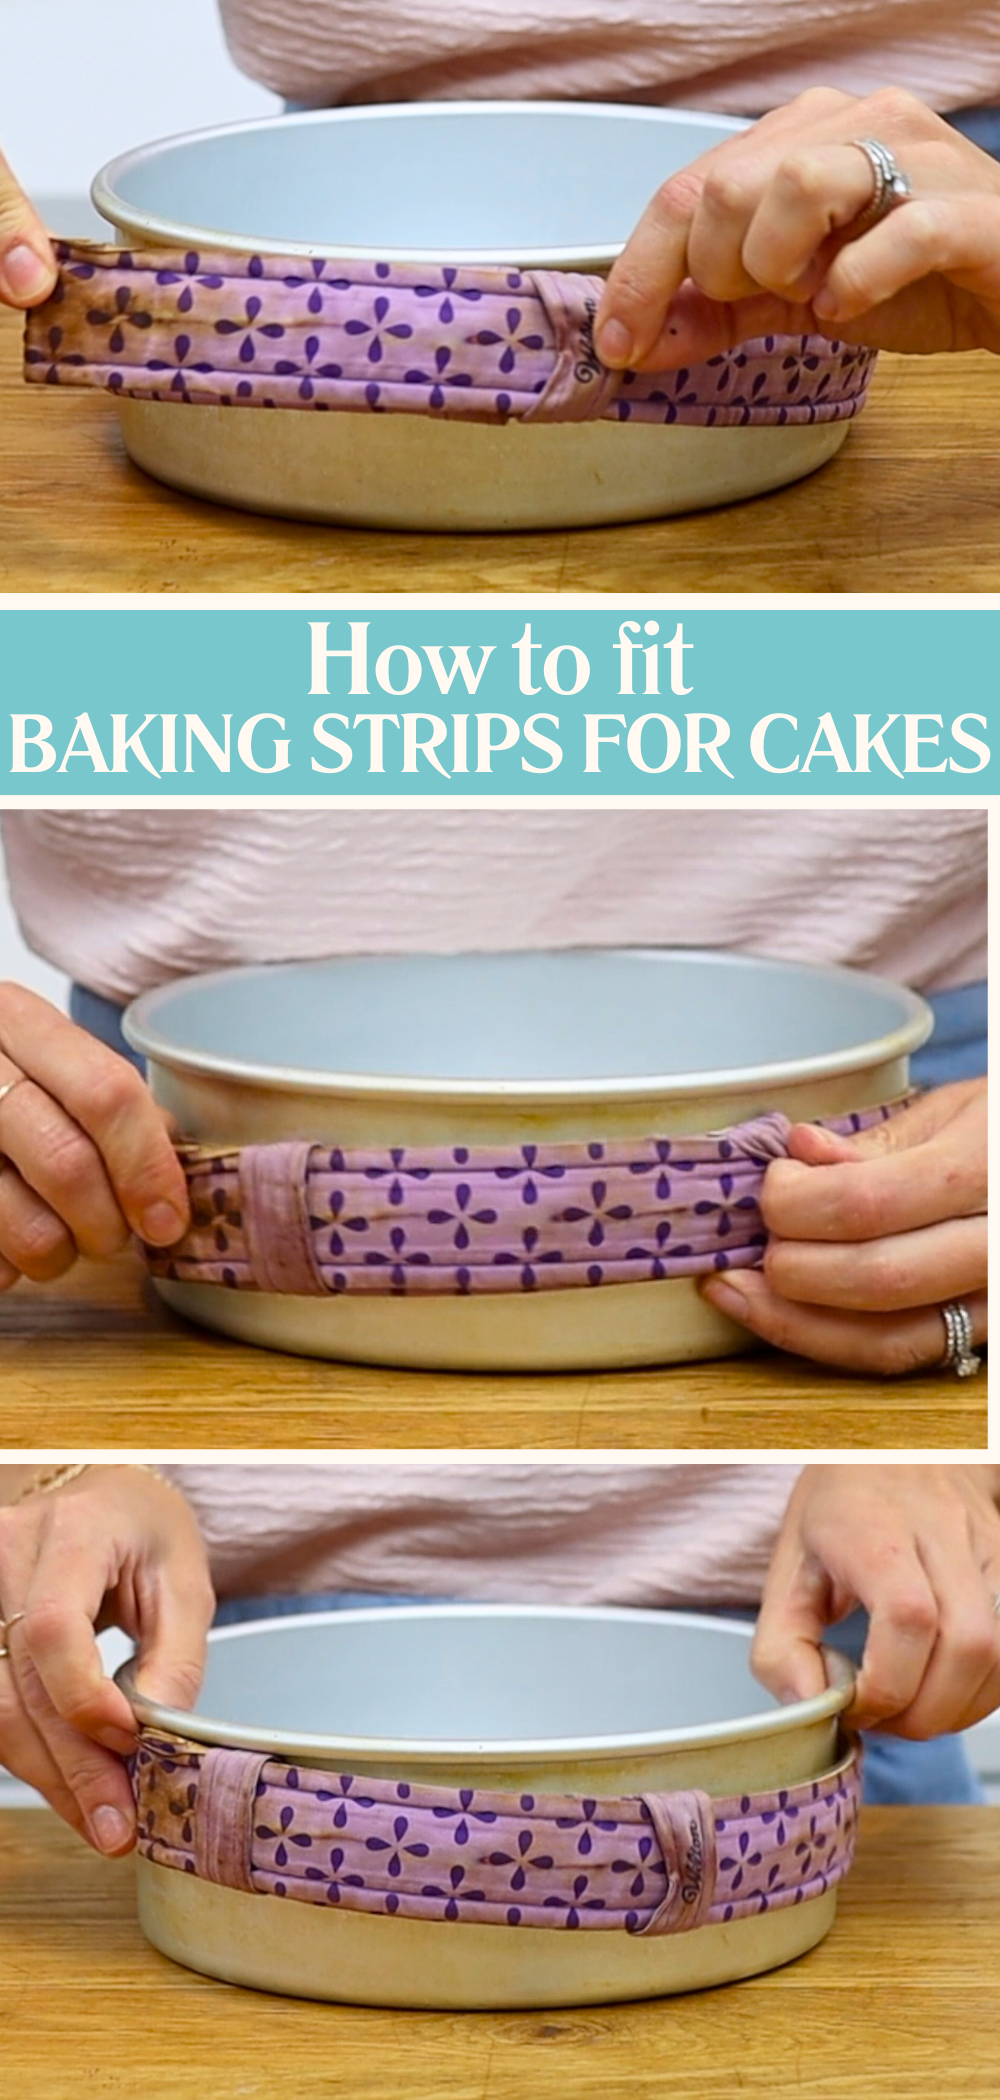
Next, soak the strip in cold water. An extra cake pan works perfectly for this! Just fill it with water and press the strip down until it’s fully submerged. Let it soak for about five minutes while you grease your pans and prepare your cake batter. This ensures the fabric absorbs enough water to stay damp throughout baking.
After soaking, squeeze out the excess water so it’s damp but not dripping. If it’s too wet you’ll create extra steam in your oven. Wrap the strip back around your cake pan and it should fit perfectly if you adjusted it before soaking.
Use baking strips with any cake batter but you'll notice more of a difference with some recipes than others. I notice the most drastic difference with my Very Vanilla Cake layers - more about that next! When using baking strips your cake batter will bake more slowly so add 5 to 10 minutes to the recipe baking time. The extra time is worth it for the flat tops you’ll get!
To show the difference I baked two identical cakes, one with baking strips and one without. The cake with baking strips (on the left) is taller and has a perfectly flat top. The one without (on the right) is shorter and domed, which means you’ll need to trim it before stacking. After trimming, the layer baked without baking strips can be just half the height of the one baked with strips!
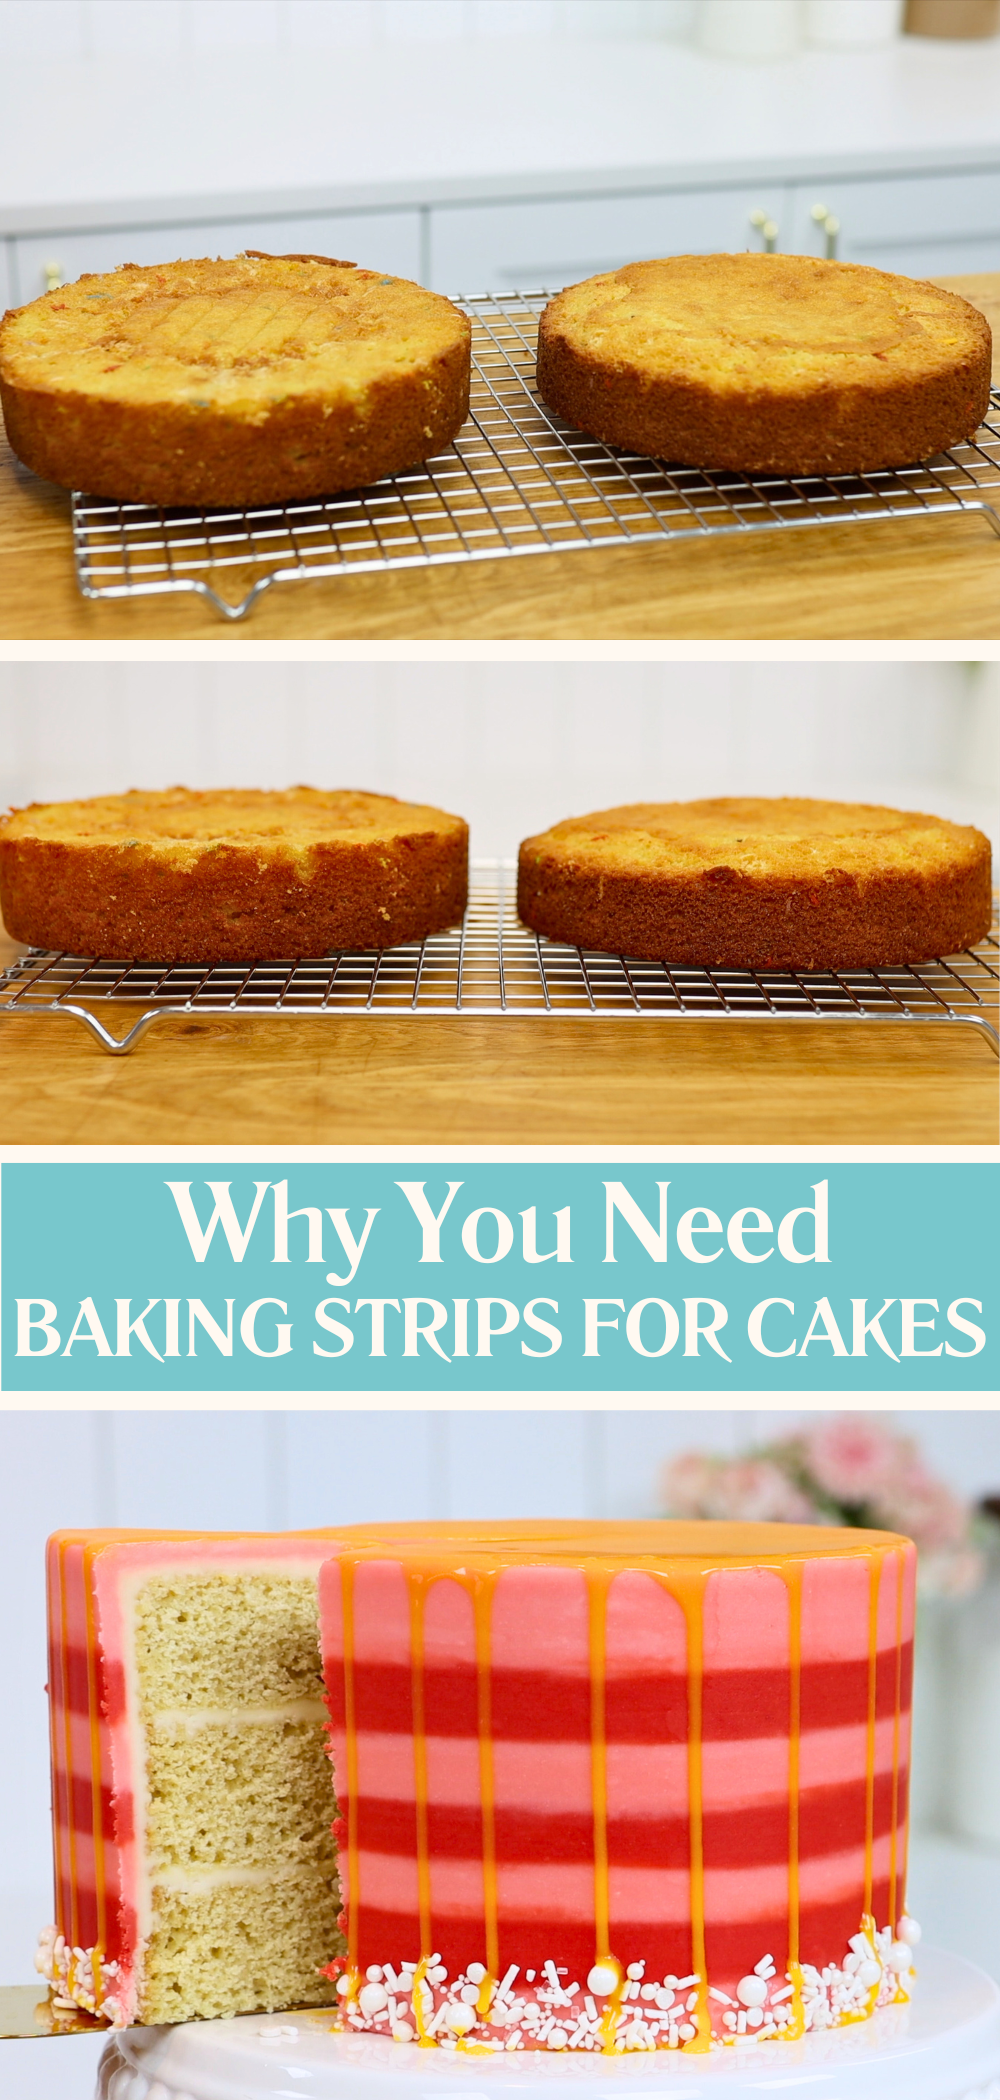
Flat cake layers aren’t just prettier, they stack more evenly and have a better texture because they’ve risen evenly from the edges to the centre.
To prevent domed cakes, baking strips are the best tool for baking even layers. They’re reusable, inexpensive, and work with any cake pan size. They’re also a huge time saver because you can go straight from oven to assembly without levelling the cake first.
Baking strips for cakes are available from most cake decorating shops and online baking supply stores. There are a few different brands and designs but they all work in the same way. I love these! I recommend choosing ones with adjustable loops so you can fit them snugly around different sized cake pans.
If you want your cakes to look beautiful both in and out, baking strips are a worthwhile investment. They prevent domed cakes, make layering cakes quicker and easier and give you beautiful, professional-looking layers with every slice. Once you try them, you’ll wonder how you ever baked without them!
You can also watch a video of this tutorial on how to use baking strips for cakes:
Decorating a cake can be just as much fun as baking it but it can also be incredibly frustrating if things don’t go quite to plan. Whether you’re struggling with messy buttercream, lumpy frosting, or piping gone wrong, these cake decorating tips will make your life so much easier. In this tutorial I’m sharing ten of my most-used cake decorating tricks that will save you time, fix common problems, and help your cakes look more professional.
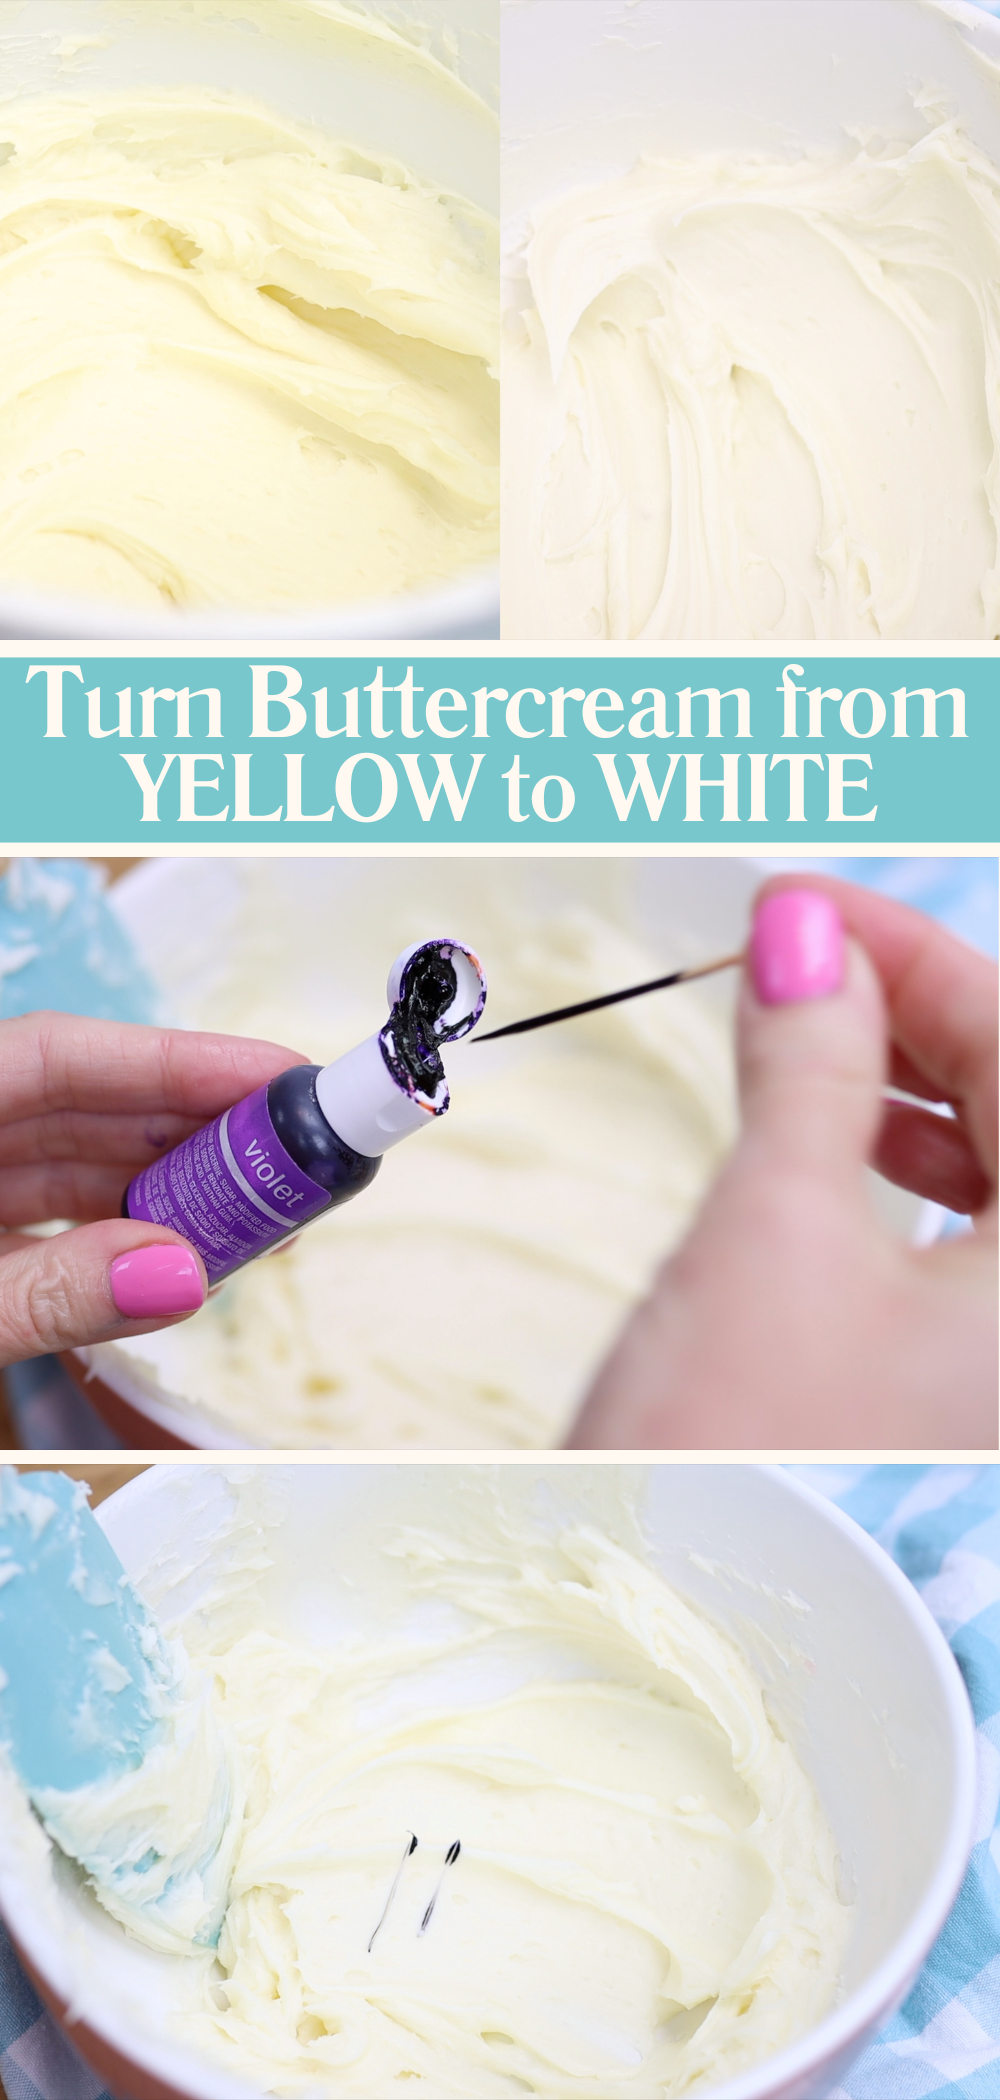
I adore my 4 Minute Buttercream but just like any butter-based frosting, it can look yellow instead of white. Here’s a trick that magically turns yellow buttercream white: use a tiny bit of violet food colouring.
Dip a toothpick into a bottle of violet gel food colour and drag that through your buttercream. Stir it in and you’ll see the yellow tinge disappear, leaving you with a much brighter white. The violet cancels out the yellow, like a colour correction filter! Just be careful because a little goes a very long way.
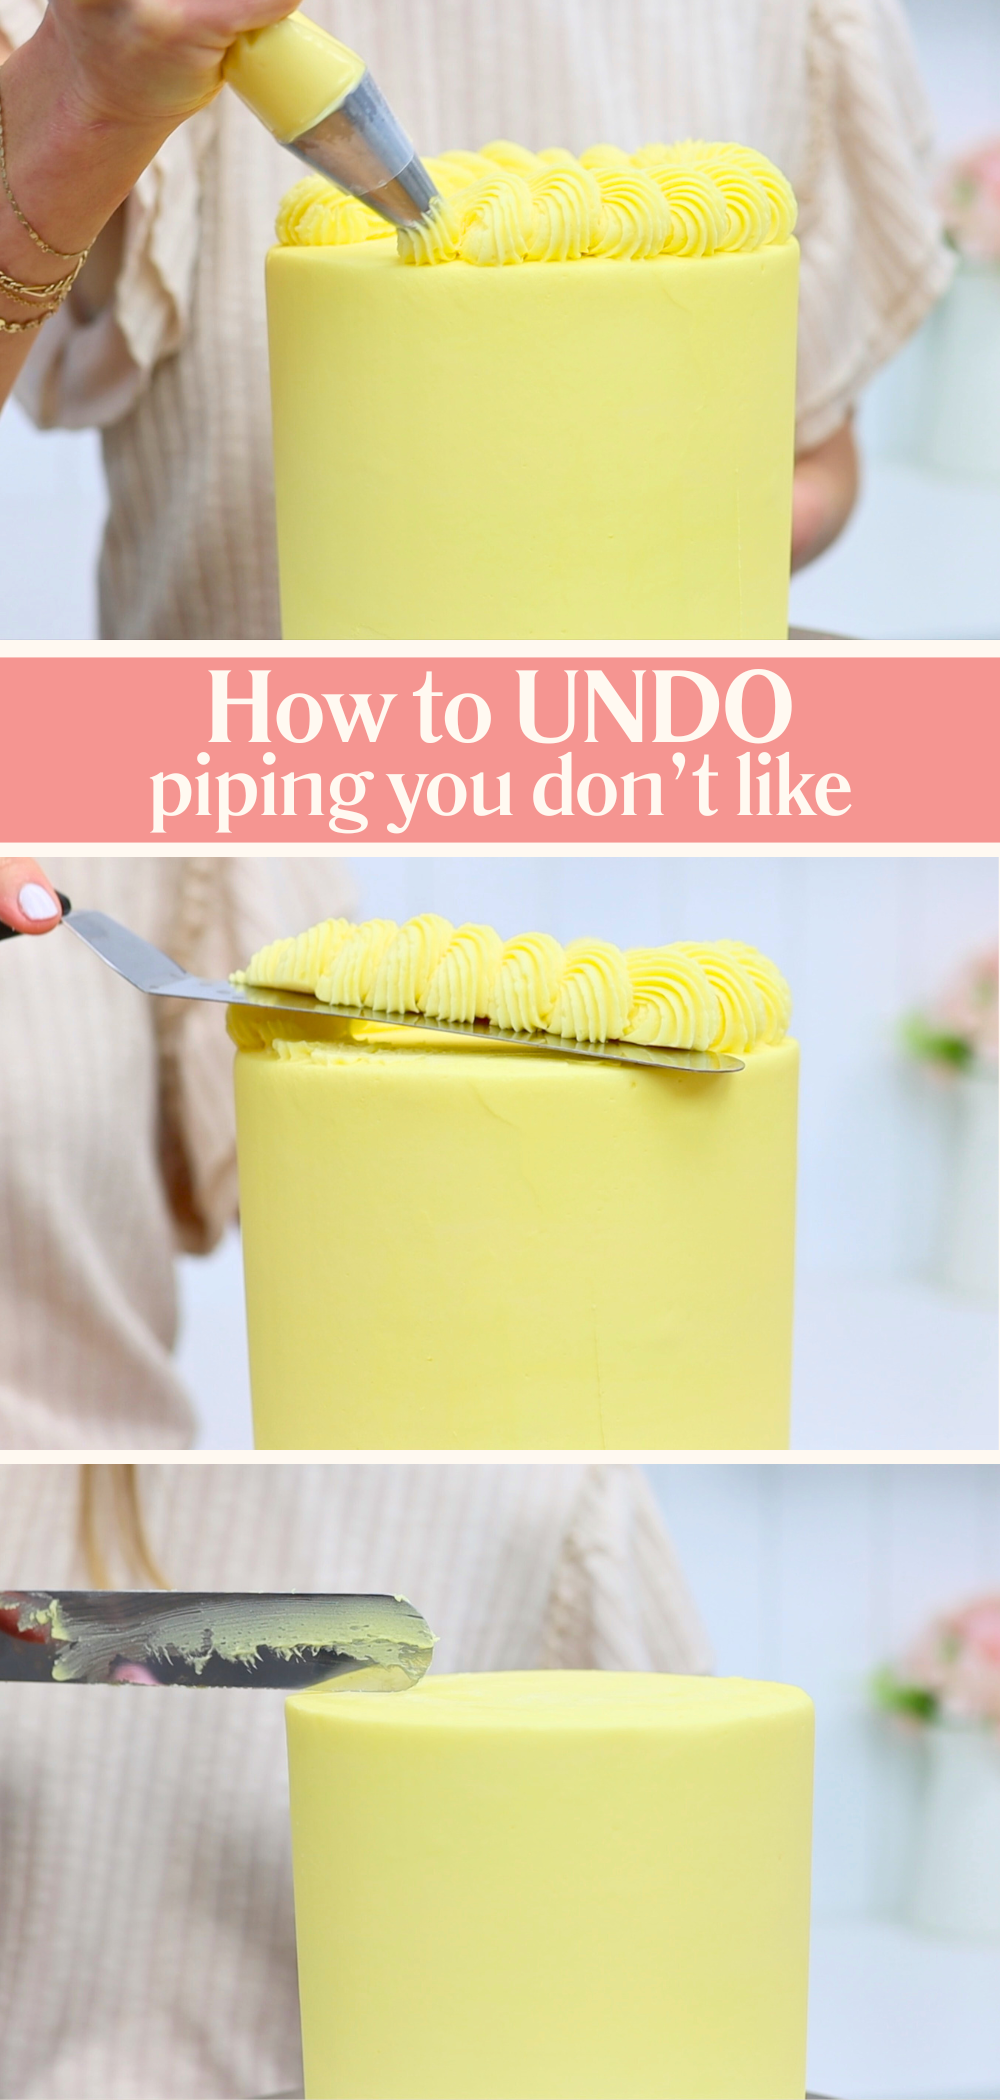
Let’s talk about borders. They can be really tricky if your buttercream is a bit too runny or too stiff, or you’re experimenting with a new piping technique. And if your hands are shaky like mine, getting a perfect border on the first attempt is tough.
The secret here is to chill the cake before you pipe. This way the frosting will be cold and firm when you pipe your border and if you don’t like how it looks, just scrape it off with an
Let’s talk about the texture of your buttercream. It can really make or break your cake! If it’s too stiff or full of air bubbles, it’s a nightmare to spread or pipe. Here’s a quick and easy way to fix it.
Scoop out about a third of your buttercream into a microwave-safe bowl and microwave it for 10 seconds. This will melt it slightly. Then stir it back into the rest of the buttercream. The melted portion loosens everything up, making the whole batch much smoother and easier to work with. This trick gives you that perfect spreadable consistency every time.
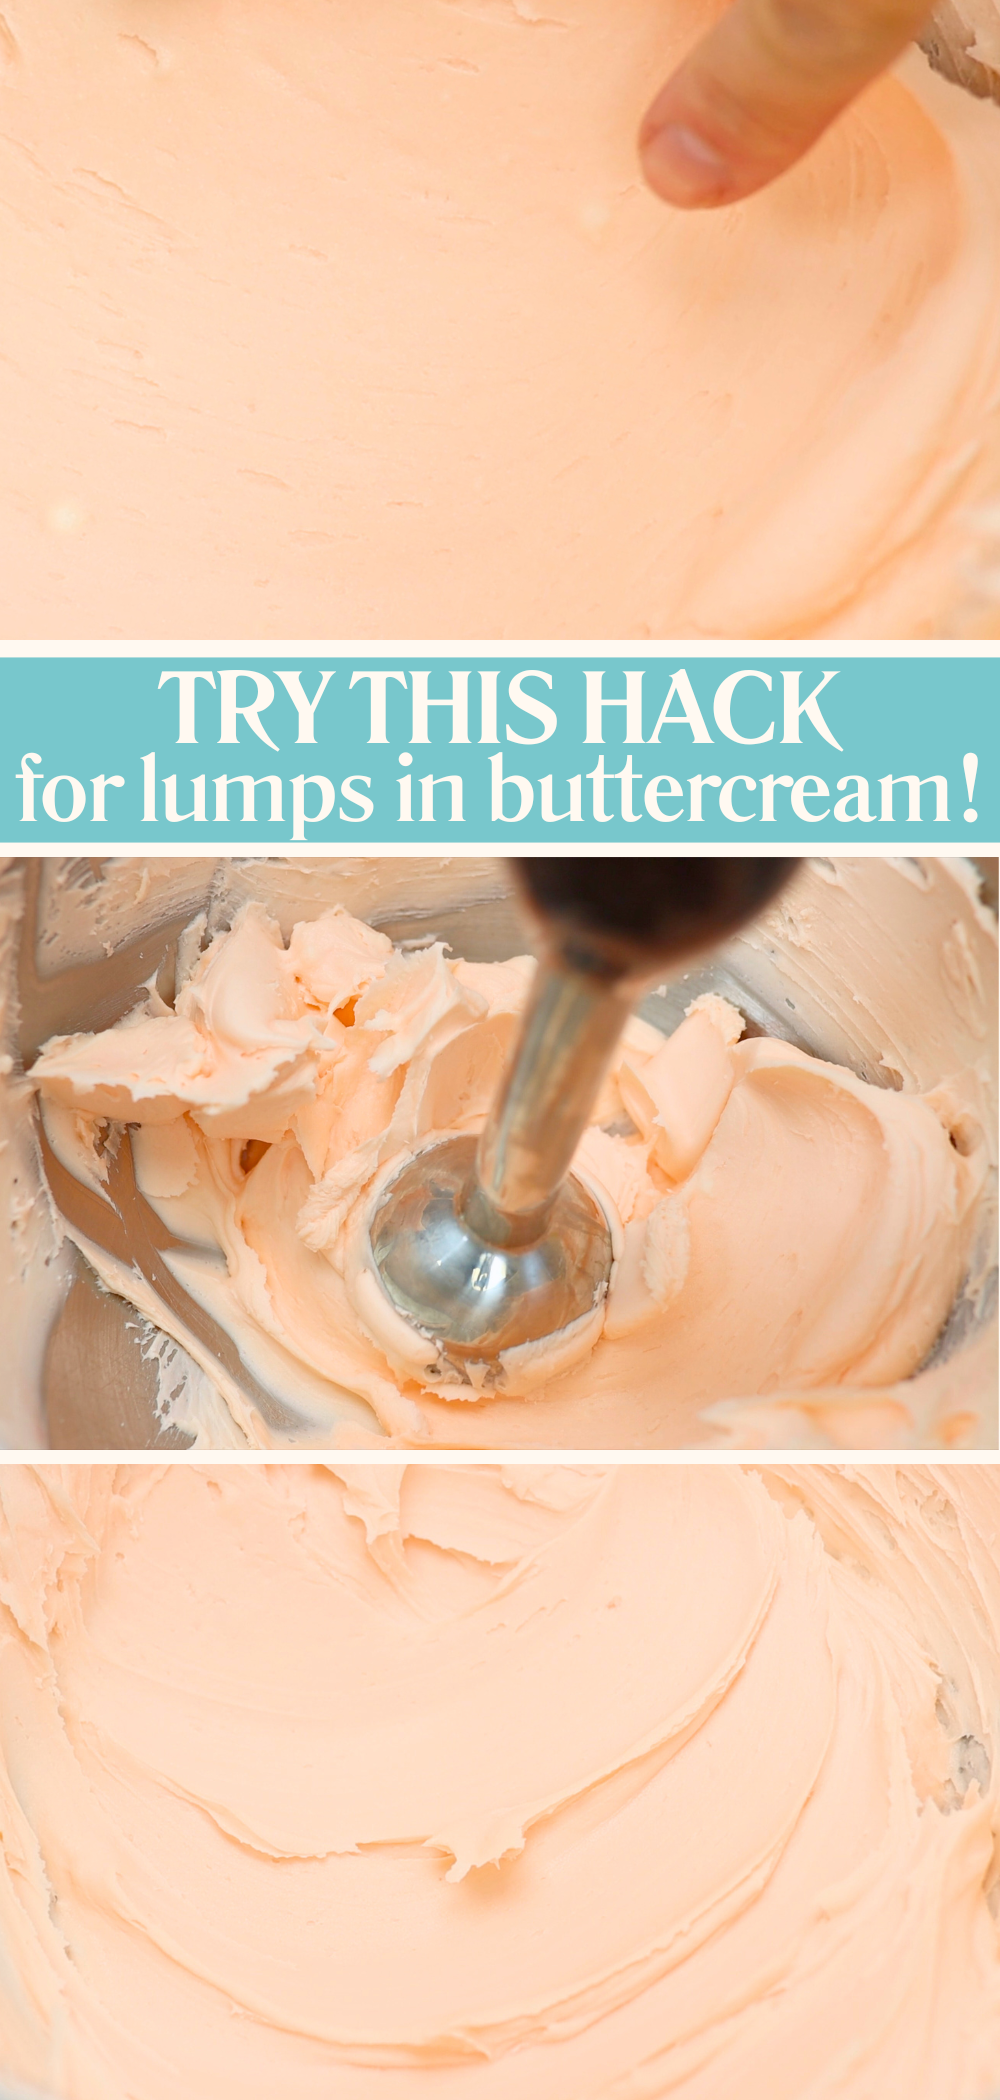
Forgot to sift your icing sugar? Don’t worry – there’s a fix. If your buttercream has annoying little lumps in it, grab an immersion blender (also known as a stick blender). Blitz the buttercream for a few seconds and the spinning blades will completely smooth it out. You’ll be left with silky, lump-free buttercream that’s perfect for frosting your cake or piping. This is a great hack if you notice lumps right before using the buttercream and don’t want to make a fresh batch.
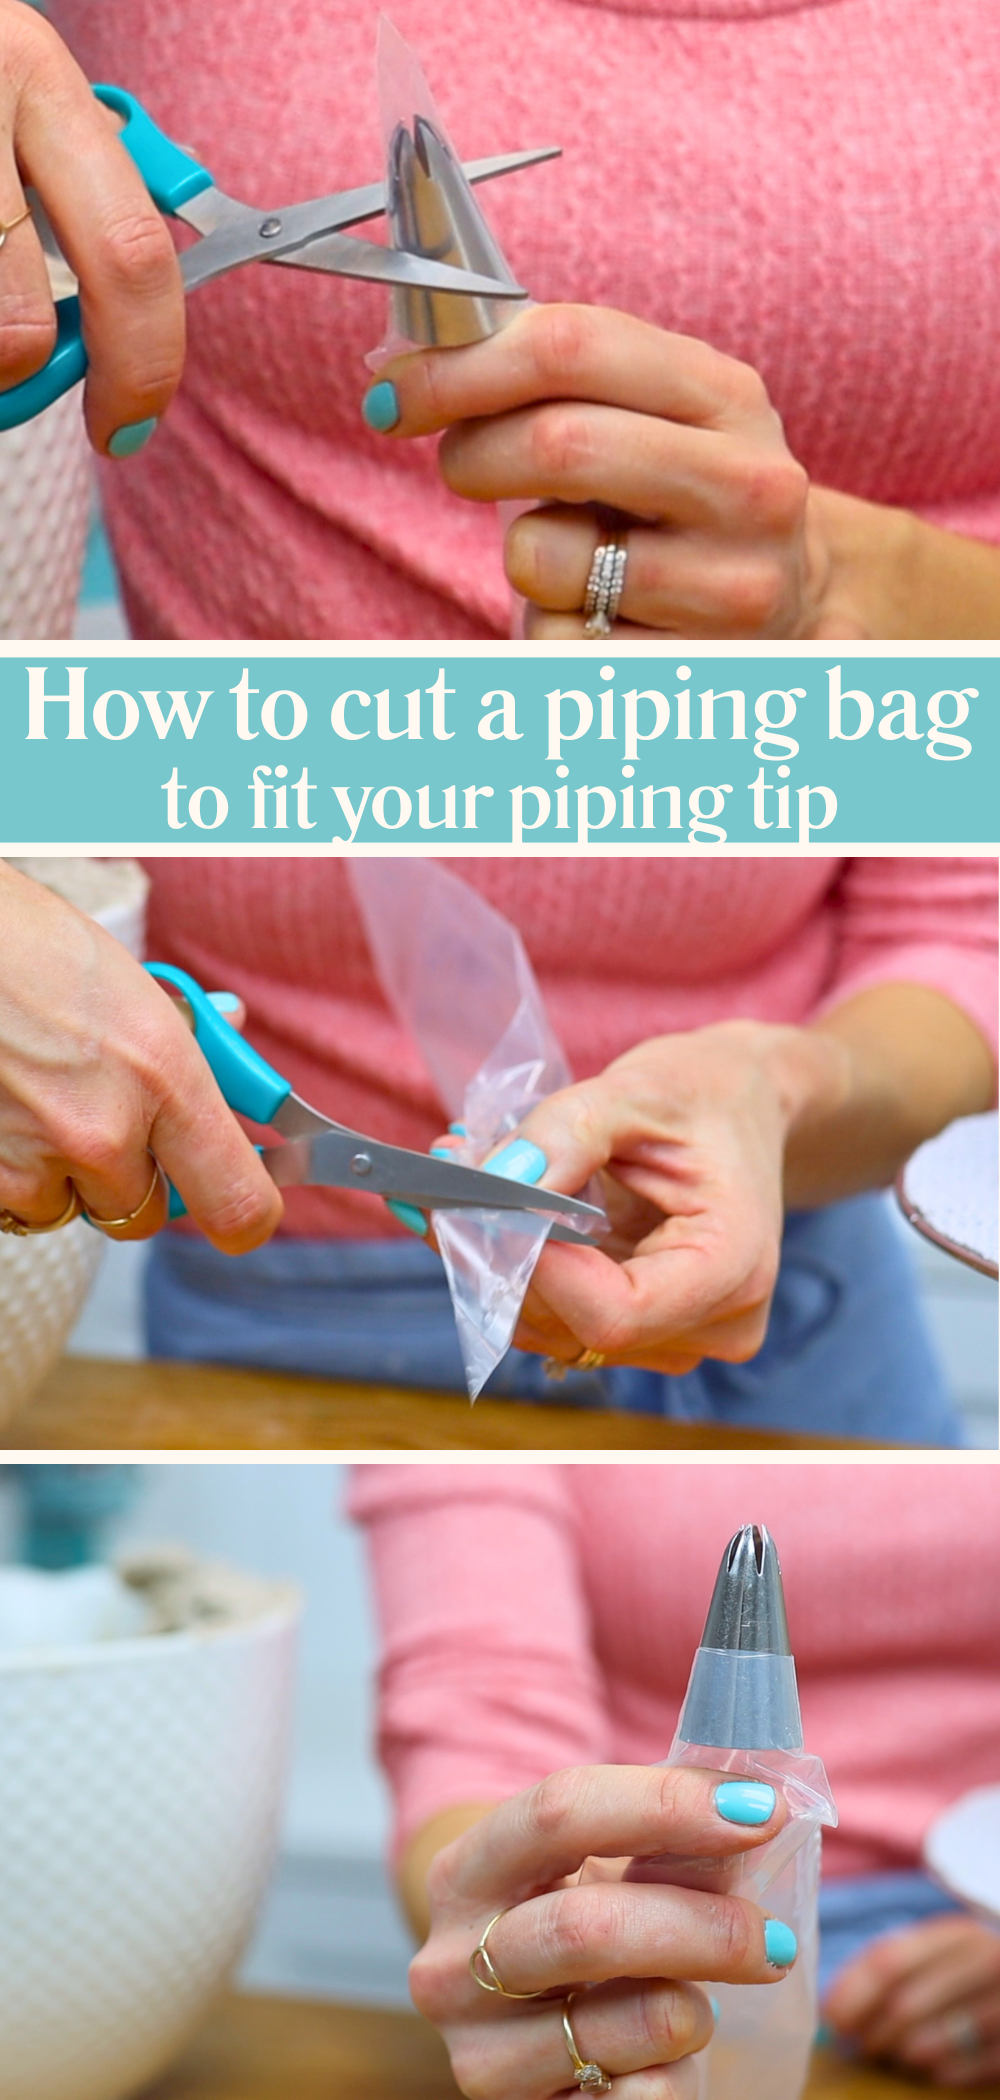
If you’ve ever had a piping tip burst out of the end of your piping bag mid-design, you’ll love this one. Here’s how to make sure your piping tip fits snugly and stays in place.
Drop the piping tip into a piping bag and push it as far down as it will go. Use scissors to score a line halfway up the tip, then push the tip out of the way and cut along that line. Now when you press the piping tip back down, about half of it should poke out through the cut in the bag. This is just enough to keep it secure while you pipe, no matter what shape or size tip you’re using.
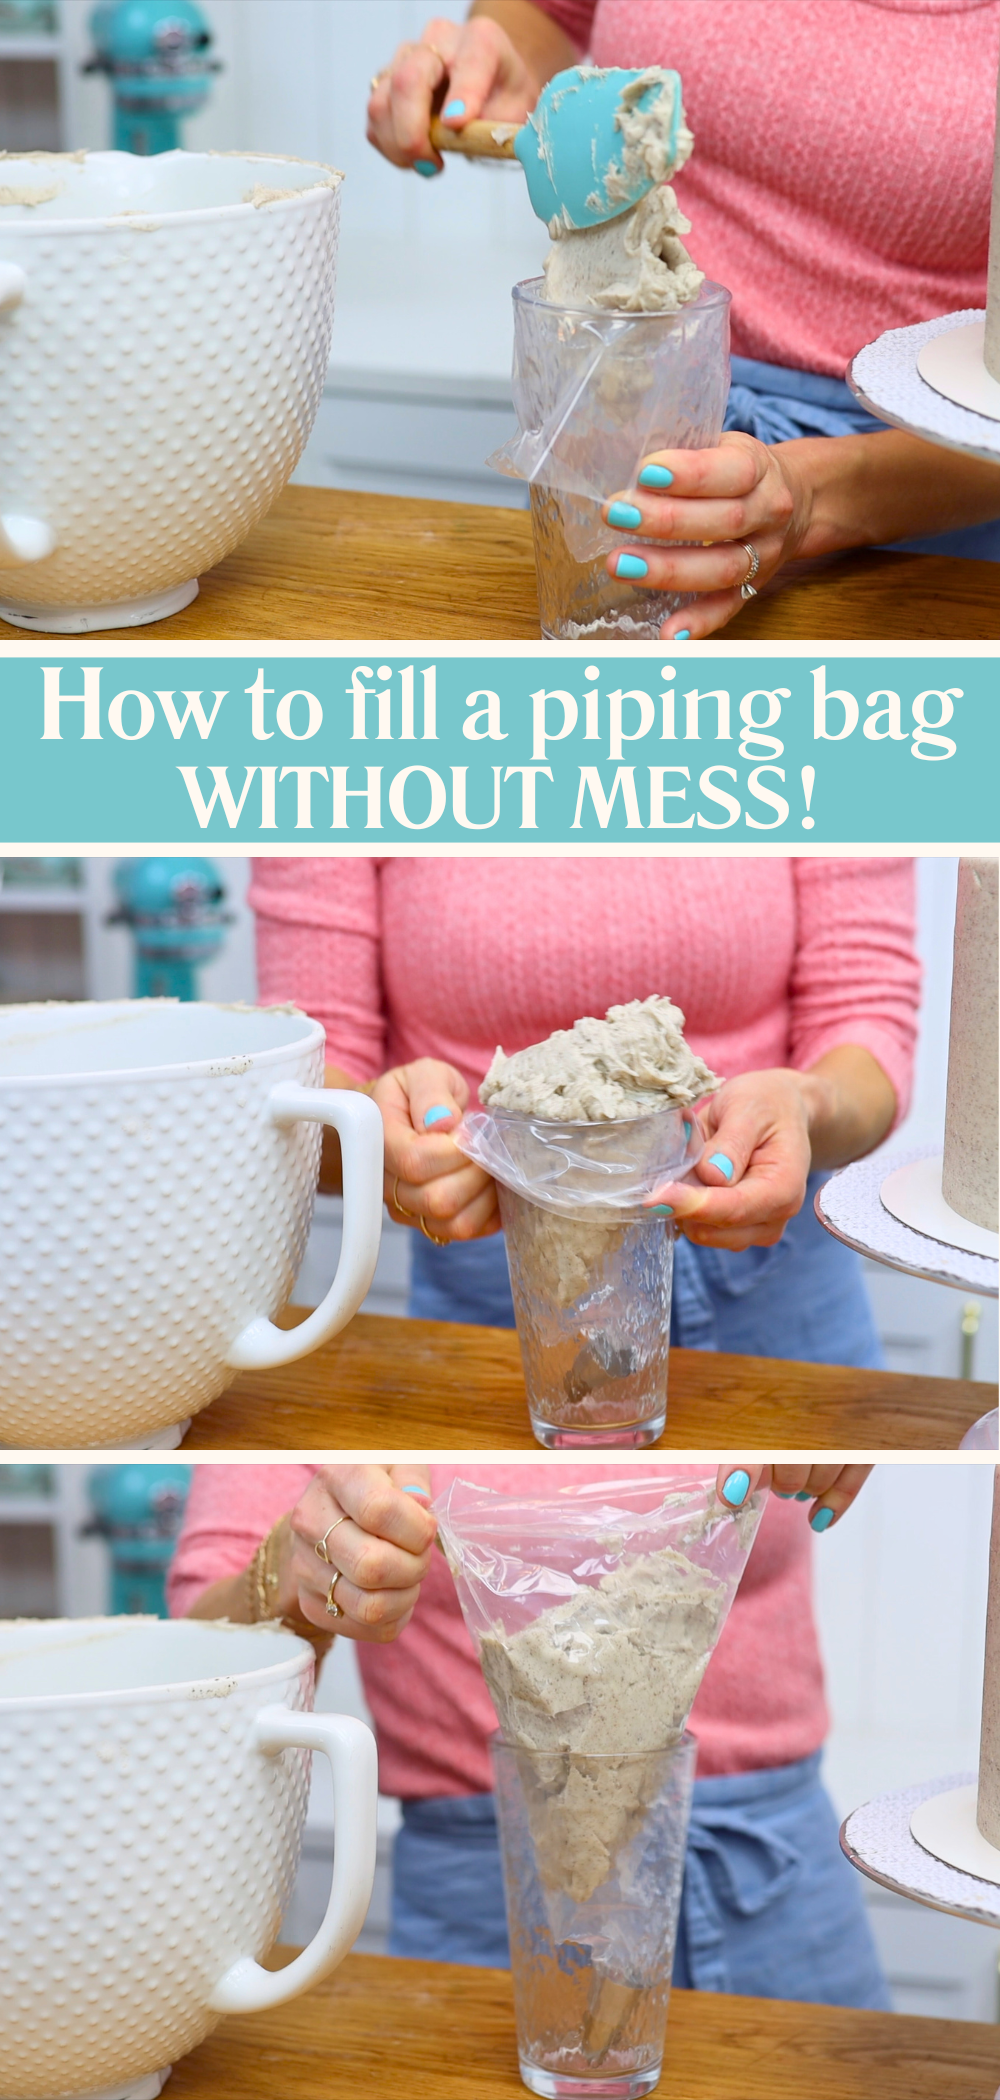
Here’s a super simple but incredibly useful trick. Stand your piping bag in a tall glass and fold the top over the rim. This holds the bag open while you spoon in your buttercream, keeping your hands clean and giving you full control.
Only fill the bag two-thirds full so there’s room to squeeze without buttercream oozing out the top. Once filled, unfold the top, lift the bag up and twist the top tightly to stop air or buttercream escaping when you’re piping.
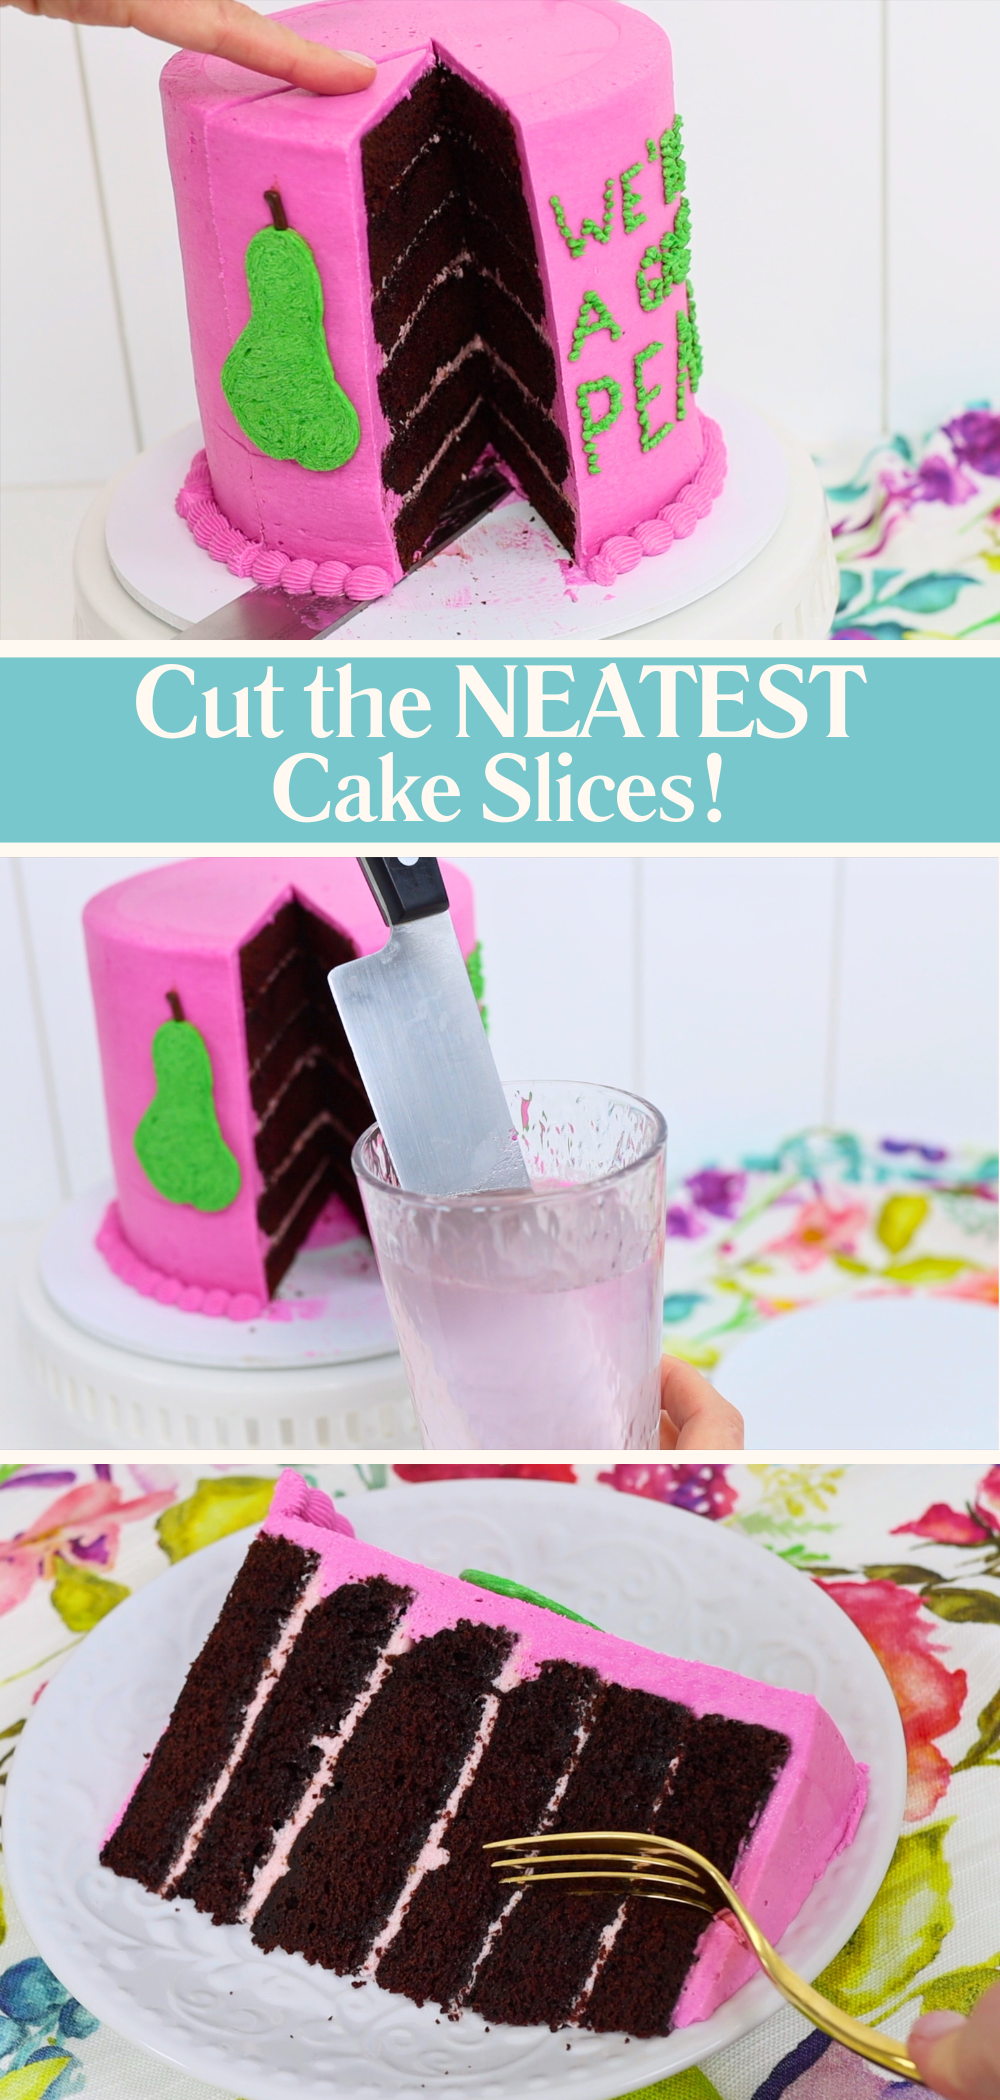
If you've ever cut into a cake straight after baking it, you probably ended up with a sticky, crumbly mess. It might be soft and delicious but it’s difficult to cut cleanly. For neat slices, try this instead.
Chill your cake for at least an hour, then leave it at room temperature for another hour. Now the buttercream will have set, so it won’t stick to your knife. The cake will have warmed up to room temperature so it will have softened again to the perfect texture for eating. Dip your knife into hot water, wipe it dry, and slice. You’ll glide through the cake cleanly without dragging crumbs along the way.
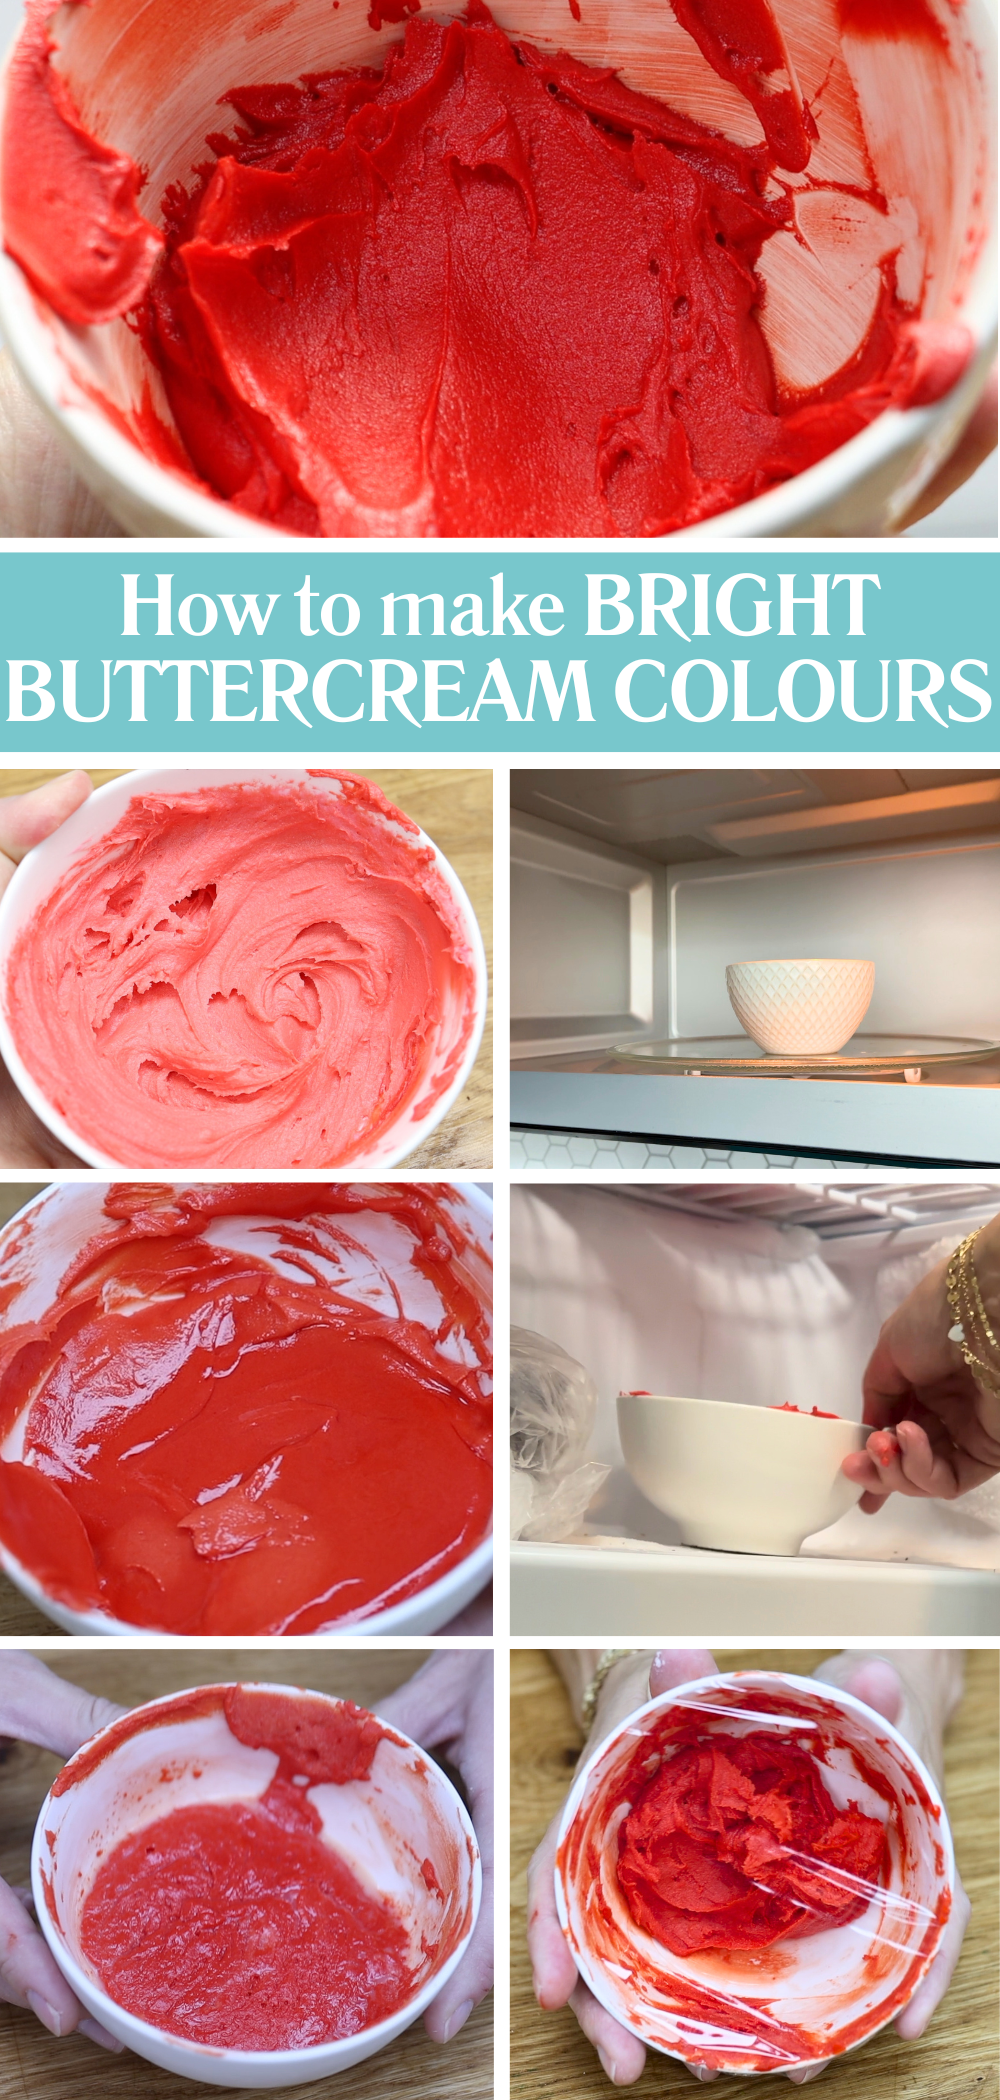
Using a lot of food colouring to make dark colours like red or navy blue can cause un unpleasant taste in buttercream. Here are three tips to avoid using so much colouring.
Tint your buttercream to be lighter than your final colour. Then microwave it for 5–10 seconds to melt the butter slightly and the heat will deepen the colour dramatically. Once melted, stir well and then pop it into the freezer for five minutes. This will bring the buttercream back to the right consistency and the cold will also intensify the colour even more. Let it rest for an hour or two, and you’ll see the colour develop even further. It’s the easiest way to get bold colours without staining everyone’s teeth!
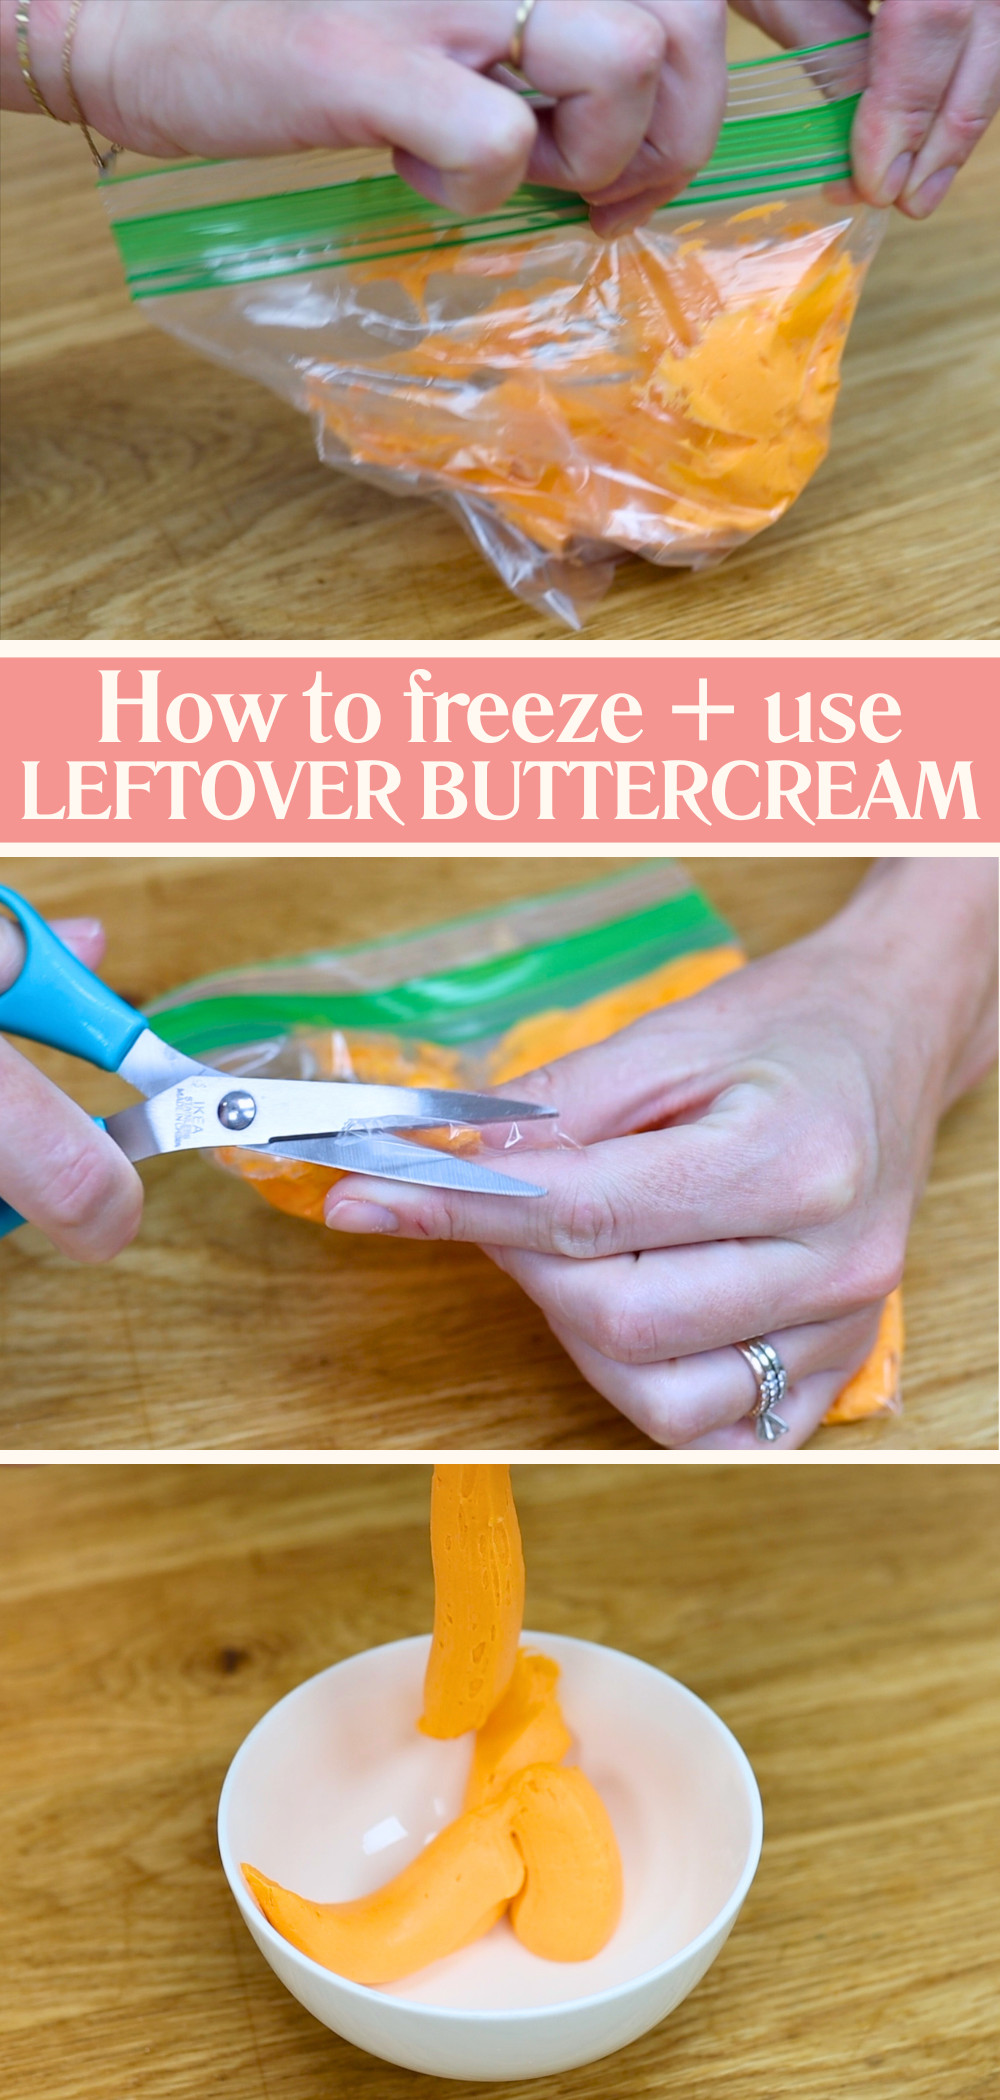
If you’ve got leftover buttercream, don’t throw it away! It can actually save you time next time you decorate a cake. Spoon your leftovers into ziplock bags or airtight containers and freeze them for up to two months. When you’re ready to use them, let them thaw at room temperature overnight. Once soft, stir them vigorously to smooth out any air bubbles, re-tint the colour if you need to, and you’re ready to decorate again.
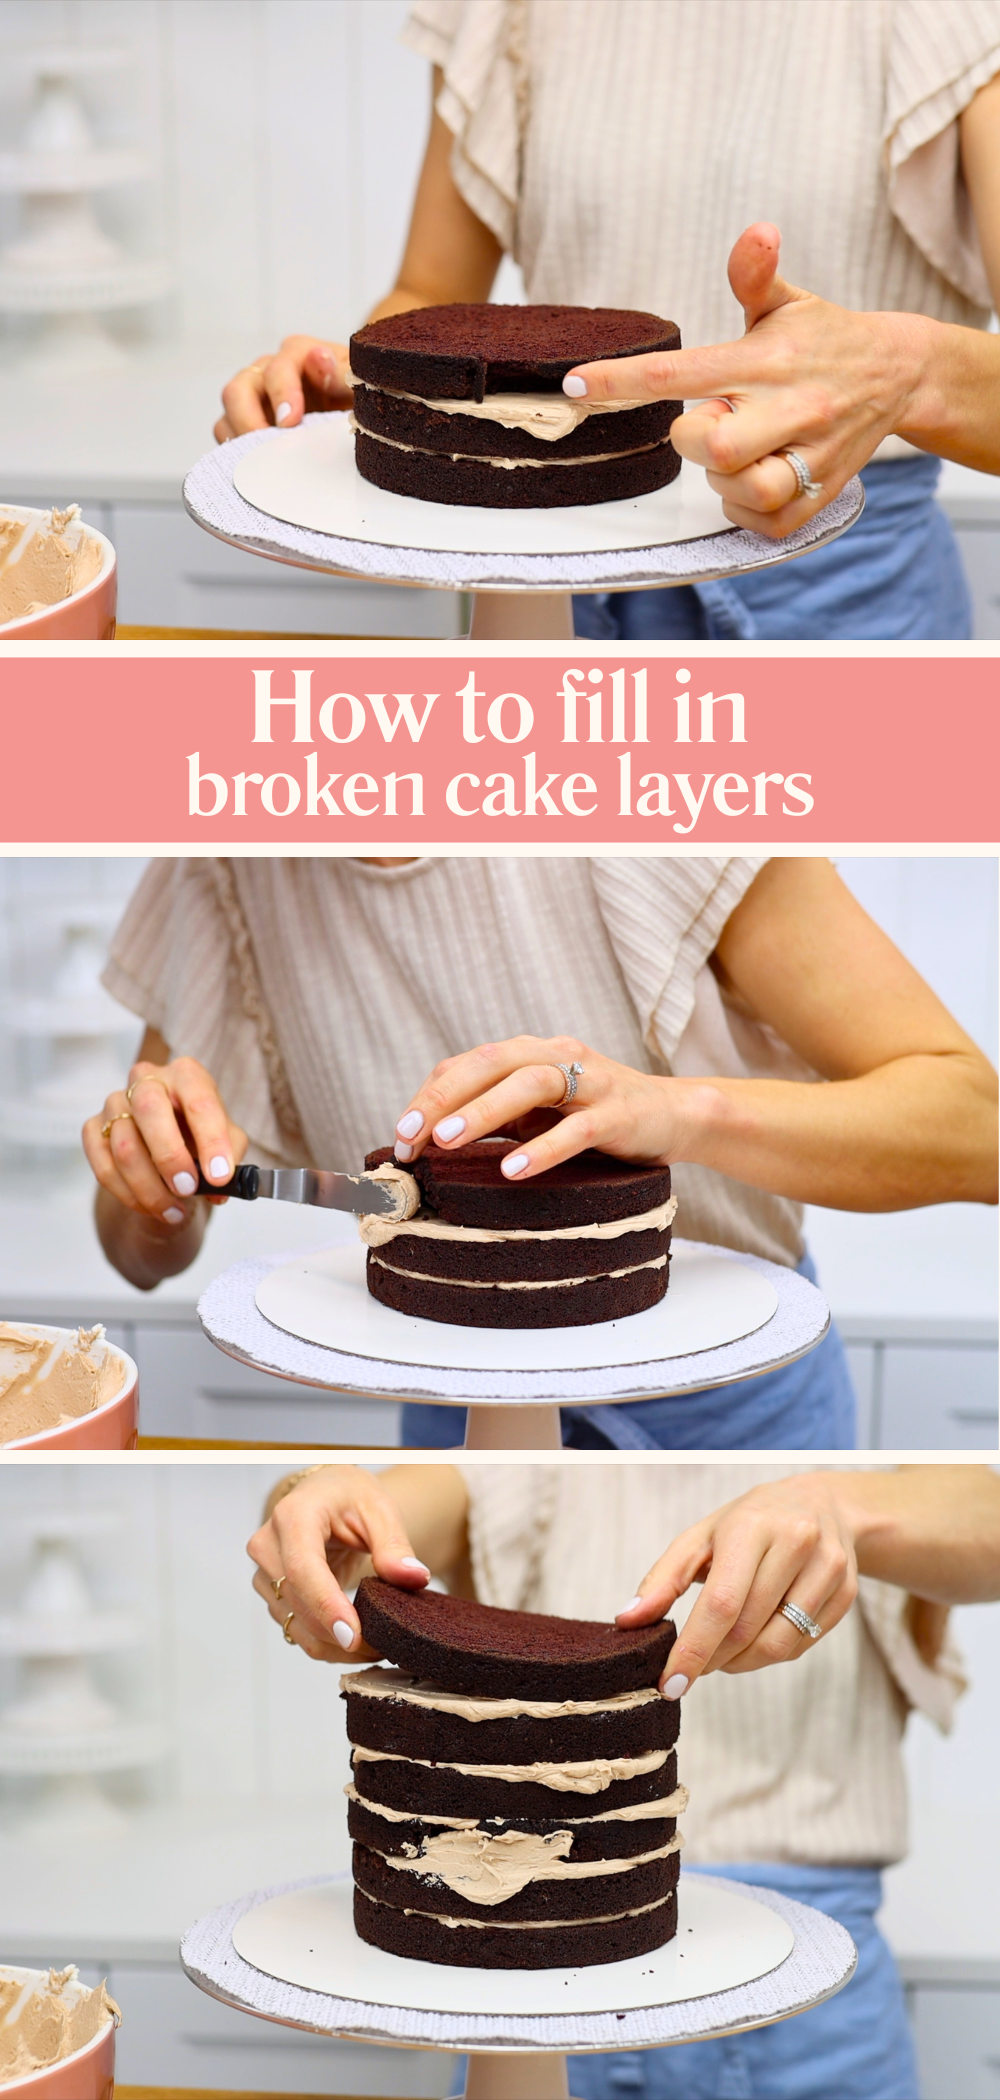
Not every cake layer comes out of the pan in one perfect piece. If you’ve got a cracked or broken layer don't throw it away! Just fill in the gaps with buttercream.
Use buttercream to glue the broken pieces back together. Then stack and fill your layers as usual and then crumb coat. Once your cake is fully frosted, no one will ever know there was a missing chunk. The frosting hides everything and you’ll end up with perfectly straight sides and a smooth finish.
I hope these cake decorating tips make your decorating life easier, neater, and much less stressful. Knowing how to fix mistakes, work smarter with buttercream, and use your tools properly makes a huge difference. With these cake decorating hacks in your toolkit, you’ll be much more confident and prepared for anything that comes your way!
You can also watch a video of this tutorial on 10 Essential Cake Decorating Tips and Tricks:
If you’re new to cake decorating, you’re probably discovering how many small decisions go into making a cake look beautiful. This guide to cake decorating for beginners is packed with 10 simple tips that would have saved me so much time, money and frustration when I was starting out. These beginner cake decorating tips will help you avoid common pitfalls, work more efficiently, and even enjoy the process more! Some of these tips might really surprise you, from how to stop your buttercream from melting to how to store fully decorated cakes.
This might seem like a minor detail but it’s actually one of the most common cake decorating mistakes beginners make. Your cake board should be at least 2 inches wider than your cake. That means if your cake is six inches across, you’ll want to use an eight inch board. This may seem exaggerated but after adding your crumb coat and frosting, the cake will be wider than you expect.
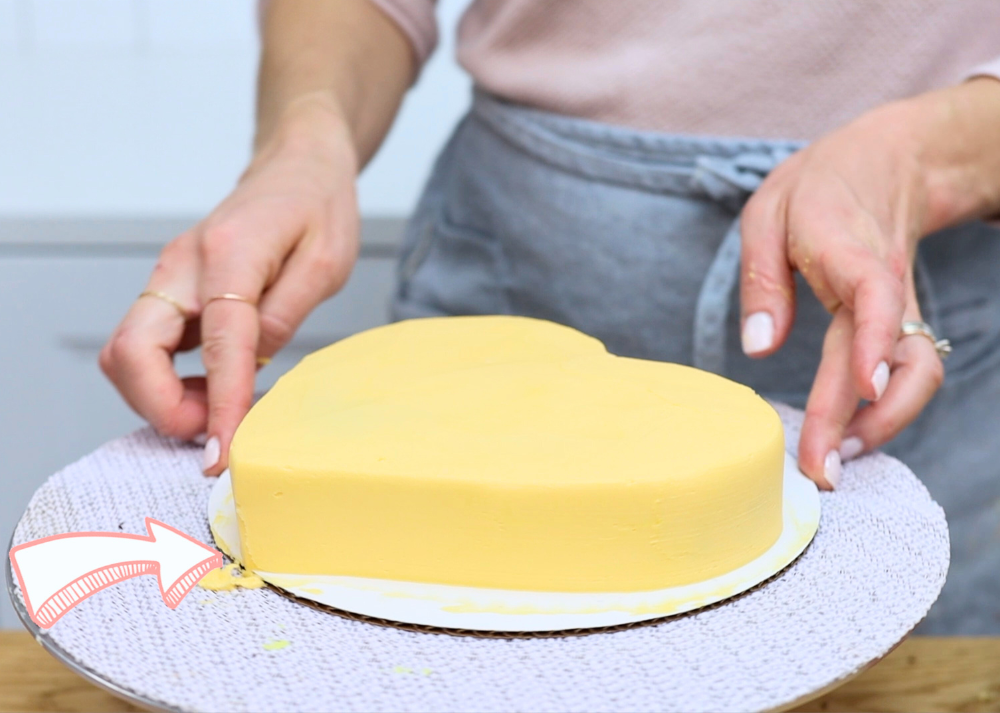
If your cake goes right up to the edge of the board, it’ll look cramped and messy. Moving it onto another board is tricky to do without damaging it. So if you’re ever in doubt, always choose the larger board. It gives your cake space to breathe and makes the final presentation look much neater.
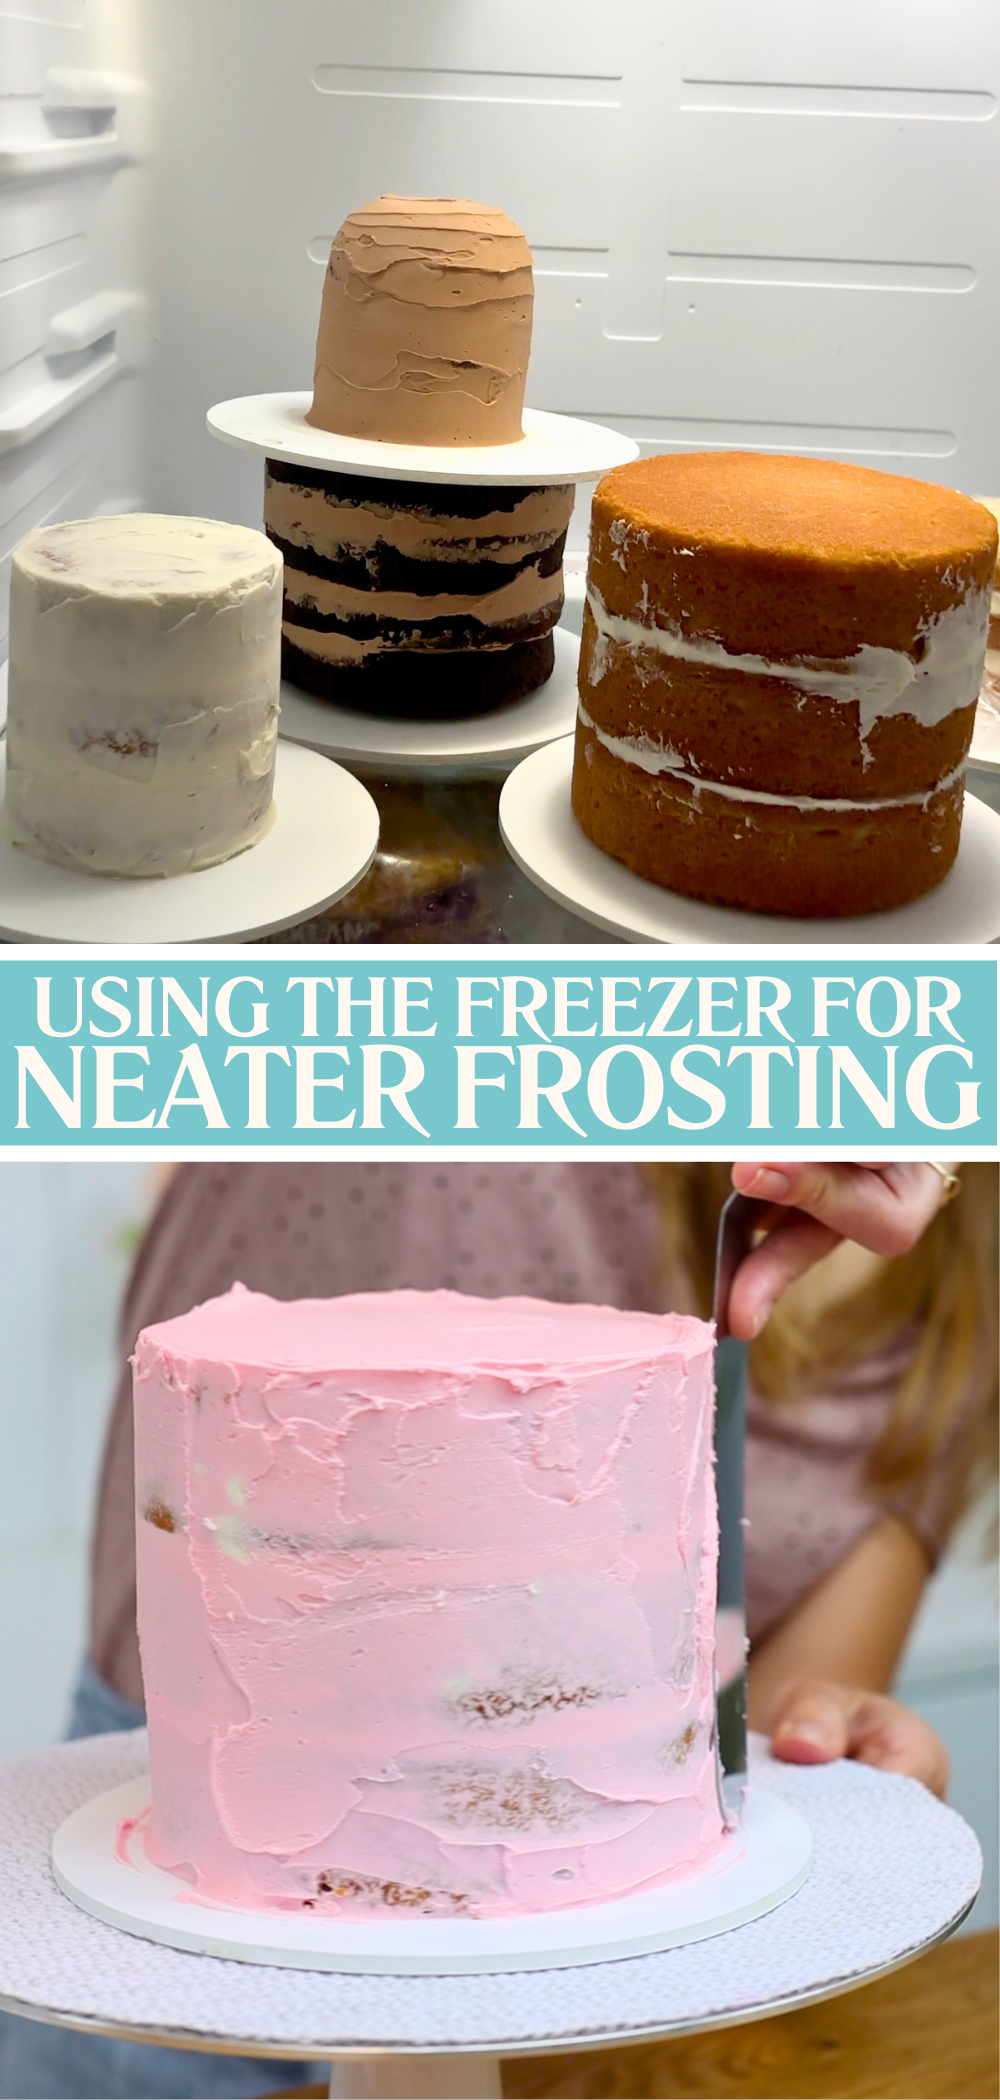
One of the best tricks in cake decorating for beginners is learning how to use your freezer properly. If you frost a cake when it’s at room temperature, the soft layers will slide around on the cake board. They'll also shed crumbs into your frosting. Here’s how to fix that.
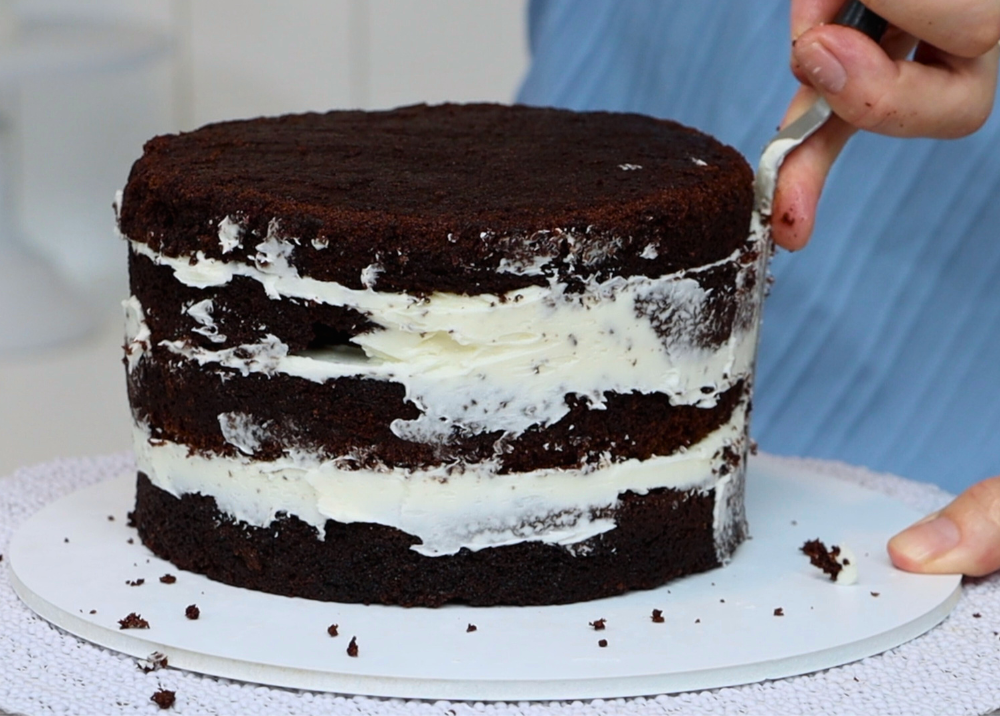
After baking and cooling your layers, spread a small blob of buttercream in the middle of your cake board. Press your first cake layer down onto it, which helps anchor the cake. Once the cake is stacked, pop it into the freezer for 15 minutes. This firms up the cake and the blob of buttercream so it stays in place while you frost it. It also means your buttercream will glide on much more smoothly without dragging crumbs. Check out this tutorial for more ways to use your freezer for cake decorating.
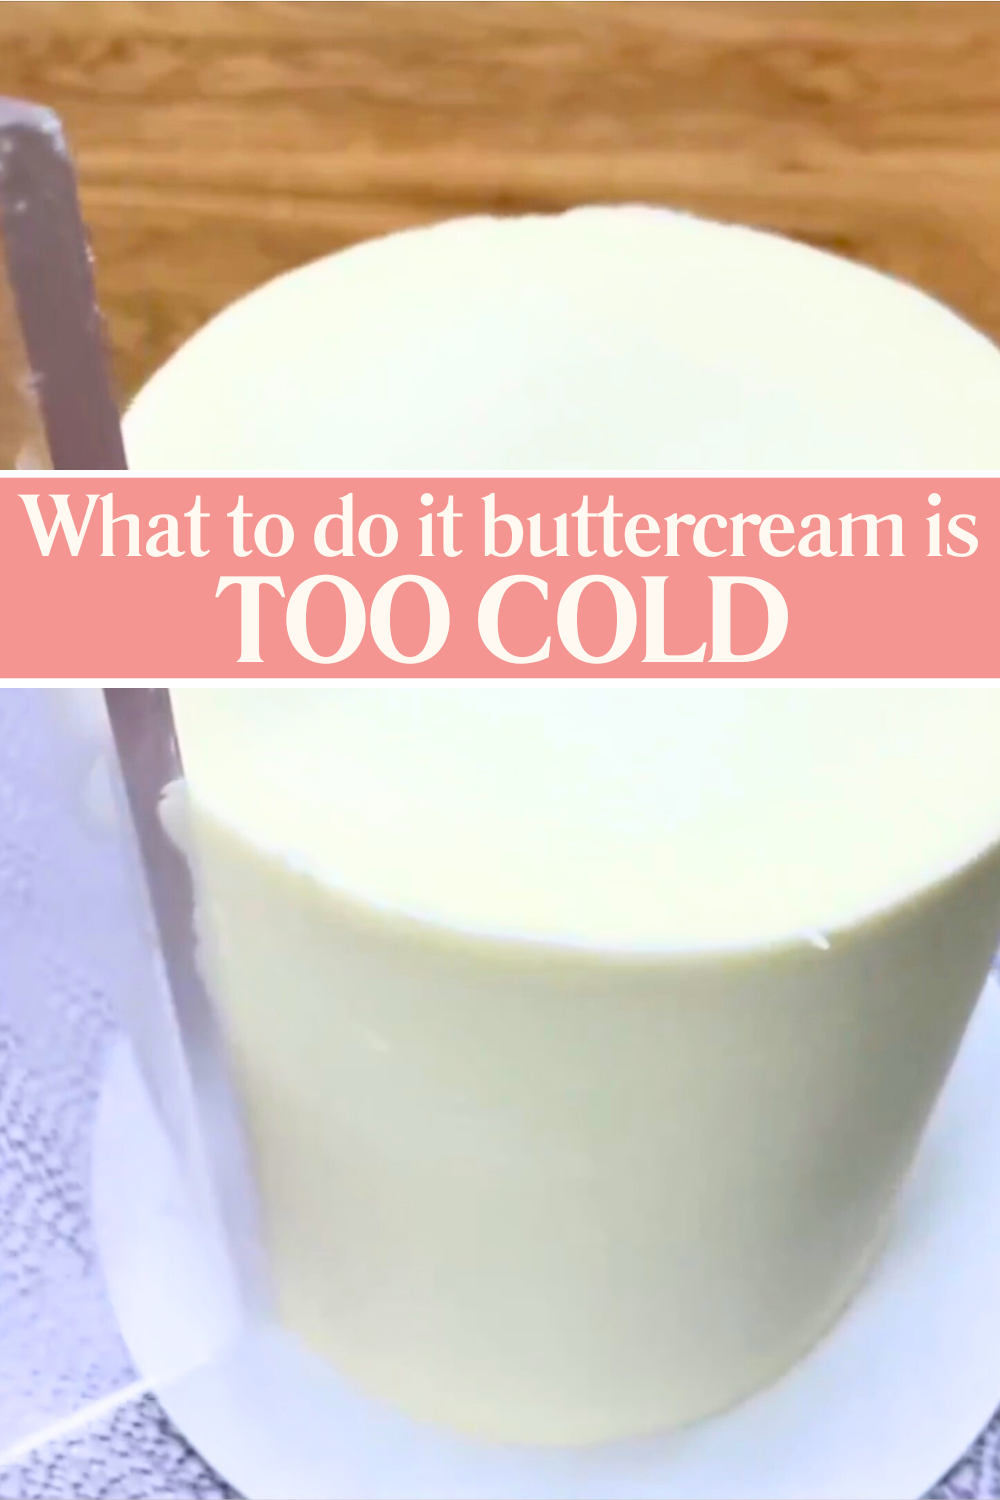
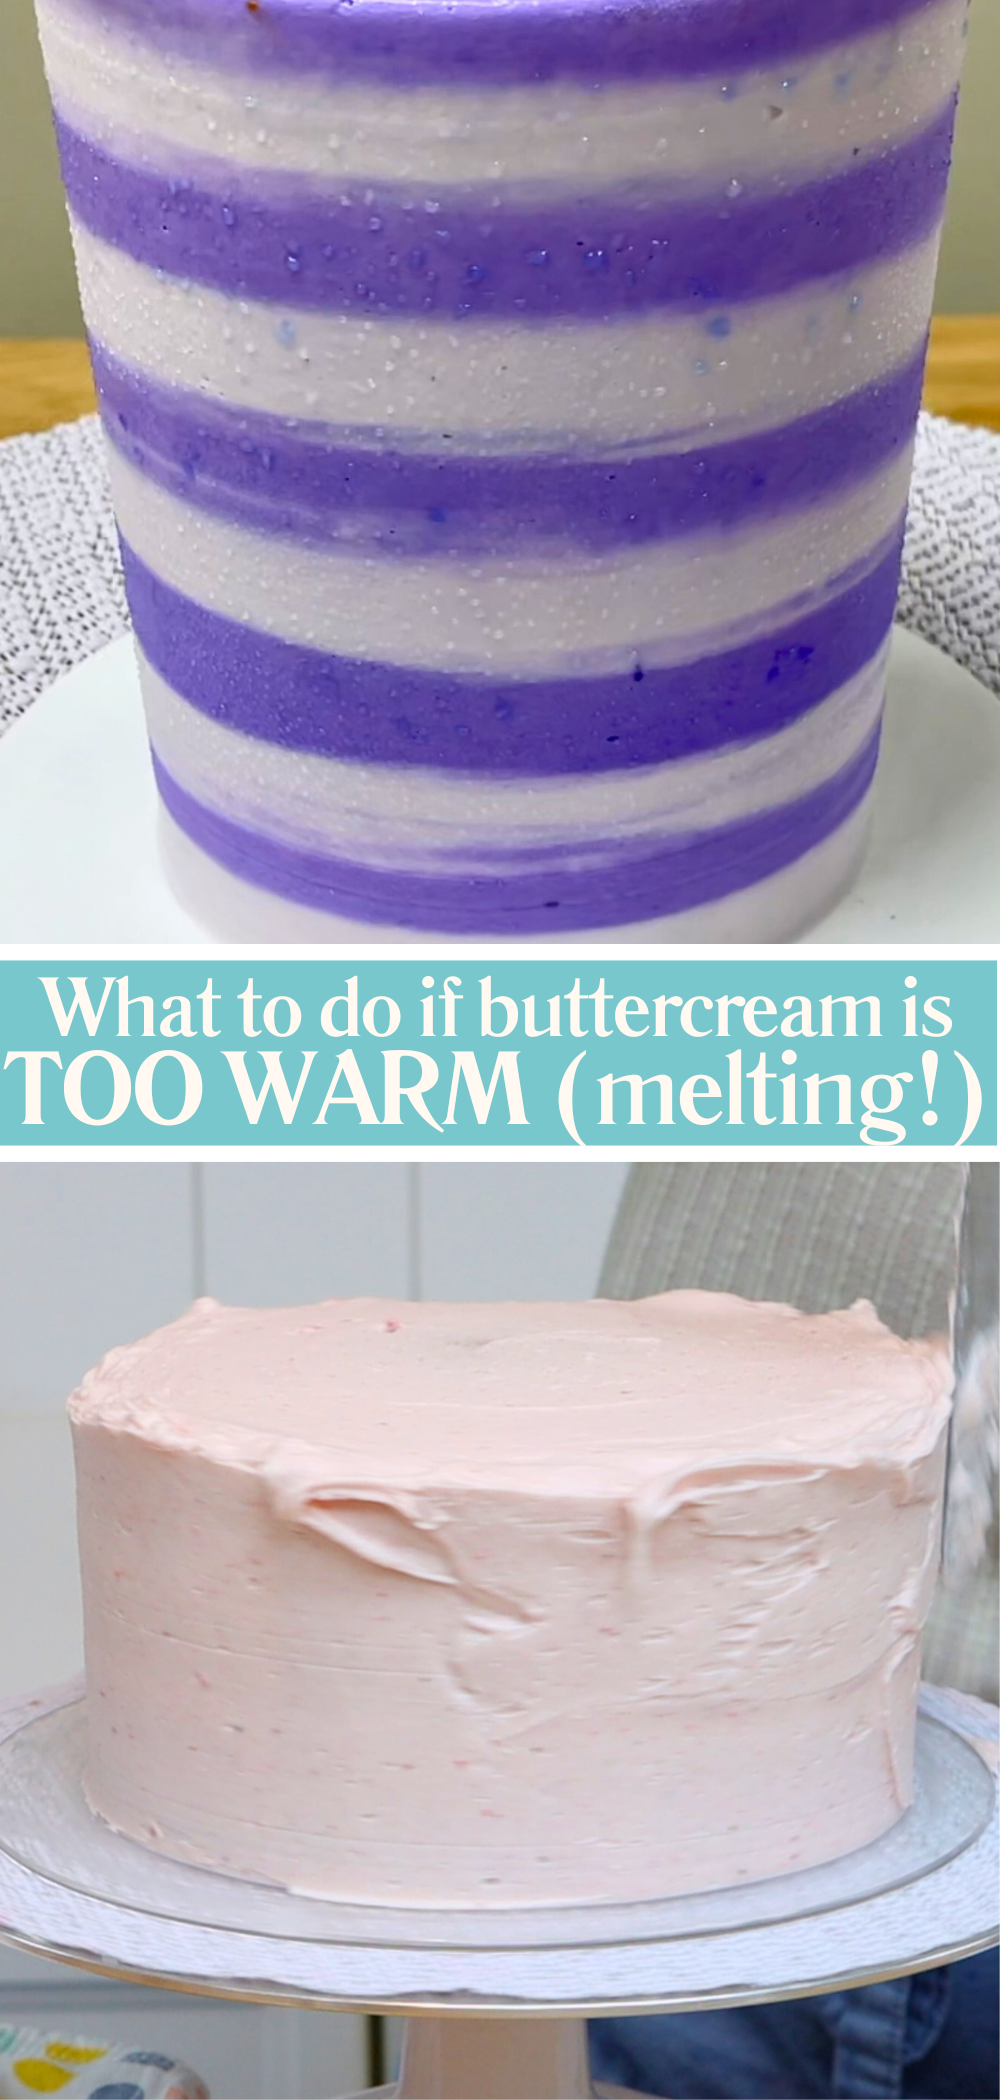
Here’s something I learned the hard way: room temperature really matters when you’re decorating cakes. When I moved to Texas I experienced freezing cold winters and 110°F summer days in an uninsulated garage studio. My buttercream couldn’t handle the extreme temperatures. In winter, the frosting was too stiff to smooth and in summer it melted off the cake.
When your buttercream doesn't behave even though you followed the recipe, it’s probably the temperature of your room. If it’s too cold, the buttercream in your bowl will feel stiff when you stir it. Your frosting smoother will leave texture behind as you scrape around the cake. It will tear the buttercream and you'll see small, shallow holes in the surface. Microwave the bowl of buttercream for 10 seconds, give it a stir, and repeat if needed.
If it’s too warm, the frosting will slide down the sides of your cake. Stick the bowl of buttercream in the freezer for a few minutes to firm it up. Getting the temperature (and therefore the buttercream consistency) right makes your decorating so much easier.
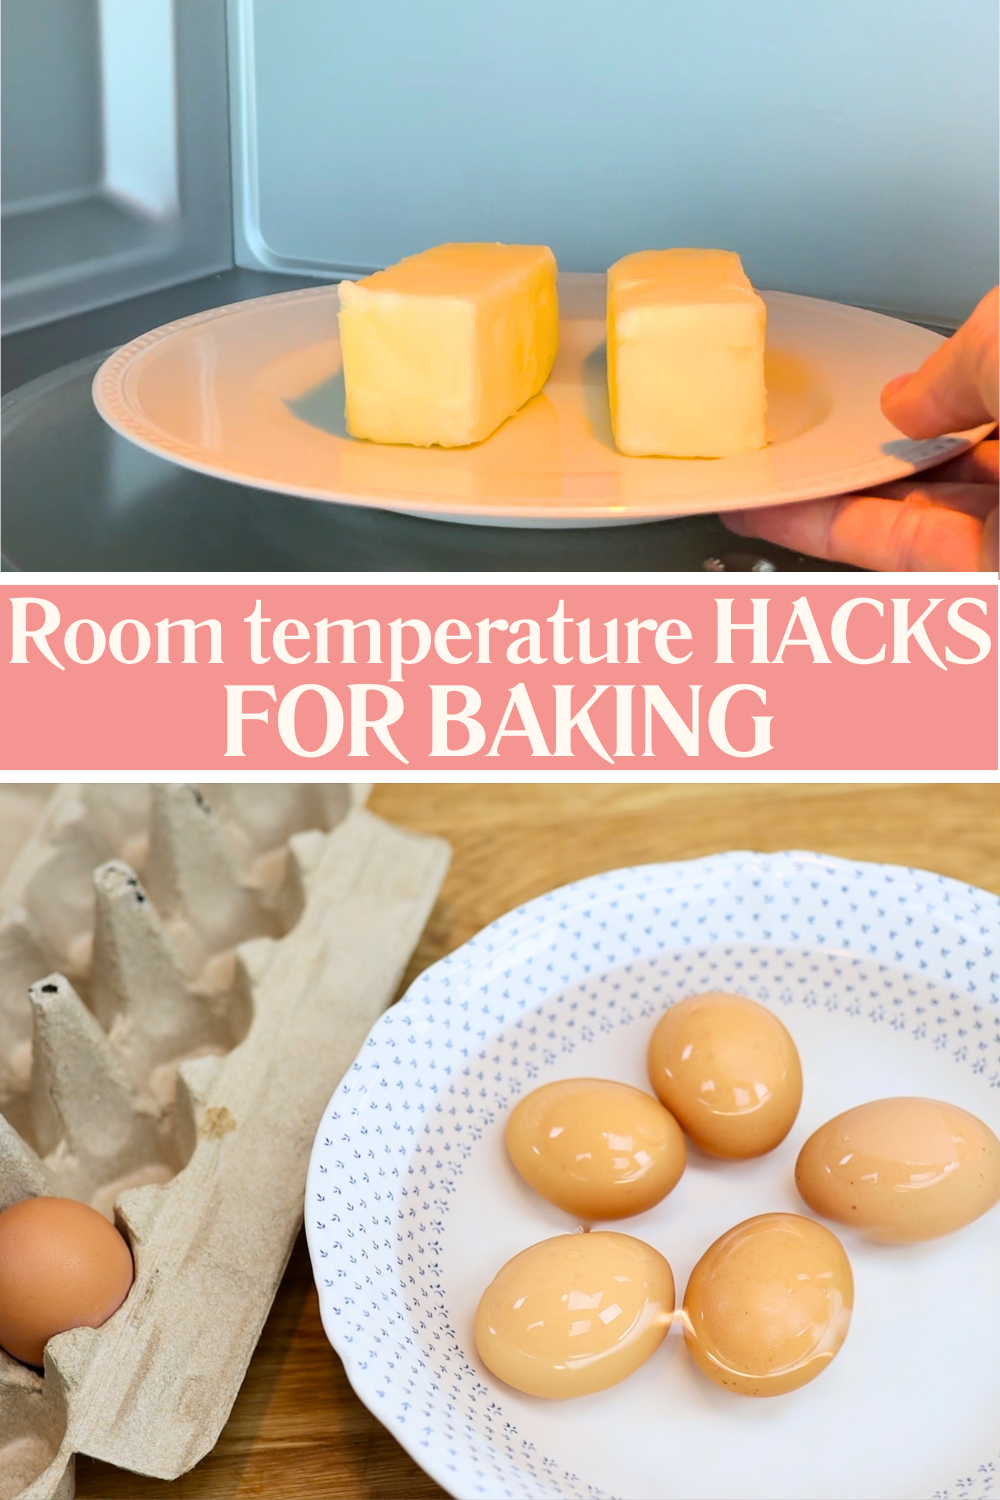
Recipes often call for room temperature butter and eggs, but that doesn’t mean you have to wait around all afternoon. Here’s how to get there quickly.
Microwave your butter for 10 seconds, flip it over, then another 10 seconds. Now your spatula should slice easily through each bar or stick of butter. For eggs, pop them in a bowl of lukewarm (not hot) water for five minutes. They’ll be ready to use and mix much more evenly into your batter. These little shortcuts will save you time and improve your baking results.
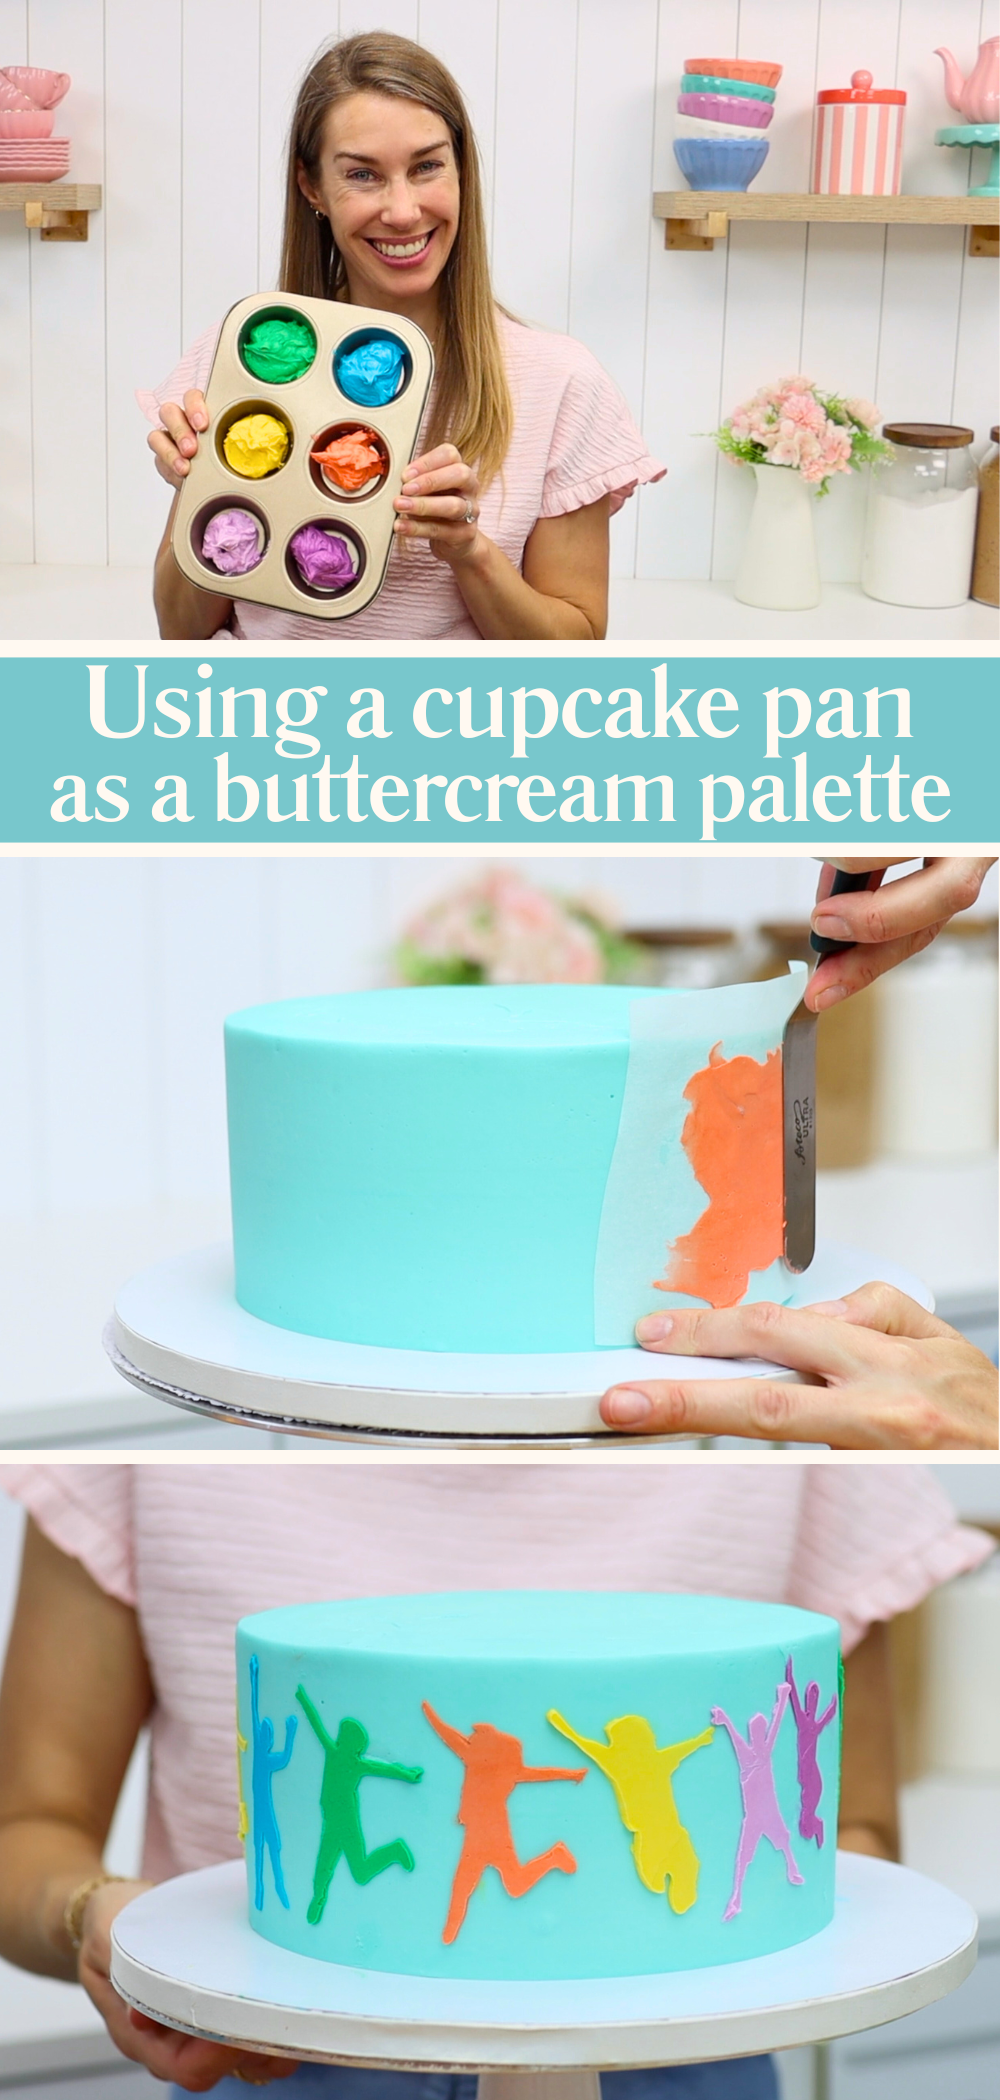
I used to think that the more cake decorating tools I had, the better my cakes would be. But you absolutely do not need a drawer full of gadgets to make beautiful cakes. In fact, you probably already own plenty of things that work just as well as “proper” tools.
For example, you can cut stencils out of parchment paper or create textured buttercream finishes with a spoon. I’ve decorated entire cakes using only everyday kitchen tools and the results looked as polished as when using professional tools. If you’re just getting started, don’t let a lack of tools hold you back. Focus on your technique instead – it matters so much more.
If you’re using several different colours of buttercream, here’s a simple trick that will save you time in the kitchen. Use a cupcake tray to mix small amounts of coloured buttercream instead of separate bowls.
Now all your colours are in one place, they're quicker to use, and you only have one tray to clean at the end. When you’re working on more complex cake designs, little time-savers like this make a big difference.
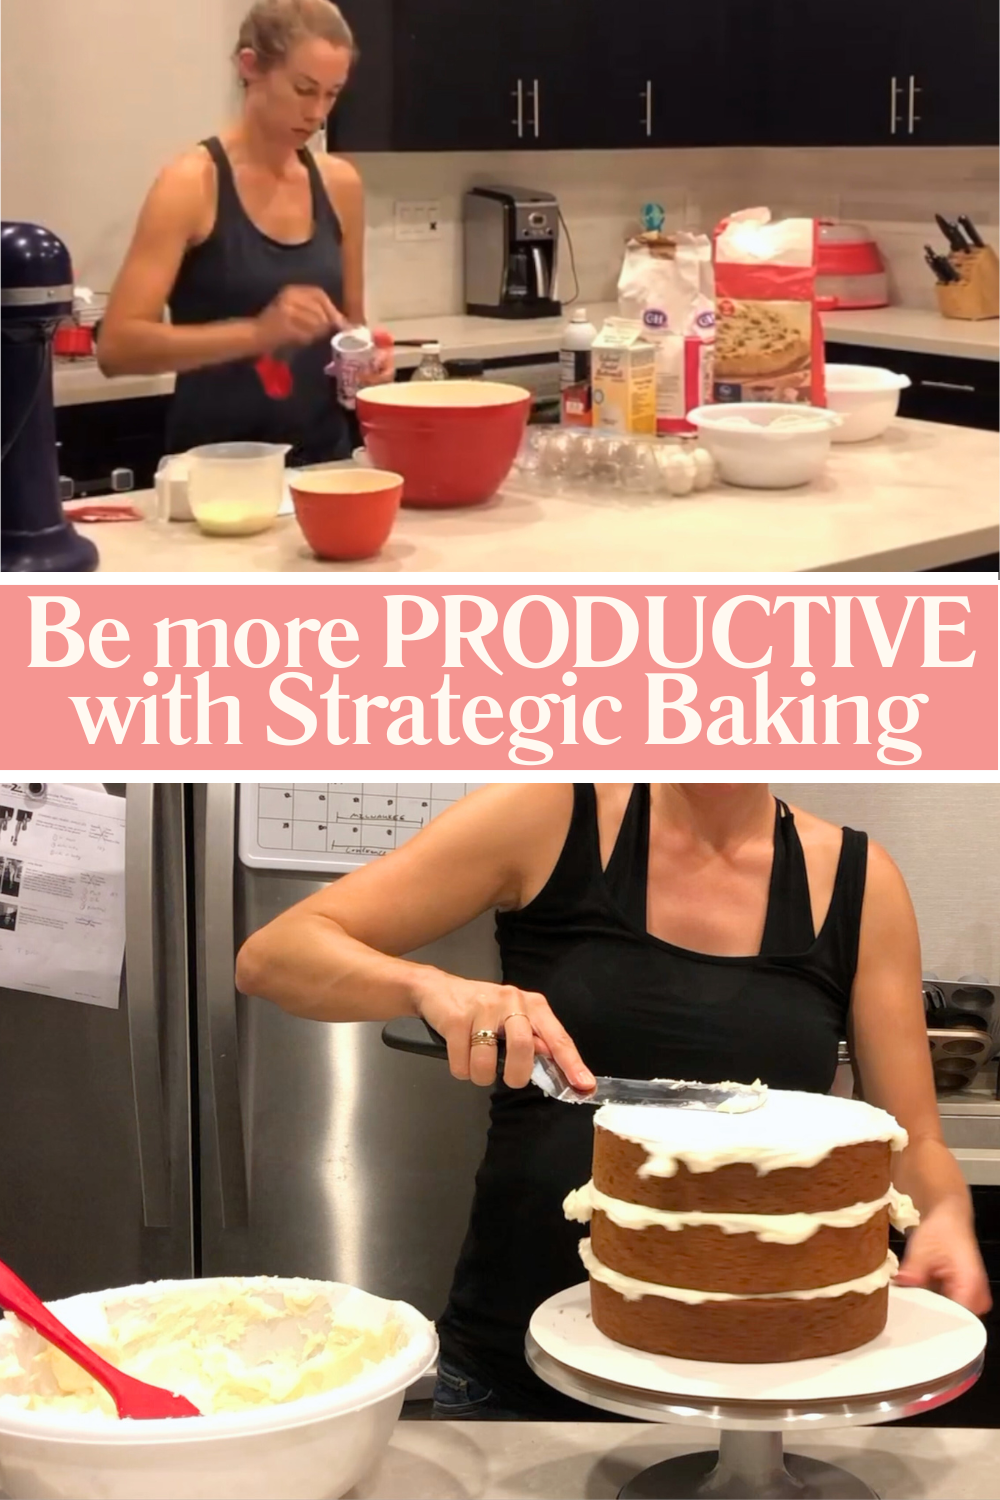
When you’re new to cake decorating it’s tempting to try and do everything in one day. But one of the most helpful beginner cake decorating tips is to break your cake process into stages.
You can:
This works especially well if you have a busy schedule or little ones at home. It’s much more manageable and you won't waste time waiting in between stages. You’ll end up spending less total time on the cake without feeling rushed.
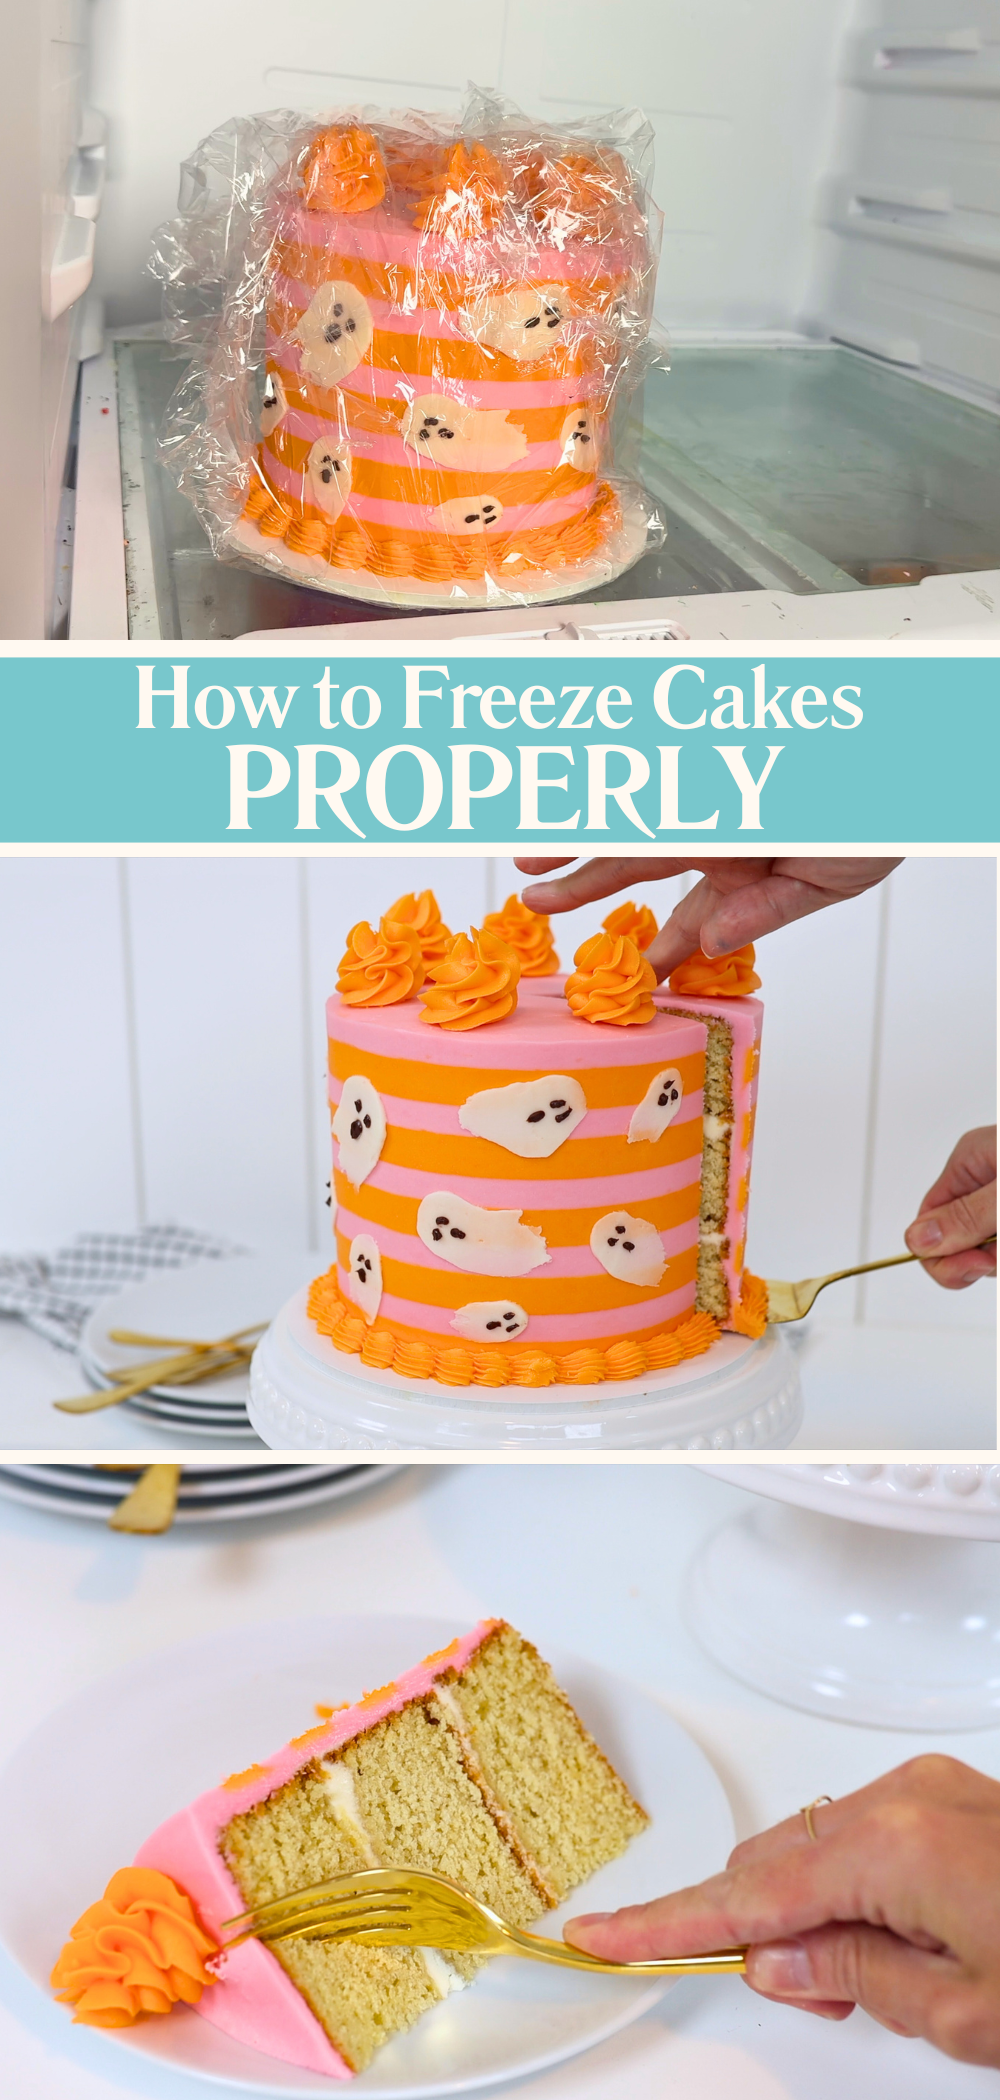
This tip blew my mind the first time I tried it: you can freeze fully decorated cakes. Once your cake is finished, put it in the freezer unwrapped for 30 minutes. This firms up the frosting and decorations. Then wrap it in two layers of plastic wrap and freeze for up to two months.
To thaw, move the cake to the fridge the day before serving. On the day, take it out of the fridge two hours before you serve it and unwrap it straight away so the wrap doesn't damage your decorations. This will save you if events are rescheduled after you've already made the cake! It's also useful if you have scheduling conflicts and can't make the cake in the days just before an event. It’s an absolute game-changer.
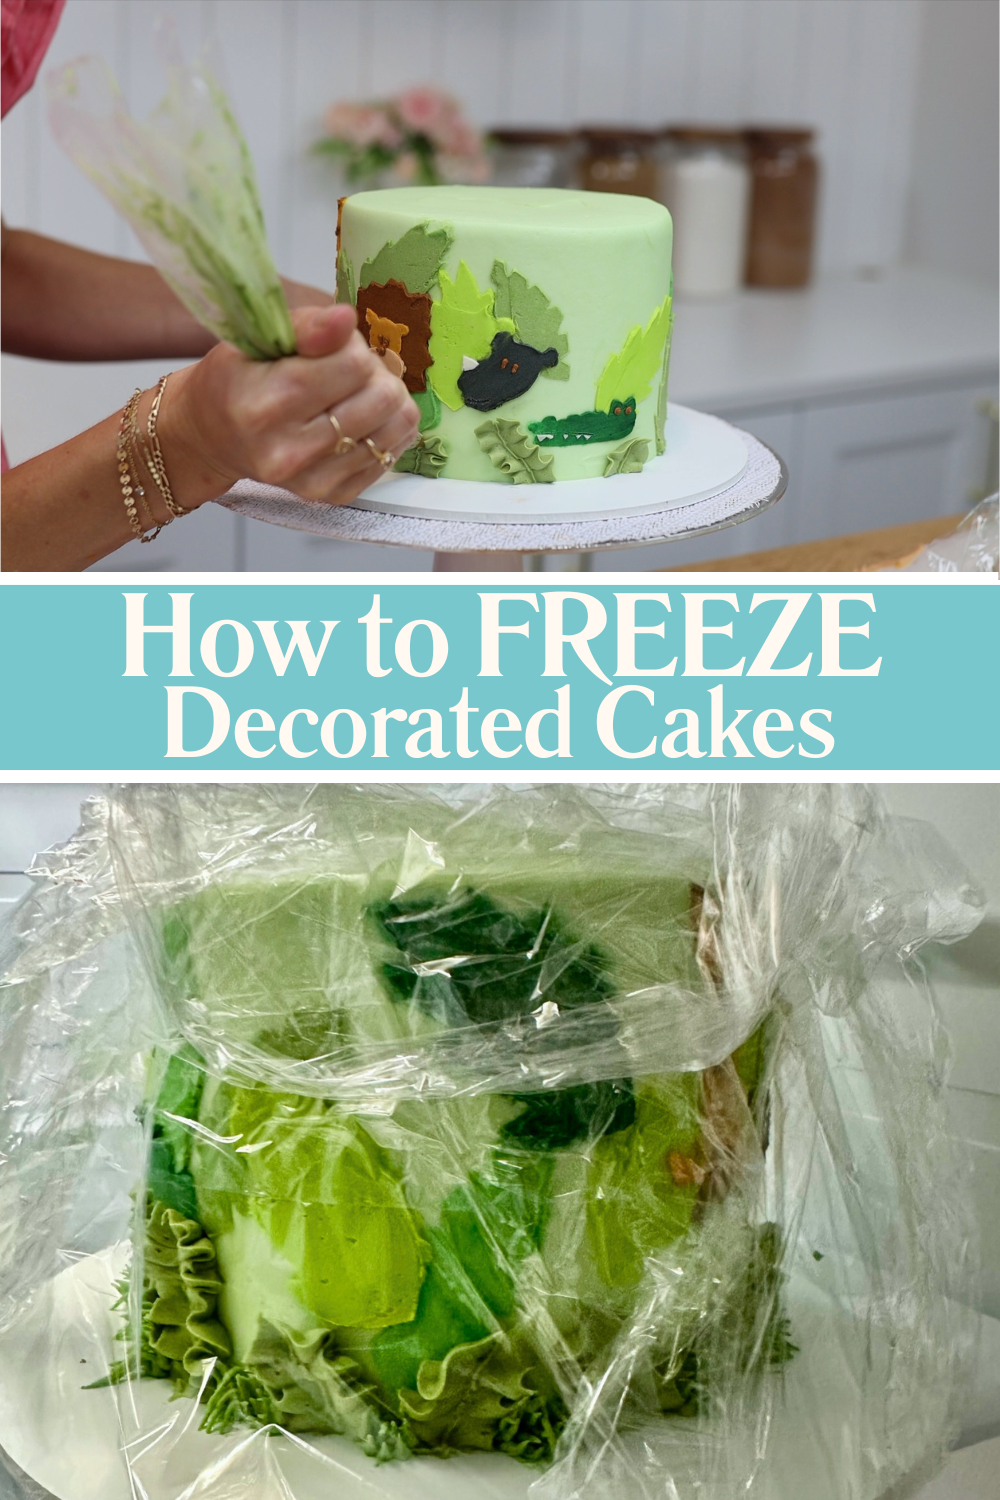
And don’t worry – I’ve done blind taste tests and couldn’t tell the difference between a freshly baked cake and one that had been frozen for a week. As long as it’s stored and thawed properly, freezing doesn’t affect the taste.
If you’re selling cakes, this one’s important. Custom decorations take time, materials, and creative energy. If you don’t charge for them, you’re doing extra work for free. Whether it’s hand-piped flowers or fondant figures, make sure your pricing reflects the extras.
This might not feel like a decorating tip, but it’s part of valuing your work. My full tutorial on how to price cakes breaks this down so you can make a profit.
Here’s another common mistake: forgetting to include delivery in your pricing. It’s not just the drive – it’s the time spent planning, coordinating, getting the cake to the venue safely, and then getting yourself back home again. There’s also petrol or gas, wear and tear on your car, and the stress of transporting a cake.
It’s completely fair – and necessary – to charge for this. If you’re taking cake decorating beyond a hobby, make sure you treat it like a business.
There’s a lot to learn when you’re starting out, but hopefully these tips help you avoid some of the common cake decorating mistakes that I had to figure out the hard way.
If any of these tips were helpful, I’d love to hear from you. Leave a comment to let me know which one you’re going to try first, or share your own favourite tip for beginners. And if you want to keep learning, visit my cake school to learn hundreds of cake decorating techniques and designs.
You can also watch a video of this tutorial on cake decorating for beginners:
After 13 years of cake decorating, I can confidently say that temperature can make or break your buttercream. You're probably reading this because you're wondering how to stop buttercream melting in hot weather. If your decorations have drooped, colours have run, or your cake has started to slide off the board, it’s almost always down to temperature, not your technique.
In this post I’m sharing my top buttercream melting tips so you can decorate beautiful cakes even on hot days, without the drama of melting buttercream.
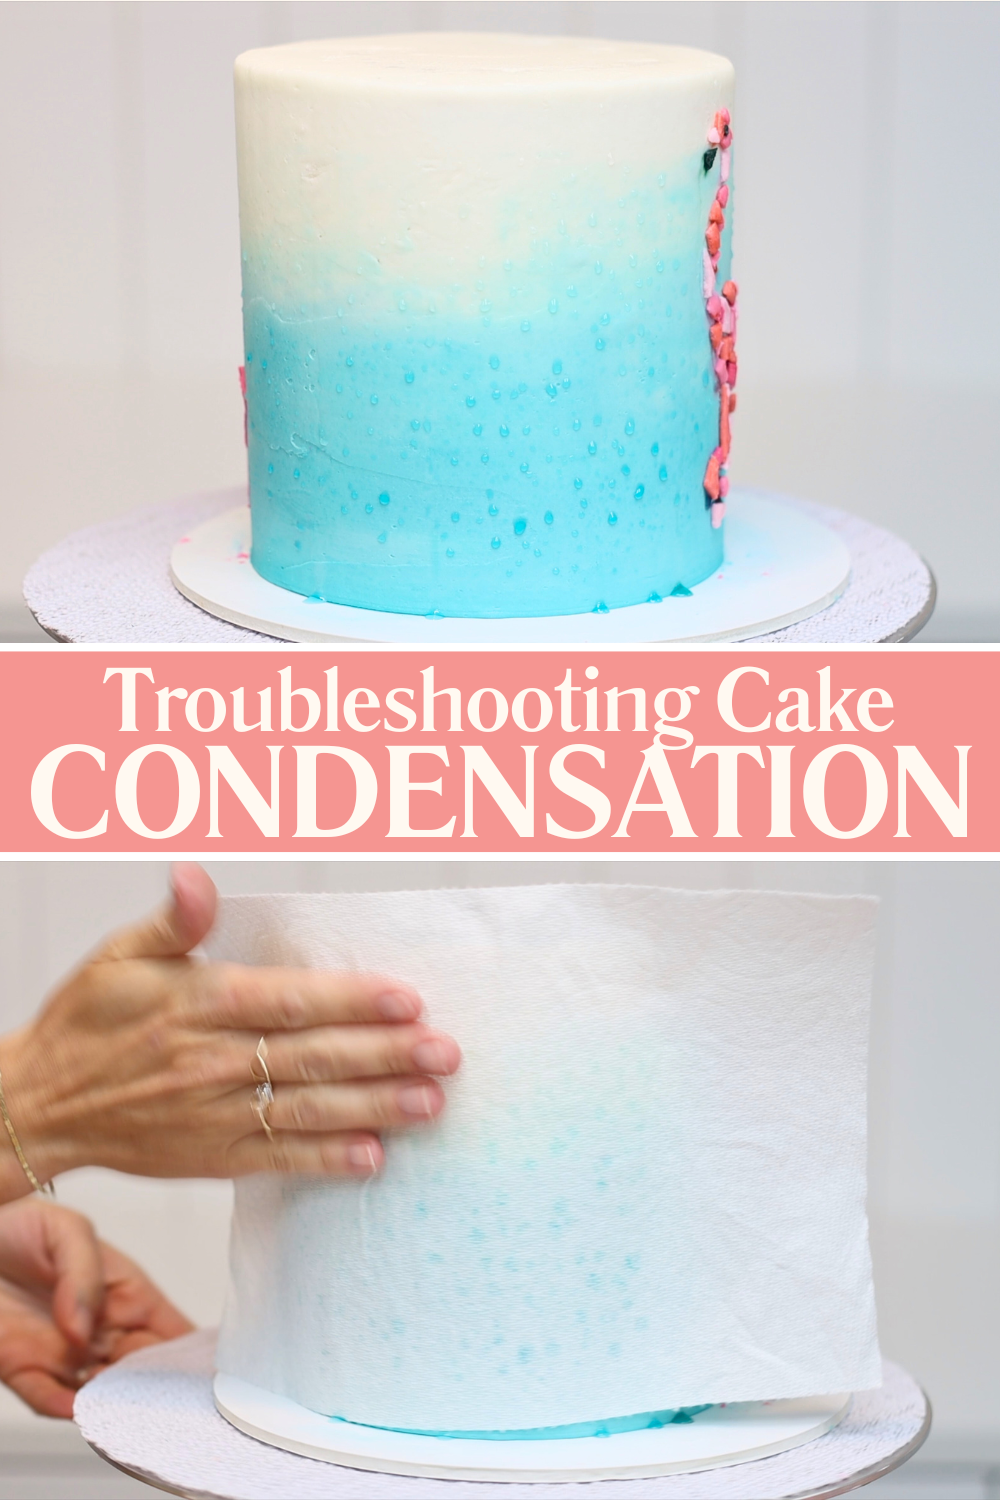
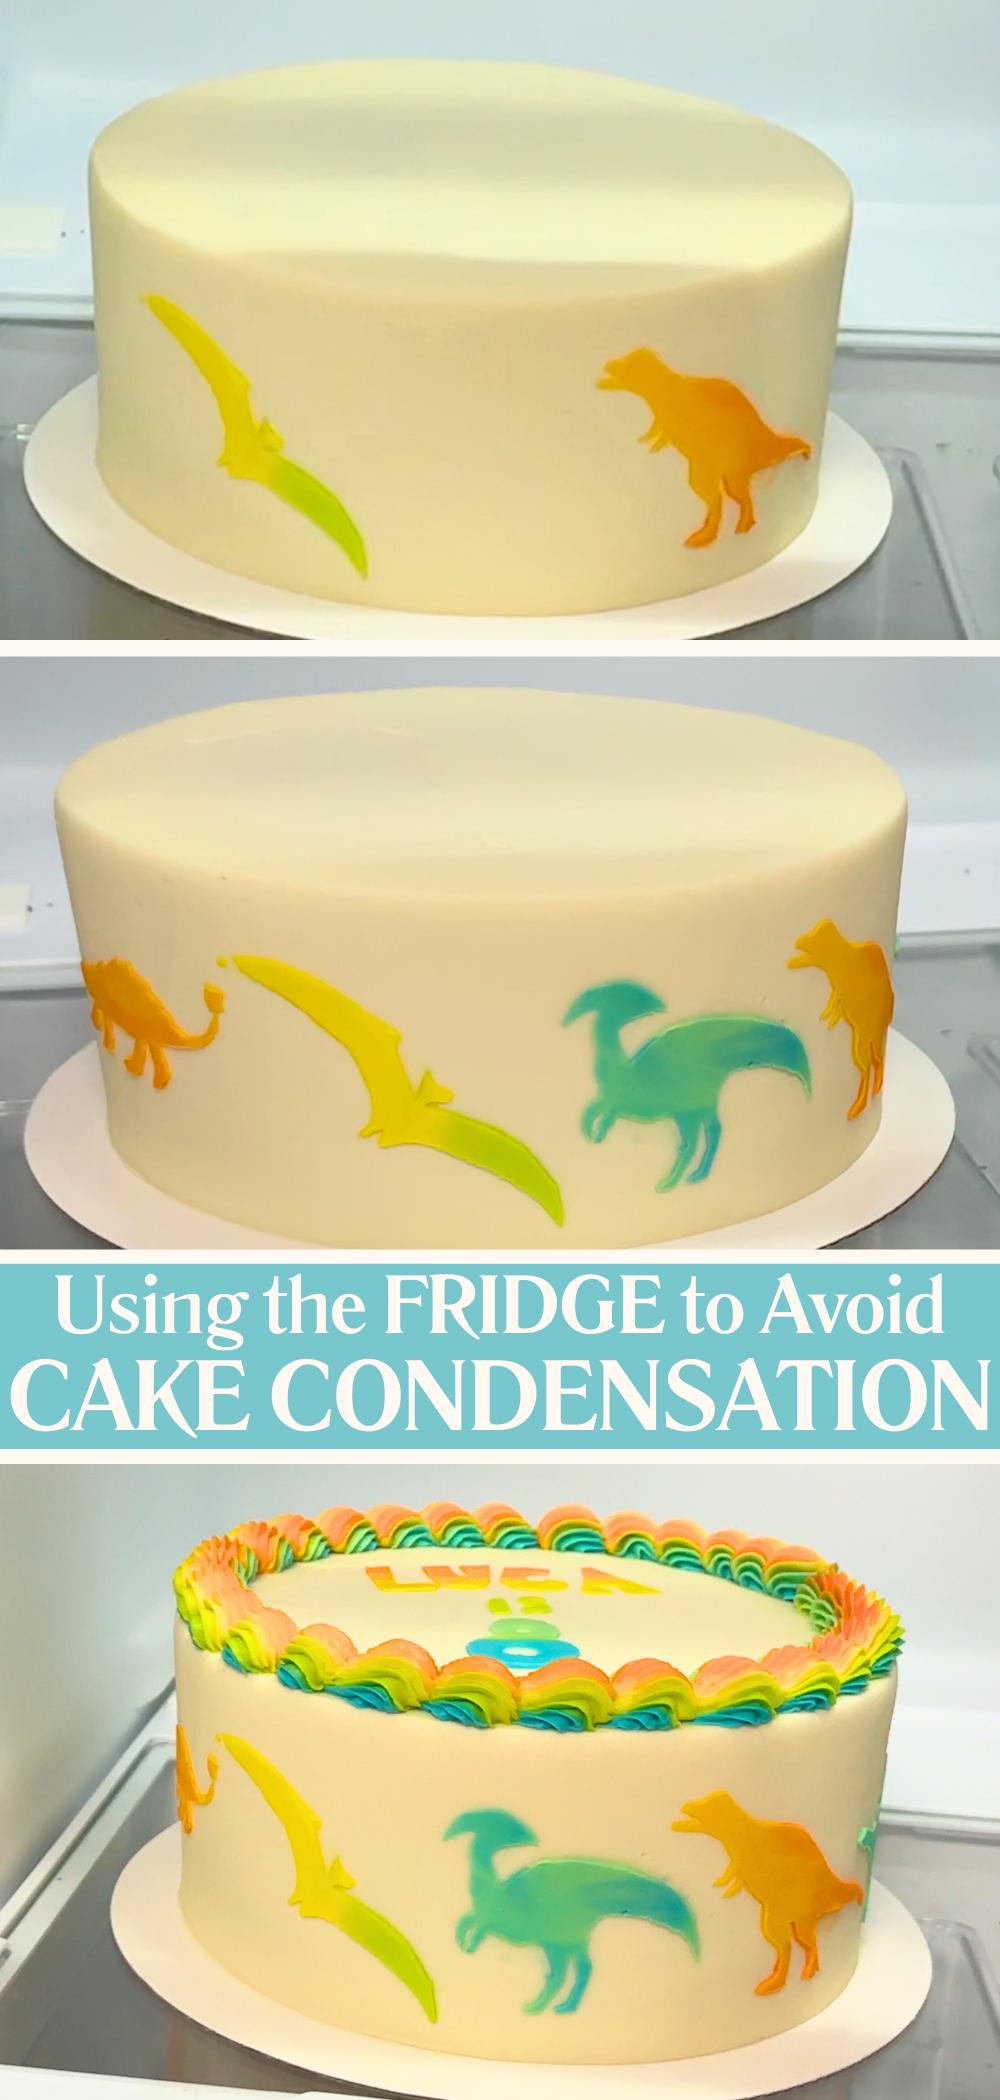
If your cake goes from the fridge into a warm room, you’ll likely see tiny droplets of condensation appear on the surface of your buttercream. This is often called “cake sweat” and it’s frustratingly common. It happens because the inside of your cake is still cold, while the outside warms up faster.
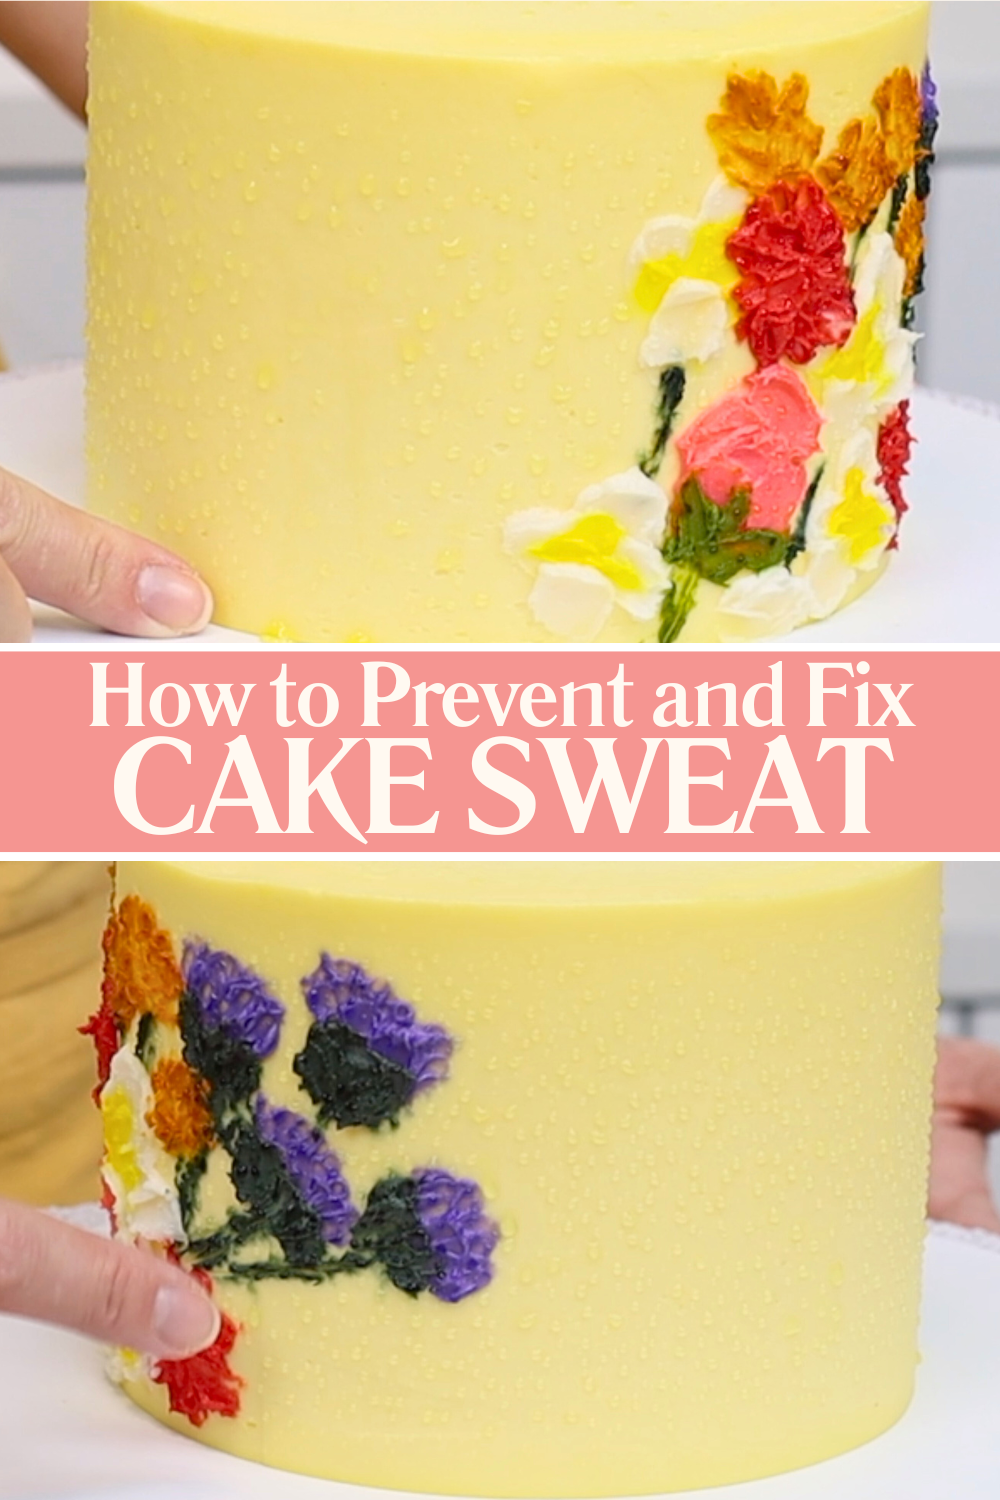
The good news? It’s easy to fix. Just dab the droplets gently with a paper towel and the condensation will stop as the inside temperature of the cake catches up with the outside.
If you want to avoid this altogether, try these steps:
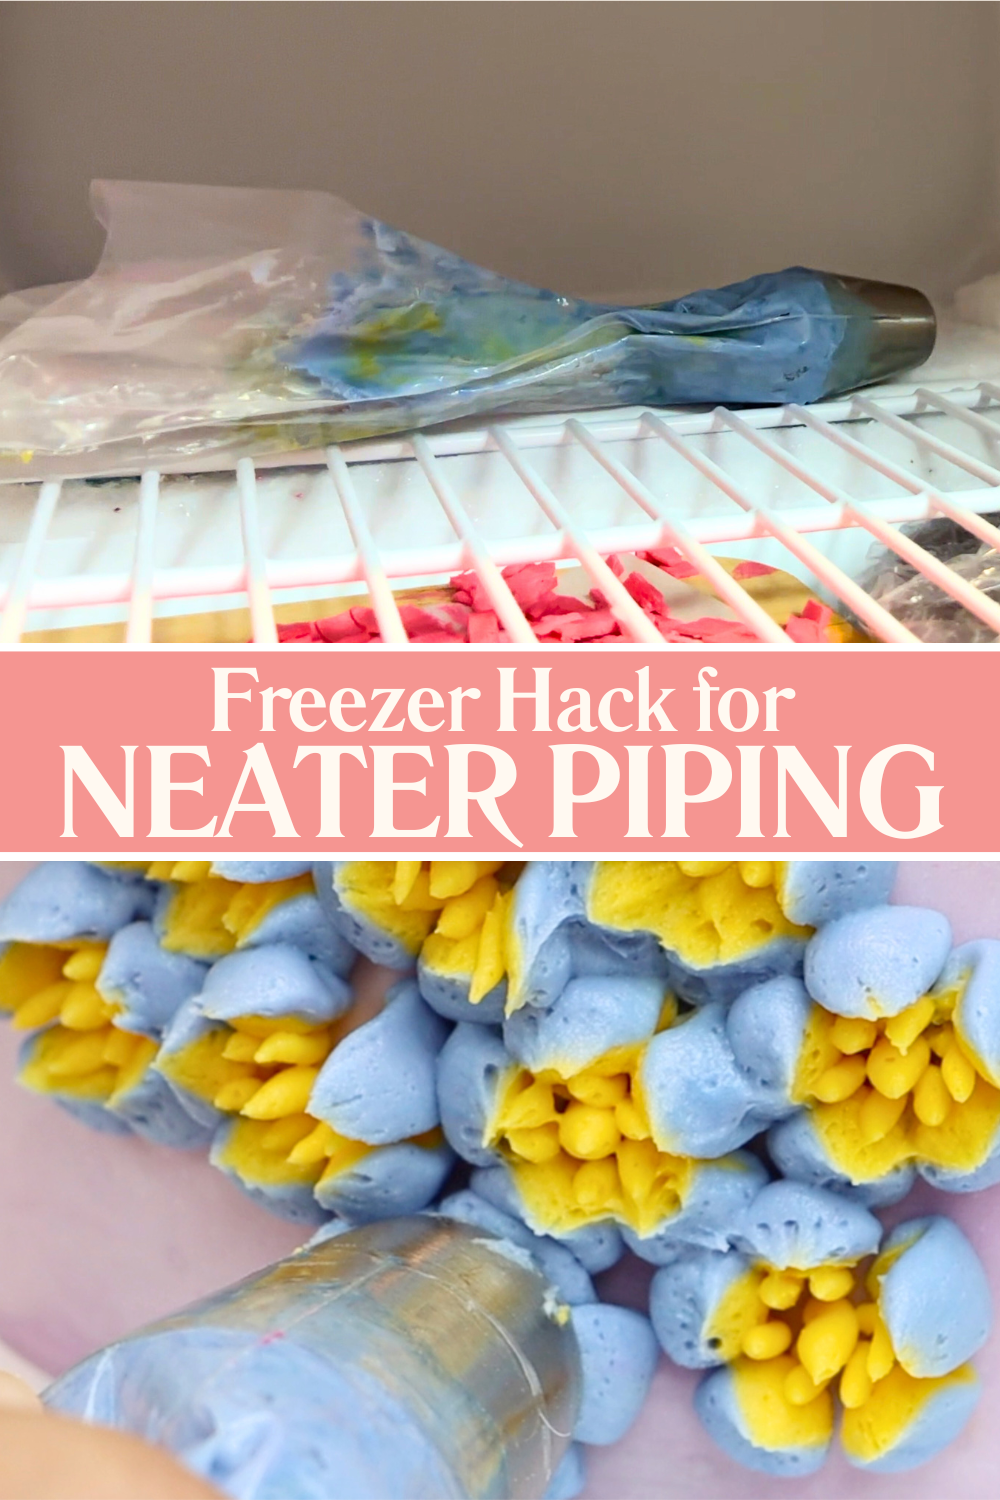
Ever noticed your piping loses definition and starts to look a bit blobby? If it's not the room temperature or the temperature of your cake, it could be your hands warming the buttercream through the piping bag.
Here's a quick hack to fix it. Pop the piping bag in the freezer for just one minute and set a timer. This cools the buttercream enough to firm it up again, without freezing it solid. After a quick chill, your piping will be clean, neat and defined once more.
Even if you’ve decorated the perfect cake, all your hard work can melt away if the cake is displayed in a hot environment. This is one of the most common causes of buttercream disasters at summer events or outdoor parties. Here’s how to stop buttercream melting when it’s hot out:
Use half butter and half shortening (like Trex or Crisco). Shortening is much more stable in heat than butter, but still allows you to get smooth finishes and neat piping.
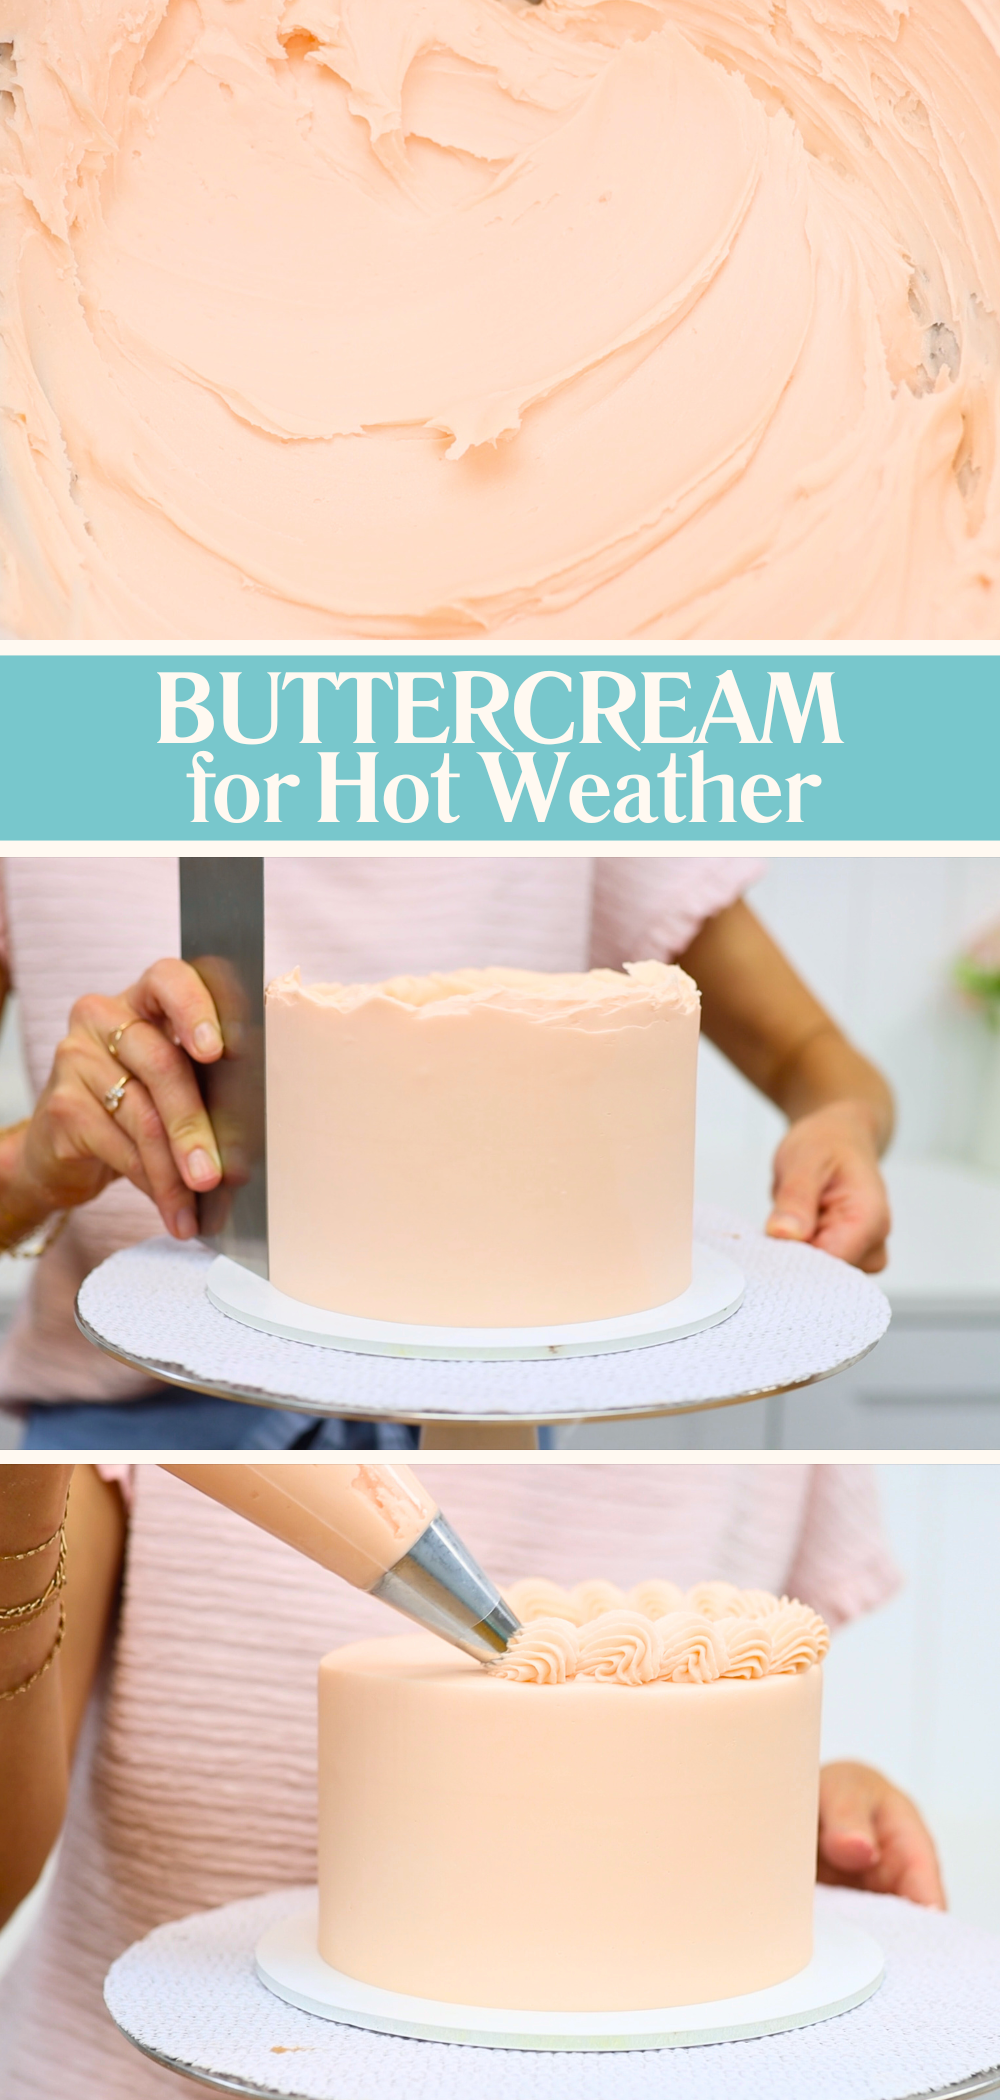
If you're familiar with the flavour of all-butter buttercream, you might notice a difference in the taste of this. To improve it, add half a teaspoon of clear vanilla extract to bring back the buttery flavour without the bite of shortening.
This half-and-half version of buttercream holds up much better in the sun. It's perfect for summer cakes or outdoor events. Look at the difference between these two cakes, sitting outside on the same day. The top cake is frosted with my 4 Minute Buttercream recipe for all-butter buttercream. The bottom cake is frosted with buttercream using the same recipe but with half of the butter replaced with shortening.
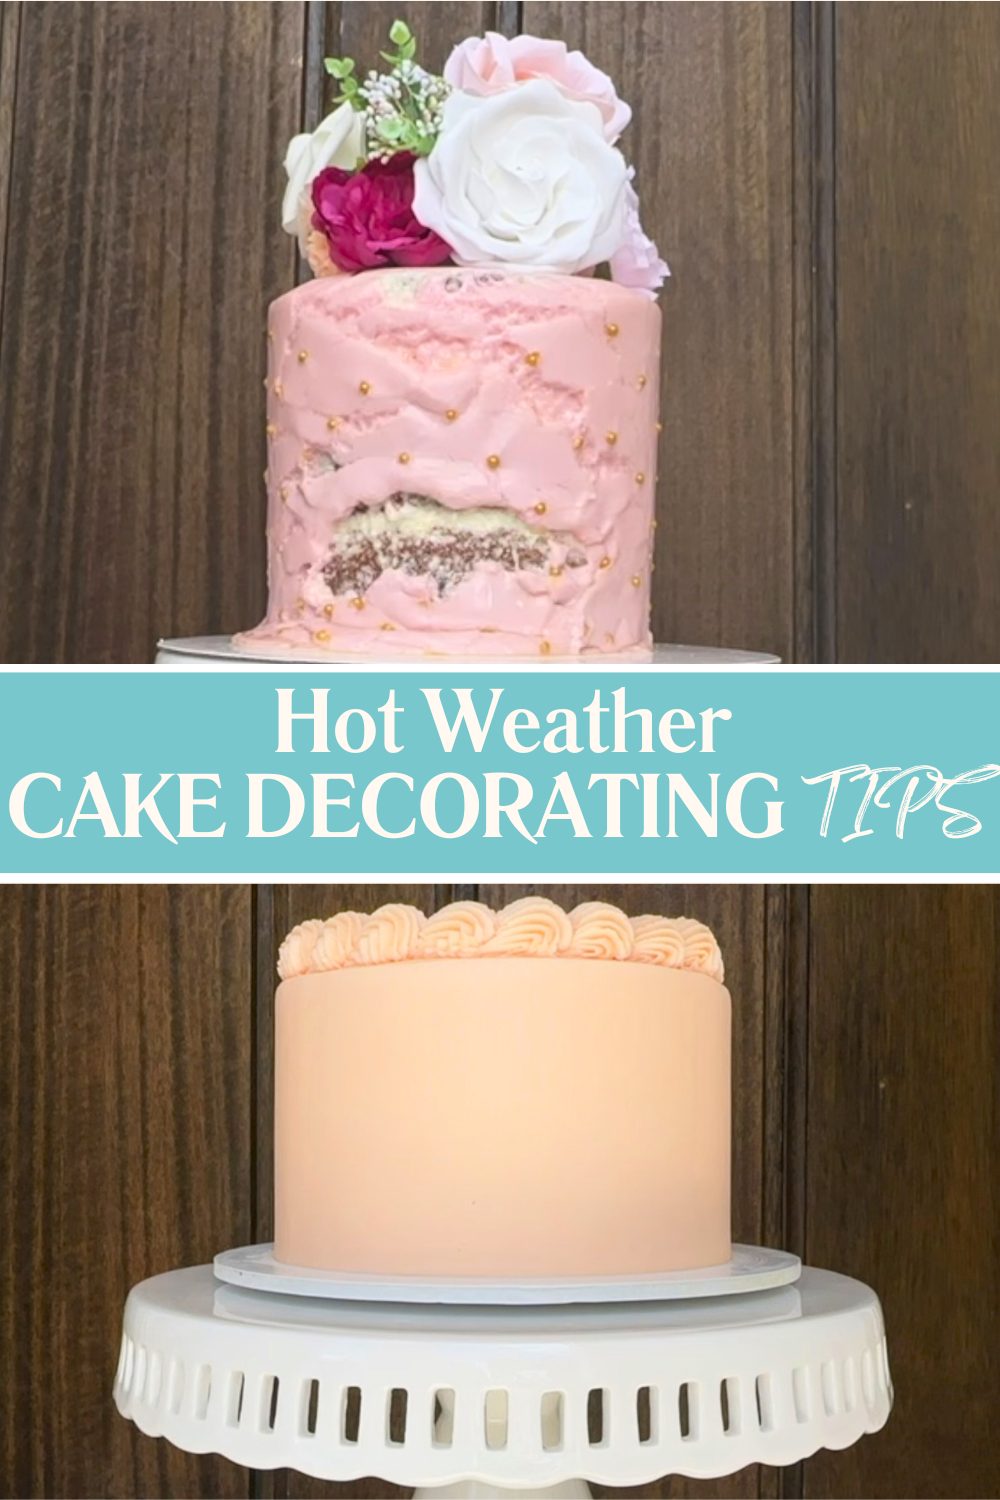
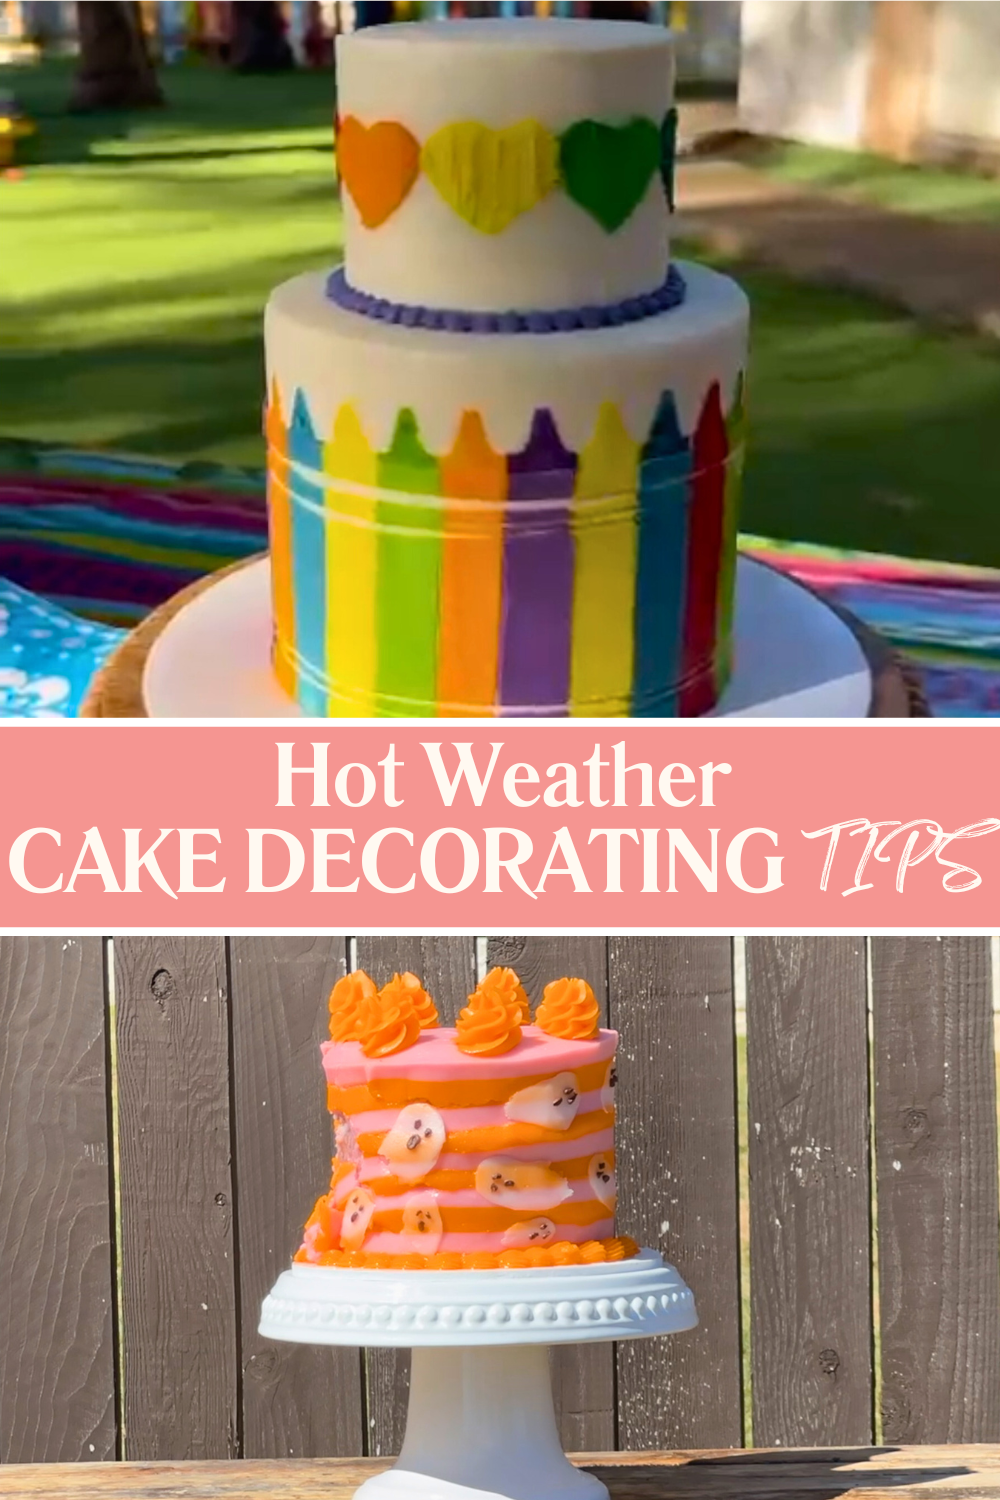
Whether you’re dealing with condensation, soft piping, or heatwave disasters, now you’ve got a toolkit of buttercream melting tips to protect your cakes. Knowing how to stop buttercream melting is all about preparation, awareness, and a few clever hacks and once you’ve got these down, warm weather won’t ruin your cakes.
Want to take your decorating skills even further? Check out my online cake school for detailed courses on hundreds of cake decorating techniques and designs.
Watch a video of this tutorial on how to stop buttercream melting: