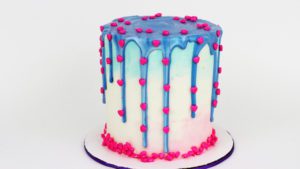
In this tutorial I’m going to show you a few ways to make and decorate with marble drips! I’ll cover how to prepare drips, how to apply marbled drips onto the sides of the cakes, and how to apply them to the top using a few different techniques so you can choose your favourite. If you prefer to watch a video of this tutorial, scroll to the bottom of the page.
PREPARE YOUR DRIP
Make a ganache by mixing heavy whipping cream (double cream in the UK) with either chocolate or candy melts. For candy melts the ratio is 4 parts of candy melts to 1 part of cream, so here I’m using 40g of candy melts and 10g of cream.

Heat this in the microwave for 1 minute at 50% power and stir until it’s smooth. If you prefer you can use white chocolate and the ratio for that is 3 parts of white chocolate to 1 part of cream. For white chocolate ganache, heat the cream first until tiny bubbles start to form around the edges and then add the chocolate and stir until it melts.
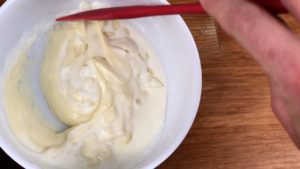
To make the white chocolate ganache really white you can add white icing colour. The one I used here is called White White Icing by Wilton.
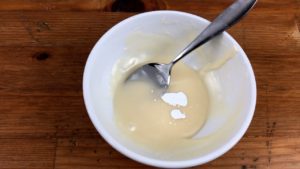
Marble the drip
with two colours of ganache
The first way to create a marble drip is to mix two colours of ganache together. You can use equal amounts of each colour or use more of the colour you want to stand out.
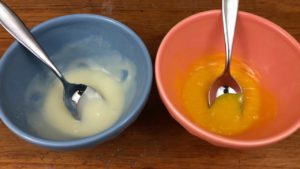
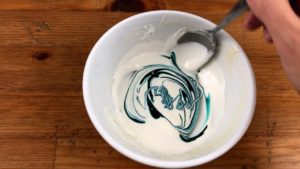
Pour one colour into the other and stir it just once to blend it slightly to make it marbled. It will marble more when you apply it to a cake later.
with ganache and gel colour
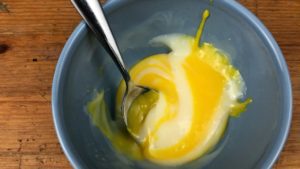
Instead of marbling two colours of ganache, you can use one color of ganache and add a few drops of gel food colour, swirling it slightly with a toothpick or a spoon. In a minute I’ll show you how different these two options of drips look on cakes.
APPLY YOUR DRIP
Frost your cake and then refrigerate it before applying the drip. The coldness helps to stop the drips as they go down the sides of the cake. Your drip needs to be the right consistency as well and I cover all of this and more in lots detail in my online course on 10 Cake Decorating Techniques.

Now I’ll show you a few ways to apply your drip, starting with the sides of the cake and then moving on to the top of the cake.
How to apply a marble drip to the sides of your cake
With a spoon
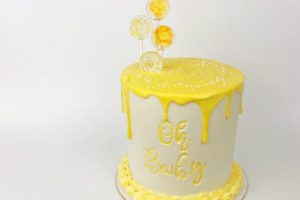
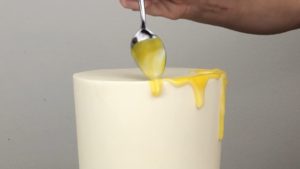
One way to apply a marbled drip is to spoon it onto your cake. This is an example of using a marble drip made with two colours of ganache (white and yellow) and you can see that the colours blend together a lot as I apply the drip.
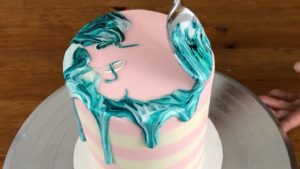
For this cake I’m using the drip I made with one colour of ganache swirled with teal gel. The marbled effect is much more dramatic because the gel colour varies in darkness depending on its concentration and the marbling lines are more defined with gel than they are with ganache.
A fun way to jazz up a marble drip is to incorporate metallics. For this next cake I’m using white and navy ganache with gold edible paint, which you can buy or you can make your own with vodka and gold luster dust.
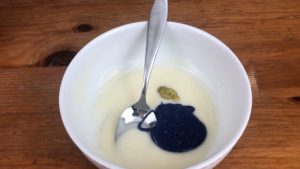
Put all of the colours in a bowl and swirl them together slightly with a toothpick or spoon. This mixes them very subtly but they’ll marble more as you apply the drip.

Scoop up spoonfuls of the marbled ganache and move your spoon slowly around the edge of the cake, pausing wherever you want there to be a drip to let more ganache spill off the spoon.

With a bottle
I normally prefer applying drips with a condiment bottle instead of a spoon because it’s quicker. However, you have more control over how much you blend the colours together when you do it with a spoon.

Using two toothpicks, I added a tiny amount of pink and blue gel to white chocolate ganache. Without mixing them together at all, I’m pouring them into a bottle and already, the colours are blending together more than I would like.
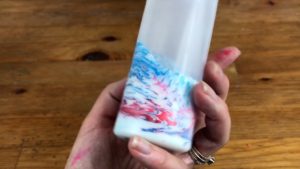
With the pouring motion and then tipping the bottle upside down, everything has blended together more than I wanted. Instead of a white drip with pink and blue marbling, the pink seems to have been swallowed by the blue.
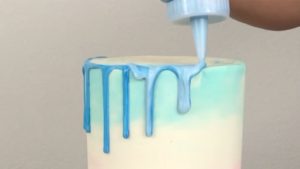
So for marbled drips I definitely recommend using a spoon instead of a bottle!
With a jug
Finally, another option to consider is to pour the marbled ganache onto your cake. Here I’m using a measuring jug with orange ganache. For pouring from a jug, the ganache needs to be a bit runnier than you might use for spooning it onto a cake,
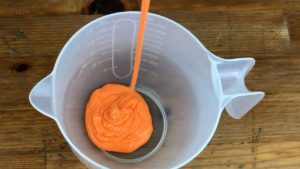
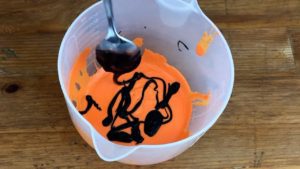
Using a spoon, drizzle a bit of your second colour of ganache over the first colour. Don’t stir it together at all because you risk over-mixing the colours and blending them together.
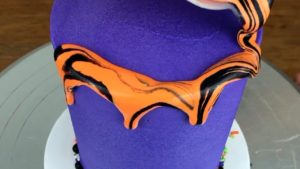
Move the jug to the edge of the cake and tilt it to pour some ganache out onto the edge of the cake, letting it spill over the side to make a drip.

Move the jug around the top edge of the cake to continue making drips. The colours will marble together a bit less than if you spoon the ganache onto the cake. You’ll have less control over the drips than you would if you used a spoon, but the marbling looks great!
How to apply a marble drip to the top of your cake
With a spoon
Here, I scooped up ganache with a spoon and then wiggled the spoon randomly above the cake to drizzle the colour to help with marbling.

But spreading it around blends the colours together so it reduces the marbled effect. (Of course, if you’re going to put something on top of the cake, like a chocolate sail, it doesn’t matter if the marbling isn’t obvious.)
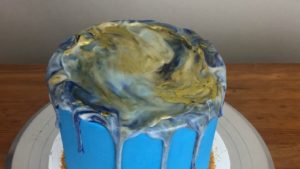
To make the marbling more obvious, after drizzling and spreading all of your colours of ganache you can drizzle one of the colours on again with a spoon.
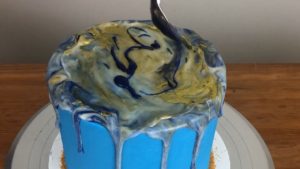
Spread it lightly over the top of the existing marbling to blend it slightly and this will accentuate that colour within the marble drip.

By drizzling and then spreading the colours of ganache, the effect is more marbled than mixing the colours in the bowl first and then pouring and spreading them onto the cake. However, it’s still not as marbled as the drips on the sides of the cake.
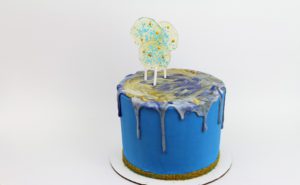
With a jug
To make the top even more marbled you can pour the lightly marbled ganache onto the top of the cake, spiraling your jug to cover the entire surface. The marbling is preserved instead of being blended by spreading with a spatula.
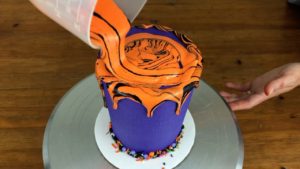
If you want to create more veining you can use a toothpick to blend the colours a bit more after pouring them. Swirl it randomly through the ganache on top of the cake, not pushing down deep enough to go through the ganache and into the frosting.
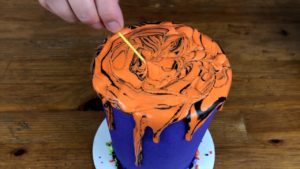
In summary, for the most effective marble drips I recommend:
1. Using a base colour of ganache and swirling it with gel colours instead of marbling two colours of ganache
2. Applying the drip to the sides of the cake with a spoon
3. Pouring the rest of the ganache with a jug onto the top of the cake.
I hope this tutorial was helpful! When you try out a marble drip please comment below to tell me which method you like best and if you share any photos of it on instagram, please tag me @britishgirlbakes so I can see it!

Here’s the video version of this tutorial:
In this tutorial I’m going to show you how to make chocolate sails 5 different ways to decorate your cakes, including baskets and shards. I’ll start with the basics of using semisweet chocolate, white chocolate and candy melts to make baskets and sails and then show you some fun variations like rainbow marbled sails with sprinkle rims, and textured sails. If you prefer to watch a video of this tutorial, scroll to the bottom of the page.
To make all of these you’ll need parchment paper or wax paper. For this first example I’m going to use Wilton candy melts but chocolate works in the same way.
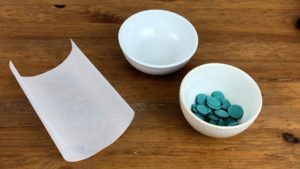
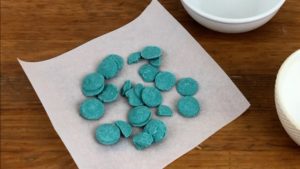
To choose the amount I dump a pile on the parchment, spreading them around to more or less cover the area I want to turn into a decoration.
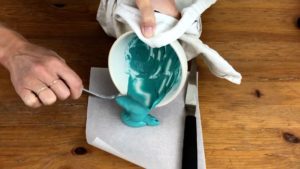
I heat candy melts at 50% power in the microwave for 1 minute at a time so that they don’t burn or seize. Stir them until they’re smooth and then pour them onto the parchment.
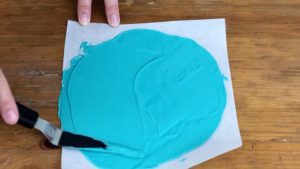
Spread them around with an
Next, choose what shape you want to use to mold the sail as it dries. I’m going to turn this into a basket-shaped decoration by placing the parchment paper inside a bowl so that the sides curve up. It’s important to do this immediately after spreading it, so that it hasn’t started to set and it won’t crack when you move it around.
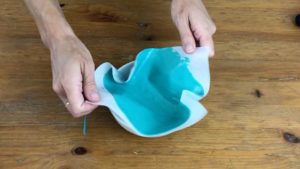
Make sure that different sides of the decoration don’t touch each other, unless you want them to stick together, because if you pull them apart you’ll damage the smoothness of the surface.

You can let the sail dry upside down instead, by draping it over a glass or bottle or other tall object, like this bottle. You can leave this to set at room temperature for about an hour, depending on the temperature and humidity, or you can put it in the fridge for 30 minutes.

Then lift the parchment out of the bowl and gently peel it back from the decoration.
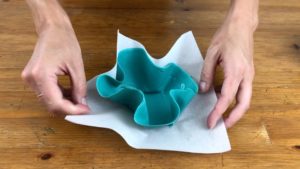
If there are any little lines of chocolate or candy melts sticking up above the edge of the decoration you can break them off with your fingers or you can dip a sharp knife in hot water and carefully glide the knife along the edge to smooth it out.

The way you attach the decoration to a cake depends on the surface of the cake. For this one, I’ve covered the cake in a ganache marble drip which is still sticky so I can press my decoration gently on top of it to secure it. I’ll show you a few different methods with other cakes later in this tutorial.

To use chocolate instead of candy melts you’ll also need parchment paper. Add texture to your sail by scrunching the parchment up and then opening it, or to give it movement by folding the parchment into a fan shape by creasing it in accordion style folds. At this point, the folds or creases are just guidelines for later, so it’s fine if the parchment flattens itself after you’ve creased it.
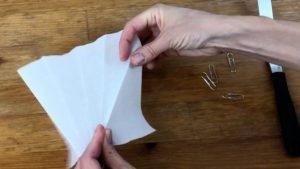
Melt the chocolate in the microwave for 1 minute at a time at 60% power so that you don’t make the chocolate seize. Now spread the melted chocolate onto the parchment paper, trying to keep the thickness the same all over and gliding your spatula from side to side, swiping it off at a angle inside of lifting it straight up so that the chocolate is nice and smooth.
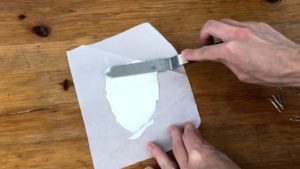
Next, use the folds or creases you made earlier to re-shape the parchment. It’s much easier to do this if you’ve already creased the parchment before spreading on the chocolate, since you can’t touch much of the parchment now that it’s covered with sticky melted chocolate.

Use paper clips to pin the parchment folds in place. Let the chocolate set at room temperature or in the fridge and then pull off the paper clips and peel the parchment paper away from the chocolate.

Chocolate is much more fragile and soft than candy melts so it breaks easily, especially if you’ve spread it quite thinly, so it’s a good idea to spread chocolate thicker than you think you should. If your sail breaks you can melt the chocolate again and make another sail.
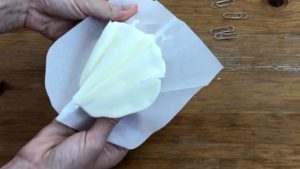
Semi-sweet chocolate works exactly the same way. Melt the chocolate at 60% power and spread it onto parchment and the shape it. Use a bowl to make a basket or a folded piece of parchment to make a fan, using paperclips to hold the parchment in its shape.

Now let it set. I always do this in the fridge because it’s quicker than at room temperature and I’m impatient to see how the decoration turns out! Then pull off the paper clips and peel off the parchment.
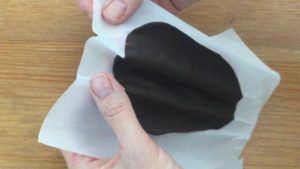
If it’s difficult to peel it off, the chocolate probably hasn’t completely set, so put it back in the fridge for a bit longer and try again.

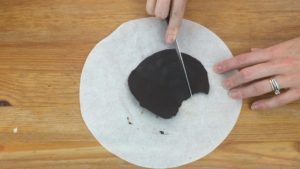
This sail that I put inside a bowl to set broke as I peeled it from the parchment so I’m trimming the sides and using just the middle part. Instead, you could cut it up into smaller sails to place in a cluster on a cake.
The ganache frosting on this cake has set so it’s not sticky like the drip on the previous cake. To attach the sails I’m piping some ganache swirls on top of the cake to act as glue. I’m using an 8B piping tip, which is an open star, but any star shaped tip will work well for swirls.
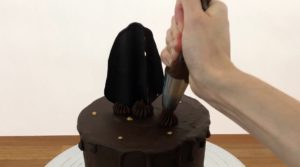
Straight after piping the swirls, which they’re still sticky, I’m pressing the chocolate sails into them. I’ll put the cake back into the fridge to set the swirls so that the sails are secured into them.
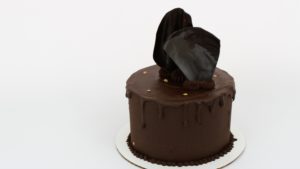
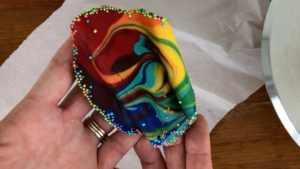
Now for some fun variations, starting with a marbled rainbow sail. I’m using Candy Melts for this but you could use white chocolate instead, melting it and then adding gel colours in small quantities because they’re very concentrate so you don’t need much.

Stir the melted candy melts or chocolate until they’re smooth, or if you’re using very small quantities like I am you can use a spoon to press down on the melted candy melts instead of stirring them.
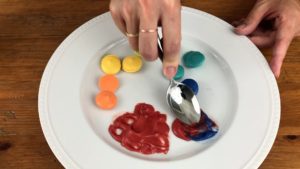
Spoon each colour onto a piece of parchment paper to make whatever shape you like. The chocolate or candy melt shape will be thick and bumpy at this point.
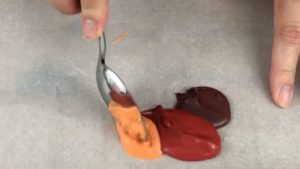
Lift the sides of the parchment and jiggle it around to make the candy melts spread out and to thin out the coverage.

To marble the colours, using the end of a spoon to draw any design to swirl them together slightly.

To create a sprinkle rim pour sprinkles around the sail, trying not to get any in the middle of the sail. I’m using tiny nonpareil sprinkles. Then either lift up the edges of the parchment paper to make the sprinkles fall down towards the middle of the parchment, where they stick to the edges of the sail, or you can push them towards the edges of the sail with your fingers.
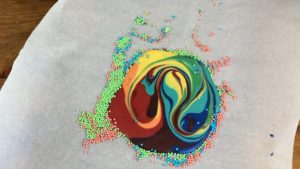
Leave the sail to set at room temperature or speed up the process in the fridge and then peel it away from the parchment. Check both sides to choose your favourite, which you’ll place to face the front of your cake.
If your sail is quite thick it will be strong enough to push directly into your cake. If it’s thin and fragile you can pipe some frosting onto the cake to attach it instead. To push your sail into your cake, it’s easiest if the cake is at room temperature so if your cake is in the fridge, take it out about an hour before doing this. Then hold the sail above the cake and push firmly down to wedge it into the frosting.
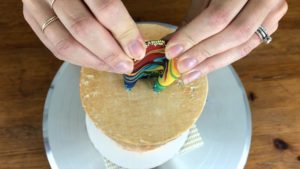
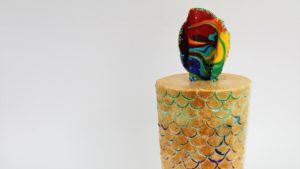
To cut a cake decorated with a sail, just lift the sail off! It will probably pull some frosting with it if the cake has been chilled, but no one will notice after you’ve cut the cake.

I teach how to decorate this cake with carved rainbow mermaid scales in my online course on Buttercream Cake Carving.
Now for some shards, which I’m going to make with both chocolate and candy melts, to resemble leaves on a camouflage cake. Drop a spoonful of melted chocolate or candy melts onto parchment paper. Straight away, use the back of the spoon to swipe it a few times to thin it out and make it longer.

Chill these so that they set. To attach them to a cake, either press them straight into the frosting of a just-frosted cake, while the frosting is still soft and sticky, or if your frosting has set I’ll show you two ways how to attach them.

To place the shards on the top of the cake, if the frosting on the cake has set you’ll need something sticky to attach them to. Pipe some buttercream swirls with a star tip like a 1M tip wherever you want to place the shards.

The press the shards into the swirls of buttercream. When these swirls set, they’re secure the chocolate shards in place on the cake. This camouflage cake design required chilling the cake so I also needed a way to attach my chocolate shards to the side of the cake.

To attach the shards to the sides, pipe a tiny bit of buttercream out of your piping bag, just enough to make a small dot (or a star shape for me, because I’m still using my star tip). While this buttercream is still sticky, press the shards against it.

You can layer shards by piping a dot of buttercream onto a shard that’s already attached to the cake, and then press on another shard on the dot of buttercream. Click here for the tutorial on how to decorate this camouflage cake.

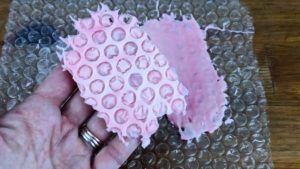
If you want to imprint a texture into your sails you can use bubble wrap. First wash it with hot soapy water and dry it well. spread your chocolate or candy melts onto the textured side.
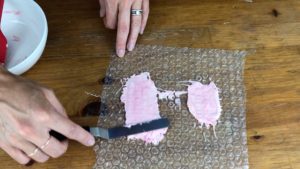
Just as with parchment paper, let the chocolate set and then peel it off. When you turn the sail over, you’ll see the pretty texture on the other side!
If the sails aren’t very thick, to prevent them breaking as you push them into the cake you can first cut a pathway for the sails in the frosting. This works if the frosting has set so isn’t stick anymore. Hold the sail where you want to put it and draw a line along the bottom edge.

Then press the sails into the lines you’ve cut, pushing down to wedge them in the cake so that they won’t fall over when you move the cake.
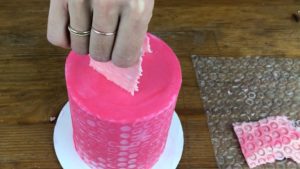
Click here for my tutorial on how to achieve the bubble wrap effect on frosting.
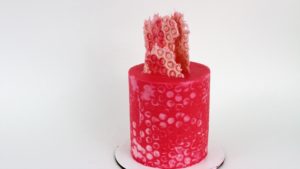
I hope I’ve given you some fun ideas for different ways to make chocolate sails. I’d love to see your versions so if you put any photos of them on instagram, please tag me @britishgirlbakes!

Here’s the video version of this tutorial:
In this ultimate guide to icing sheets I’m going to walk you through the basics of icing sheets: how to store them until you use them, how to prepare your cake, apply icing sheets to the cake, and how to decorate them with three different techniques. If you prefer to watch a video of this tutorial, scroll to the bottom of the page.
Storage
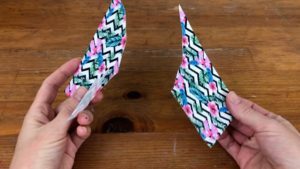
Icing sheets are thick, edible sheets of sugar. They’re sensitive to light so they’ll become discoloured if they’re exposed to sunlight. They come in fun, bright patterns that are sticky on one side and usually come attached to acetate backing sheets, which you should peel off just before you use a sheet.
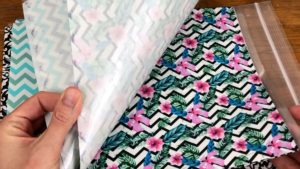
Icing sheets harden with exposure to air so you should store them in an airtight bag. To avoid discoloring, place the bag inside an envelope or put them in a dark place like inside a drawer. For 20% off icing sheets click here and use my code EMILYBGB.
Prepare your cake
Icing sheets won’t stick to buttercream that has already set so if you’re using a crusting buttercream like my 4 Minute Buttercream you’ll need to apply your frosting just before using the icing sheet.
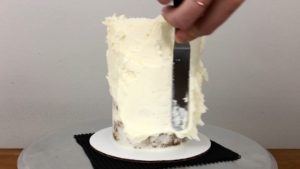
You could apply the sheet straight onto a crumb coat but if you have crumbs or bumps or dents in the crumb coat it’s better to apply a smooth final coat on top before attaching the icing sheet.
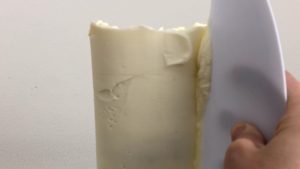
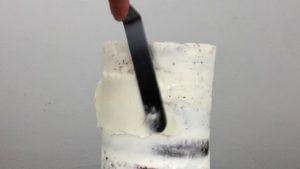
Spread the buttercream on to cover up the crumb coat. As you smooth the frosting, really focus on getting straight sides because if the frosted cake is wider at the top or bottom, the icing sheet won’t go on straight and it will either ride up or down the cake instead of sitting straight, or it will buckle and crease as you apply it.

It’s okay if you can see some shadowing of the cake through the final coat of frosting because icing sheets become even more opaque as they set and you won’t be able to see this subtle shadowing through the patterns on the icing sheets.
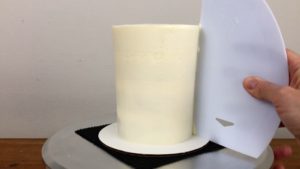
If you’re going to do a peekaboo design you don’t have to frost the whole cake at this point, just where you’re going to apply the peekaboo shape or shapes, and I’ll cover this in more detail in the next steps.
Because the icing sheets are opaque, it’s okay if the frosting is a colour that’s not white, like this purple frosting. Even though parts of the icing sheet design are white, and you might expect to be able to see the purple frosting through them, you won’t be able to!

Apply the icing sheets
As soon as you’ve finished frosting your cake, peel the acetate backing of your first icing sheet.

Press the base of the icing sheet down against the cake board to line it up straight and press it gently against the frosting to secure it to the side of the cake, starting at the bottom of the cake to make sure it goes right down to the base and then pressing all the way up.
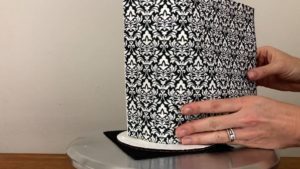
Each end of the icing sheet should be straight, going vertically up from the cake board to the top of the cake, not slanted. If it’s slanting like on this side it’s because it doesn’t go all the way down to the bottom of the cake, and that’s because the frosting on the sides of my cake isn’t perfectly straight – the cake is wider at the top than at the bottom.
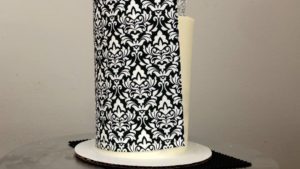
At this stage, while the frosting is still fresh and soft, you can peel the icing sheet gently off the cake and then scrape off some more frosting from the thicker parts of your cake, in my case the top, so that it’s straight and then re-apply the icing sheet.
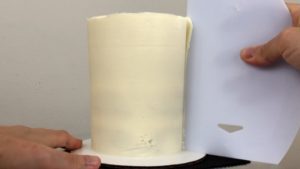
You have to work quite quickly if you do this because you don’t want your frosting to set before you scrape it and you don’t want the icing sheet to dry out and harden.
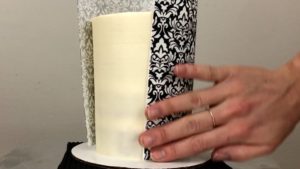
Once you’ve made sure the icing sheet goes all the way down to the bottom of the cake so it’s sitting straight, press it against the frosting with your hands or you can use a fondant smoother.

Make sure the edges of the icing sheet are pressed flat against the cake rather than sticking out.
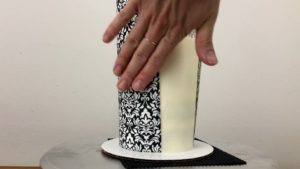
You’ll probably have to use 2 or even 3 sheets to cover your cake completely. I’m cutting a strip out of a second sheet to finish wrapping this one, which is a 4” cake. I like to cut the strip a little bit bigger than I need, maybe an inch wider, because you can trim it later.
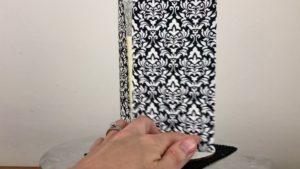
Press the next icing sheet onto the frosting and then immediately cut off any excess with scissors, before the sheets set because they’ll crack and snap if you try to cut them then.
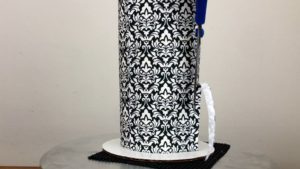
Icing sheets are a little bit sticky but not sticky enough to stick to each other and conceal an overlap, so it’s best to cut the second sheet at the same place the first one ends, so that they sit right next to each other. You can try brushing the edge of the bottom sheet with some piping gel to make the top sheet stick, but applying any liquid is a bit risky because it can make the colours bleed on the pattern on the icing sheet.
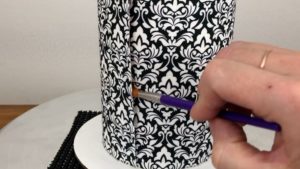
Don’t worry too much about the patterns lining up and matching because the patterns tend to be quite busy and when the cake is finished you’ll hardly notice the join. When you’re happy with the sides, trim the top of the icing sheets so that they’re the same height as the cake.
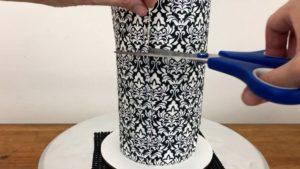
You can measure and cut them before applying them but it’s tricky because if you mis-measure by just a millimeter you’ll have either frosting or the icing sheet sticking out at the top of the cake. It’s easy to trim the sheets now, while they’re still soft and pliable.

Since the buttercream frosting will have started to set by now, you can rest the blade of your scissors on the top of the cake as you cut to use as a guide of where to cut. Tidy up any jagged cuts afterwards so that the icing sheet is perfectly flush with the top of your cake.
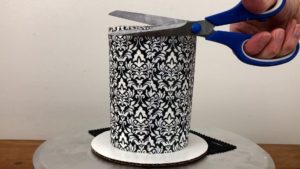
If you’re going to decorate the top of the cake you might choose to leave it as is, or you can cover the top with an icing sheet. I use a cake pan or cake board the size of my cake as a guide and draw around it onto an icing sheet, making a wider circle to leave room for the frosting on the cake.
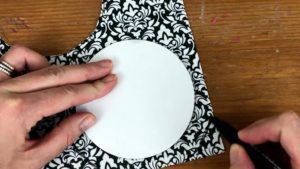
The icing sheet should still be on its acetate backing while you’re doing this and when you cut it out you’ll cut through the icing sheet and the backing. If the frosting on your cake has already set, spread on some more to completely cover the top of the cake.

Try not to spread the buttercream over the edges and onto the icing sheets around the sides of the cake but if that does happen, wipe if off with your
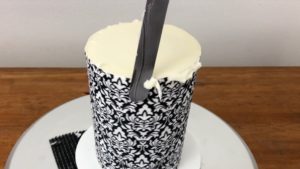
Then peel the acetate off the icing sheet circle and place the icing sheet on top of the cake. Because it’s bigger than your cake you’ll have room to trim around it, pressing the bottom blade of your scissors gently against the sides of the cake to line the scissors up and cut the excess off the edges of the circle so that it’s the same size as the cake.

You can go around several times to tidy up any jagged cuts or trim off even more until there’s no icing sheet sticking out over the edge of the cake.
The seams where the icing sheets join will probably be disguised by the pattern on the icing sheet but if not, you can use piping to disguise the join and add some colour and texture and interest to your cake, which I’ll show in detail in the next step.

For a fault line design, don’t worry if the icing sheets don’t go all the way down to the bottom of the cake because you’re going to cover that part with frosting later.
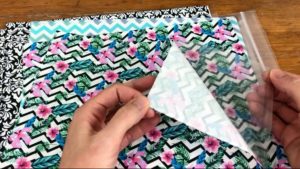
Instead of pressing the icing sheet onto the frosting and then trimming the top, you can pre-cut the icing sheet so that it’s a little bit shorter than the cake, since the top will be covered with frosting as well. Of course, you don’t need to cover the top of the cake with an icing sheet for a fault line cake because you’ll be frosting over the top.

For a peekaboo design, immediately after frosting the area where you’re going to create your peekaboo shape, press a piece of the icing sheet onto that area. It doesn’t have to be the same shape as the peekaboo yet – just cover an area slightly bigger than the shape you’ll eventually use for the design.

I’m using two different patterns for this cake, which will be two birds kissing so a different pattern for each bird. This is a great way to use up any parts you’ve trimmed from other icing sheets! The rest of the cake is still covered with just a crumb coat, but now that the peekaboo background pattern is in place, it’s ready to be frosted with a final coat in the next step.

Decorate your cake
I’ll show you a technique that adds some nice texture as well as conveniently covering the join of icing sheets, and a trendy design that’s a great solution if your icing sheets don’t go all the way up to the top or down to the bottom of the sides of your cake. Finally, I’ll show you the rest of the process of creating a peekaboo cake.

To add texture to this cake I’m using a piping bag fitted with a petal tip, a Wilton #104, and I’m pointing the narrow end of the tip away from the cake and holding the wider end against the side of the cake.
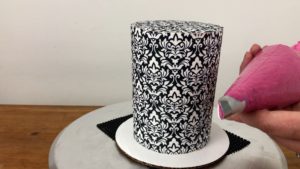
Squeeze out the buttercream as you move the piping bag up in a diagonal to pipe a ruffle of buttercream. Wherever you pause and hold the tip in place for a moment while still applying pressure to squeeze out the buttercream, the buttercream creates a wave out of the narrow end of the tip, which is why that’s the end pointing away from the cake.
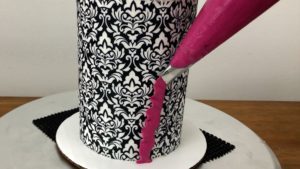
I’m piping several ruffles onto the cake, overlapping each ruffle about halfway over the previous ruffle so that you can’t see any of the icing sheet pattern between the ruffles
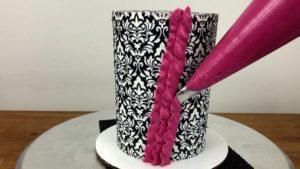
I’m letting them stick up a bit over the top edge of the cake and to get neat peaks on the ruffles, as you lift your piping bag away, release your pressure on the bag at the same time. You can of course choose where you want the ruffles to go, so if you don’t like the seam where your icing sheets join, this would be a great place to cover up with this piping!

When you’ve piped all of the ruffles you want, chill the cake for about an hour in the fridge to set the ruffles. Meanwhile, prepare edible gold paint by mixing gold luster dust with a drop of clear alcohol like vodka or a clear extract like lemon extract. instead. You want a thick liquid, almost paste-like, to get a nice bold gold colour.

When the ruffles have set in the fridge you can start painting them, angling the brush to paint along the wavy edge of each ruffle. Use little dabbing motions from the side of the ruffle onto the edge to create a gold rim. It’s best to use a thin, stiff paintbrush so you can be very precise about where you paint the gold.

The next design is a fault line cake, which just means that the top and bottom of the cake will be bordered by another partial layer of frosting. Spread the frosting all around the bottom of the cake, applying it randomly for a rustic effect.

Spread frosting onto the top of the cake and smooth it with your

Then spread frosting around the top of the sides of the cake, leaving the middle of the sides of the cake exposed so that you can see the icing sheet pattern. Aim for an even thickness of frosting but don’t worry about smoothing it yet.
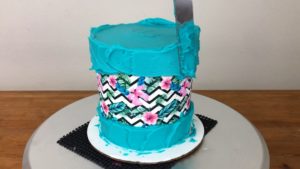
Use a frosting smoother to smooth the frosting on the sides of the cake or you can use a textured cake comb, which is what I’m doing here.
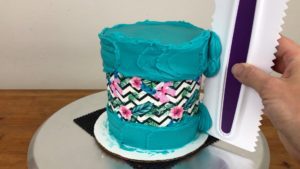
I’m scraping around the cake several times to imprint the texture and for more details on how to do this, check out my tutorial 5 Tips For Perfectly Textured Frosting.

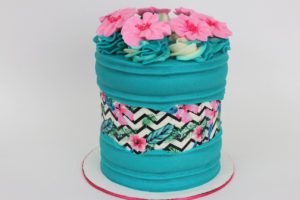
I decorated this cake with two tone swirls and piped flowers and I cover every step of this design in lots of detail in my online class for this Icing Sheet Fault Line Cake.
For a peekaboo shape, start by cutting doubles of your shape out of parchment paper. I’ve cut out 4 little birds for the 2 birds I’m going to create, so I have 2 copies of each bird.

For each shape, cut one copy about two thirds from the left and the other copy about two thirds from the right, so that they overlap in the middle. This is important for revealing the peekaboo shape later.
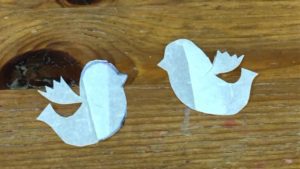
Line up the two parts of your shape on the icing sheet on your cake so that they overlap to make the complete shape. Hold them in place with one hand while you scoop up some buttercream with an

While still holding the parchment shapes in place, spread buttercream around the edges to secure it. The icing sheet will be slippery so you’ll need to push quite firmly against the parchment shapes to prevent them from moving around.

Spread from the inside to the outside of the shape so that you don’t push any buttercream underneath the parchment paper. Completely cover the outline of the shape (or shapes, like my two little birds) but leave the center of each shape exposed so that you have access to where the two parchment sides overlap.
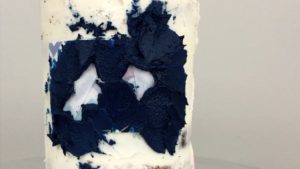
I’m tearing a random shape for another peekaboo cake, and I’ll cut this one down the middle but not all the way through, so that it stays together but also gives me space to peel it apart for the peekaboo.

Press the parchment onto the icing sheet on the cake, which should be bigger than the parchment paper shape, and while holding the parchment in place, spread buttercream around it.
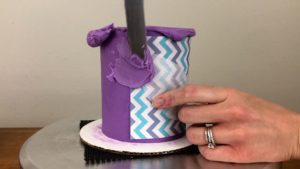
Then when the shape is outlined, spread buttercream over the rest of the cake.
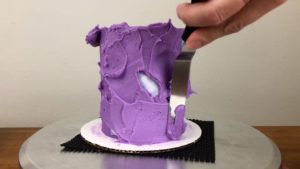
Smooth the frosting as normal and you’ll scrape more buttercream over the parchment shape but make sure that the middle section of the peekaboo shape stays visible. You can alternate the direction you scrape with your frosting smoother so that you don’t spread the buttercream over as much of the parchment.
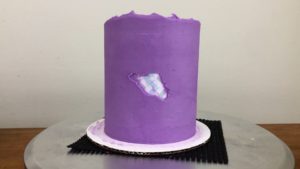
Finally, it’s time to reveal the peekaboo! Slide your

Peel the shape off to reveal the icing sheet pattern underneath!
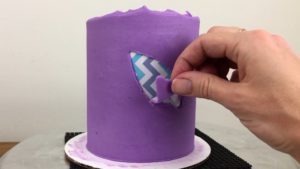
A few tips for this: first, I don’t recommend using very intricate shapes, like these birds, which have thin parts sticking out and small details like the zig zag edges of the wings. When you peel off the parchment those details get lost easily with the uneven edge of the peekaboo shape.

Also, avoid very busy patterns or patterns that contain the same or similar colors to the frosting because it’s difficult to see which are the parts of the peekaboo shape. With this tropical pattern which has black in it, the navy frosting dividing the bird’s tail and wings gets lost in the design.
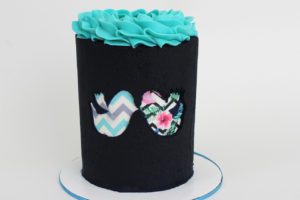
Finish decorating your cake however you like and you can store the cake at room temperature or in the fridge – the icing sheets will be fine at either temperature and the condensation in the fridge won’t affect them.

Here’s the video version of this tutorial:
I’m going to use these 3 cakes to show you step by step how to use cake combs for texture, with a few tricks for super smooth texture. After that I’ll show you some fun variations like double textures! If you prefer to watch a video of this tutorial, scroll to the bottom of the page.
1. Choose the right textured cake comb. It should be at least as tall as the cake so you can scrape the entire surface of the side of the cake wither each stroke, and it can be any material – plastic, acrylic, metal… try them all and see which you like best and which works best with your frosting.

I’ve used all three materials with my buttercream and I don’t have a preference, but you might find one more effective or easier to use than others.
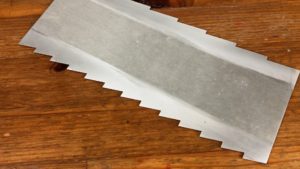
2. Prepare your cake before using a textured cake comb. Your cake needs to be straight so that the comb only removes excess frosting, not part of the skeleton of your cake as well. Make sure as you’re assembling your cake than each layer is sitting directly on top of the layer below it.
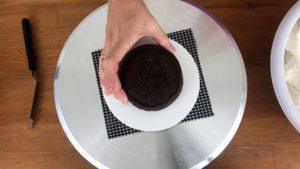
As you assemble your cake with layers of cake and filling, check that the sides of the cake are nicely vertical, not leaning over to one side. I find that the cake is easier to assemble and frost when the layers are cold, because they’re firmer and less crumbly than when they’re at room temperature. I like to chill my layers in the fridge for an hour before I start.
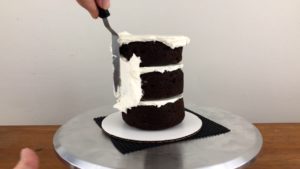
You’ll definitely need a crumb coat before the final coat of frosting, and this first thin coat of frosting traps any crumbs that come off the cake, so later, if you accidentally go too deep with your cake comb, you’ll see the crumb coat as a warning instead of gouging straight into the actual cake and digging out crumbs that will then get into your final coat of frosting.
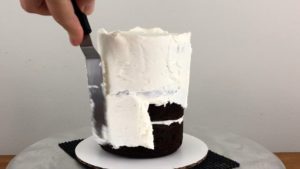
Ideally, this crumb coat should be a different color to the final coat, so you notice if you expose it, and it should be a lighter color than the final coat so it doesn’t show through.
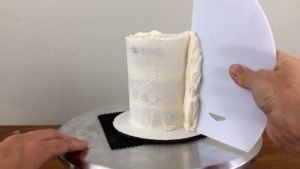
3. Apply a thick, even final coat of frosting. This layer of frosting will probably be thicker than you’re used to. It needs to be at least as thick as the grooves on your cake comb, so that the entire depth of the texture on the comb can be imprinted into the frosting. This is my 4 Minute Buttercream Frosting.
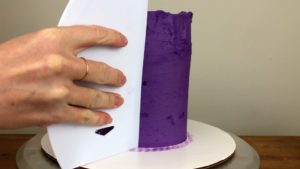
After applying buttercream to the top and sides of the cake, smooth it with a frosting smoother and then fill in any air pockets and indents by spreading on more buttercream and then smoothing again.
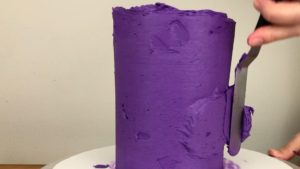
This frosting doesn’t need to be perfect because you’re going use use a textured cake comb over the top, but you need to make sure it’s applied evenly all over the cake so that it’s straight. You’ll get used to judging whether the frosting is thick enough but you’ll also find out in the next step if it is, or if you need more frosting.
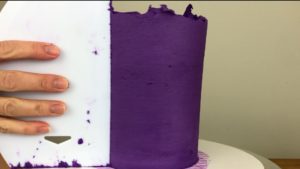
It’s important that the frosting goes all the way up over the top of the sides of the cake, so that there aren’t any air pockets there later. After smoothing out the top to tidy up the top edge of frosting, if there are any gaps in the frosting you should fill those in and smooth over them before starting with your textured comb.

4. Position your textured cake comb correctly. Line it up straight vertically, so that it’s flush with the sides of the cake. Rest the bottom of the comb on the cake board to help you get it straight.

5. Scrape, touch up, and repeat! The process of imprinting the texture is simple and very repetitive but it’s essential that you do repeat it again and again until your texture is neat and smooth.

Scrape until you get a lot of buildup of frosting on the comb, wipe off that frosting from the comb, and then repeat. Your texture will probably be messy at the beginning but as you go around the cake again and again it will get smoother and the texture will become more defined.
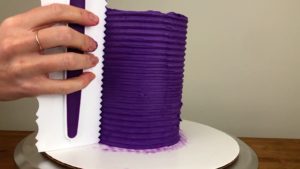
After several goes, touch up any big indents or air pockets in the frosting by filling them in with more buttercream and then repeat the process with the cake comb. This also works if you scrape through the frosting to reveal the crumb coat, which means your frosting is too thin so you need to spread some more over that area.
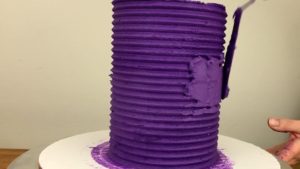
It might work best if you slant the side of the comb towards you at a 45 degree angle against the side of the cake instead of pressing it straight into the sides of the cake, because depending on the consistency of your buttercream, when the grooves of the comb are at an angle they might scrape the cake more smoothly and create fewer air pockets.

Don’t worry if your texture looks messy at the beginning. It took about 10 minutes of scraping, touching up, and scraping again to texture this cake neatly so be patient! Go around the cake with your textured cake comb again and again, touching up any gaps in the texture with more frosting, until the texture is nice and smooth.
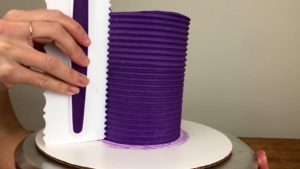
Now I’ll show you a few variations with textured cake combs.
This first cake is going to be a striped cake. Follow the same process by starting with a thick coat of frosting with straight sides.

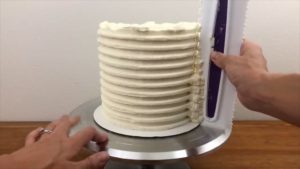
Now use a striped cake comb, scraping a section of the cake at a time with your comb pressed down against the cake board and held at a 45 degree angle against the side of the cake. Scrape around the cake several times, wiping off the comb in between each scrape to take off any excess buttercream.
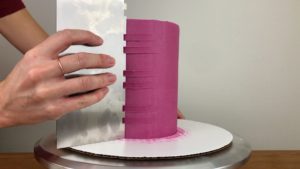
If your cake looks messy at the beginning don’t panic, it’ll come together after a few minutes of scraping. The 45 degree angle is really essential for a striped cake comb and you’ll notice much smoother grooves when you hold it at this angle.
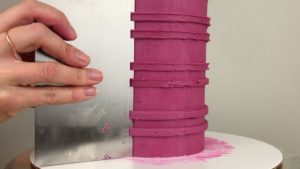
Touch up any air pockets within the stripes that are sticking out from the cake, spreading buttercream over them and scraping again with your comb to get a smooth coat of frosting imprinted by the texture on the comb.
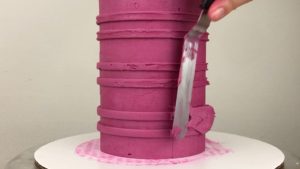
Here’s what my final scrape with the striped cake comb looked like, after several minutes of scraping, touching up, and scraping again. If you’re looking for more detail on striped cakes, check out my tutorial 4 Secrets To Perfect Stripes On Cakes.

Chill the cake in the fridge for 30 minutes or in the freezer for 15 minutes and meanwhile, mix some colours of buttercream for the filling. I’m using gel colours to get bright shades of fuschia, sunset orange and burgundy.
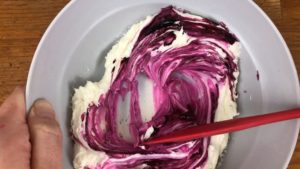
Now fill in the stripe grooves you made with the comb, spreading a single colour of buttercream all over the cake to fill in all of the grooves or if you’re using more than one colour you can pipe them into the grooves.
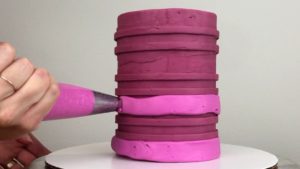
Don’t worry about how neat the piping is but it’s important that the buttercream completely fills in the grooves, otherwise you’ll have air pockets later on. I’m using a large round tip (a Wilton #1A) for fuchsia and for the thinner stripes for the orange buttercream I’m using a small ribbon tip (a Wilton #104).
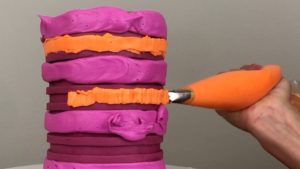
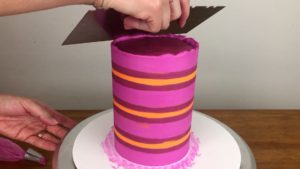
When you’ve filled in the grooves, use a frosting smoother to scrape around the cake several times. With the first few scrapes you’ll smudge the buttercream as it spreads out over the edges of the grooves but keep going, scraping more and more buttercream off each time.

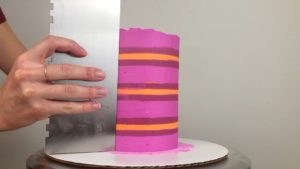
If you notice any air pockets, where the buttercream you spread or piped into the grooves didn’t completely fill the groove, spread on a bit more of that colour to fill int he gaps. After several scrapes with your frosting smoother, you will have taken off all of the excess buttercream, leaving neat stripes behind.
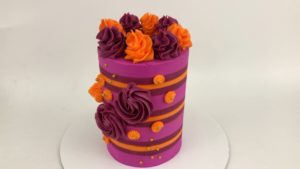
Smooth out the top as normal and decorate the cake however you like!
I have an online class on decorating this cake from start to finish on my online cake school.
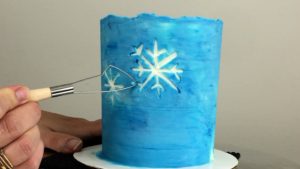
Another fun variation once you’re confident with textured cake combs is to use different textures for different parts of a cake. For this cake I’m going to add a layer of textured frosting to the bottom section of the cake. To do this, start by frosting the top and sides as normal.

After frosting your cake, chill it to set this first layer of frosting, which will take about an hour in the fridge or 30 minutes in the freezer.

I’ve decorated the sides of my cake with some buttercream carving and I cover various techniques and styles for carving images, patterns, and designs in my online course on Buttercream Carving.
When the frosting has set and is firm to the touch, apply a second layer of buttercream to the bottom of the cake. You can spread it on randomly with your
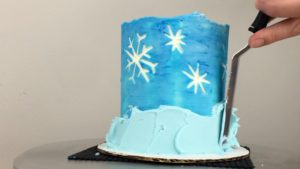
Smooth this second layer of frosting to expose any gaps (where the frosting isn’t thick enough) and fill those in by spreading on some more buttercream and scraping again to get a smooth layer of frosting of an even thickness.

Now use a textured frosting comb to imprint texture into the second layer of frosting.
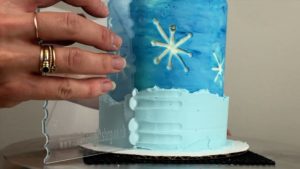
Scrape around the cake with the textured comb several times, touching up any gaps along the way, until you’re happy with how neat the texture is.
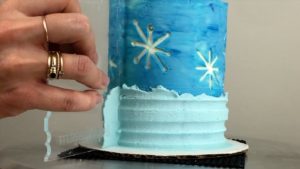
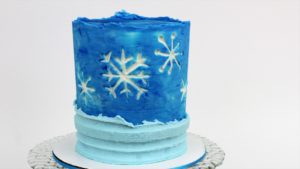
This cake has different sections of textured frosting on the top and bottom halves of the cake, but you can also divide a cake down the middle and use different textures for each side.
To divide the frosting vertically requires a few more steps but I use a very straightforward technique and I share all of the details in my online class on Textured Half and Half Cakes on my online cake school.
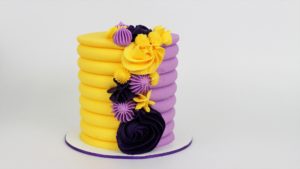
Here’s the video version of this tutorial:
In this tutorial I’m going to share four secrets to get perfect stripes on cakes using buttercream frosting! I’ll also show you a few variations to get different styles of stripes and then do some troubleshooting to answer questions about why your stripes aren’t turning out exactly the way you want them to. If you prefer to watch a video version of this tutorial, scroll down to the bottom of the page.
The process to get perfect stripes starts long before creating the stripes. When you assemble your cake, make sure your layers are lined up evenly on top of each other to give your cake straight even sides. Don’t apply too much filling between the layers or it will bulge out when the cake gets to room temperature.

You’ll need to crumb coat your cake, which is a thin layer of frosting to trap any crumbs that come off the cake so your final layer of frosting will be crumb free. Now that your cake is ready, let’s explore the striping technique.
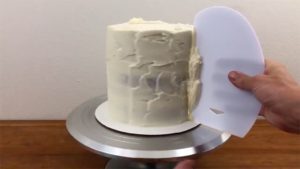
A striped cake comb looks like this. There are lots of different types: plastic, metal, or acrylic. Whatever you choose, just make sure the comb is at least as tall as your cake.
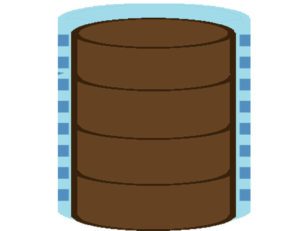
Here’s a quick diagram for how the striped cake comb works. This is a cross section of the cake with a crumb coat and then a final coat of frosting. You use your cake comb to make these nice deep grooves in the frosting and then you chill it.
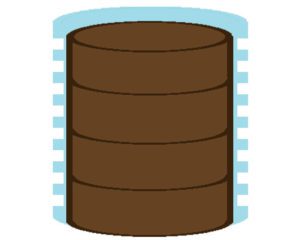
You apply another colour of frosting to fill in the grooves and that frosting will probably also spread over the original frosting on the cake, which is fine.

Then you use a frosting scraper to scrape off the extra frosting, a few layers of it, leaving these beautifully neat stripes. Now let’s see it in real life.
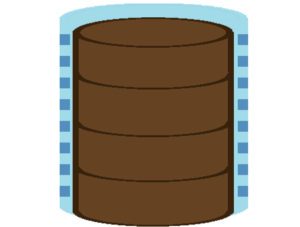
You apply another colour of frosting to fill in the grooves and then you use a frosting scraper to scrape off the extra frosting, a few layers of it, leaving these beautifully neat stripes. Now let’s see it in real life.
When your crumb coat has set, apply the first colour of frosting to your cake. I’m using my 4 Minute Buttercream which I love because it’s easy to make, delicious, and sets when it’s chilled, which makes this technique successful. If it’s too thick to be able to spread it easily over your cake, add some cream or milk to thin it out a bit.
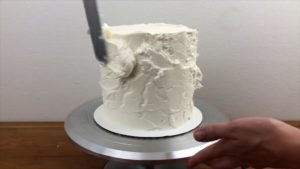
The first secret to perfect stripes is to make sure the frosting is at least as thick as your cake comb grooves all around the cake. This might seem like a lot of frosting but you’re going to scrape a lot of it off by the time the cake is finished and having this much frosting ensures solid neat stripes. Get your top and sides fairly smooth (they don’t have to be perfect yet) and don’t worry about frosting sticking up over the sides of the cake yet.
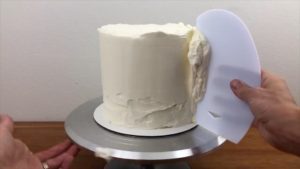
The second secret to perfect stripes is to make sure the sides of the cake are straight and even. When you look at the cake from every angle you want the sides to be straight, not slanting diagonally up or down because when you use the cake comb your grooves will end up being different thicknesses and the stripes in the shallower grooves will get swallowed as you smooth out your cake. I’ll show you an example of this with some troubleshooting later.
Now take your striped cake comb and place it against the side of the cake. Line it up so the base is flat on the cake board and make sure you are holding it straight up vertically against the side of the cake. Spin your
After passing the frosting comb around a few times you’ll probably have air pockets in the part sticking out, which will be the white stripes. If your frosting comb grooves are deep enough you’ll be scraping off so much frosting that the air pockets won’t matter but if you have shallow grooves, the next colour of frosting is going to get into the air pockets and leave marks on the white stripes. For perfect stripes, you can either go deep with your frosting comb grooves or you can fill in the air pockets with some extra frosting, spreading it on with an
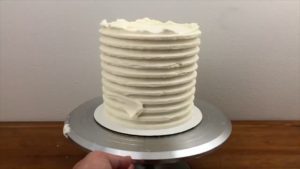
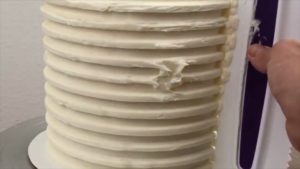
Tidy up the top edge by scraping any frosting sticking up over the top of the sides of the cake. You can see here that the top of my cake has the first parts of a groove, which would make a teeny tiny skinny part of a stripe. Because I have a thick coating of frosting on my cake I can just smooth this groove out onto the top of my cake, taking that stripe away completely so that the top stripe of my cake is a complete stripe.
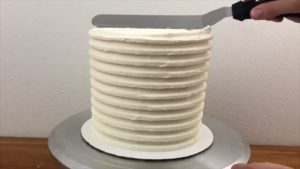
Here comes the third secret to perfect stripes. When you’re happy with the stripe grooves and the top frosting, chill your cake in the fridge for 30 minutes or in the freezer for 15 minutes while you prepare your next colour. This lets the first colour stripe set and hold its shape around the grooves before you apply the next colour. It’s also important for the top of the cake and you’ll see why in a minute.
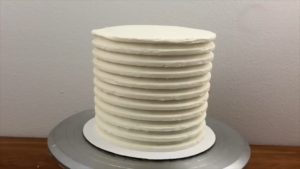
Now if you want all of your stripes to be the same colour, use an
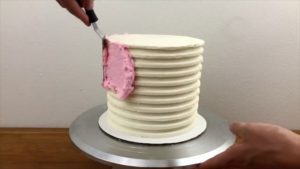
The final secret for perfect stripes is to be really patient with your frosting scraper. The first few times you go around the cake you’ll want to panic because the cake will be a messy disaster with smeared frosting and smudged blurry stripes with absolutely no resemblance to stripes.
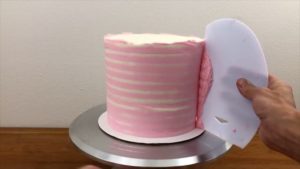
Don’t worry, just keep going. You’re wiping off the extra frosting of the second colour. A few more scrapes around the cake and you’ll expose the first colour of stripes and a few more scrapes and you’ll start seeing neater stripes. Keep going and the stripes will get more and more precise.
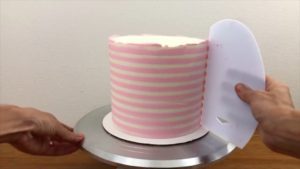
Then tidy up the top of the cake, scraping the sticking up frosting onto the top of the cake. Because you’ve chilled your cake, it’s easy to wipe the second colour of frosting off with an
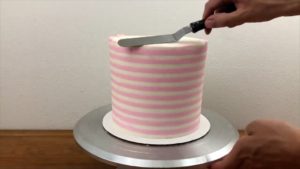
These stripes look beautiful just as they are or you can jazz the cake up with some sprinkles and frosting rosettes on top or whatever decorations you like.

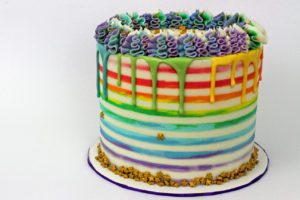
Now I’m going to show you a few variations to liven up your stripes. A fun way to make your stripes even more beautiful is to use an ombre design. Crumb coat your cake and then apply all of your colours to the side in rows going up the cake. I’m using an

Smooth the frosting with a frosting scraper, filling in any gaps in the frosting by spreading on more of that colour. You can frost the top of the cake now or later, after filling in the stripe grooves, and I’ll do it later for this cake so I’m leaving just the crumb coat on top for now.
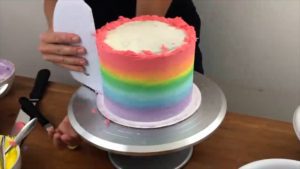
Use your striped cake comb to indent stripe grooves into the frosting. Tidy up the top edge of the cake by scraping off the sticking up frosting with an

After chilling the cake, apply another colour of frosting to the sides of the cake to fill in the stripe grooves. I’m also using white frosting for the top of the cake.

Then use your frosting scraper to smooth the sides and the top of the cake. As you scrape away layers of white buttercream you’ll reveal the rainbow or ombre stripes underneath.

The result is this pretty rainbow effect with impossibly neat stripes!
If you want the top surface of your cake to be a different colour to the stripes, apply that first. Here, when I crumb coat my cake I’m also giving the top of the cake its final coat of frosting (which is white).

Chill the cake to set the crumb coat and the frosting on top and then apply the final coat of frosting to the sides of the cake. I’m using yellow frosting for this Harry Potter cake. Smooth the frosting with a frosting scraper.
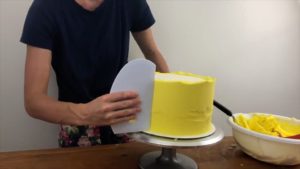
Tidy up the top edge, scraping any smudges of yellow off the top to leave the top completely white with just a ring of yellow around it, which is the top of the yellow frosting on the sides of the cake.

Use your striped cake comb to indent stripe grooves and chill the cake again, for 30 minutes in the fridge or 15 minutes in the freezer.
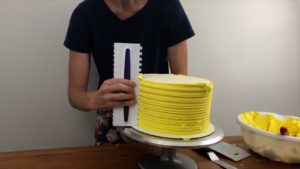
Fill the stripes in with your next colour of frosting, which you can spread onto the cake or pipe into the grooves if you prefer. More about that later!

Scrape off all of the excess frosting and here’s an example of how messy it might look after the first few scrapes.

Continue scraping several times to take off several layers of frosting, smoothing out the frosting to eventually reveal perfect stripes! I’m leaving the overhanging frosting around the tops of the sides of the cake and chilling the cake for about 30 minutes in the fridge until the frosting is firm.
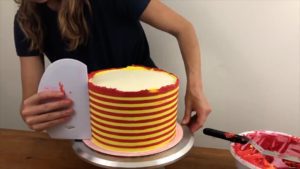
Now I’m using a sharp knife to trim around the cake, taking off the excess frosting sticking up over the sides. If you get any smudges of the side frosting onto the top frosting just use your knife to scrape it off. It’s very important the cake is cold so your knife leaves the frosting smooth.
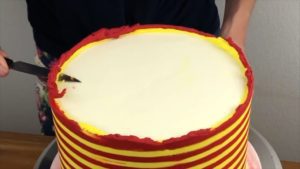
This technique leaves a neat top edge to the cake with the red and yellow frosting outlining the white center.

You can alternate the colours of your stripes by piping the frosting into the grooves made by the cake comb. I frosted this cake with pale blue frosting, used my cake comb, and now I’m piping on white and blue stripes.

You can use almost any frosting tip for this or even a piping bag with a hole cut in the end without a tip. I used a round tip (Wilton #1A) and a petal tip (Wilton #125) for this cake because it’s what I had on hand.
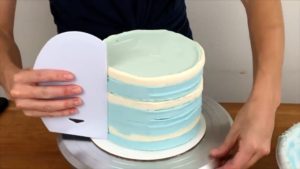
You scrape off quite a lot of frosting with this method but don’t waste it – you can mix the colours together and use the new colour to decorate another cake or you can put the blended colours into a piping bag with a star tip and pipe on these pretty frosting rosettes on top of the cake as a finishing touch.

Striped cakes are really, really easy once you get the hang of using this cake comb technique. I timed this cake from start to finish, including building the layers, crumb coat, frosting, using the comb, filling in the stripes, smoothing the frosting and piping the rosettes on top and it took me just 32 minutes!

For this cake I want one bright green stripe and the rest purple so after applying my orange frosting, using a cake comb, and chilling the cake, I’m piping on one bright green stripe into one of the stripe grooves, making sure it completely fills the groove so that there are no air pockets.

With an
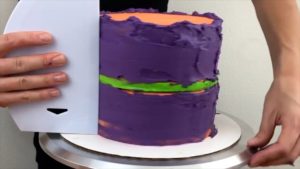
After scraping off layer after layer, I’ve exposed the perfect orange, green and purple stripes on this fun Halloween cake!
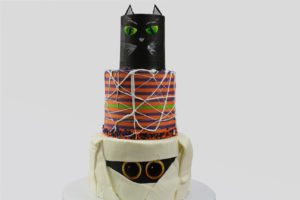
You can play around with the symmetry of the stripes because you don’t have to add a colour into every groove. If you don’t want your stripes to be regular and close together, you can space them out randomly around your cake, adding fewer stripes.

To do this, once you’ve frosted your cake and use the cake comb and chilled it, use your second colour to fill in the grooves where you want the stripes and then use the original colour of frosting to fill in the other grooves, so here I’m piping in two black stripes and then filling in the rest of the grooves with my original colour, white,
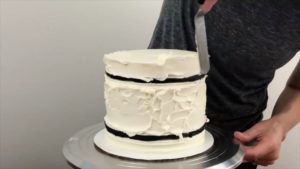
When I smooth it out, those white stripes blend with the original white frosting and the white stripes disappear so the only stripes left on my cake are the two black ones. I love this – it’s so classy!

Let’s do some troubleshooting to work out why your stripes don’t look like you want them to. Why are some of your stripes disappearing when you smooth your cake? Here’s an example of that happening: you can see that the sides of this cake aren’t perfectly straight. Although the cake comb is pressed down flat on the cake board so it’s straight, the frosting is slanting diagonally up on the cake so the grooves aren’t going in as deep at the top of the cake as they are at the bottom.
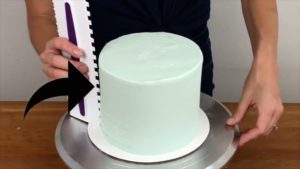
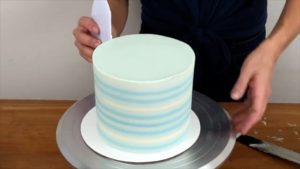
Now after filling in the grooves and smoothing the cake with a frosting scraper, the shallow groove at the top of the cake gets swallowed by the frosting smoother, scraping off the very thin layer of the stripe colour (which was white) and exposing the pale blue base frosting below.
Why are there smudges of other colours in the middle of your stripes? Here’s a quick diagram explanation and then I’ll show you a real-life example. Here we have a cake with a crumb coat and a final coat of frosting. When you use your cake comb you might get indents or air pockets like the one on the third stripe down on the left.
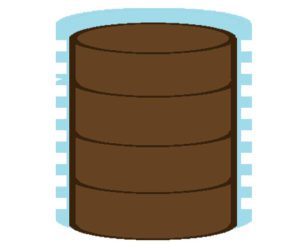
You chill your cake and apply a darker blue frosting for the stripes and that colour goes into the indent.

When you start scraping the frosting, you see the smudges of dark blue in that indent but as you keep scraping you get past the indent and you see your nice smooth stripes.
Here’s the real-life example. These thin dark blue lines on the light blue stripes are where there were indents in the base color of my frosting.
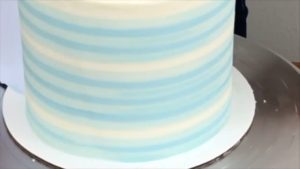
Because the indents are shallow and the grooves from my cake comb were deep, as I keep smoothing with my frosting scraper I’m taking off the outer layer of frosting and going deeper than the indents so eventually, those lines go away.
I love this striped cake comb technique and I’ll probably never go back to any other way of doing stripes but if you don’t have a cake comb, you can use piping bags to pipe rows of coloured frosting onto your cake. Alternate colours and make sure there are no gaps in between the rows of piped frosting.
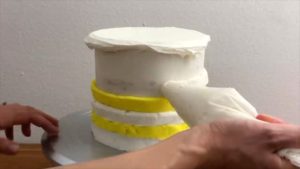
Then use your frosting scraper to smooth the frosting, touching up any areas where there are air pockets by spreading more buttercream over them.
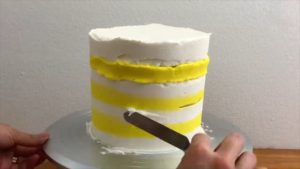
Smooth the sides and the top until you’re happy with the stripes!

This method is quick and easy and makes less perfect but more rustic-looking stripes.

I can’t wait to see the different stripes that you create! Please tag me @britishgirlbakes if you share a photo of your striped creation on instagram!
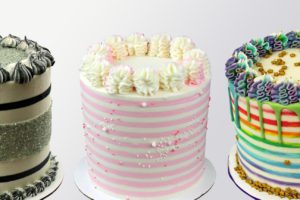
Here’s the video version of this tutorial:
In this tutorial I’m going to share how to turn cupcakes into cake! This is a great hack if you don’t have a mini cake pan or if you have extra cupcakes and want to do something special with them. If you prefer to watch a video of this tutorial, scroll to the bottom of the page.
Bake your cupcakes as normal and let them cool completely. You can use any flavour for this but I’ll be using my vanilla and chocolate cake recipes for this tutorial.
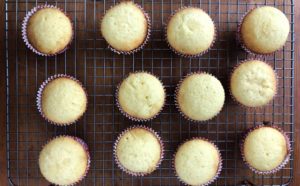
If you like, you can put them in a ziplock bag and freeze them for up to a month, to save time on the day you assemble and decorate your cake.
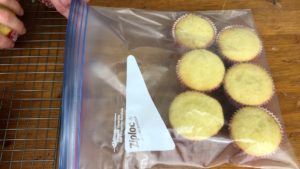
If you freeze the cupcakes, take them out of the freezer and leave them at room temperature for about an hour to thaw before you start.
You’ll need 1 or 2 cupcakes per cake and some buttercream in a piping bag if you want to pipe the filling and/or frosting, or in a bowl if you want to spread it on.
If you baked your cupcakes in wrappers, peel those off now. This means you can bake a batch of cupcakes and later decide to turn some into cakes, or you can use wrappers so that the cupcakes don’t stick to the pan when you bake them.
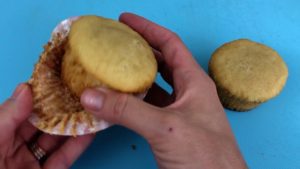
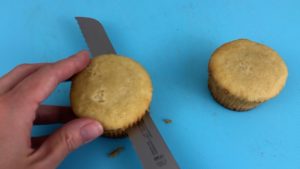
Use a serrated knife like a bread knife to cut your cupcakes horizontally into two halves or into thirds. I’m going to use 1 and a half cupcakes for each of my mini cakes, so I’m cutting my cupcakes into halves and I’ll use 3 cupcakes to make 2 cakes.
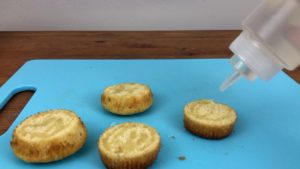
You can drizzle the cupcakes with simple syrup if you like, which keeps them moist if you’re not going to eat the cake on the same day, and you make simple syrup by simmering equal amounts of water and sugar together until the sugar dissolves.
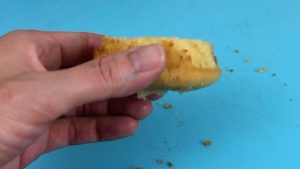
You’ll notice that the top halves of cupcakes are wider than the bottom halves, so your cake layers will be different widths. This doesn’t matter after you frost the cake.
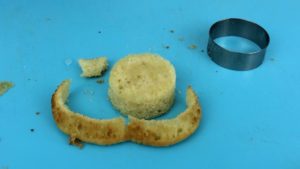
If you want the layers to be perfectly straight when you cut into the cake you can trim the top halves with a knife or a round cookie cutter.
To assemble your cake you’ll need a cake board on a non slip mat on a
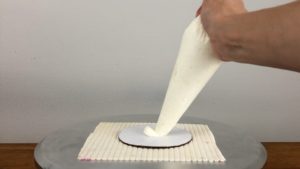
Push a cupcake layer into the buttercream, lining it up so it’s in the center of the board.
Pipe or spread a layer of filling on top. I’m using my 4 Minute Buttercream for this filling and I’ll also use it for the frosting, but you can use whatever you like.
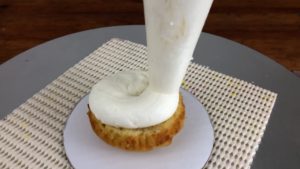
Place the next cupcake layer on top, pushing down to attach it to the filling below.
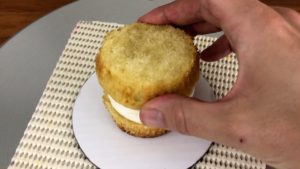
Check the cake from a few angles, or by spinning the
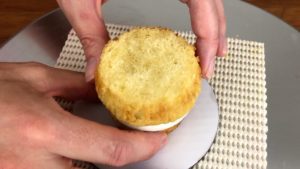
Add another layer of filling. It doesn’t mater if you pipe or spread it – piping it is a bit quicker but if you spread it on instead, you’ll avoid having to wash a piping bag.
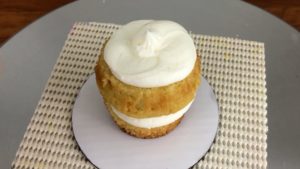
Continue alternating cake and filling and after your final layer, spin the cake around again to check that it’s straight and push down on one side if you need to adjust it a bit. Now chill the cake for about an hour in the fridge or 30 minutes in the freezer to set the filling and that dollop of buttercream on the cake board so that the cake doesn’t slide around you frost it.
Now that the cake is cold, pipe or spread buttercream onto it for the crumb coat. It’s easiest to pipe it on, since the cake is so small that spreading it straight on is a bit tricky, but you can do whatever you prefer.
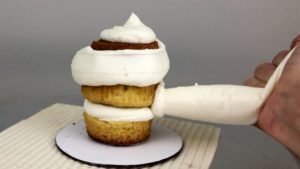
Chilling the cake before you do this is really really important for such a small cake. Although a larger cake will usually stay in place as your frost it, a little bit of pressure from your frosting smoother can push this little cake right off the cake board if it isn’t secured. That buttercream you piped onto the board before assembling your cake will hold the cake firmly in place if it’s properly chilled and set.
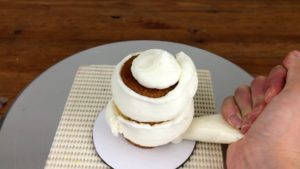
Cover the cake completely with buttercream, spreading it to cover the top of the cake and making sure it goes all the way down to the cake board at the bottom of the cake so there isn’t any cake exposed.
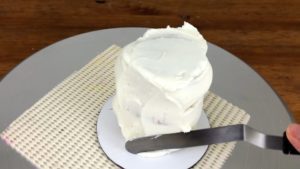
Use a frosting smoother to scrape off the excess buttercream to create a cake with straight sides. Tidy up the top edge by scraping the frosting that’s sticking up, over onto the top of the cake.
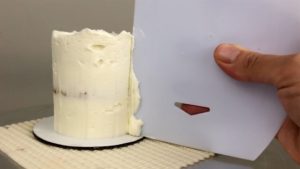
Fill in any air pockets with more buttercream using your
Spread or pipe on the final coat of frosting. You can frost and decorate these little cakes made with cupcakes however you like and I’ll show you two ideas now.
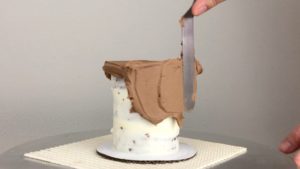
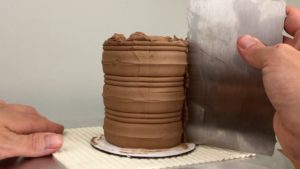
For this first cake I’m using chocolate cupcakes and chocolate buttercream. After smoothing the frosting, use a textured cake comb to imprint texture.
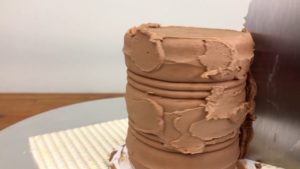
Spread more buttercream over any gaps or air pockets in the frosting and then use the textured comb over that area again. I cover this in much more detail in my tutorial on 5 Tips For Perfectly Textured Cakes.
When you’re happy with the frosting, put the cake on a baking tray and then pour chocolate shavings around the cake board. I grated a bar of chocolate against the fine side of a cheese grater to make these shavings but sprinkles would work well too.
Use the back of a spoon or an
To decorate this cake with a chocolate sail, melt chocolate chips in the microwave at 50% power and spoon the melted chocolate onto parchment or wax paper.
Spread the melted chocolate onto the paper with your
Drape the paper over the top of a bottle to make an upside down bowl shape and arrange the paper to give the sail the shape you want. If you’re looking for more design ideas, I have a detailed tutorial on Chocolate Sails 5 Ways.
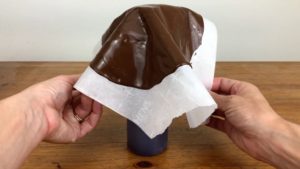
When the chocolate sets and hardens after about an hour in the fridge or about two hours at room temperature, carefully peel the chocolate away from the paper to release the sail.
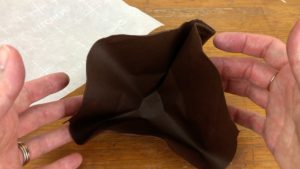
Now place the sail on top of your cake! If the frosting has set, the sail won’t stick to it so you can spread some fresh buttercream onto the cake where you’re going to place the sail, to act as a glue.
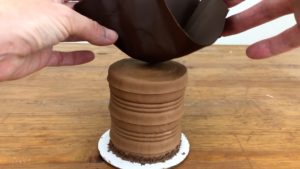
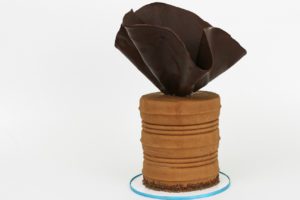
Looking at this elegant little cake, you would never guess it started out as something as simple as a cupcake!
For this next cake I’m using vanilla cupcakes and covering the crumb coat with a final coat of pink buttercream.
You need smooth frosting rather than textured frosting for this design. After smoothing the frosting and tidying up the top edge, chill the cake for 30 minutes in the fridge to set the frosting.
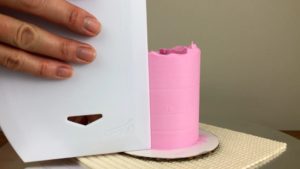
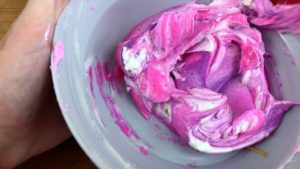
Meanwhile, prepare a piping bag with buttercream. I have a bowl of a few different shades of pink and purple buttercream stirred together just a little bit together, to leave the colour marbled.
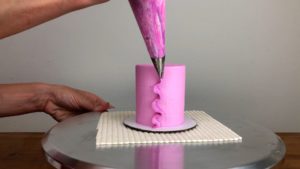
Spoon the buttercream into a piping bag fitted with a petal tip (this is a Wilton #104). You can see that this tip has a narrow end and a wider end, which is important for the next step.
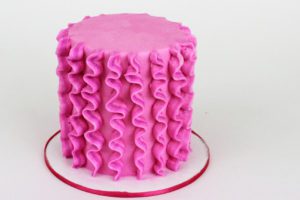
Holding the bag facing down with the wider end pressed against the side of the chilled cake. As you apply pressure to the bag, pull the bag slowly upwards, moving your hand from side to side to make the ribbons of buttercream wave back and forth up the side of the cake.
I don’t like this ribbon so I’m scraping it off with my frosting smoother and this works because the frosting on the cake has set because it’s cold, so the frosting isn’t damaged by the pressure of my frosting smoother as I scrape.
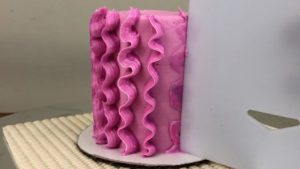
If you use whipped cream frosting or a meringue based frosting that doesn’t set, you can still pipe these ruffles but be very careful not to scrape the frosting with the piping tip because you’ll drag indents into it.
After piping ribbons all the way around the cake, use an
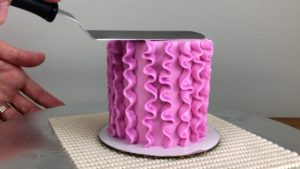
And here it is! Another pretty little cake that looks nothing like a cupcake! For more decorating ideas, check out my tutorial on 8 Ways To Use A Petal Tip.
Here’s the video version of this tutorial:
Fondant is easy to make and if you don’t mind getting your hands a bit sticky, it’s worth the time to save money on pre-made fondant!
Ingredients
3/4 cups water
3 tablespoons (3/4oz or 21g) gelatin
19 1/2 cups (2500g or 5lb 8oz) powdered sugar
3 tablespoons glycerin
1 1/2 cups liquid glucose
1/3 cup vegetable shortening
1 tablespoon clear (aritificial) vanilla essence
Method
1. Whisk water and gelatin together in a saucepan and leave to rest for 15 minutes.
2. Warm the water and gelatin mixture over low heat, stirring occasionally with a spatula, until the gelatin has dissolved.
3. Add glycerin to the saucepan and stir until dissolved.
4. Add glucose to the saucepan and stir until dissolved.
5. Add shortening to the saucepan and stir until dissolved.
6. Add vanilla or other flavouring to the saucepan. If you want to tint the whole batch the same colour, you can add gel food colour now as well. Remove from heat and set aside to cool for 5 minutes.
7. Measure out the powdered sugar and pile it in a heap on a table or wide counter, making a well in the center.
8. Pour the mixture from the saucepan into the well in the powdered sugar. Optionally, rub vegetable shortening on your hands so that the mixture doesn’t stick to you as much. Use your hands to fold the powdered sugar into the mixture, working quickly so that the mixture doesn’t spill over the edge of the table or countertop. Continue folding until you have made a ball of fondant. It will be sticky until it has set overnight.
9. Wrap the ball tightly in 2 layers of cling film or saran wrap and then place inside a large ziplock bag. Store at room temperature for several weeks.
Watch my video tutorial at the top of the page for visual, step by step instructions!
In this tutorial I’m going to show you 8 ways to use a petal tip, like this number 125 tip. By angling the tip differently, you can create different effects for all sorts of textured designs! If you prefer to watch a video of this tutorial, scroll down to the bottom of the page.
1. Shapes filled with lines
By holding the wide end of the petal tip against the cake with the narrow end pointing outwards, you can pipe thin strips of buttercream to fill in any shape on the side of a cake.
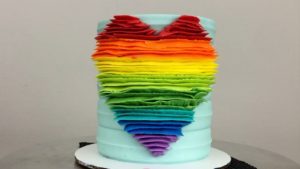
Here, I’m piping a rainbow heart onto textured frosting and I’ve outlined the heart with a toothpick to show me where to pipe.

If you pipe too far or the piping droops, you can take off excess buttercream or move the line higher or lower because the buttercream is still soft and pliable. If you wait more than a few minutes, the buttercream will set and then you won’t be able to do this.
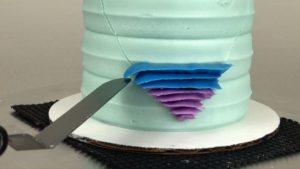
I used my 4 Minute Buttercream for this cake but you could use ganache or whipped cream instead. The advantage of my buttercream is that when it sets it holds its shape so you can rest the piping tip against the side fo the cake as you pipe and you won’t scratch and damage the frosting. I set my buttercream by putting the cake in the fridge for about an hour.

2. Vertical ribbons
Instead of piping horizontally you can pipe vertically up the sides of a cake. This works best on smooth frosting rather than textured frosting.
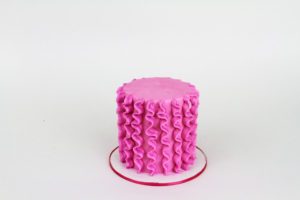
Hold the petal tip the same way, with the wide end pressed against the cake and the narrow end pointing outwards. Move the bag away from you slightly and then pull it back towards you to create these pretty vertical ribbons winding up the sides of the cake.

If you let the frosting on the cake set before you do this then if you pipe a ribbon you don’t like you can use your frosting smoother or an
When you’ve finishing scraping you can pipe another ribbon over the top.

On this cake I’m trying to space the ribbons evenly around the cake, to make sort of a pattern around the cake.

For this cake I’m wiggling the ribbons randomly up the sides of the cake, trying to cover the whole surface of the side of the cake with buttercream that folds back and forth over itself. I’m using my one bag piping technique for this cake to create the ombre pink and purple ribbons.
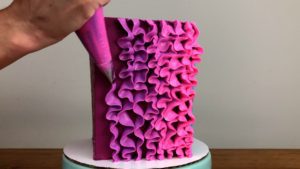
3. Diagonal ruffles
By holding the petal tip with the wide end pressed against the cake and the narrow end pulled slightly away from the cake, the buttercream fans out and makes ruffles.

If you move the piping bag slowly while applying pressure, the buttercream will wiggle a bit and fold over itself as it comes out of the tip and that gives the ruffles some movement.

Here I’m overlapping each ruffle by about half to make sure I completely cover up the frosting underneath, so that this entire section of the cake is covered with rows of buttercream ruffles.

This is going to be a mermaid cake with decorations made out of melted candy and you can watch that tutorial here.
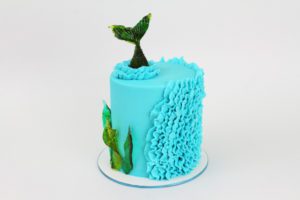
For this cake, I’m holding the petal tip the same way, with the narrow end lifted slightly off the cake, to pipe buttercream ruffles going diagonally up the cake.
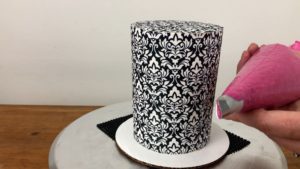
This cake is covered in a sugar icing sheet, so I can press the wide end of the tip against the cake without damaging it. I share my experience for icing sheets in my Ultimate Guide To Icing Sheets.
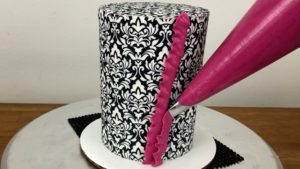
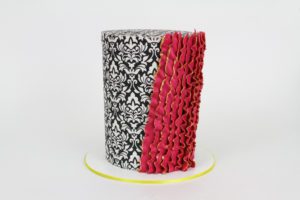
After piping these ruffles I’m putting the cake in the fridge to set the ruffles and then making an edible gold paint with luster dust and vodka to paint the edges of the ruffles.
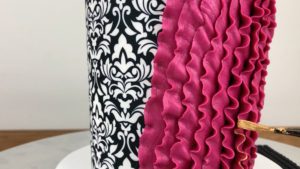
Because the buttercream has been chilled, it’s hard and the ruffles hold their shape as I paint them.
4. Drawing shapes
Holding the petal tip the same way, with the wider end pressed against the cake and the narrow end lifted slightly off the side of the cake, you can pipe shapes.

Here I’m piping a rainbow by curving the buttercream in an arc, starting with red and then going through the colours of the rainbow.
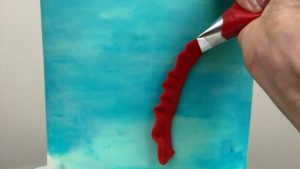
I’m overlapping each ruffle over the previous one to make sure I’m completely covering up the frosting on the cake with each arc of colour. For more rainbow cake ideas, check out my tutorial on 10 EPIC Rainbow Cakes.

5. Layered ruffles
To cover a cake complete with layered ruffles, first frost the top of the cake and smooth the frosting around the edges and on top.
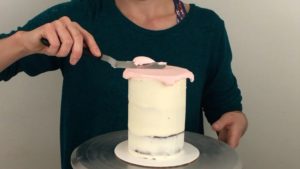
Then hold your petal tip with the narrow end pointing upwards, so that the tip is just above the top edge of the cake, and pipe a ruffle of buttercream all around the top of the sides of the cake, so that it’s sticking up slightly above the top of the cake.
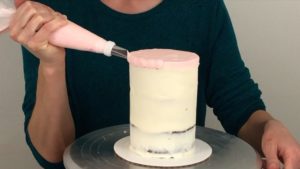
Release your pressure on the piping bag when you’ve gone all the way around the cake to finish the first ruffle. Move your piping bag down and start the next ruffle so that it’s layered over the bottom of the previous ruffle.

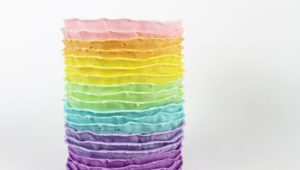
Continue all the way down the cake like this to layer the ruffles, changing colours along the way if you want to create an ombre gradient of colours or a rainbow.
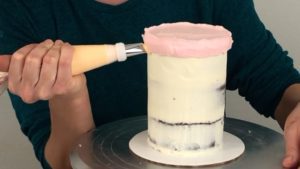
If you’re using several colours, it’s helpful to have a coupler for your piping bags so that you can change the tip from one bag of buttercream to another without having to first empty the bag to get the piping tip out so that you can use it with the next colour.
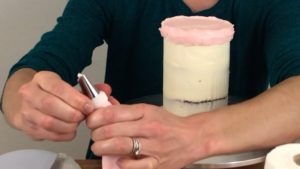
As you move around the cake, the faster you pull the bag, the less the ruffles will wiggle but the slower you move the bag as you squeeze out the buttercream, the more they’ll wiggle to create these pretty wavy edges.

I like to start and end each ruffle at the same point, so that the joins line up above each other, and that will be the back of the cake.
6. Zig zag ruffles
For zig zag ruffles, hold the piping bag horizontally with the narrow end of the petal tip pointing away from the cake.

As you apply pressure to the bag to squeeze out the buttercream, move the bag up and down as you spin the cake on the
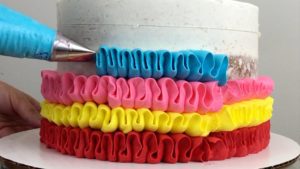
You can pipe rows of these ruffles on top of each other or you can pipe them in stripes, and I have a class on my online cake school with all of the details for this design with ruffled stripes and homemade metallic chocolates on top.
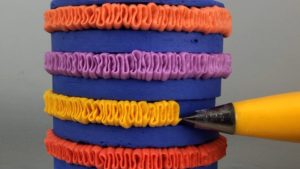
7. Squiggly shapes
Similar to the heart shape filled with strips of buttercream on the first cake in this tutorial, you can outline a shape onto a cake and then fill it with squiggles using a petal tip.
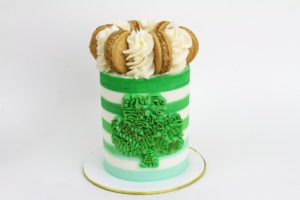
The narrow end of the tip should be facing outwards from the cake and as you squeeze the buttercream out of the bag, move the bag back and forth in random directions to fold the buttercream over itself and create random squiggles to fill the shape.

It’s easiest to start at the bottom of the cake so that you can reach the rest of the shape, because if you start at the top and work your way down it’s difficult to angle your wrist to get into the bottom section of the shape.
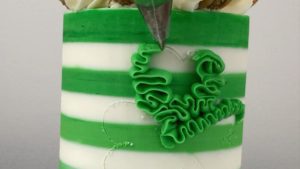
8. Flowers
Not surprisingly, petal tips are great for piping the petals of buttercream flowers!
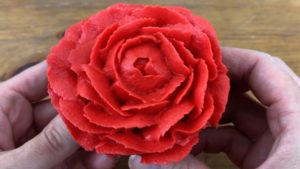
For a rose, pipe a blob of buttercream onto the middle of a cupcake – I’ll also show you how to pipe flowers to transfer onto a cake.
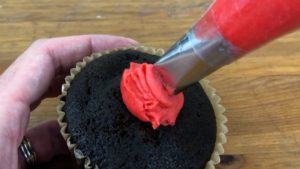
Hold the piping tip with the wider end pointing downwards and have to top of the tip slightly higher than the top of your blob, and apply pressure to the bag to squeeze out the buttercream as you twist the cupcake between your fingers to spin it so that the buttercream wraps around the blob.
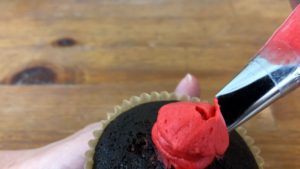
Release your pressure and pull away after doing a full loop to form your first petal! Only the top of this will be visible so don’t worry about the sides.

Now pipe a ring of petals, keeping the narrow end of the tip pointing upwards, piping little arcs that rise up in the middle and overlapping the previous petal by a third or a half so that they wrap over each other.

Keep the tops of the petals as close as possible to the bud in the middle. Now pipe another ring of petals, starting each arc to the left or right as the arc in the inner ring so that they don’t line up but instead they’re all offset. Just like in the previous ring of petals, each petal should overlap the previous petal.

Continue with these rings of petals and for your final ring of petals, pay attention to where you start each arc to make sure you cover up the bottom of the previous ring of petals, since this will be the outer edge of the rose and it will be visible at the end.

If you want to put the rose on a cake, you’ll need a flower nail and a square of parchment paper or wax paper which you can buy pre-cut or cut yourself out of a roll of paper. Pipe a dot of buttercream onto the flower nail and then press a square of paper into it to secure it in place and then pipe your flower on top.

After piping your flower, pull the paper off the nail and put it on a board or plate in the freezer for about 30 minutes to chill it. Watch this video to learn how to pipe 8 easy buttercream flowers.

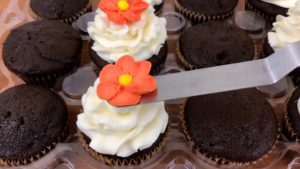
Then you can peel the flower off the paper or slide an
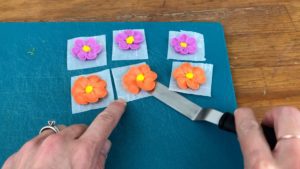
Place the flower on the frosting on a cupcake or attach it to a cake with a dot of fresh buttercream.
Here’s the video version of this tutorial:
Have you ever wondered how to get frosting so perfect that it looks like fondant? I’m going to show you how to get smooth frosting using just 3 tools: a
I frost all of my cakes with my 4 Minute Buttercream but this technique will work for whipped cream, ganache, and meringue buttercreams as well. Whatever you use for your frosting, the consistency is very important. If it sticks to the cake in clumps and pulls off the cake when you try to spread it, it’s too thick.
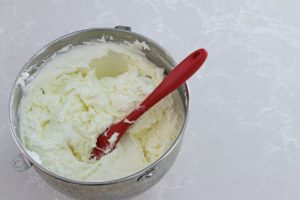
To test the frosting before spreading it onto your cake, scoop some up with a spatula. It needs to be thick enough that it holds its shape when you lift a spatula out of the bowl, but the peaks should be smooth, not rugged. If you’re using my 4 Minute Buttercream you can thin it out with a bit of cream or milk until you get a nice spreadable consistency.

After you’ve built your cake, start by spooning some frosting onto the top. Use an

Never lift the spatula straight up off the cake, because it will pull the frosting and maybe some cake up with it. Angle the spatula slightly and pull it off the cake in a sweeping motion and that way it will come off neatly.
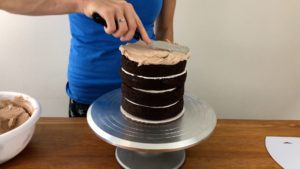
Once the top is covered, put the top of the spatula in the middle of the cake and angle the spatula at about 45 degree and then spin the cake, scraping off the top of the frosting and leaving a smooth top. You can do this a few times until you’re happy with the top.
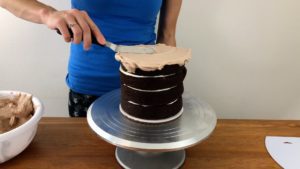
Then use your
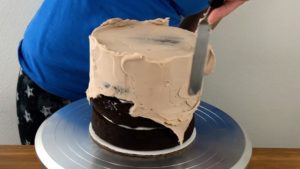
I like to go from top to bottom with the frosting, and then I go around the top again to make sure the frosting goes up over the top of the cake. If it doesn’t, you’ll have gaps in between the sides and top of the frosting.
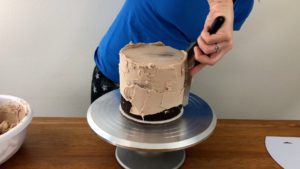
This first coat of frosting is a crumb coat, to lock in any crumbs that come off the cake, and we’re going to do a second coat of frosting later so this one doesn’t have to be perfect. You’ll probably be able to see the cake through the frosting in some places and that’s fine. We’ll cover it up later,

Next you need a frosting scraper or frosting smoother. Anything with a flat side – it can be plastic, metal or acrylic. Hold it against the side of the cake and spin the
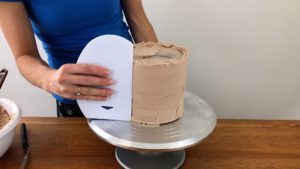
After going around the cake a few times with your frosting smoother, you’ll notice some areas where there are indents in the frosting, where it’s not as thick as it is over the rest of the cake. Use your

When you’ve filled in all of the gaps, scrape with your frosting smoother again. Remember that this coat of frosting doesn’t have to be perfect – it’s just the first layer.
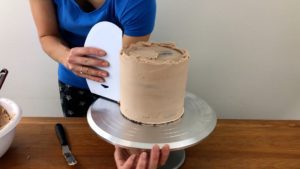
When you’ve finished your crumb coat, it needs to set before you apply the next coat. I chill my cake layers before frosting so my crumb coat sets within a few minutes in a fridge but if your cake is at room temperature, you can leave it for about an hour to set or put it in the fridge for 30 minutes or in the freezer for 15 minutes.

Now we’re going to repeat the process, starting with the top of the cake, using an
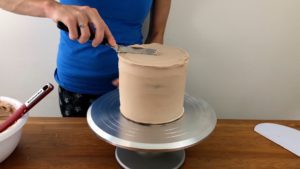
Now apply the frosting to the sides, going from the top all the way down to the bottom, spreading it from side to side to cover the whole cake. You might need to spread more buttercream around the top of the sides to make sure the frosting goes all the way up over the top of the sides of the cake, to make sure there are no gaps, aiming for the same thickness all the way around the sides of the cake.
Scrape around the cake with your frosting smoother and after each scrape, wipe any frosting off from the frosting smoother into a bowl with your
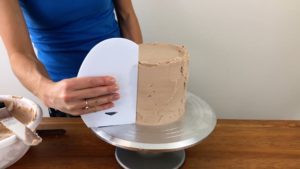
After a few scrapes, use your
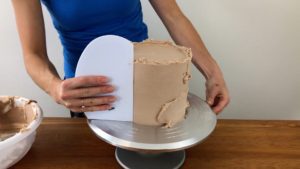
If you start spinning the
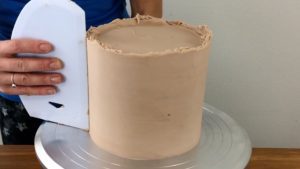
Smooth frosting is the foundation for so many cake designs. Once you’ve mastered this, you can decorate all kinds of styles of cakes. I have a free online course on 10 Frosting Techniques and you can sign up here.
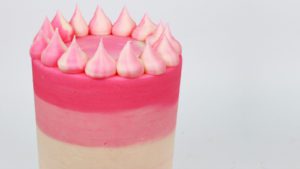
When you’re happy with the sides, tidy up the top edge of the frosting on the cake. Swipe your frosting smoother or
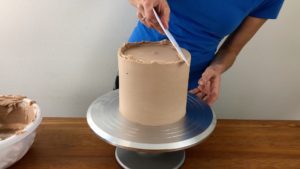
Scrape around the sides of the cake again to flatten the bulge of frosting around the top of the sides and then tidy up the top again, swiping from the outside to the middle.

You can do this as many times as you like, until you like the shape of the cake. By alternating between scraping the sides and the top of the cake, the edge around the top of the cake will get neater and sharper as you go.

This technique takes a few tries to perfect but I love how simple it is – you only need a
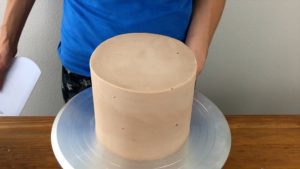
You can watch the video of this tutorial below or for my online ‘Frost Along’ class, where I frost a cake from start to finish while you follow each step as you frost your cake, click here.

Here’s the video version of this tutorial:
Meringue pops make fun, colourful cake toppers or they’re a whimsical dessert on their own!
This recipe makes about 24 meringue pops, depending on their size.
Ingredients
4 egg whites (about 160g or 5 1/2 oz)
1 cup (225g or 8oz) of sugar
pinch of salt
about 24 cookie pops, wooden skewers or toothpicks
Method
1. Separate 4 eggs by cracking them and then passing the yolk back and forth between the two halves of the eggshell, letting the egg whites fall into the bowl of your mixer. Save the yolks for another use. Add sugar and salt to the mixing bowl.
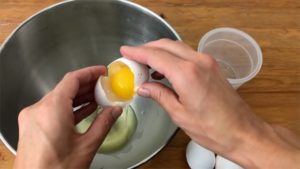
2. In a small saucepan, bring about an inch of water to a boil. Turn off the heat and place the bowl of your mixer on top of the saucepan so it’s not touching the water.
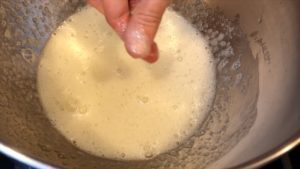
3. Whisk the mixture with a whisk for 2 minutes. Pinch a bit of the mixture and rub your fingers together. If you can feel any grains of sugar, whisk for another minute. If the mixture is smooth, it’s ready for the next step!
4. Transfer the bowl to your mixer and use the whisk attachment to whisk until stiff peaks form, about 7 minutes.
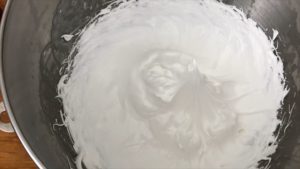
5. Line a baking tray with parchment paper and preheat oven to 200 degrees Fahrenheit (95 degrees Celsius). Optionally, divide mixture into bowls and add a few drops of gel food colour to each one, folding it gently to mix.
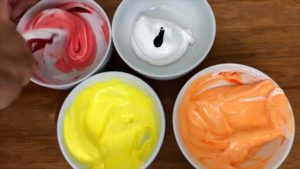
7. Spoon the mixture into a piping bag fitted with a star tip (I used a 1M) and pipe swirls onto the parchment paper, leaving an inch between each one in case they expand during baking.
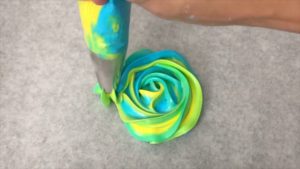
For two tone meringue pops, place two colours of the meringue mixture side by side in the piping bag.
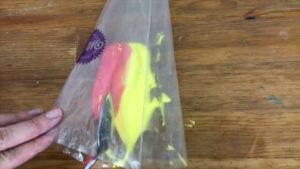
8. To jazz up the meringue pops, sprinkle them now (before baking) with sugar pearls, sprinkles or sanding sugar.
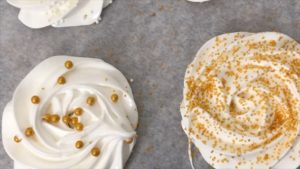
9. Optionally, insert a cookie stick, wooden skewer or toothpick into each meringue, pushing in gently into the middle of the meringue swirl. If you prefer, you can place the stick on the baking tray before piping the meringues, piping a tiny dot of the meringue mixture onto the tray to attach the stick so that it doesn’t move around while you’re piping the meringue swirl.
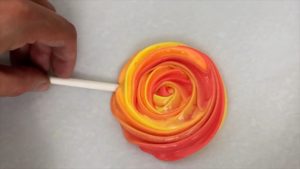
10. Bake for 90 minutes. Touch a meringue and if it’s still stick, bake for another 30 minutes. When the meringues are hard, turn off the oven but leave the meringues inside for 2-3 hours to cool gradually so they don’t crack.
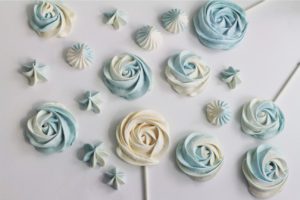
11. Now push the pops into your cake or store them in an airtight container at room temperature or in the fridge.
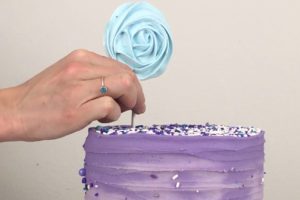
Watch my video tutorial below for more visual, step by step instructions!