Birthday cakes have become a huge part of the celebration and these cakes for kids and tweens include everything from simple sprinkle cakes to detailed themed cakes. They all look impressive but are secretly simple to make, without needing professional decorating skills. Try these beginner-friendly techniques that you can customize for any age, theme, or colour scheme.
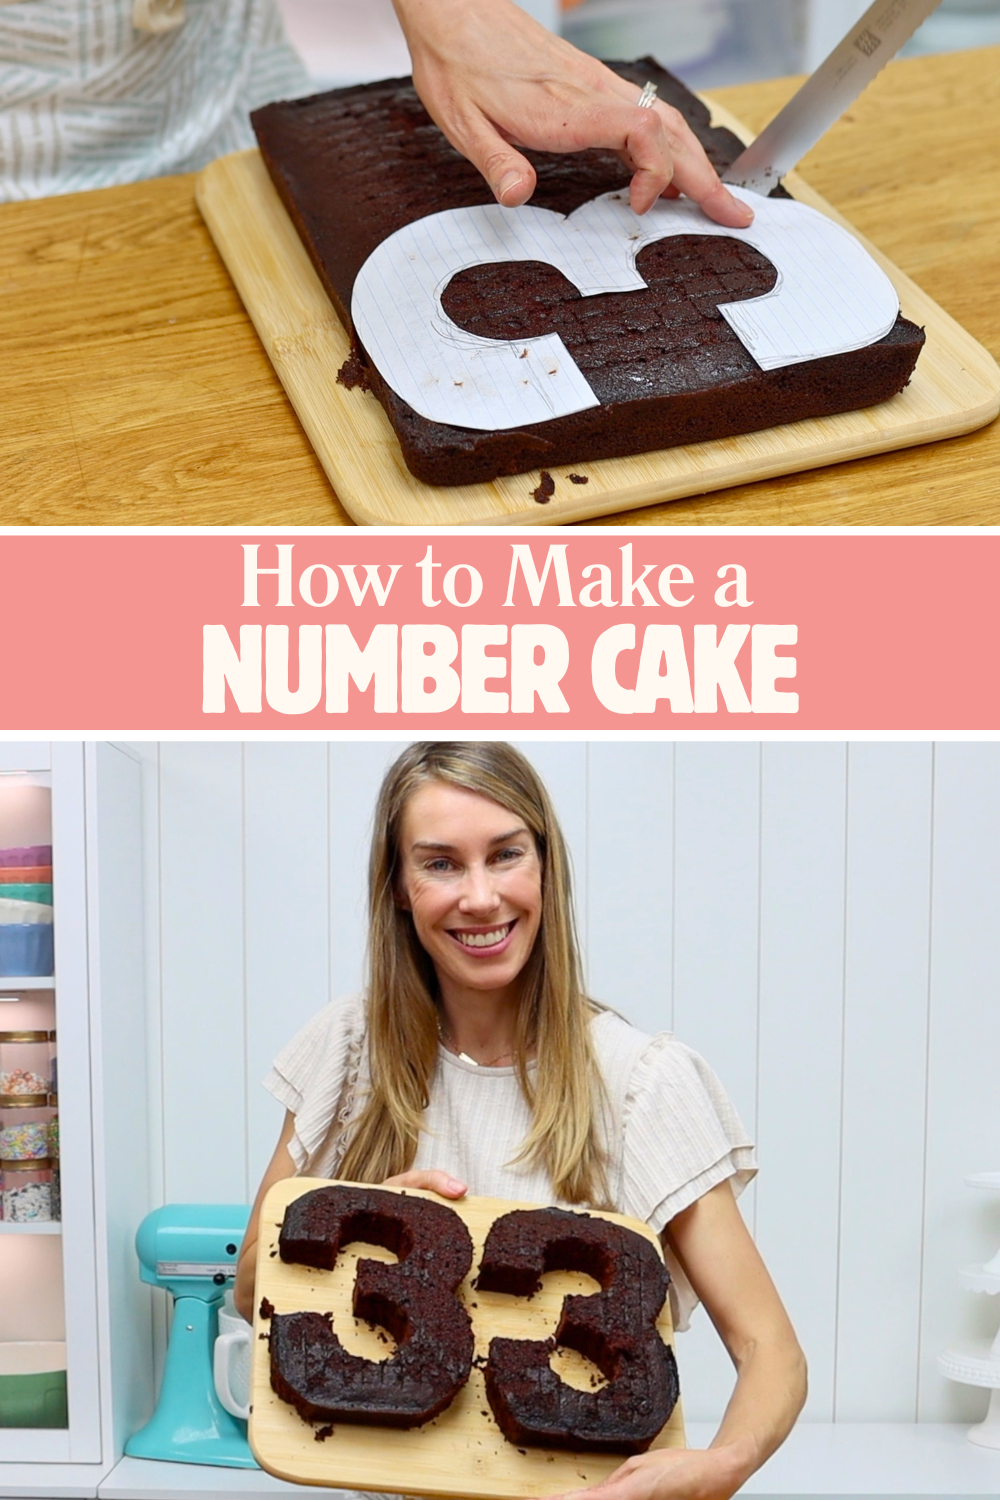
Number cakes are one of the most versatile cakes for kids because you can customize them for any age or celebration theme.
Start by baking a sheet cake. Use a piece of paper that’s about half the size of the cake to draw your number template. Place the template onto the cake and cut around it to create two identical number shapes. This is much easier when the cake is cold because the cake is firmer and less crumbly.
Attach the first cake layer onto a cake board with two dots of buttercream underneath to hold it in place. I use my 4 Minute Buttercream for all of my cakes - it's delicious, easy to make, and smooths and pipes beautifully! Pipe your filling on top using any piping style you like. Simple dollops with a round piping tip work beautifully, or you can use a 1M piping tip for rosettes and swirls.
Lower the second cake layer on top, making sure it lines up neatly with the bottom layer. Again, cold cake makes this much easier to handle.
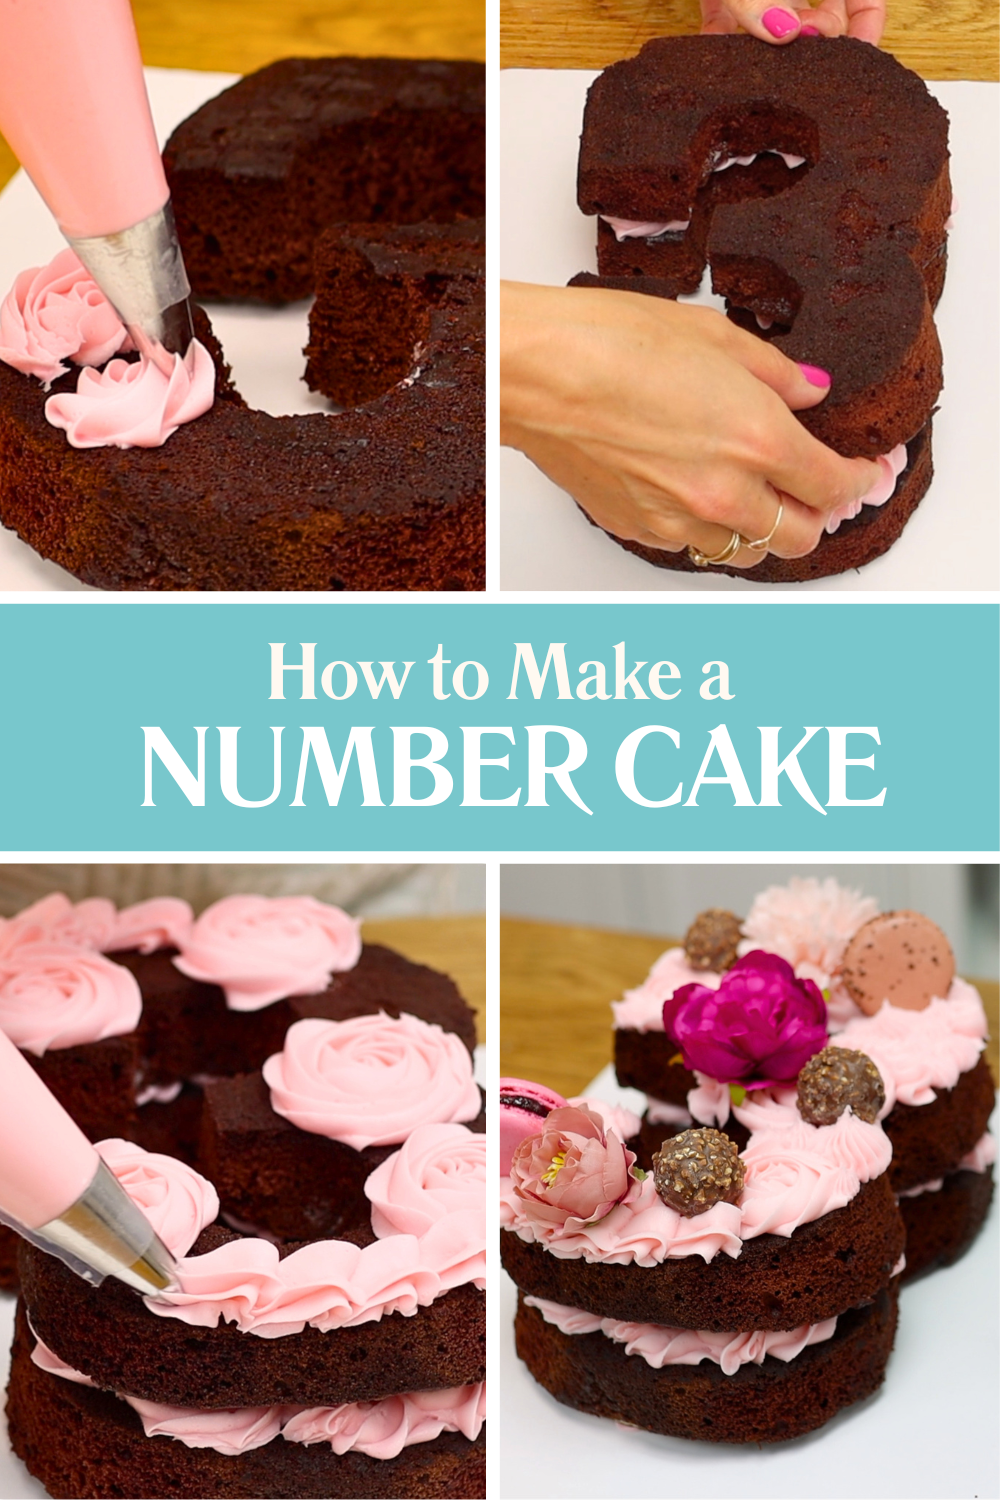
Pipe decorations over the top layer using a variety of piping tips. A 1M tip creates rosettes and wavy swirls, a petal tip creates ruffles, and open star tips like a 4B or 2B are perfect for filling gaps with texture.
Decorate the top with chocolates, candies, macarons, flowers, sprinkles, or any toppings that match your theme. This can be a really fun cake for kids to help decorate because there’s no pressure for everything to look perfect.
Emoji cakes are playful cakes for tweens and kids and they’re much easier to make than they look.
To make a mini version, cut three small cake layers out of a larger cake using a round cookie cutter. If you prefer a larger cake, that's fine too! You can use any size cake layers for this design.
Attach the first cake layer onto a cake board with a dot of buttercream and continue layering cake and filling until the cake is stacked. Cover it with a crumb coat, chill if needed, and then add a final coat of frosting.
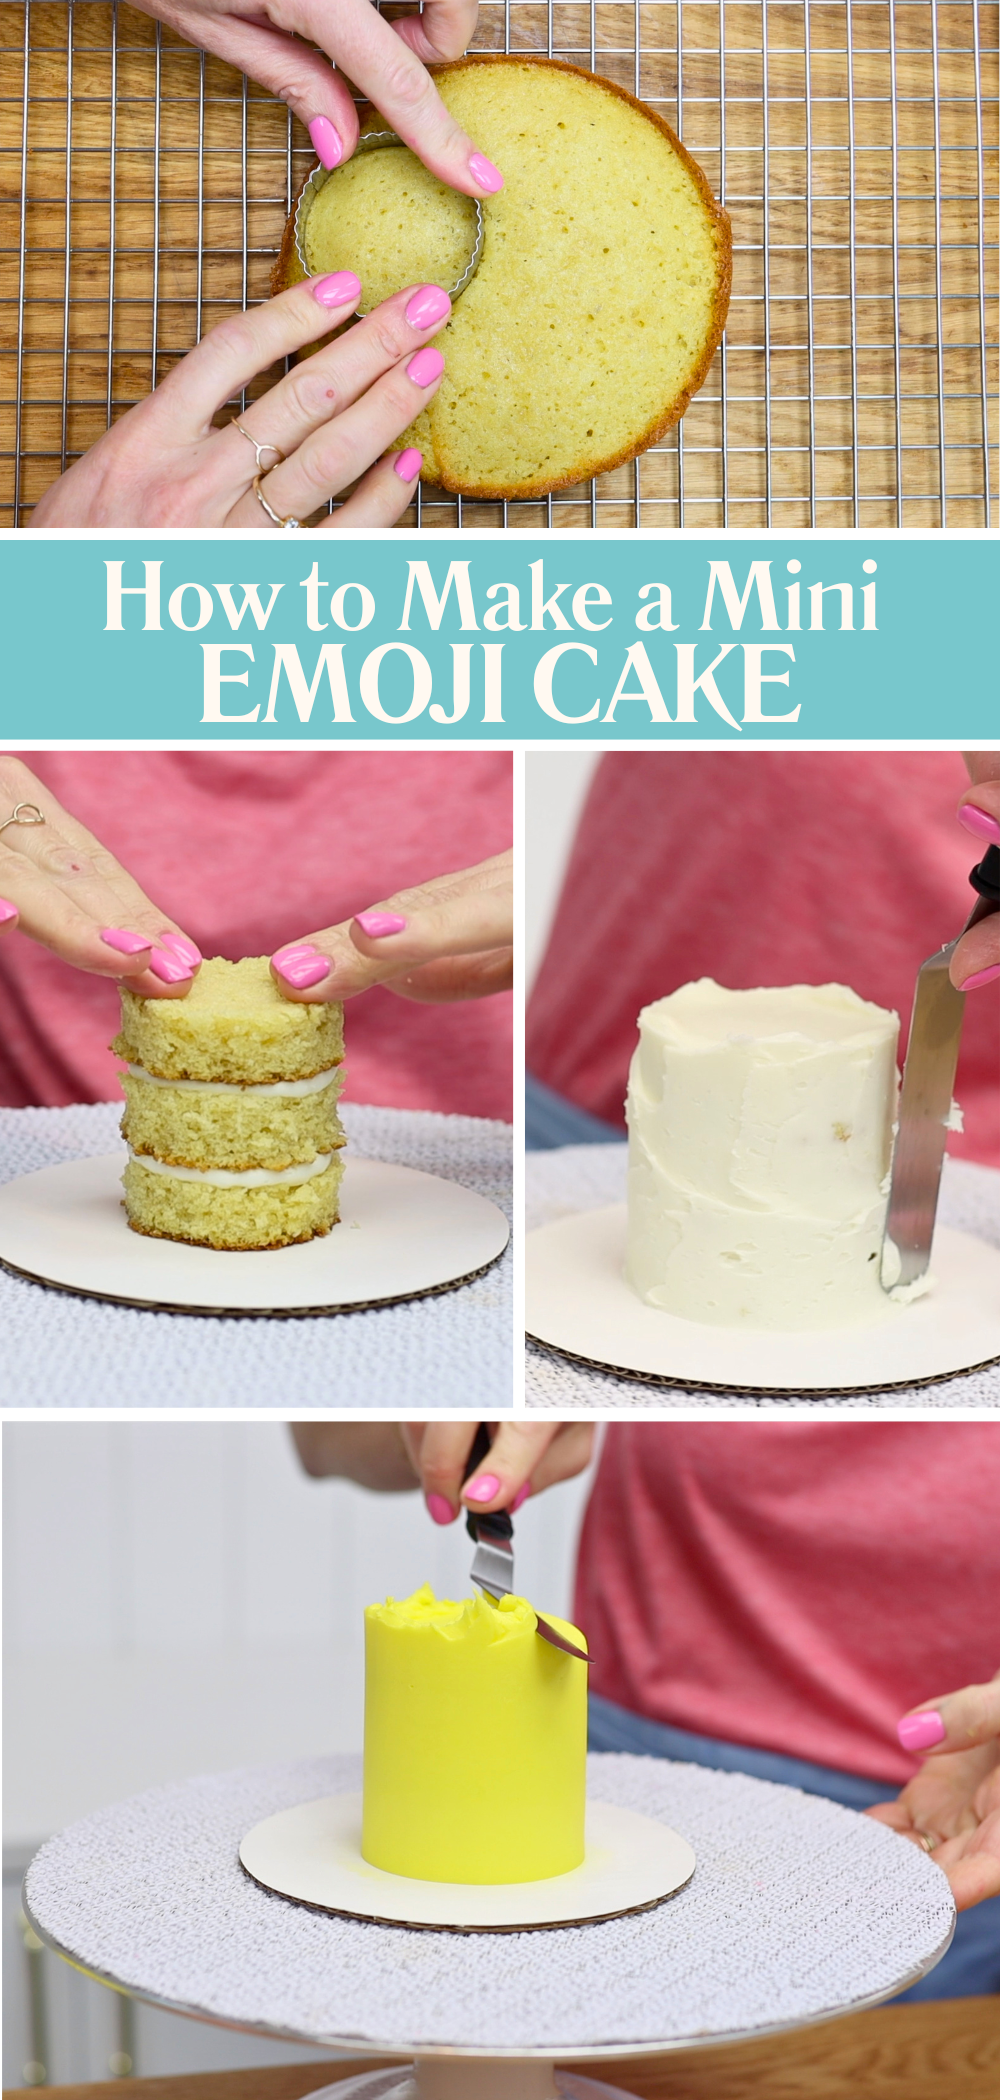
To create the emoji face, make homemade stencils by drawing the emoji features onto parchment paper or wax paper and cutting the shapes out. Use the surrounding paper as the stencil.
Chill the cake so the frosting is firm before pressing the stencil against the cake. Spread buttercream over the stencil and then peel it away to reveal the emoji design underneath.
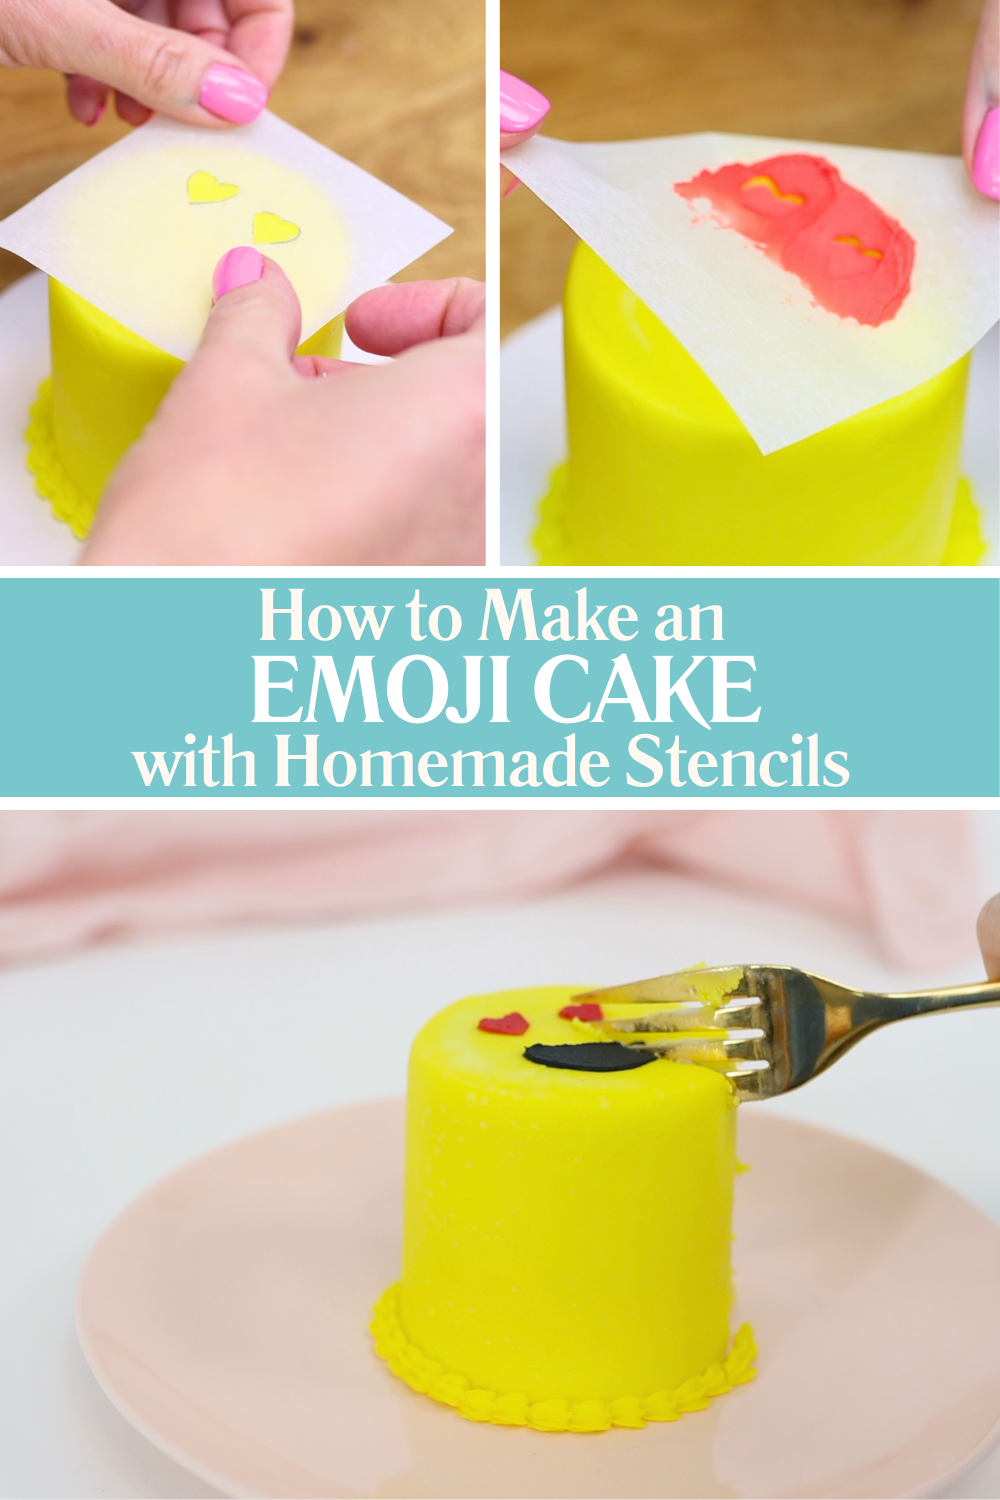
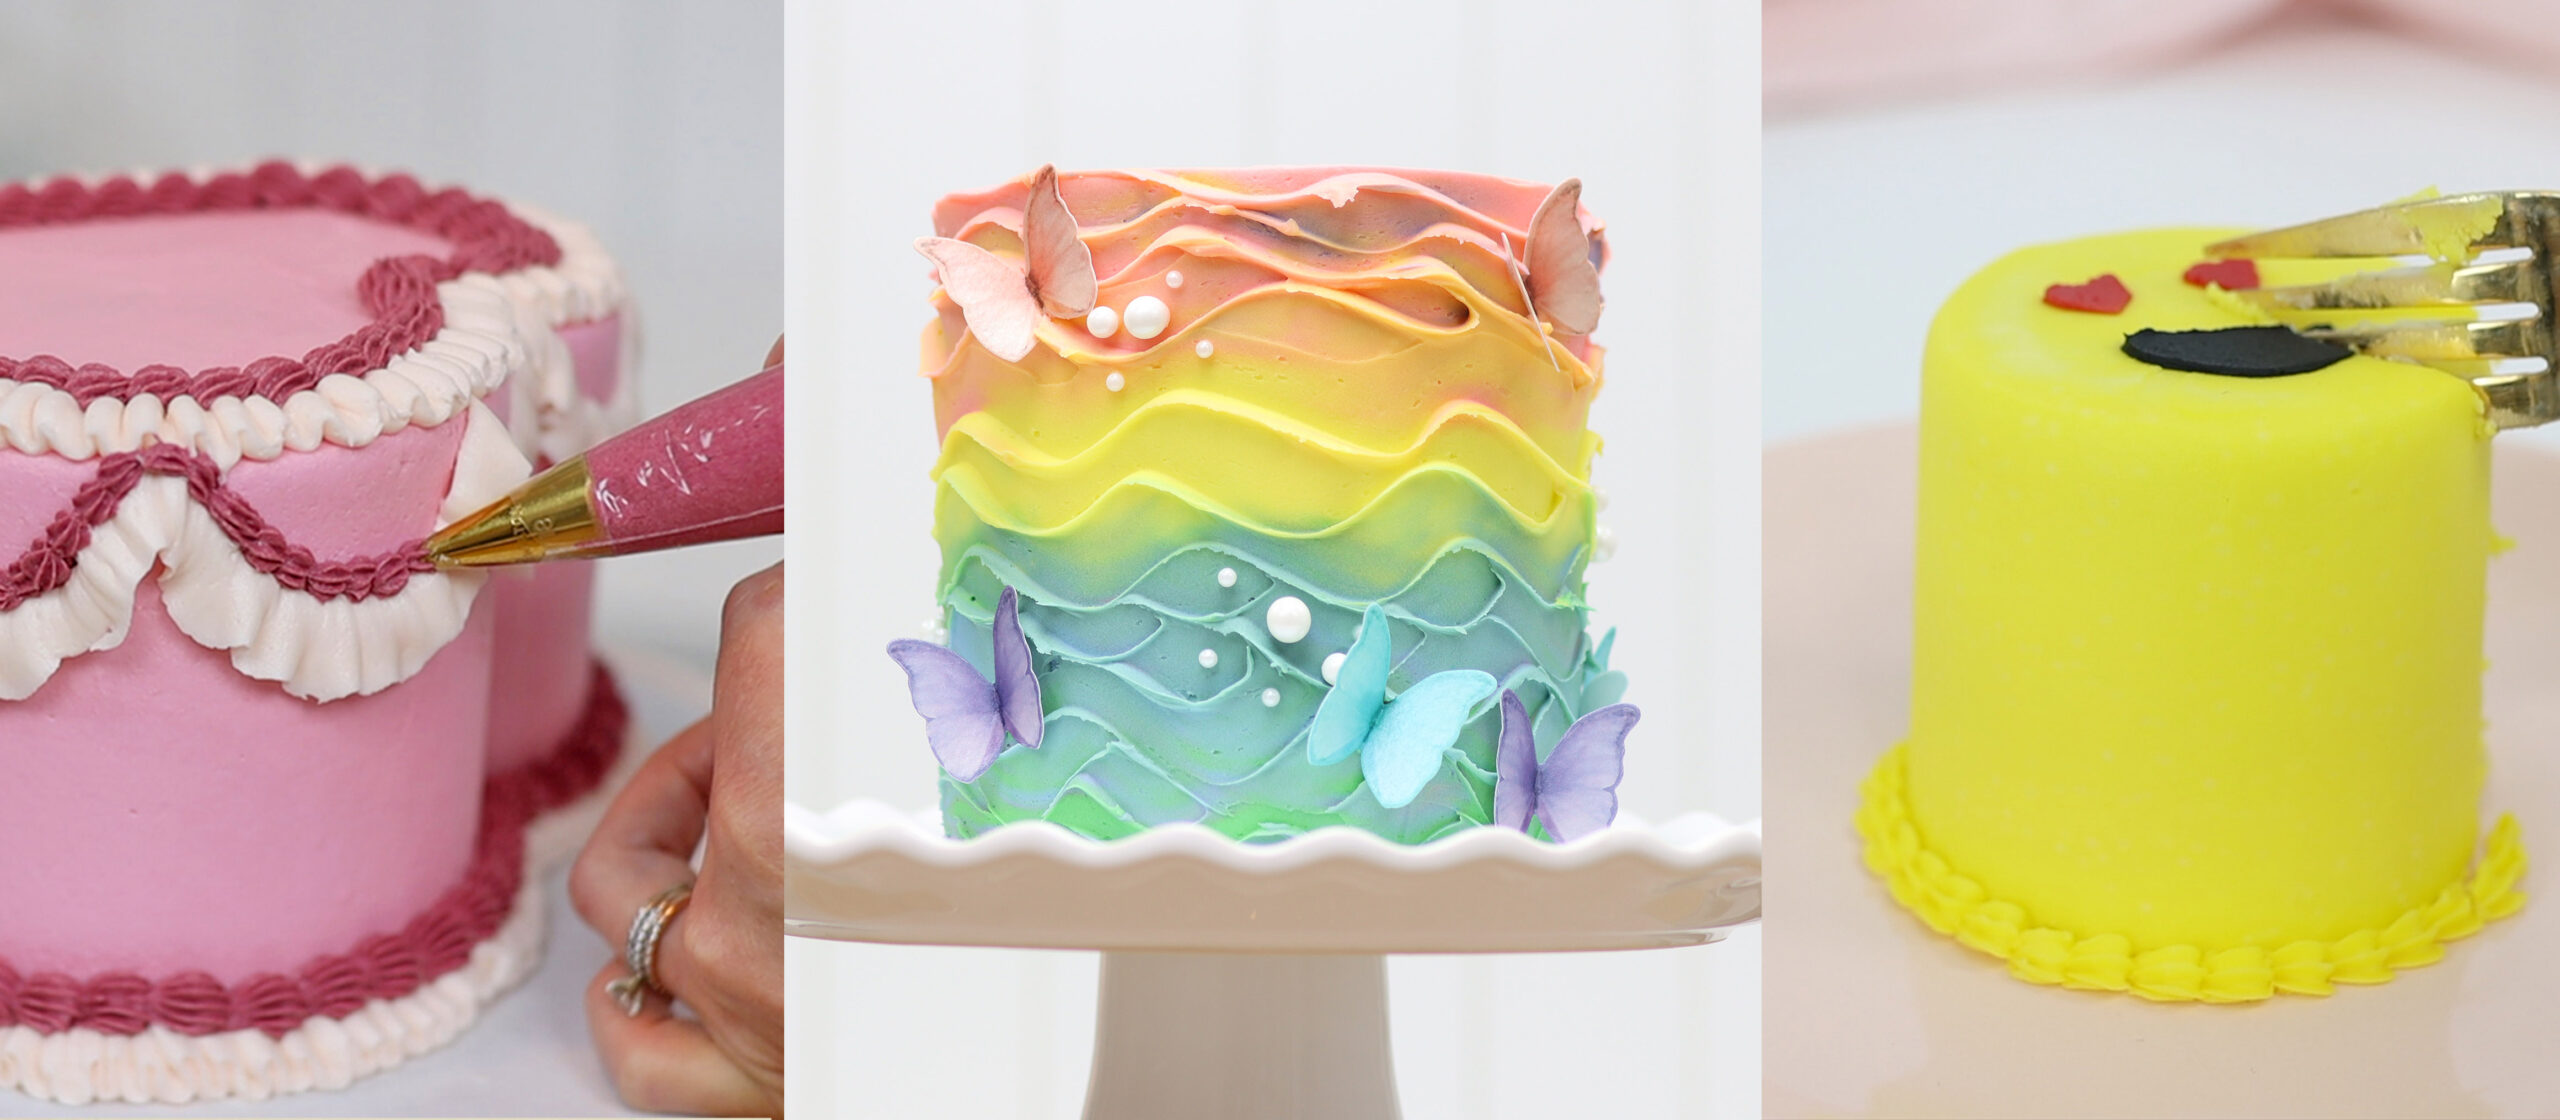
Make a heart-eye emoji like this one or kids can choose their favourite emoji - I love the sunglasses face! These simple emoji designs are instantly recognizable.
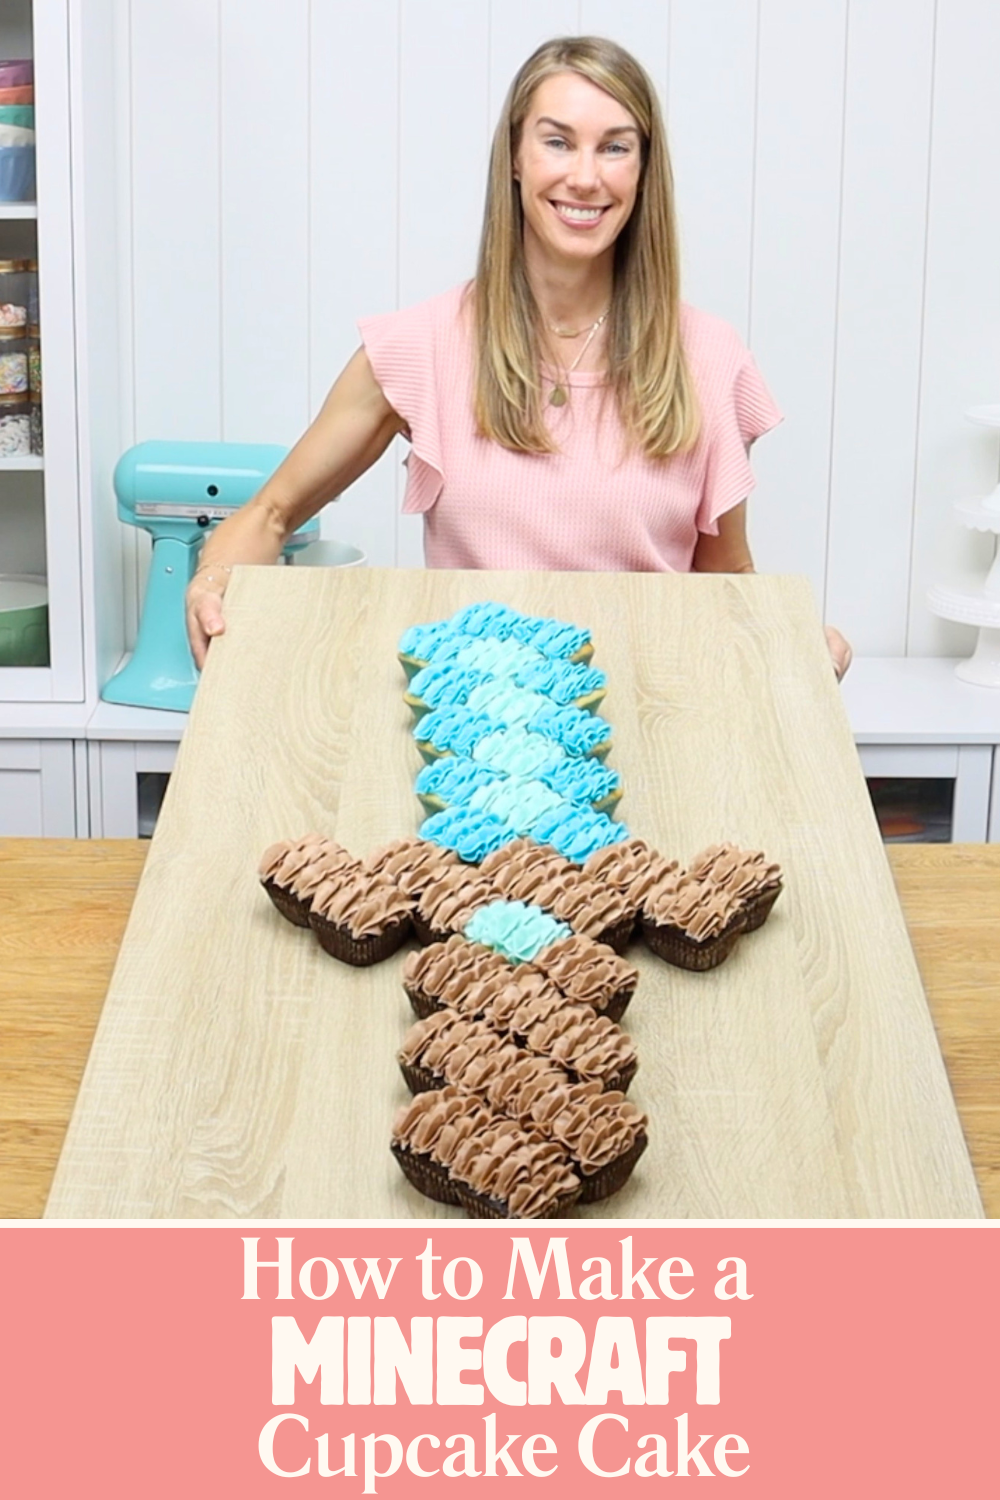
If you need cakes for kids who love gaming, this Minecraft cupcake cake is such a fun option.
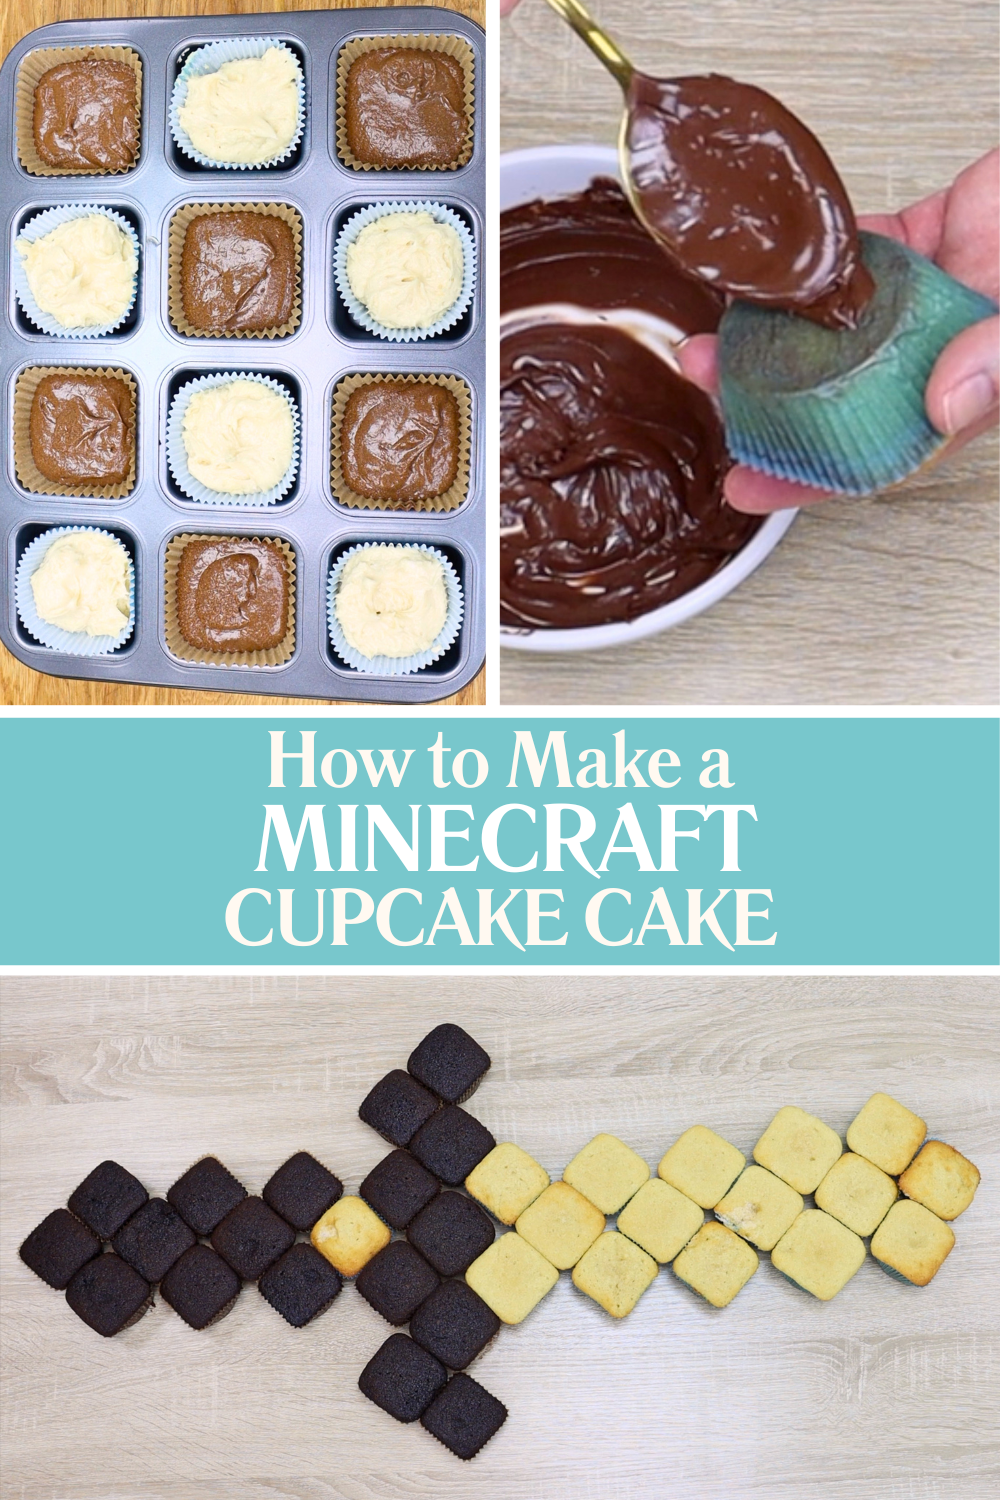
Bake cupcakes in a square cupcake pan using regular cupcake liners. As the cupcakes bake, they’ll spread to fill the square shape, which gives them that pixelated Minecraft look. Arrange the cupcakes into the shape of your design before decorating. This example creates a Minecraft sword.
Laying out the cupcakes first helps you figure out how large your cake board needs to be. If you don’t have a cake board large enough, improvise with another flat surface. This cake uses an IKEA tabletop as the base.
Melt chocolate chips and use the melted chocolate as glue underneath each cupcake so they stay in place when transporting the cake.
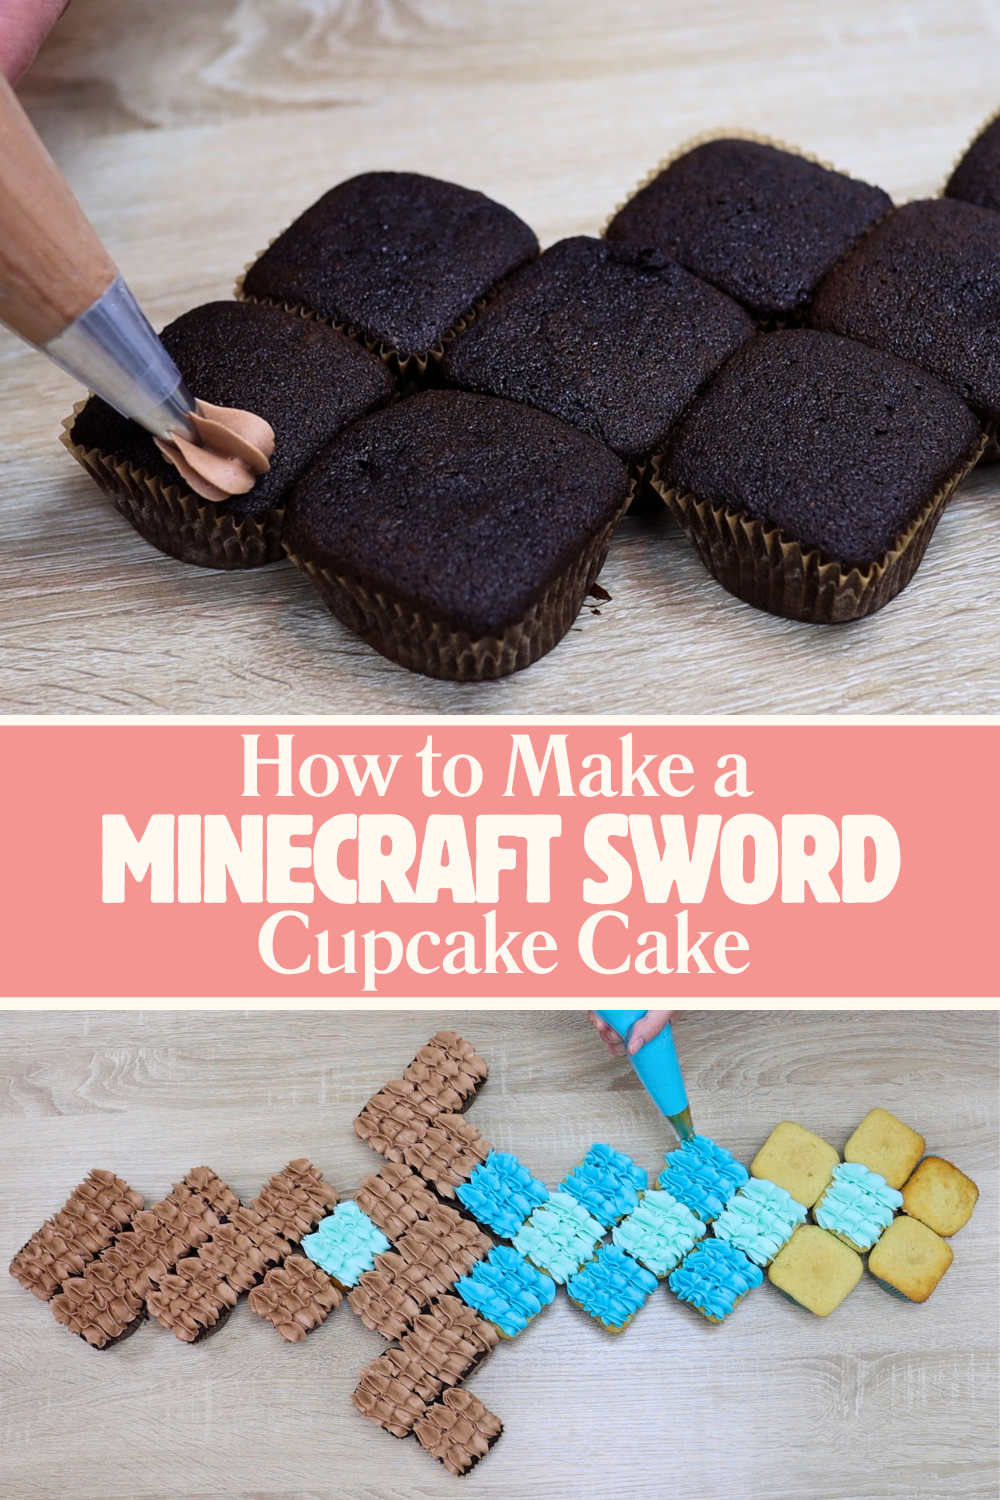
Decorate the cupcakes using buttercream and a 1M piping tip. Tint half the buttercream brown using melted chocolate and pipe wavy swirls onto the chocolate sections first. Tint the remaining buttercream light blue and after piping the inner cupcakes, add more blue to the buttercream and then pipe the outer cupcakes. Using two shades helps create that pixelated Minecraft style.
Cupcake cakes are especially practical for birthday parties because they’re so easy to serve. Instead of slicing cake, guests can simply pull cupcakes away from the design.
If you want to make this ahead of time, wrap it airtight with cling film or plastic wrap to stop the cupcakes drying out.
This rainbow ombré butterfly cake is one of the prettiest cakes for kids and tweens. Tint buttercream in all of the colours you want to use, making sure the colours blend smoothly into each other like a rainbow gradient. Layer the colors side by side inside a piping bag and pipe the frosting onto the cake.
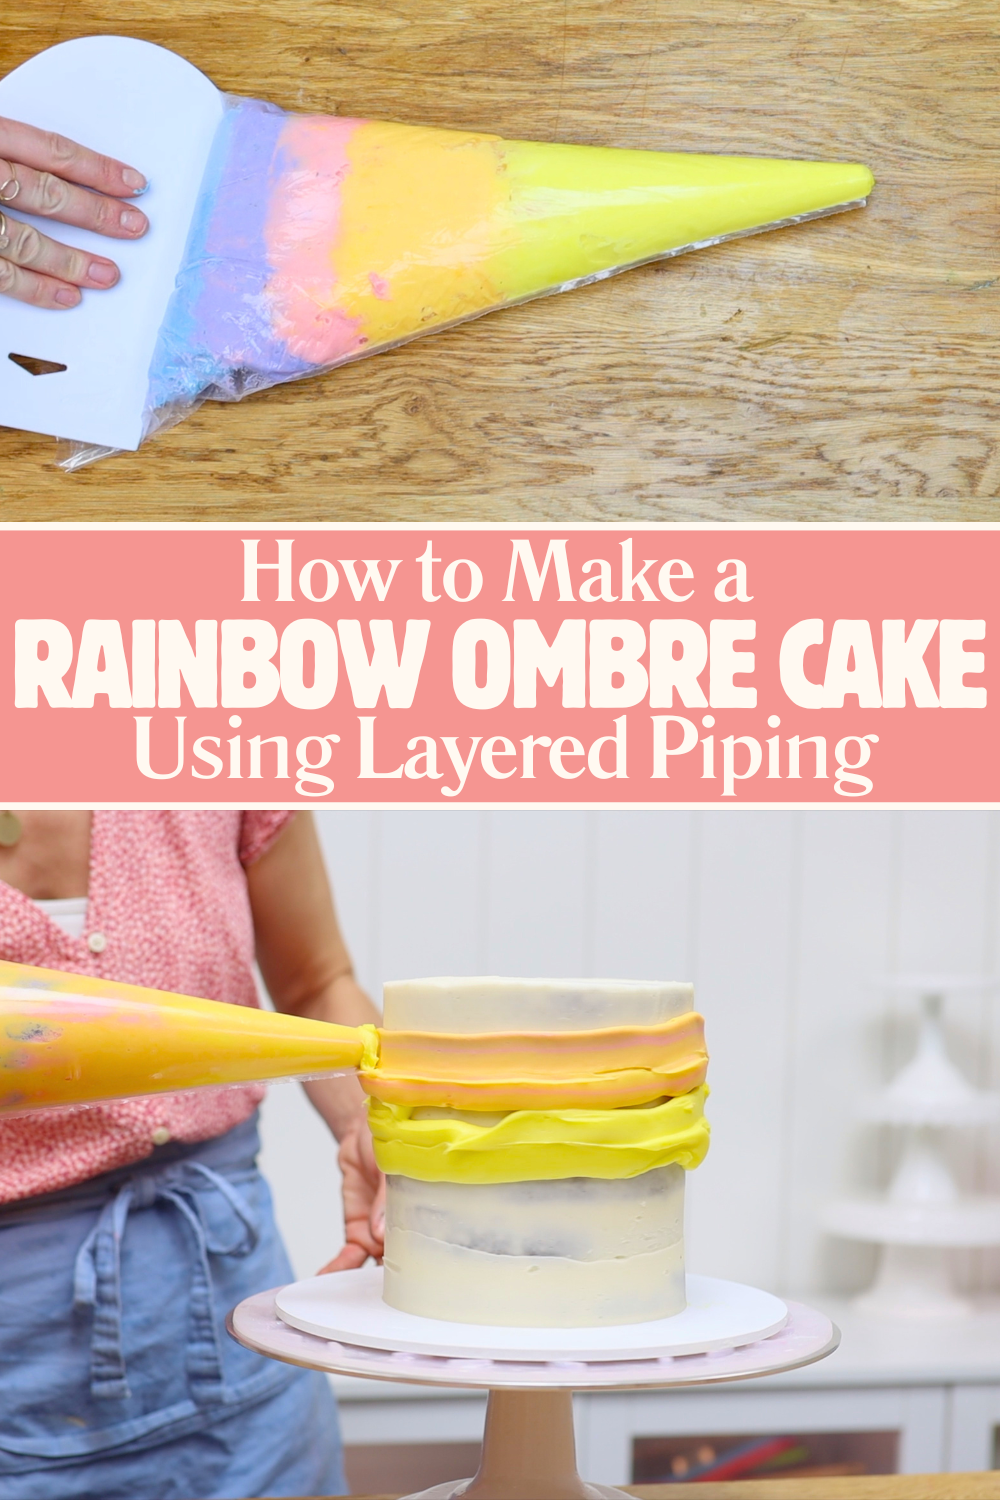
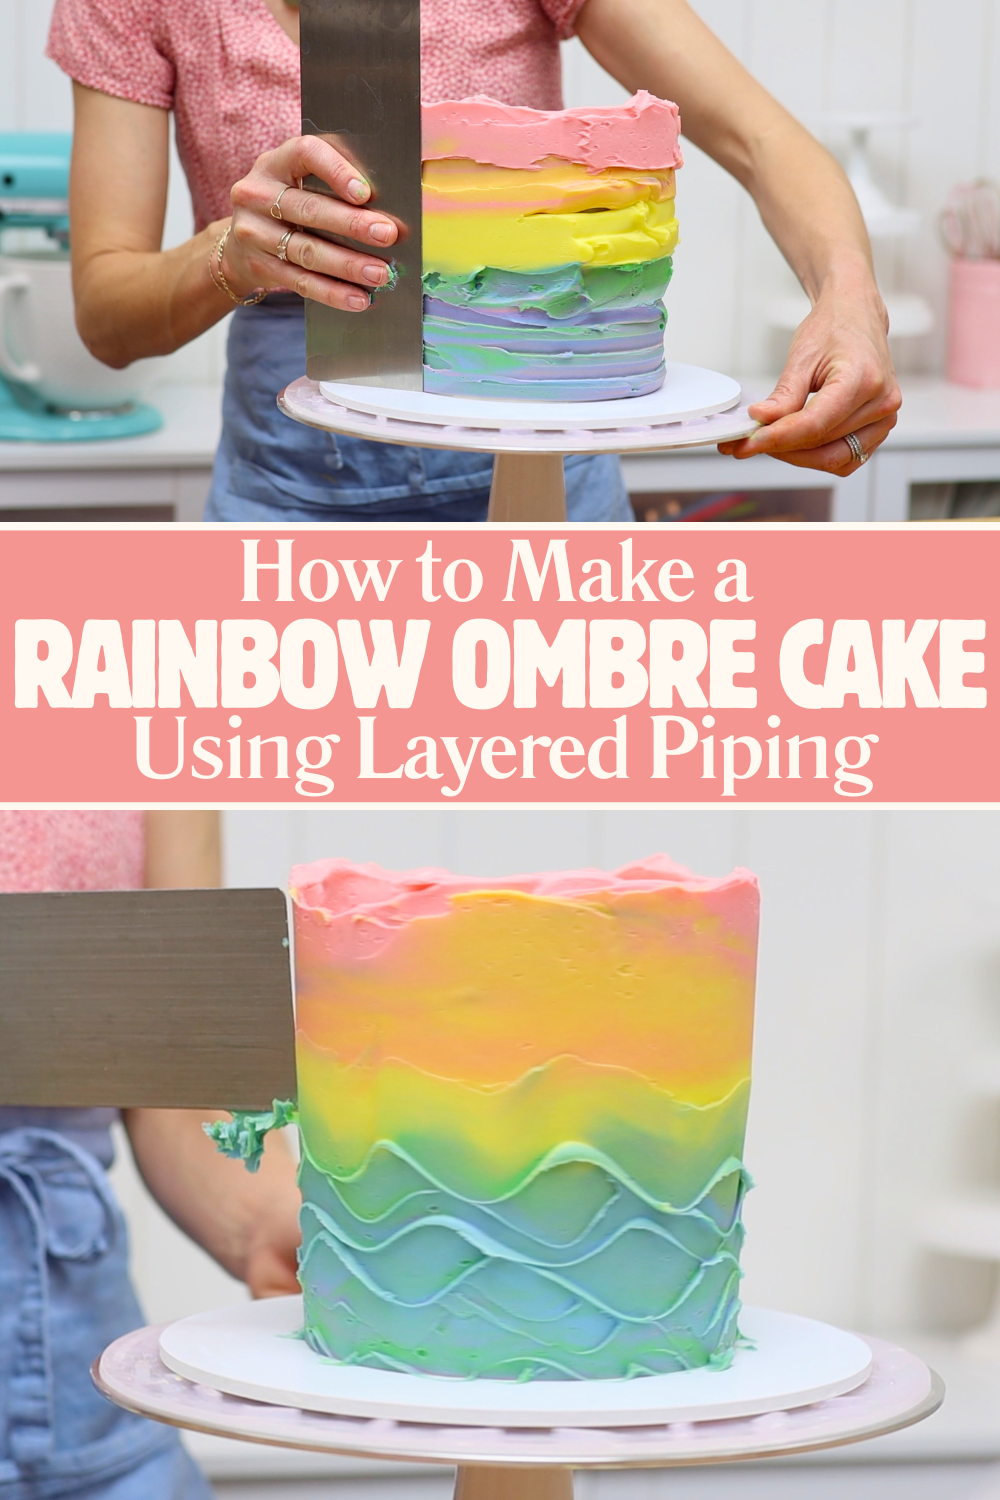
As you smooth the frosting, the colours blend into each other to create the ombré effect. For this design to work with just one piping bag, start by piping yellow just above the middle of the cake and continue with orange and pink above it. Then pipe purple at the bottom and continue with blue and the green above it.
Although this design looks beautiful smooth, adding texture makes it even prettier. Use the edge of a cake scraper and wiggle it gently up and down through the frosting to create soft waves.
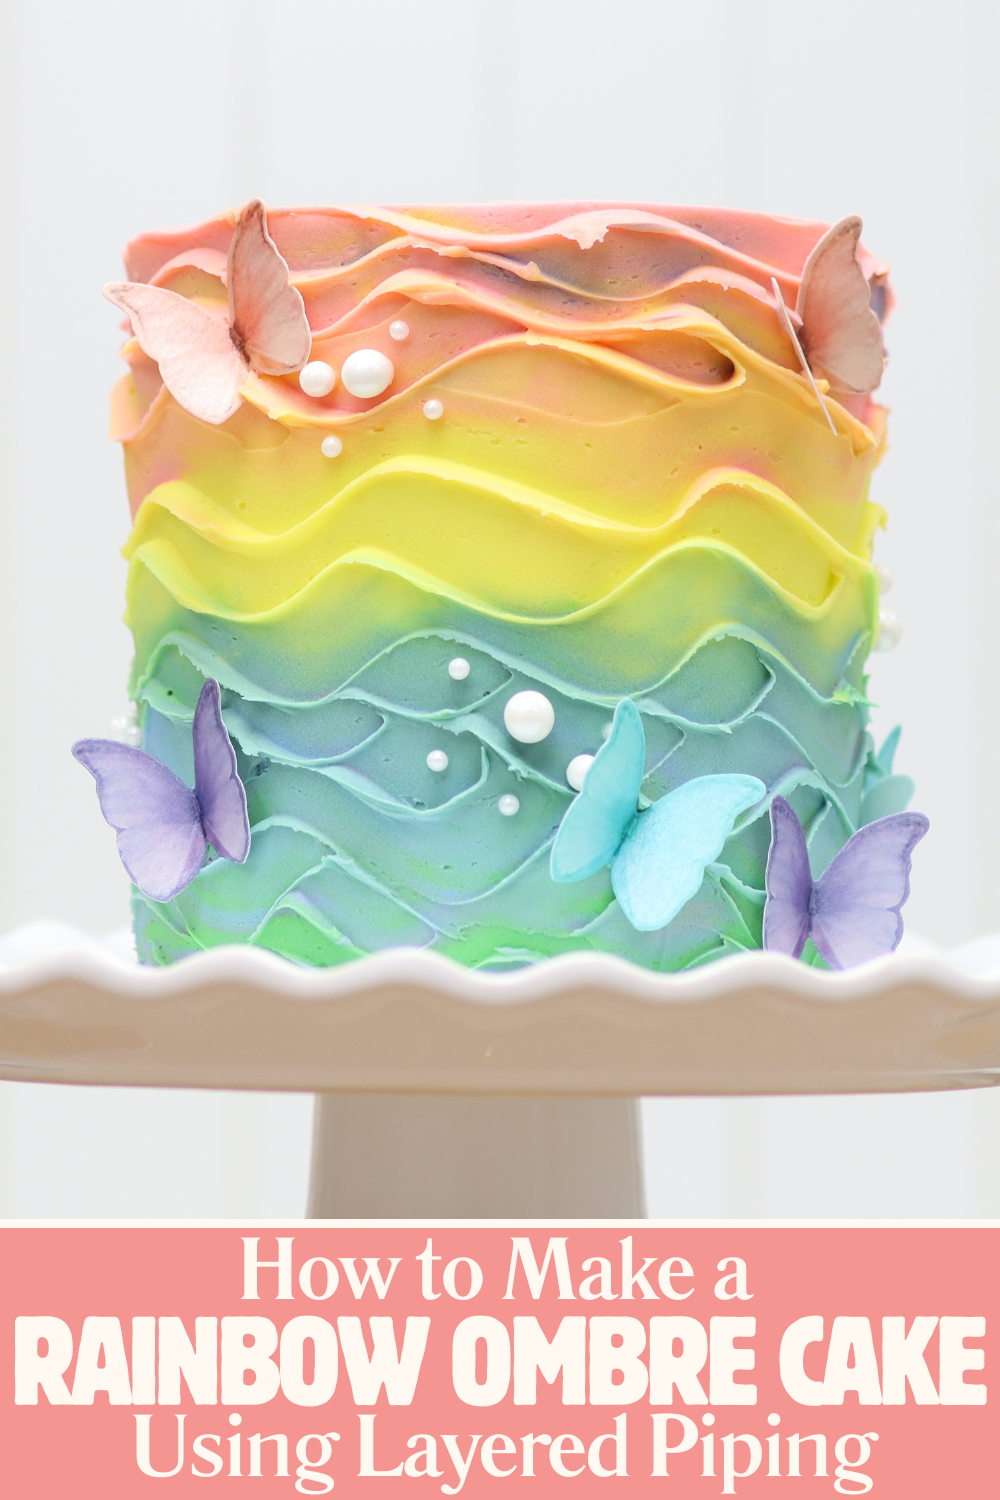
Add sprinkles or sugar pearls immediately while the frosting is still soft and sticky. Optionally, finish the cake with wafer paper butterflies for extra movement and colour. Wafer paper decorations are lightweight and easy to add to cakes without weighing down the frosting.
This graffiti cake is one of the coolest cakes for kids and tweens! For an extra surprise inside, create rings of rainbow colours using my Rainbow Cake Recipe.
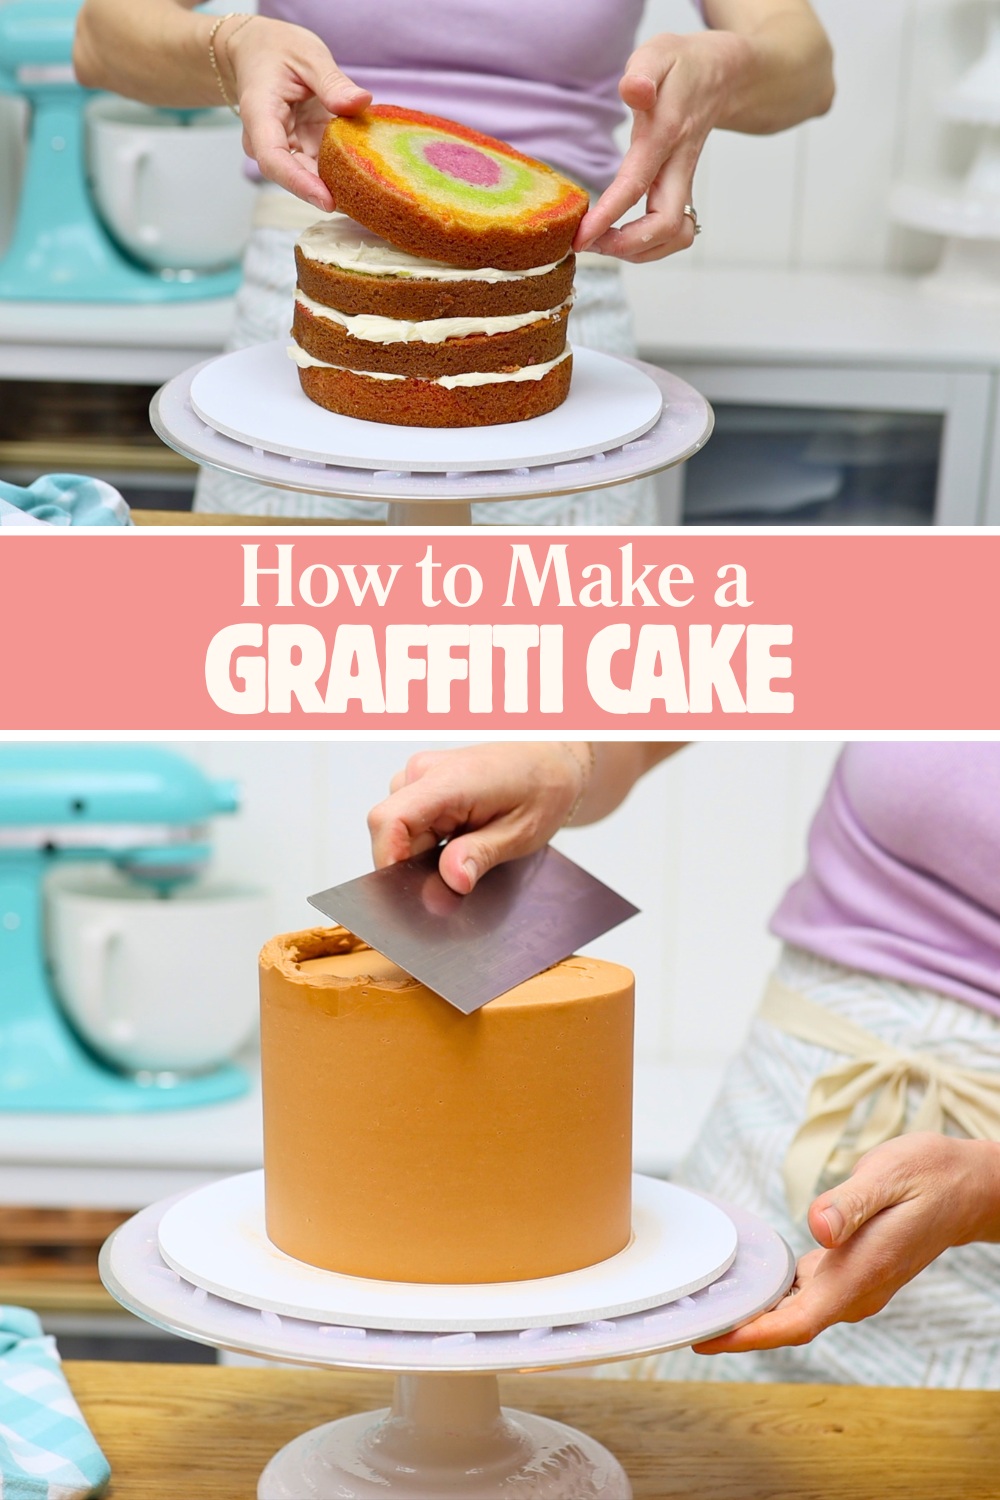
Layer and frost the cake as usual. For a brick-effect frosting, I used melted chocolate chips with a tiny bit of orange food colouring in my buttercream. If you prefer a bolder brick colour, add red food colouring.
After chilling the frosting until firm, use a zigzag textured cake comb to imprint horizontal lines into the cake. Then use a petal piping tip to score vertical lines between each brick. Cold frosting works best for this because soft frosting drags easily and creates unwanted texture.
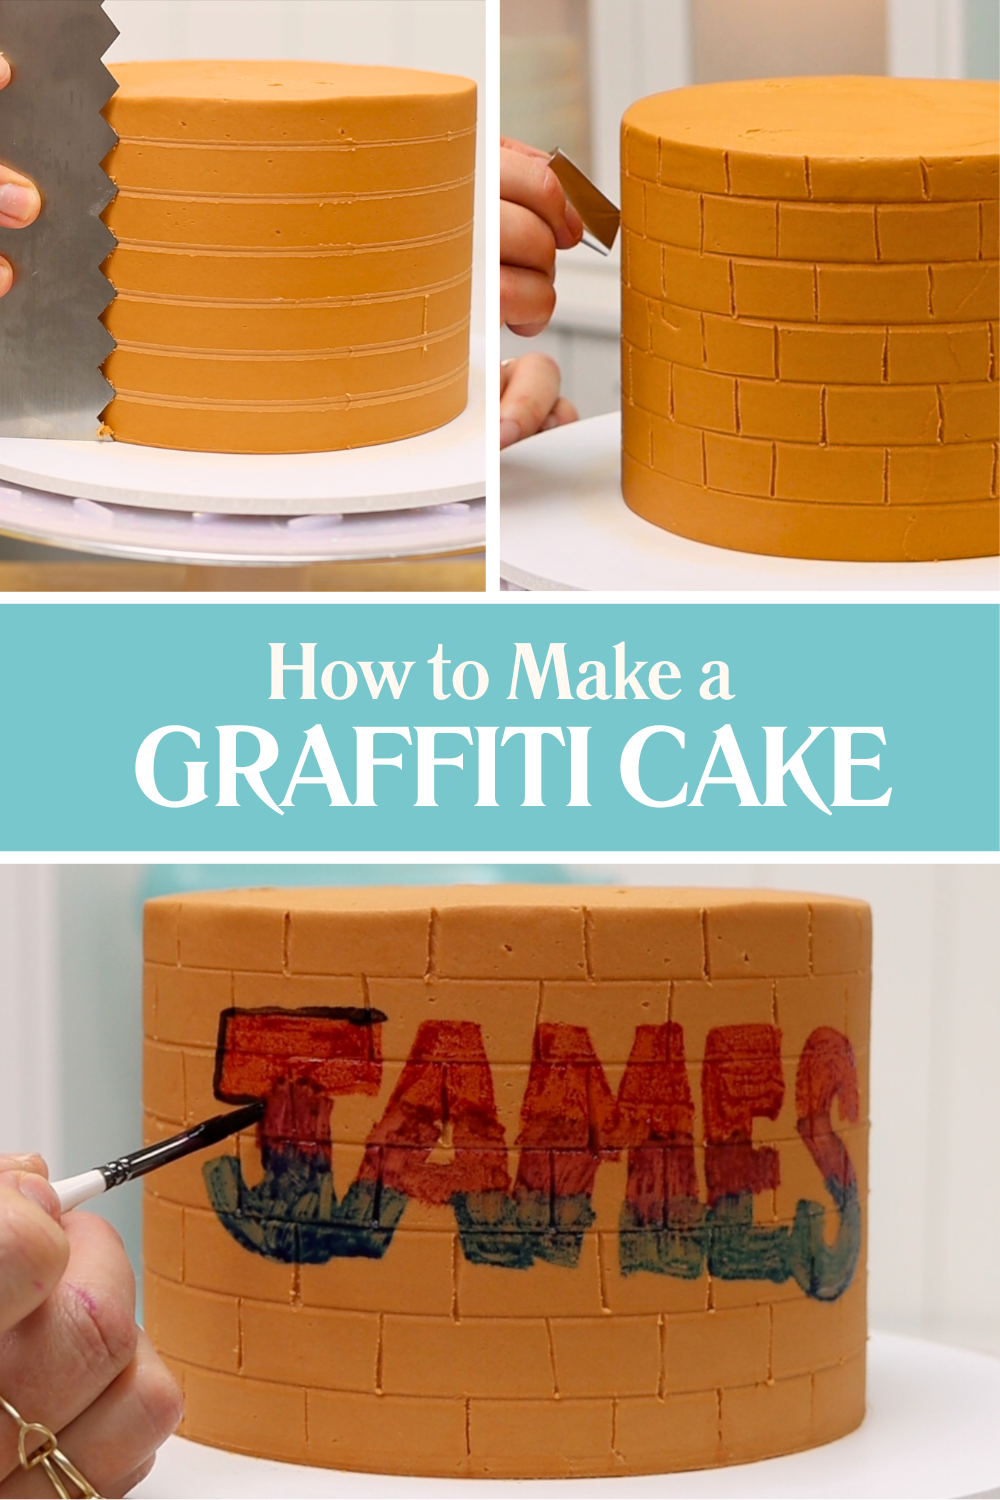
To create the graffiti effect, mix about a teaspoon clear almond extract or clear vanilla extract with food colouring and paint directly onto the cake with a paintbrush.
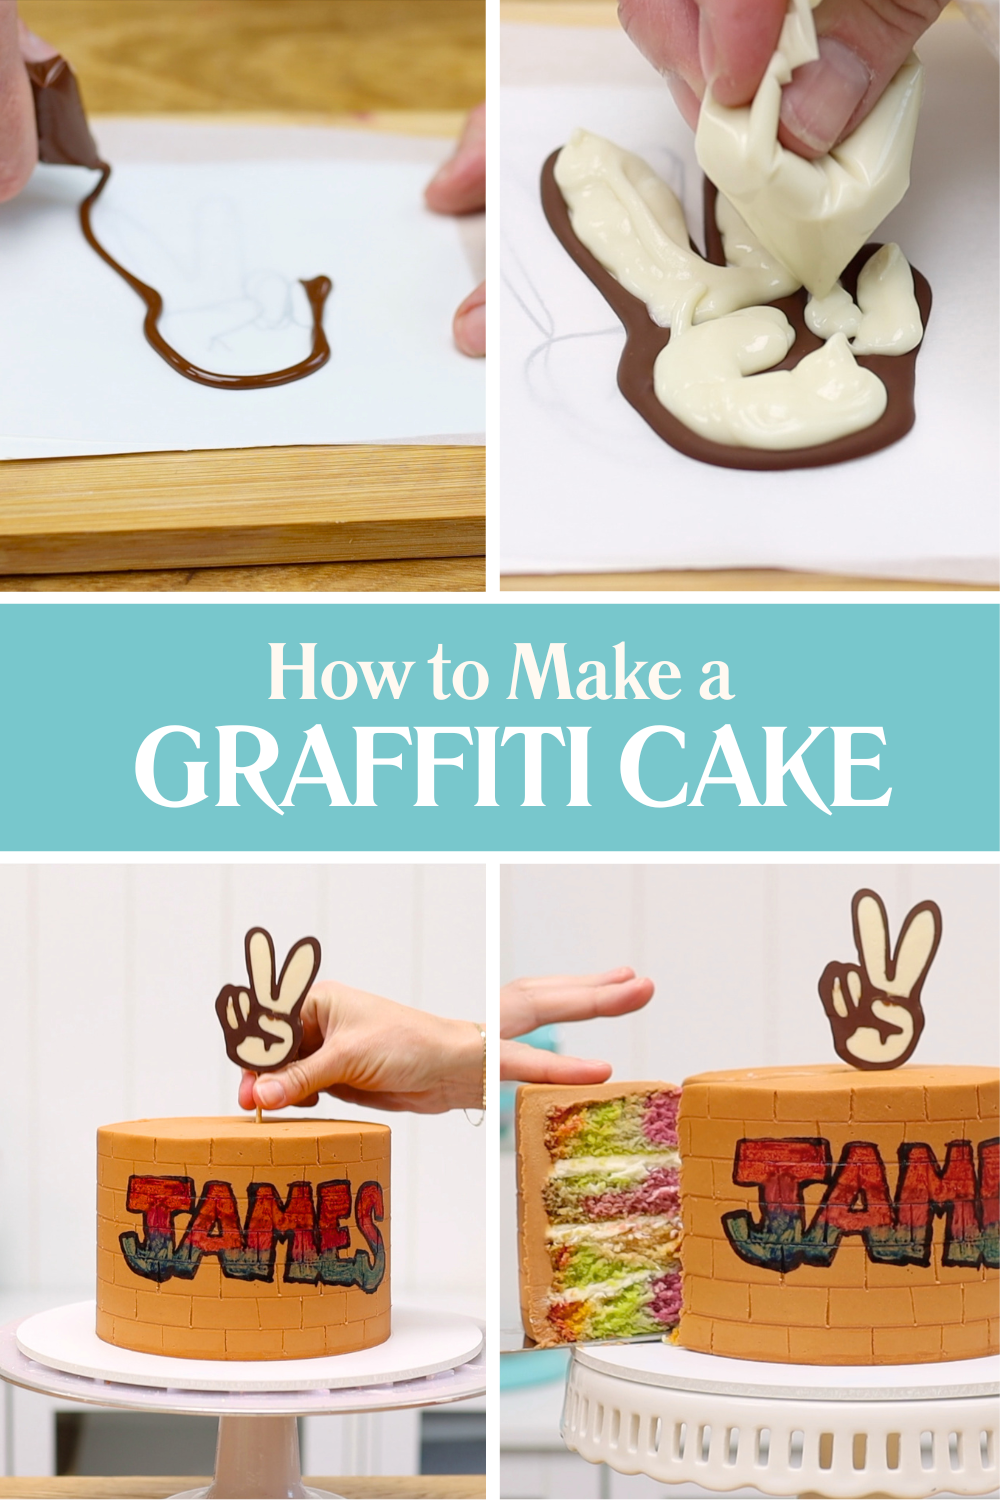
This cake design also includes a homemade edible chocolate topper. Melt chocolate chips in the microwave at 50% power so they don’t overheat. Spoon the melted chocolate into a sandwich bag, snip off a tiny corner, and pipe over a design drawn onto parchment paper. I used a hand showing the peace sign. Freeze the outline briefly to set it and then fill in the middle with white chocolate. Press a wooden skewer into the chocolate and freeze again until firm before peeling it away from the paper and inserting it into the cake.
If you want simple cakes for kids and tweens that still feel festive and fun, sprinkle cakes are always a great choice.
The most important step for this cake is to frost the cake smoothly. If you need help for this, check out my tutorial on how to frost a cake.

Place your frosted cake onto a tray before decorating so the tray catches all of the extra sprinkles.Pour sprinkles around the bottom edge of the cake and gently press them into the frosting so they stick. Tap the extra sprinkles off the cake board and pour them back into the container to reuse later.
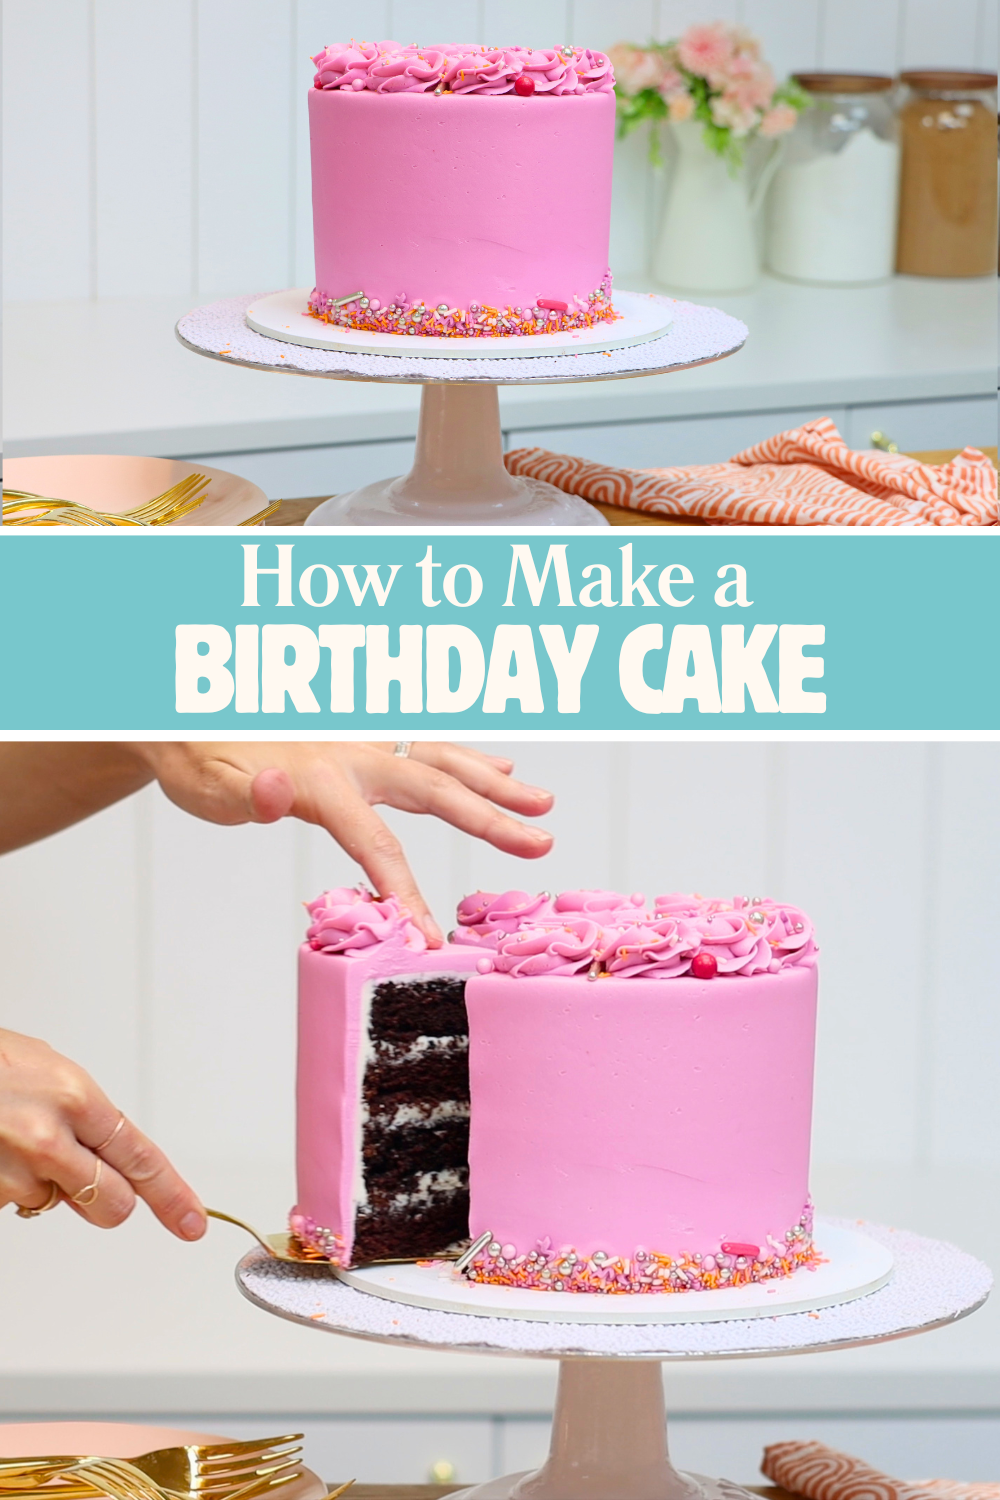
Spoon leftover buttercream into a piping bag, filling it no more than three-quarters full so it’s comfortable to hold. Pipe swirls around the top edge of the cake. Double swirls add texture and height without making the cake overly sweet or heavy with frosting.
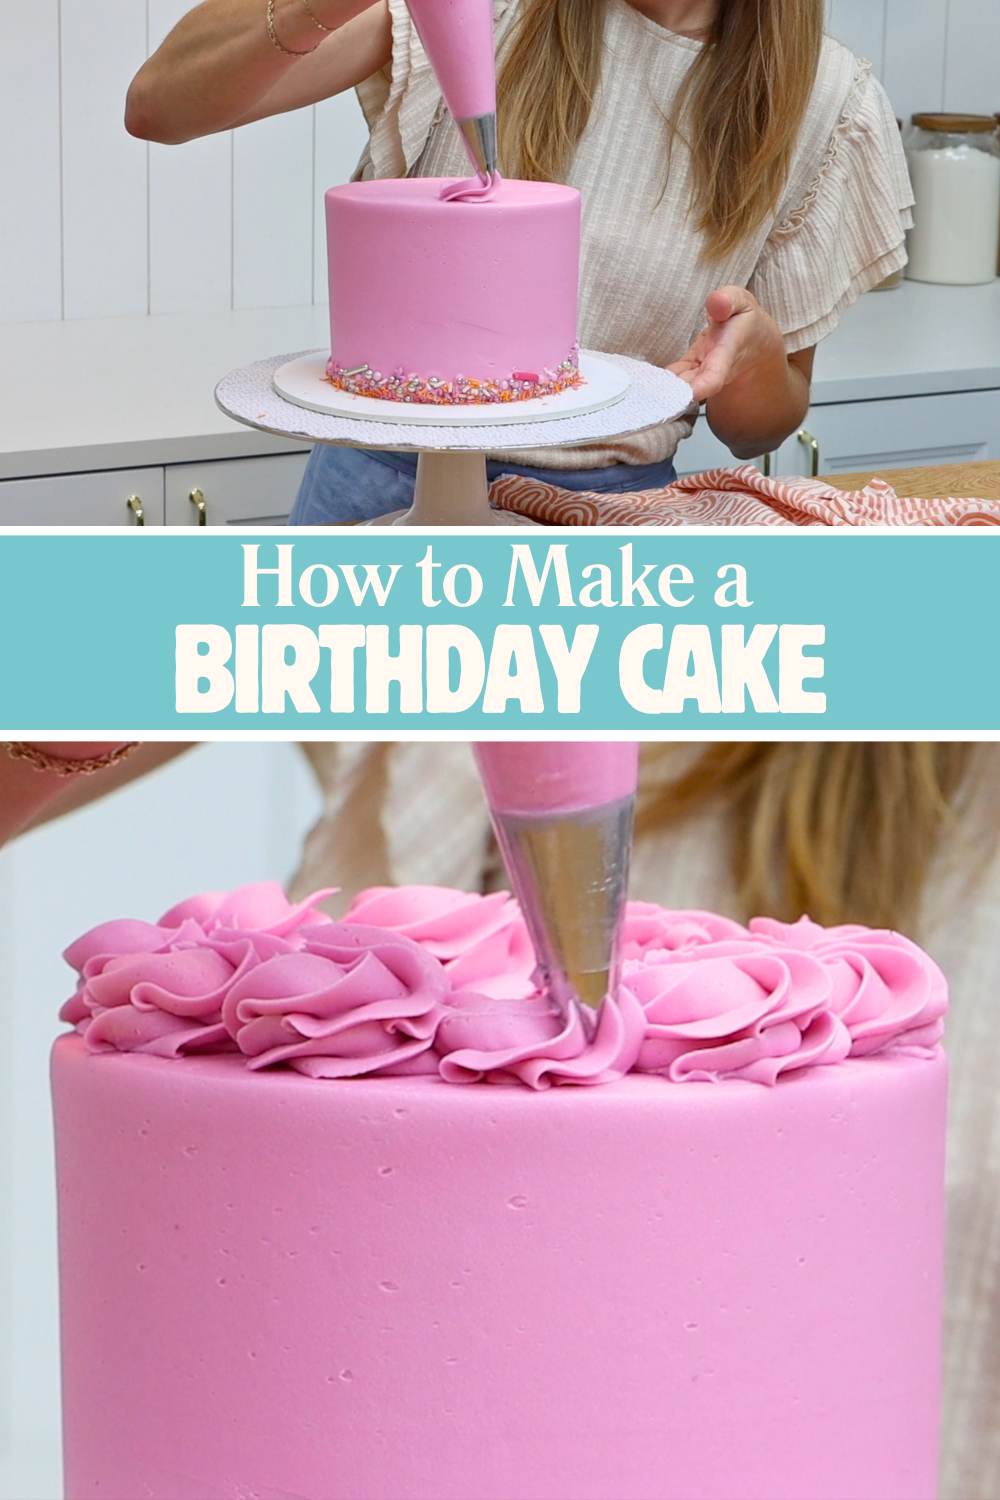
If you want sprinkles on top, add them straight away while the frosting is still soft and sticky.
This is one of the easiest birthday cakes to make but it still feels colourful, celebratory, and fun for all ages.
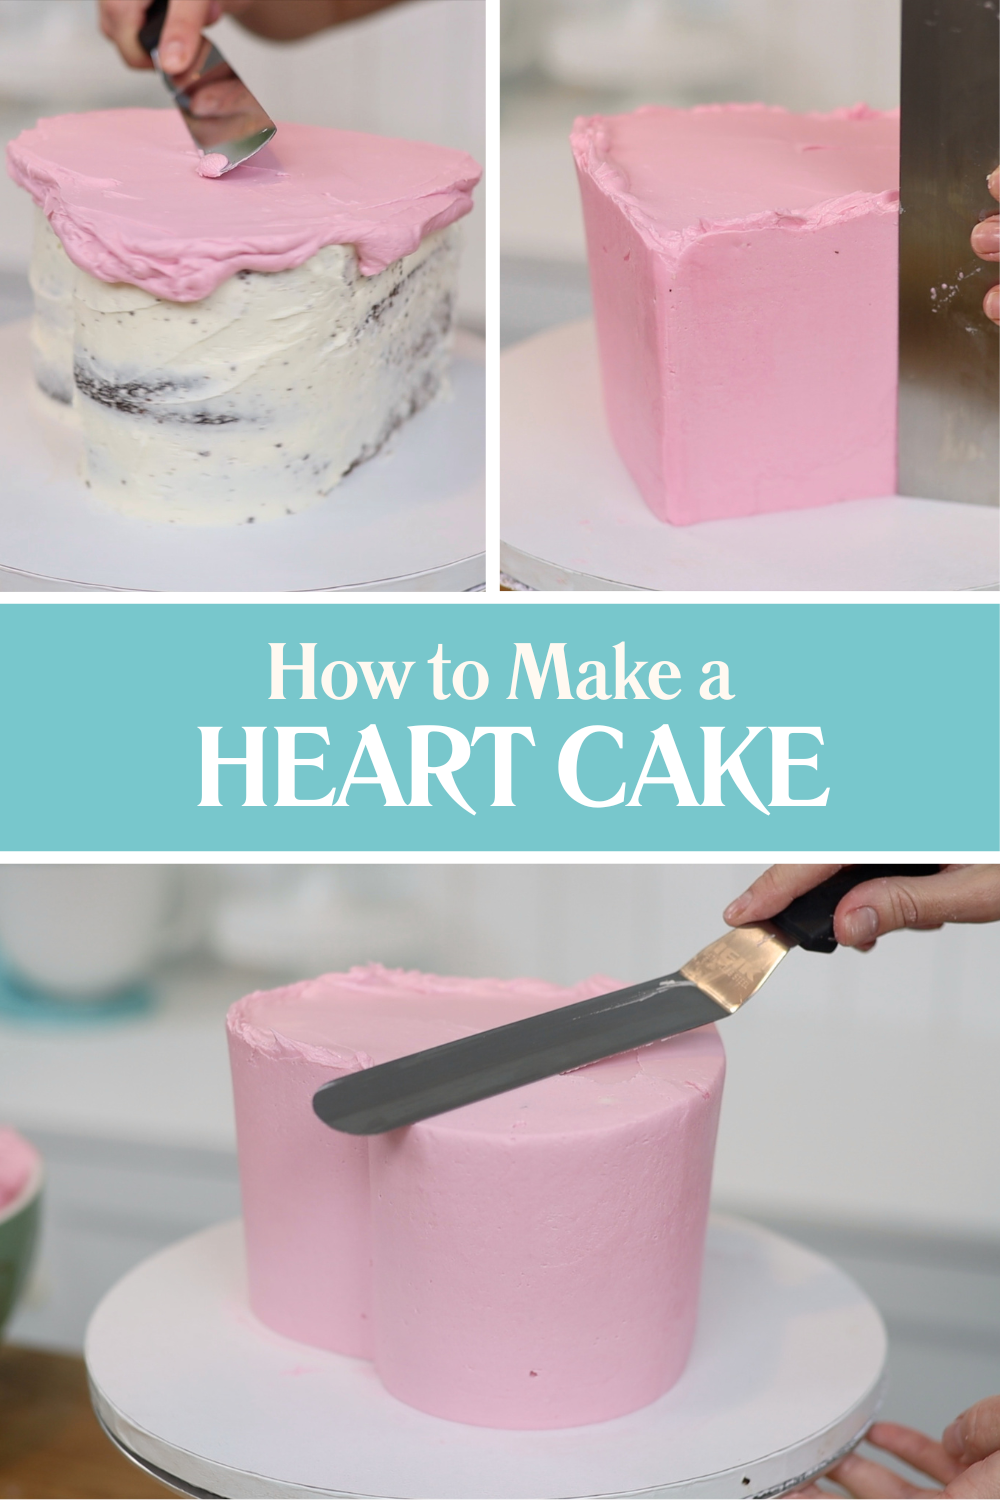
Vintage heart cakes have become incredibly popular and are surprisingly easy to create. With this method you don't even need a heart shaped pan to bake the layers!
Start with round cake layers and cut small sections off two sides of each layer to create the bottom point of the heart shape. Spread buttercream onto the curved sides and attach the cut-off pieces using the buttercream as glue. Now you have a heart-shaped cake layer! Layer the cake with filling and repeat until you have a full heart-shaped cake.

Like most cakes, this design is easiest to frost when the cake is cold so chill it before adding a crumb coat. Chill again before adding the final coat of frosting and smoothing it carefully. Smooth frosting helps vintage piping stand out neatly.
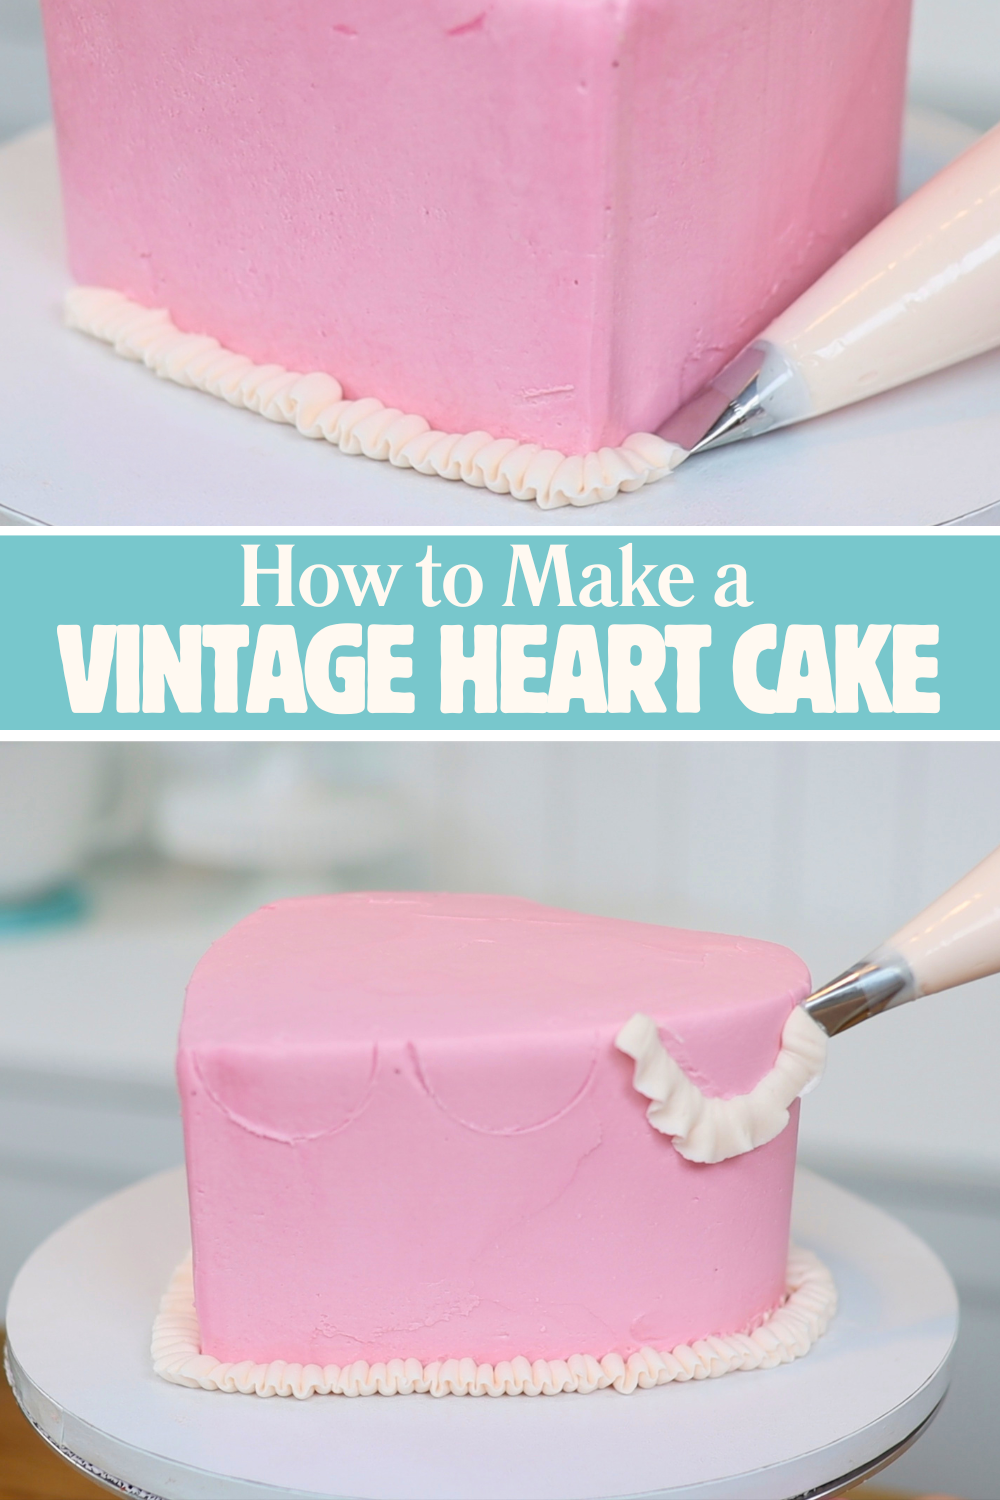
Use a variety of piping tips to add the vintage details. A petal tip like a Wilton 104 creates beautiful ruffles around the bottom of the cake. Use cookie cutters to lightly press into the frosting to create guides for piping swags, also using a petal tip.
Star-shaped piping tips add gorgeous texture for beaded details, which can be layered over other piped decorations. Changing the size of the piping tip creates even more variety. For example, I used a Wilton 32 star tip to pipe on top of ruffles at the bottom of the cake and a smaller Wilton 18 star tip to pipe above the ruffly swags:
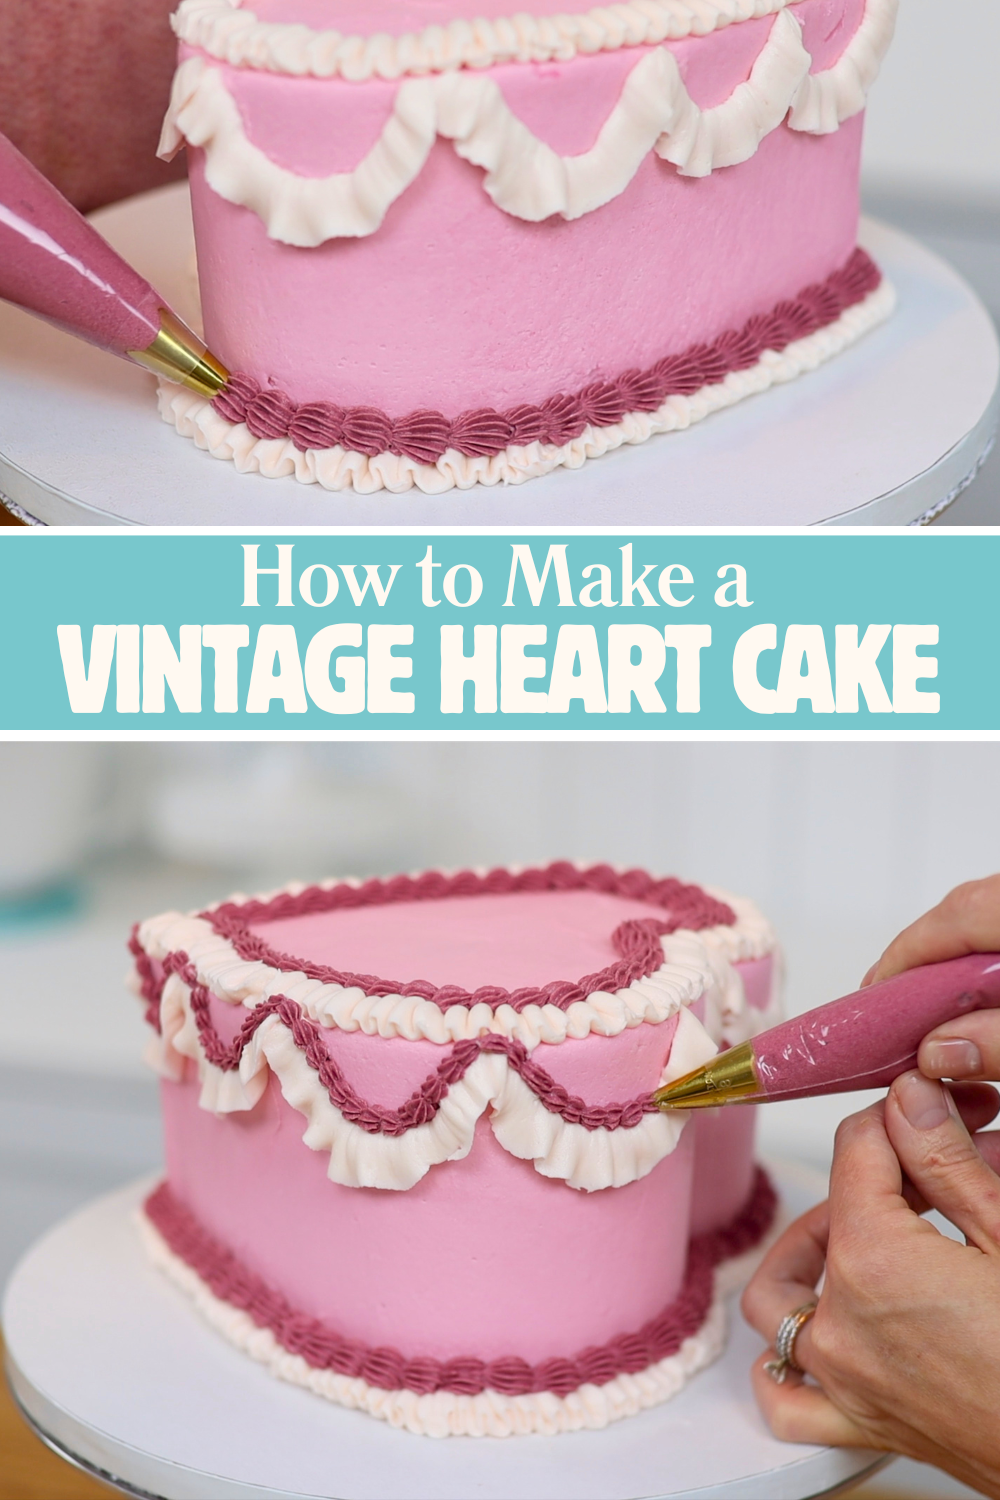
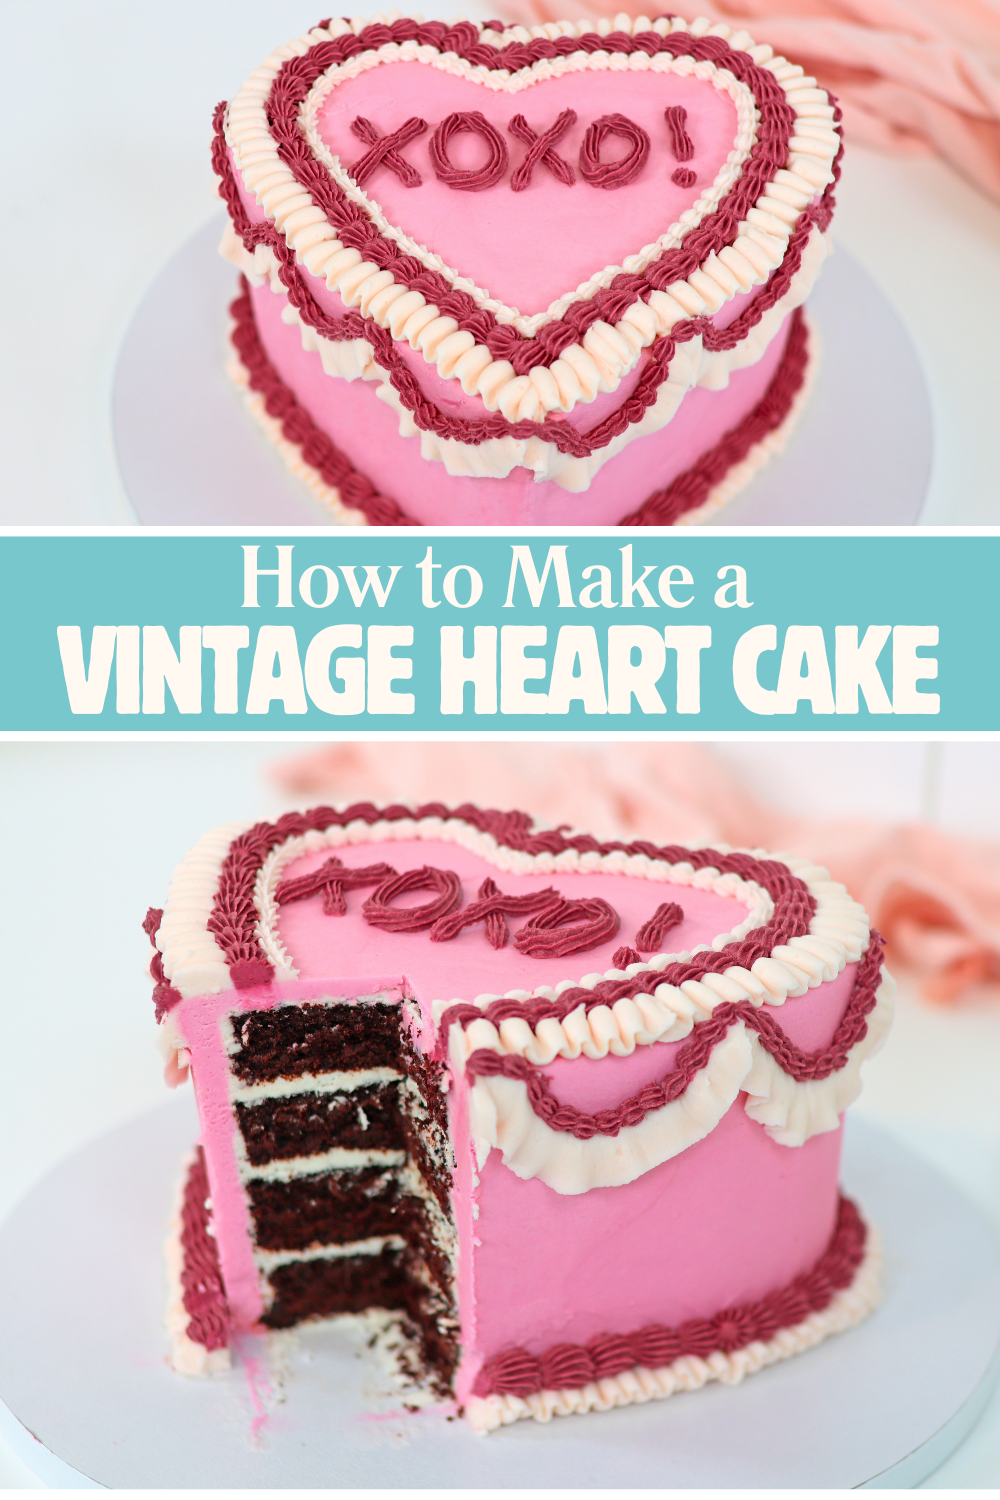
To add a message, use a small round piping tip or my favourite tip for lettering on vintage cakes is a small star-shaped piping tip.
I hope you've seen some ideas you love for cakes for kids and tweens. Ask me any questions in the comments section below and visit my cake school to learn hundreds more cake decorating designs and techniques. Or take my FREE course on 10 Frosting Techniques!
You can also watch a video of these cake ideas for kids and tweens: