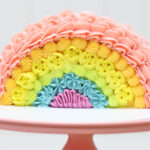
In this tutorial I'll show you how to frost mini cakes with the right tools and techniques for super smooth frosting.
Before diving into the technique, let’s talk about the tools you’ll need. You don't need anything special for mini cakes compared to larger cakes.
A
You’ll need an offset spatula and a cake comb with a straight edge, also called a frosting smoother. It can be made of plastic, metal or acrylic. I like to use a 9 inch
You'll assemble your cake on a cake board. It can be cardboard with a greaseproof lining or foam core or acrylic. It should be at least 2 inches wider than your cake.
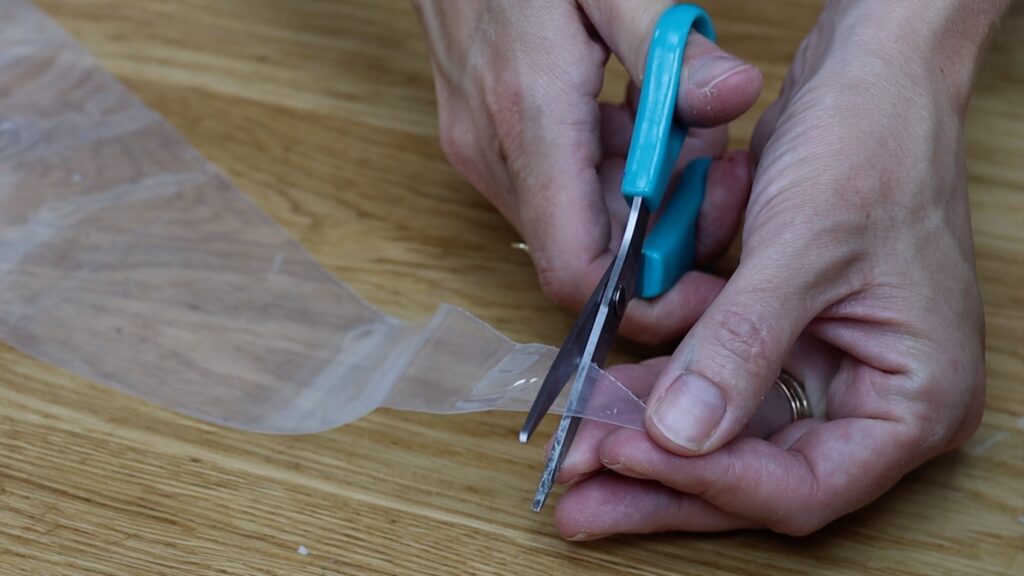
A piping bag is really helpful but not essential. You don’t need any piping tips for frosting mini cakes with a piping bag. Cut a little piece off the end and fill the bag with frosting and you'll pipe through that hole.
Of course, you'll also need cake layers and frosting! I'm using my Small Chocolate Cake Recipe, baked in 4 inch pans. I'll fill and frost it with my 4 Minute Buttercream, which is delicious and also easy to make, use, and store. For mini cakes I add a bit more milk than normal so that the frosting is a bit less stiff. You’ll see how this makes the process much easier.
To explain how to frost mini cakes it's important to start at the very beginning because the first step is crucial.
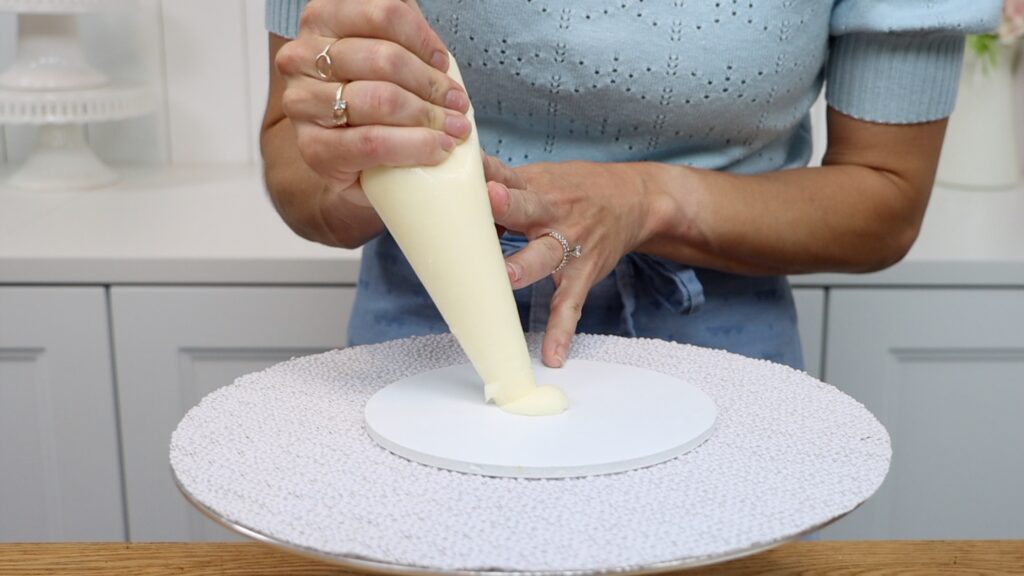
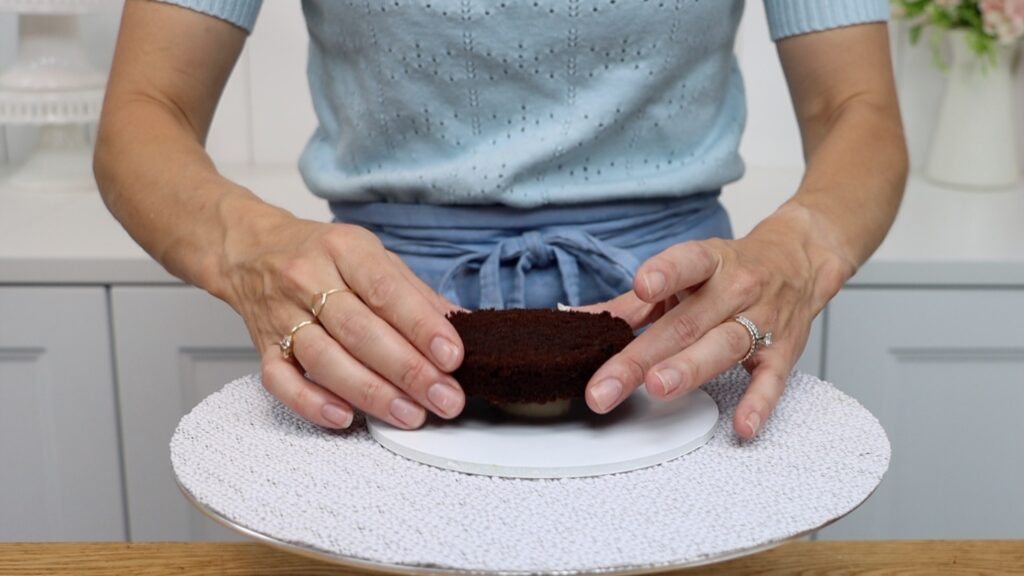
Pipe or spread some frosting onto the middle of cake board and then press your first cake layer down onto it. Adjust it to center it so that the cake is in the middle of the board. That frosting underneath will set and act like glue to hold the cake in place. This is how to prevent mini cakes from moving around while you frost them.
Now add your filling on top of this first cake layer. Piping is quicker and will pull off fewer crumbs from the cake. After piping it, I like to spread it to cover the whole cake and also level it. If you don't want to dirty a piping bag, spreading it straight onto the cake is fine too.
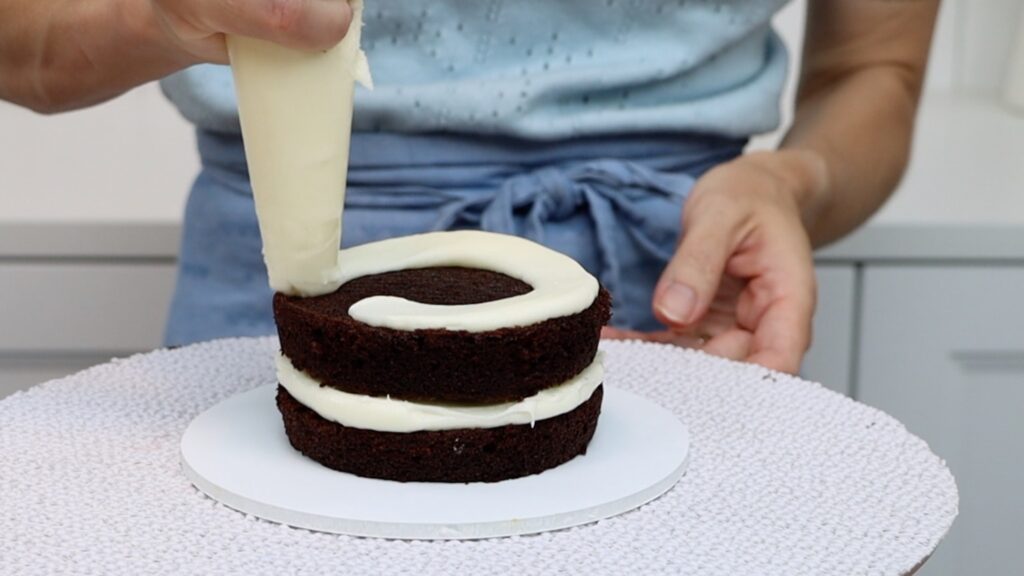
As you place your next cake layer on top, it’s important to spin the
Alternate filling and cake layers to assemble your mini cake. Then spread around the sides to push the filling flat against the cake if it’s sticking out.
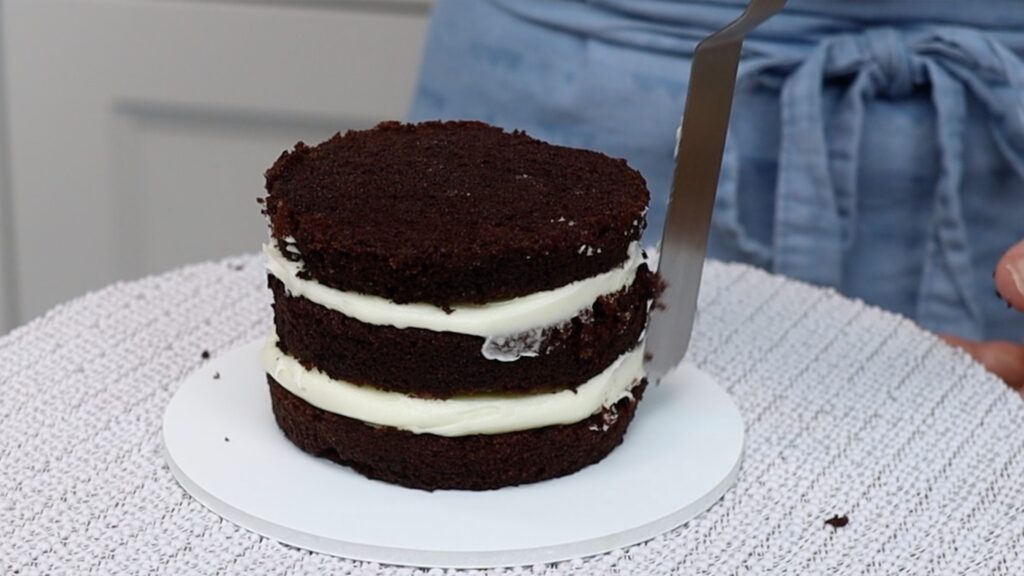
The other most important step is to chill mini cakes before frosting them. Room temperature cake layers are crumbly and soft but when they’re cold, they’re firm and much less crumbly. That means that as you spread the frosting onto the cake, you won’t pull off as many crumbs.
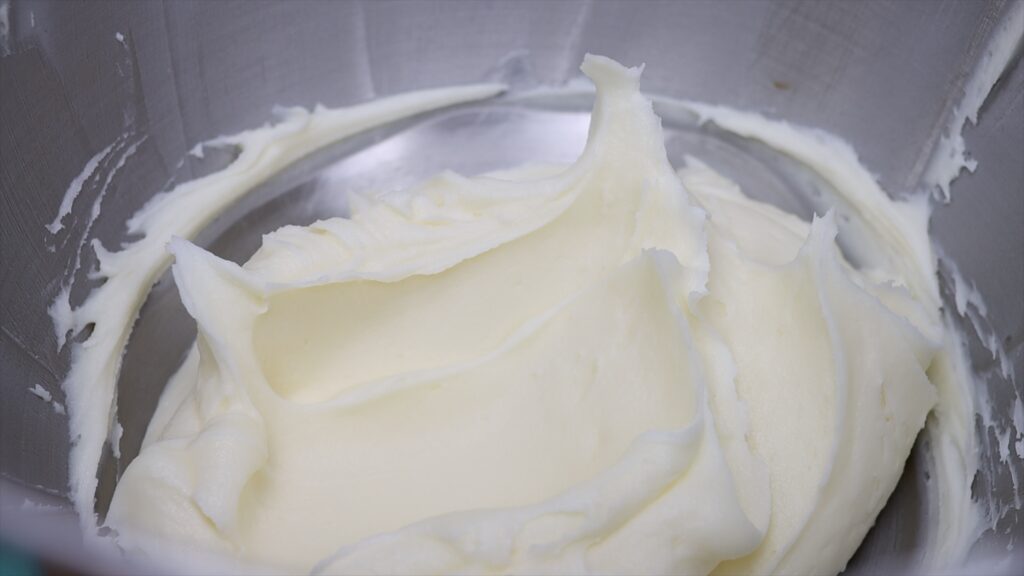
Put the cake in the freezer for 30 minutes to chill, or the fridge for an hour. Meanwhile, check the consistency of your frosting. It should be smooth without air bubbles and it should be easy to stir. It should be just stiff enough to hold peaks when you pull your spatula out of the bowl. If you scoop some up and tap your spatula on the side of the bowl, the frosting should fall back down into the bowl instead of clinging to your spatula.
Now for the most troublesome part of the process: how to frost mini cakes. If you've followed the steps so far you will have set yourself up for success. Now it's time for the crumb coat. When your cake is cold, pipe or spoon some frosting onto the top. Spread it around to cover the top so that it sticks out over the edges.
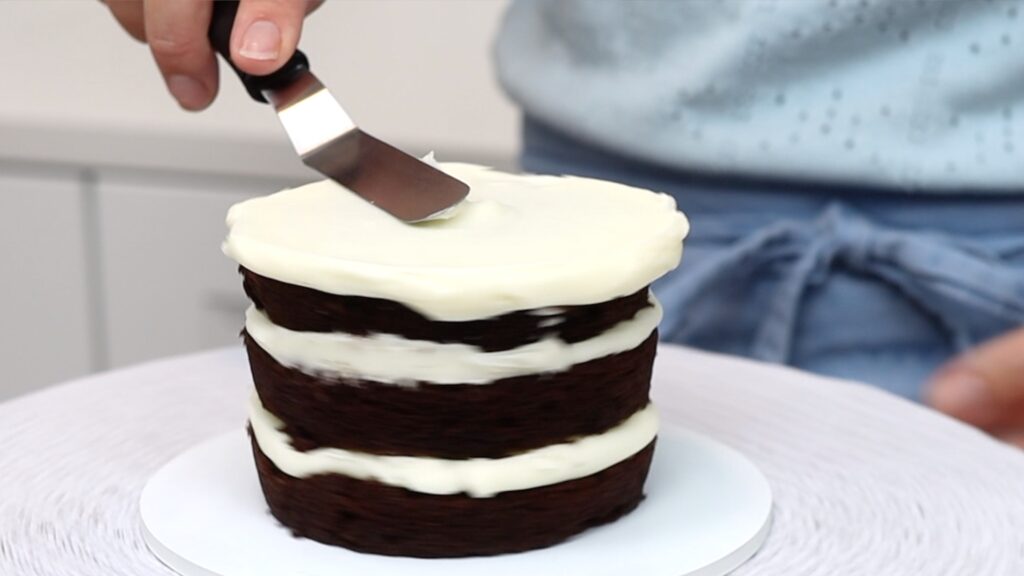
This is the first layer of frosting, called a crumb coat. It doesn’t have to be perfect because it’s going to be covered up but it does need to trap any crumbs that come off the cake so it needs to cover the entire cake.
I like to pipe the frosting onto the sides because this way you’ll pull off the fewest crumbs. Spread the frosting using side to side motions with your
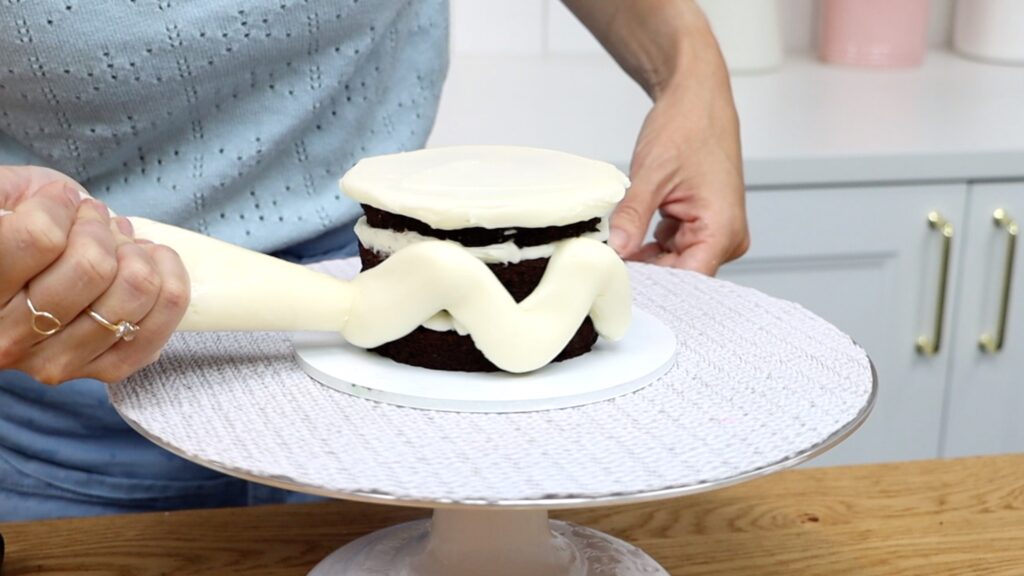
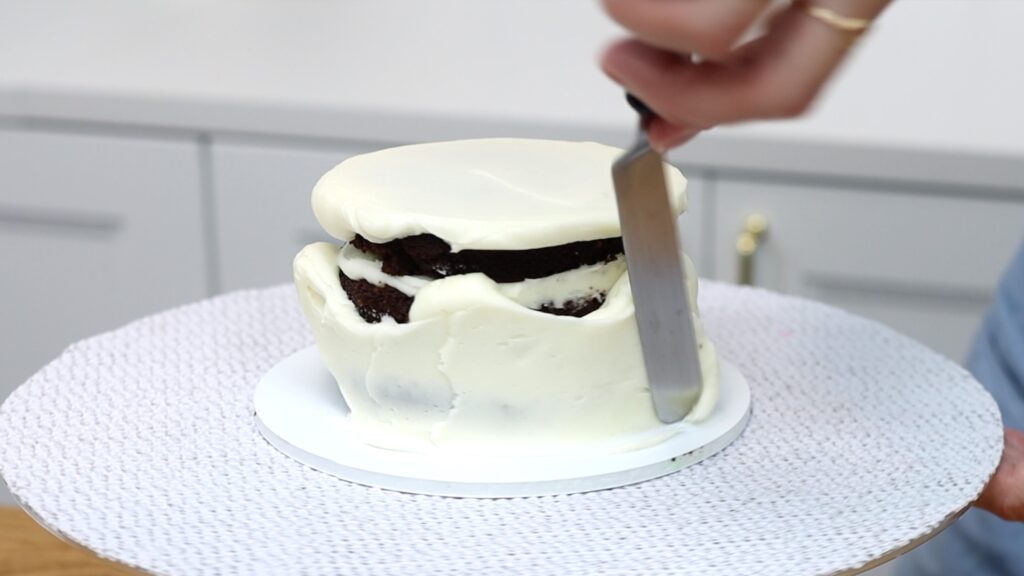
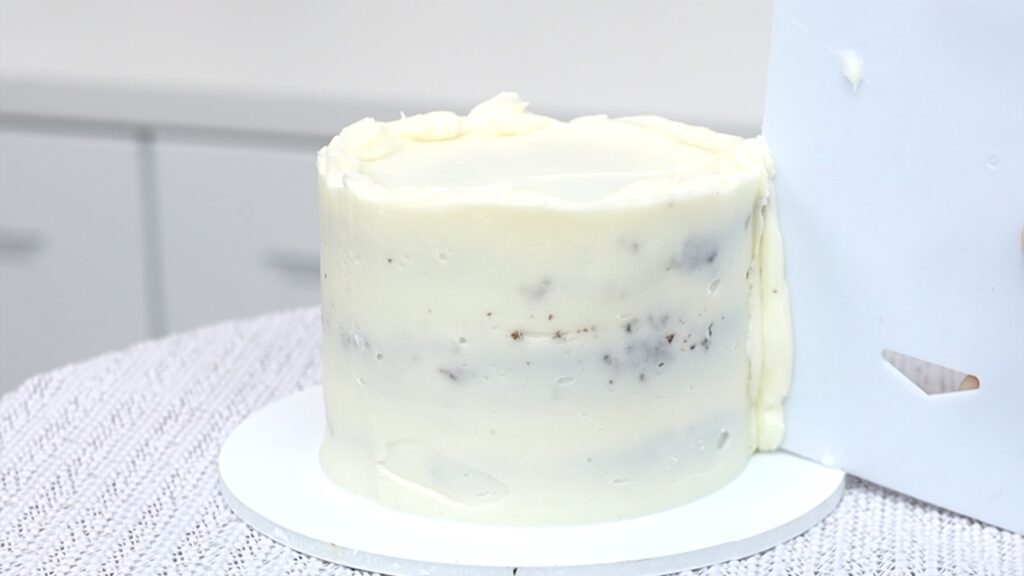
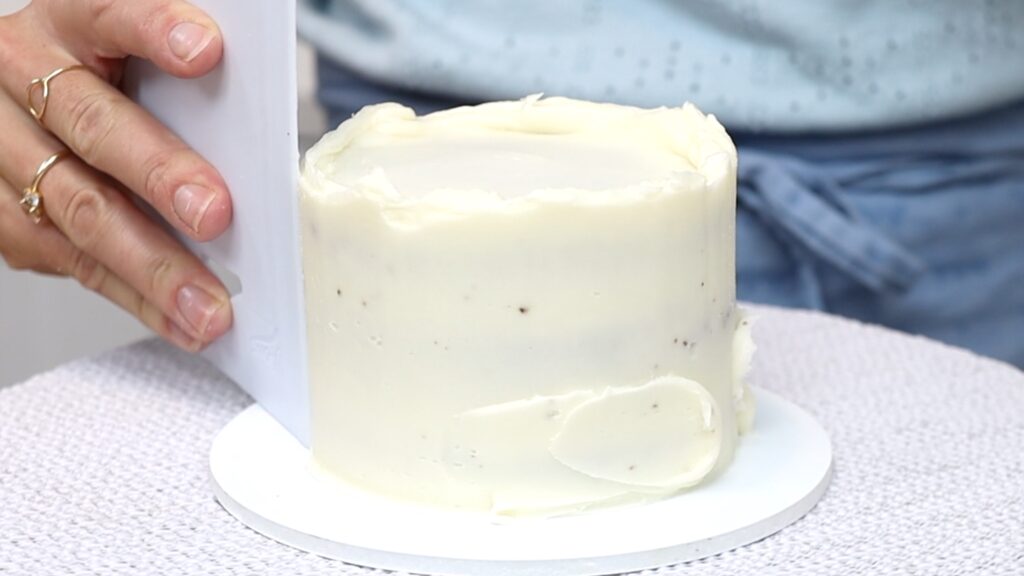
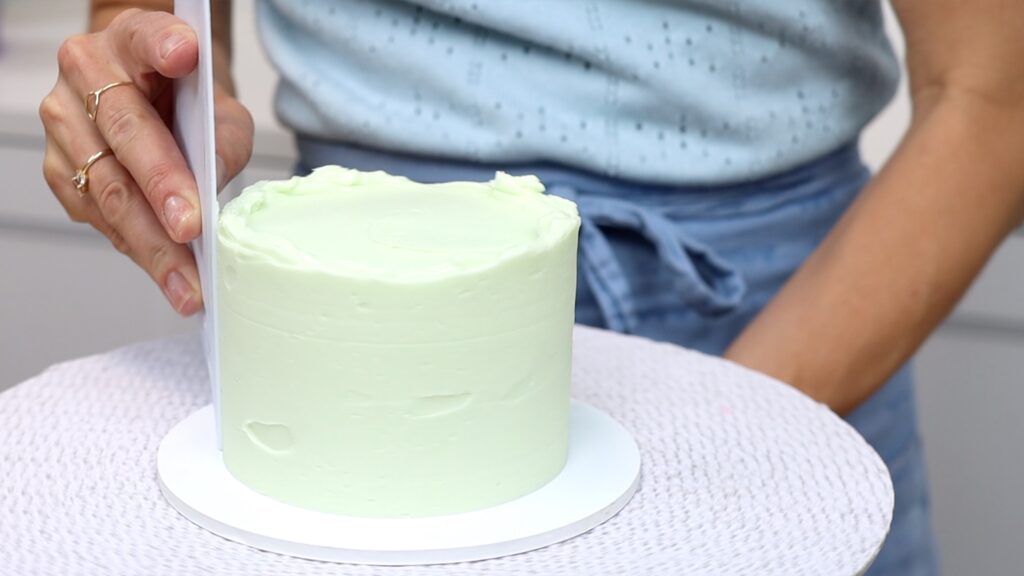
When the cake is completely covered with frosting, switch to a cake comb. Push the base down on the cake board to line it up straight and then scrape around the cake. You'll smooth the frosting and take off the excess.
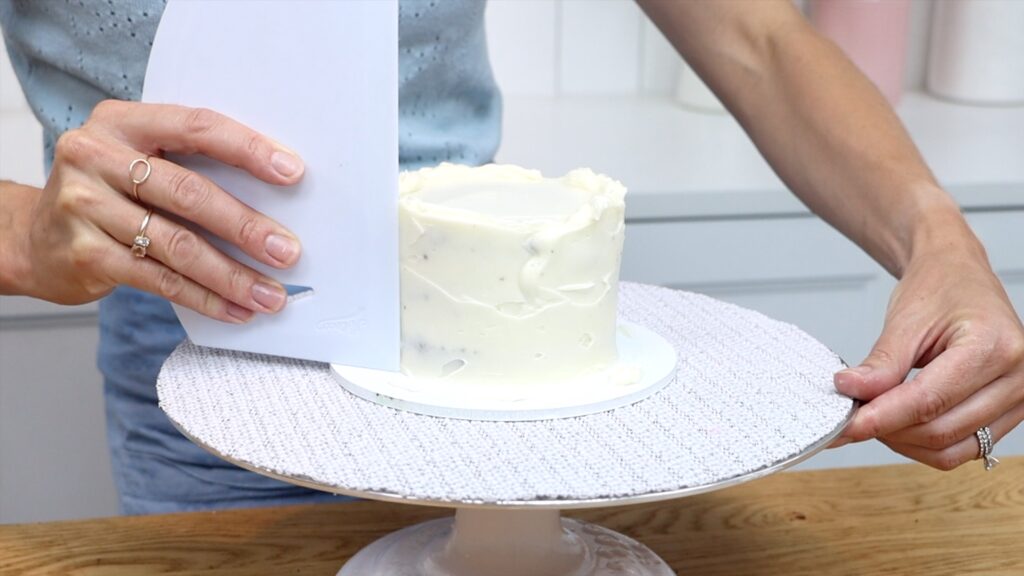
For mini cakes it’s really important that you don’t let much frosting build up on your cake comb. That weight can push the cake sideways and dislodge it from the frosting on the cake board that’s acting as glue to secure the cake.
When you notice frosting building up on the cake comb, swipe away from the cake. Scrape that excess frosting into a bowl.
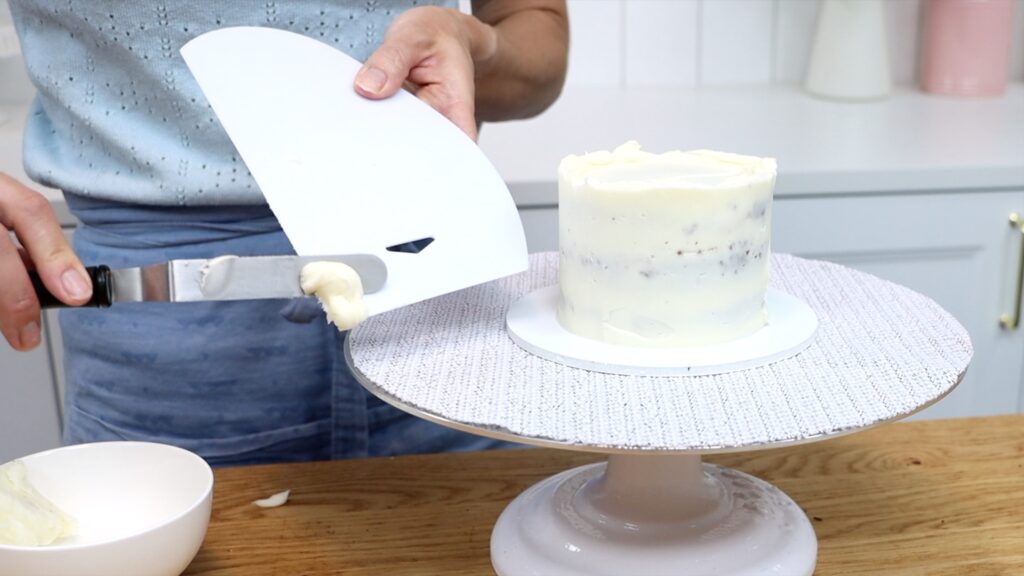
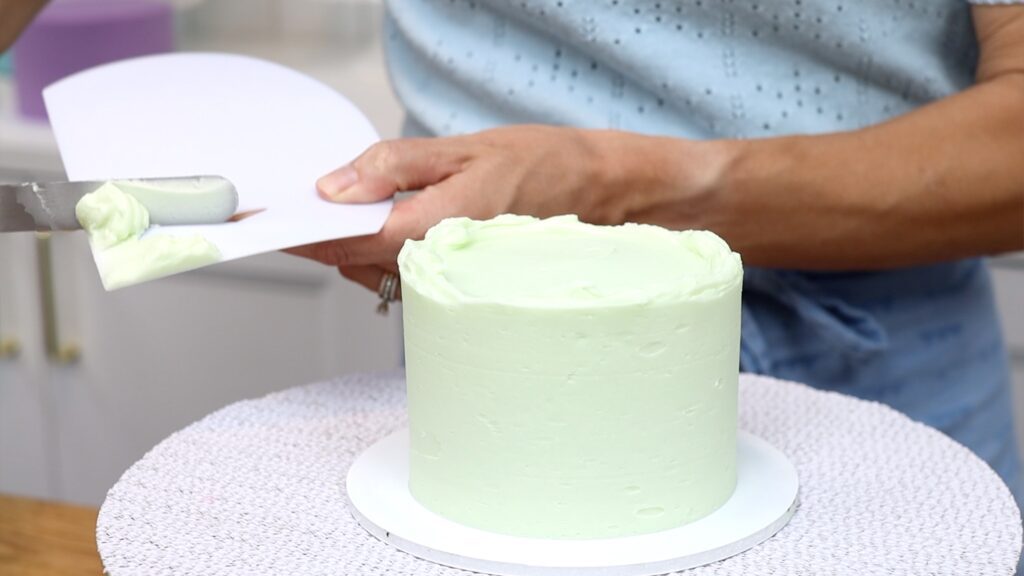
Then spread that frosting back onto the cake to fill in any indents, gaps, or air bubbles. Scrape again to smooth this frosting against the cake.
Tidy up the top edge by pushing sideways with your
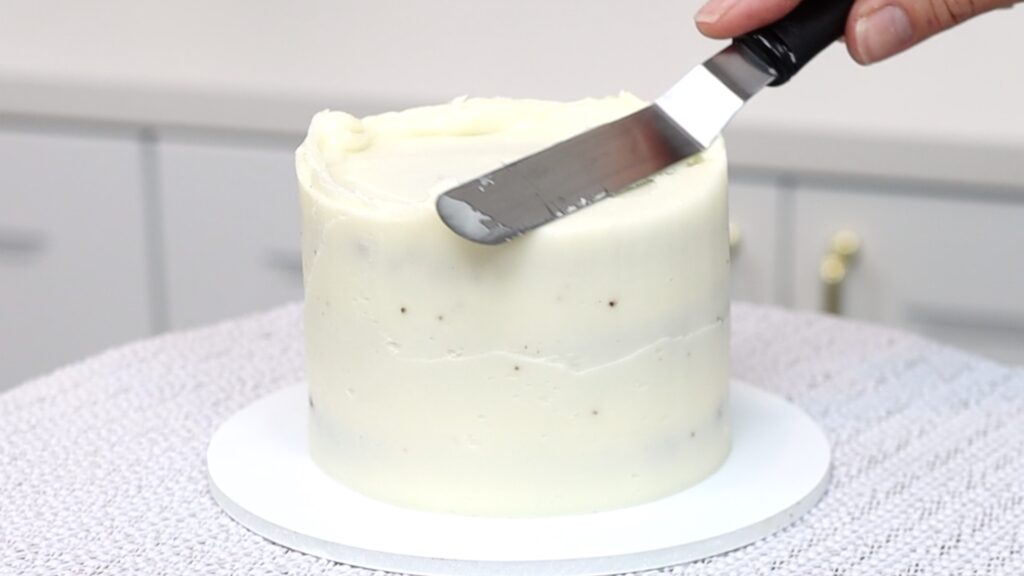
Chill the cake again for 15 minutes in the freezer or 30 minutes in the fridge to set this crumb coat. If you haven't already, tint the frosting for your final coat.
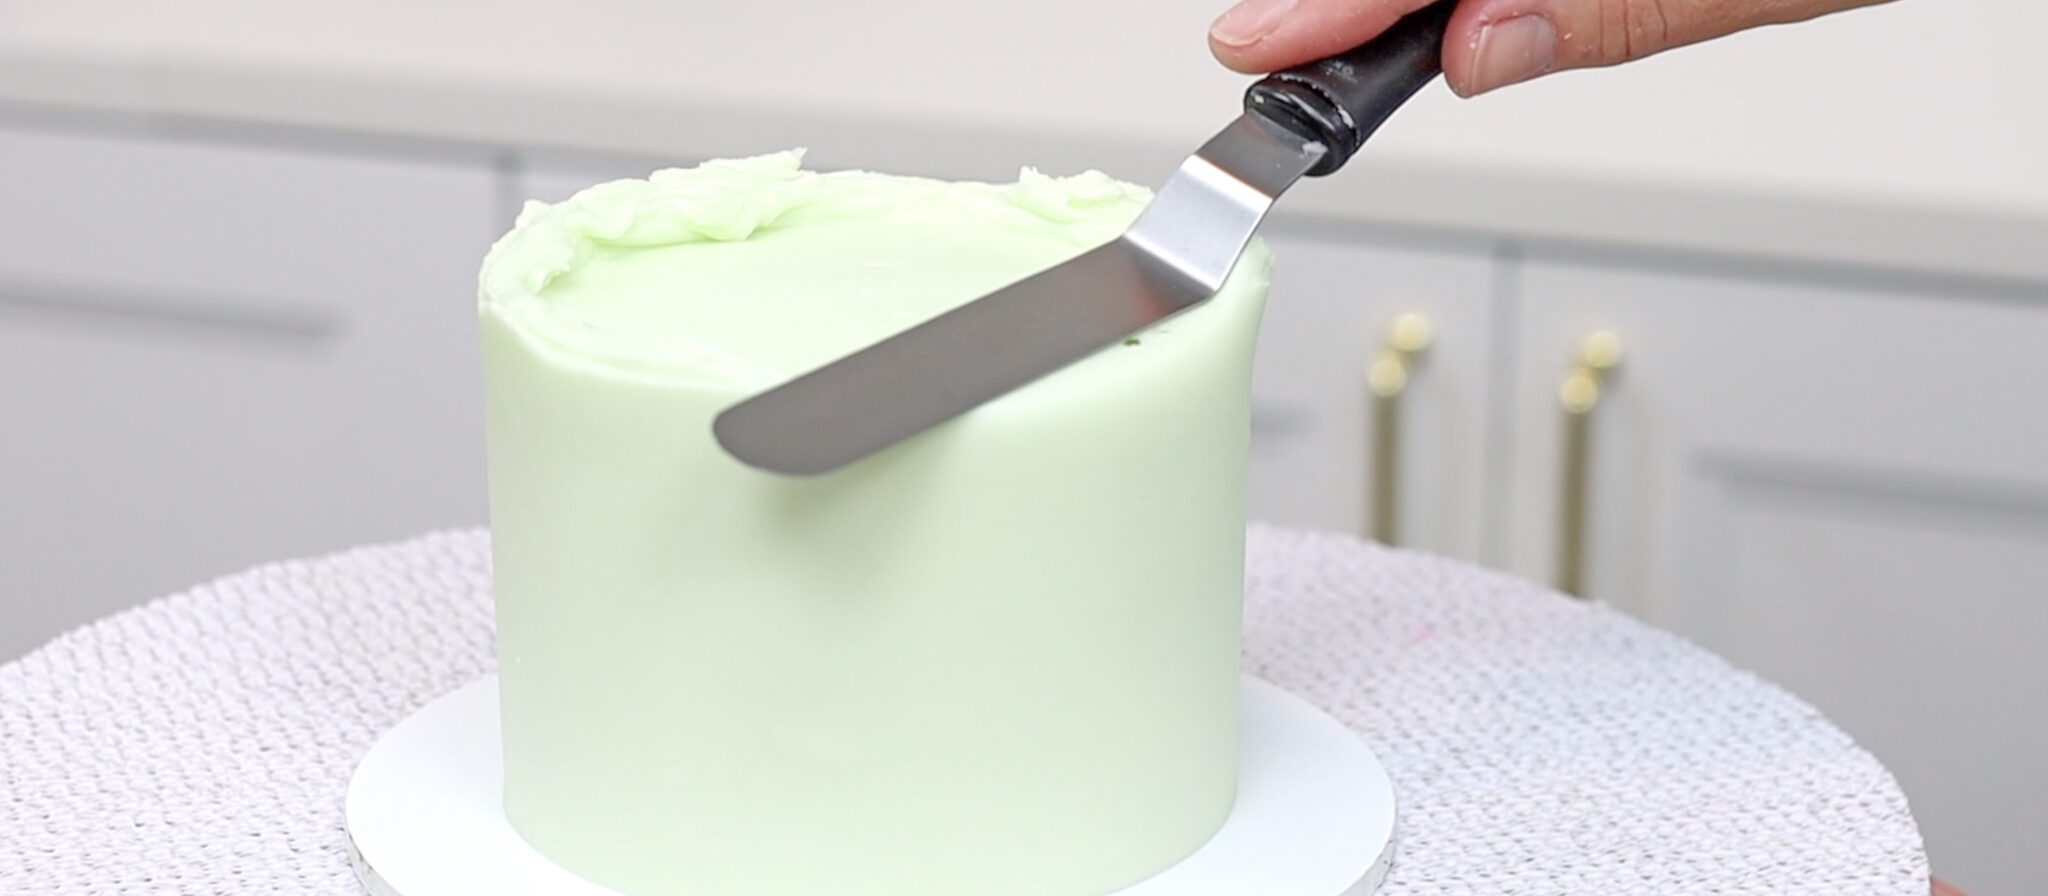
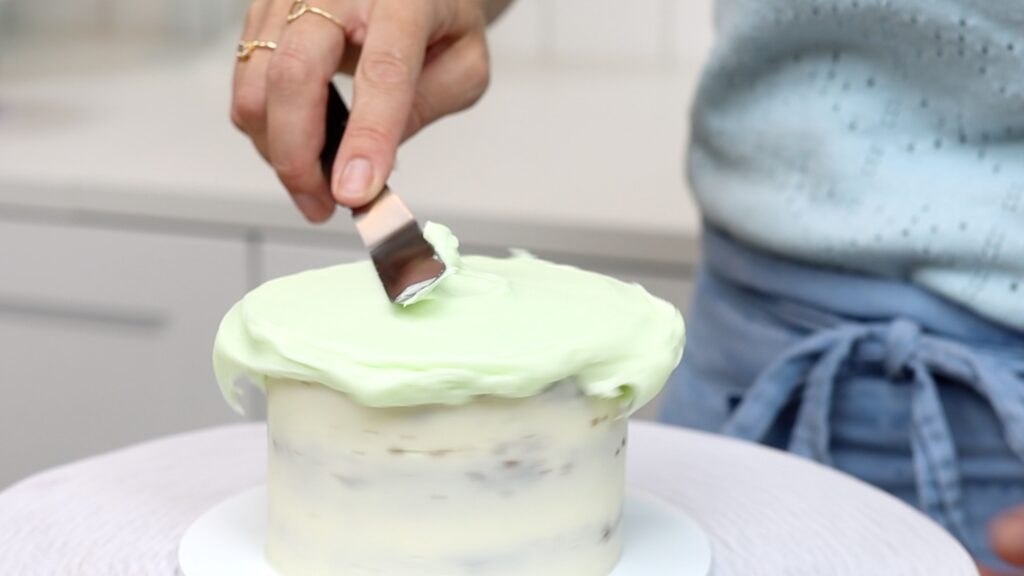
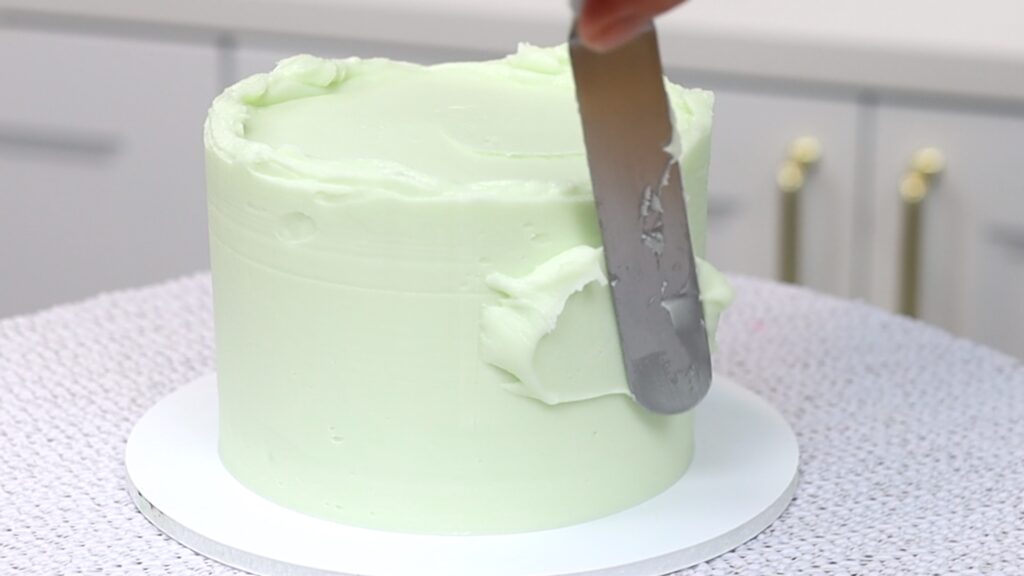
Now that the crumb coat has set, it's time for the final coat of frosting. Repeat the process of crumb coating the cake except this final coat needs to be much neater. Take your time to smooth the top by spinning the
Once the top is smooth, move down to the sides. Spread the frosting to cover the whole cake, all the way down to the cake board. My frosting around the top of the cake is never as thick as lower down so I go back up and spread more there. Spread the frosting upwards as well as sideways to create a lip around the top edge of the cake. This will prevent drooping edges or a domed top.
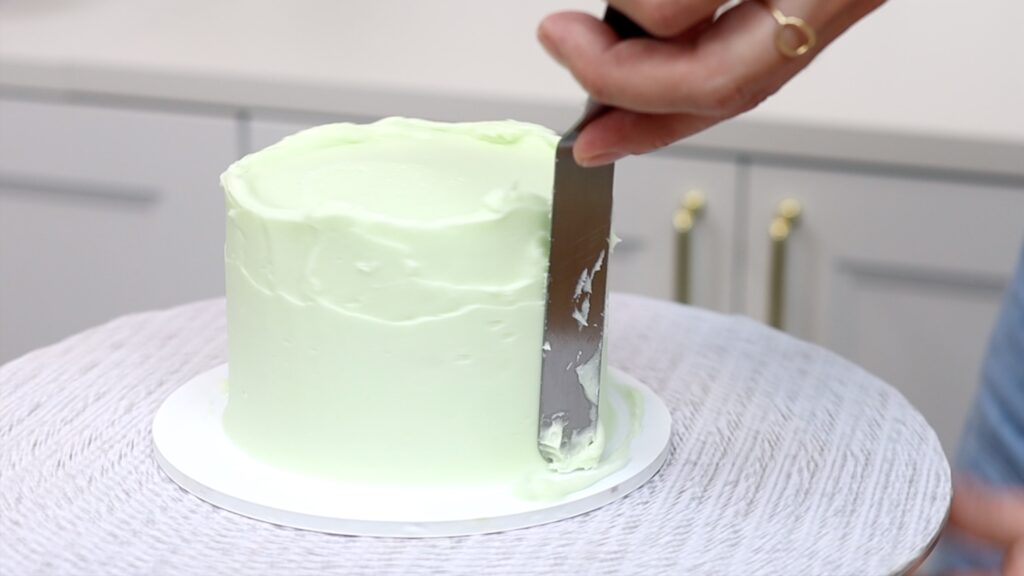
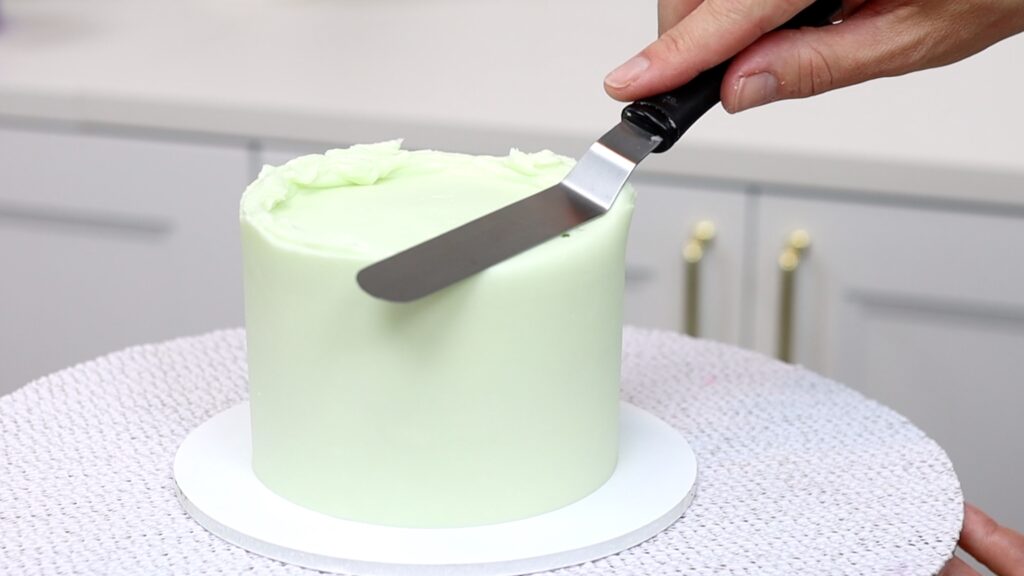
Now scrape around the cake with your cake comb. Push the base of the comb down on the cake board to line it up straight and scrape around several times. Then touch up any indents or gaps by spreading more frosting over those. Scrape again and repeat as necessary.
I start by scraping the frosting with a plastic cake comb, which I find the quickest to use. For the final stages I switch to a metal or acrylic comb because those give me the smoothest frosting.
When the sides are smooth, push sideways with your
I like to chill my cakes before decorating them so that the frosting gets firm and doesn’t get damaged. There are endless ways to decorate mini cakes and you’ll find hundreds of designs and techniques on my cake school. I have a membership option called ClubPLUS which gives you access to every MasterCourse and MiniCourse on the school as well as Live Workshops and 5 Minute Fridays, where I teach tips and techniques and demonstrate FAQs in just five minutes. I hope to see you there!
You can also watch a video of this tutorial on how to frost mini cakes: