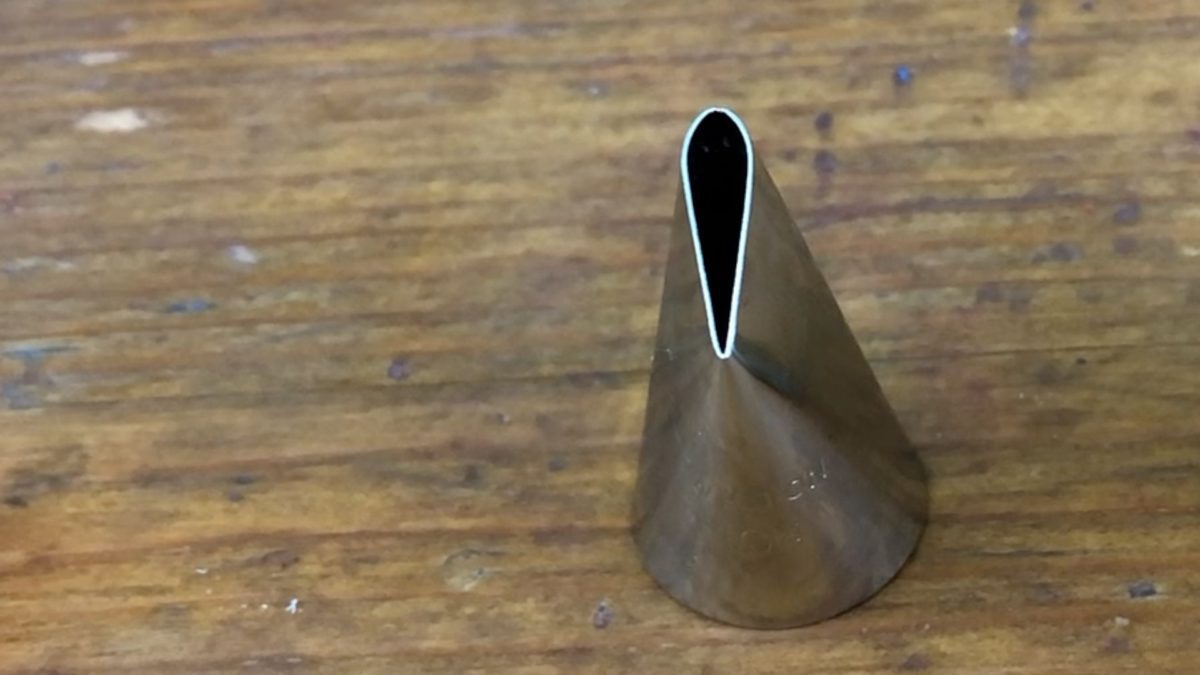
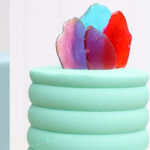
In this tutorial I’m going to show you 8 ways to use a petal tip, like this number 125 tip. By angling the tip differently, you can create different effects for all sorts of textured designs! If you prefer to watch a video of this tutorial, scroll down to the bottom of the page.
1. Shapes filled with lines
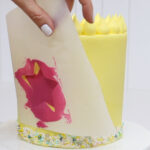
By holding the wide end of the petal tip against the cake with the narrow end pointing outwards, you can pipe thin strips of buttercream to fill in any shape on the side of a cake.

Here, I’m piping a rainbow heart onto textured frosting and I’ve outlined the heart with a toothpick to show me where to pipe.

If you pipe too far or the piping droops, you can take off excess buttercream or move the line higher or lower because the buttercream is still soft and pliable. If you wait more than a few minutes, the buttercream will set and then you won’t be able to do this.

I used my 4 Minute Buttercream for this cake but you could use ganache or whipped cream instead. The advantage of my buttercream is that when it sets it holds its shape so you can rest the piping tip against the side fo the cake as you pipe and you won’t scratch and damage the frosting. I set my buttercream by putting the cake in the fridge for about an hour.

2. Vertical ribbons
Instead of piping horizontally you can pipe vertically up the sides of a cake. This works best on smooth frosting rather than textured frosting.

Hold the petal tip the same way, with the wide end pressed against the cake and the narrow end pointing outwards. Move the bag away from you slightly and then pull it back towards you to create these pretty vertical ribbons winding up the sides of the cake.

If you let the frosting on the cake set before you do this then if you pipe a ribbon you don’t like you can use your frosting smoother or an

When you’ve finishing scraping you can pipe another ribbon over the top.

On this cake I’m trying to space the ribbons evenly around the cake, to make sort of a pattern around the cake.

For this cake I’m wiggling the ribbons randomly up the sides of the cake, trying to cover the whole surface of the side of the cake with buttercream that folds back and forth over itself. I’m using my one bag piping technique for this cake to create the ombre pink and purple ribbons.

3. Diagonal ruffles
By holding the petal tip with the wide end pressed against the cake and the narrow end pulled slightly away from the cake, the buttercream fans out and makes ruffles.

If you move the piping bag slowly while applying pressure, the buttercream will wiggle a bit and fold over itself as it comes out of the tip and that gives the ruffles some movement.

Here I’m overlapping each ruffle by about half to make sure I completely cover up the frosting underneath, so that this entire section of the cake is covered with rows of buttercream ruffles.

This is going to be a mermaid cake with decorations made out of melted candy and you can watch that tutorial here.

For this cake, I’m holding the petal tip the same way, with the narrow end lifted slightly off the cake, to pipe buttercream ruffles going diagonally up the cake.

This cake is covered in a sugar icing sheet, so I can press the wide end of the tip against the cake without damaging it. I share my experience for icing sheets in my Ultimate Guide To Icing Sheets.

After piping these ruffles I’m putting the cake in the fridge to set the ruffles and then making an edible gold paint with luster dust and vodka to paint the edges of the ruffles.

Because the buttercream has been chilled, it’s hard and the ruffles hold their shape as I paint them.

4. Drawing shapes
Holding the petal tip the same way, with the wider end pressed against the cake and the narrow end lifted slightly off the side of the cake, you can pipe shapes.

Here I’m piping a rainbow by curving the buttercream in an arc, starting with red and then going through the colours of the rainbow.

I’m overlapping each ruffle over the previous one to make sure I’m completely covering up the frosting on the cake with each arc of colour. For more rainbow cake ideas, check out my tutorial on 10 EPIC Rainbow Cakes.

5. Layered ruffles
To cover a cake complete with layered ruffles, first frost the top of the cake and smooth the frosting around the edges and on top.

Then hold your petal tip with the narrow end pointing upwards, so that the tip is just above the top edge of the cake, and pipe a ruffle of buttercream all around the top of the sides of the cake, so that it’s sticking up slightly above the top of the cake.

Release your pressure on the piping bag when you’ve gone all the way around the cake to finish the first ruffle. Move your piping bag down and start the next ruffle so that it’s layered over the bottom of the previous ruffle.

Continue all the way down the cake like this to layer the ruffles, changing colours along the way if you want to create an ombre gradient of colours or a rainbow.

If you’re using several colours, it’s helpful to have a coupler for your piping bags so that you can change the tip from one bag of buttercream to another without having to first empty the bag to get the piping tip out so that you can use it with the next colour.

As you move around the cake, the faster you pull the bag, the less the ruffles will wiggle but the slower you move the bag as you squeeze out the buttercream, the more they’ll wiggle to create these pretty wavy edges.

I like to start and end each ruffle at the same point, so that the joins line up above each other, and that will be the back of the cake.

6. Zig zag ruffles
For zig zag ruffles, hold the piping bag horizontally with the narrow end of the petal tip pointing away from the cake.

As you apply pressure to the bag to squeeze out the buttercream, move the bag up and down as you spin the cake on the

You can pipe rows of these ruffles on top of each other or you can pipe them in stripes, and I have a class on my online cake school with all of the details for this design with ruffled stripes and homemade metallic chocolates on top.

7. Squiggly shapes
Similar to the heart shape filled with strips of buttercream on the first cake in this tutorial, you can outline a shape onto a cake and then fill it with squiggles using a petal tip.

The narrow end of the tip should be facing outwards from the cake and as you squeeze the buttercream out of the bag, move the bag back and forth in random directions to fold the buttercream over itself and create random squiggles to fill the shape.

It’s easiest to start at the bottom of the cake so that you can reach the rest of the shape, because if you start at the top and work your way down it’s difficult to angle your wrist to get into the bottom section of the shape.

8. Flowers
Not surprisingly, petal tips are great for piping the petals of buttercream flowers!

For a rose, pipe a blob of buttercream onto the middle of a cupcake – I’ll also show you how to pipe flowers to transfer onto a cake.

Hold the piping tip with the wider end pointing downwards and have to top of the tip slightly higher than the top of your blob, and apply pressure to the bag to squeeze out the buttercream as you twist the cupcake between your fingers to spin it so that the buttercream wraps around the blob.

Release your pressure and pull away after doing a full loop to form your first petal! Only the top of this will be visible so don’t worry about the sides.

Now pipe a ring of petals, keeping the narrow end of the tip pointing upwards, piping little arcs that rise up in the middle and overlapping the previous petal by a third or a half so that they wrap over each other.

Keep the tops of the petals as close as possible to the bud in the middle. Now pipe another ring of petals, starting each arc to the left or right as the arc in the inner ring so that they don’t line up but instead they’re all offset. Just like in the previous ring of petals, each petal should overlap the previous petal.

Continue with these rings of petals and for your final ring of petals, pay attention to where you start each arc to make sure you cover up the bottom of the previous ring of petals, since this will be the outer edge of the rose and it will be visible at the end.

If you want to put the rose on a cake, you’ll need a flower nail and a square of parchment paper or wax paper which you can buy pre-cut or cut yourself out of a roll of paper. Pipe a dot of buttercream onto the flower nail and then press a square of paper into it to secure it in place and then pipe your flower on top.

After piping your flower, pull the paper off the nail and put it on a board or plate in the freezer for about 30 minutes to chill it. Watch this video to learn how to pipe 8 easy buttercream flowers.

Then you can peel the flower off the paper or slide an

Place the flower on the frosting on a cupcake or attach it to a cake with a dot of fresh buttercream.

Here’s the video version of this tutorial:


Awesome job. I have learnt so much from watching your videos on YouTube/ instagram. I look forward to practicing all I have learnt from you so far. Thank you for sharing.
I'm so happy they're helpful!
I love the way you teach thanks for the techniques.
Thank you for your lovely comment!