Here are 10 hacks to help you practice cake decorating without wasting time, ingredients or money!
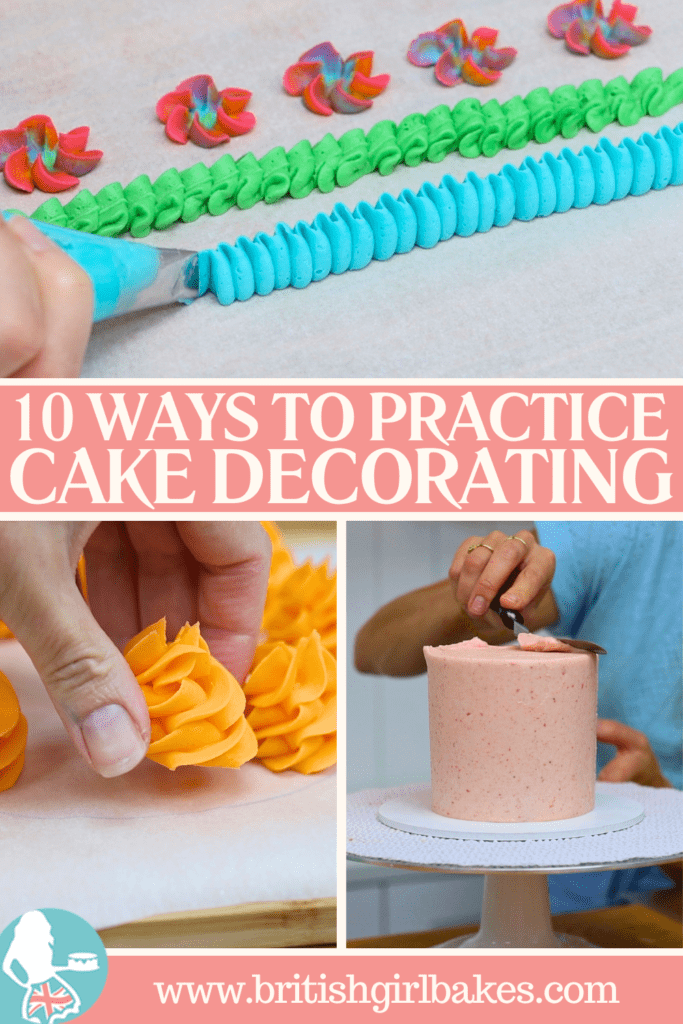
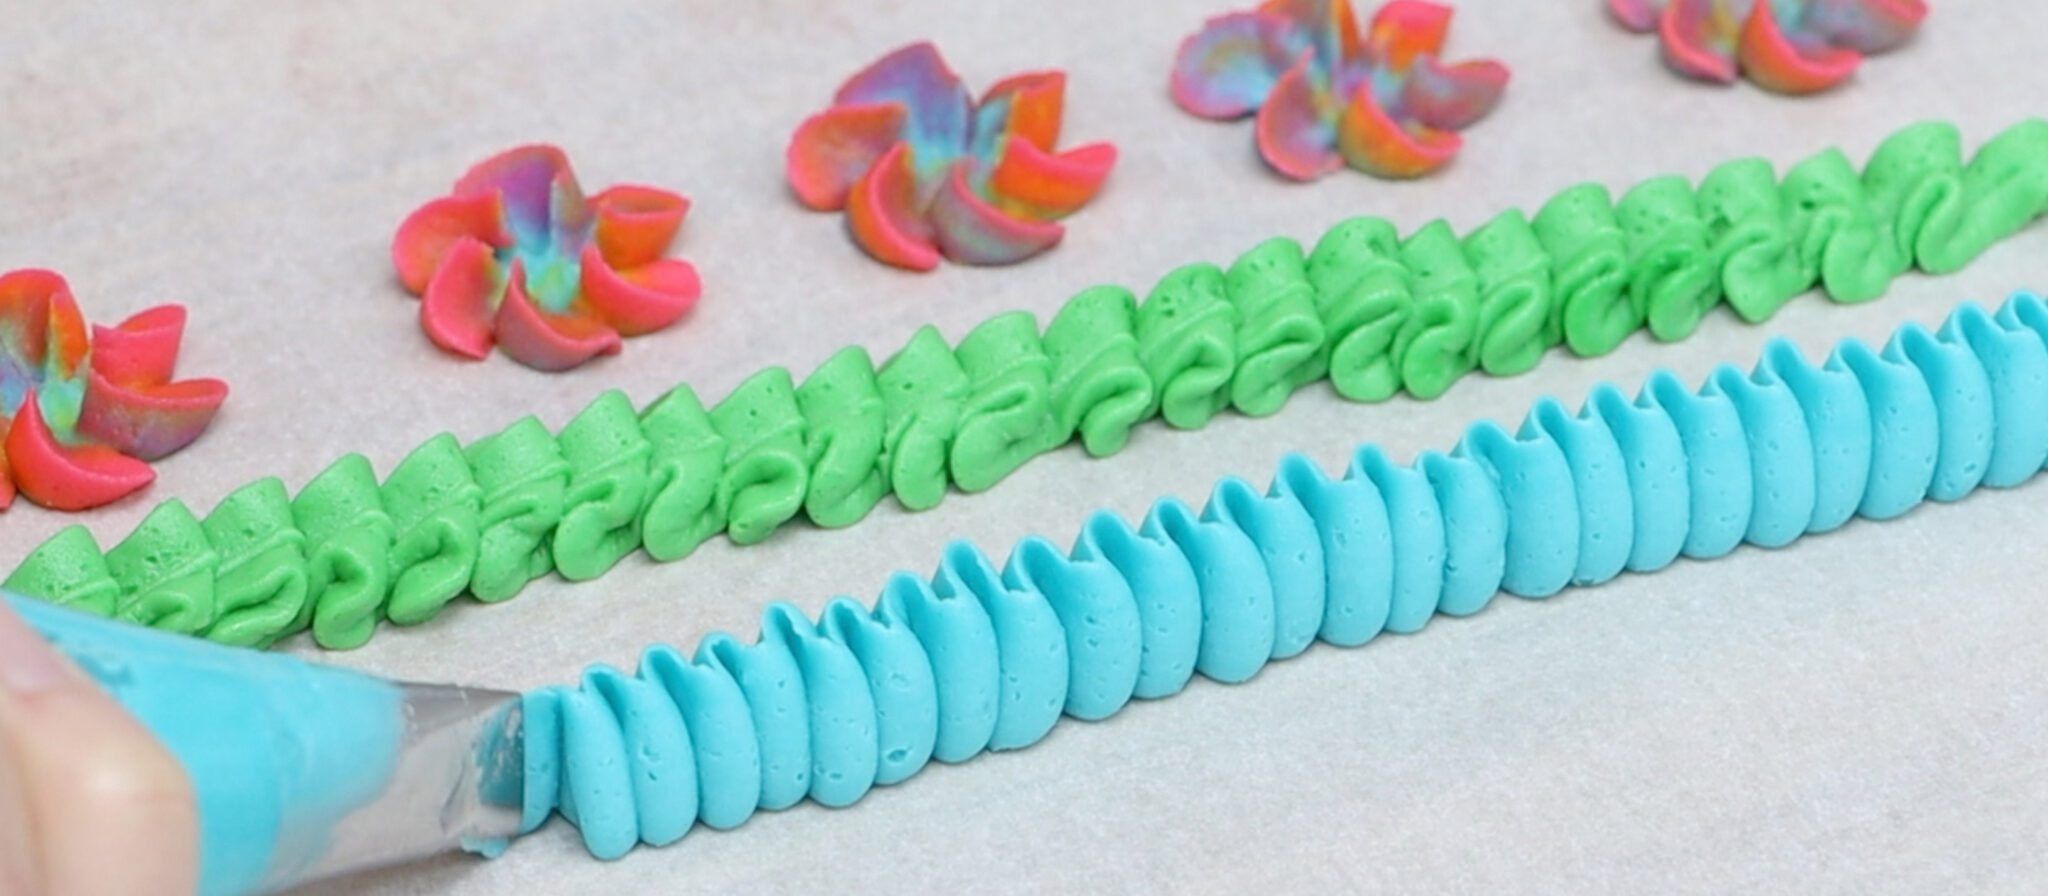
There are SO many different piping techniques and to master each one you’ll need to practice. Pipe onto parchment paper or wax paper or a silicone mat and then scrape the piping back into the piping bag to use for practicing again and again. You’ll save money on ingredients by re-using the frosting.
Even for simple techniques like piping these pointed dots, to make Christmas tree lights on a cake, it’s a good idea to practice them on paper or a plate before moving on to your cake, to get used to the consistency of the buttercream and the pressure you need to use when you squeeze the bag.
For more tips to help with piping, check out my tutorial on 15 Piping Hacks for Cake Decorating.
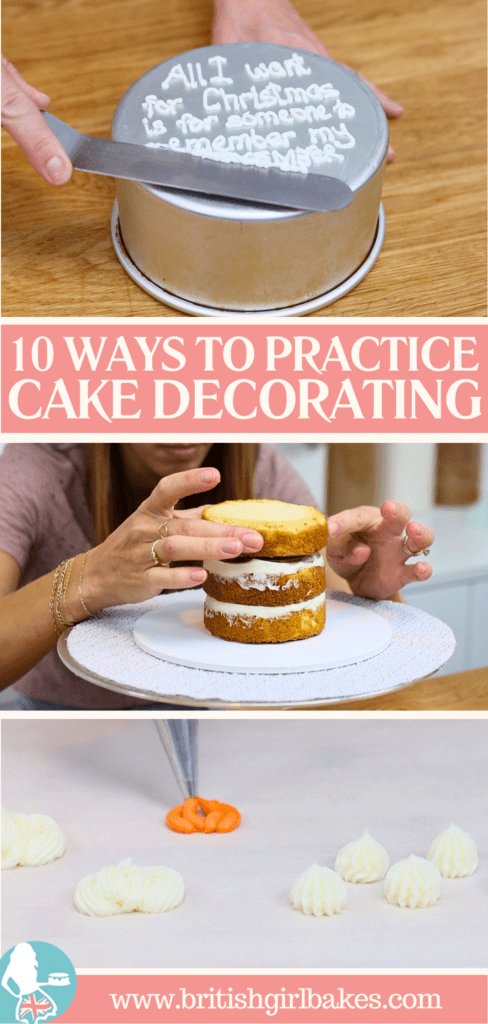
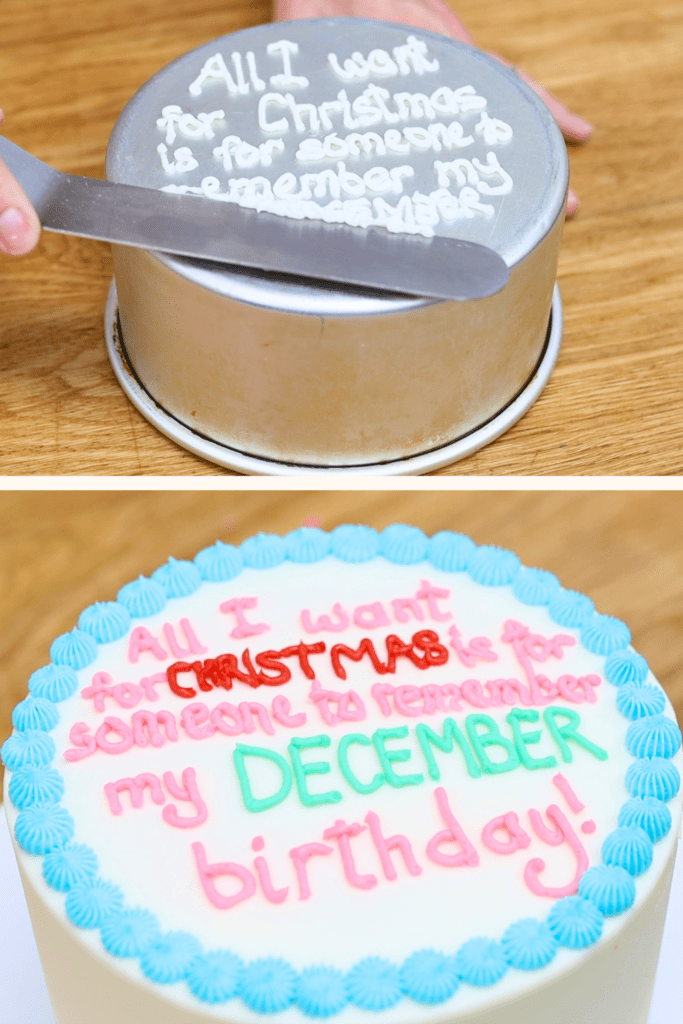
For writing message on cakes, it’s not just the technique you might want to practice, it’s also the spacing and positioning on a cake, which I think is the trickiest part! Choose a cake pan the same size as your cake, or the same size as the available space on the cake, if you’ve already piped a border onto it. Pipe your message onto the pan before the cake, to practice your lettering but also to practice centering it on the pan, scraping and repiping the message until you feel comfortable so that when you then pipe it onto the cake, you won’t make any mistakes and have to scrape it off and try again.
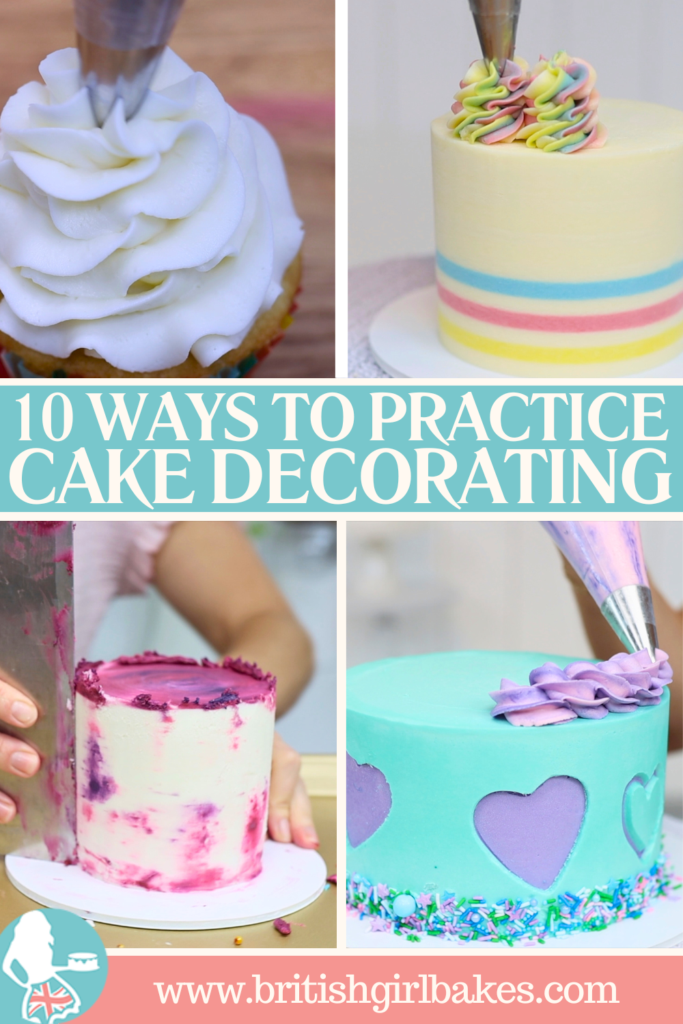
When you make a practice cake, try out as many techniques as you can on the same cake! I often do one design on the front of the cake and another on the back, like with these two Valnetines Day designs:

After practicing a technique on the side of a cake I might practice something else on the top of the cake. And maybe try a border around the bottom of the cake and another style of border on top, too!
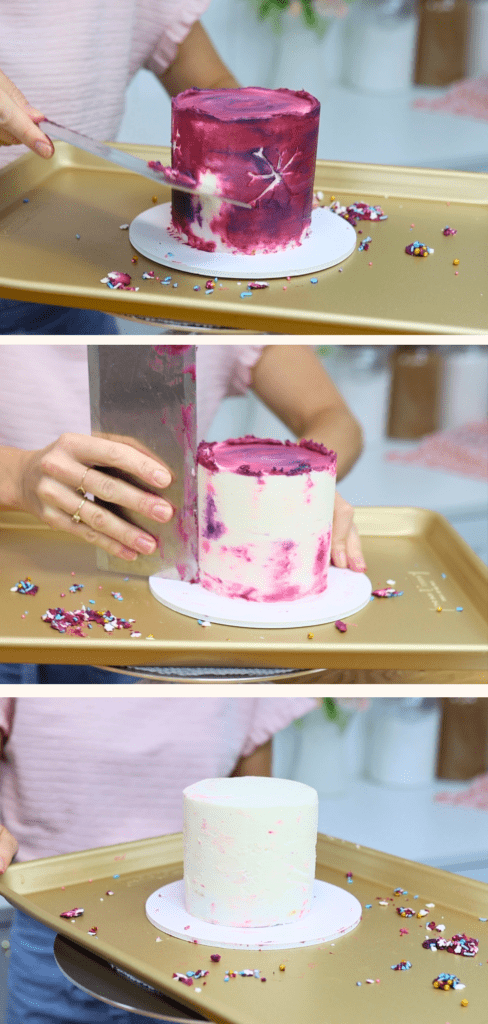
Another great hack for practicing is to use a cake zombie, which is a cake that you use again and again for practice. This is especially useful if you have kids at home, so maybe it takes you several days to get around to frosting and decorating the cake, and by then it’s gone stale. Instead of throwing it away, scrape it and try another frosting or decorating technique on top, or several different techniques, and then repeat by scraping again and decorating again!
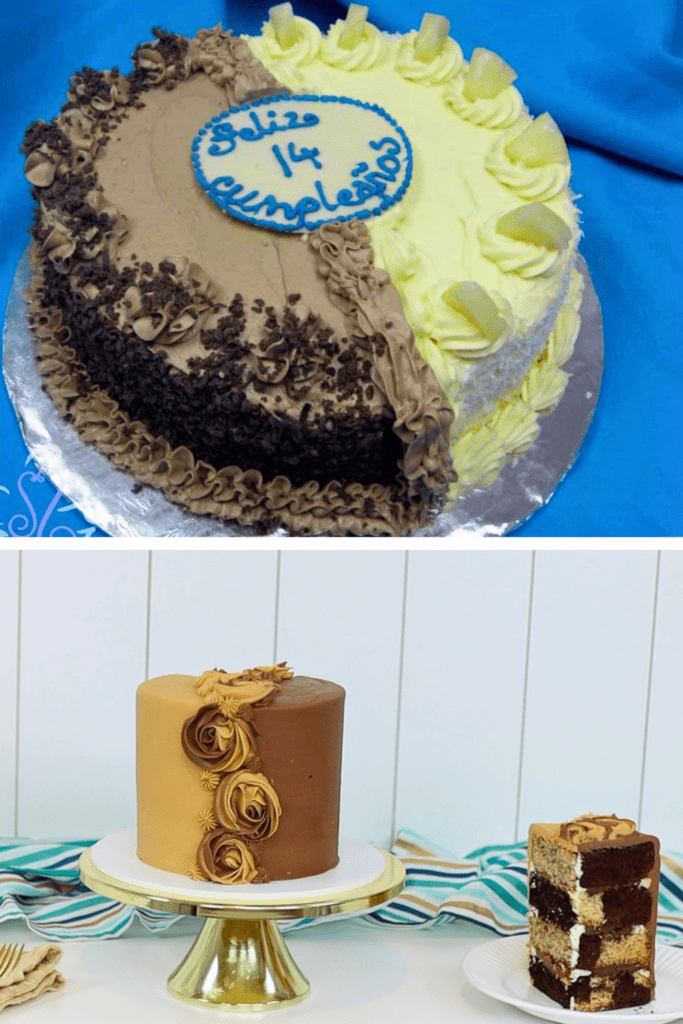
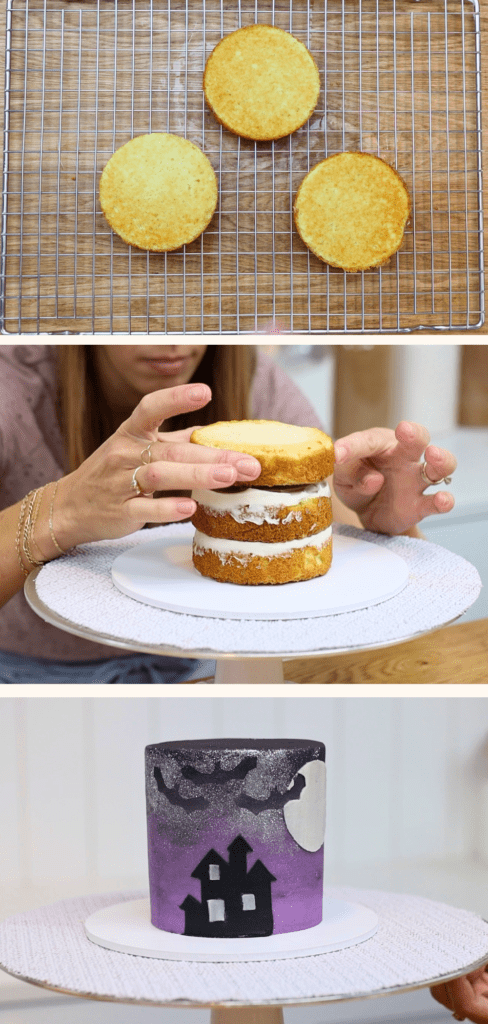
When I first started making cakes back in 2009 I was teaching English in Costa Rica and I made cakes for all of my students’ and friends’ birthdays, for every party I went to, and little by little my cakes got better and better until I ended up opening a cake shop and selling them! Make cakes for your neighbors, your kid’s teachers, school functions or community events, and of course your friends and family! Look at this half and half cake I made recently, with half banana cake and half chocolate vanilla marble cake, covered with half and half frosting and some piping, compared to my first half and half cake before LOTS of practice, back in 2012!
Styrofoam cakes, often called cake dummies, can be used to practice all sorts of techniques without having to bake a cake first.
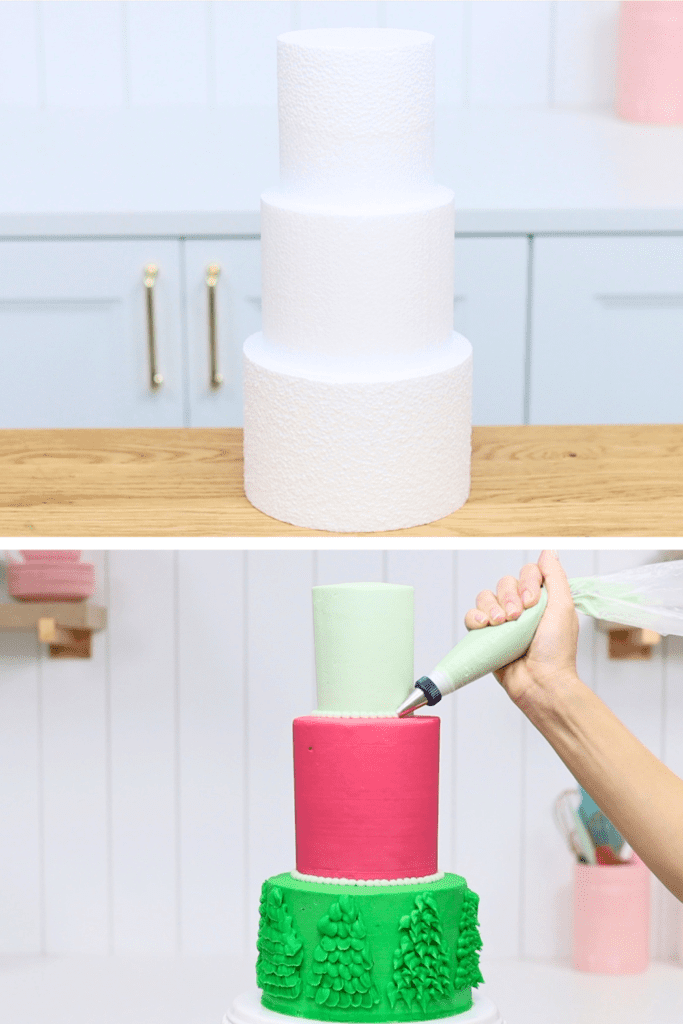
The trickiest thing about these is that they’re so lightweight. They’ll slip all over the cake board if you don’t attach them. To attach styrofoam to a cake board use a blob of buttercream as glue. Then leave it to set for a few hours at room temperature or 30 minutes in the fridge. Now the cake dummy will be stuck securely in place and won’t move around.
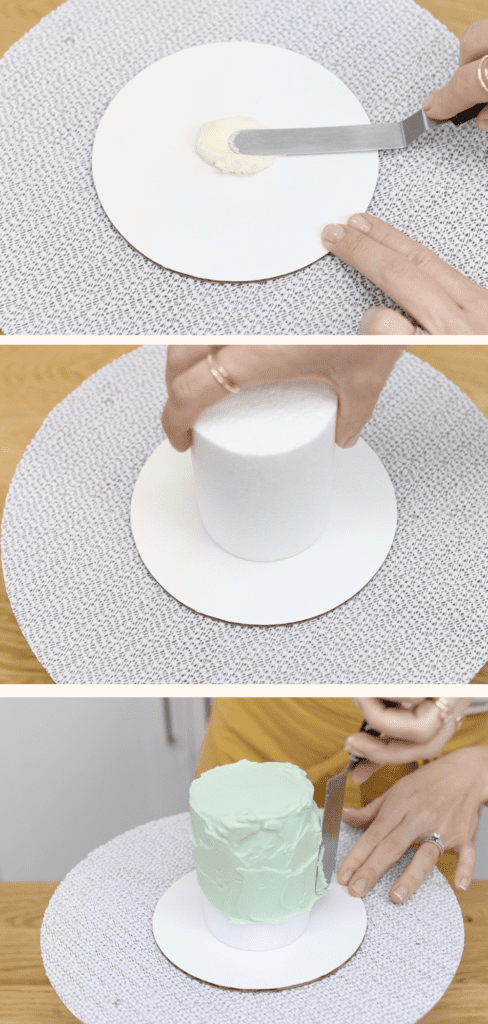
Then you can frost it just like you would frost an actual cake. Now you can practice whatever techniques you like!
Make mini cakes instead of large ones when you want to practice a technique. You’ll save time because the cake layers will bake quicker. You’ll spend less on ingredients for smaller cake and frosting recipes. You can practice the same designs as you’d use on larger cakes, trying out new tools or techniques or whatever you want to practice, but for a fraction of the cost!
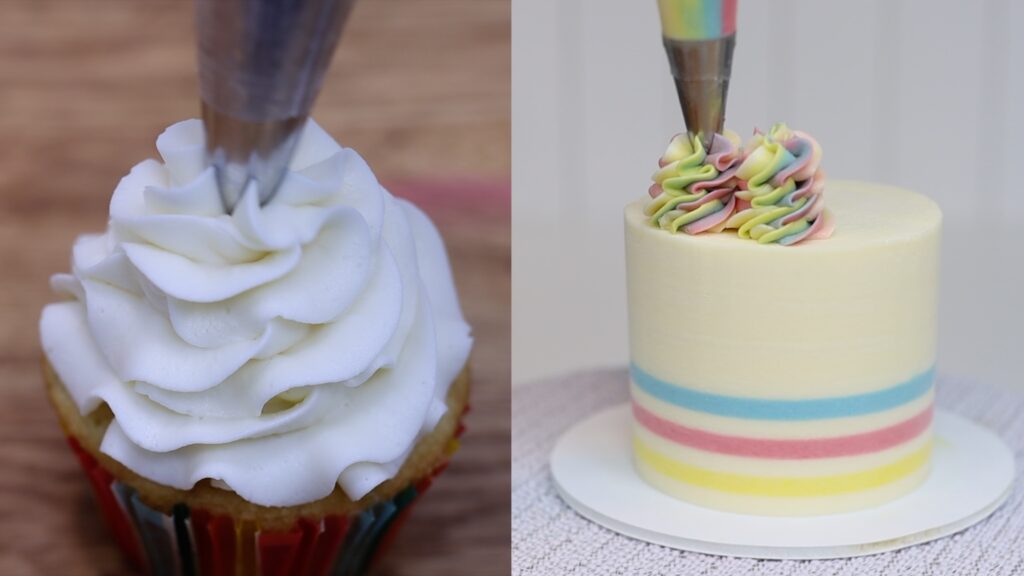
Take this even further and practice on cupcakes instead of cakes! Pipe swirls, the kind you would pipe on top of a cake, or try out a homemade stencil or drop flowers.

I think piping is one of the trickiest parts of cake decorating. You need to have the right consistency of buttercream and also the right amount pressure on the piping bag. And you’ll need to move the piping bag not just with the right motion but also at the right speed.
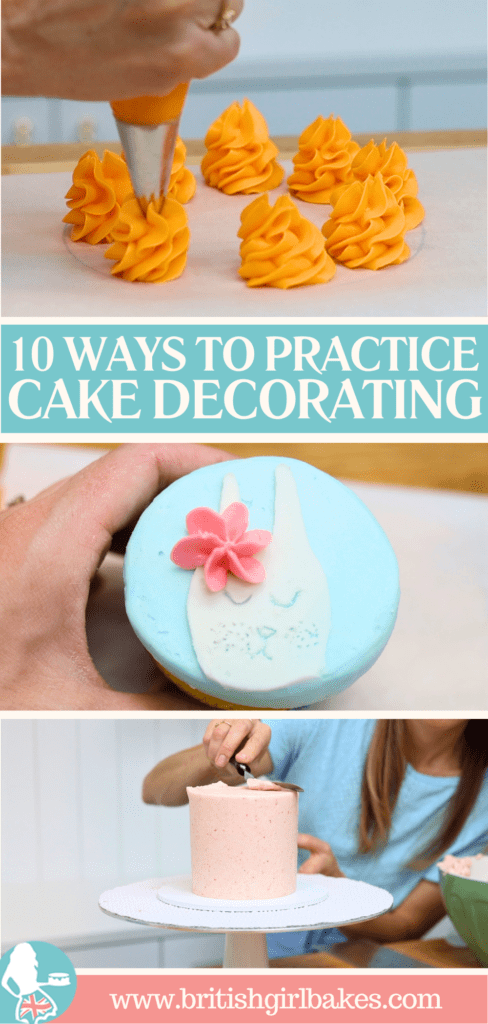
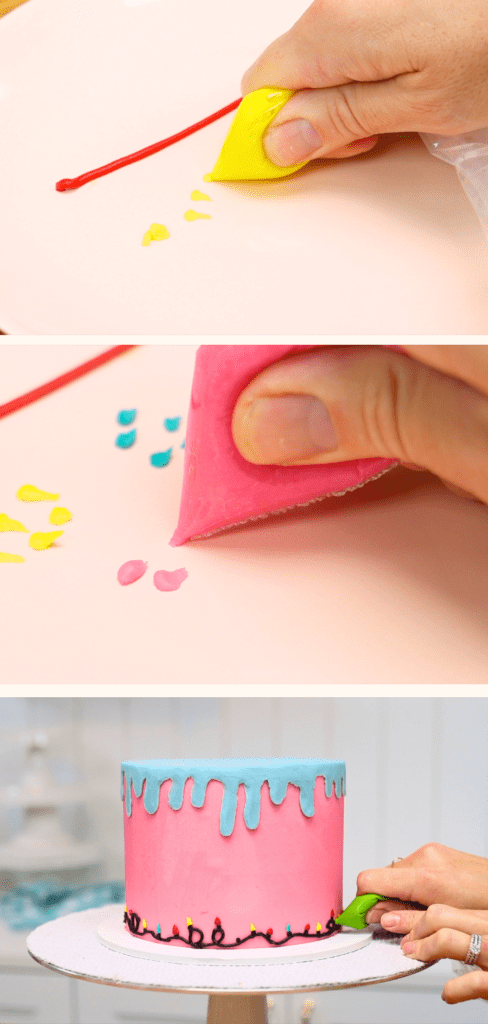
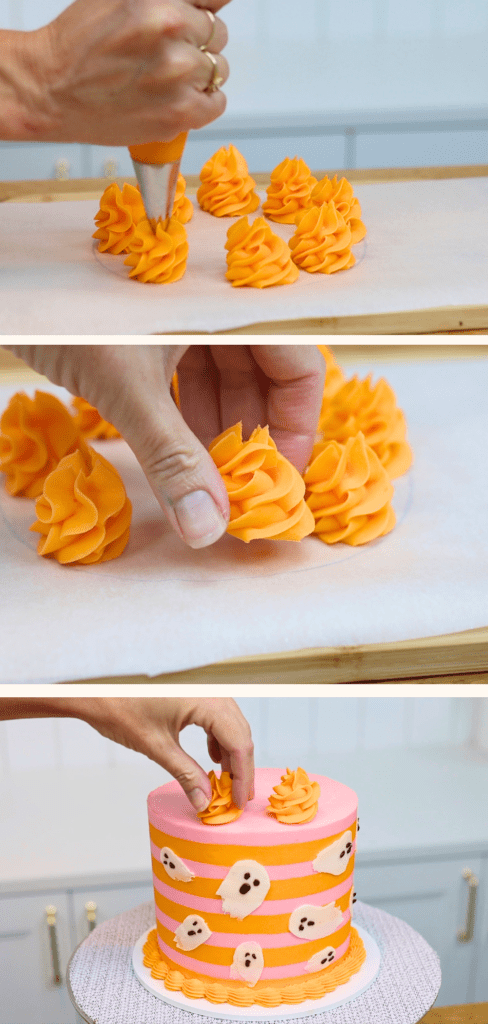
Here’s a hack: Pipe your decorations onto parchment paper and the freeze them to make them hard. It’s easier to pipe down onto paper than sideways onto a cake. If you don’t like any of your piping, just don’t use them. If you pipe them straight onto a cake, if you don’t like them you’ll have to scrape them off which is messier.
When the piped details are frozen, lift them up and place them on your cake! Use a dot of fresh buttercream to attach them, like glue.

This way you can choose which decorations are the prettiest and only use those!
For the top of the cake, trace around the baking pan onto a piece of parchment or wax paper, and then pipe within the circle. If you don’t like any of the piping, it’s easier to scrape it off this paper than an actual cake! Put them into the freezer to chill and set so that they’re firm and then pick them up and place them onto your cake!
My favourite hack to practice cake decorating is to take my online courses! You’ll find hundreds of cake decorating ideas and designs to watch and instead of figuring them out yourself by watching hundreds of YT videos until you find the one that answers your questions, find EVERYTHING in one place on my cake school, and ask your questions below each video and they’ll come directly to me so I can answer them straight away! Start your FREE 7 day trial by going to BGB.com and click on CAKE SCHOOL. See you there!
You can also watch a video of this tutorial on 10 hacks to practice cake decorating:
Choose one of these pins to save this tutorial to Pinterest for later: