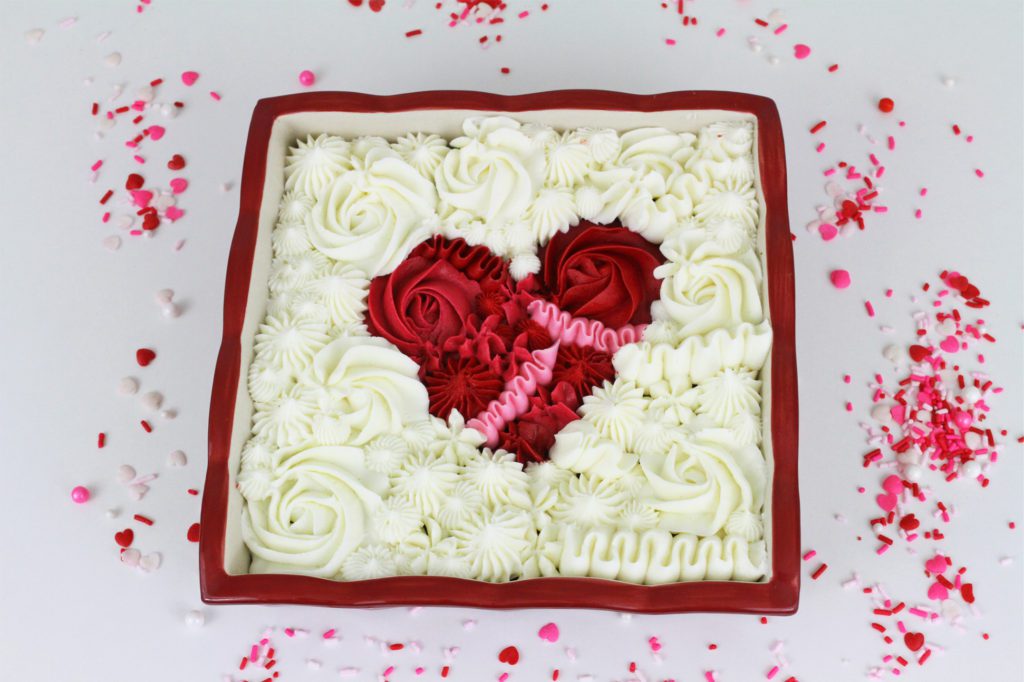
This first one is the easiest cake you could possibly decorate! Bake your cake in a deep baking tray or casserole dish and you can even use other desserts like brownies or cheesecake for this. Use a sharp knife to score a design on the top, like the heart I’m drawing on this one, and you can trace around a printed image if you’re not confident about drawing your own shape.

Fill few piping bags with different piping tips and different colours of buttercream and then cover the shape with swirls, wiggles, and rosettes! I piping these rosettes and swirls with a 1M star tip, 8B open star tip and 199 tip, and the ruffles with a 104 petal tip, holding the tip with the wider end facing downwards, towards the cake, and the narrow end pointing upwards to create some movement the ruffle.

I like to chill the cake at this point to set the pinks and reds so that when I continue, the coloured buttercream doesn’t smudge onto the rest of my piping around the shape. Meanwhile, I wash the piping bags and tips to re-use with plain white buttercream. I used my 4 Minute Buttercream for this cake. For the outline of the shape, I start with the corners of the cake to get into the trickier spaces while I still have lots of room the maneuver, and gradually working my way in towards the heart.

You’ll notice that the shape gets much darker after refrigerating it, and that’s because red tones get darker when they get cold but they’ll lighten up again when the cake comes back to room temperature.
It’s a good idea to check the cake from different angles when you think you’ve finished, or even as you go along, to check that the cake underneath the frosting isn’t visible anywhere through the piping.

Almost as easy to decorate as a tray bake cake is this naked heart-shaped cake with piped buttercream filling. Start by drizzling your cake layers with simple syrup to keep them moist, since they won’t be covered in frosting which normally locks the moisture into the cake. I cover this step in detail in my tutorial on 10 Hacks For Decorating Cakes Like A Pro. Wrap the cake layers in cling film or saran wrap and chill them in the fridge for at least an hour or in the freezer for 30 minutes, because they’re much easier to carve in the next step if they’re cold.

While the cake layers are in the fridge, trace around your cake pan onto paper so that you have a guide of the size of your layers, and then draw a heart within that outline.

Cut the shape out and place it on a chilled cake layer and cut around it using a serrated knife, cutting the general outline first with lots of little straight cuts and then smoothing out any angular parts next by trimming them with even smaller cuts. Repeat this for all of your layers.

Tint buttercream with gel food colours. I used my 4 Minute Buttercream with different amounts of Rose Pink gel to make different shades of pink, and put the buttercream in piping bags fitted with any star shaped piping tip (I used 1M tips). Now use a plate or a cake board and pipe a dollop of buttercream in the middle, which will secure your first layer of cake in place.


Pipe swirls around the edge of the heart, piping a small spiral and as you lift the piping bag slowly, continue to pipe a smaller spiral on top and then release your pressure on the piping bag as you lift it up and away from the cake to leave a nice neat peak on your buttercream swirl. Do the outline of the heart first so that the swirls line up nicely, and then fill in the middle and these swirls are less important because they won’t be visible after you add the next layer of cake, so they don’t have to be as neat.

Add another layer of cake and another layer of swirls, and I’m using my darker pink for these ones. Another layer of cake, and walk around your cake to check it from different angles and adjust the layer so that it’s lined up straight on top of the rest of the cake, and then pipe on the top layer of swirls. Scatter some sprinkles on top immediately, before the buttercream sets because then the sprinkles won’t stick to it anymore.


To store the cake you can place it in the fridge for 30 minutes or the freezer for 15 minutes to set the swirls, and then take it out and wrap the cake and plate or cake board in cling film or plastic wrap to prevent it from drying out. Put it back in the fridge and when you’re ready to serve it, take it out and take the cling film off immediately, before the buttercream softens, so that you don’t damage the piping while you’re unwrapping it. Leave it for about an hour to come to room temperature and then enjoy!

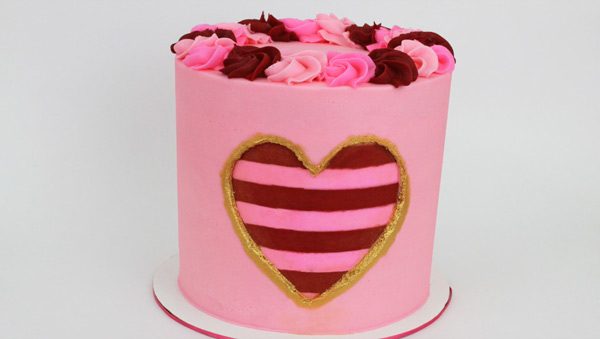
This sprinkled heart can be added to any cake, like this pink and red striped beauty. If you’re interested in how to do these stripes, I have a very detailed free YouTube tutorial on 4 Secrets For Perfect Stripes.

Chill your frosted cake in the fridge for at least an hour to set the frosting and meanwhile, draw a heart on parchment paper and cut it out, making a cut in the middle of the heart to get the scissor blades in and cutting it out while leaving the paper around it intact, and this will be your stencil.

Prepare your sprinkle mix using a pre-made mix or create your own by pouring different colours, shapes and sizes of sprinkles into a bowl and mixing them up. I recommend using a baking tray for this next part, so that you don’t get sprinkles all over the place.

When you can press gently against the frosting on your cake without indenting it, it’s ready for the stencil. Place your chilled cake on the baking tray and hold your stencil up against the side of the cake. If there are any imperfections in the frosting on your cake, this is a great opportunity to hide them by placing the heart on top of them! Line the stencil up so that it’s straight and spread buttercream over the heart shape to completely cover it.


Spread from the parchment surround the heart, towards the middle of the cutout heart shape, because if you go the other way you might push buttercream underneath the parchment paper and mess up the outline of your heart. The stencil will be very flimsy because parchment paper is so thin and the frosting on the cake has set so the parchment won’t stick to it, so only your hand is holding it in place. If the stencil moves around, line it up again and continue spreading on the buttercream. Ideally you should use the same colour as the frosting on the cake or the colour of the sprinkles you’re going to use to fill it. It doesn’t need to be thick, just enough to cover the whole heart shape and you should smooth it out with your

Immediately press your sprinkles into the fresh buttercream so that they stick, working your way around the whole shape to make sure it’s all covered with sprinkles. If you’re not going to add a sprinkle border around the bottom of the cake, it’s a good idea to make sure your parchment stencil goes all the way to the bottom of the cake to prevent any sprinkles accidentally sticking to the cake as they fall down. When you’ve covered up as much of the shape as possible with your sprinkles, carefully peel off the parchment to reveal your sprinkled shape!
If there are any parts without sprinkles, probably around the outline of the shape, you can add sprinkles individually to cover up that buttercream and complete the shape.


For my tutorial on 6 Ways To Decorate Cakes With Parchment Paper click here. To finish off this cake I piped some buttercream swirls with piping bags fitted with 1M tips and filled with pink and red buttercream, the two colours of my frosting stripes, alternating colours as I worked around the cake.

If you’re looking for more Valentines Day cake designs, I have a tutorial on this stunning carved buttercream cake, which is one of the 18 cakes I teach how to decorate in my online course on Buttercream Carving, on my online cake school.

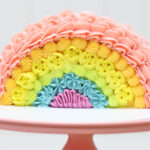
I also have an online class on how to decorate this fun peekaboo cake:
You can watch the video of this tutorial here:


Thanks they look so beautiful and delicious
Thank you!
I’ll have to thank you for the success today
🙂
Thank you so much very informative.
I'm happy you found it useful!