Vintage cakes or Lambeth cakes have been trending for a while because the over the top piping is so eye-catching and unique to this style. In this tutorial I’ll share 10 secrets for success with vintage cakes!
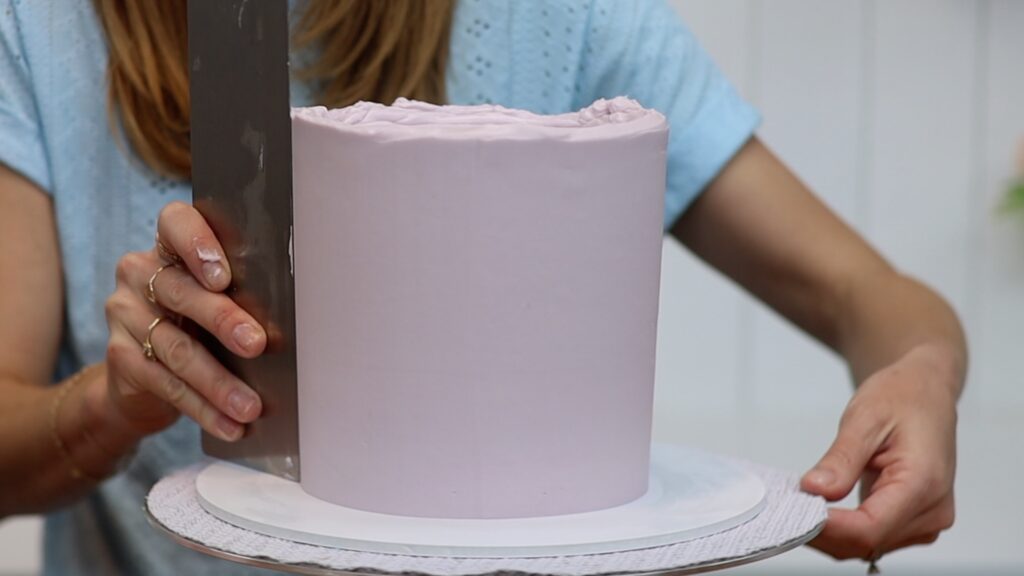
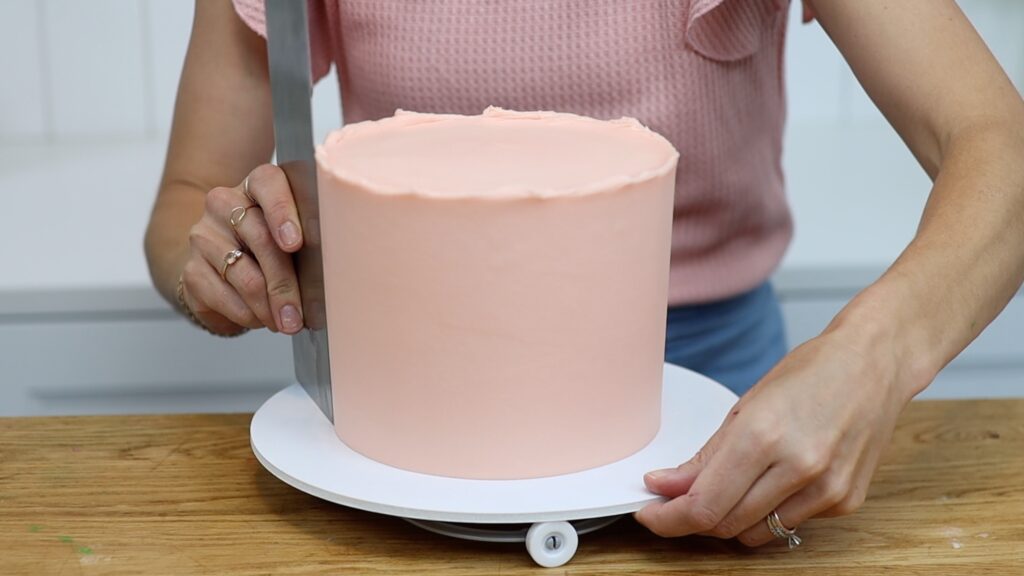
Neat vintage cakes begin long before you even pick up a piping bag! When you do pipe onto the cake, you need the frosted cake to be firm. If the frosting is still soft, the pressure of your piping tip can damage the frosting. After you’ve smoothed the frosting on your cake, chill the cake for the neatest vintage piping. About an hour in the fridge is ideal but thirty minutes in the freezer will work instead. I use my 4 Minute Buttercream to frost all of my cakes because it gets firm when it's cold but softens as it warm up.
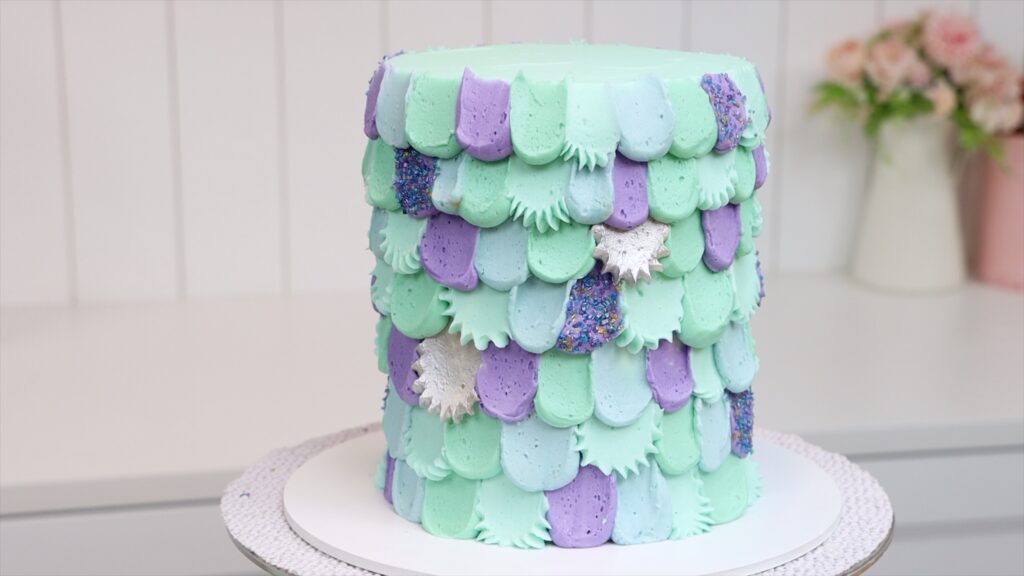
Draw your vintage cakes before you start piping onto them. This will help you visualize if there’s room for everything on the cake and that there are no big gaps. I like to write the piping tip numbers that I’m going to use along one side of the sketch. On the other side I list the colours I'm going to use for each part of the piping.
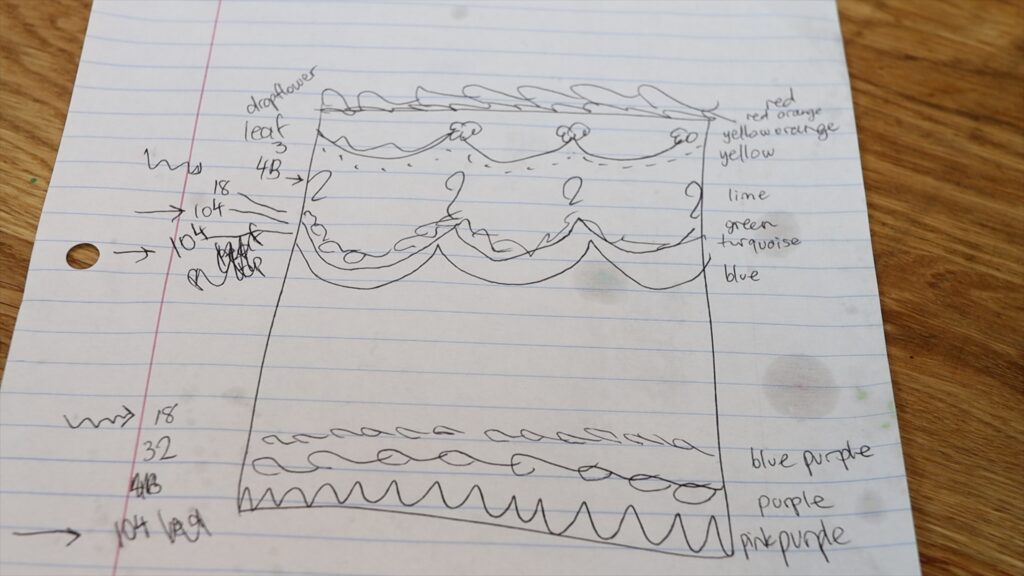
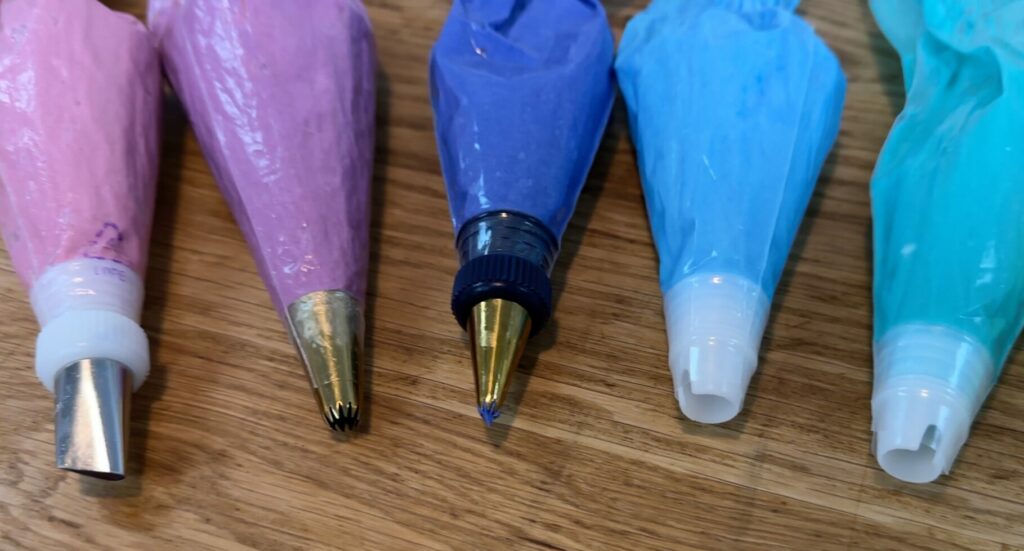
This way I can see which tips I’ll need to use multiple times and I'll put couplers into the piping bags filled with those colours. For example, on this cake I’m going to use a #104 tip for purple, blue, and turquoise so I’ll put couplers in those piping bags. Couplers allow you to switch the piping tip quickly and easily between different bags.
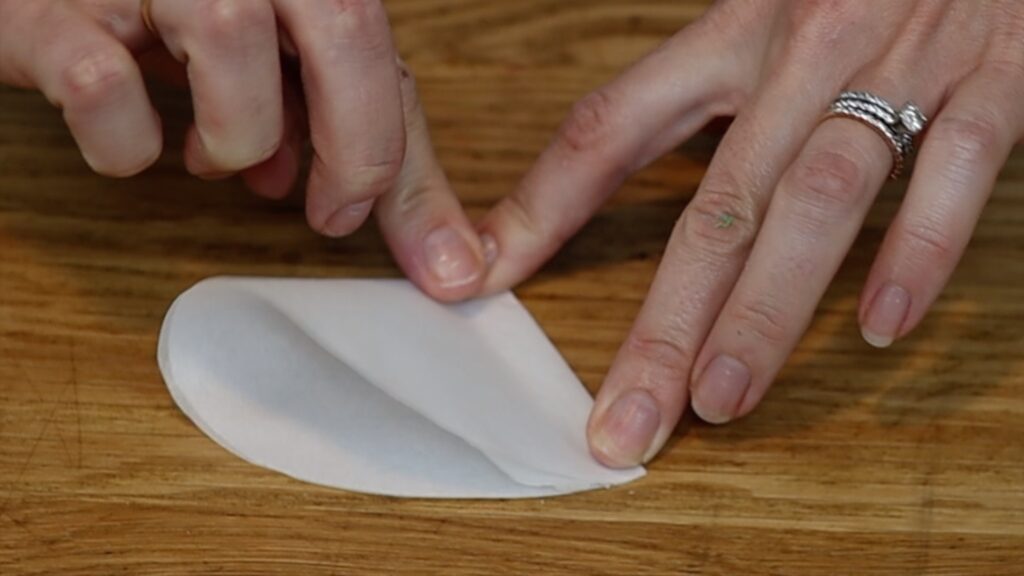
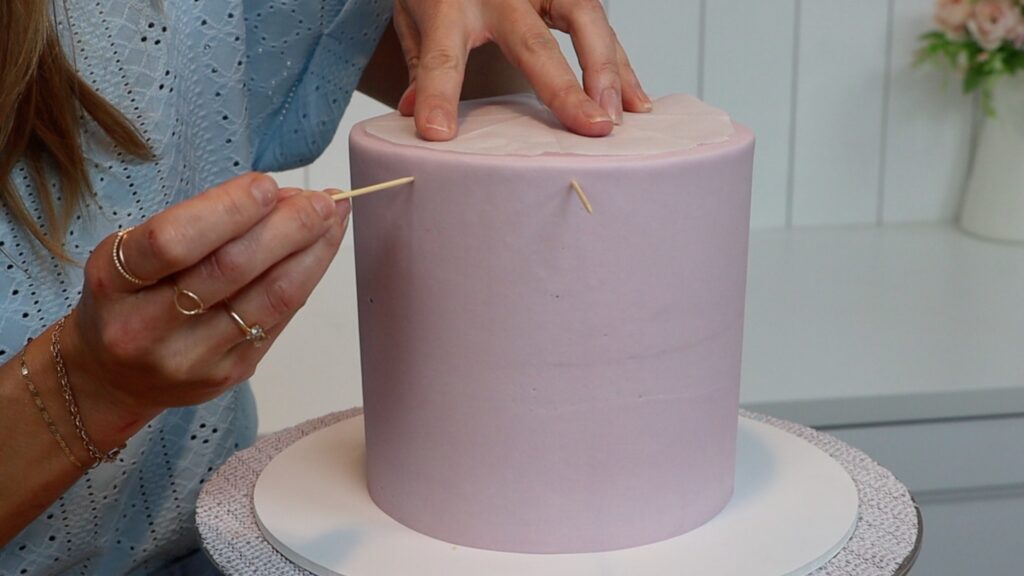
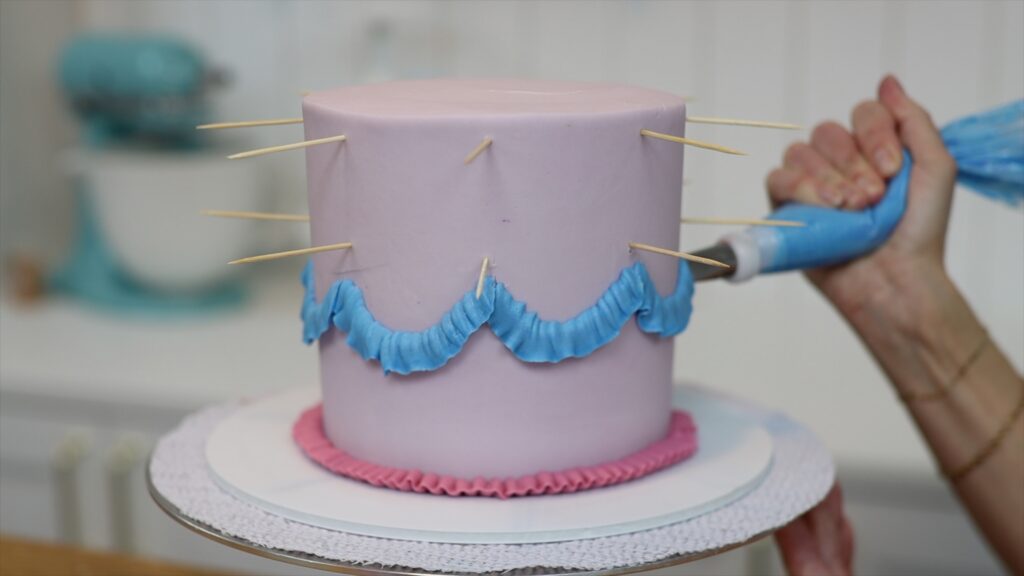
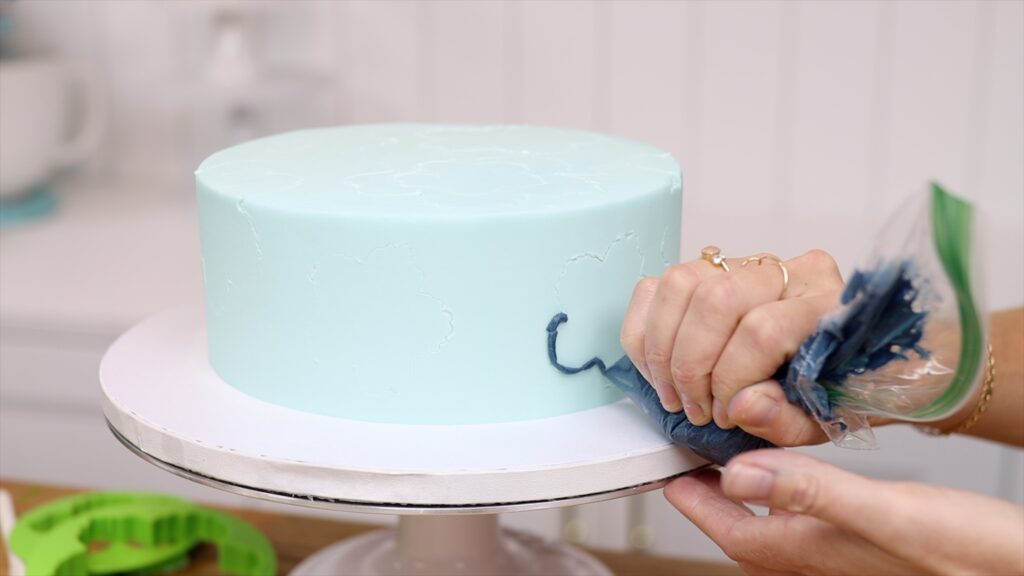
When the frosting on your cake has chilled and set, outline the main parts of your design. You can do this with toothpicks or cookies cutters or both. Start by cutting a circle of parchment paper or wax paper or baking paper that’s the same size as your cake. The easiest way to do this is to draw around the pan you baked the cake in. Fold it in half three or four times and then unfold it and place it on top of your cake.
Use the creases in the paper as guidelines to poke toothpicks into the side of the cake. You should have a toothpick below each crease and you’ll see how this is helpful in a minute.
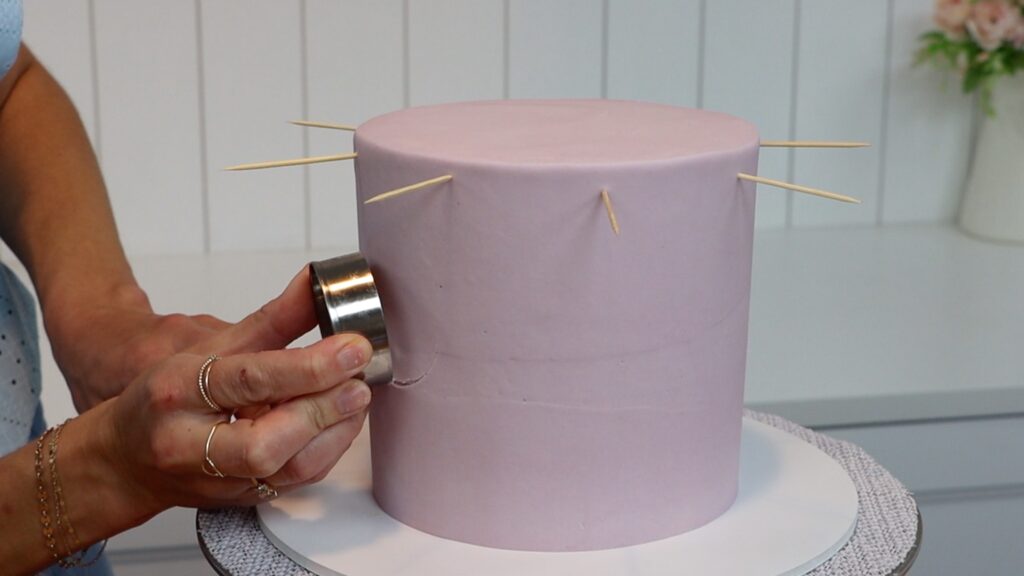
For even more guidance as you’re piping, use a round cookie cutter to mark curves into the frosting. You’ll follow these curves with your piping tips later.
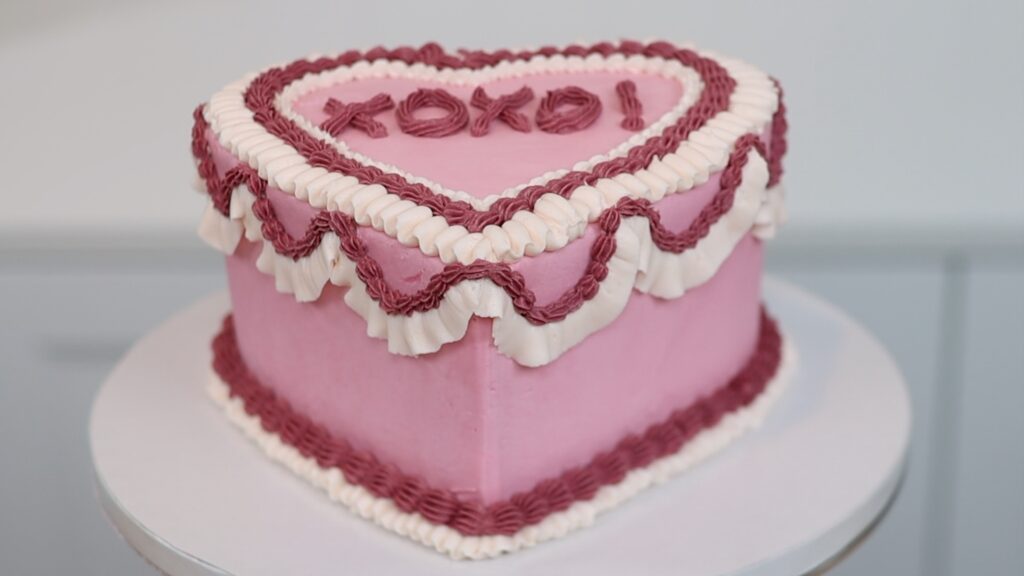
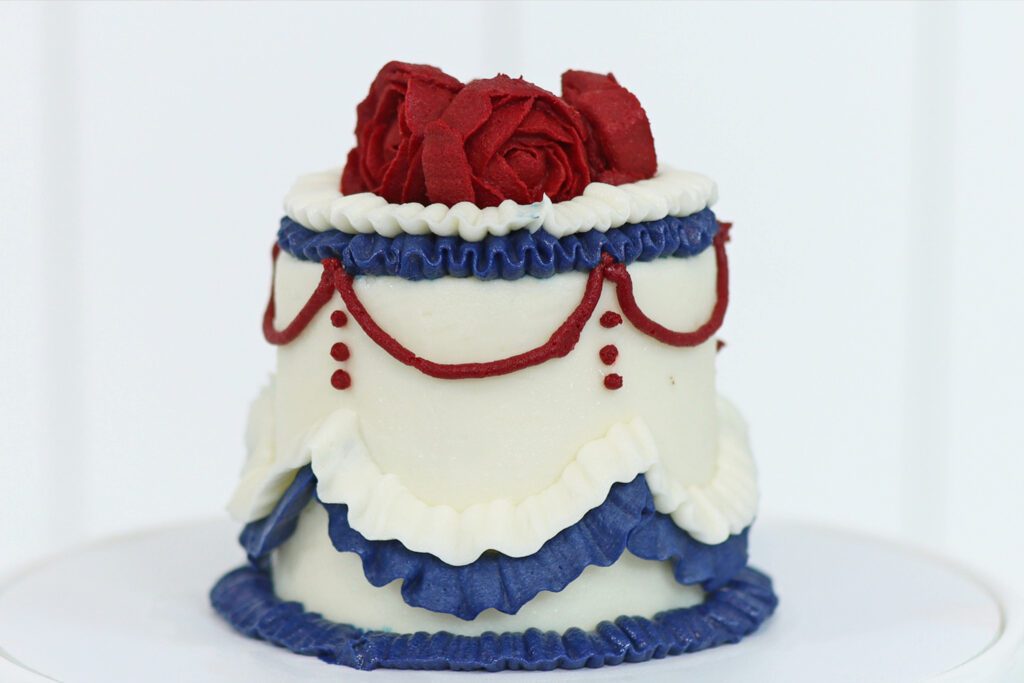
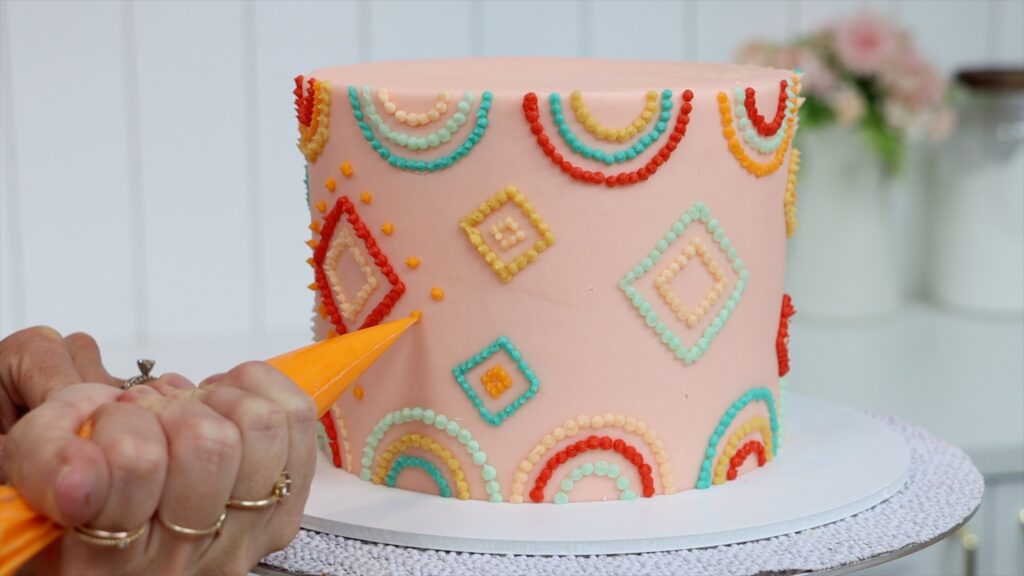
Use a variety of piping tips and colours for the most interesting design on vintage cakes. For this cake I’m using seven piping tips and 11 colours, which is the most I’ve ever used. For this vintage heart cake I used just three piping tips and two colours, which still creates some nice interest.
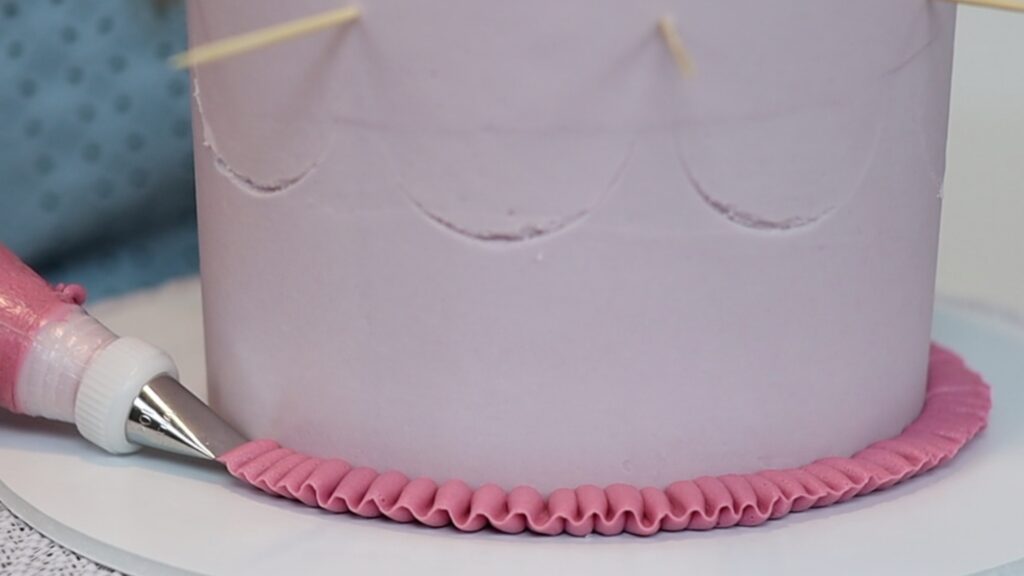
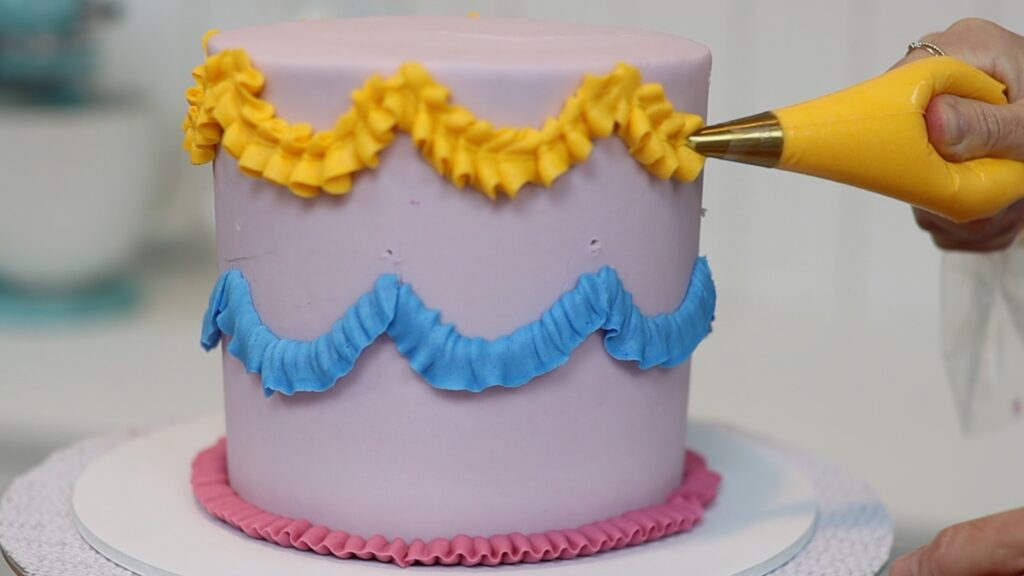
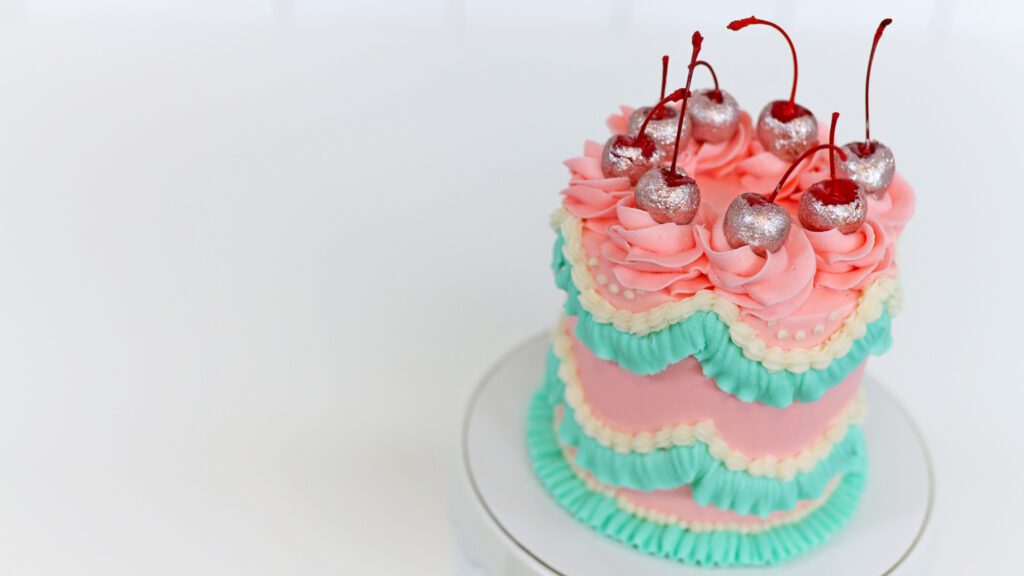
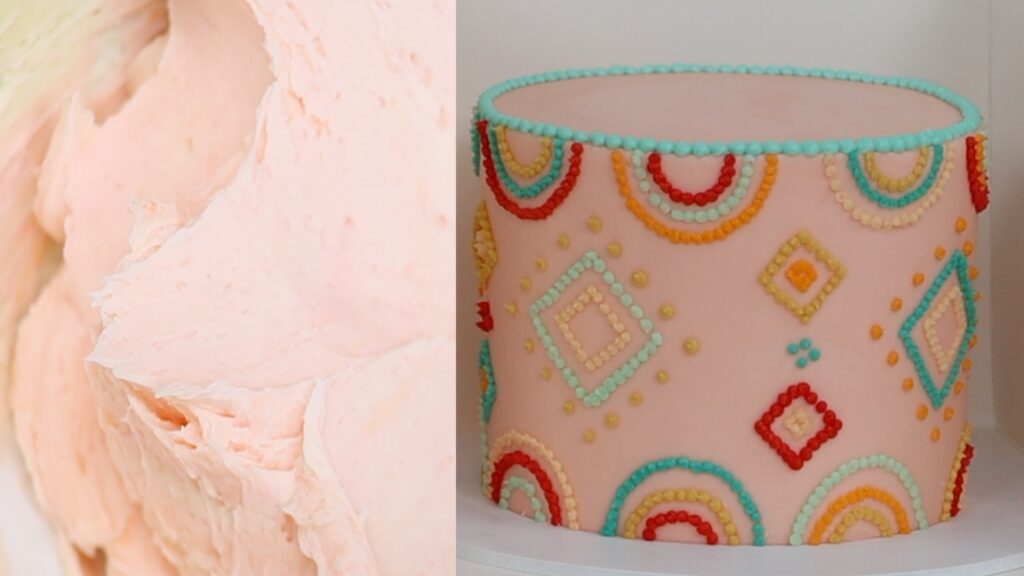
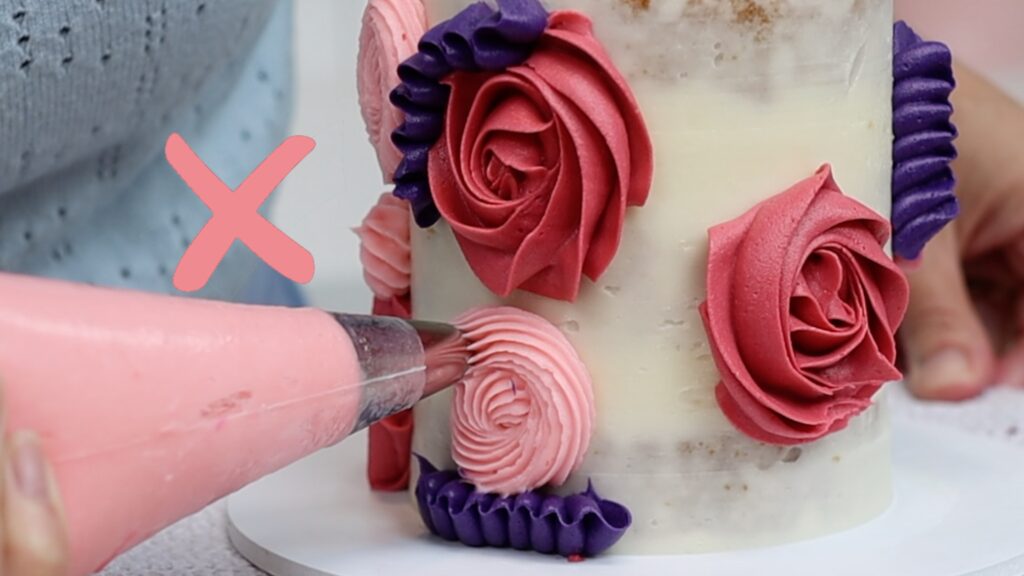
Once you have your piping bags and colours ready, it’s time to pipe! The fifth secret for vintage cakes is to use variety in your piping. Use different techniques for different styles of piping, even if those techniques use the same piping tip. For example, a petal tip can be used for ribbons by holding it horizontally and wiggling it up and down. You can see this in the pink piping in the photo below. The same piping tip can be used for ruffly swags by holding it vertically, with the narrow part of the teardrop shape pointing down. As you pipe, wiggle your wrist to allow the frosting to ruffle. The blue piping below is an example of this piping technique.
You can also create more variety by using the same technique with different tips. For example, these blue ruffles were piped with a petal tip but these orange ruffles are piped with a leaf tip:
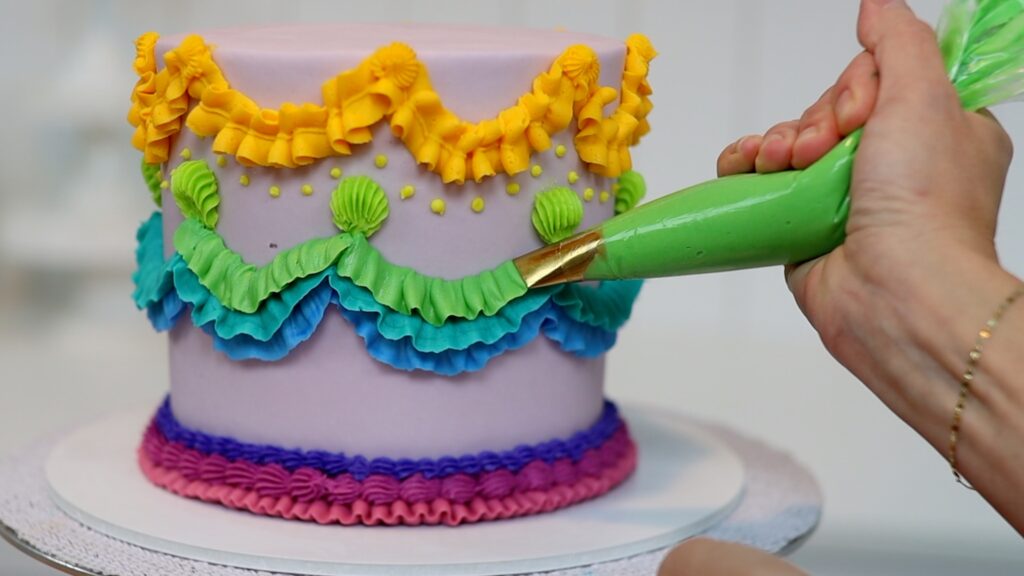
Layering is my favourite part of vintage cake designs. Using different shapes and sizes and colours of piping side by side is a really unique technique that you don’t see in many other designs. Actually, I can’t think of any other styles that use this!
The other trick that's really important for layering piping is coming up next!
Before layering piped details on top of each other, chill the first detail. It will set after about 20 minutes in the fridge so that it holds its shape even as you pipe on top of it. The weight of the next piped details won’t make it bulge or sag and the colours won't mix together. Also, you won't damage the old piping if you brush against it with this next piping tip. And if you have shaky hands like mine, you can rest the piping tip on the piping you’ve chilled to steady your hand and you won’t damage that chilled piping.
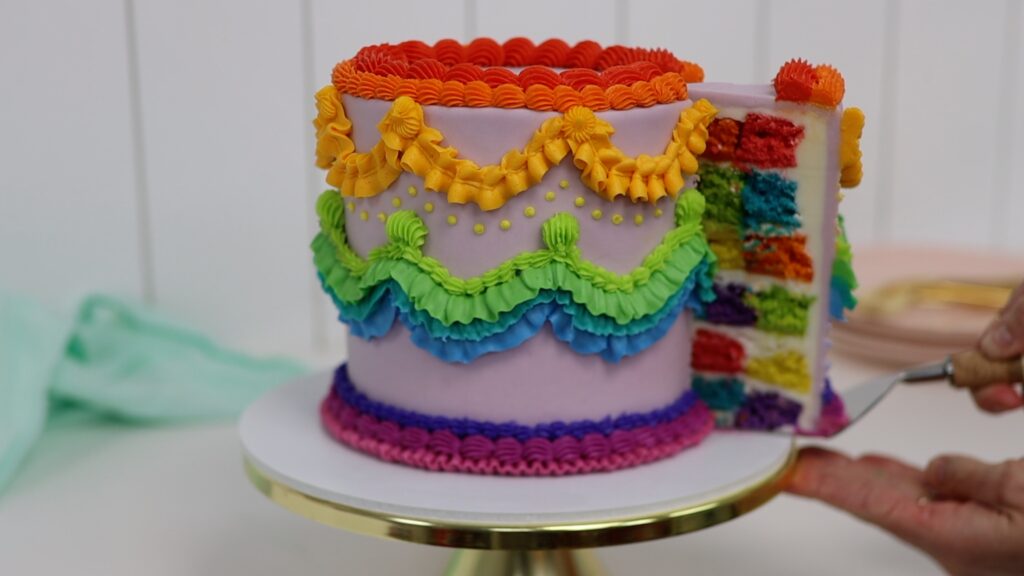
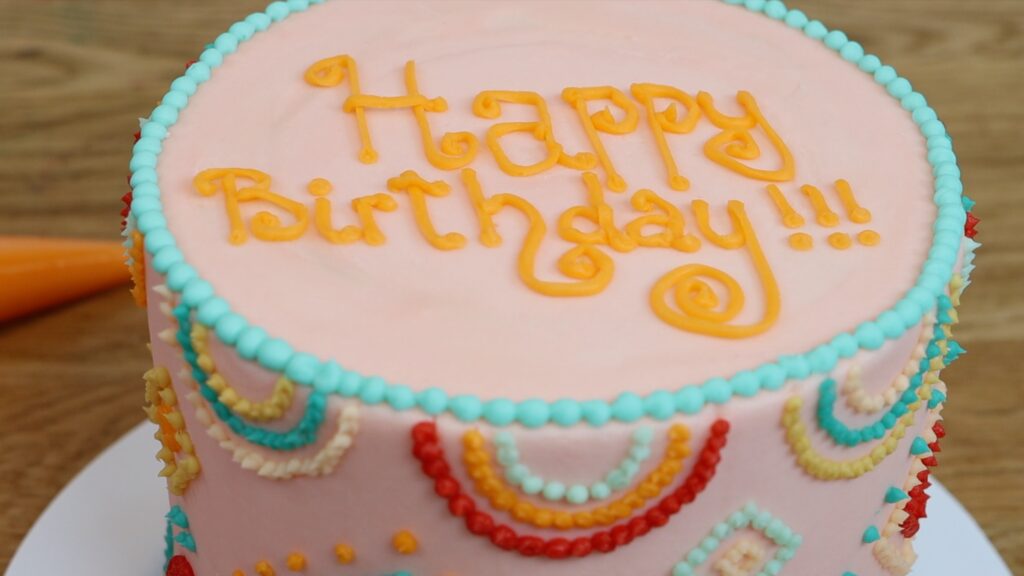
Repetition is key to vintage cakes! Use the same style of piping in different places on the cake, like the shell piping in purple at the bottom and again in orange at the top:
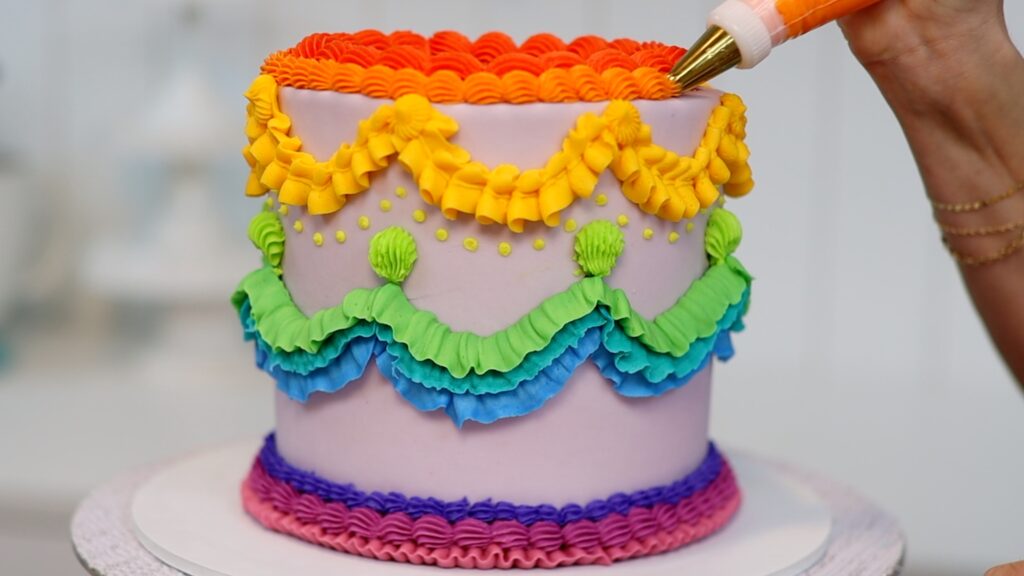
Even if you use lots of different colours and styles, repetition brings everything together by the end.
I love vintage cakes with all their piped details just as they are. But if you want to add even more glamour, add cherries dipped in edible glitter or piped flowers.
Finally, make sure your cake is as delicious as it looks by storing it properly! Vintages cakes should be refrigerated to preserve the heavy piping. Take them out a few hours before serving so that the cake and frosting warms up to room temperature. This takes about two hours for small cakes or four hours for large cakes. Buttercream cakes taste best at room temperature!
I hope this tutorial has been useful! I'd love it if you checked out my online cake school! You can take courses on baking and decorating cakes or choose the All You Can Cake membership for access to everything on my cake school to really take your cake decorating to the next level!
You can also watch a video of this tutorial on 10 secrets for vintage cakes:
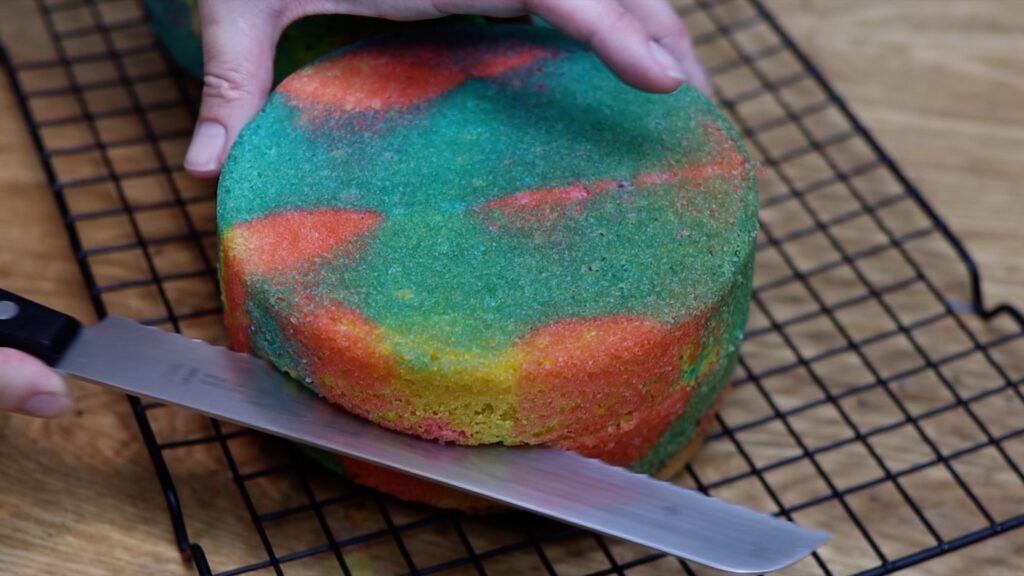
In this tutorial I'll show you how to make a tie dye cake that's tie dye both inside and out!
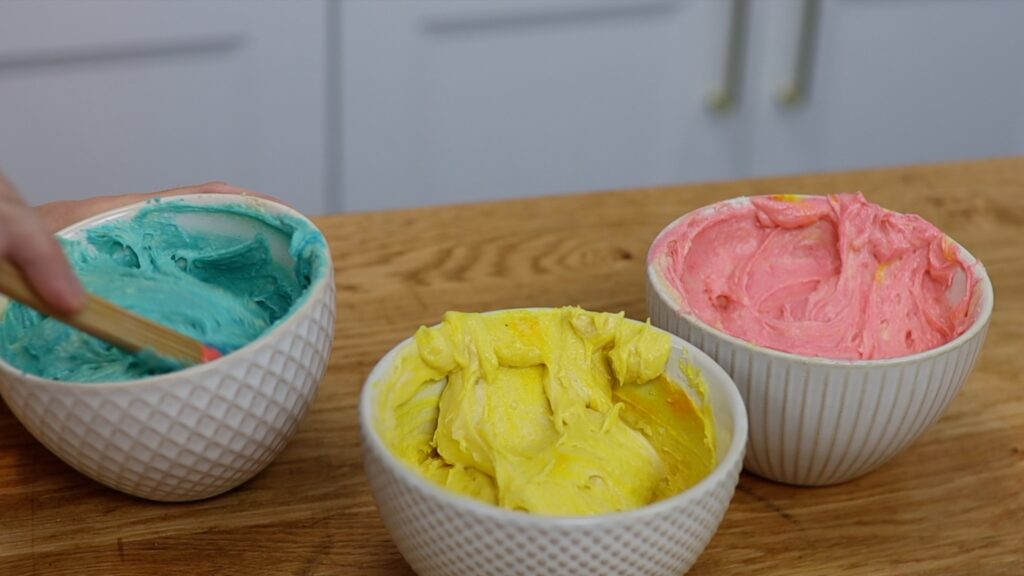
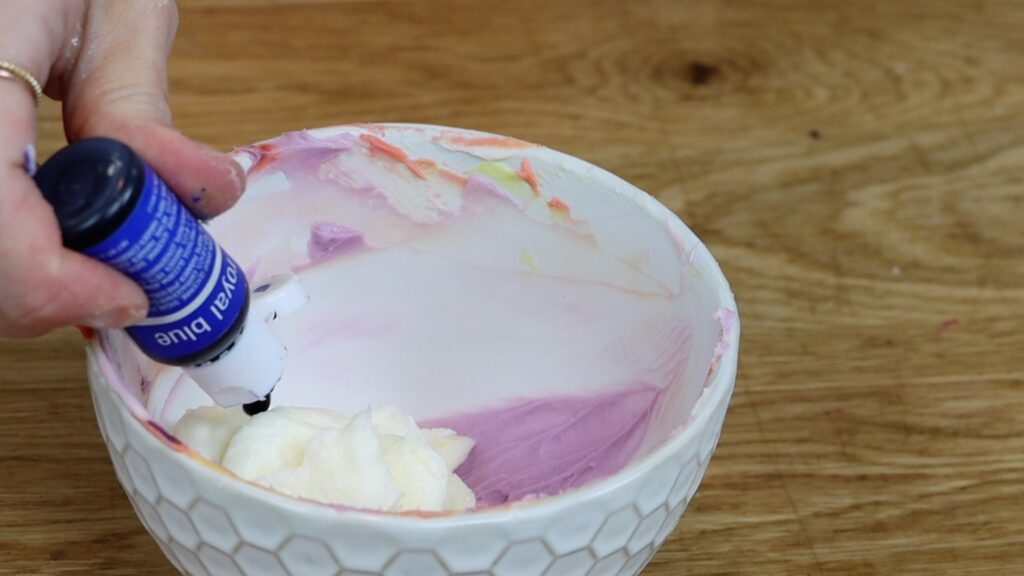
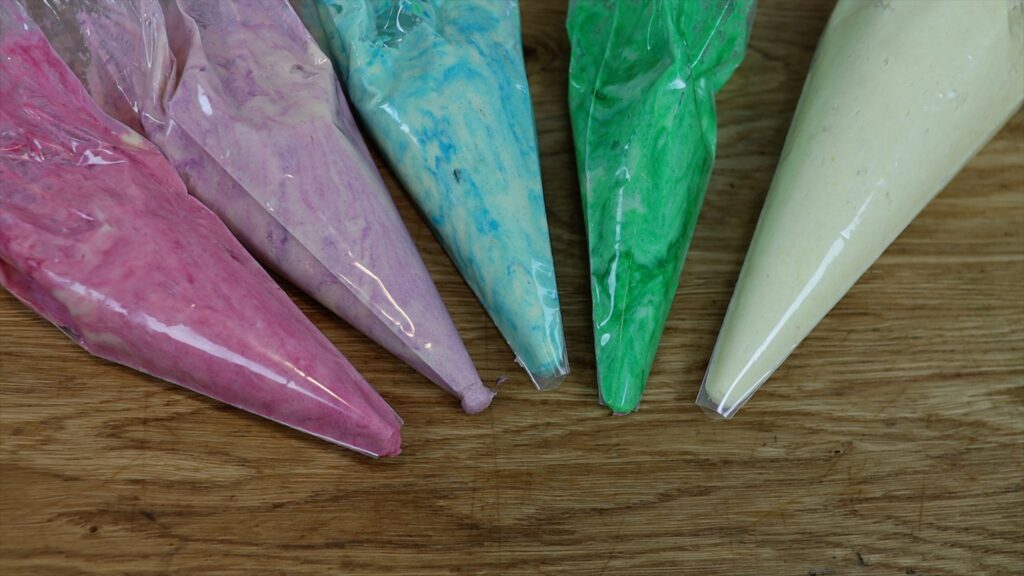
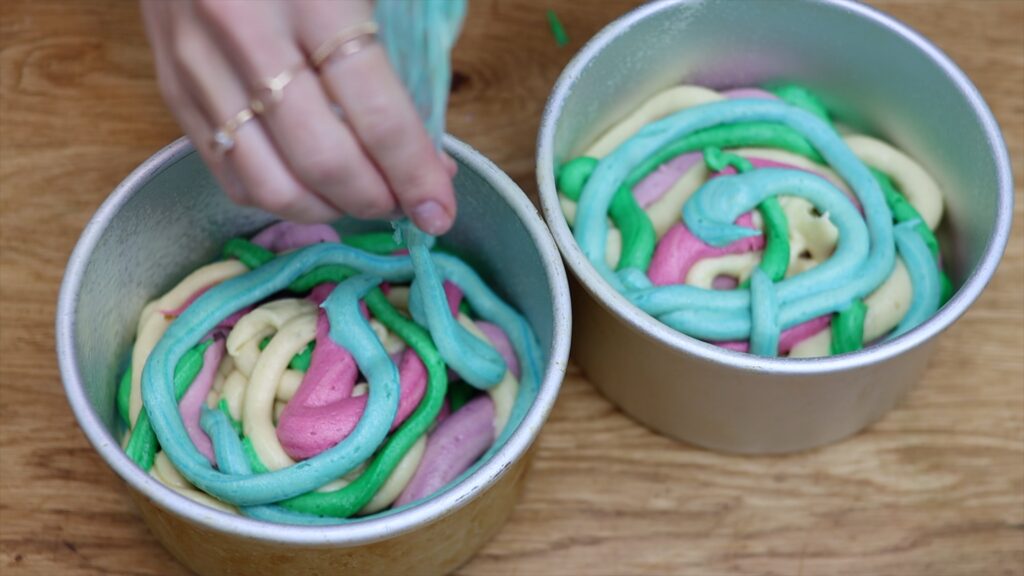
For tie dye cake batter, divide your batter into four or five bowls add food coloring to each one. I’m using four bowls, making yellow, pink and blue and leaving one bowl plain.
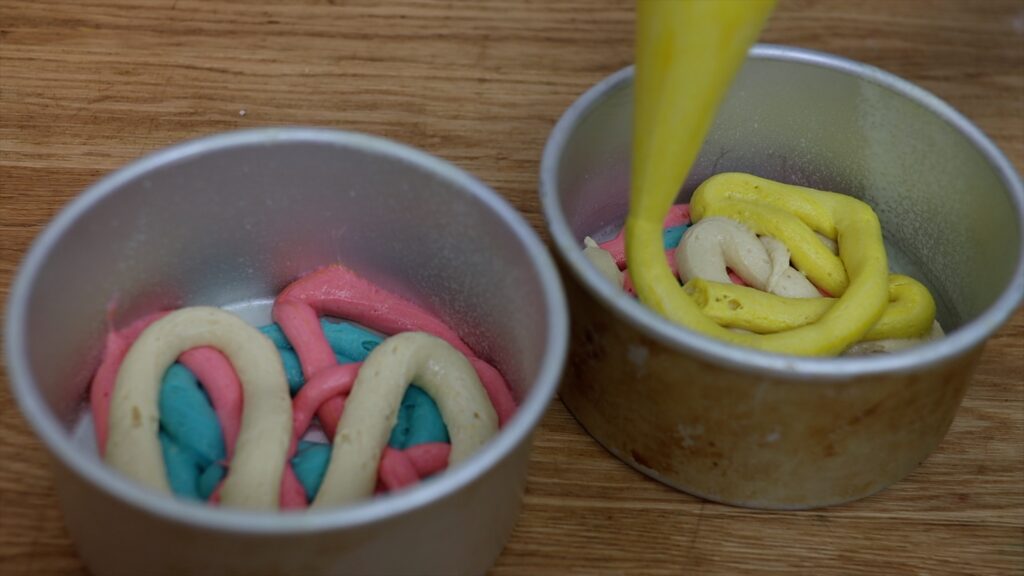
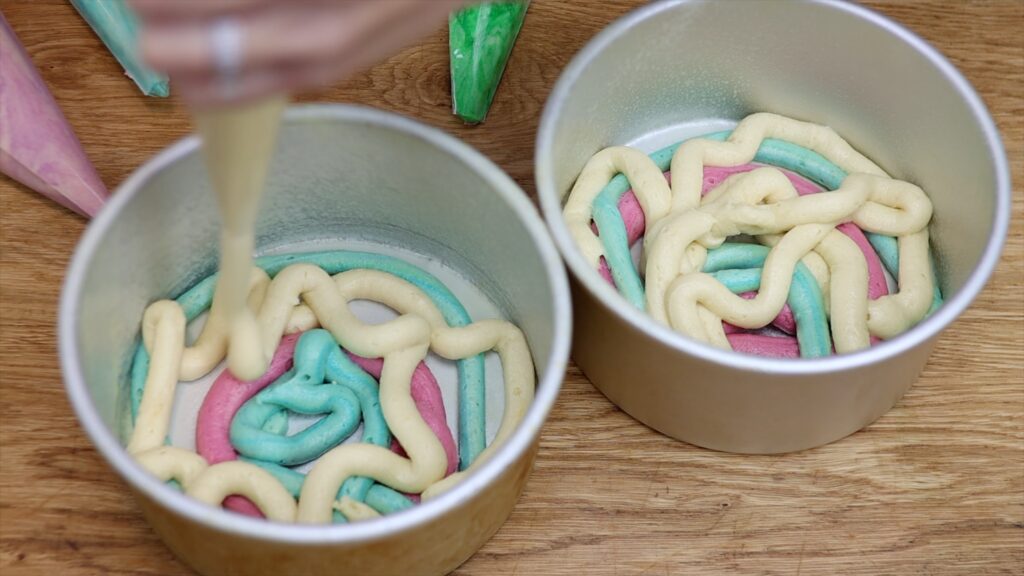
You can spoon the coloured batter into pans or scoop it into piping bags and pipe it into cake pans. Switch back and forth between the different colours, squiggling the batter to make random patterns in the pans.
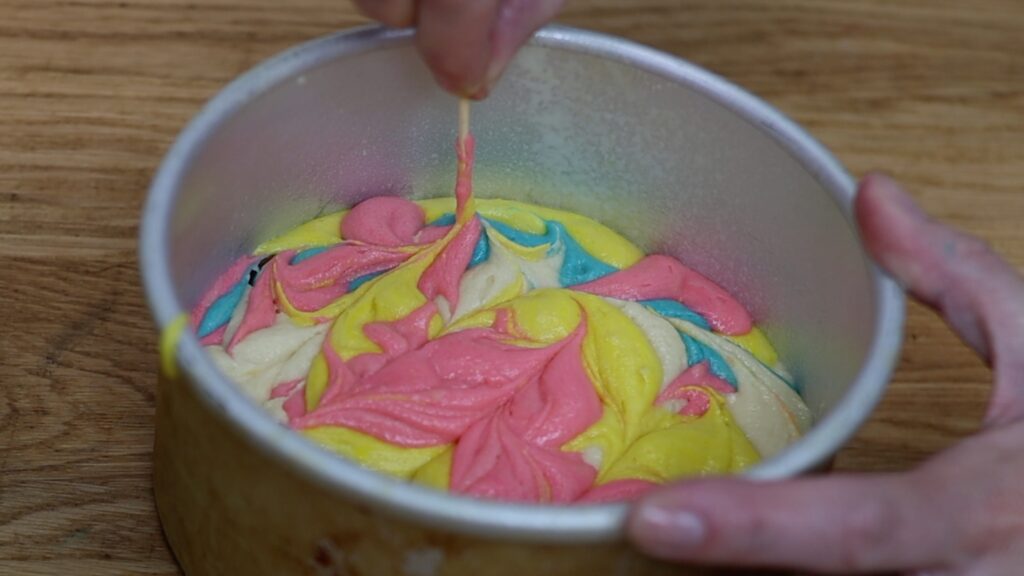
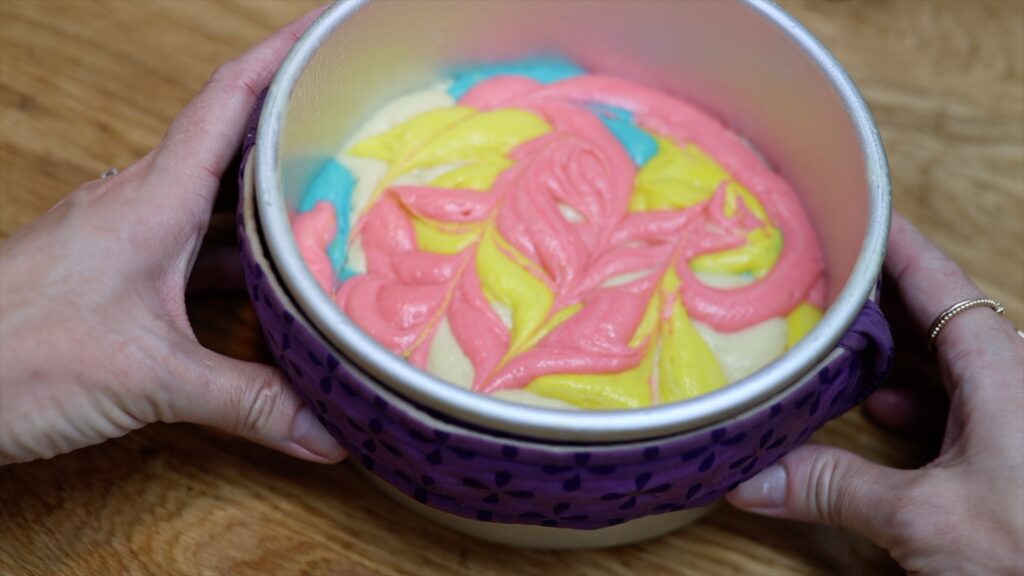
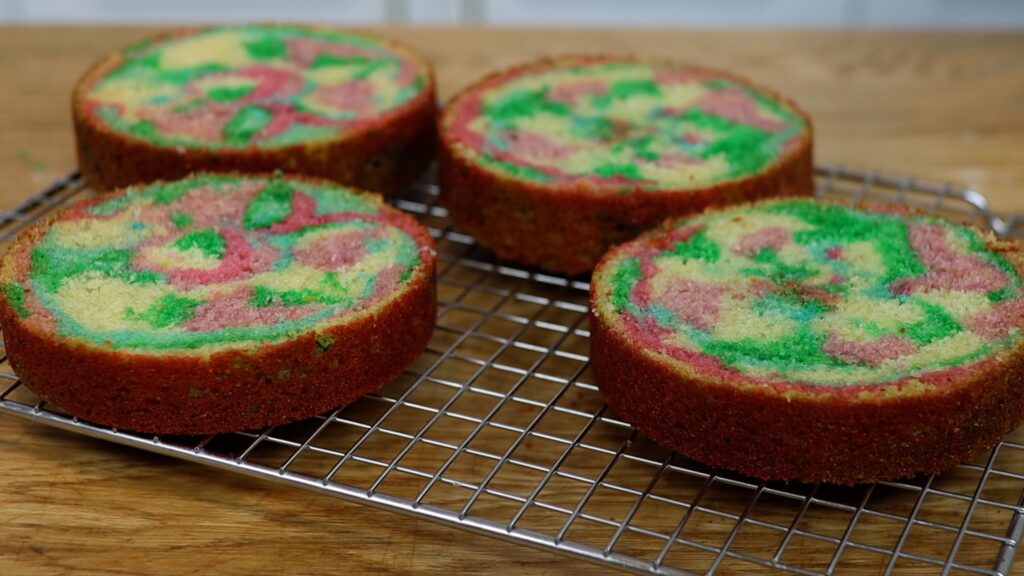
Tap the pans a few times to flatten and level the batter. Then drag a toothpick through the batter to mix the colours.
I like to using baking strips to help the cakes bake evenly and rise higher without domes. I soak them in a pan of water for five minutes and then squeeze the water out. Wrap tightly around the cake pans and bake as normal.
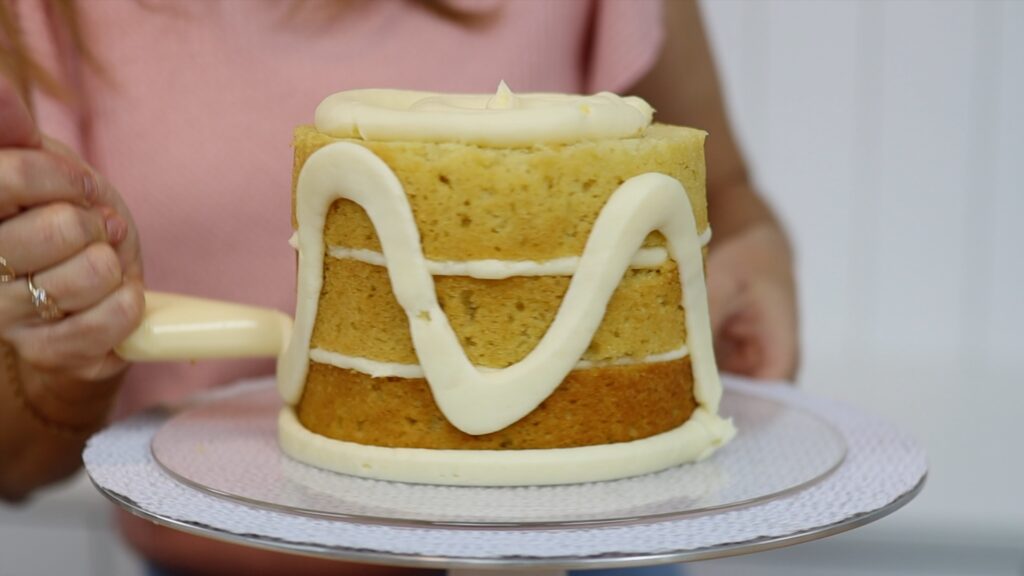
Divide the cakes in half if you want more layers. Then assemble your cake by alternating cake and filling.
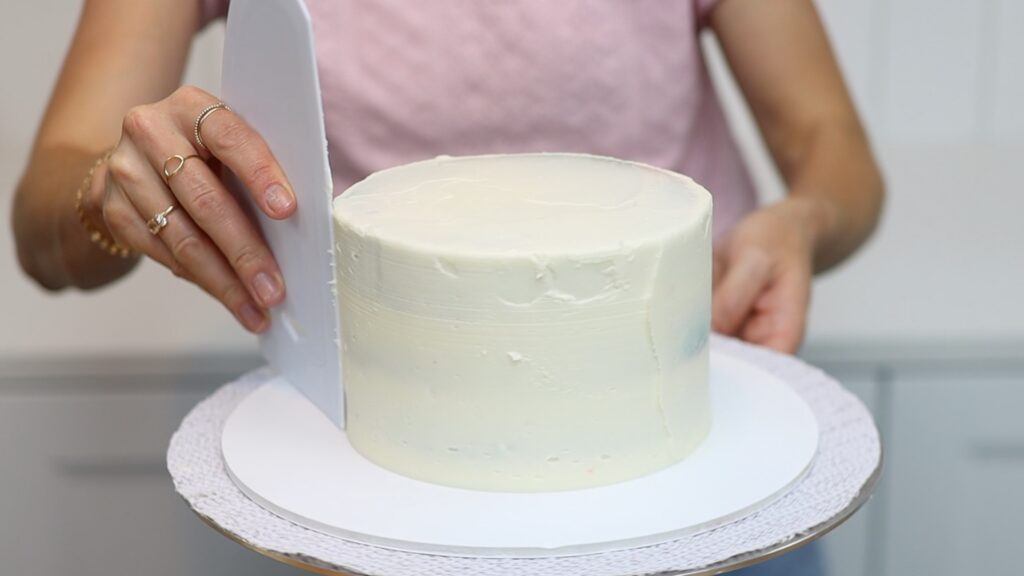
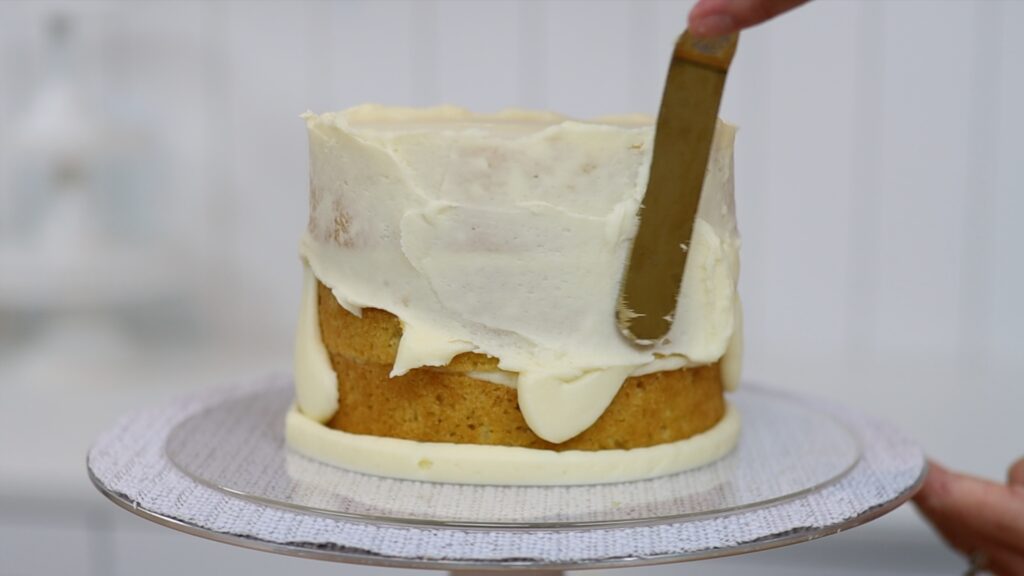
To frost the cake, start with a crumb coat. This is a thin layer of frosting to trap any crumbs that come off the cake so that they don’t get into the final layer of frosting. I'm using my 4 minute buttercream.

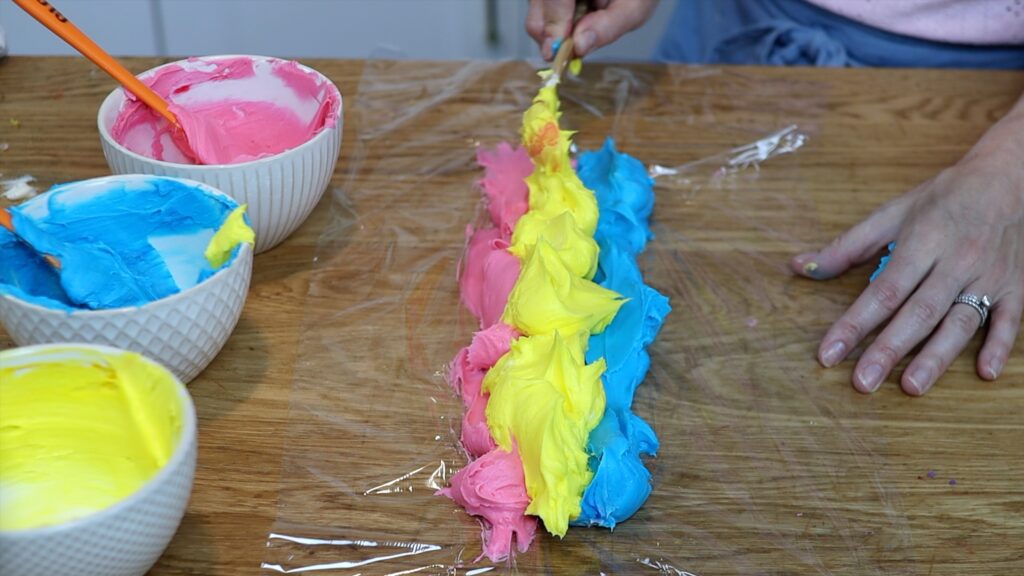
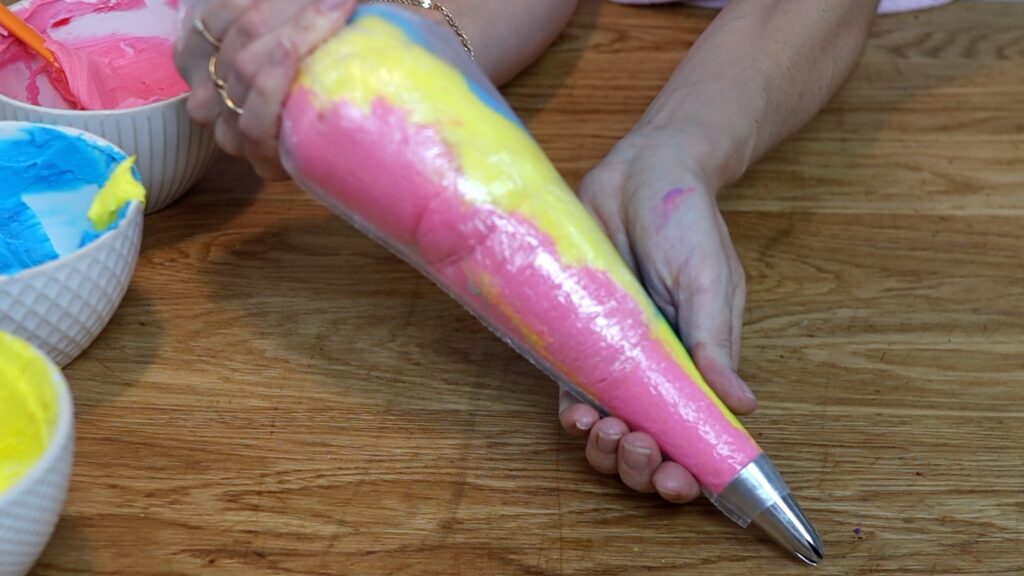
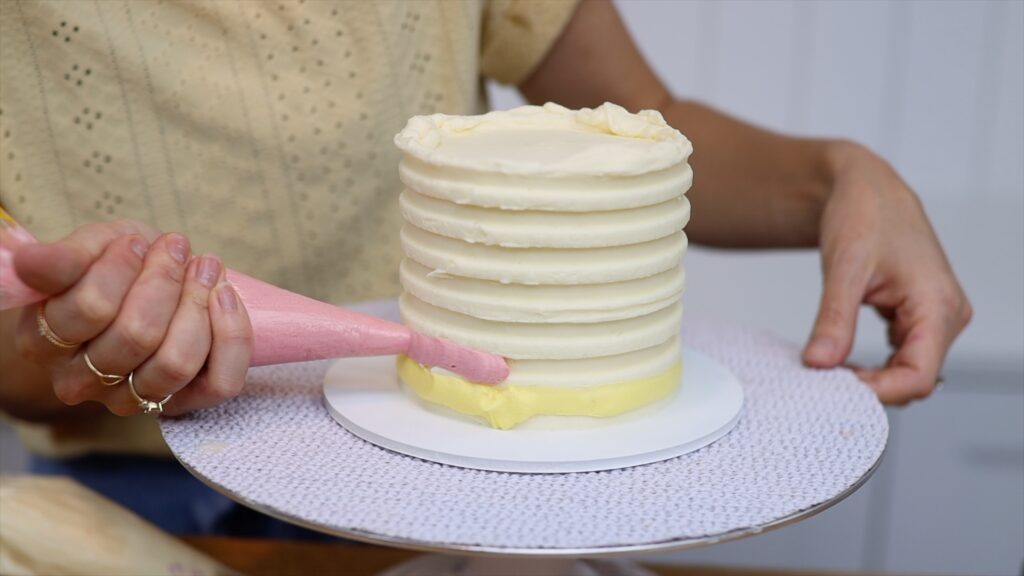
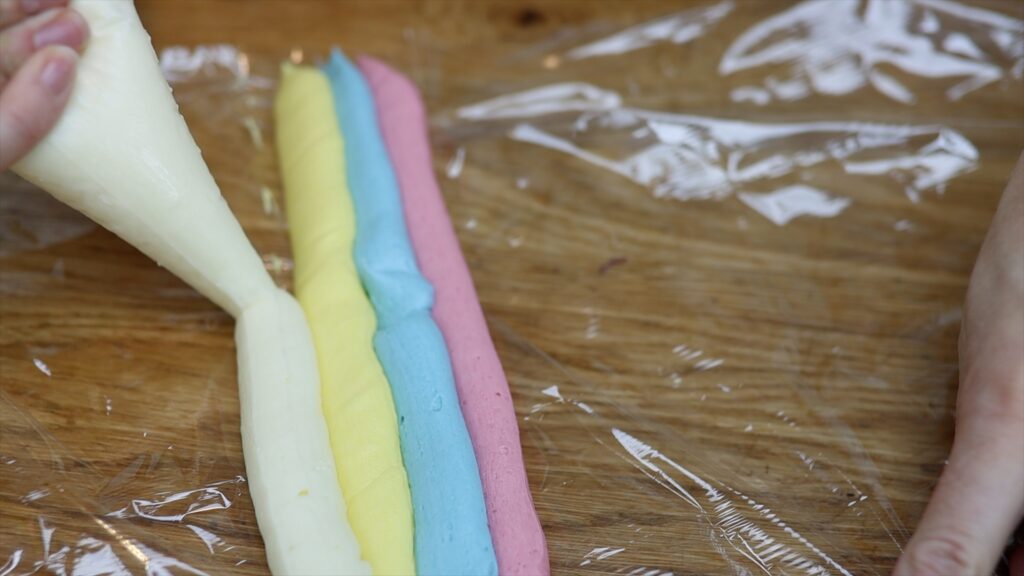
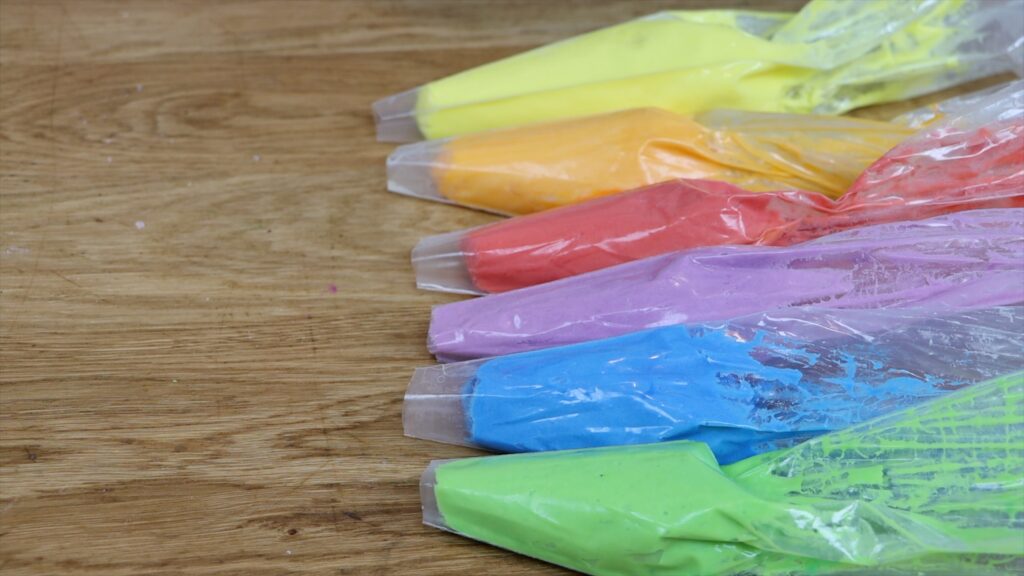
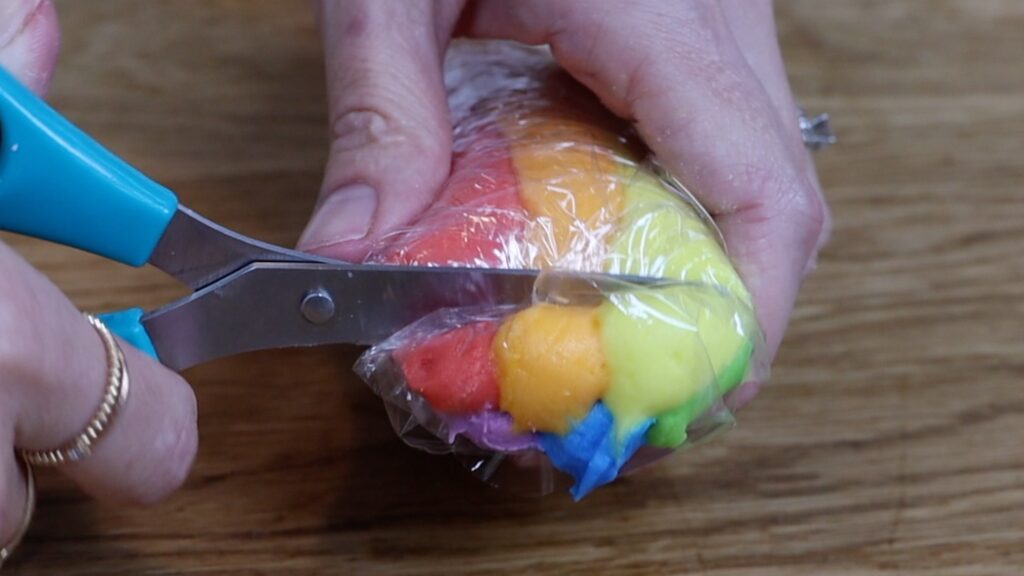
Chill the cake for about 30 minutes in the fridge to set the crumb coat. Meanwhile, tint a few bowls of buttercream the same colours as the cake batter. Line them up on a piece of cling film or Saran Wrap. You can put the colours into piping bags and pipe them in lines, side by side. To save yourself washing those piping bags, spoon the colours onto the plastic instead, like I’m doing here.
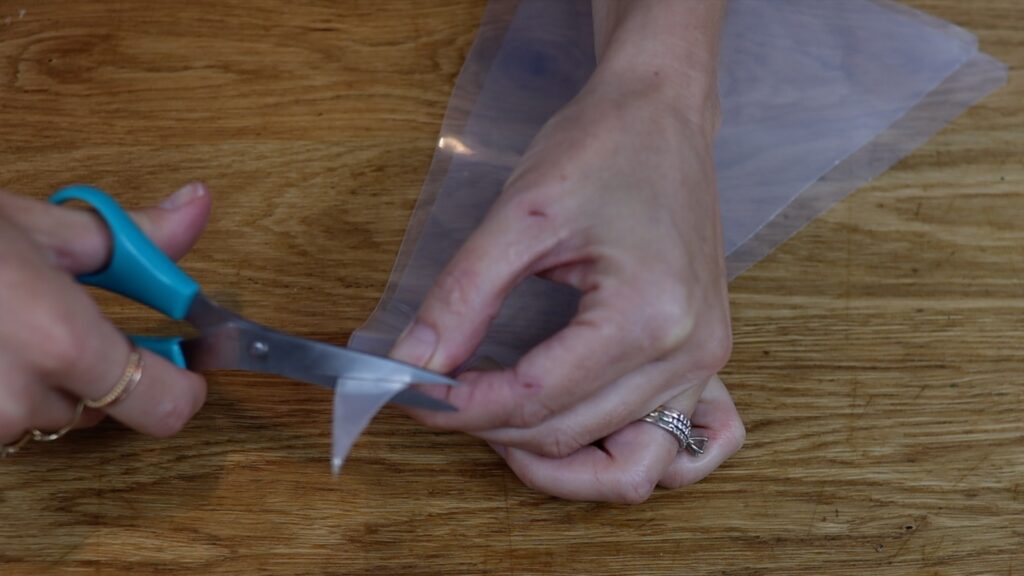
Roll the plastic wrap up into a log around the buttercream and twist the ends. Cut off one end and drop that end down into a piping bag fitted with a star tip like a 1M.
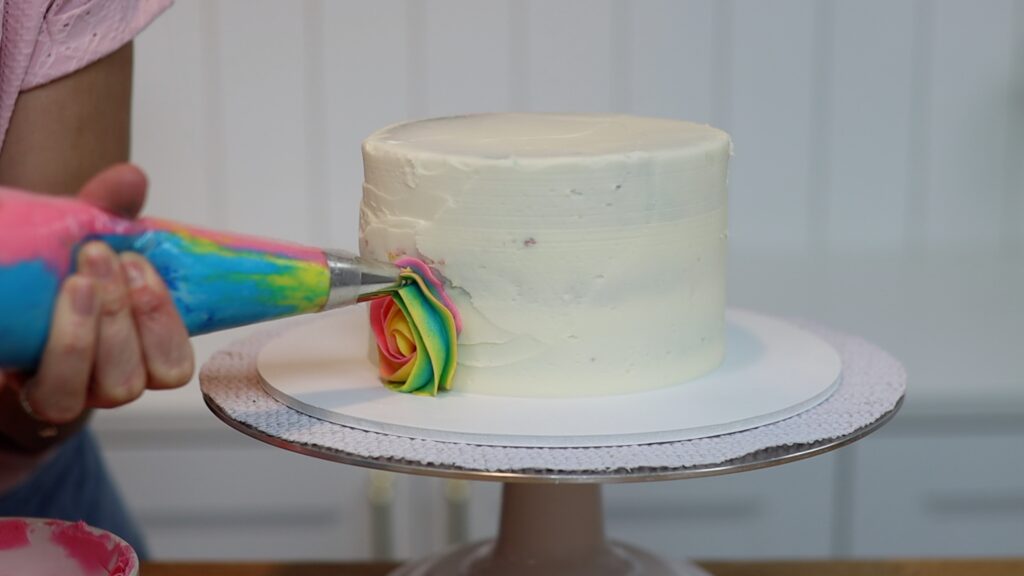
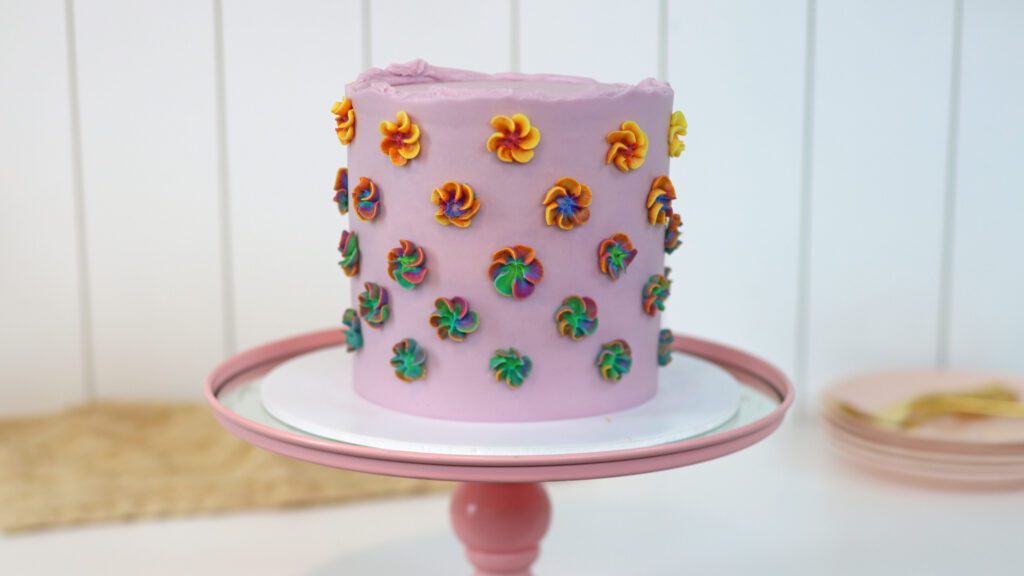
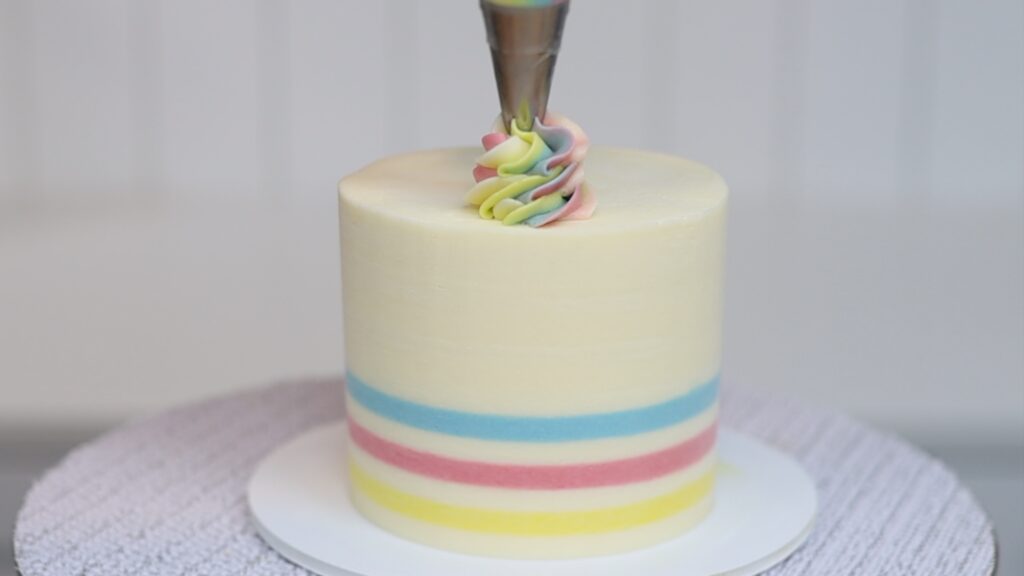
Now pipe the multi-coloured buttercream onto the cake. I’m piping rosettes and filling in any gaps by squeezing out little stars. Different piping techniques will give you different results when you flatten it next, creating a cross section of your piping. Cover the sides and top of the cake and then put the cake into the freezer for 15 minutes.
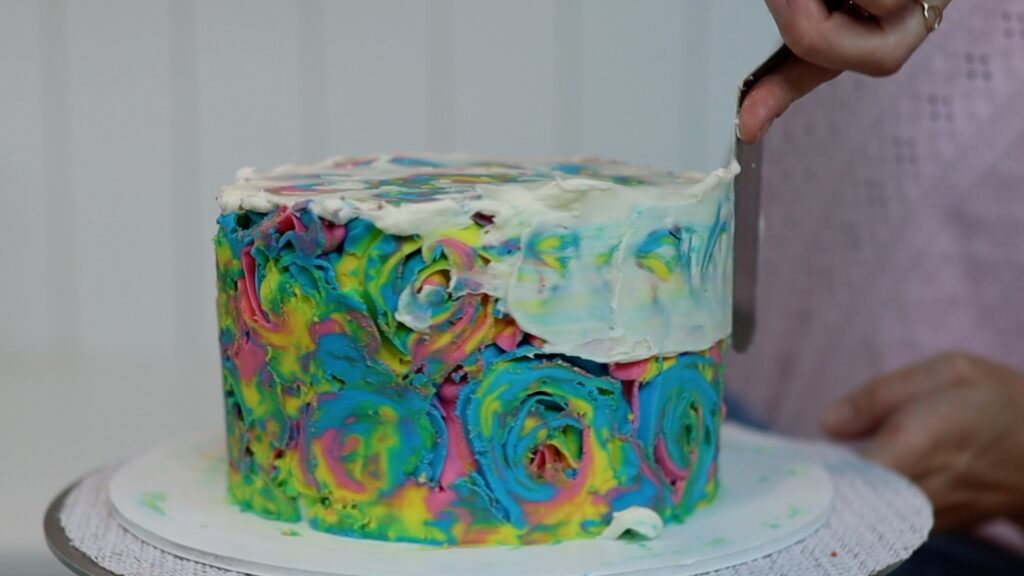
I call this technique 'facelift frosting' because you're going to give your piping a facelift! To do this, use a hot cake comb to scrape around the cake. You can heat the edge with a blowtorch, which is my favourite method because it's the fastest. Other options are to hold the cake comb under hot running water from the tap or dip it into a bowl of boiling water. You’ll question yourself after the first few scrapes because it will look like you’re destroying your piping!
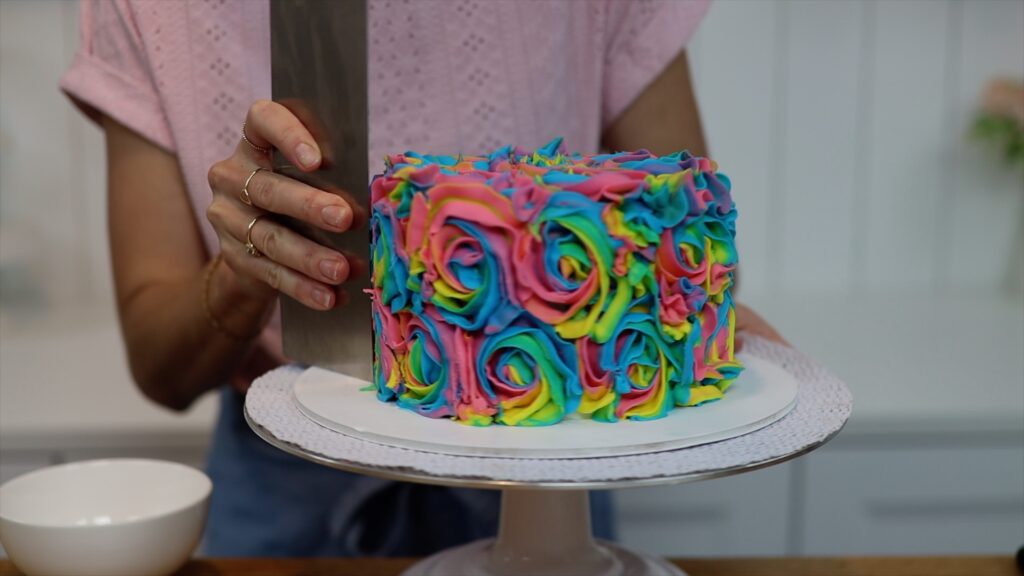
Keep scraping, re-heating your cake comb after every few scrapes. If you piped onto the top of the cake you’ll need to scrape that too. The frosting won't get perfectly smooth because you’ll have gaps in between parts of the piping. What you’re looking for is a smooth curve around the sides of the cake. The top surface should be level even though it will have lots of holes in it.
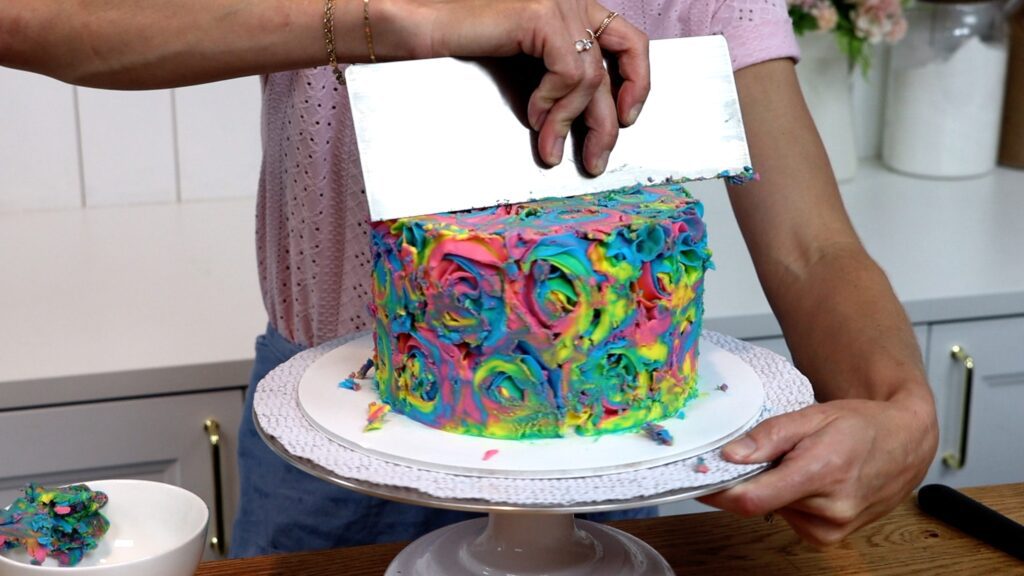
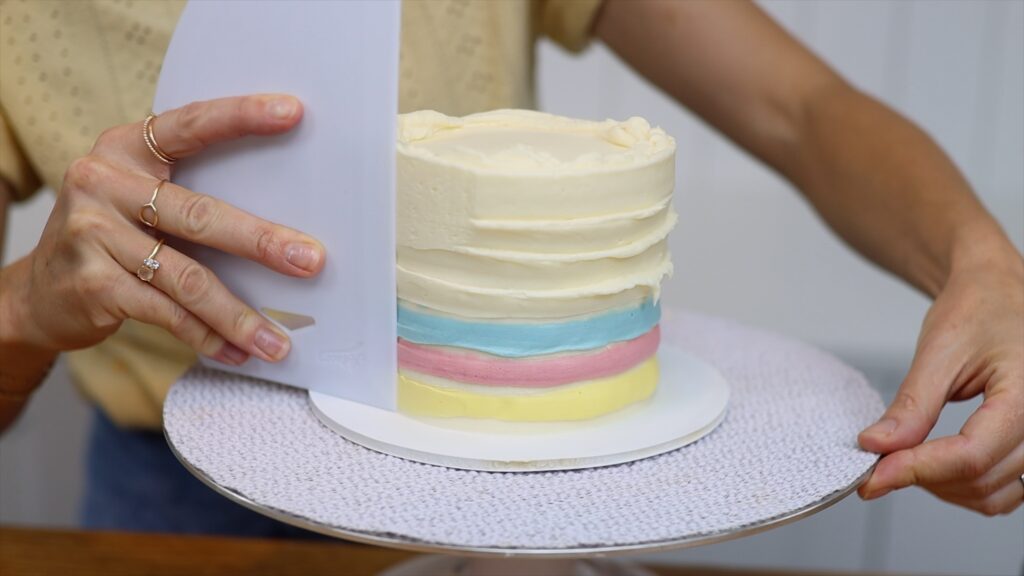
Tie dye has those white markings or creases and to recreate those, spread white frosting all over the cake. This is another part of this technique where it feels that you’re ruining the cake!
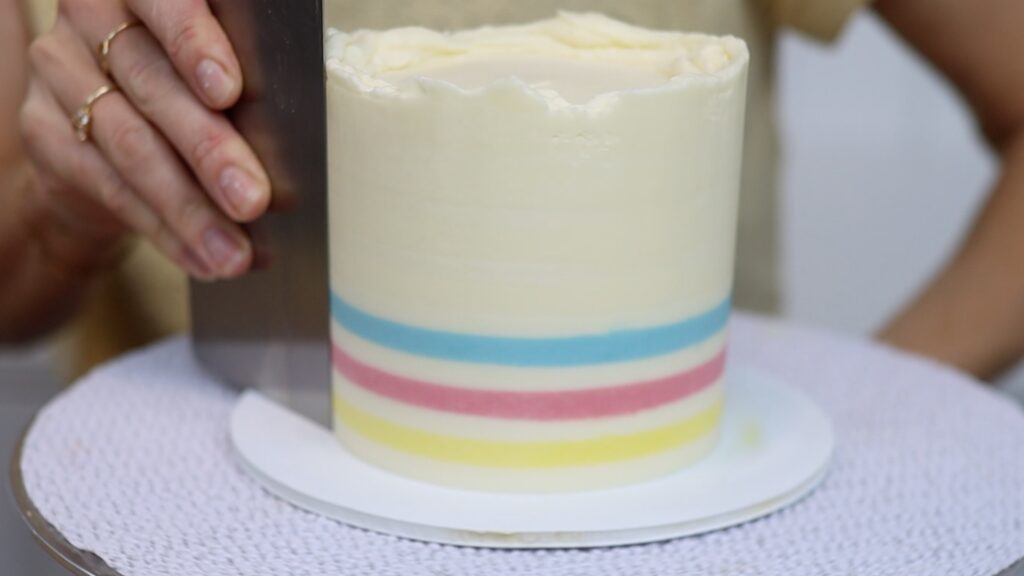
The point of this white frosting is to fill in the gaps, not to cover up the colours! So after spreading it all over, switch back to your cake comb and scrape around the cake again. You'll take off the excess white frosting and leave it only within the gaps in the piping.
The white frosting will set quickly because the coloured frosting is cold so using a hot cake comb will make this much easier. It will melt the outer layer of frosting instead of trying to scrape cold hard buttercream off the cake!
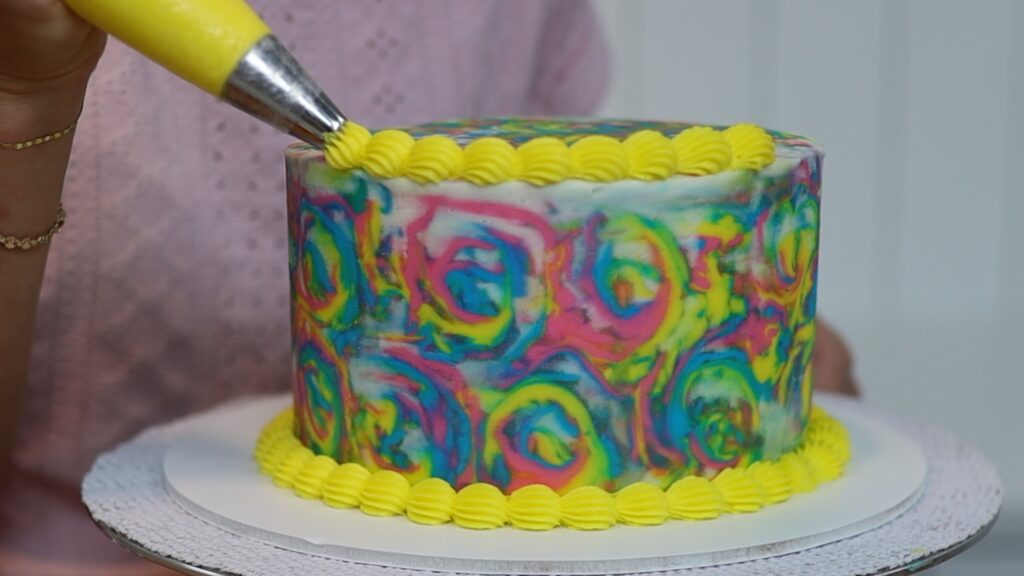
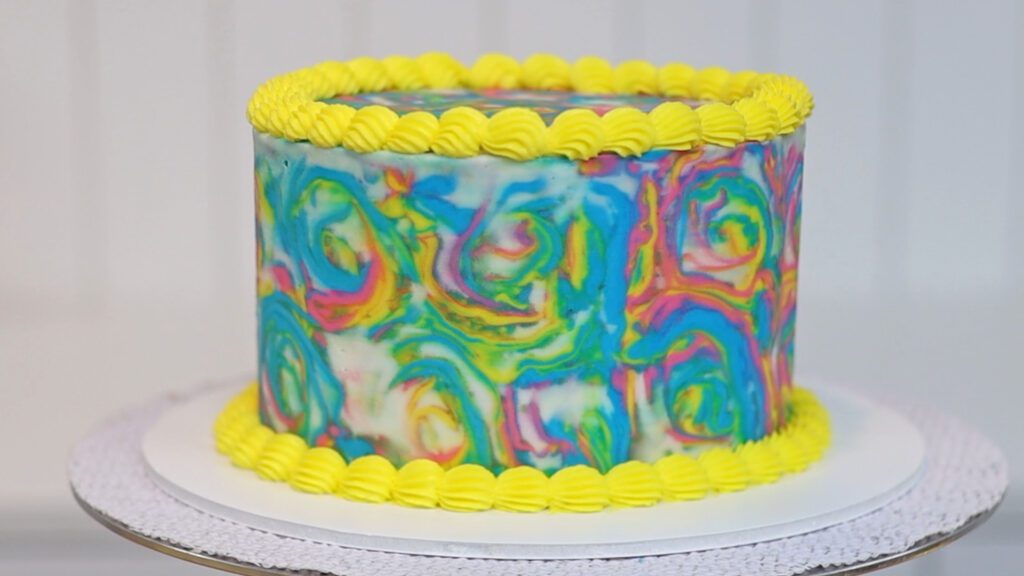
There are so many possibilities for this technique! Different piping tips and piping styles will give you very different results. There are also so many ways you can decorate it. I’m adding some neon yellow borders using a 4B star tip. It would be fun to add some peace signs or smiley faces or other hippy style decorations too!
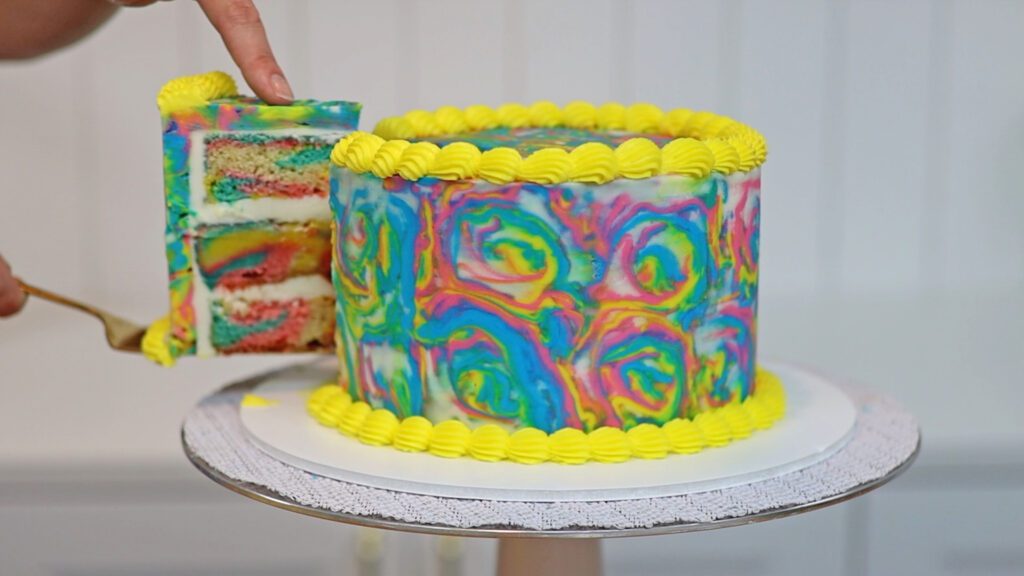
I stopped at this point because I was impatient to cut into this to see whether the inside matched the outside. Here's the slice shot - I wasn't disappointed! Bright swirls of colour, my delicious very vanilla cake layers, my creamy 4 minute buttercream… absolute perfection!
Will you try this? What other design should I attempt with this technique? Tell me in the comments!
You can also watch a video of this tutorial on how to make a tie dye cake:
Here are 7 easy Easter cake ideas and Easter cupcake ideas, too! You don’t need any decorating experience for these and you can even do them with kids!
You can do the first of these Easter cake ideas even if you don’t have any cake pans. Pour your batter into a baking dish or casserole dish. Add your favourite Easter treats like mini eggs, Easter coloured M&Ms, chopped up strawberries, and creme eggs.
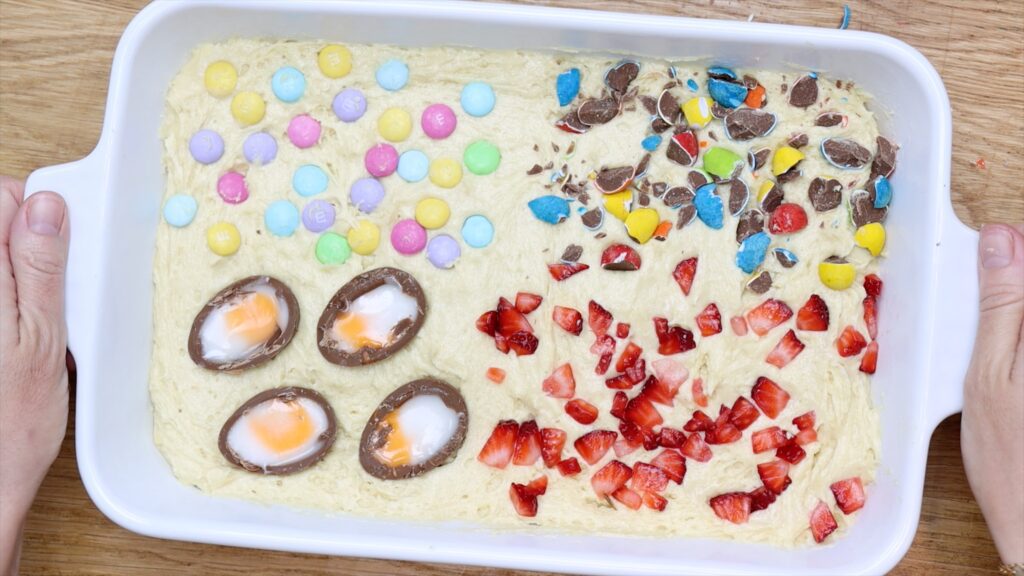
Bake your cake and don’t worry if the treats look a bit funky when they come out of the oven! After the cake cools, spread or pipe frosting on top. I’m using a different colour for each section of the cake, piping different techniques with a 1M star tip.
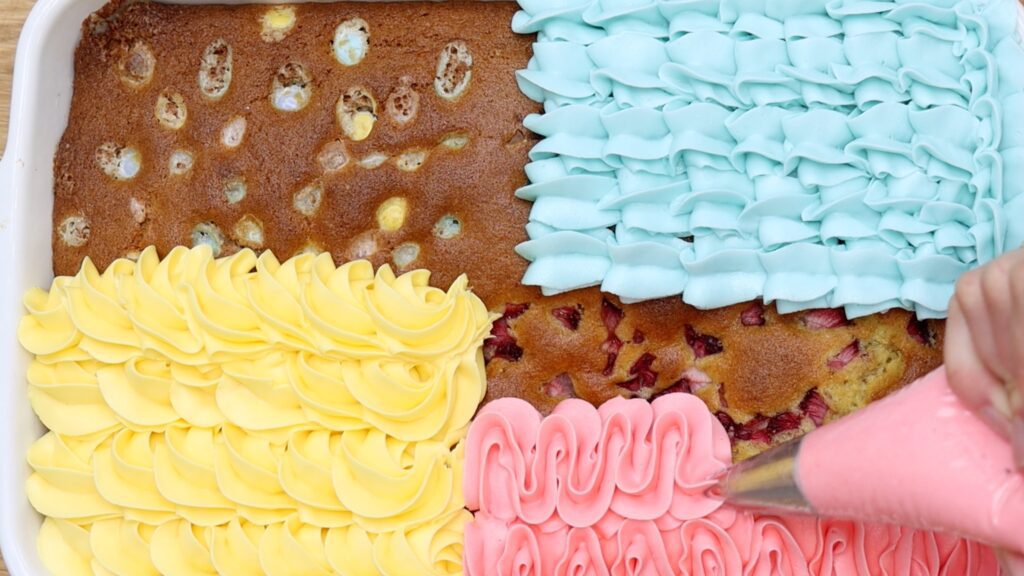
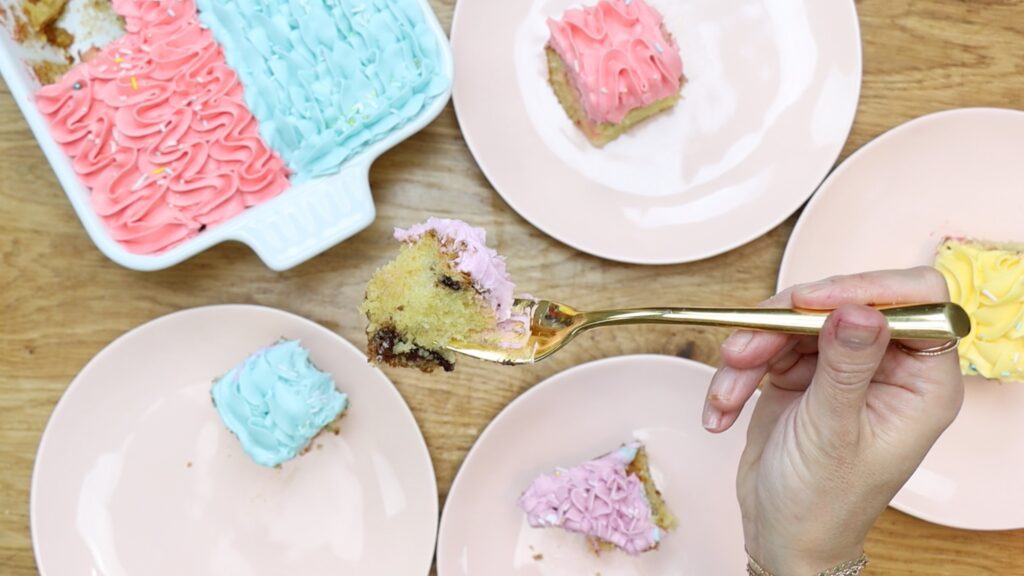
The final result is colourful and textured and fun! Of course, the best part is cutting into the cake and tasting each of the ingredients. Which one would you choose first?
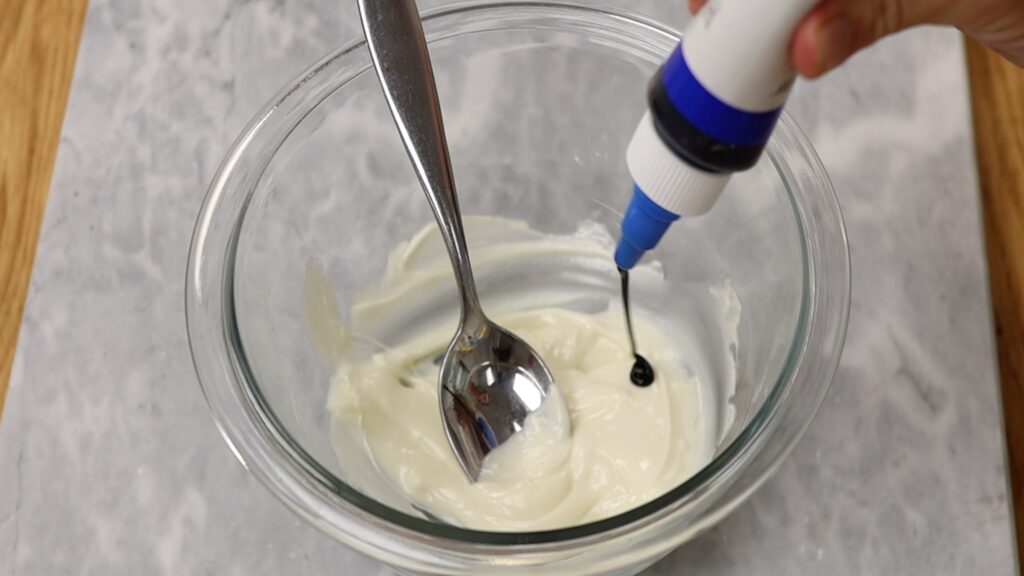
Turn a simple frosted cake into an Easter egg cake with this tehcnique. Mix a spoonful of cocoa powder and a few drops of water to make a chocolate liquid. You won't be able to splatter a paste so make sure you use enough water. Dip a paintbrush into it and then flick it all over your cake to make speckled frosting. I definitely recommend covering the countertop and the wall behind the cake while you do this!
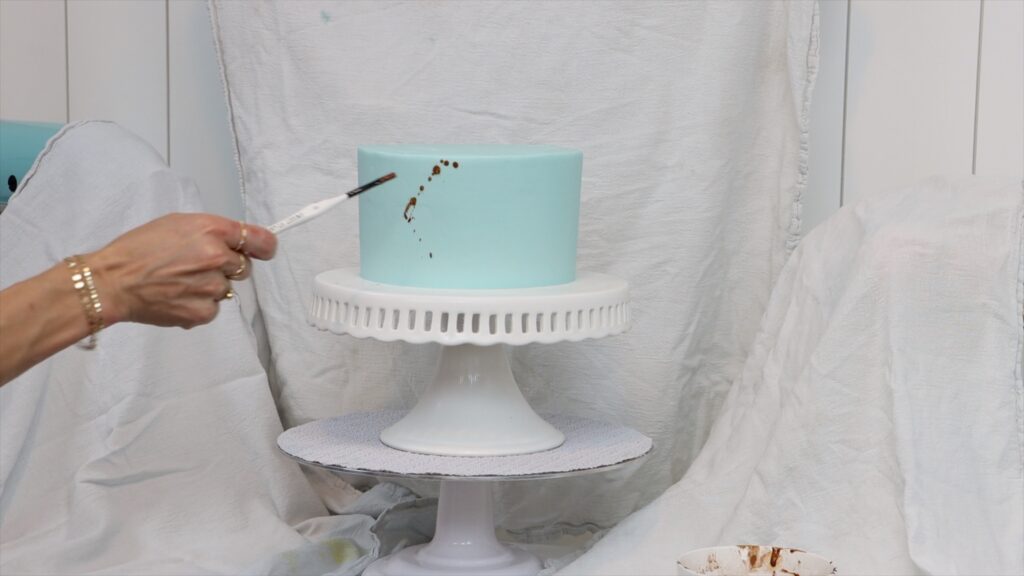
You can use striking motions or tap the paintbrush against your other hand to create a spray.
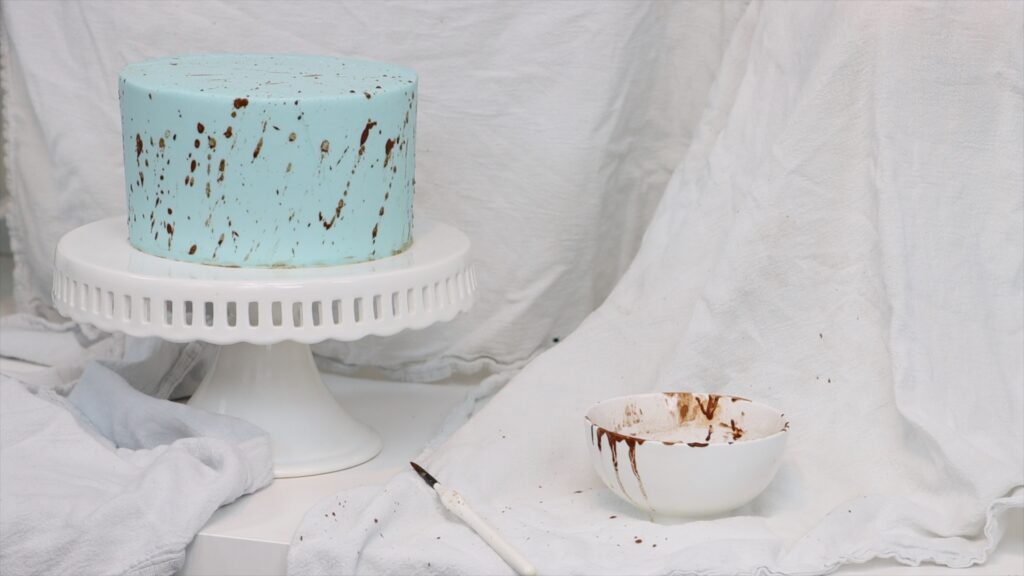
Wipe any splatters off the cake board or cake stand and then add a border if you like. This is a 4B piping tip:
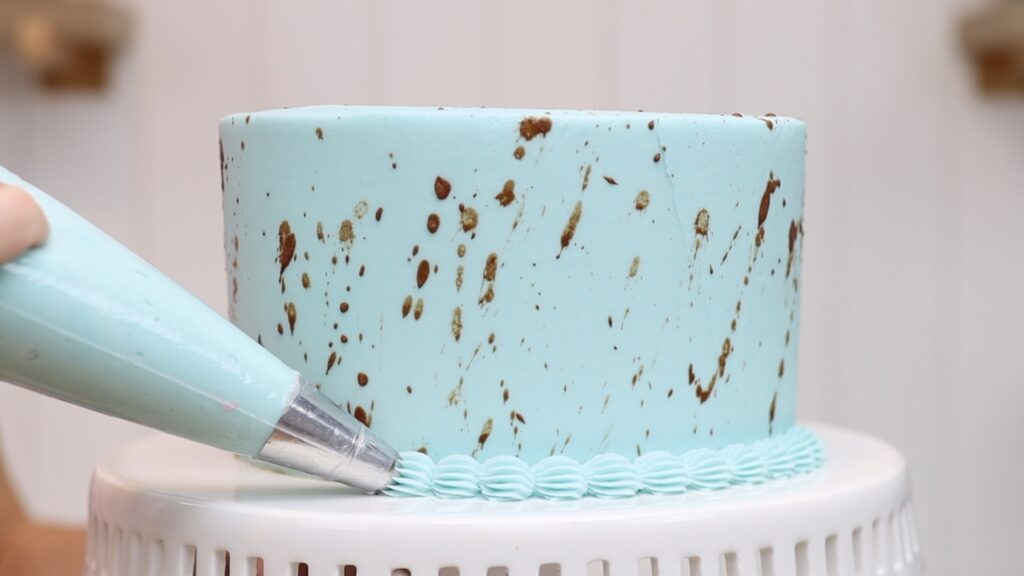
The cake looks stunning just like this but you can also add any of the other decorations in this tutorial. I’m piping a nest using a rope border technique with my Best Chocolate Buttercream.
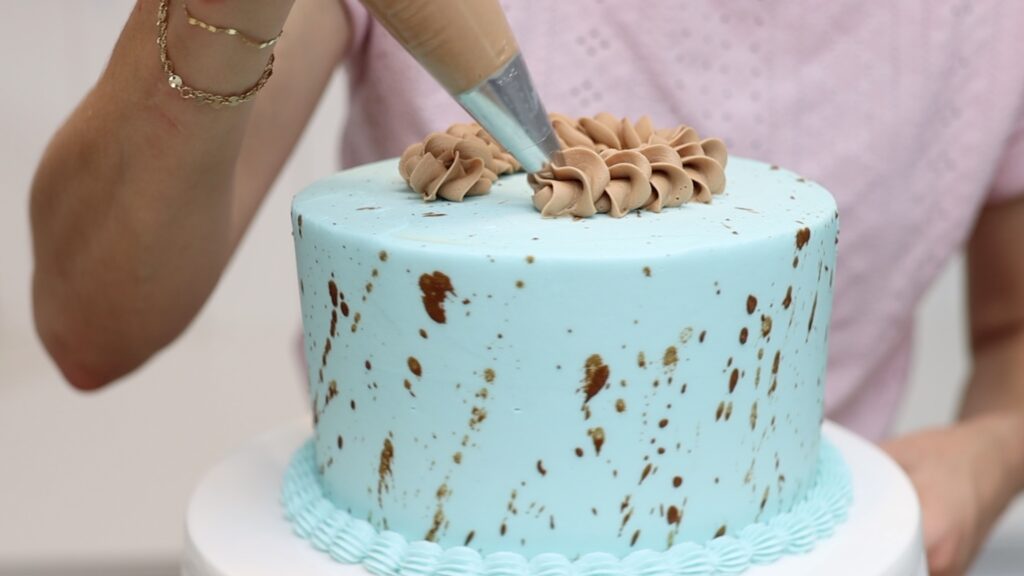
Cadbury's Mini Eggs are the perfect size for this and you can dust them with edible glitter to add sparkle!

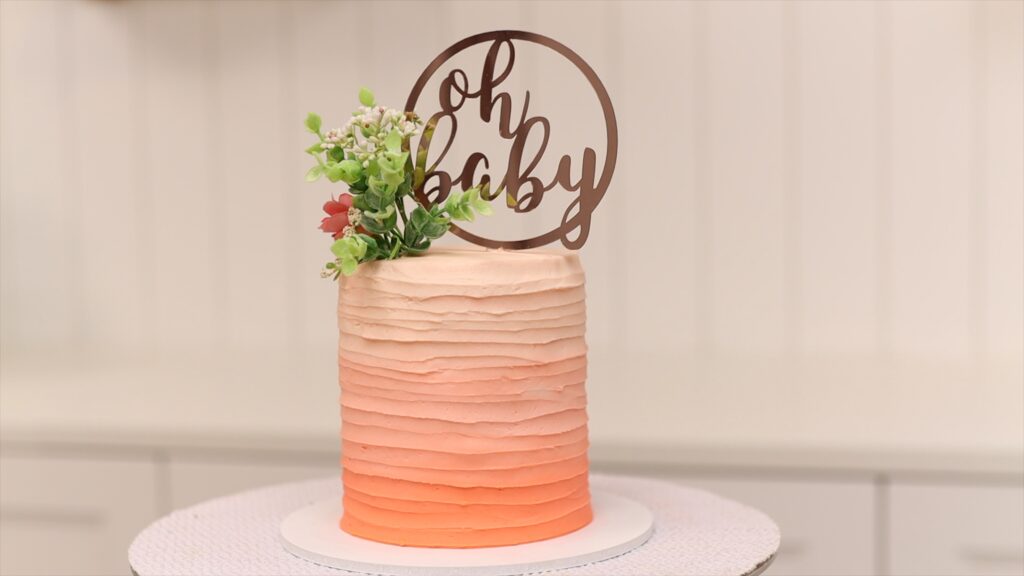
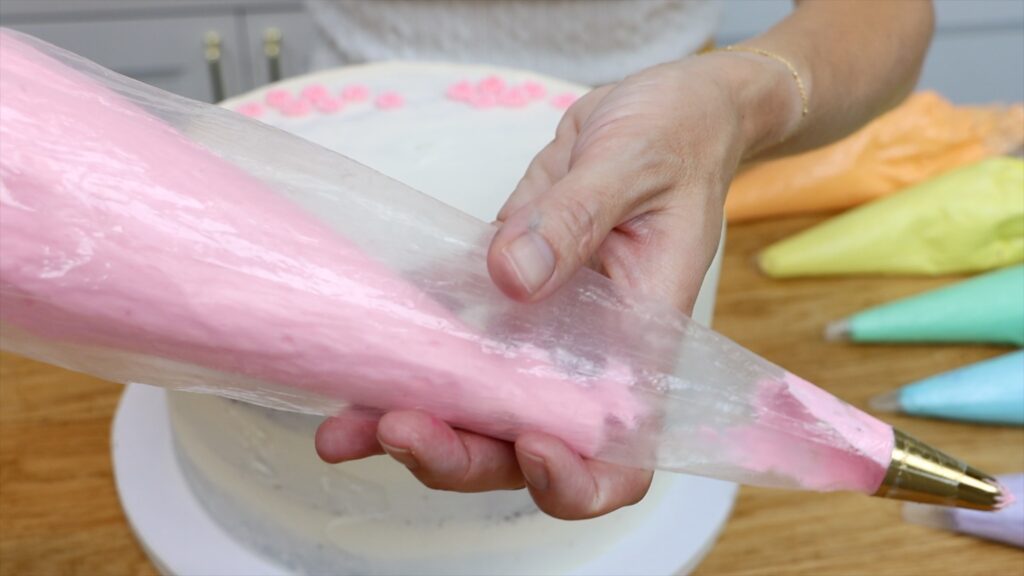
There are two easy techniques on this next cake. The first is one bag frosting, where you layer different colours of frosting within a piping bag. You only need a small amount of each. Next, as you pipe, you'll create a gradient of colour on your cake.
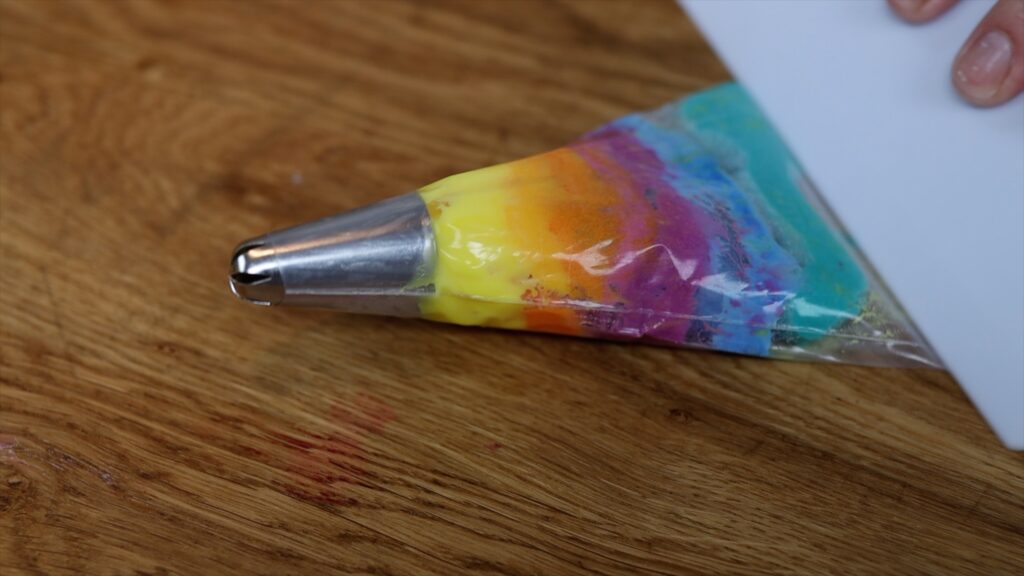
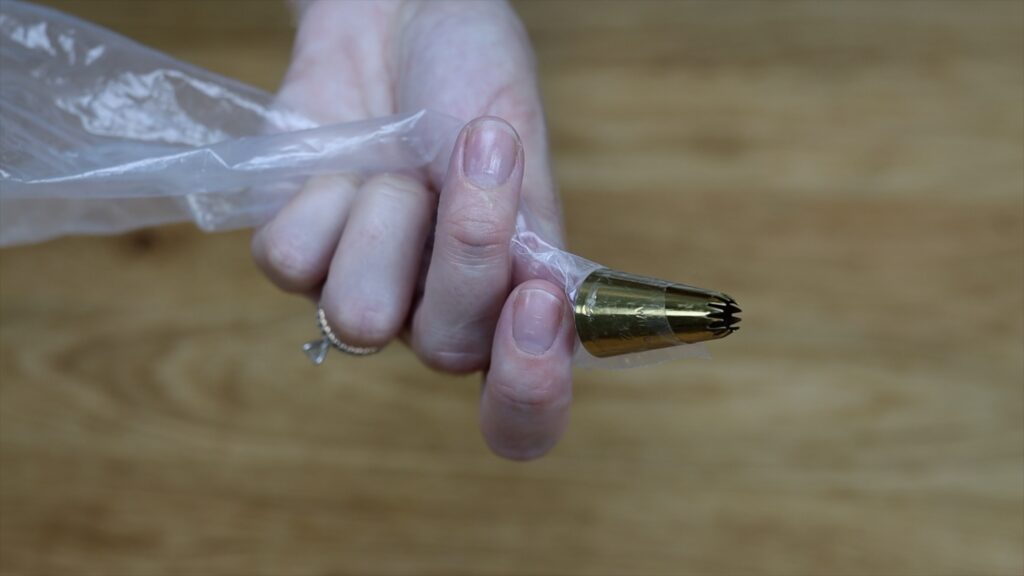
The second technique is piping drop flowers, which you can do with any rounded star tip like a 2D tip.
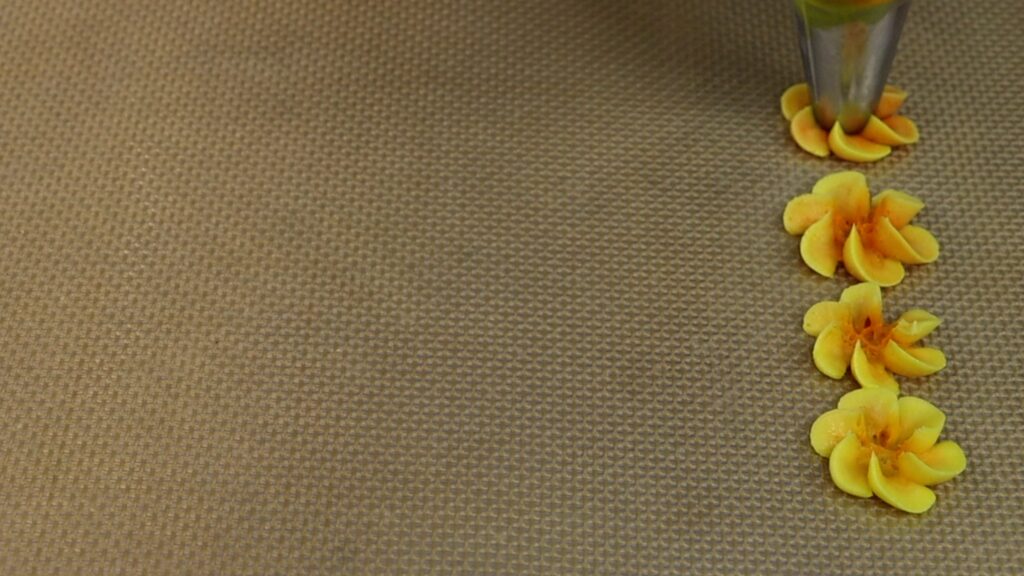
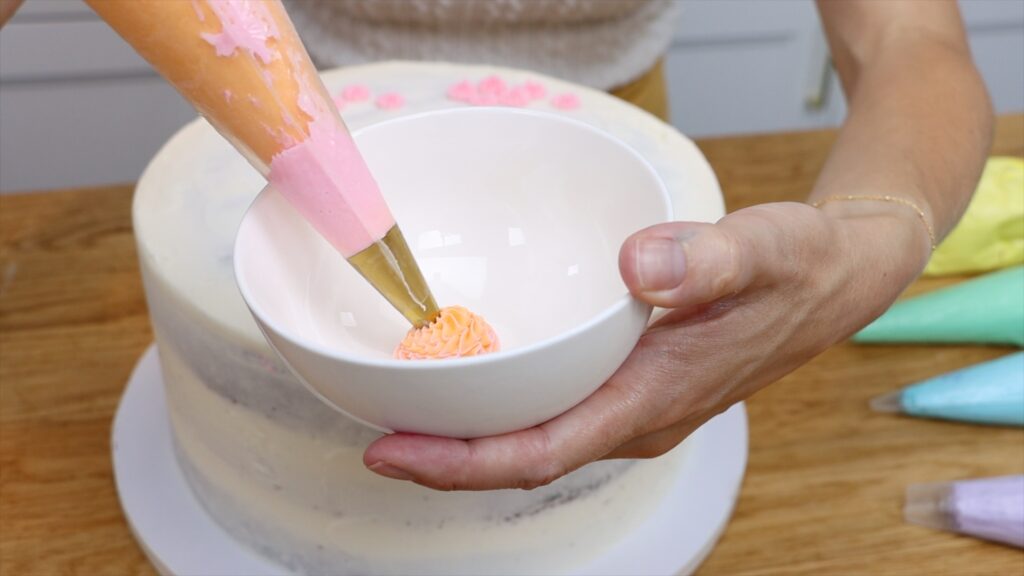
Hold the bag vertically and rest the piping tip on a silicon mat or a piece of parchment paper. Squeeze the bag and twist it to let the petals fan out sideways. You’ll freeze these to set them and then place them on your cake later.
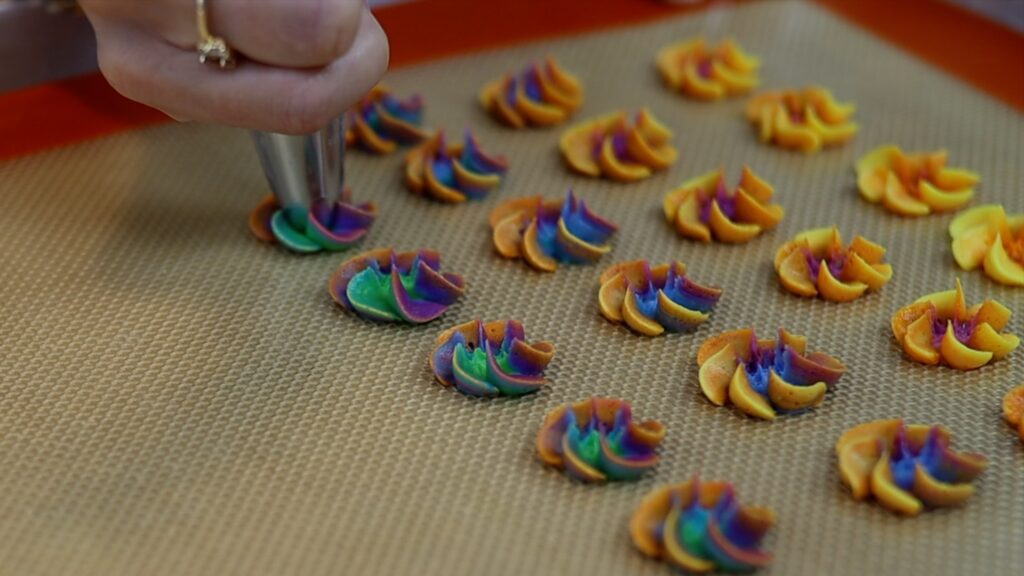
As you pipe flower after flower, you’ll see the different colours as they push down through the piping bag. You’ll see the previous colours on the outer edges of the petals and the new colours will come through in the center.
Put the piped flowers into the freezer for about 10 minutes to chill and harden. Then you can lift them up and press them onto a frosted cake.
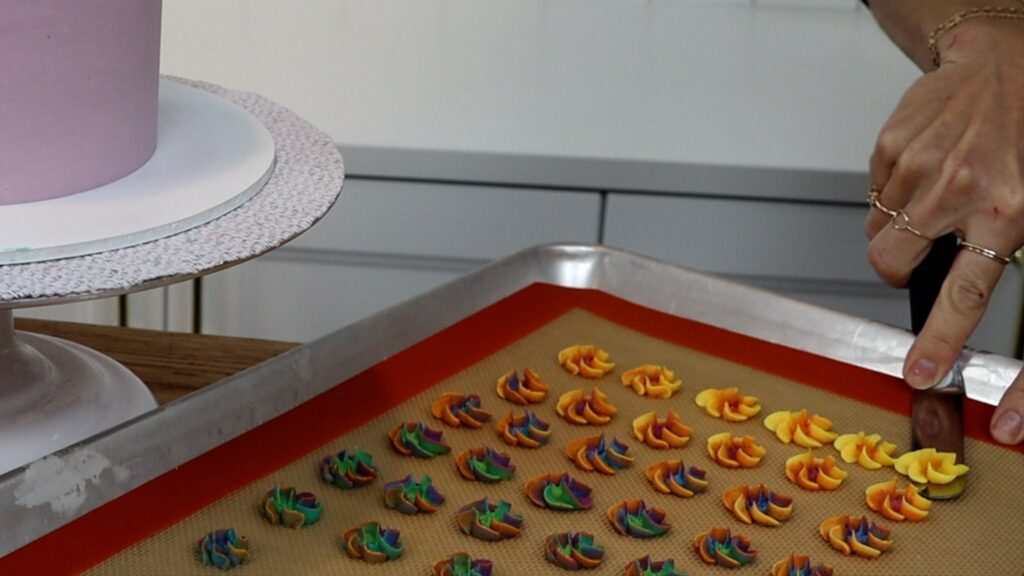
They’ll only stay cold for about a minute and when they start to soften, they'll break when you move them. At this point, put them back into the freezer for a few minutes to chill and firm up again.
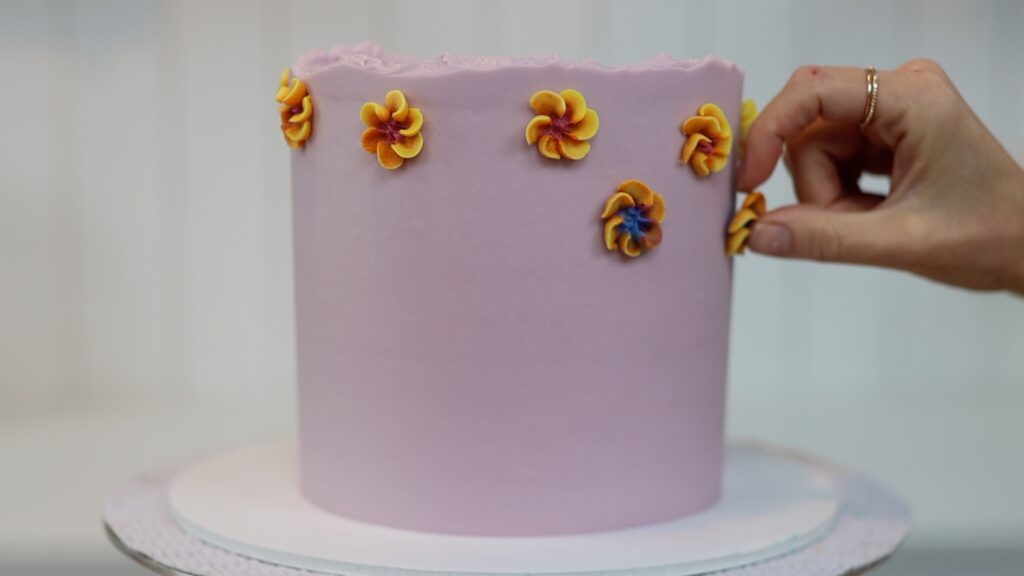
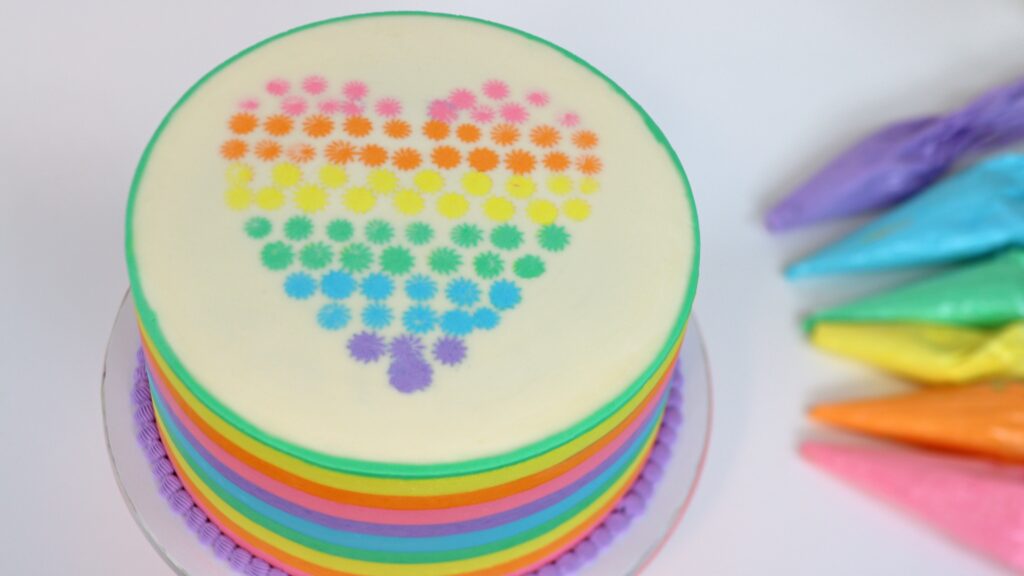
This design uses just one piping bag and piping tip but the result is gorgeous! You could cover a cake completely with these, or add a single row around the cake.
To incorporate Easter colours in your cake, use a striped cake comb. Scrape around a frosted cake a few times until the grooves are neat. Then put the cake into the freezer for 15 minutes.
Next, pipe coloured buttercream into the grooves. You can fill all of the grooves or only create a few stripes as an accent. To do this, pipe coloured buttercrema into a few grooves and the background colour into the rest of the grooves.
As you smooth the frosting, the colourful stripes will get neater and neater. Wherever you've filled grooves with the background colour, the piped frosting will blend into the background frosting. Those stripes will disappear to create a plain, smooth surface instead.
To use your leftover colours to pipe some swirls on top of the cake, lay out a piece of plastic wrap. Squeeze the leftover colours into rows along it and then roll it up into a log.
Cut off one end and drop that end down into a piping bag fitted with a star shaped piping tip. Twist the top of the bag and then pipe swirls onto the top of the cake. All of the colours will come through the piping tip, matching the colours of the stripes on the cake.
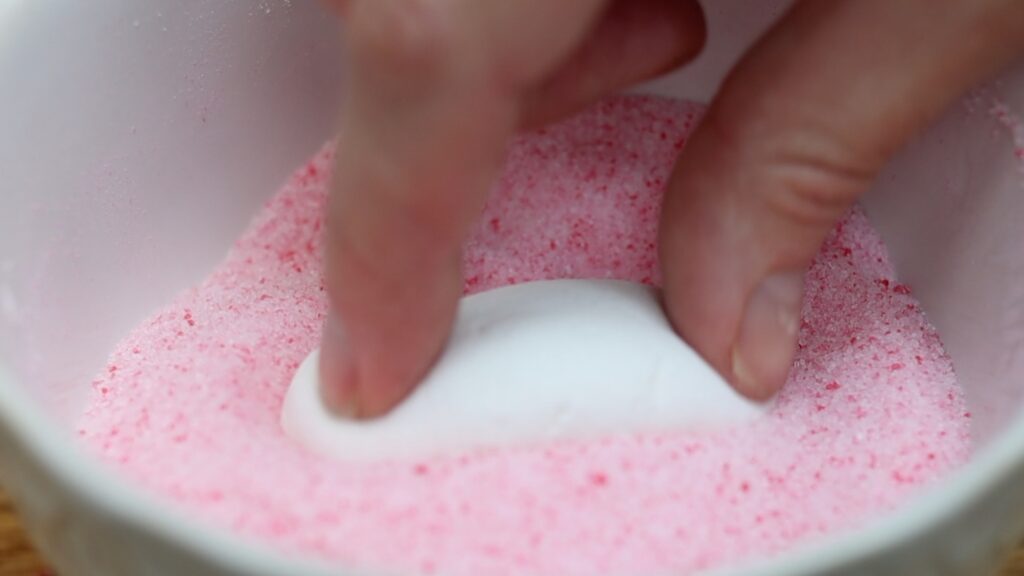
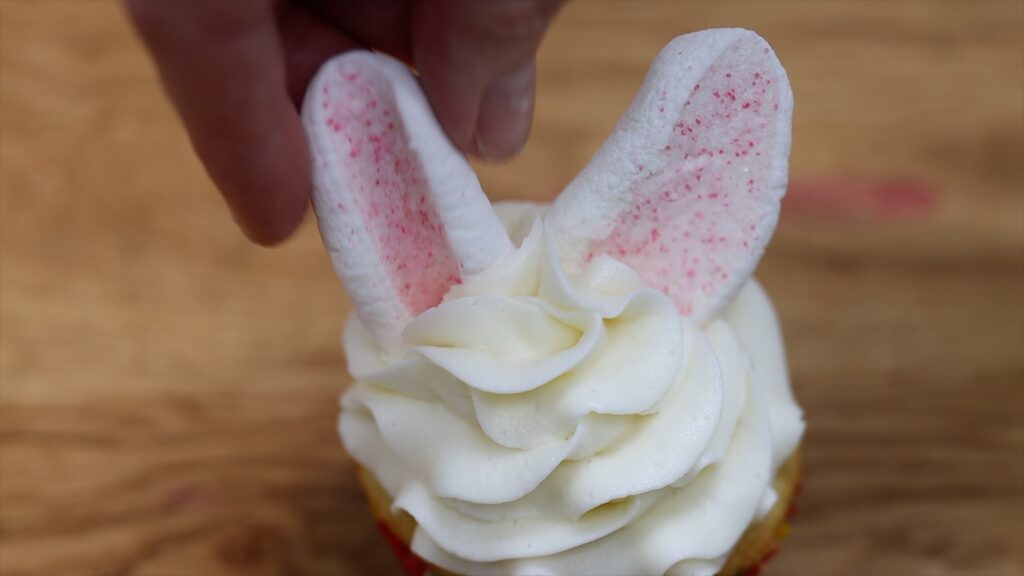
Now for some cupcake cake ideas. The easiest Easter cupcake to make is a simple bunny. Swirl buttercream or any other frosting onto a cupcake using a star tip like a 1M. Then cut a marshmallow in half diagonally for diamond shaped ears or cut straight across it for oval shaped ears. It’s important to use a freshly opened bag of marshmallows for this! They need to be soft with a sticky middle.
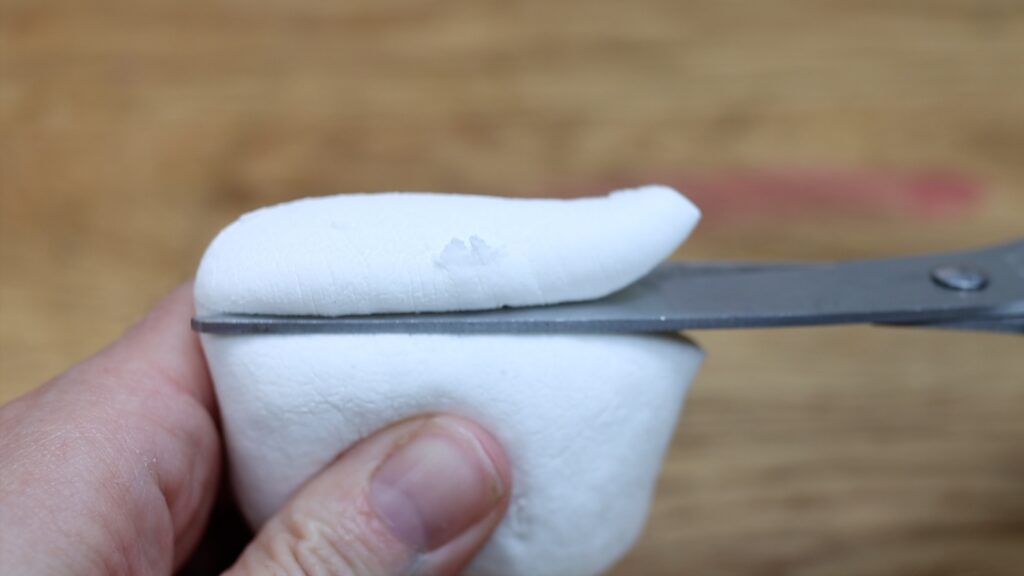
Pour some sugar into a bowl and add a drop of pink food coloruing. Stir it around until it’s the colour mixes into the sigar and makes it all pink.
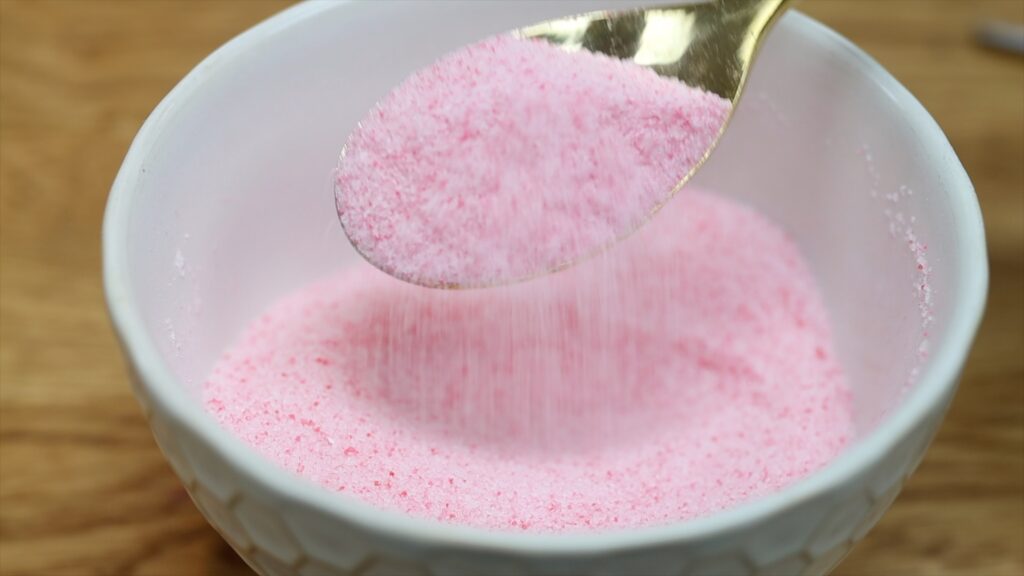
Next, press the cut side of each piece of marshmallow into the bowl. The pink sugar will stick to it and it will look like the inside of the bunny's ear.
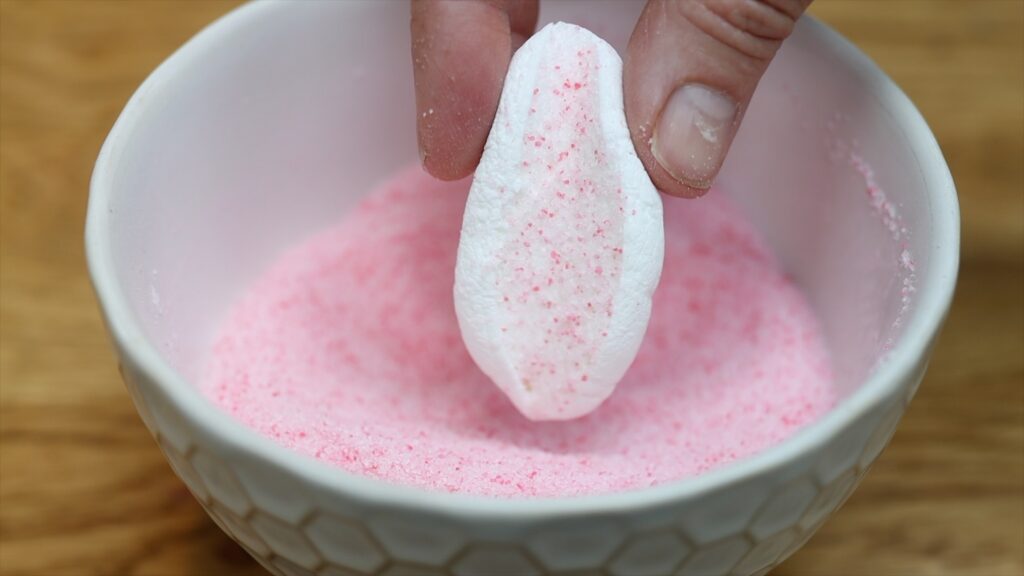
Then poke two pieces into the frosted cupcake to make an Easter bunny!
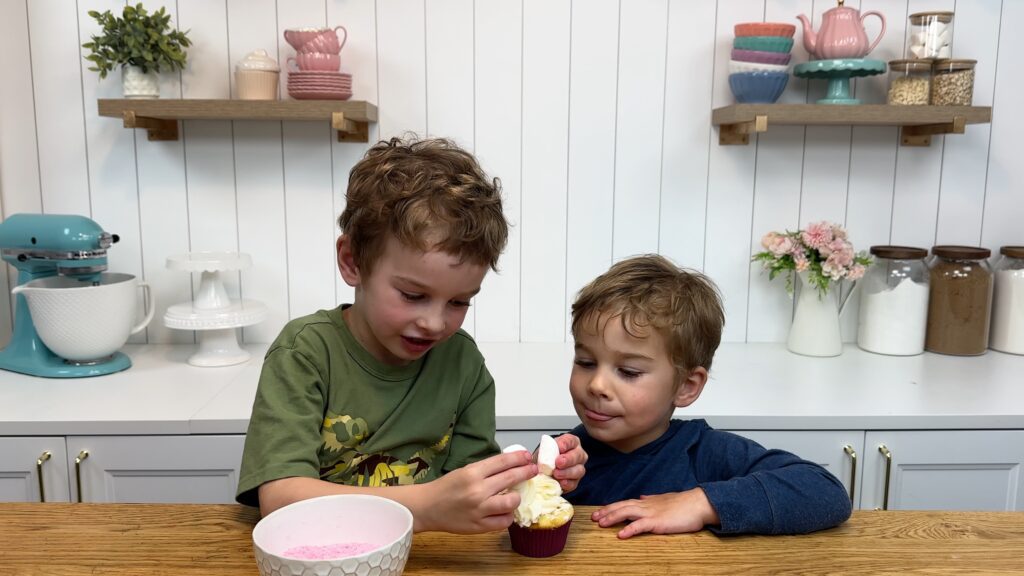
This is a fun Easter cupcake idea to do with kids and they'll love being able to do it all themselves! These are simple but adorable and delicious!
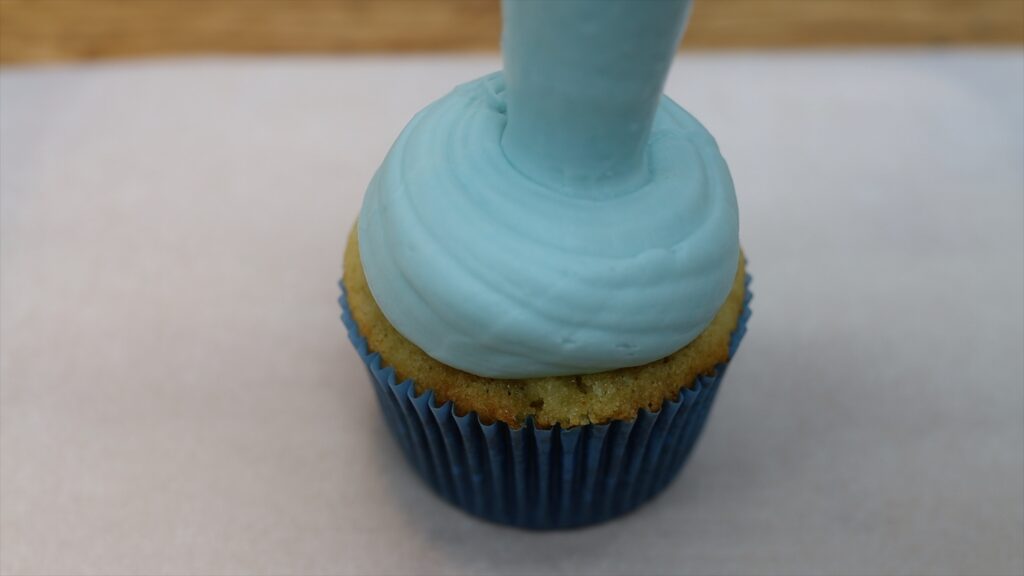
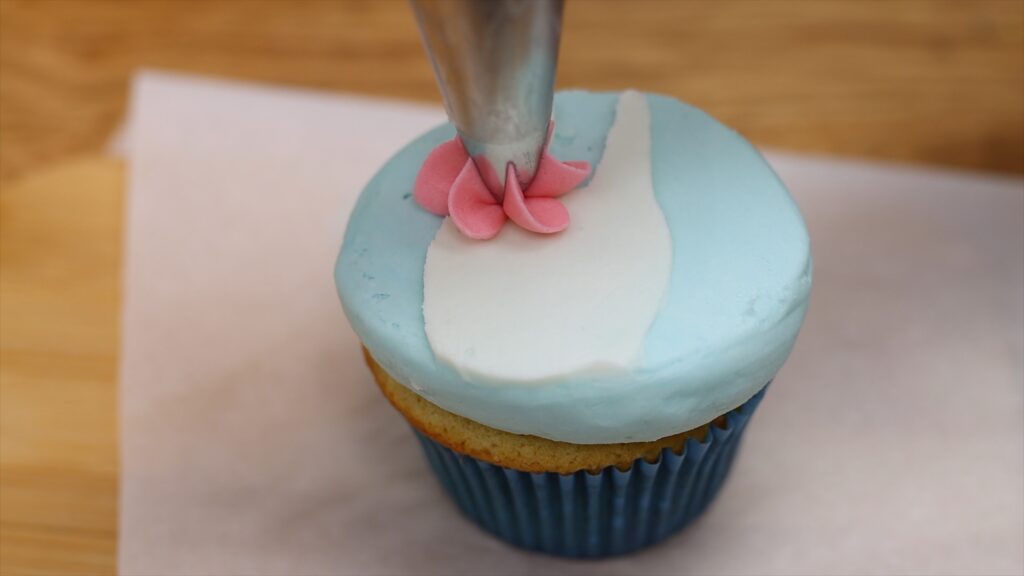
For a more sophisticated Easter bunny design, make a flat top cupcake. Pipe a blob of buttercream onto a cupcake, letting it bulge out to almost cover the cupcake.
Then flip it over onto a tray or cutting board lined with parchment paper or wax paper or baking paper.
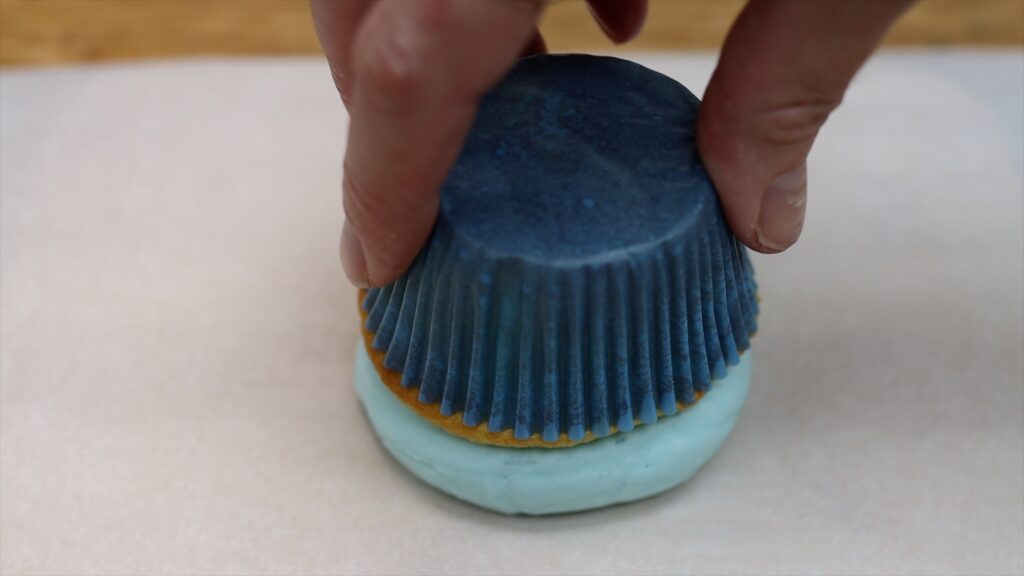
Put it into the freezer for 30 minutes and then peel the cupcake away from the paper. You’ll have a beautifully flat, smooth surface to decorate!
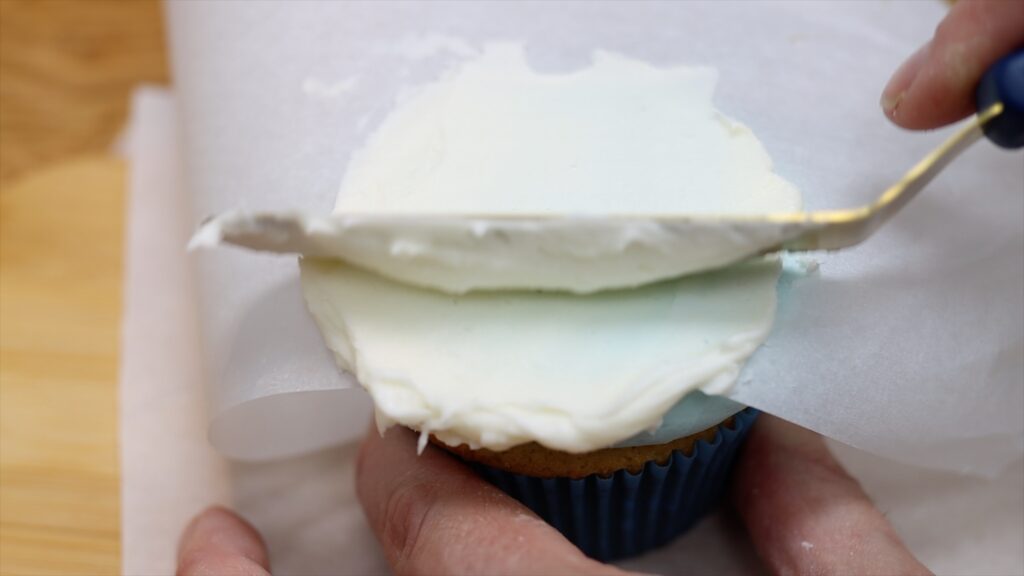
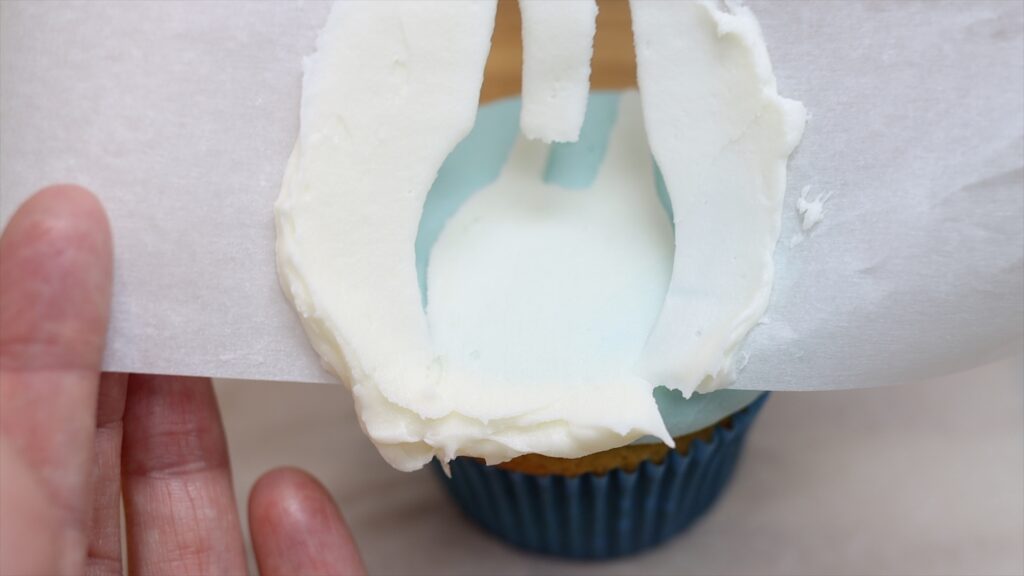
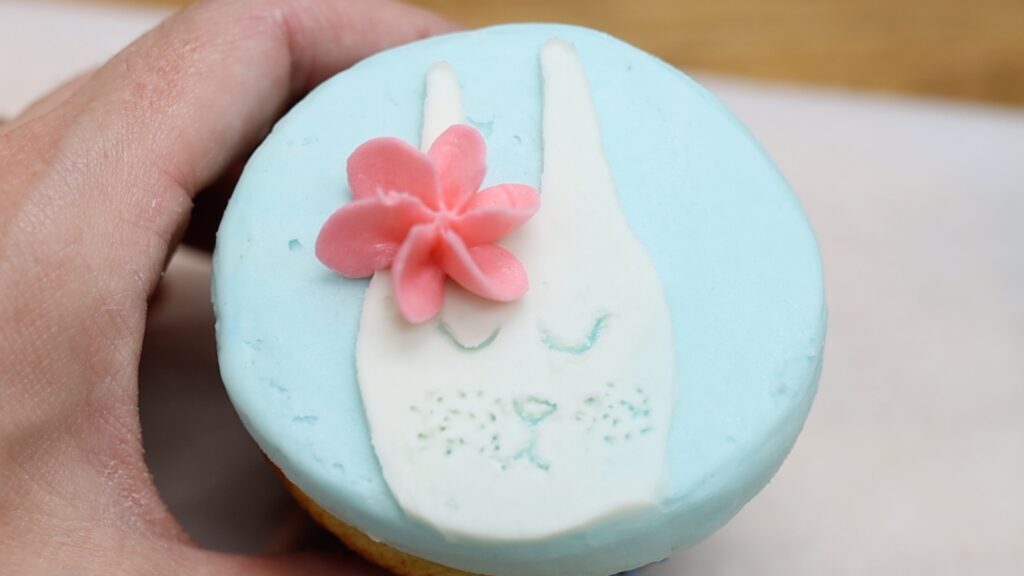
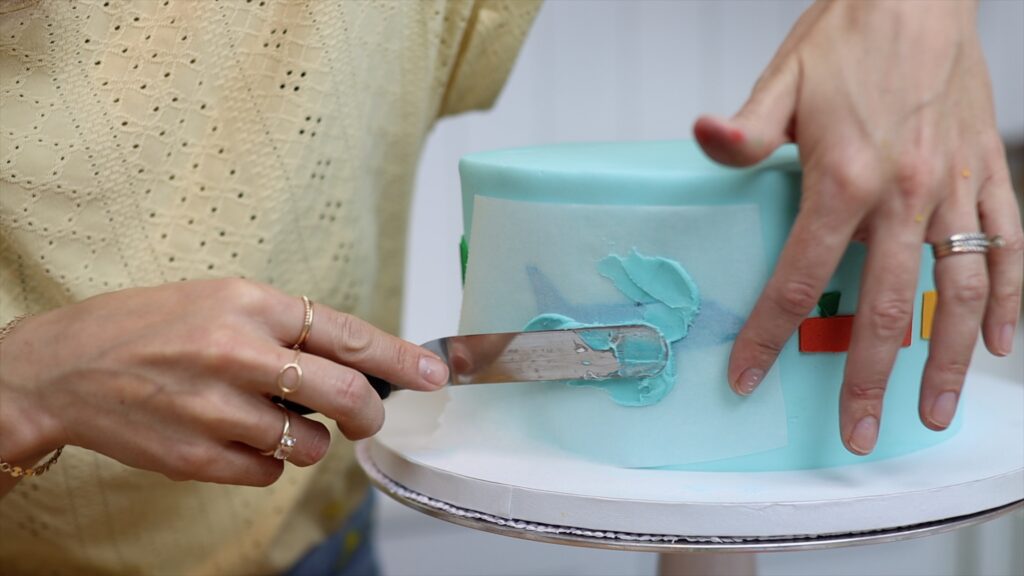
Cut an Easter bunny out of another piece of parchment paper and as you cut, leave the surrounding paper intact. Press this down onto the cupcake and you have a homemade stencil! Spread some frosting over it and scrape off the excess to leave a thin layer behind.
Peel the stencil off and voila!
To make this a bit fancier you can pipe on a flower using any star shaped tip, like this 1M. Twist as you squeeze to make the petals fan out sideways.
Add some details to the face with a toothpick or paint them on with a very thin paintbrush. This design is almost too pretty to eat!
You can use this technique on cakes too! Chill the cake after frosting it for at least hour in the fridge and then press a homemade stencil against it. Spread buttercream over the top and peel it off!
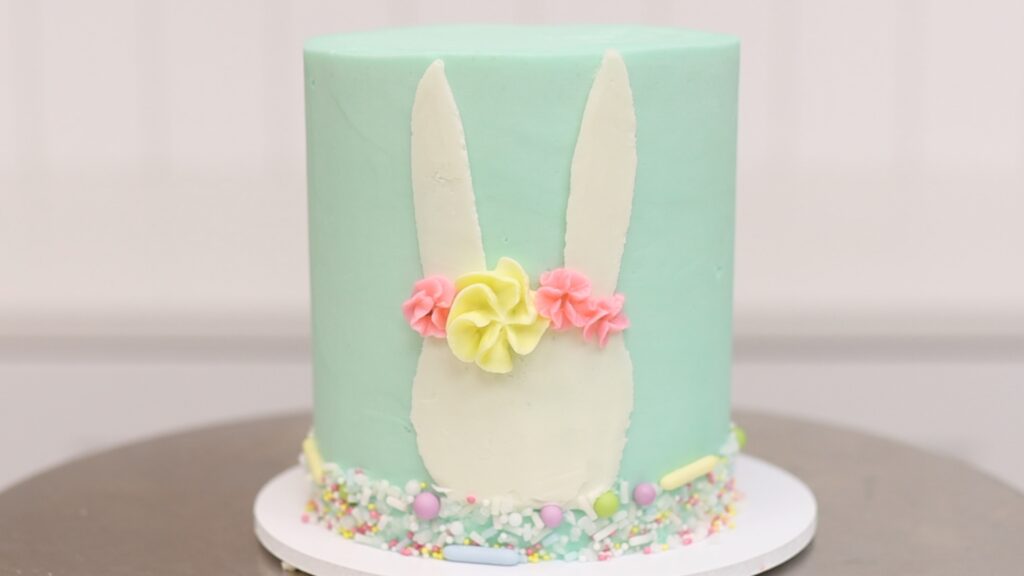
You can add flowers and sprinkles to make it more colourful. See the step by step tutorial for this cake in my tutorial on 4 easy Easter cake ideas.
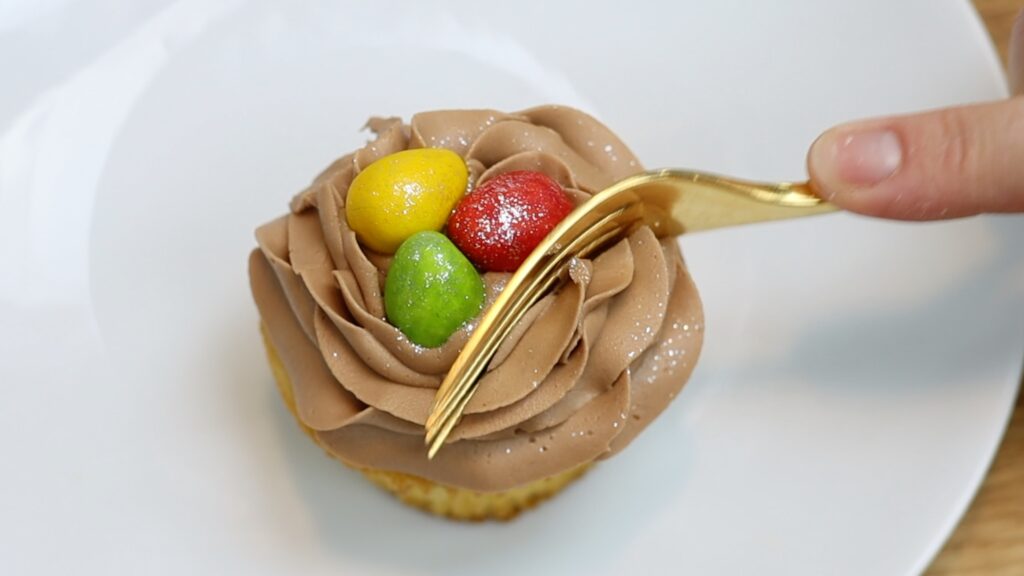
To pipe a nest, use a star shaped piping tip to pipe a ring or a tall swirl. Add some chocolate or candy Easter eggs in the middle. You don’t have to press hard to attach these if the buttercream is still soft and sticky.
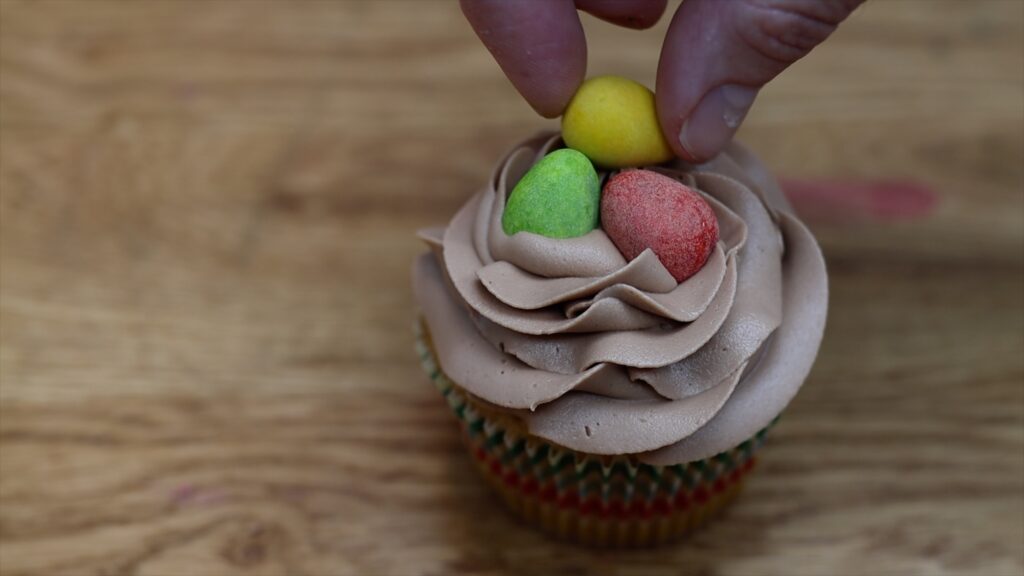
The Easter coloured Mini Eggs were sold out so I’m using rainbow Mini Eggs instead. Brushing them with edible glitter makes the colours a bit lighter and more festive. I tapped the glitter paintbrush over the frosting nest, too.
I hope you’ve seen some ideas you’d like to try! Learn hundreds of cake decorating techniques and designs on my cake school, where you can choose an online course or a membership for access to everything!
You can also watch a video of this tutorial on 7 Easter cake ideas and Easter cupcake ideas:
Cake toppers take your cakes to the next level by adding height and colour and detail. Here are 10 easy cake toppers to use for your cakes.
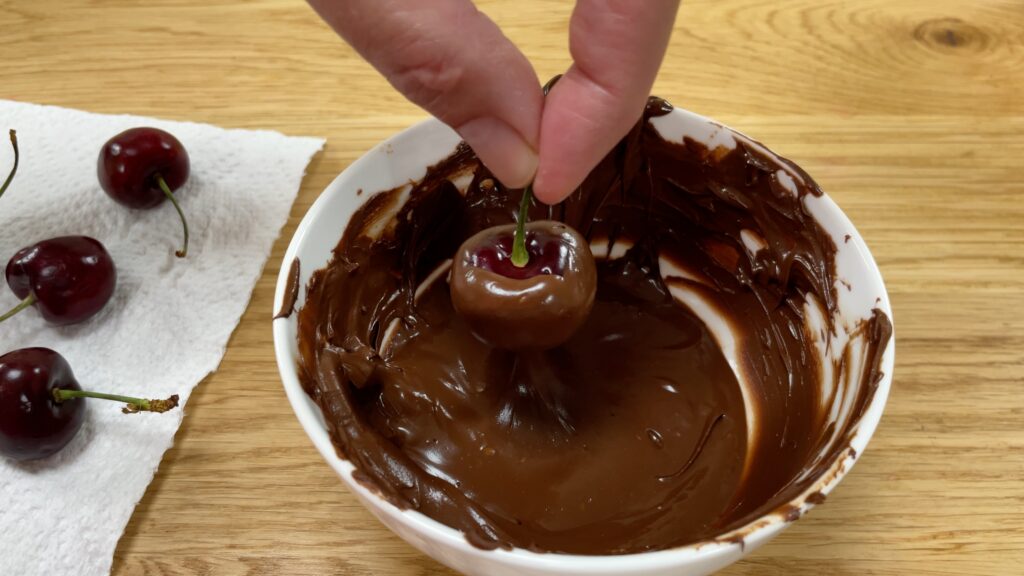
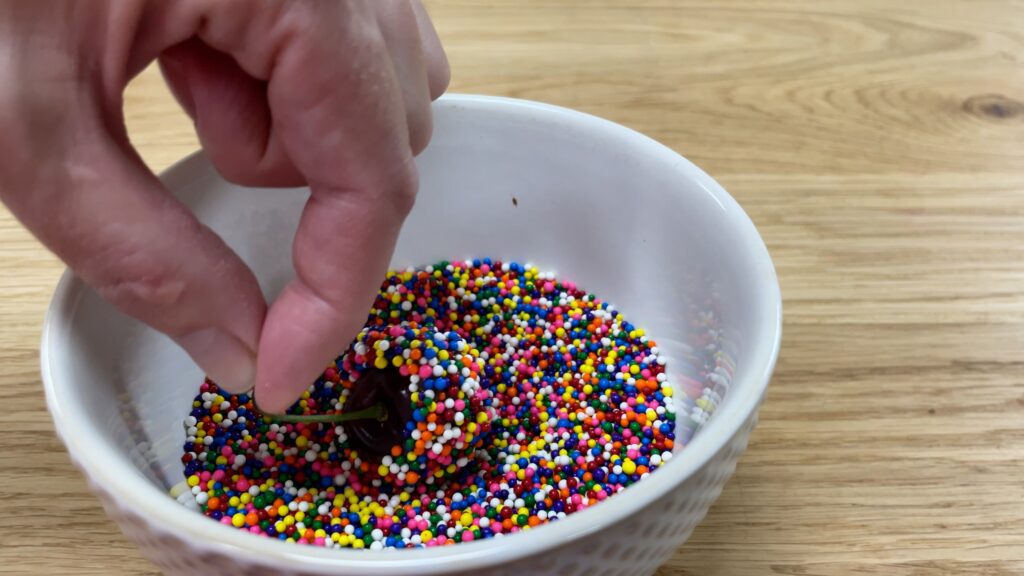
Make colourful cherries by dipping cherries into melted chocolate and then pressing into a bowl of sprinkles. Non pareils or hundreds and thousands are perfect for this because they’ll give you full coverage over the chocolate and not much texture when you bite into them.
For glittered cherries use glaced or candied cherries. They’re sticky so you can dip them into a jar of luster dust or edible glitter and it will stick to the cherry to cover it completely. This will make them colourful and also shimmery or metallic!
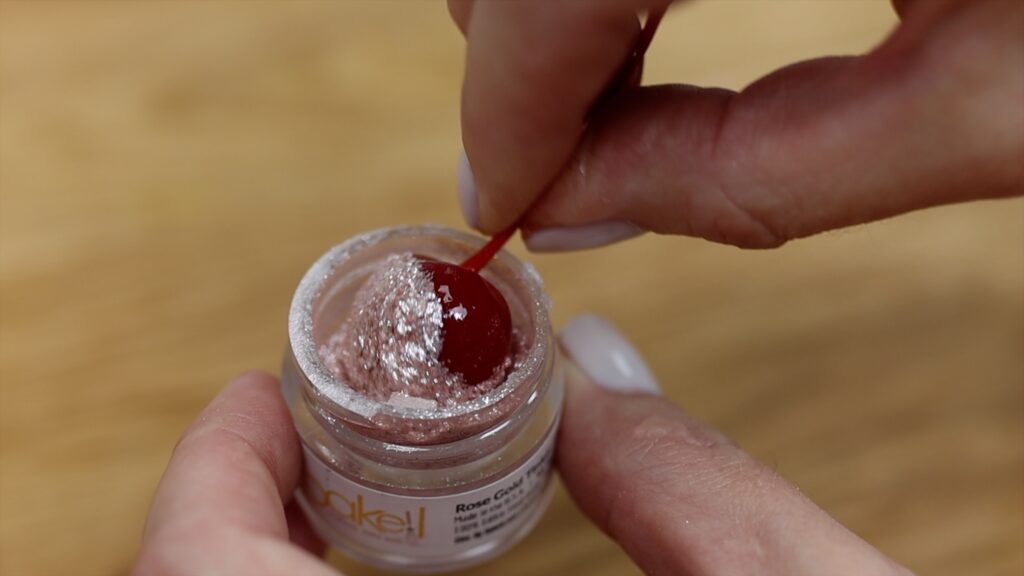
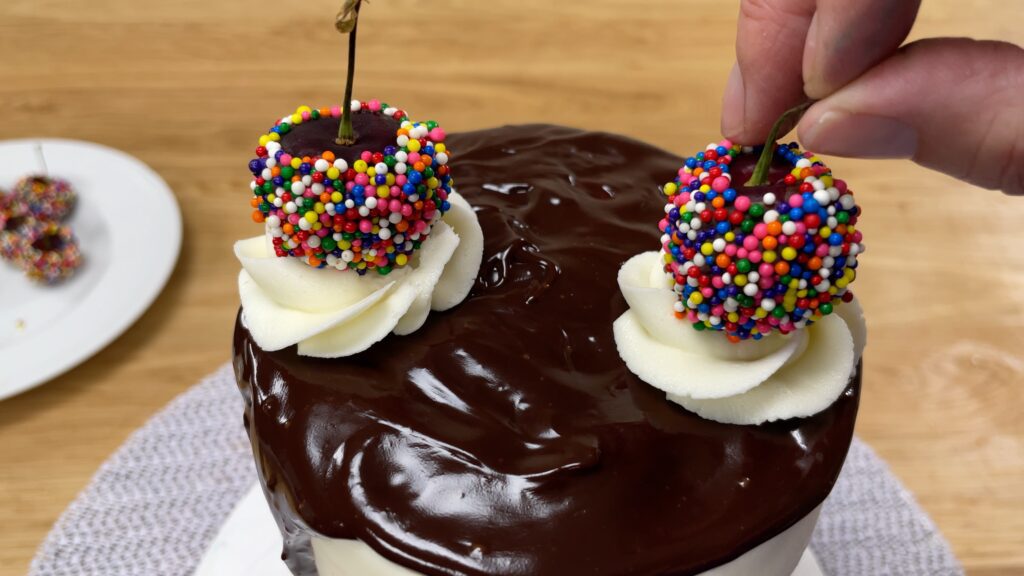
These look so pretty and showstopping when they’re nestled into piping on a cake.
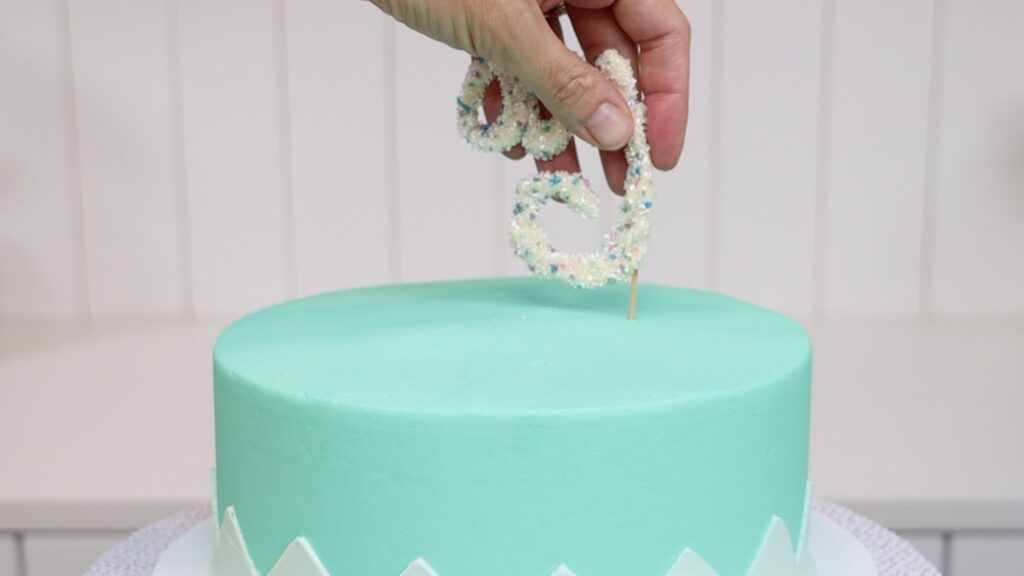
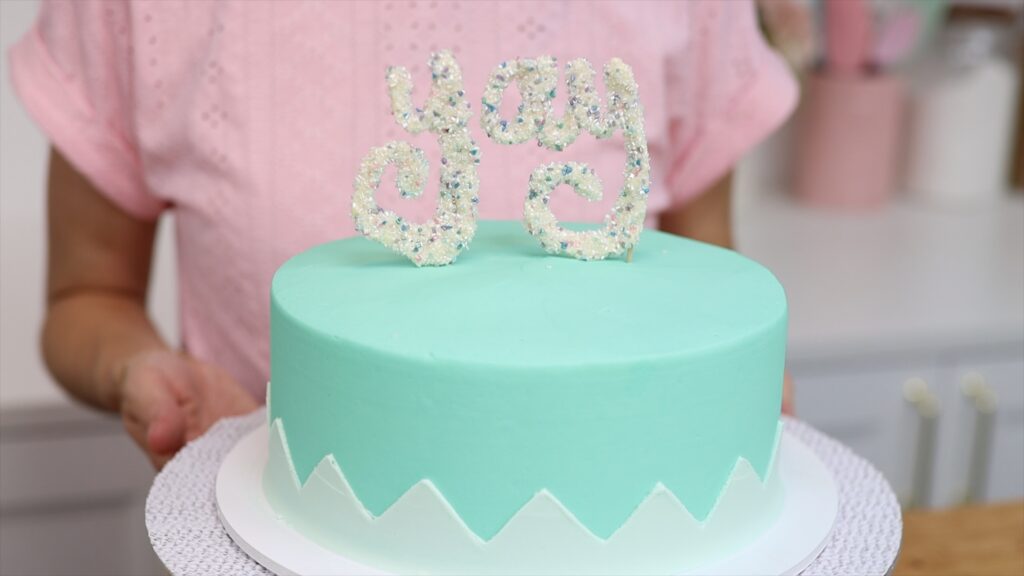
Make custom cake toppers with chocolate and sprinkles. You can use white chocolate or dark chocolate or whatever kind you like. Melt chocolate in the microwave for 30 seconds at a time using 80% power so it doesn’t burn or seize. Stir until it’s smooth and then spoon the chocolate into a sandwich bag. Cut a tiny piece off one of the bottom corners of the bag to squeeze the chocolate through. Then draw a design or write a message onto a piece of baking paper, parchment paper or wax paper.
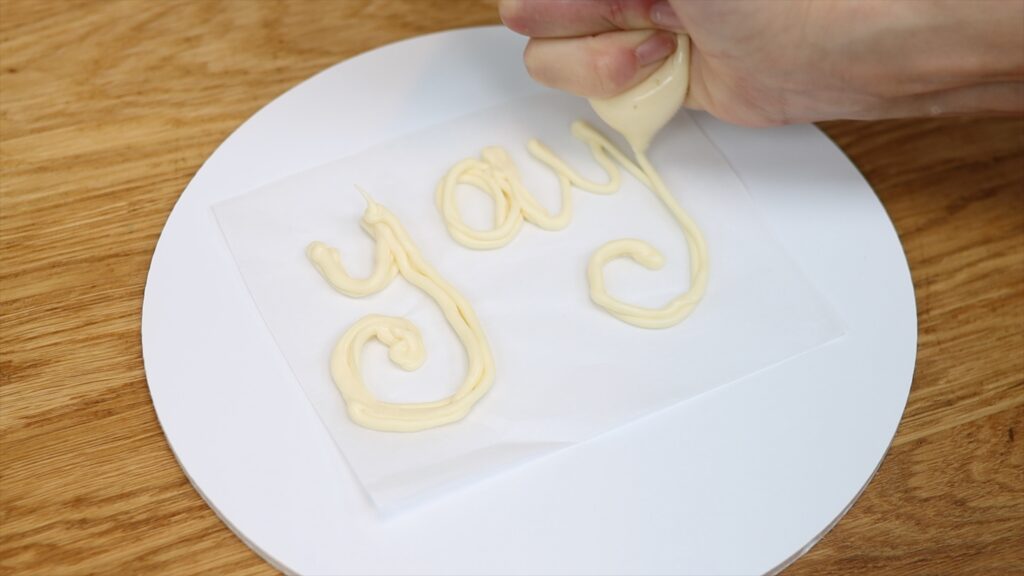
Make the lines as thick as you can, while still being legible. This way they’ll be strong and less likely to snap than if they’re thin. Push a toothpick into the bottom of each section and cover it up with some more chocolate. The lines don’t need to be neat or smooth because you'll cover them up in a minute.
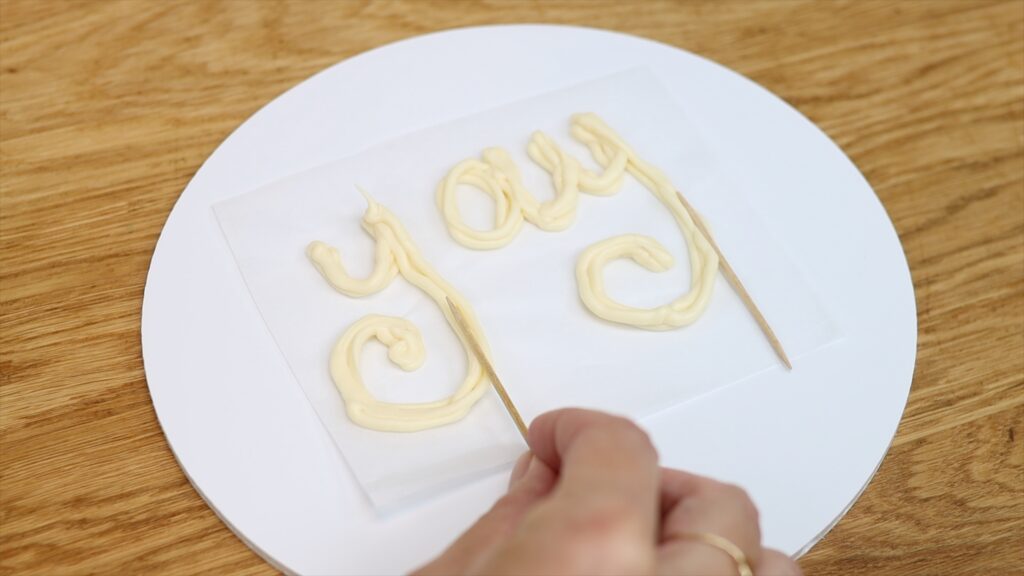
Next, pour sprinkles or coloured sugar on top, pressing down gently to attach them to the melted chocolate. It’s good idea to do this on a cake board or a tray so that you can lift it up and put it into the freezer. The chocolate needs to set and it will be strongest when it’s cold. After about 5 minutes you can pick up the toothpicks to lift up the chocolate and it won’t break.
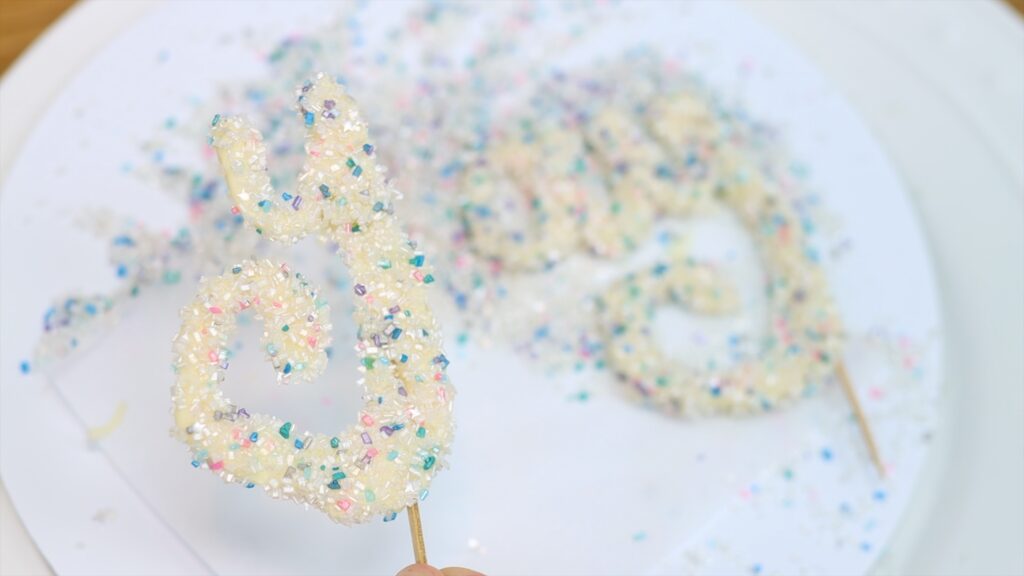
Then push the chocolate into the cake. The toothpicks will secure the chocolate so that it stands up straight. This is such an easy way to make fun, colourful cake toppers!
Create cake toppers using ingredients that match your cake flavour. For example, I'm using fresh berries to match the filling and frosting on this cake.
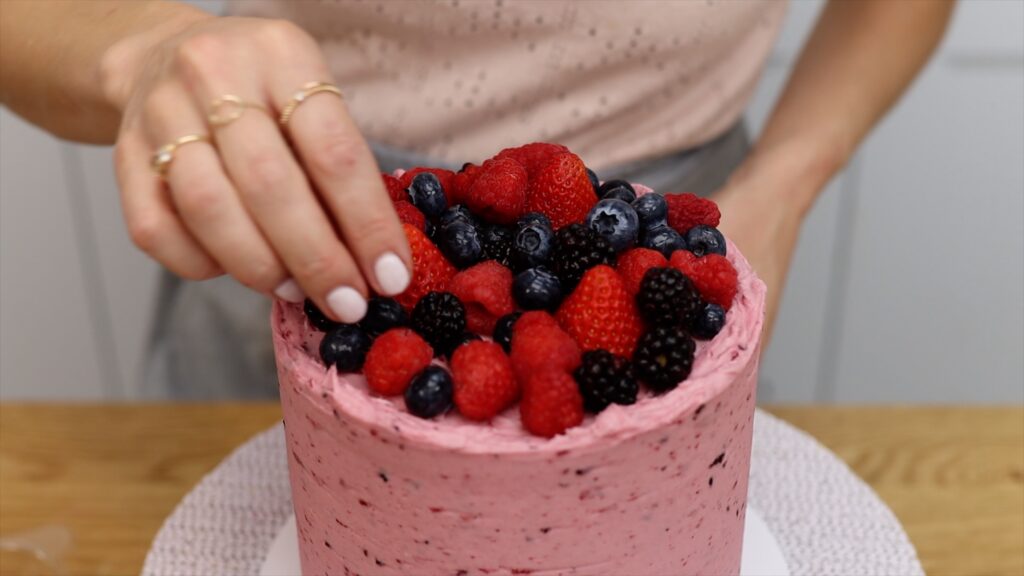
If the frosting on the cake has already set, it won't be sticky anymore and the toppers won't stick to it. You’ll need to spread fresh frosting wherever you want to place the toppers to act as glue to attach them.
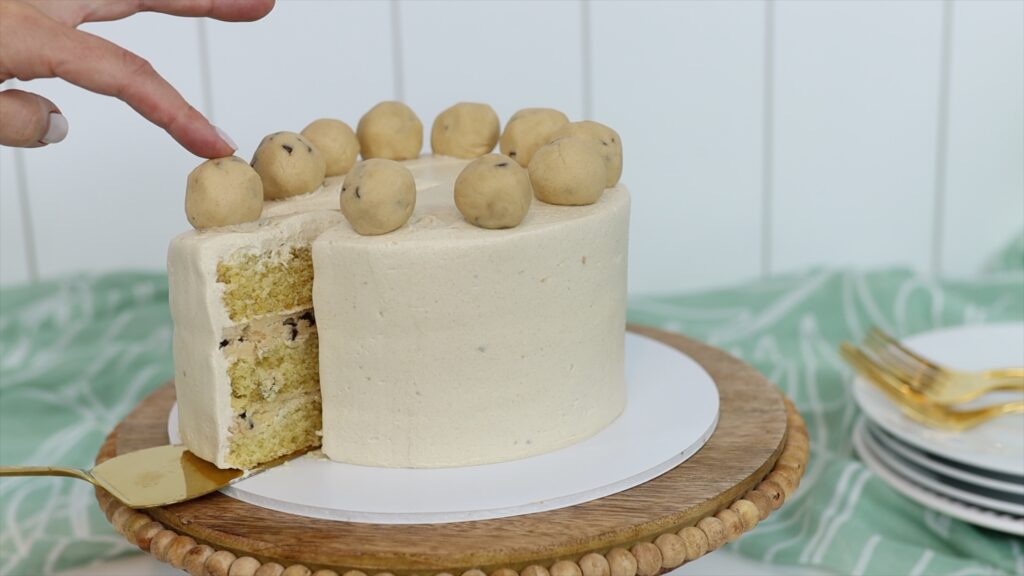
If the frosting hasn’t set yet, you can press the toppers straight onto it. These are cookie dough balls on my cookie dough cake, which has cookie dough filling and brown sugar frosting. Yum!
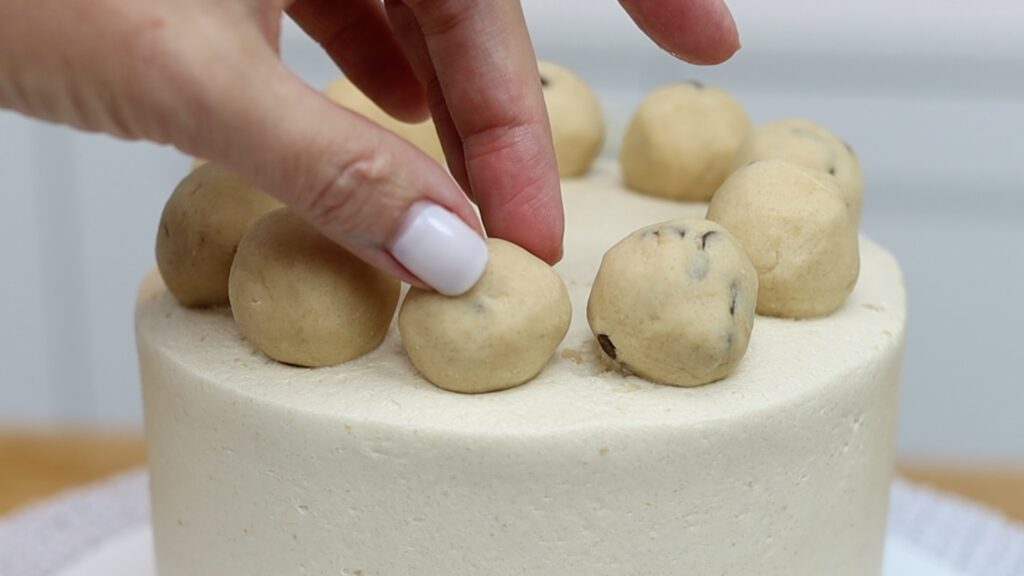
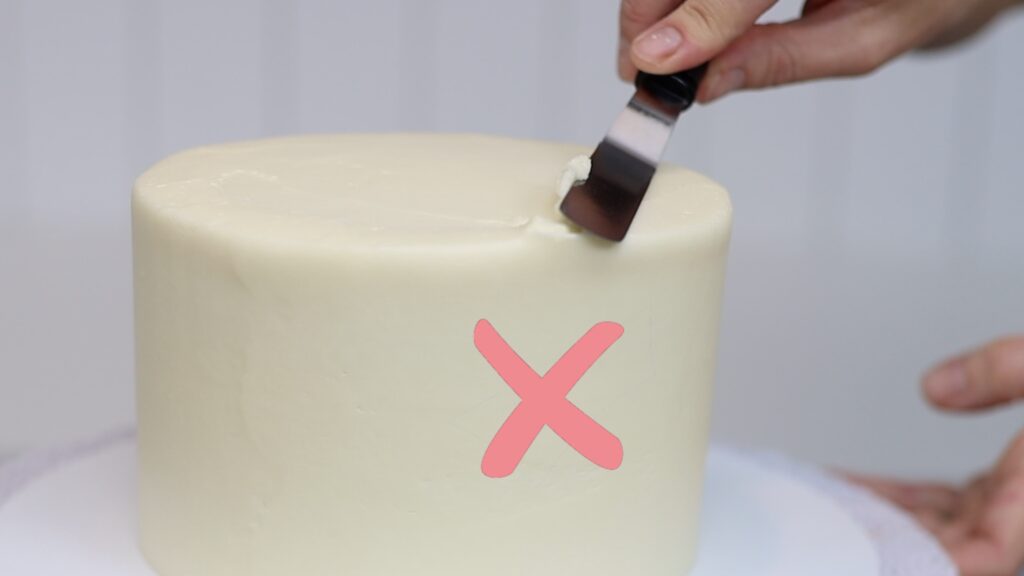
When the frosting is still soft, notice that the weight of cake topper can make the frosting bulge. Instead, it's best to chill the cake before adding any cake toppers.
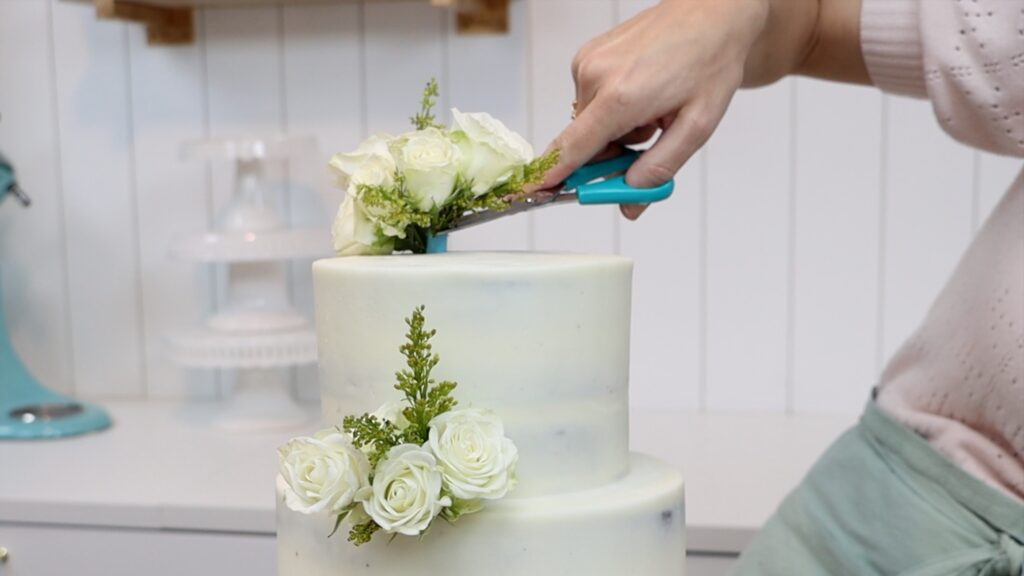
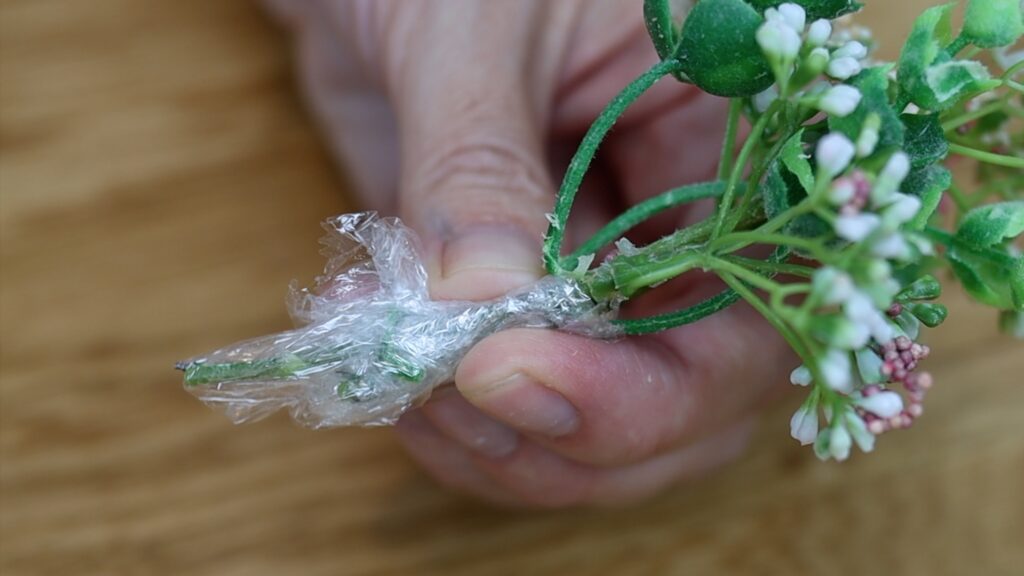
Fresh flowers make stunning cake toppers almost effortlessly! First, do a quick Google search to make sure the flowers you want to use aren't toxic. Wash and dry the flowers and cut the stems an inch of two below the flowers. Group them together to make small clusters. Wrap the stems with cling film or Saran Wrap so that no liquids seep out into your cake.

Now push the wrapped stems into a straw and cut the straw so it’s barely longer than the stems. Then push these into your cake, using scissor blades to push them all the way in. Or you can push just the straw in first and then poke the stems into it next. Fresh flowers are simple but stunning!
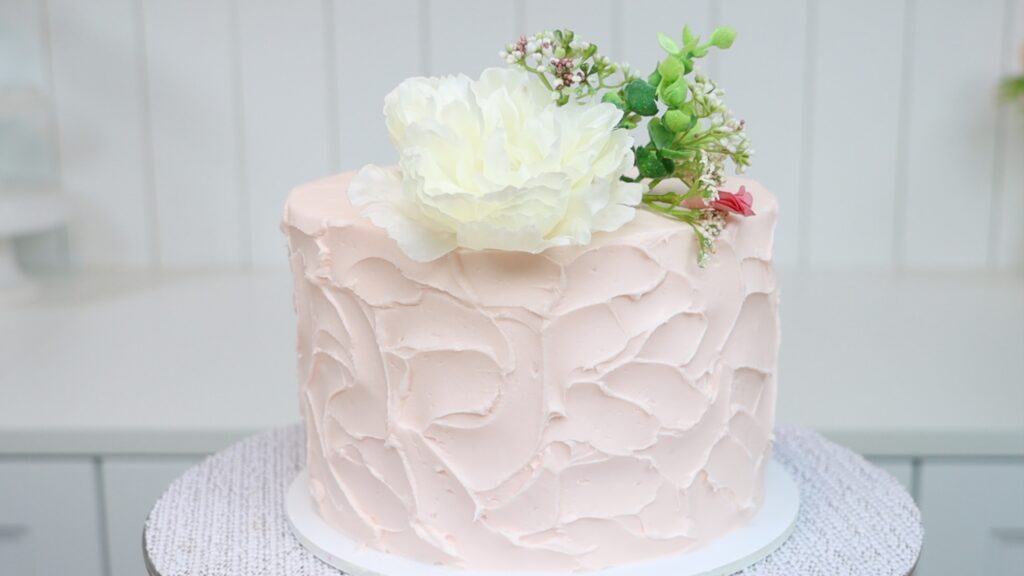
Another option is to use artificial flowers. They won’t wilt so you can arrange them on a cake in advance and they'll still look perfect the next day. Also, you don’t have to worry about any floral juices oozing into your cake. It's still a good idea to wrap the stems so they're food safe before pushing them into the cake.
You can skip the straws if you don’t have any but they make it easier to push the flowers in and to remove them later.
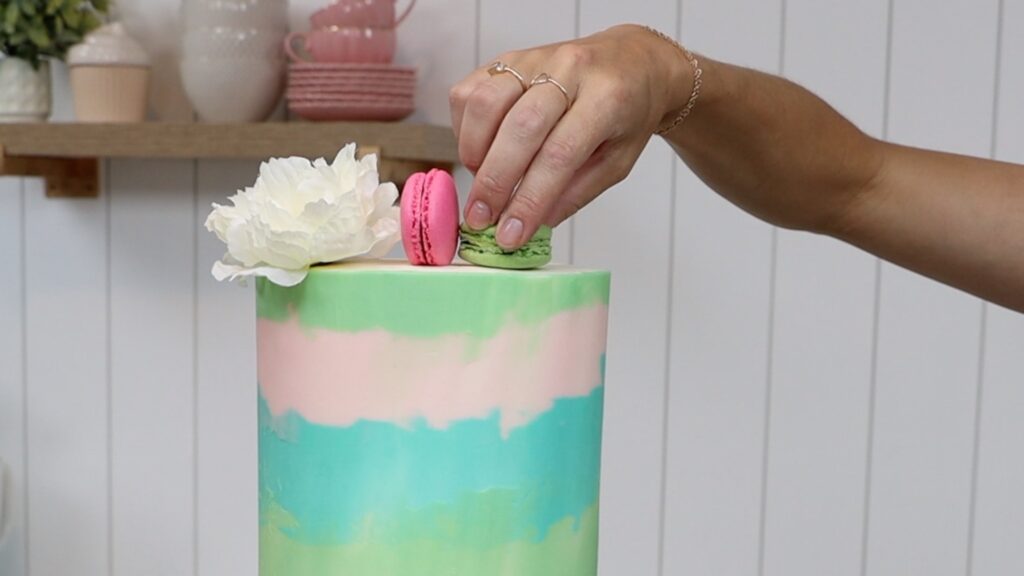
Use macarons or candies to add height and detail to the tops of your cakes. This is a great way to match a colour scheme! You can make the macarons or buy them from a bakery or even from a supermarket or grocery store.
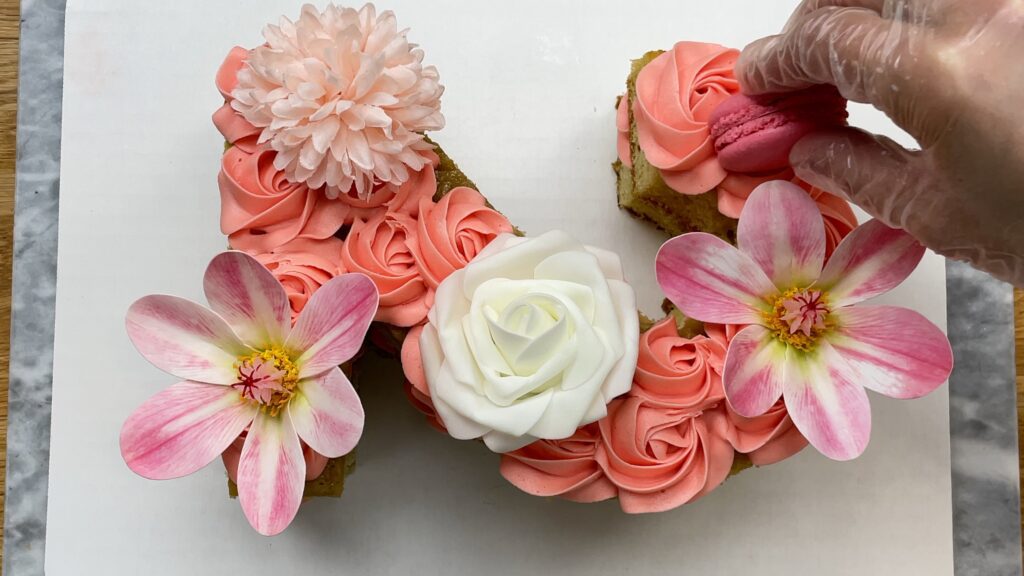
If you’ve just frosted your cake, the frosting will still be soft so decorations will stick to the frosted cake. If the frosting on the cake has already set, attach toppers by spreading or piping a dot of buttercream first. This will act as glue to secure them so they don’t fall over when you move the cake.
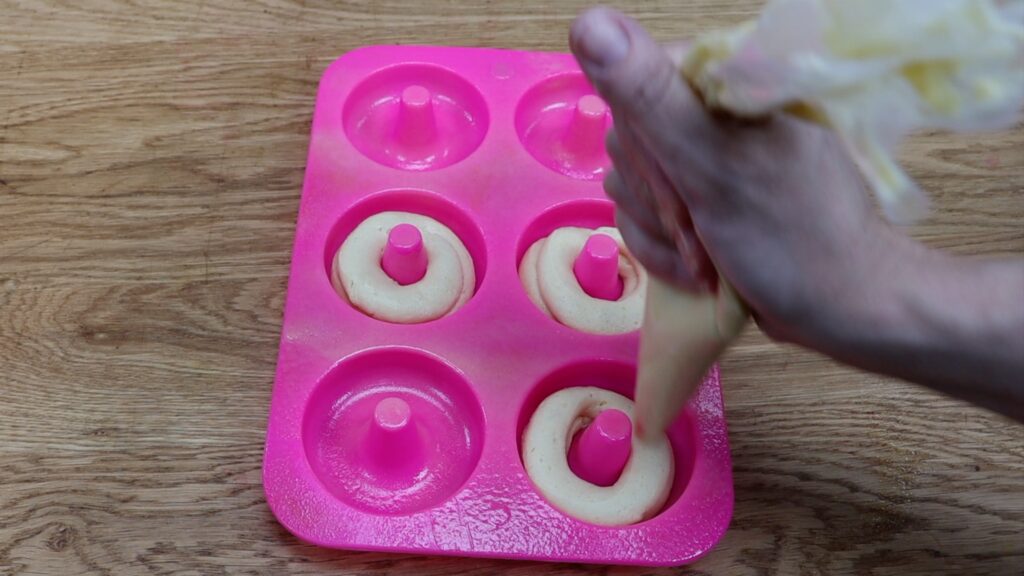
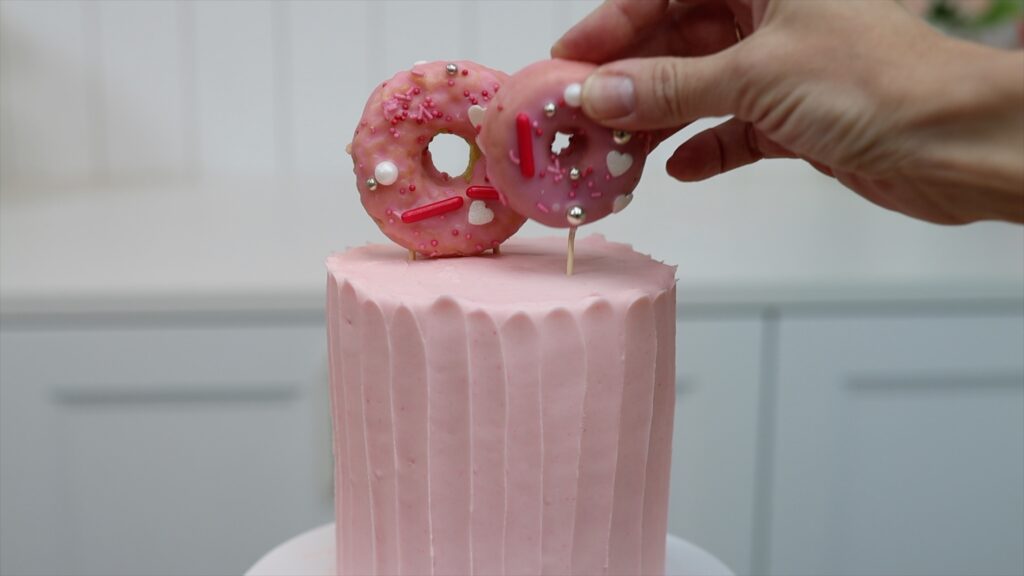
Make your own delicious donuts to use as cake toppers! Pipe extra cake batter into a silicon donut mold and bake for the same time as you would bake cupcakes, 14-17 minutes.
After cooling, dip them into ganache. Ganache is easy to make with three times as much white chocolate as cream. You can tint this with oil based colours or buy coloured candy melts to use instead of white chocolate.
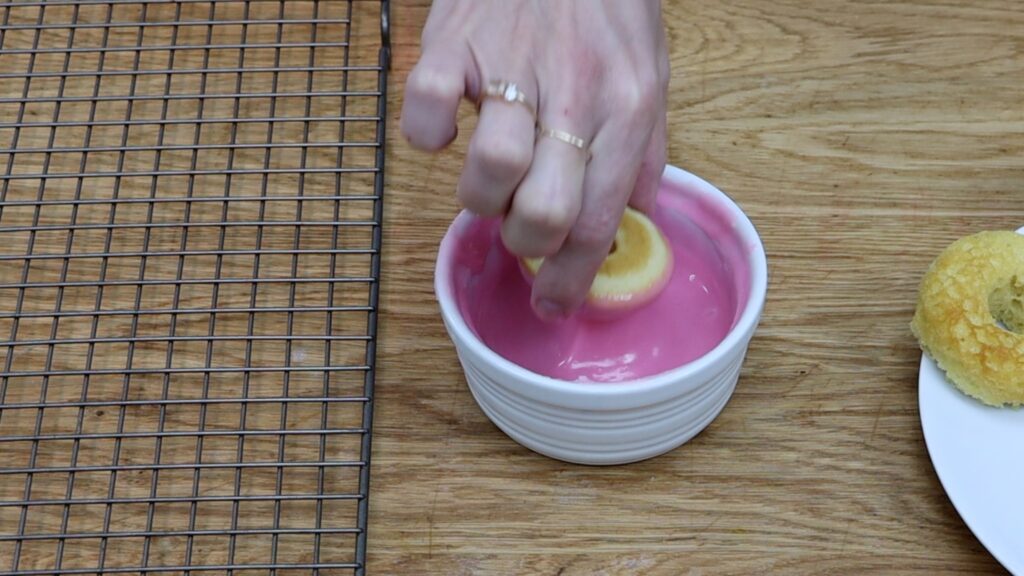
Add any decorations like sprinkles straight away, while the ganache is still soft and sticky. Push a toothpick or two toothpicks into the donut and then push the toothpicks into the cake. The toothpicks will support to donut so that it stays upright and in place.
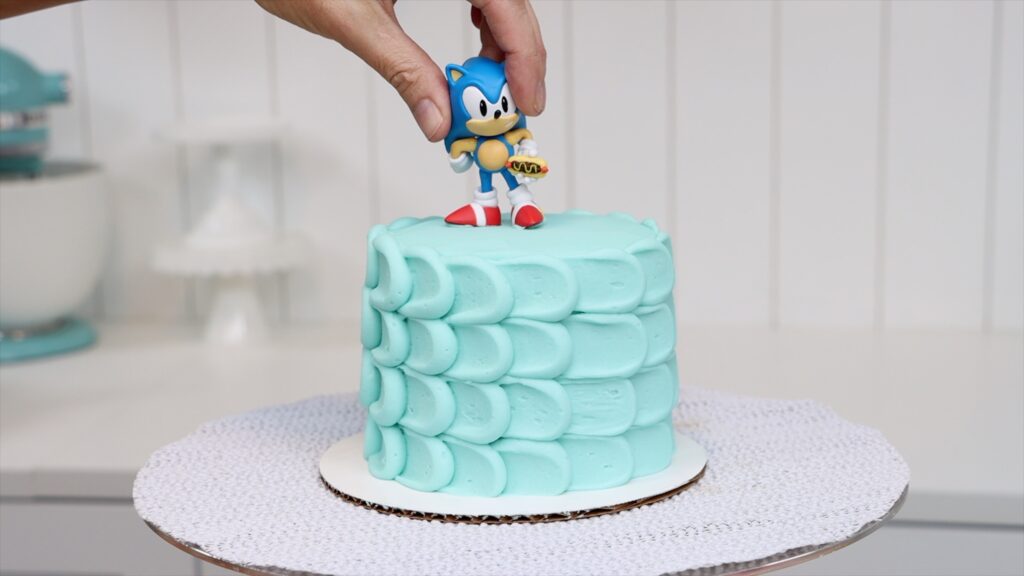
Use toy figures like cars or cartoon characters as cake toppers on themed cakes. It's much less time consuming than making the figures out of buttercream or chocolate or fondant. Also, for children’s characters, figures are more easily recognizable than your own version.
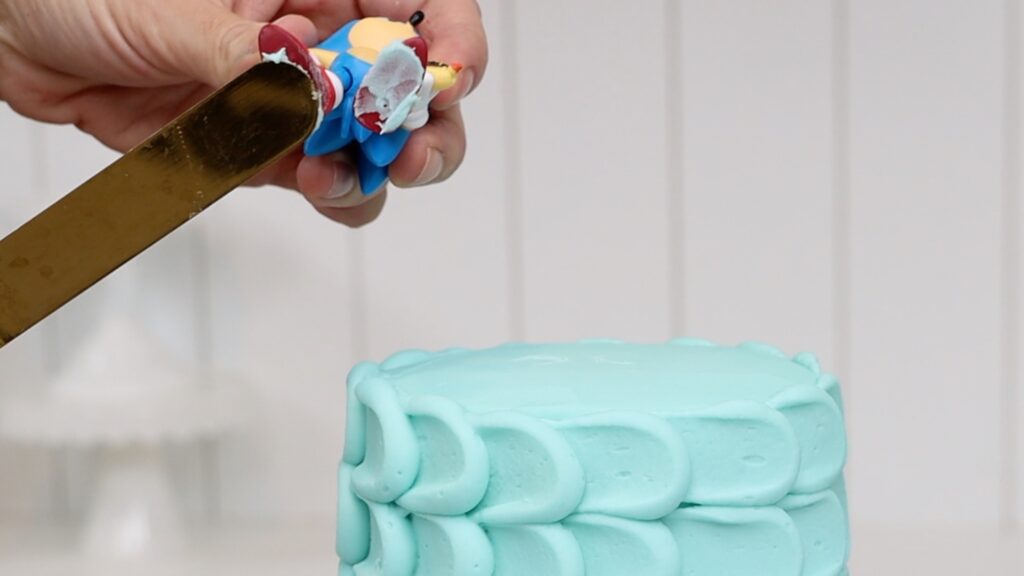
Just like with other toppers, they won’t stick to frosting that’s already set. If a buttercream cake has been in the fridge you’ll need to use fresh buttercream as glue on the cake topper.
Use cookies like Oreos as cake toppers by arranging them around the top of a cake. Push them gently down into the frosting or into a drip on top of the cake. Space them evenly and then pipe swirls in between them.
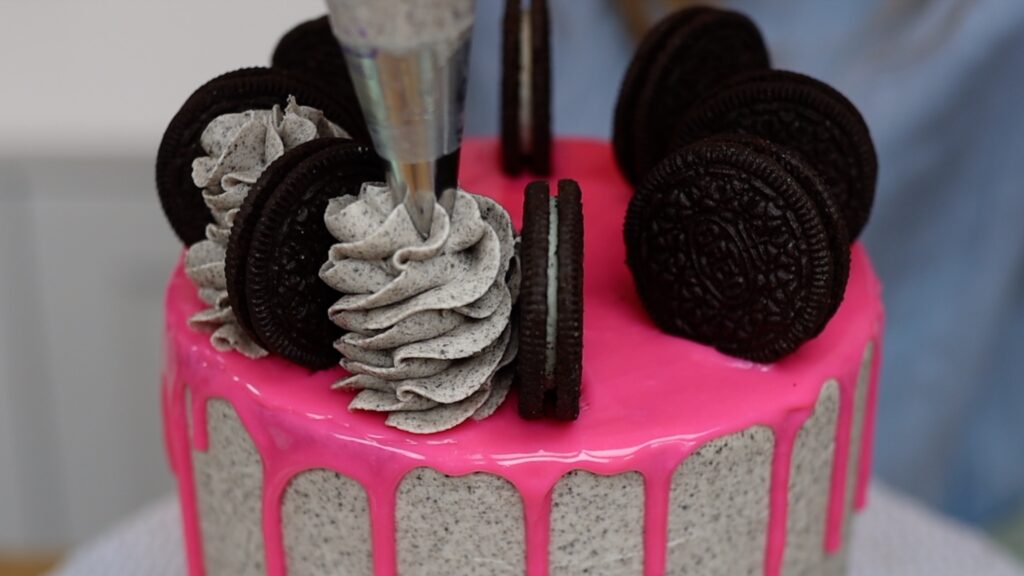
The cookies will keep the swirls the same width and, if you keep an eye on the top of the cookies, you can pipe every swirl to be the same height, too!
You can buy cake toppers for any occasion like birthdays or baby showers. The message will be more visible than if you pipe it because it stands upright. Push it into the cake after transporting because the vibrations of a car will wiggle it and make the hole in the cake bigger and visible around the stick of the cake topper.
Which cake topper are you going to try next? Tell me in the comments! And visit my cake school to learn hundreds of cake decorating techniques and designs with individual courses or a membership for access to everything, which you can try out with a FREE 7 day trial!
You can also watch a video of this tutorial on 10 easy cake toppers:
Use these 10 rainbow cake hacks for techniques and designs to make your rainbow cakes quick, easy, and better!
Let's start with how to mix rainbow colors in just one bowl. Start with yellow and then continue in this order:

This is not the order of the colours in the rainbow! The reason for this order is that the leftovers of each colour in the bowl can blend together with the next colour without muddying or dulling that colour. For example, leftover orange mixes into red and then leftover red mixes into purple. You can add more plain white buttercream to the bowl as needed but you won't have to clean the bowl.
Even without washing the bowl in between, you'll end up with gorgeous, bright rainbow colours.
To mix small amounts of rainbow colours (which I'll show you how to use later) use a cupcake pan. It's more convenient than using lots of little bowls because it's quicker to wash up afterwards.
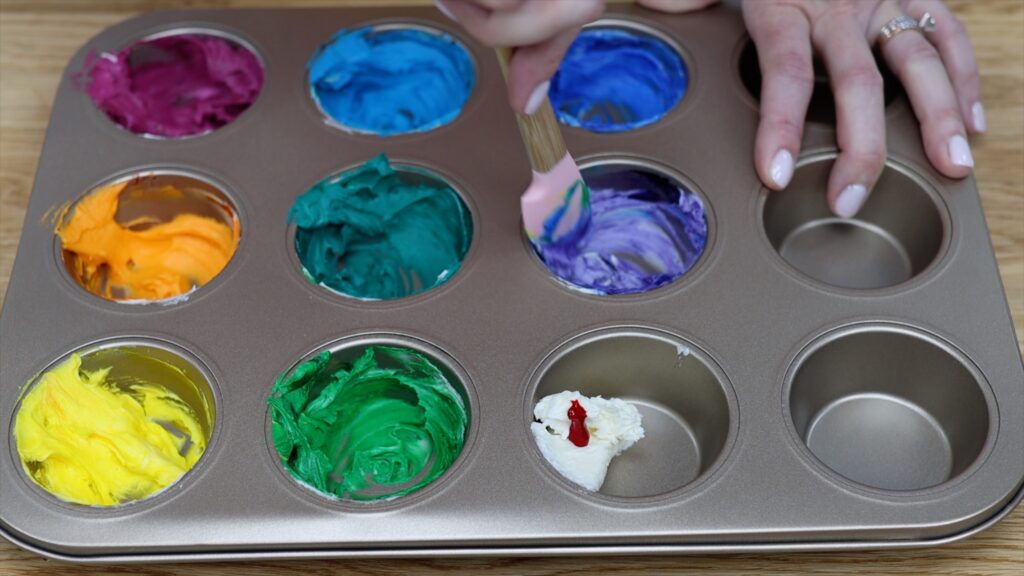
Also, you can tint the colours in advance and cover the whole cupcake pan with cling film or Saran Wrap. This keeps the buttercream soft until you use it so that it doesn't dry out and crust.
To pipe rainbows onto your cake, line up your coloured frosting on a piece of cling film or Saran Wrap. Then roll it tightly into a log.
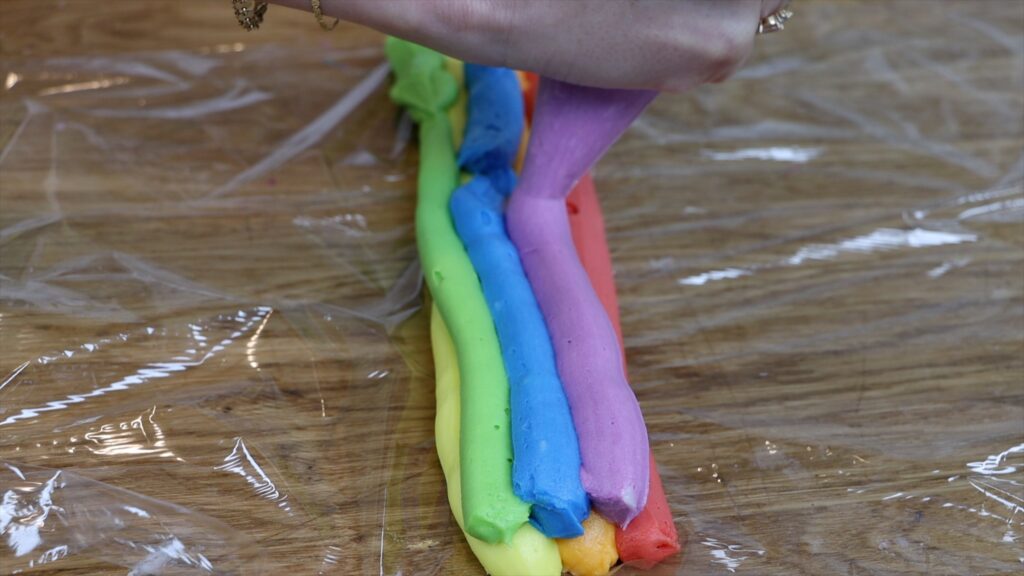
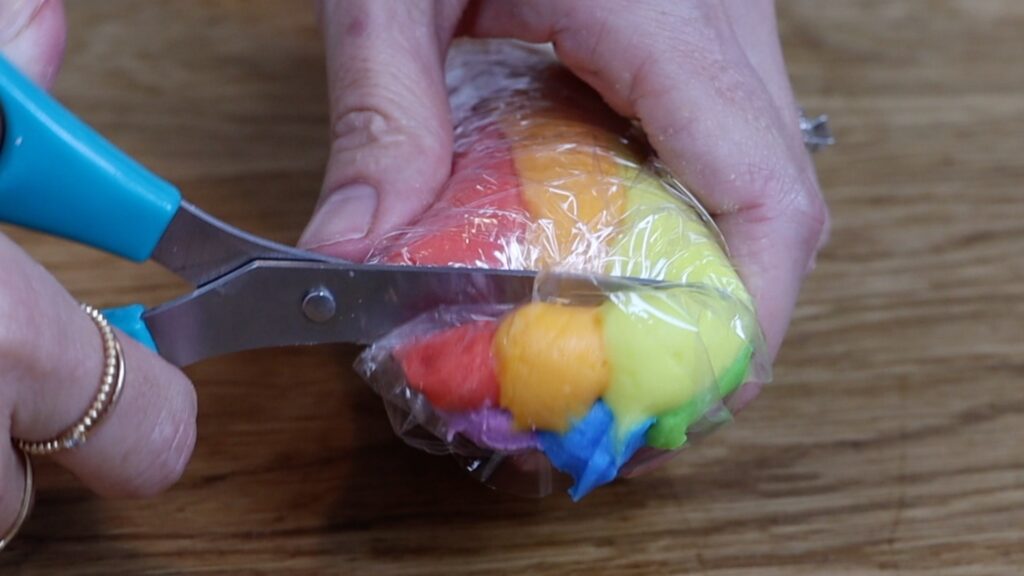
Cut off one end and drop that end down into a piping bag. Use a star tip to pipe arcs onto your cake and all of the colours of the rainbow will come through.
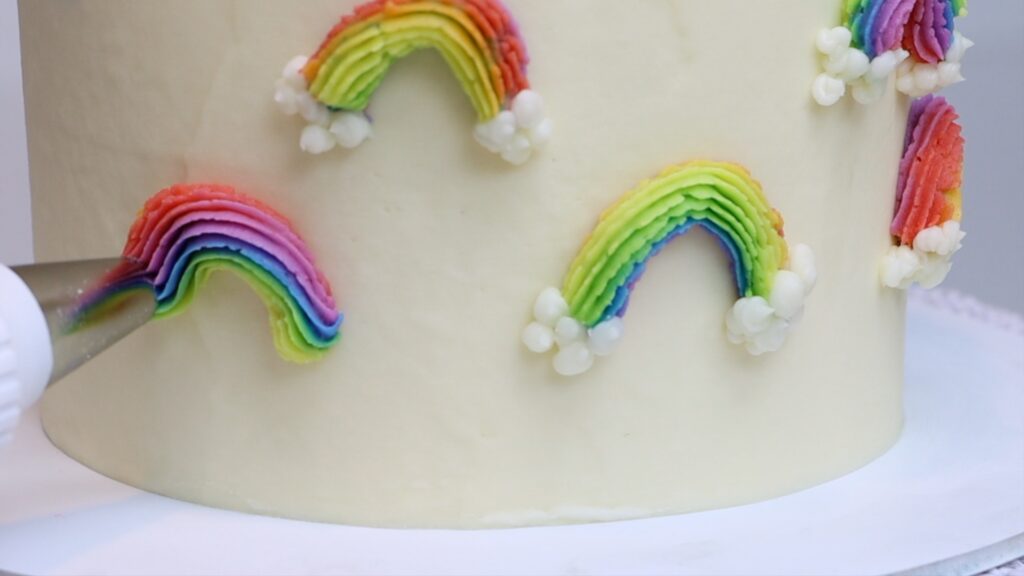
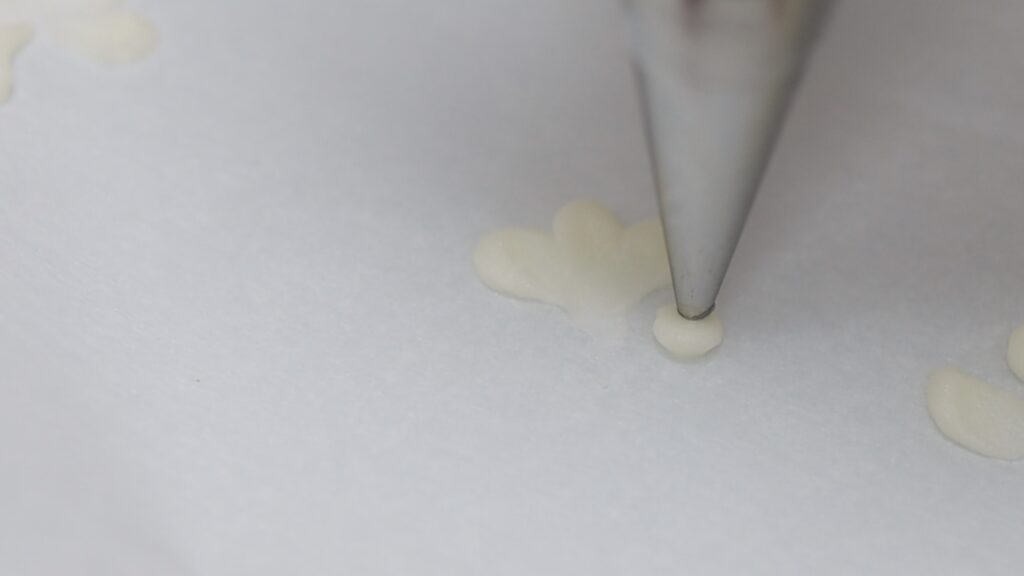
Add clouds by piping white buttercream at each end. If you're using a small round piping tip like this #4, squeeze each dot for a few seconds. This allows it to bulge out to make these fluffy clouds.
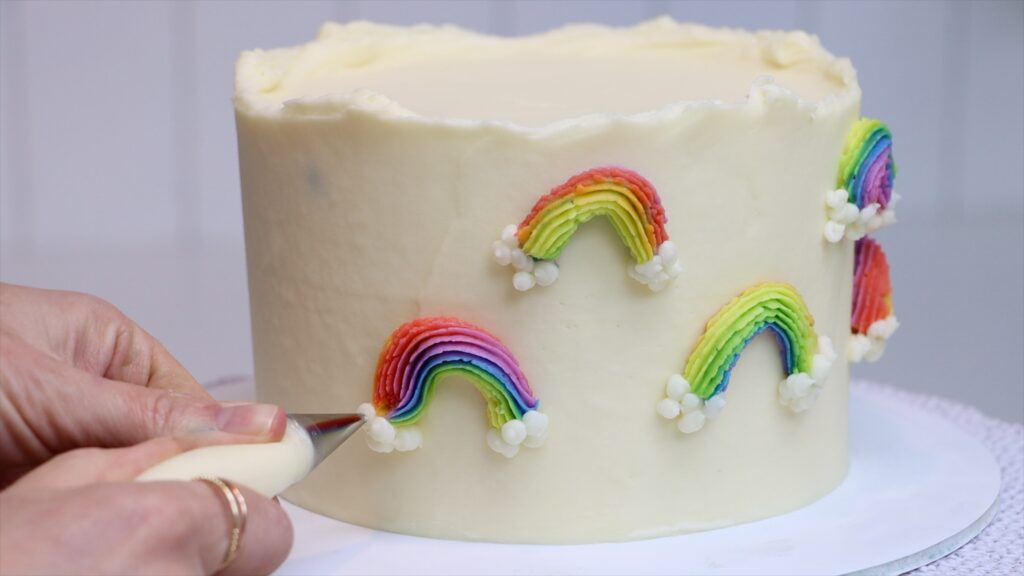
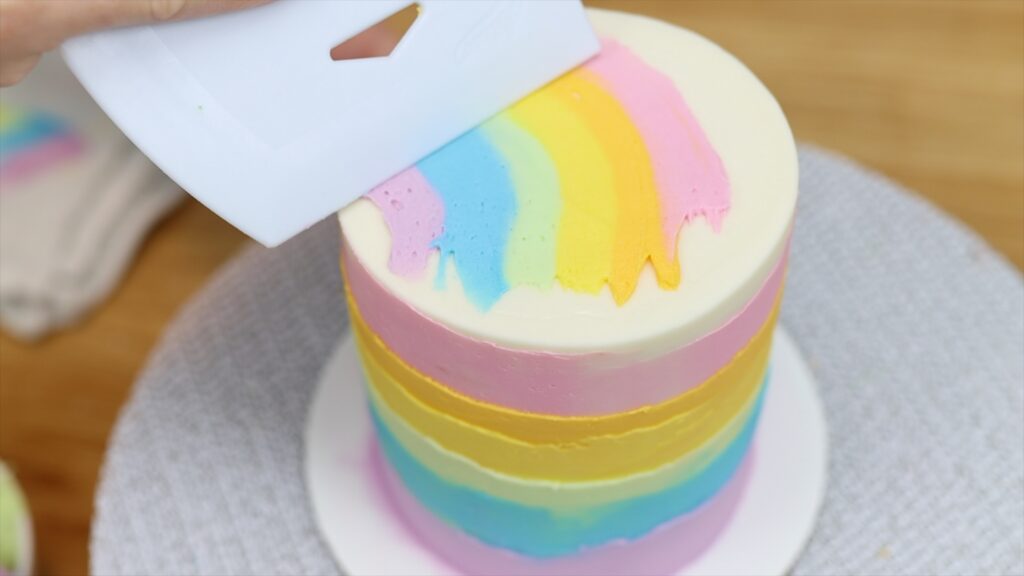
For the quickest rainbows, squeeze blobs of rainbow colours along the straight edge of a cake comb. Rest it against a frosted cake and curve it around to spread the frosting onto the cake into a rainbow.
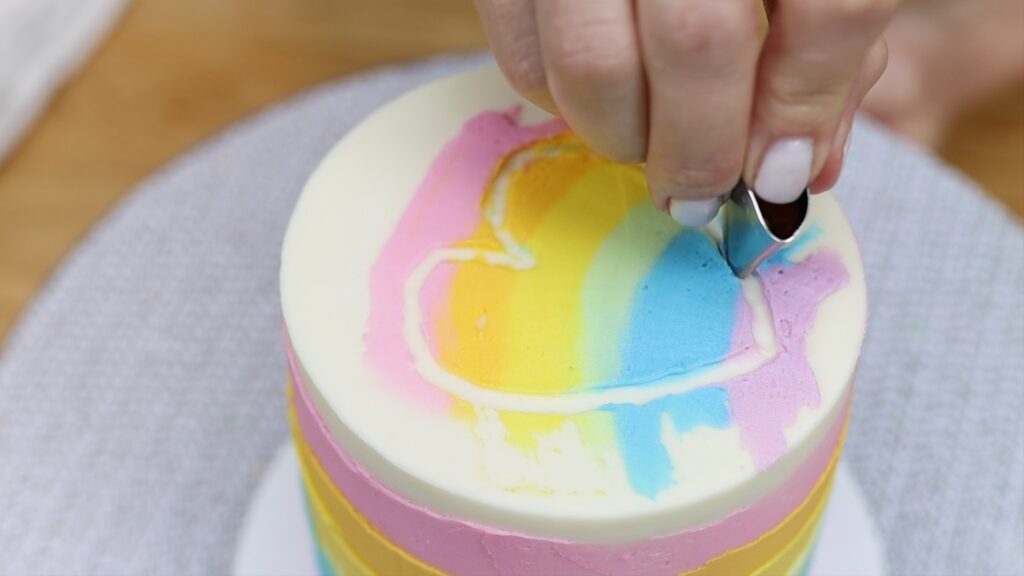
You might need to scrape a few times to get the frosting really smooth. You can carve shapes or letters into the rainbow using a petal piping tip.
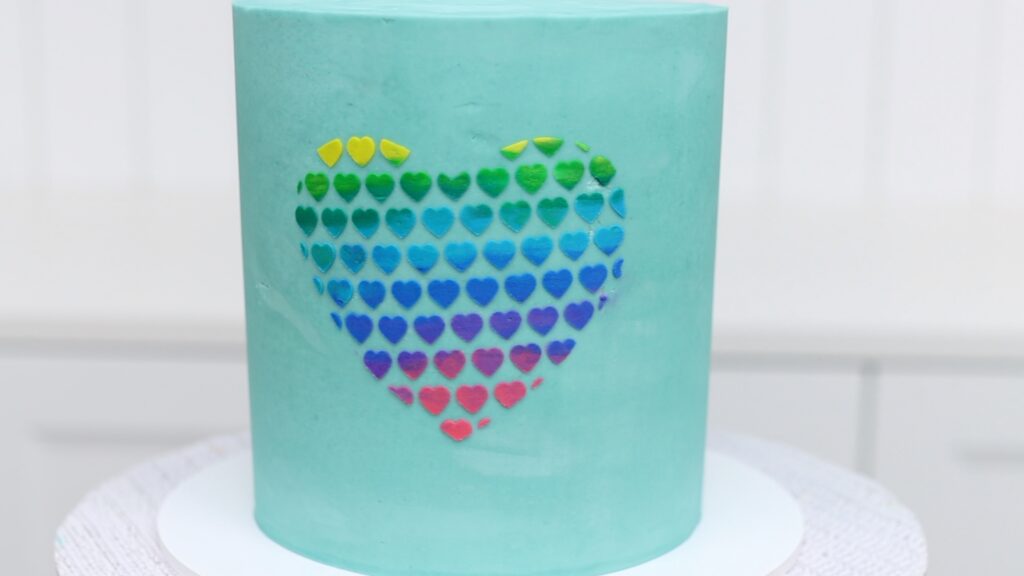
To create a stencilled rainbow you only need tiny amounts of rainbow frosting. Attach your stencil to a chilled cake by taping it tightly or pinning it into the cake. Spread your rainbow frosting over the stencil one colour after another.

When you scrape over this with a cake comb or spatula you'll take off the excess and blend the colours together naturally. Peel the stencil off to leave a stunning rainbow design on your cake!
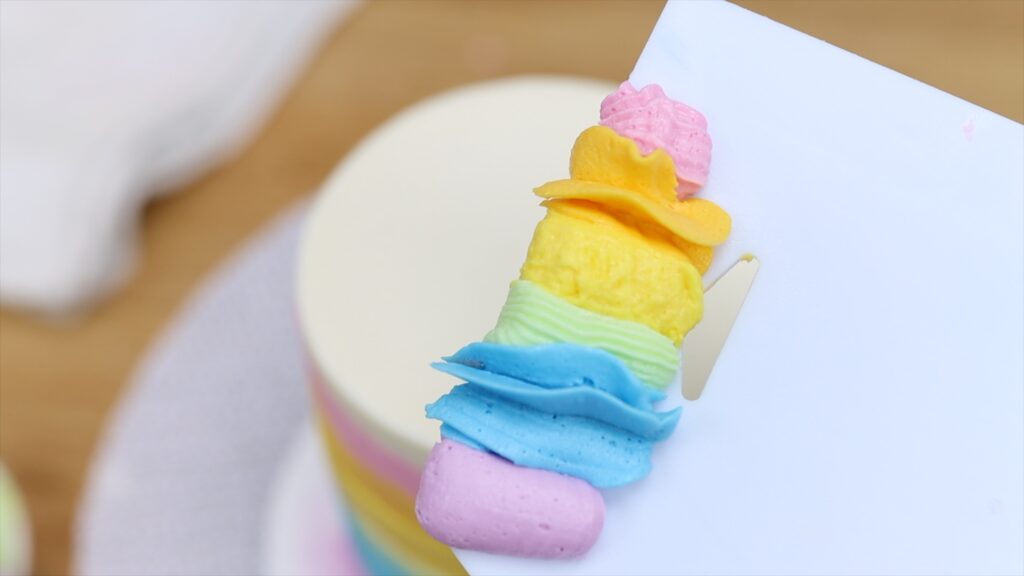
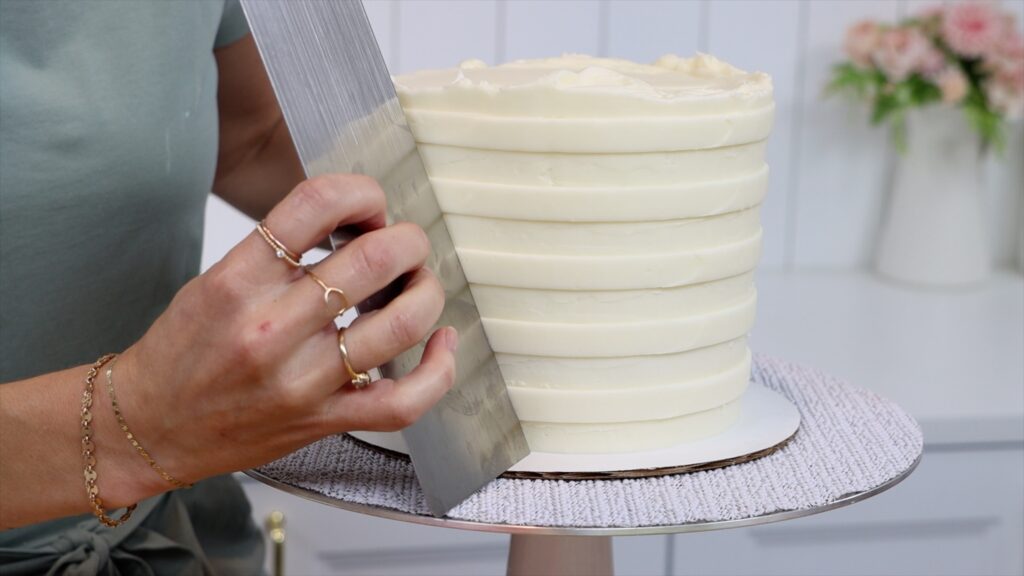
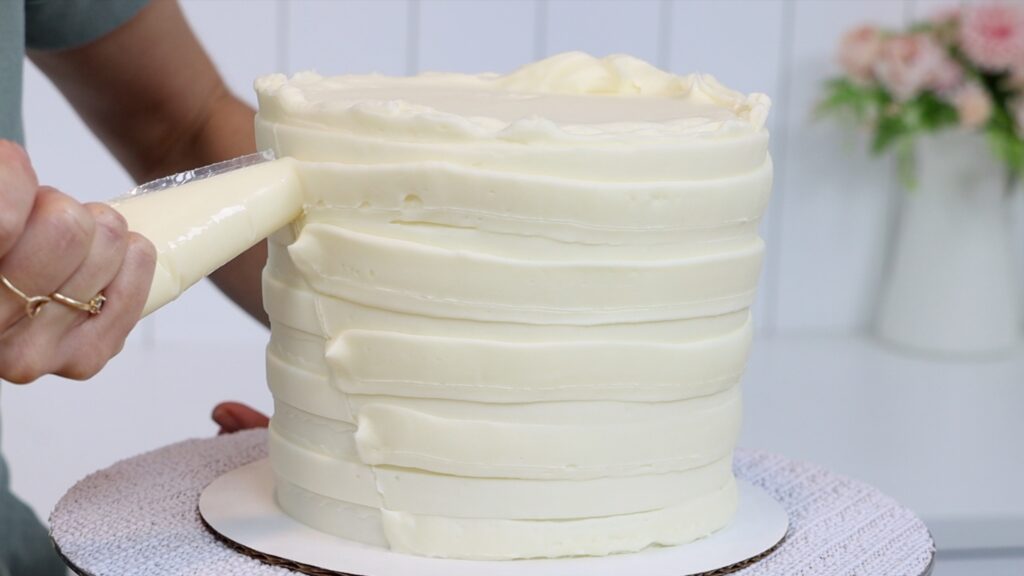
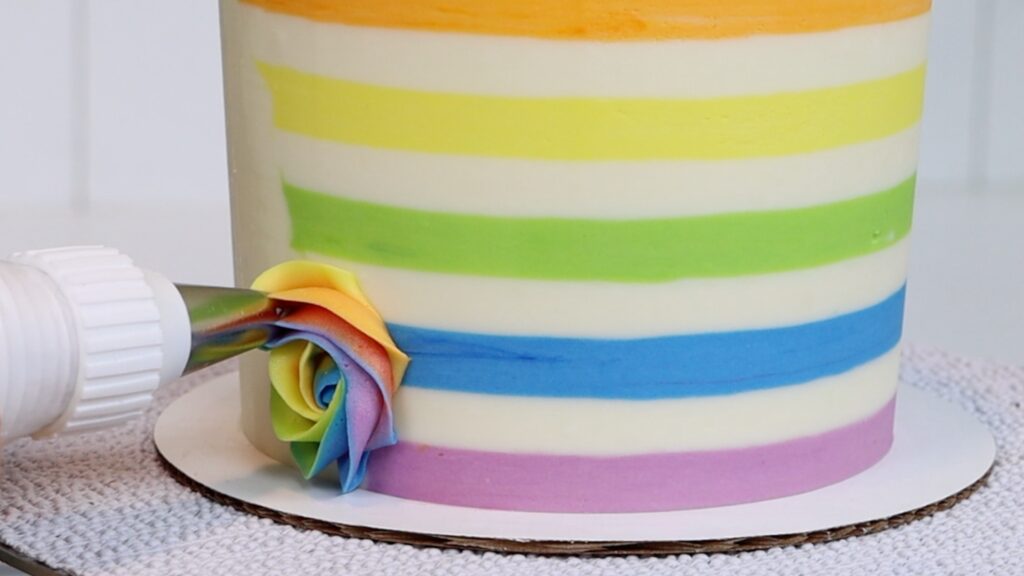
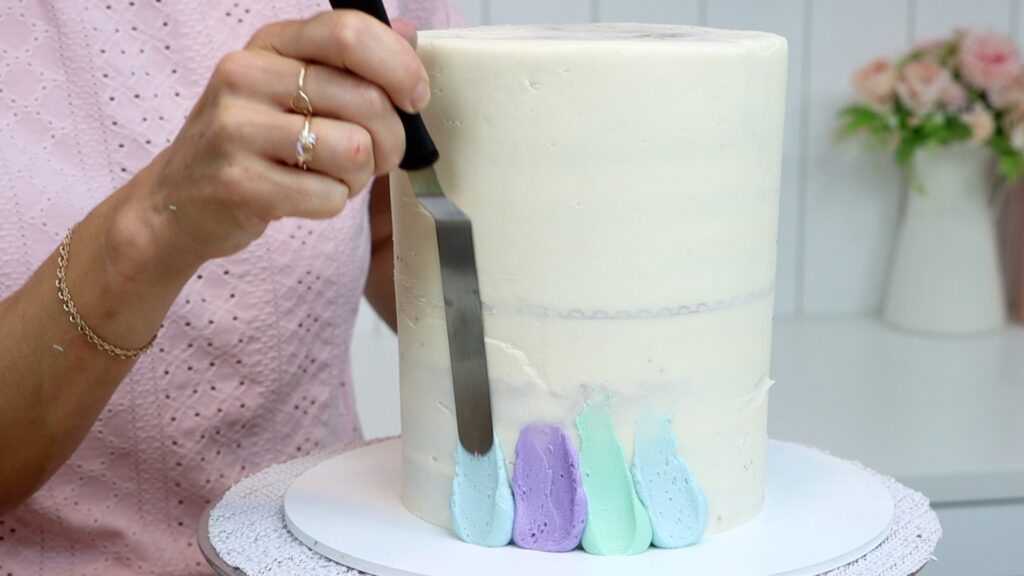
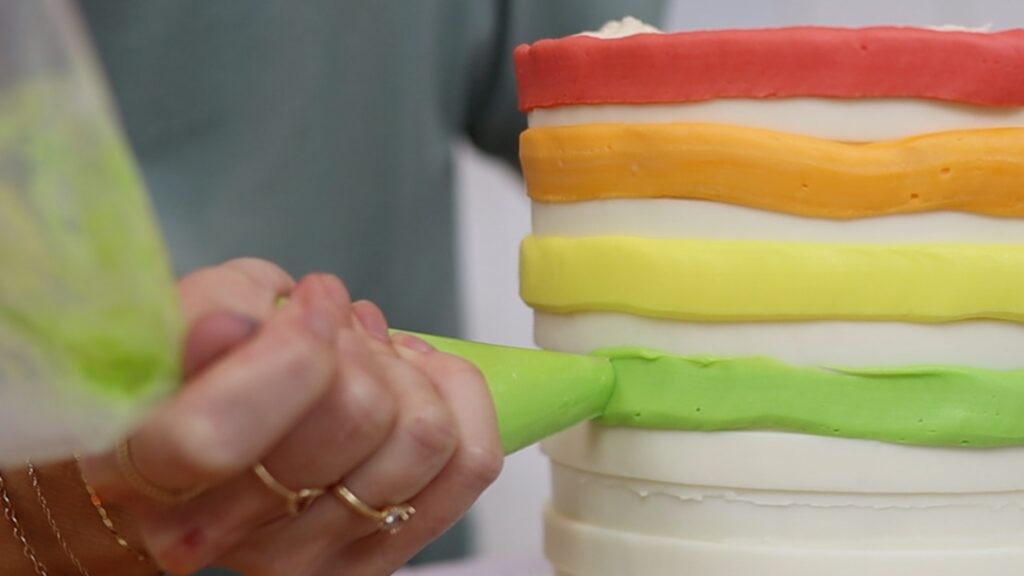
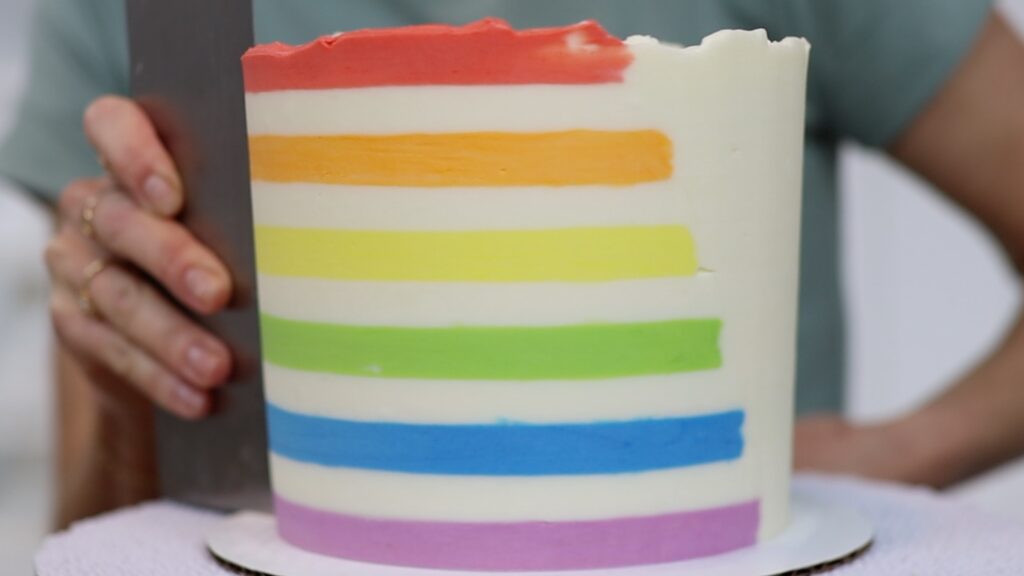
Another quick way to add rainbow colours to a cake is with this layered technique. Frost and chill your cake first so that the frosting is very firm. Then pipe or spread your first colour around the cake. Since the frosted cake is cold and firm, this colour won't blend into it. Scrape around the cake with a cake comb to flatten and smooth this colour.
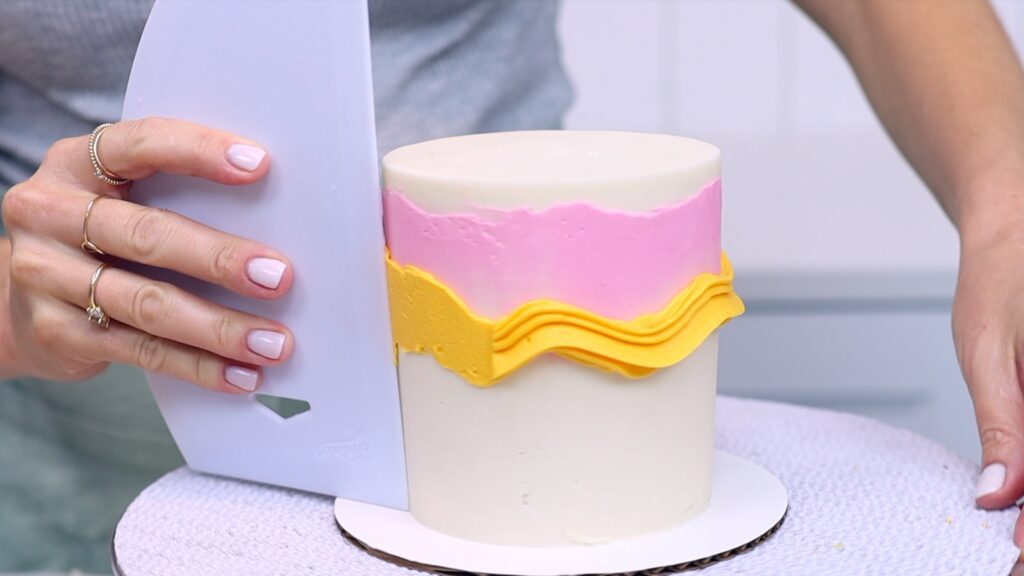
Now pipe or spread your next colour above or below the first colour. If your cake isn't very cold you'll need to chill it in the freezer for about 2 minutes in between each colour.
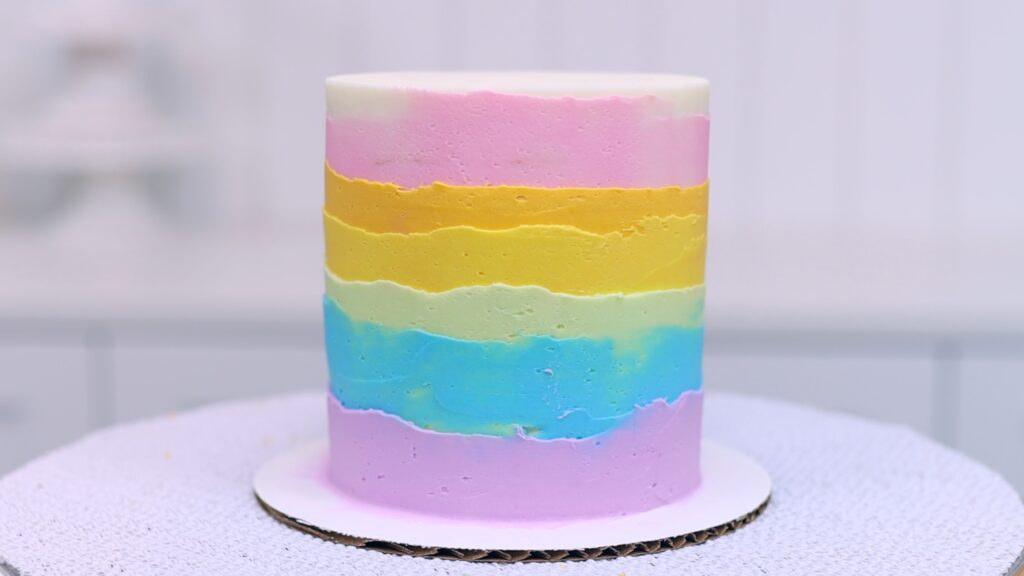
These layers of rainbow colours are simple but the result is beautiful!
To make a cake in the shape of a rainbow is super easy. Cut round cakes in half and layer them with filling.
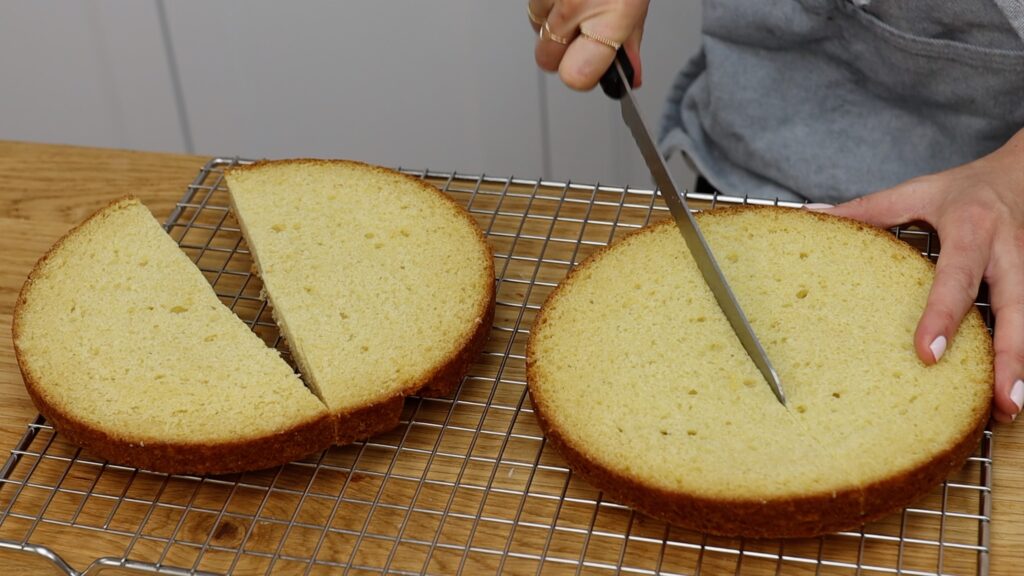
Then flip the cake onto its side and you have a semicircle or a rainbow shape.
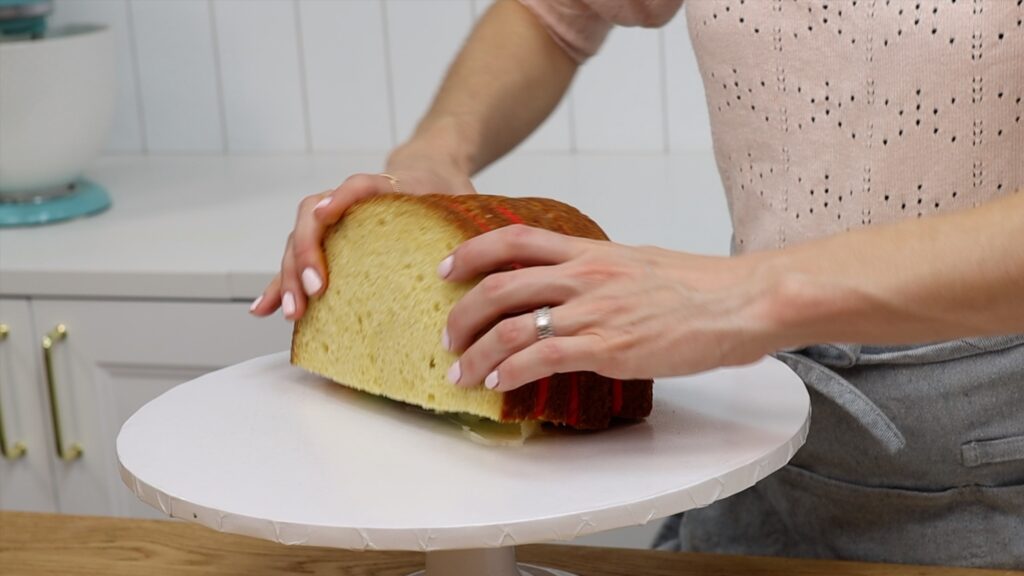
Frost the cake to seal in the moisture so it doesn't dry out. Then cover it with rainbow piping or however else you want to decorate it. You can read or watch my detailed tutorial on how to make this rainbow cake.

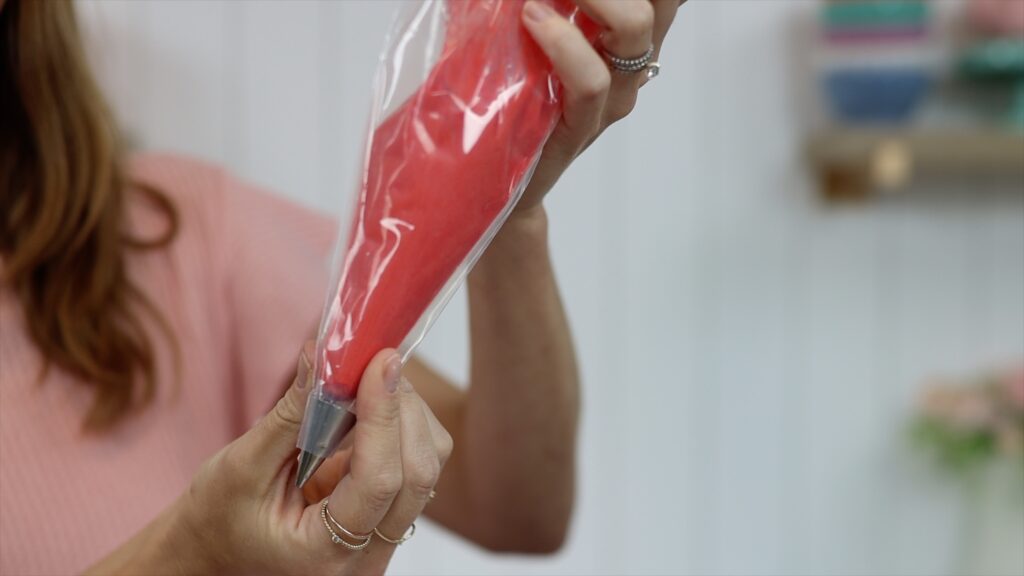
To pipe with rainbow colours using just one piping tip for all of your colours, use this hack. Prepare your colours in piping bags with the ends cut off each one, but without piping tips in the bags. Choose your piping tip and drop it into a different piping bag. I'm using an open star tip #32.
Drop your first bag of coloured buttercream into the piping bag with the piping tip. You'll squeeze this colour out through the piping tip of the other bag. When you finish, pull this piping bag of coloured frosting out of the piping bag with the piping tip.
Drop the next colour in and squeeze out the last of the previous colour into a bowl until you see the new colour come out.
Pipe with this colour and repeat for the rest of your colours. Always squeeze the bag into a bowl in between colours. With this hack you can pipe colourful designs without needing a piping tip for each piping bag of coloured frosting. The cake in the photo below was made using my facelift frosting technique:
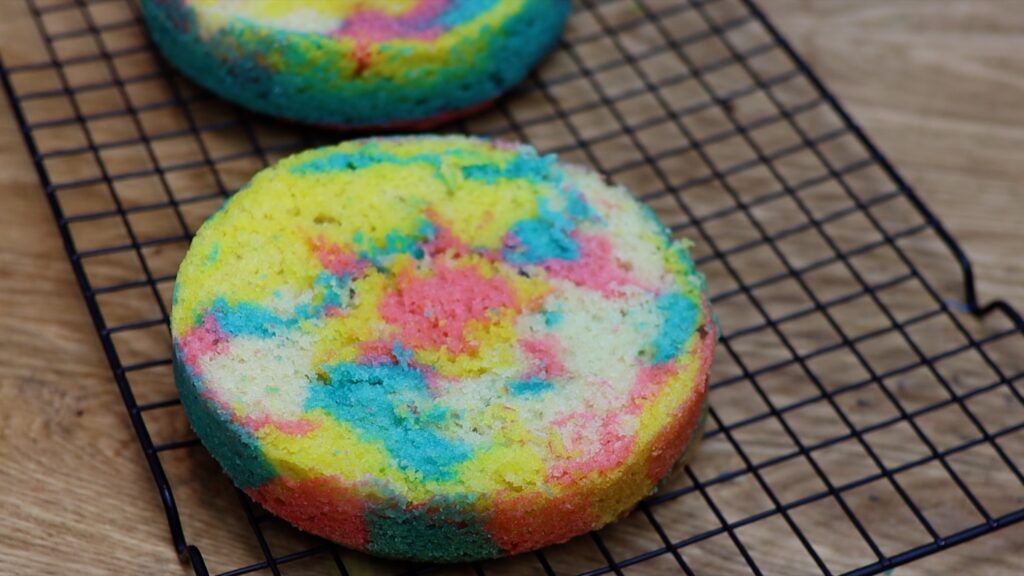
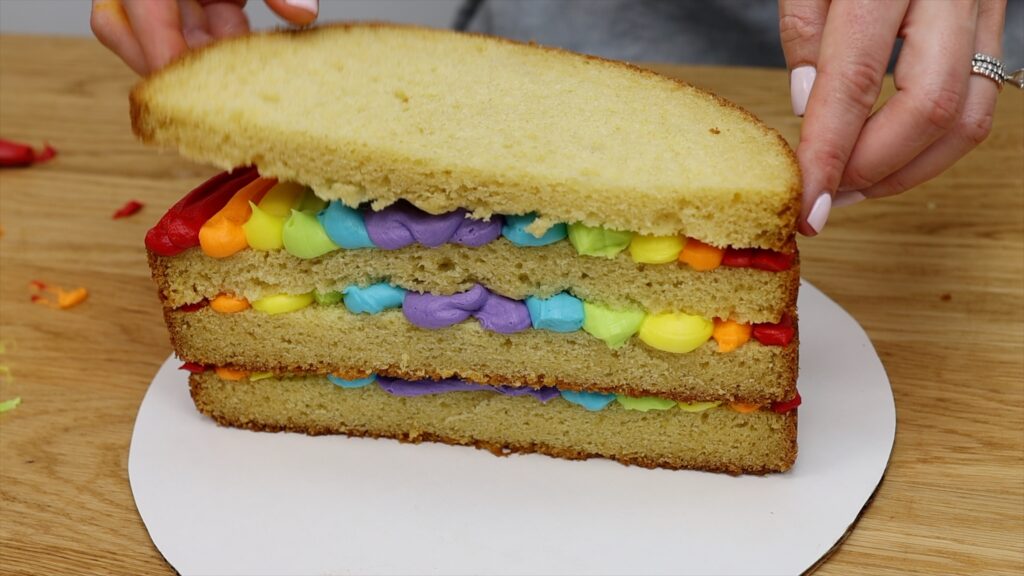
For rainbow coloured cake layers inside the cake, try this. Divide your batter and tint each bowl and then spoon each colour into a piping bag. Squeeze the bags into cake pans, making random colourful designs.
Tap the pans to level the cake layers and bake as normal. When you cut into the cake everyone will be surprised by the fun colours!
To cover a cake with rainbow sprinkles choose tiny non pareils or hundreds and thousands. Smooth the frosting on your cake but it doesn't have to be perfect for this design. Scoop up handfuls of sprinkles and press them against the cake while the frosting is still soft and sticky and they'll attach easily. It's best to put your cake on a tray to catch the sprinkles that bounce off.
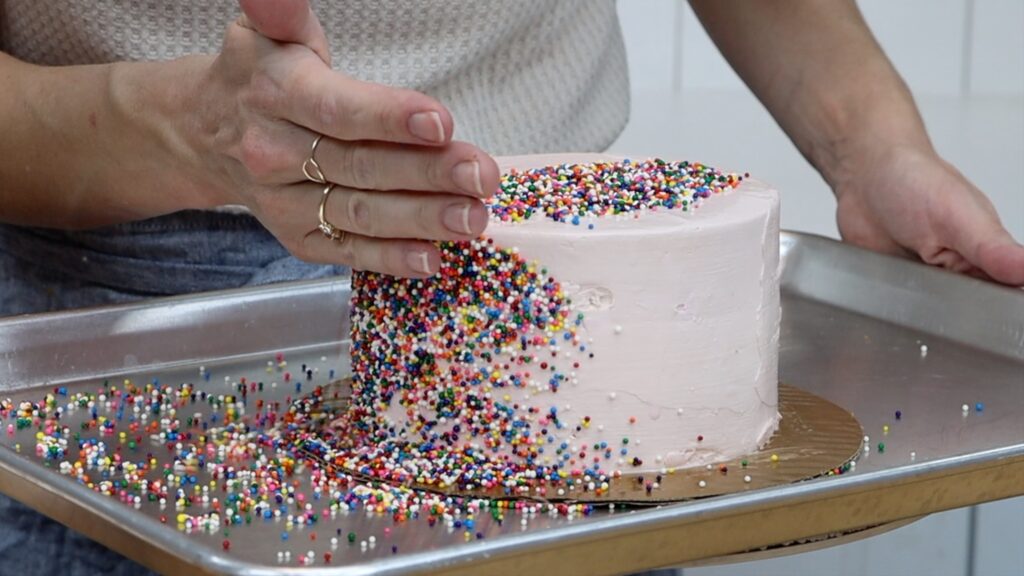
This is a popular choice for a cakeover or a cake makeover, where you buy your favourite flavour of cake and redecorate it. You might do this to personalize it or just to save yourself the time of baking.
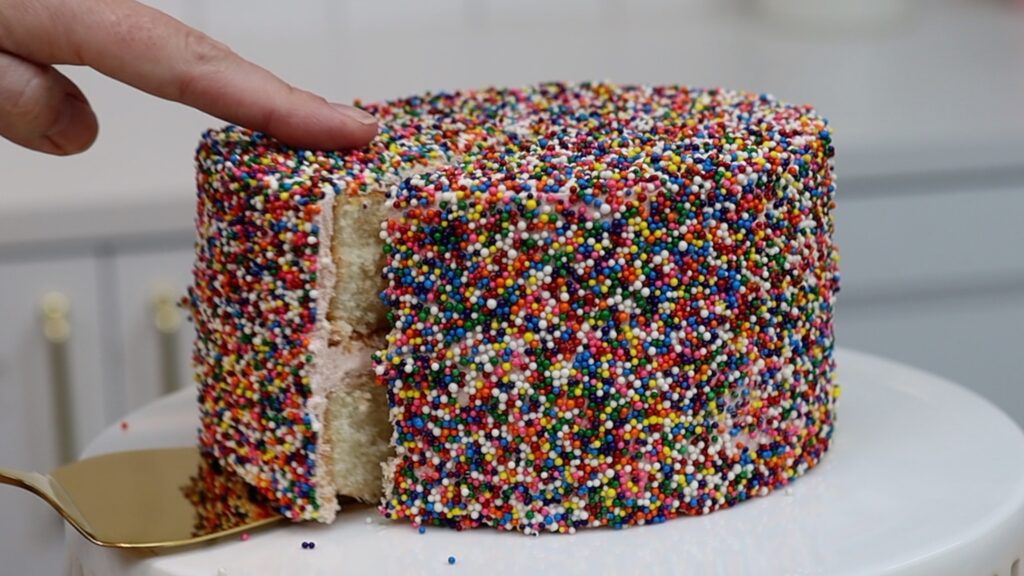
These tiny sprinkles create an instant rainbow effect without needing to master any cake decorating techniques. Since they're so tiny, they really don't add much texture to the cake when you bite into it.
Which rainbow cake hack will you use? Tell me in the comments! Visit my cake school to learn hundreds of cake decorating techniques and designs with my online courses and memberships. See you there!
You can also watch a video of this tutorial on 10 rainbow cake hacks:
Use these 10 cake decorating shortcuts to skip the
Using a cake comb to scrape around a cake doesn't guarantee you smooth frosting. If your buttercream is too stiff or has air bubbles, even 100 scrapes won’t smooth it. Here’s a shortcut: scoop up a third of the buttercream and microwave it for 10 seconds.
When you stir the melted buttercream back into the main bowl of frosting, it will thin out the consistency. As a bonus, you'll get rid of any air bubbles in the process!
This microwaved frosting will glide effortlessly as you spread it onto your cake. Your cake comb will whisk away the excess to leave a silly smooth surface behind.
Cake combs come in all sorts of patterns that can be used to texture the frosting on a cake. But do you really need to buy a new one every time you want a different texture? Nope! Just grab your
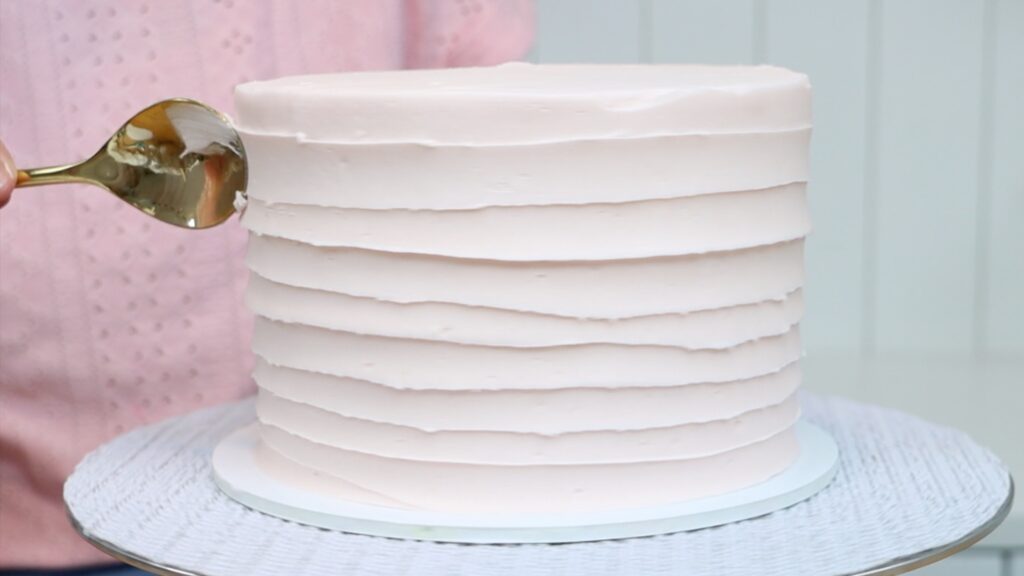
Or pull straight up to make vertical swooshes, or use arc motions to create this rustic texture instead:
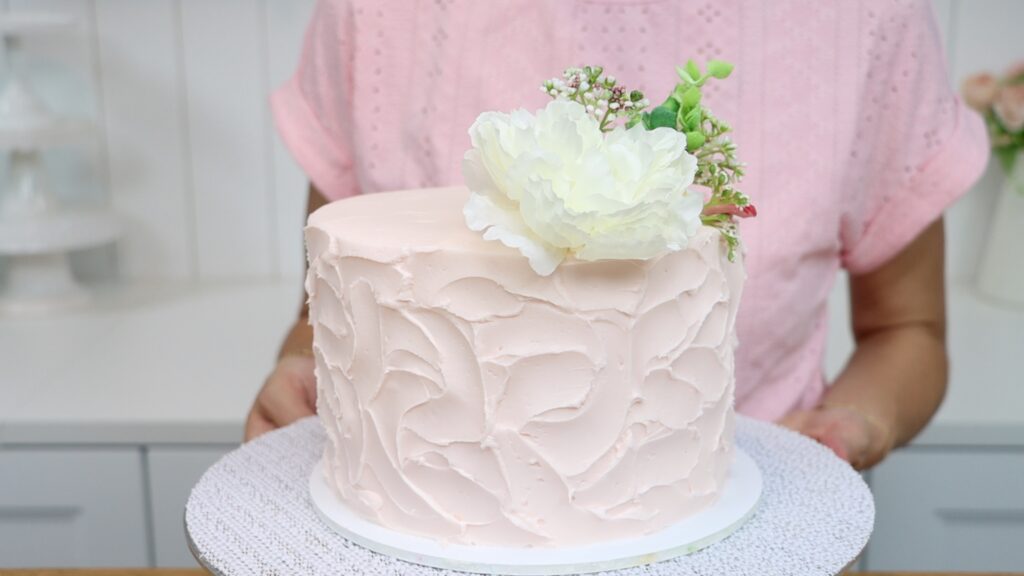
It’s quicker, easier and cheaper than mastering cake comb texture! Learn more ways to decorate cakes with no tools in this tutorial.
If you don’t have a
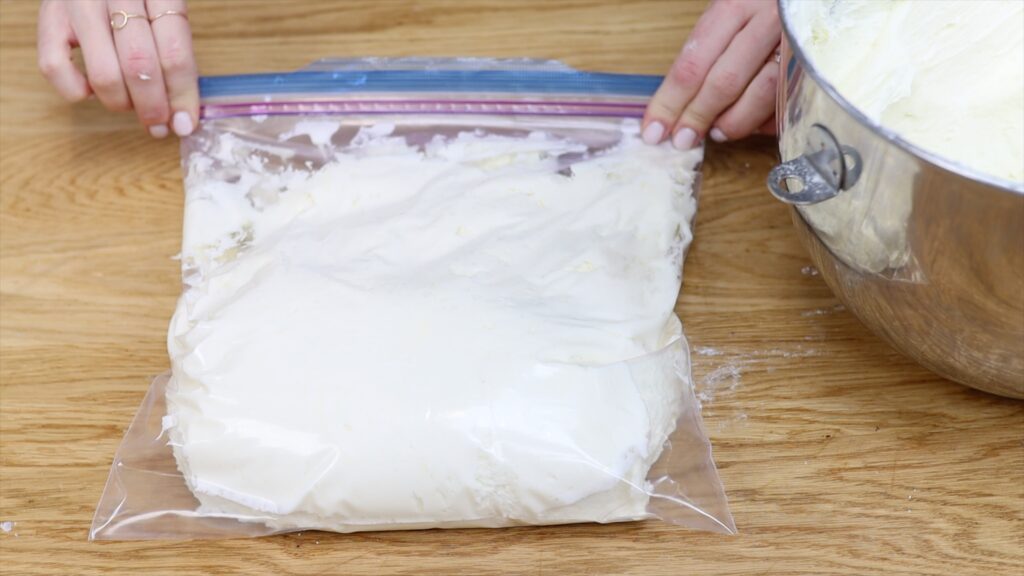
Run out of piping bags? Don’t panic! Spoon your frosting into a ziplock or sandwich bag and push it down into one of the bottom corners. Then cut the tip off the corner and twist the bag tightly where you grip it. When you squeeze, you’ll push the frosting out through that hole just like you would with a piping bag. Now you can pipe dots, beaded borders and lines without a piping bag!
If you have piping bags but no tips, cut the end off the piping bag to leave a small hole. Now you can create dotted or pointillist designs by piping hundreds of dots! The longer you squeeze the piping bag while holding it still, the bigger the dots will spread out the be.
You can even use a piping bag with no piping tip to write pretty messages, like this!
A coupler allows you to switch a piping tip between different piping bags. If you don’t have a coupler, use this cake decorating shortcut! Drop the piping tip into a piping bag and prepare different piping bags, without piping tips, filled with coloured frosting. Lower the first coloured bag into the bag with the piping tip.
As you squeeze the bag you’ll push the coloured buttercream through the piping tip that’s in the other bag. Pipe all the details you want with that colour first. Then lift the coloured bag out and drop the next one in. Squeeze the last of the previous colour out into a bowl until you see the next colour come through.
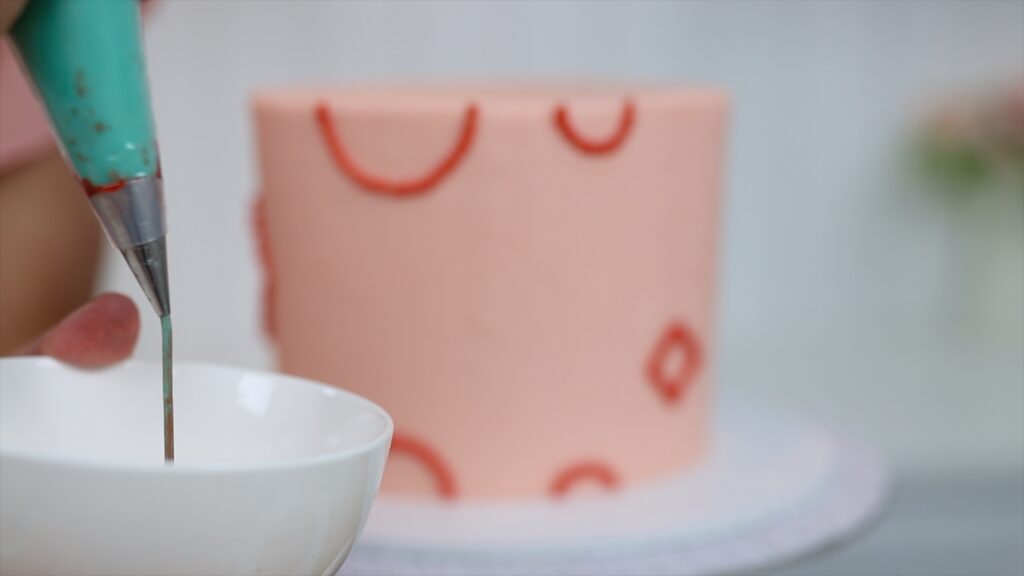
Pipe the details with this colour and repeat for as many colours as you want to use. Remember each time to squeeze out the remainder of the previous colour into a bowl before piping onto the cake. With this shortcut you can switch quickly between several colours, all using just one piping tip. You'll save time by not having to wash and dry anything in between colours and no coupler is necessary!
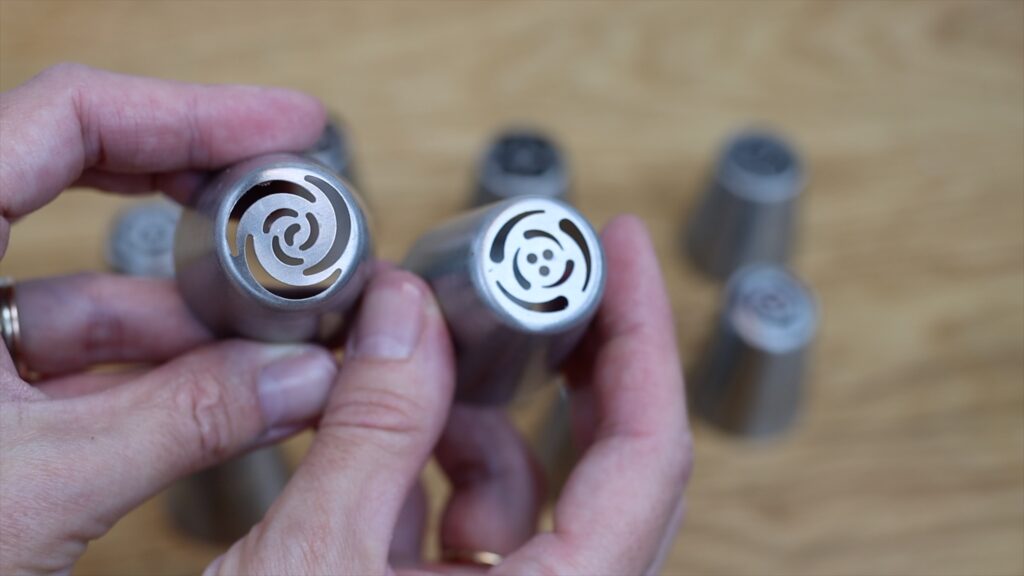
To pipe intricate flowers you don’t need a flower nail and parchment squares and several different piping tips. Skip all of that by using Russian Tips as a shortcut! Combine multiple colours by stirring them together slightly for a marbled effect. For more control, pipe colours onto a piece of plastic wrap using a different colour for the middle.
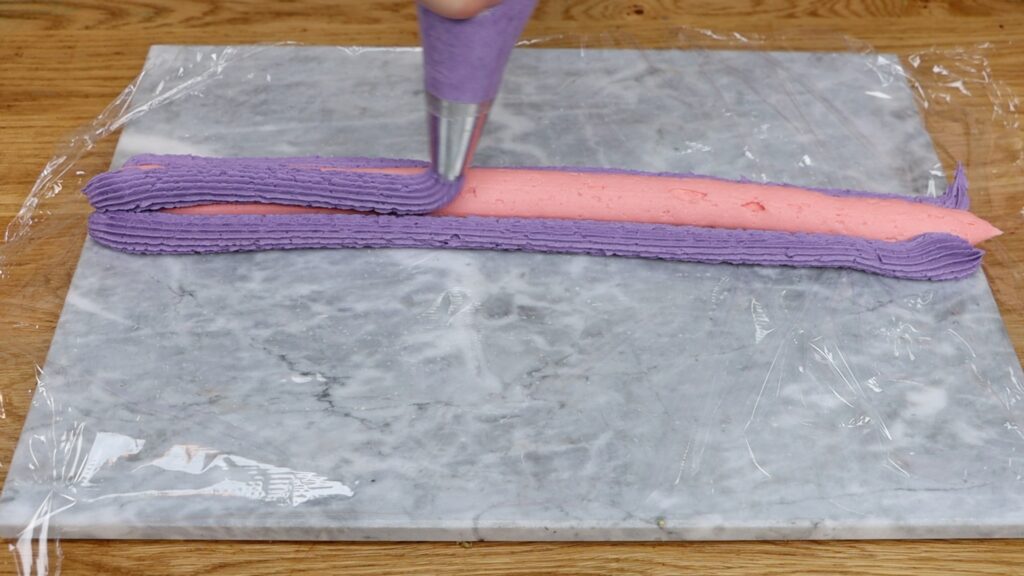
Roll the plastic up tightly around the frosting to make a log. Then twist both ends of the log and cut one end off.
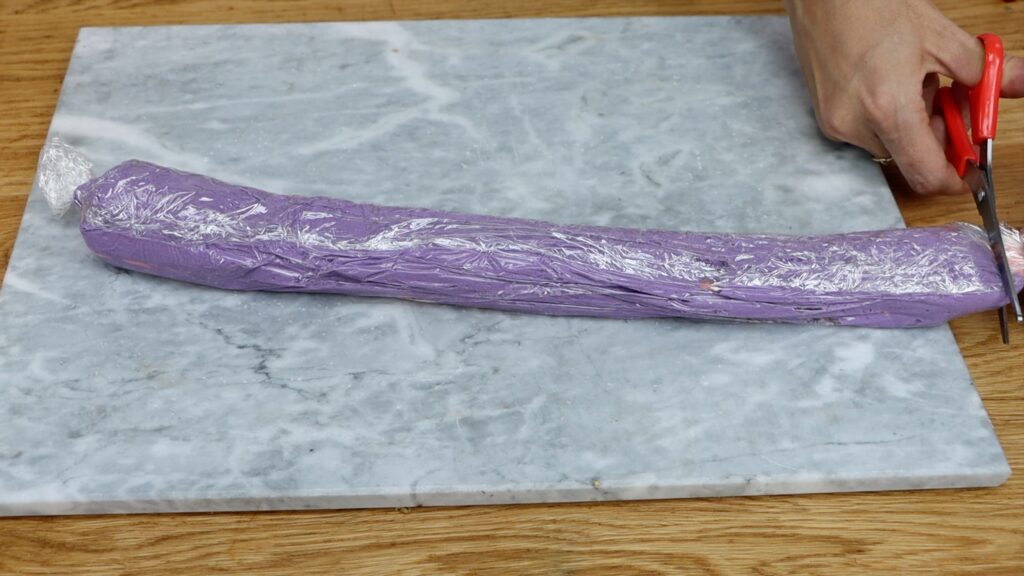
Drop the cut end down into a piping bag with any flower shaped Russian Tip inside. These are my favourites:
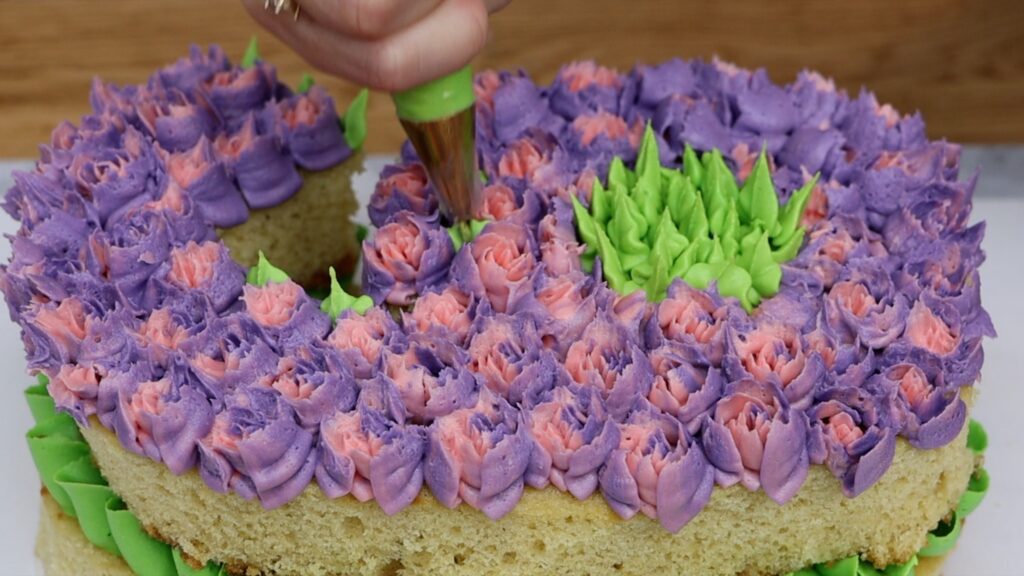
Squeeze and release to pipe detailed, colorful flowers with individual petals in seconds!

Add more with a leaf tip, conveniently filling in any gaps in between the flowers!
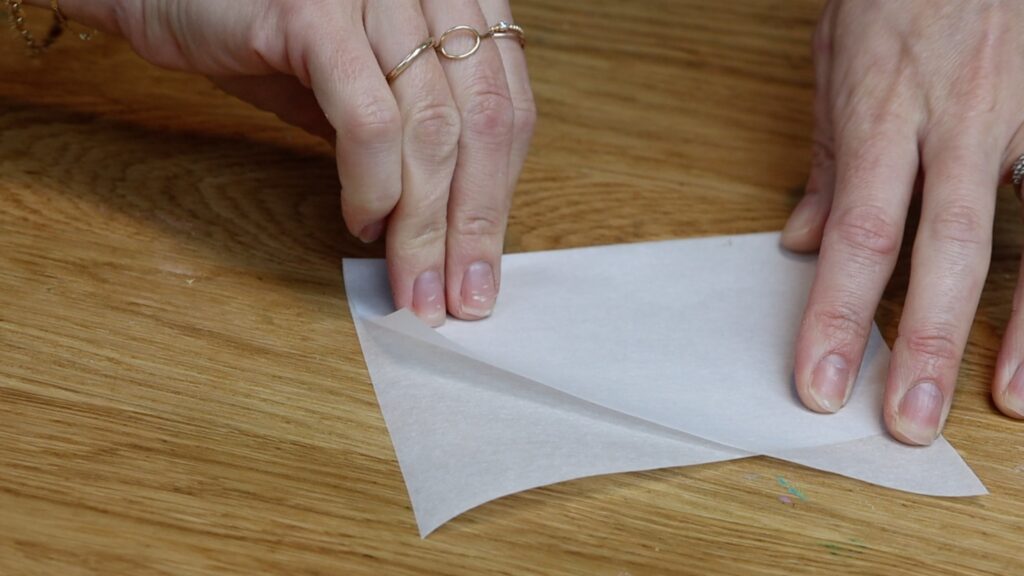
Stenciled cakes are stunning but stencils are expensive to buy for every cake you decorate. Instead, grab a roll of parchment paper. Cut a piece out a few inches bigger than your design and draw or trace your design onto it.
If you’re using different colours, use a different piece of parchment paper for the details of each colour. If your design has 4 colours, you’ll have 4 stencils.
Cut the design out, keeping the surrounding paper intact.
You’ll need a cold cake for stenciling, so that the buttercream frosting chills and sets and gets really firm. I leave my cakes in the fridge for at least an hour before using stnecils. This way you won’t damage the frosting when you press the stencils against it.
When you take the cake out of the fridge, tiny beads of condensation will form after a few minutes. Wrap your homemade stencil around the cake and it will stick to the condensation! Spread frosting over the design you cut out, being careful not to spread it over the edges of the parchment and onto the frosted cake. Scrape off the excess with an offset spatula or cake to leave a thin, smooth layer behind.
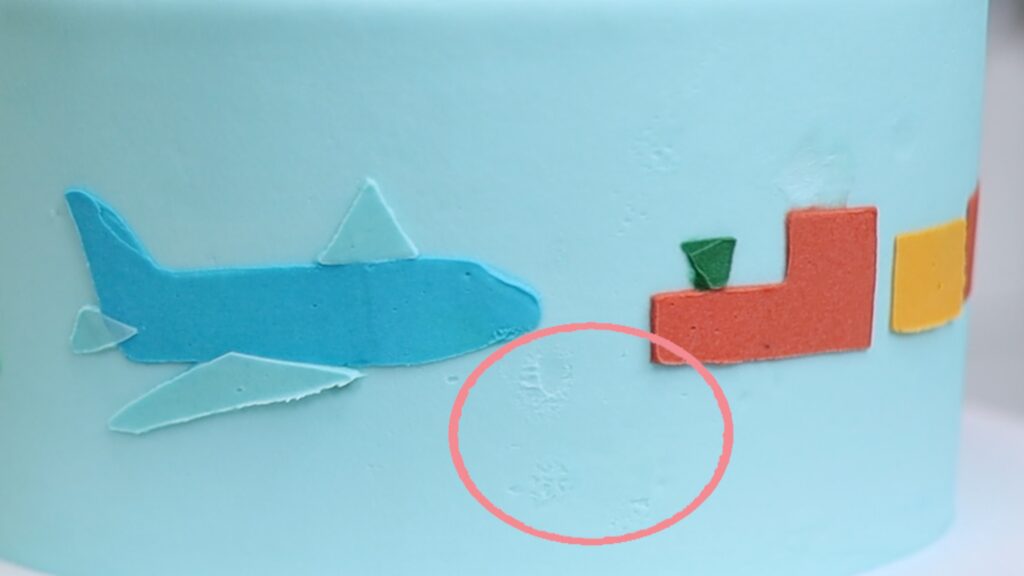
Peel the paper off and voila! Use a toothpick to tidy up any smudges or texture on the buttercream
Repeat with the rest of the stencils, if you’re using more than one colour. Put the cake in the freezer for about 5 minutes in between each stencil to set the previous colour. If you don't, the parchment paper will smudge the details you’ve already stenciled onto the cake.
Tadaa! Easy homemade stencils to make neat designs that are completely customizable!
For even, level layers you could trim the tops off with a serrated knife to get rid of the domes. Save time by using baking strips instead. To use these, soak in water for 5 minutes and then squeeze so they're not dripping wet. Place the strip around a cake pan and tighten until it's snug.
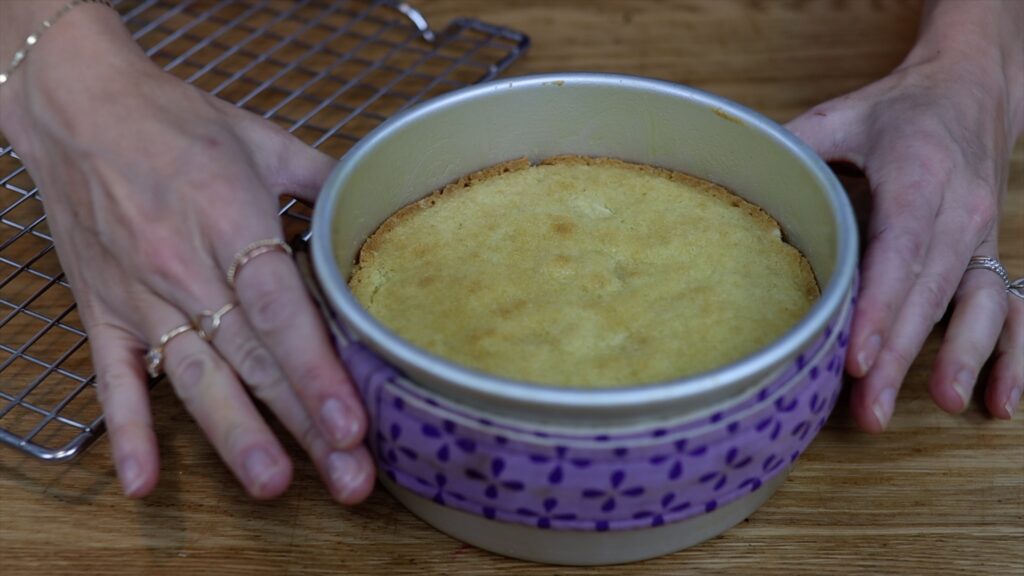
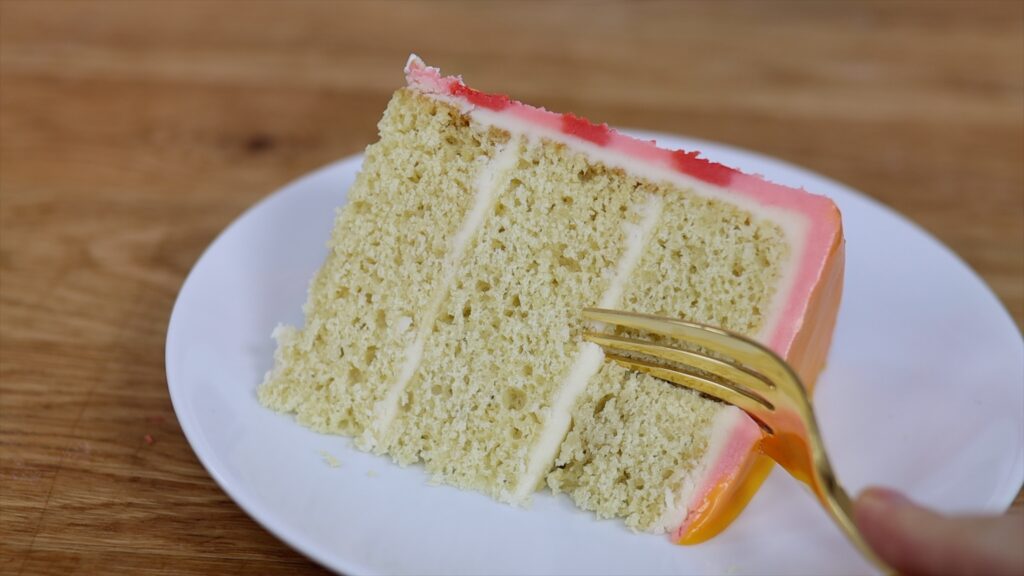
Your cake layers will bake evenly without burnt edges and they’ll rise higher for taller cakes. Also, amazingly, they’ll be perfectly flat without needing to trim them! When you cut into the cake, the slices look beautiful with straight, even layers of cake and filling.
Get more tool recommendations in my tutorial on which cake decorating tools really work.
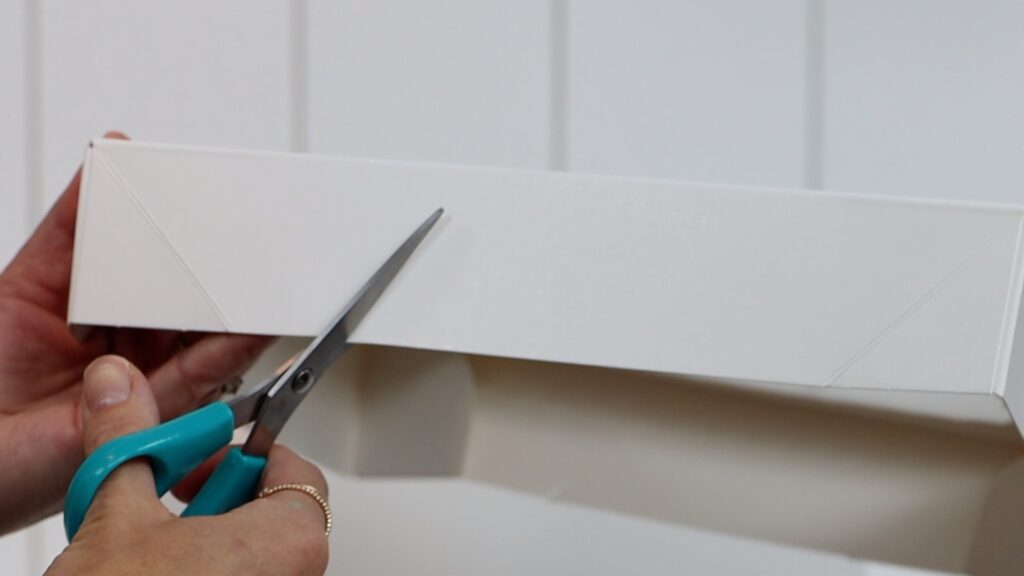
Instead of buying bigger cake boxes for tall cakes, tier cakes or cakes with cake toppers, use this shortcut! Cut one side of the lid with two diagonal slits. The shorter you cut the slits, the higher up you'll raise the lid. Do the same on the opposite side of the box. This will make a flap in the middle on those two sides.
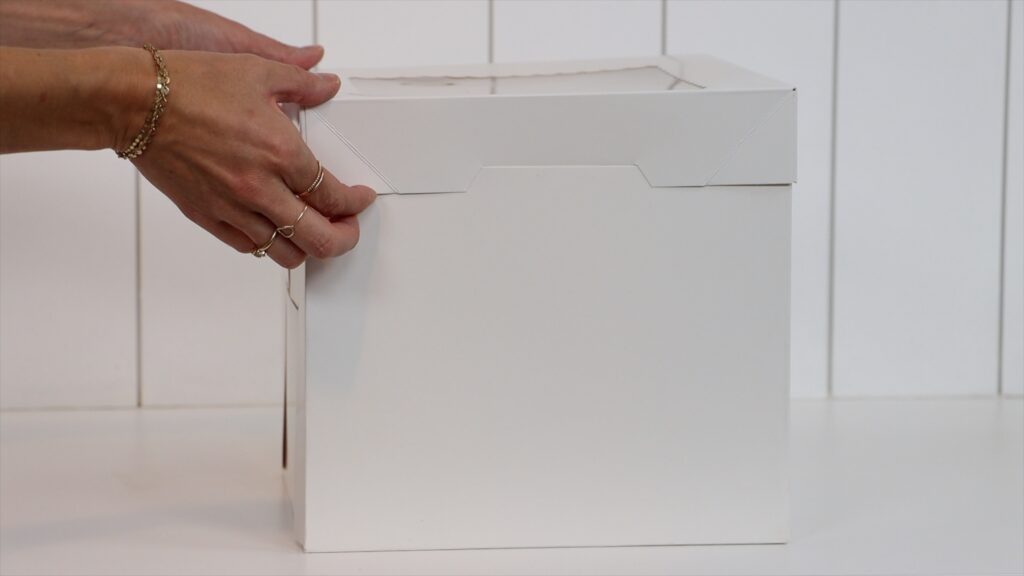
Then slide the flaps into the inside of the box. Now the lid won’t touch the top of the cake and damage it. You’ll be able to safely transport your cakes without needing to buy new packaging!
I hope this tutorial has been useful! Tell me in the comments: which are your favourite cake decorating shortcuts?
For more cake decorating shortcuts, tips and tricks visit my cake school, where you'll learn hundreds of techniques and designs in my online courses!
You can also watch a video of this tutorial on 10 cake decorating shortcuts:
Buttercream is my favourite frosting for cake decorating but to be successful with it you need to know these five things about it.
I use my 4 Minute Buttercream for all of my cakes!
Let's start with the right temperature to work with buttercream. Since it's made with butter, just like butter it melts in the heat and gets hard when it's cold. If it's hot in the room you'll struggle with cake sweat, which are droplets of condensation on the frosting. You might even see colours running down the cake.

For many techniques, the frosting needs to set before decorating it. For example, for stenciling the cake needs to be in the fridge for at least an hour first. When you take the cake out of the fridge, the buttercream won't stay firm for long in a warm room. When you press the stencil against the cake your fingers will melt the frosting and leave unwanted indents behind.
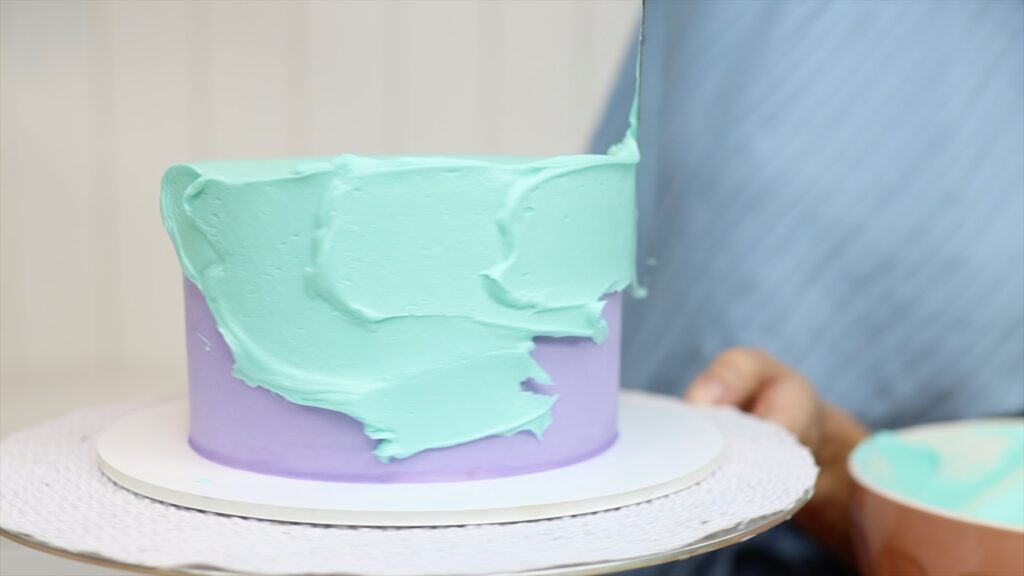
Cold temperatures have their own set of problems. I attempted to frost this cake when there was a freeze where I live and look what happens! The cake isn't cold and the buttercream was at room temperature when I made it the day before. But the cold weather has chilled the buttercream as I smooth it so much that it's started to set. You can see the stiff texture on the cake on the left compared to the softness on the cake on the right.
So, what's the right temperature? Room temperature is around 72°F or 22°C and that's ideal.
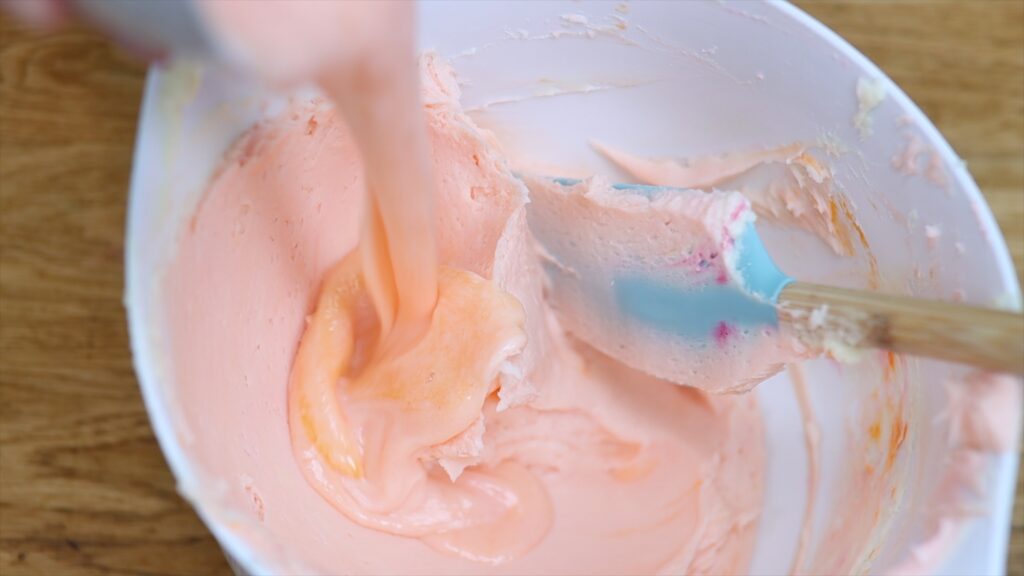
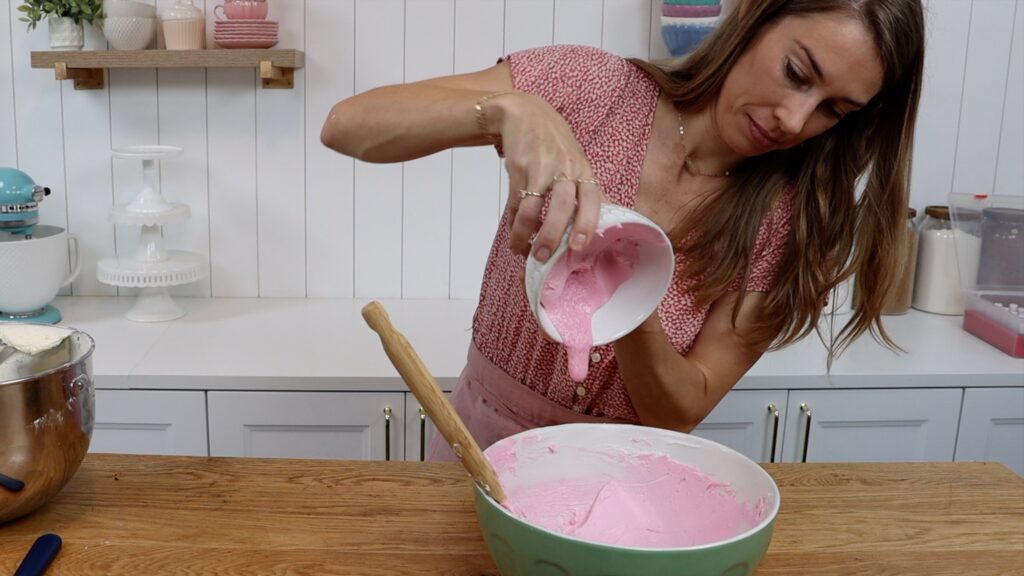
There are three things to watch out for when you tint buttercream. First, the consistency of the buttercream. The more colour you add, the runnier it will become especially if you're using liquid colours rather than gel colours.
If you know you're going to add a lot of colour, consider leaving out the milk or cream in the buttercream recipe. Wait until after you've added the colour so that you can add less than normal if necessary.
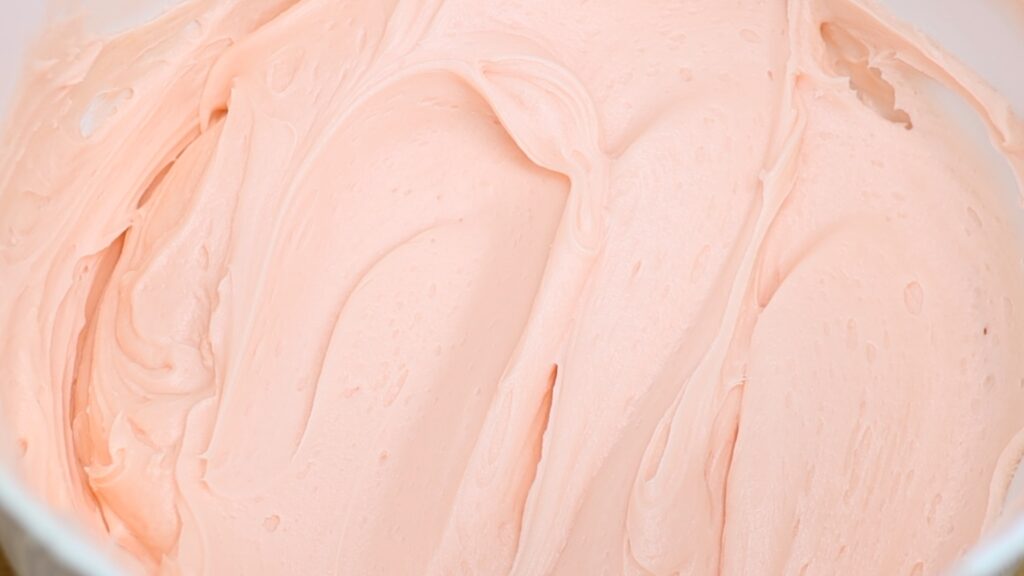
The second thing to keep in mind is that colours develop and darken with time. If you're aiming for a certain shade, mix the colour a little bit lighter than you want it to be. After a few hours it will be significantly darker.
The third thing to beware of is the flavour of food colours. The more you add, the more you'll notice it, typically a bitter taste. To prevent it don't add more than a small squirt of gel to a bowl of buttercream. Then darken it with this method: scoop out a third of the buttercream microwave it for 10 seconds. Mix the runny, melted buttercream back into the main bowl.
The colour of the buttercream will get darker in the microwave. As you mix it back in it will make the whole batch darker. As a bonus side effect, the consistency will transform into absolute perfection!
Let's talk about how to smooth buttercream frosting on a cake. Here are my best tips:
1. Make sure the buttercream is a nice loose consistency that's easy to stir and leaves soft peaks:
2. Spread it diagonally upwards onto the cake to make a lip or wall around the top of the cake. This will give you sharp edges later instead of drooping or domed tops.
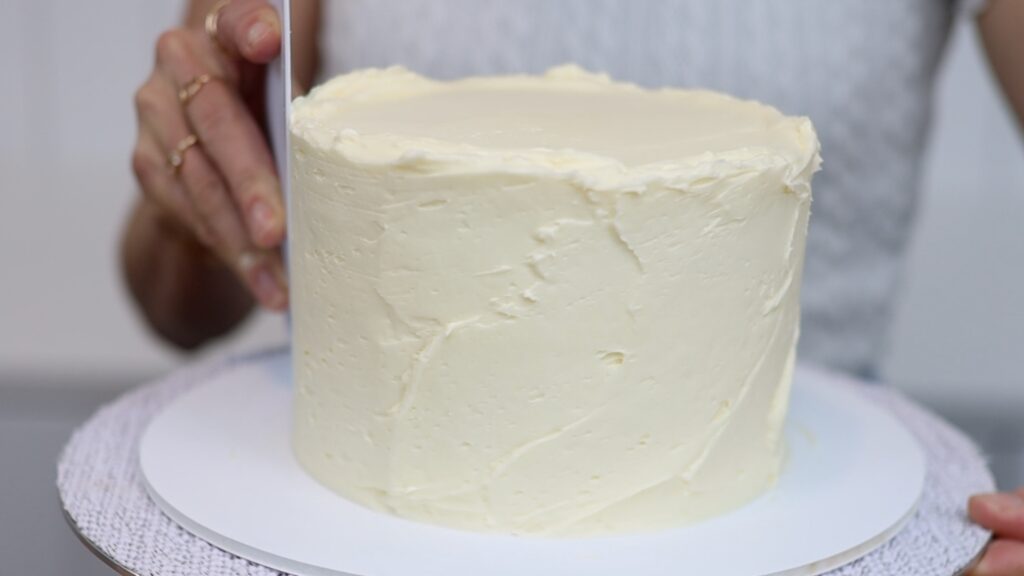
3. Before scraping around the cake with a cake comb, push the base of the comb down on the cake board. This lines the edge up straight against the cake to make straight sides on your cake.
4. Pull long spins on the
5. For the top edge swipe sideways with your
For piping with buttercream the consistency should be fairly stiff so that the details will hold their shape. However, you don't want the buttercream to be too stiff or it will split around the edge of the piping. Also, stiff buttercream is difficult to push out through the piping tip so it will strain your wrist as you pipe. That strain won't give you smooth piping because the buttercream won't come out evenly.
Top tip: if the buttercream gets runnier as you pipe, it's warming up from the warmth of your hands. Put the bag in the freezer for 1 minute and it will stiffen up for neater piping.
Buttercream should always be covered so it's airtight and doesn't dry out and crust. You can keep it in a bowl covered with plastic wrap or a lid or put it in a tupperware or in a Ziploc or sandwich bag.
How long can you store buttercream? At room temperature for 2 to 3 days because the high ratio of sugar to dairy preserves the dairy. It can be refrigerated for 2 weeks or stored in the freezer for 2 months. Take it out of the fridge or freezer the night before you're going to use it so it has time to warm up to room temperature.
I hope these tips have been useful and that you're excited to decorate your next cake! For hundreds of cake decorating techniques and designs visit my cake school. You'll find online courses and also memberships to take your cake decorating to the next level!
You can also watch a video of this tutorial on 5 things you must know about buttercream:
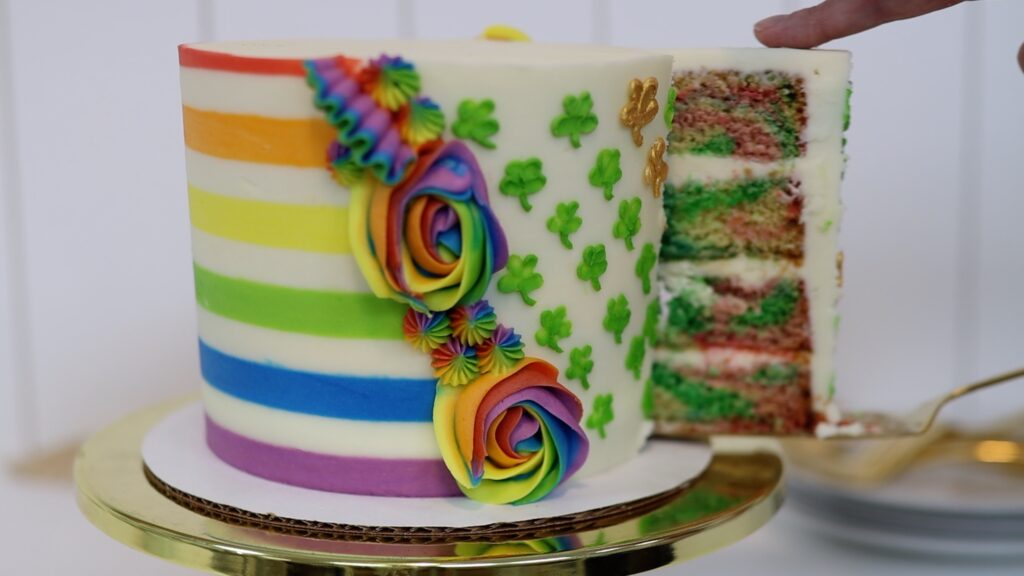
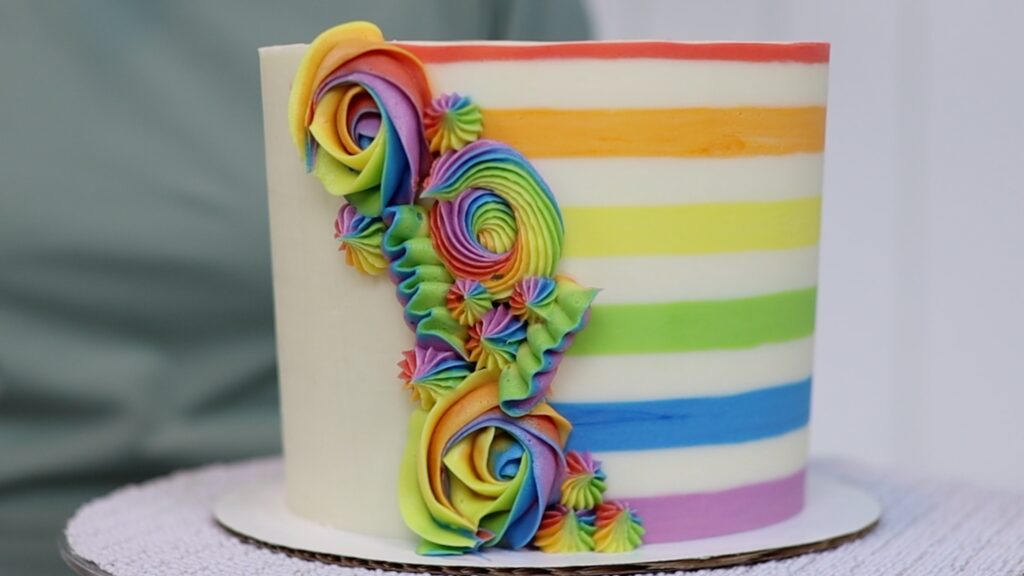
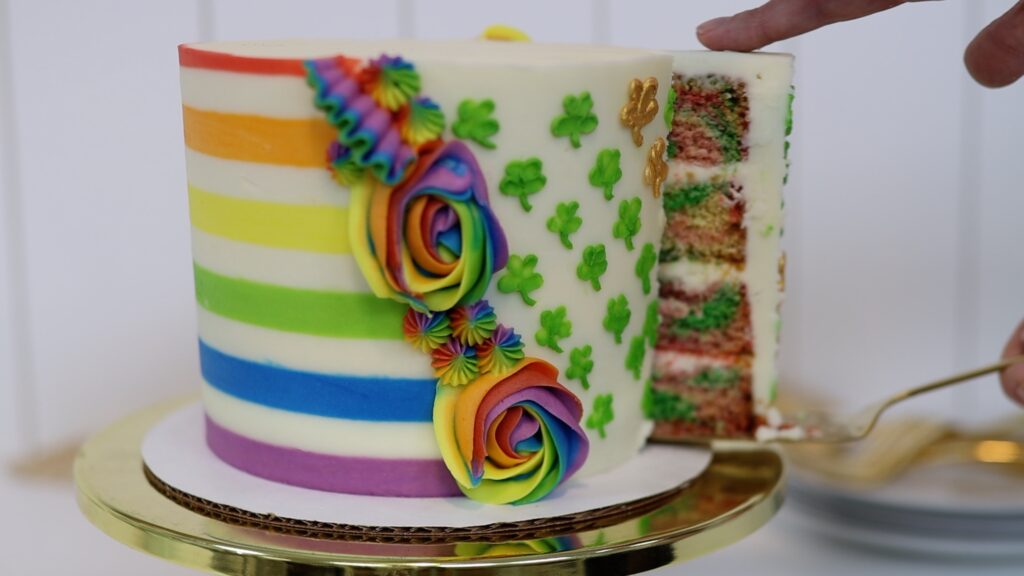
Let's decorate a half stripe cake with rainbow colours and optional gold and green shamrocks! This is a unique, eye-catching cake perfect for St Patrick’s day or any other rainbow themed celebration.
You can use any flavour for the cake layers but rainbow colours makes them more fun to cut into! To do that, I divided my Very Vanilla cake batter between five bowls. Add a drop of gel color to four of them, leaving the last bowl plain. Cut the ends off 5 piping bags and spoon the batter into them.

Then you can pipe the batter in squiggles to make a random, colourful pattern. Tap the pans so that the cakes are level before putting them in the oven. As they bake, the edges will darken like they always do but the insides will be bright and beautiful!
I like to chill my cake layers after they cool so that they’re less crumbly. This makes the next few steps much easier and neater. Thirty minutes in the freezer is enough time for them to firm up but they’ll come back to room temperature and get nice and soft again before you eat the cake.
Assemble your cake by alternating the cake layers with whatever filling you choose. Next, cover the cake in a crumb coat, which traps any crumbs that come off the cake. This is my 4 Minute Buttercream.

Piping the frosting onto the cake is quicker than spreading it straight on. Then spread the piped frosting around the cake and you’ll pull off fewer crumbs this way. Chill the crumb coated cake in the fridge for 30 minutes or the freezer for 15 minutes. This will set the crumb coat before adding your next layer of frosting.
Spread another layer of frosting generously onto your cake. Scrape around the cake a few times with a cake comb so that the sides are straight and fairly smooth. Then switch to a striped cake comb. You need quite a thick layer of frosting for stripes, at least as thick as the grooves of your striped cake comb. If your frosting is too thin, the grooves on the comb will dig through this frosting and into the crumb coat.

Keep scraping until your stripe grooves are very neat, with smooth edges. Don’t worry about the top edge of the frosting yet. Put the cake in the freezer for 15 minutes to set these stripes and meanwhile, prepare the colours for the rest of the stripes.
Here’s a hack for rainbow colours that you can mix in just one bowl without washing the bowl in between colours. Start with yellow and after scooping that out and into a piping bag you’ll continue in this order:
This obviously isn’t the order of the colours in the rainbow. The reason for this order is that the leftovers of each colour in the bowl can blend together with the next colour without muddying that colour. For example, leftover orange mixed into red is fine and leftover red mixed into purple is fine. You'll end up with bright colours even though they’ve all been prepare in the same dirty bowl! (Well, not dirty, just not washed and dried in between colours!) To make half-stripes you’ll need a piping bag with plain white buttercream in it, too.
Take your cake out of the freezer and use your cake comb to score a diagonal line into the cake. Spin the cake around and score another one on the other side of the cake. These lines will divide the cake in half.
Pipe the white buttercream into the striped grooves on one half, between the two scored lines.
Then scrape around the cake with a straight edged cake comb. You'll push this buttercream all the way into the grooves to fill them. You'll also take off the excess with your comb. Scrape in both directions so that the ends of the stripes don’t drag into the other half the cake. If there are any indents or air pockets, spread more buttercream over those areas and scrape again. Scrape until you’ve left a smooth surface behind. The stripes will blend into each other to make a solid white half of the cake.
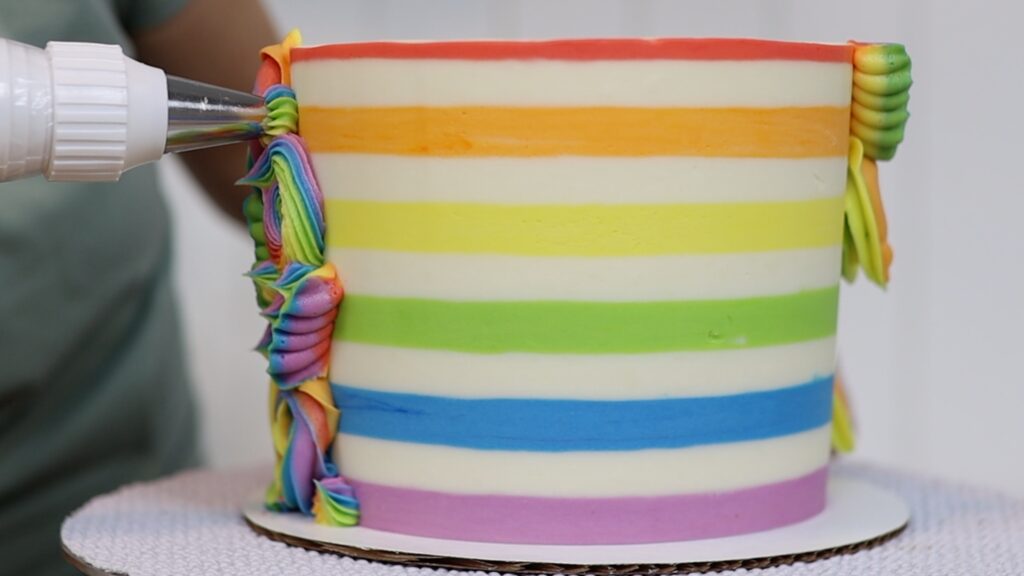
Now use your rainbow colours on the other half. Follow the same technique of piping and then scraping, scraping, scraping, in both directions.
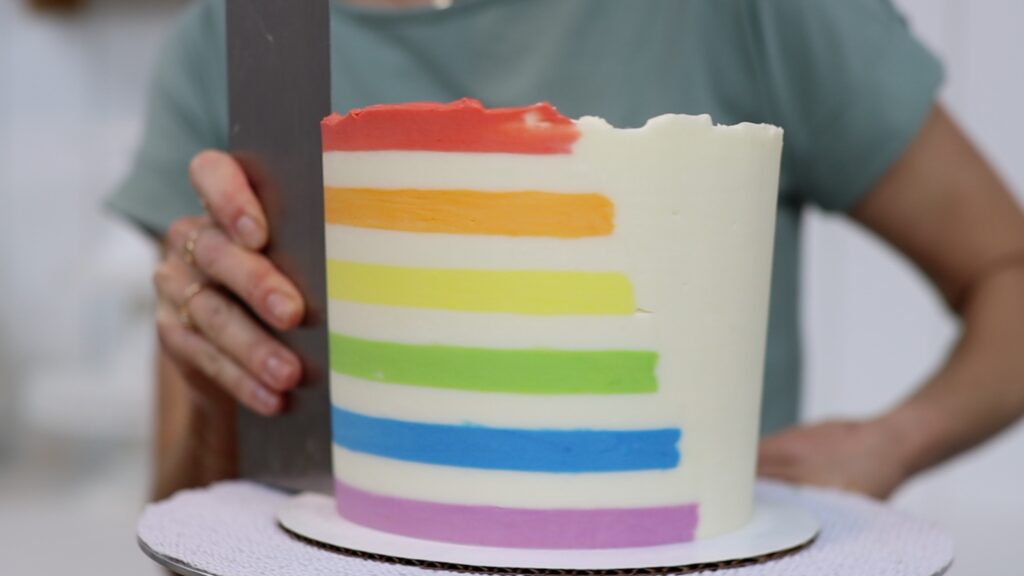
When the stripes are smooth they'll lie flat against the white stripes, as if they're painted onto the cake.
Put the cake back into the freezer for 2 minutes while you fill a glass with hot water. Dip a sharp knife into the hot water and take your cake out of the freezer. Cut around the top edge to take off the buttercream that’s sticking up, leaving a smooth, straight, sharp edge.
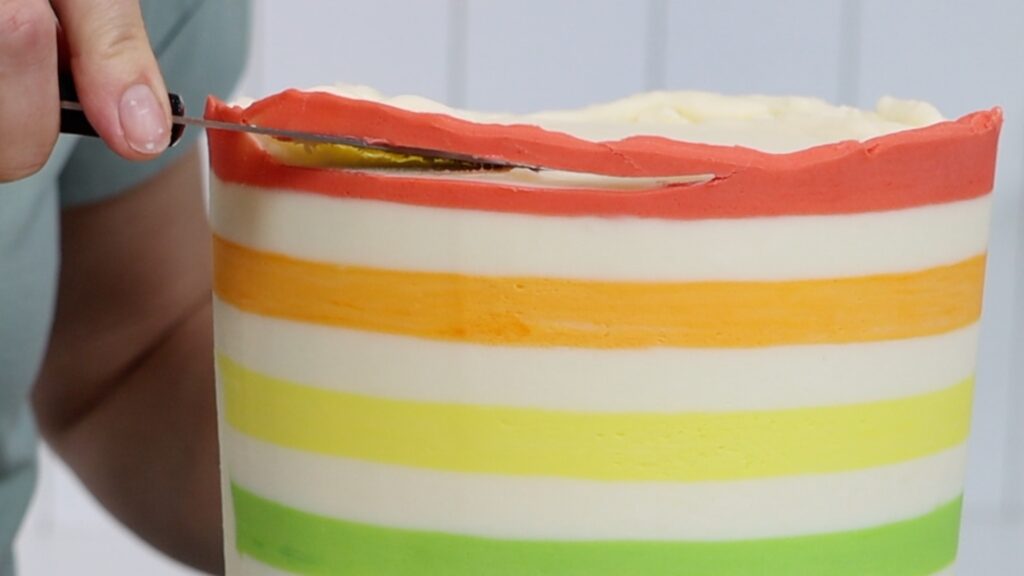
My top stripe is too thin. I should have made my filling thicker to add some height to the cake or baked another cake layer. Oh well!
To cover up the join of the two halves of the cake, spread out a piece of cling film on the counter. Pipe the leftovers of your coloured buttercream onto it in rainbow order.
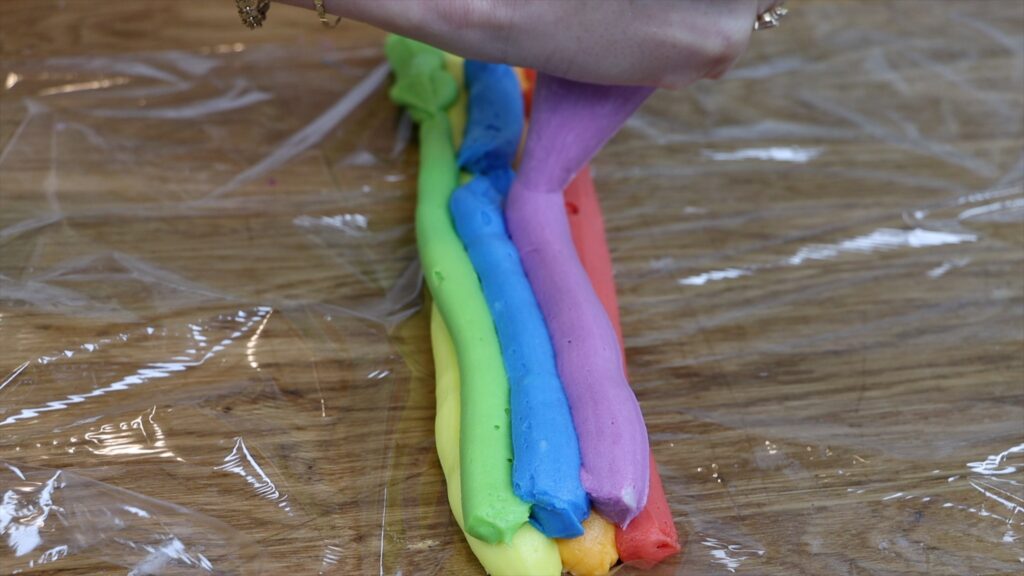
Roll the colours tightly to make a log and cut one end off so that the colours are right up against the edge.
If you want to use several piping tips, you’ll need a coupler in your piping bag. If not, drop your chosen piping tip down into the piping bag. Now lower the cut side of the log of rainbow buttercream down into the piping bag.
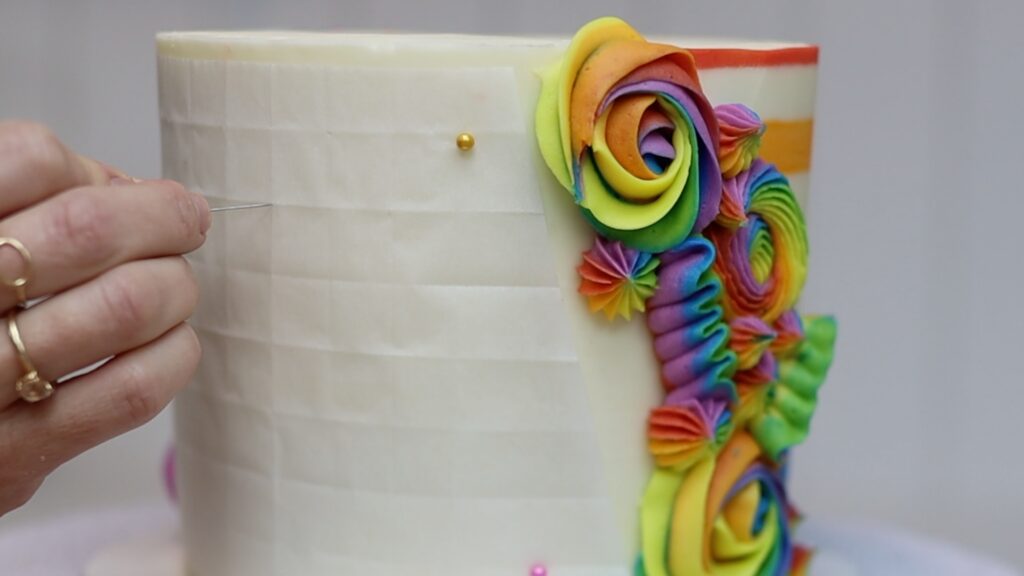
If you’re using a coupler you can use various piping tips to add different textures. I’m starting with these swirls or spirals which I’m piping with a 1M star tip:
Then unscrew the coupler ring and switch to another piping tip and screw that on. I’m piping these ruffly ribbons next, with a #125 petal tip:
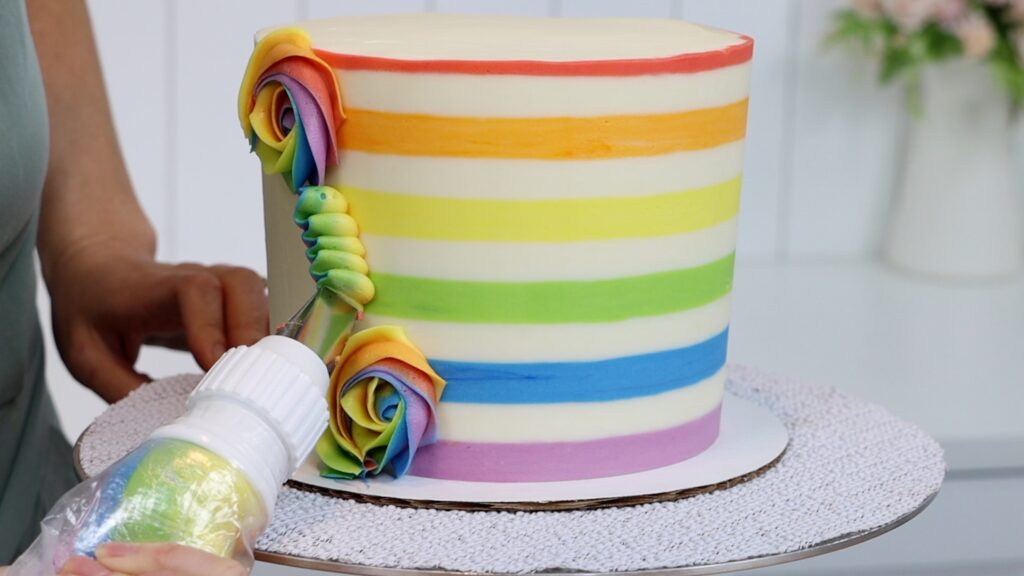
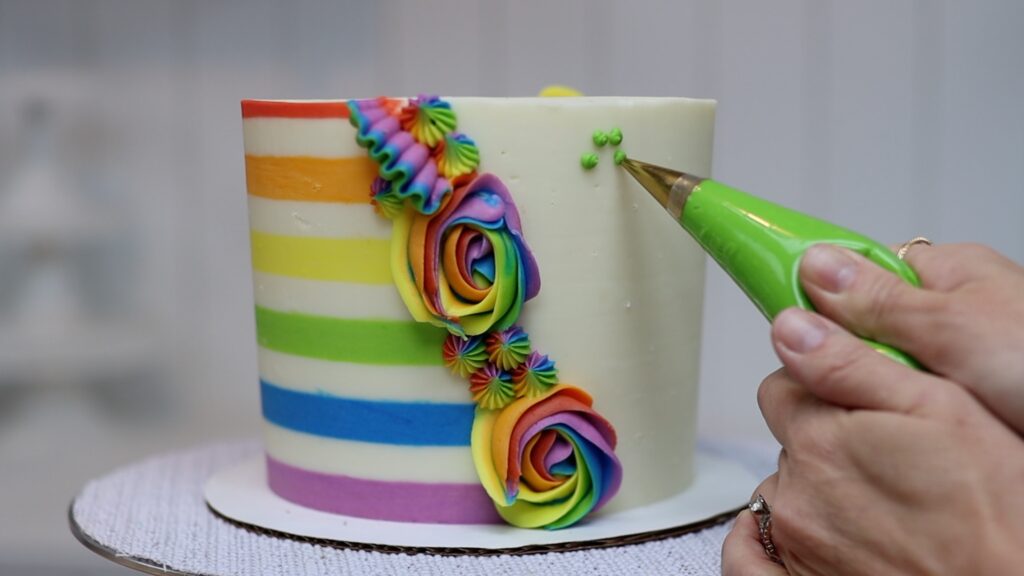
Rosettes are great to add last to fill in any gaps. This is a 4B open star tip. They can also be used to widen the band of piping anywhere you think it needs it.
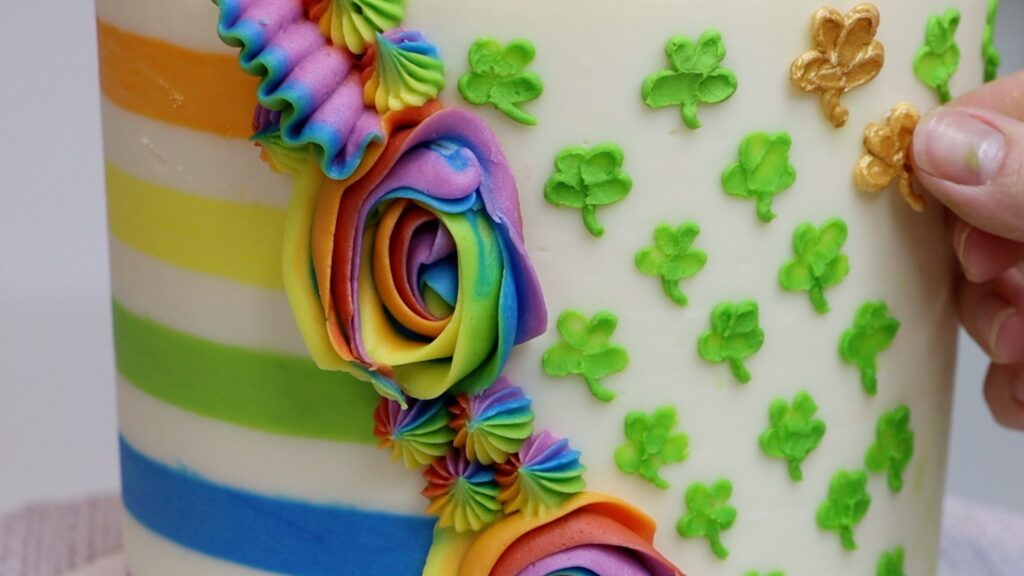
Stop at this point for a rainbow cake or for St Patrick's Day, add these fun shamrocks! Put the cake in the fridge and pipe a few shamrocks onto a piece of parchment paper or wax paper. Pipe a dot using a small round tip like a #4 and drag with your piping tip to make a teardrop shape. You can spread the dot gently with an
Squeeze the dot out for a few moments to make it bulge. This will give you more frosting to drag out next. Add a stem with the same piping tip.
After finishing the cake I googled shamrocks and clovers to find out the difference and wouldn’t you know, shamrocks are only supposed to have three leaves! If you make three-leaf shamrocks yours will be even quicker to pipe, with one less leaf on each!
Piping onto paper is great practice before piping onto the side of the cake, which is a bit trickier! And you’ll turn these into gold shamrocks in a few minutes.
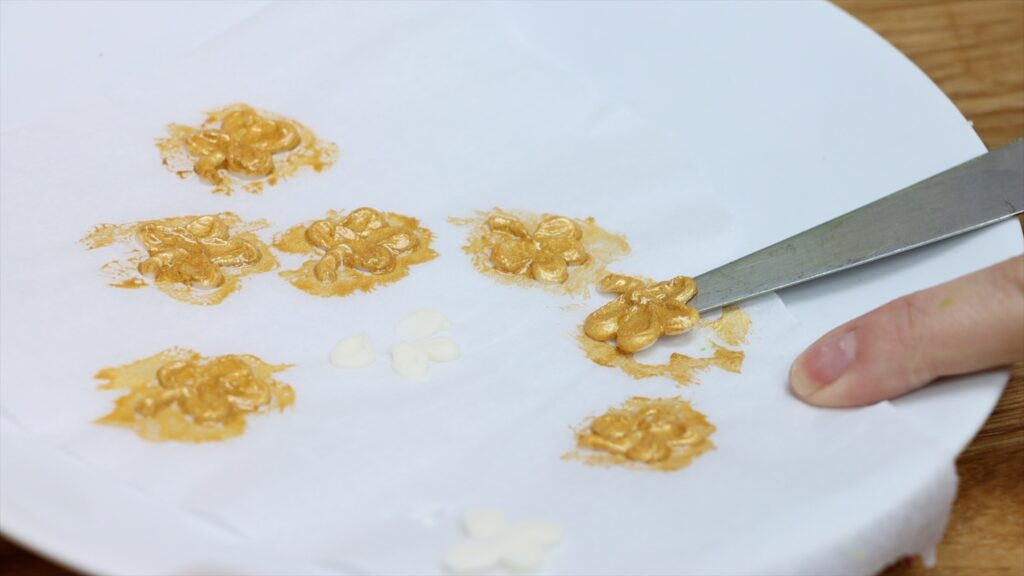
Put these into the freezer while you make some gold paint. You can do this by mixing gold luster dust with a few drops of any clear alcohol like vodka, or a clear flavor extract like clear vanilla. You can also buy edible gold paint in bottles instead.

Take the frozen shamrocks out of the freezer and paint each one. Use little dabbing motions for the thickest coverage which will give you the strongest, most metallic gold colour. Put these back into the freezer for a few minutes to set the colour.
Measure a piece of parchment paper or wax paper so it will wrap around the white half of the cake. Marking the diagonal onto it will make it easier, so that your piping won’t get in the way. Cut those diagonal ends off now.
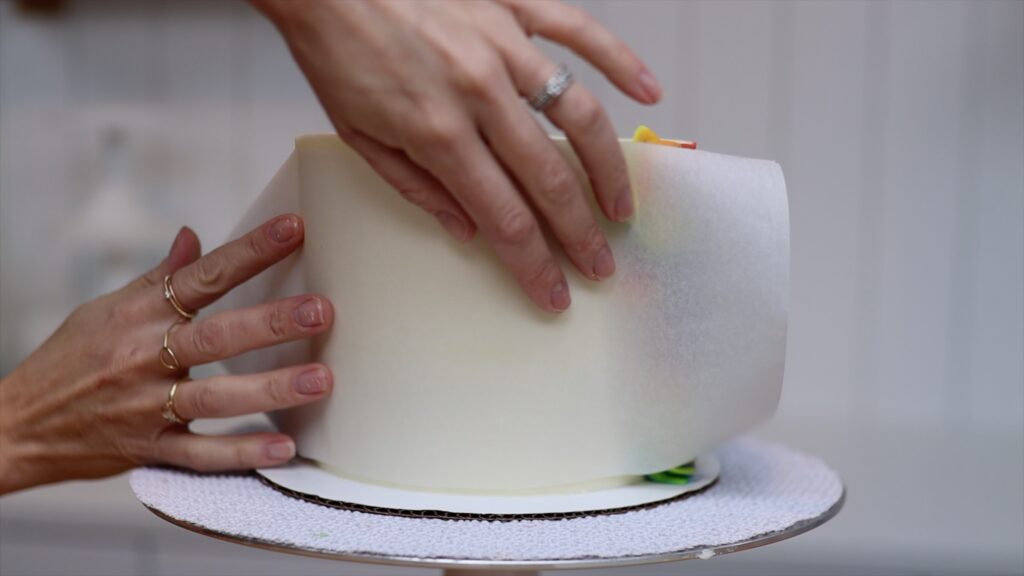
Fold the paper in half and in half again and again and again. Then unfold it and do the same in the other direction to make a grid.
Take your cake out of the fridge and the piping should have set, so you won’t damage it. Wrap your paper grid around the cake and pin it in place.
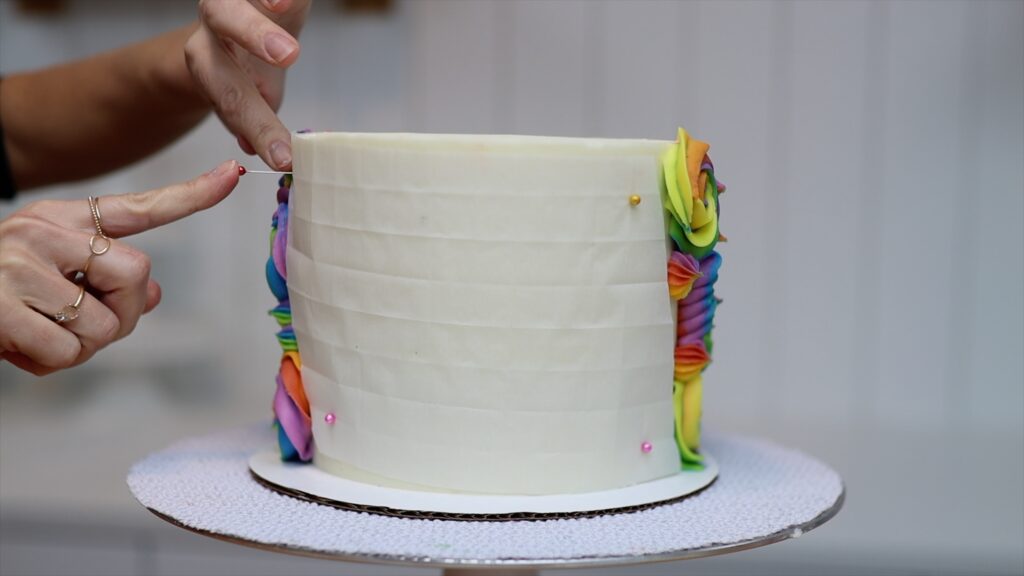
Then use another pin to poke through every other join in the grid along one row. For the next row, poke through every OTHER other join or crease, so that the places you’re poking are not one above the other. These dots you’re poking will guide you as you pipe your shamrocks.
Unpin the paper grid and peel it off the cake. You should be able to see the holes you poked into the frosting. Next, pipe pipe green shamrocks onto the cake using the same technique as you did onto paper earlier. Cover all of the dots you poked into the cake except for one diagonal, which you'll cover with gold shamrocks next.
Pipe a tiny white dot of frosting onto those poked dots along the empty diagonal. Then pick up a gold shamrock by sliding an
Press the frozen gold shamrock gently into the buttercream dot you've just piped. Continue along that diagonal to fill it with the gold shamrocks. Work quickly because as the buttercream shamrocks thaw, they'll get soft and you won't be able to pick them up.
I love adding edible gold to cakes because it’s so expected!
This is such a fun cake and the diagonal divide is so eye-catching! I teach hundreds of cake decorating techniques and designs like this one on my cake school. You can take individual courses or choose a membership for access to all of my courses, live sessions, and more!
You can also watch a video of this tutorial on how to make a rainbow half stripe cake:
Piping bags are useful to save time when you're cake decorating, even without piping tips! Here are ten ways to use them.
Pour sprinkles into a piping bag and cut a small piece off the tip of the bag. Put a tray on a
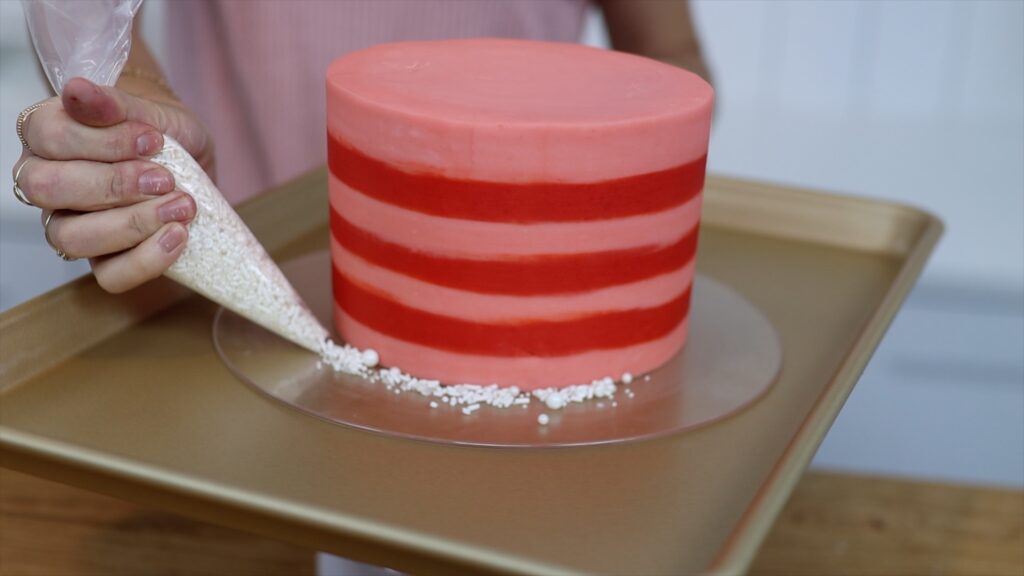
Tapping the bag on the cake board will loosen any sprinkles that clog the bag. Now use an offset spatula or a spoon or your hand to scoop up the sprinkles and press them into the cake. The tray will catch any sprinkles that roll off the cakeboard so they don't go everywhere!
At the end you can angle the cake board and tap it so that loose sprinkles fall onto the tray. With the help of a piping bag you've made a a pretty sprinkled border! Here's a tutorial with more ways to use sprinkles to decorate cakes!
Use piping bags to make chocolate details to decorate your cakes. Melt chocolate in the microwave for 30 seconds at 50% power so it doesn't overheat. To colour it use oil-based colours so that the chocolate doesn't seize.
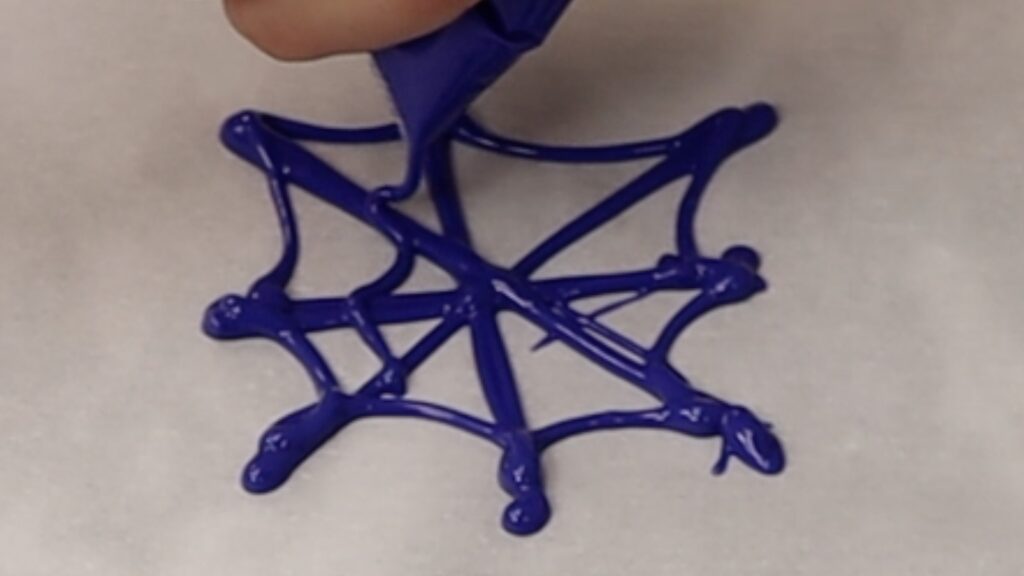
Spoon the melted chocolate into a piping bag or a sandwich bag like a Ziploc bag. Cut a tiny piece off the tip to squeeze the chocolate through. Squeeze the bag to pipe the chocolate onto a piece of parchment paper or wax paper or baking paper or a silicon mat. You can trace shapes or designs or pipe them freehand.
You could leave the chocolate to set at room temperature but it takes about 30 minutes. For a quicker option, slide a cutting board or upside down baking tray underneath the paper. Then lift the tray with the paper and chocolate decorations on it. Put it in the fridge or freezer for 5-10 minutes.
When the chocolate has set you can lift it up with your fingers or slide an
Pipe elaborate patterns and designs using just piping bags with no piping tips! Start by cutting a tiny piece cut off the end of each piping bag. The more you cut off the bigger your dots will be. It's a good idea to do a test squeeze before piping onto your cake. If you have to use a lot of pressure to get the buttercream out, cut the hole bigger. When you can push the buttercream out easily, your dots will be neater.
Hold your piping bag at the same angle as you pipe so that you're always pulling away from the cake. That way, the little peaks on the dots will all point in the same direction.
Use piping bags for a foolproof drip on cakes. Heat about a quarter of a cup of heavy whipping cream in the microwave for 20 seconds. Then add 3/4 of a cup of white chocolate chips, pushing them underneath the cream.
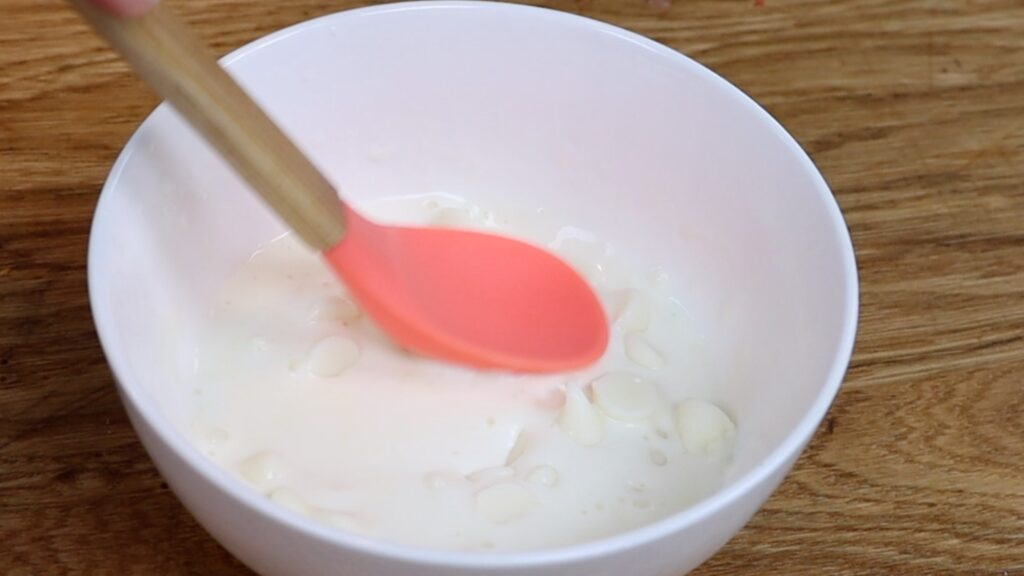
Leave it to melt for 5 minutes and then stir until it's smooth. To tint it, oil-based colours are best because you can add as much as you like to make bright colours. If you only have gel colours used for buttercream, use just a few drops so the chocolate doesn't seize. When the drip cools to room temperature, pour it into a piping bag and cut a tiny piece off the tip.
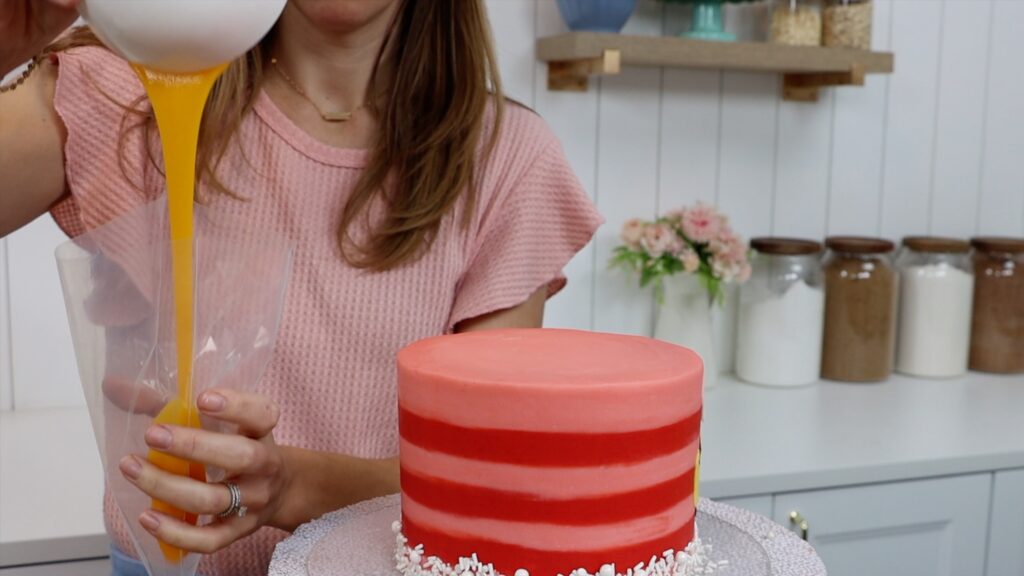
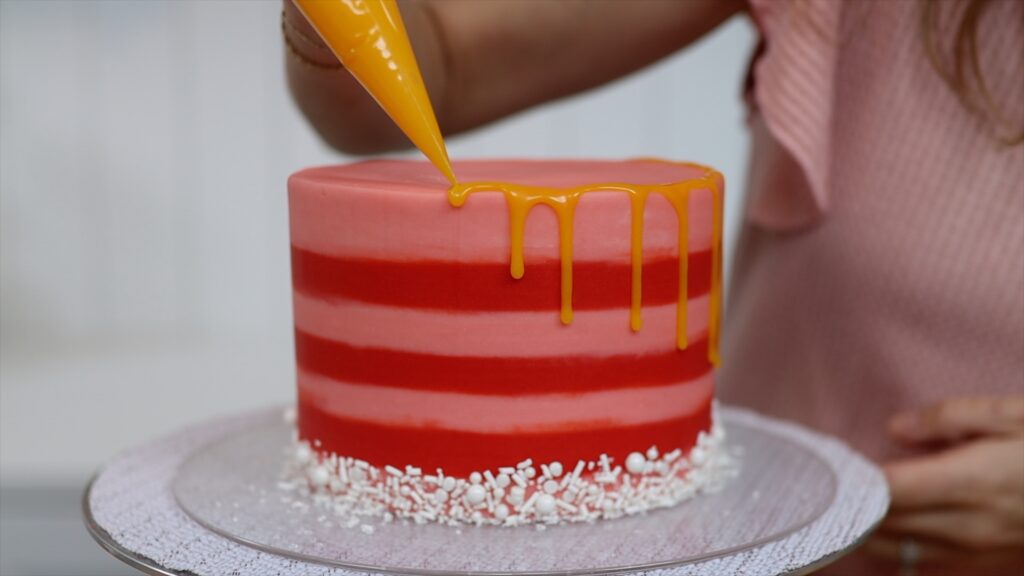
To apply the drip, pull the piping bag slowly around the outer edge of the cake. Pause and move it just over the edge of the cake to allow each drip to spill over. This is the fastest drip you can apply without any special tools!
It's no surprise that piping bags are time-saving for piping! Fill cakes quickly by piping around the edge of each cake layer and spiraling inwards:
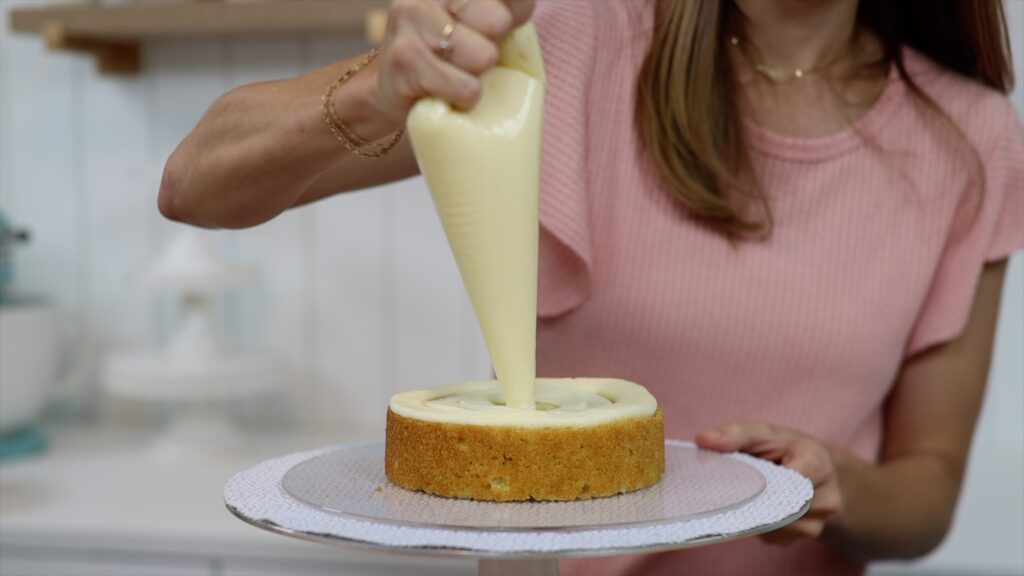
For frosting, pipe onto the top of the cake and then in zigzags around the cake. By piping the frosting on first, when you spread it it won't pull off crumbs or chunks of cake.
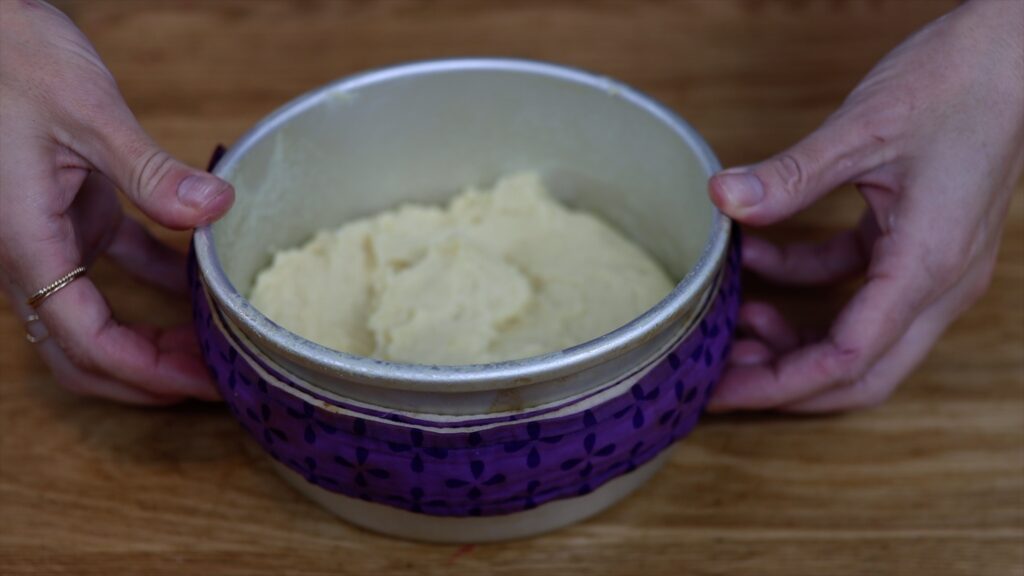
You can also pipe cake batter! This is really useful for quickly filling cupcake pans without getting batter all over the pan. Tint and pipe cake batter to make unique, colourful cake layers:
Make sure you tap the cake pans so that the cakes bake as level as possible. The outer edge will darken as it bakes but the colours inside will stay bright. Cutting into a cake like this is so much fun!

Make scallops by piping dots of frosting onto a cake with piping bags. Then swipe them upwards or sideways to flatten and spread them. The trick here is to wipe your
You can use a spoon for this technique instead if you prefer. By covering the cake with these scallops you can create colourful texture quickly and without any special tools.
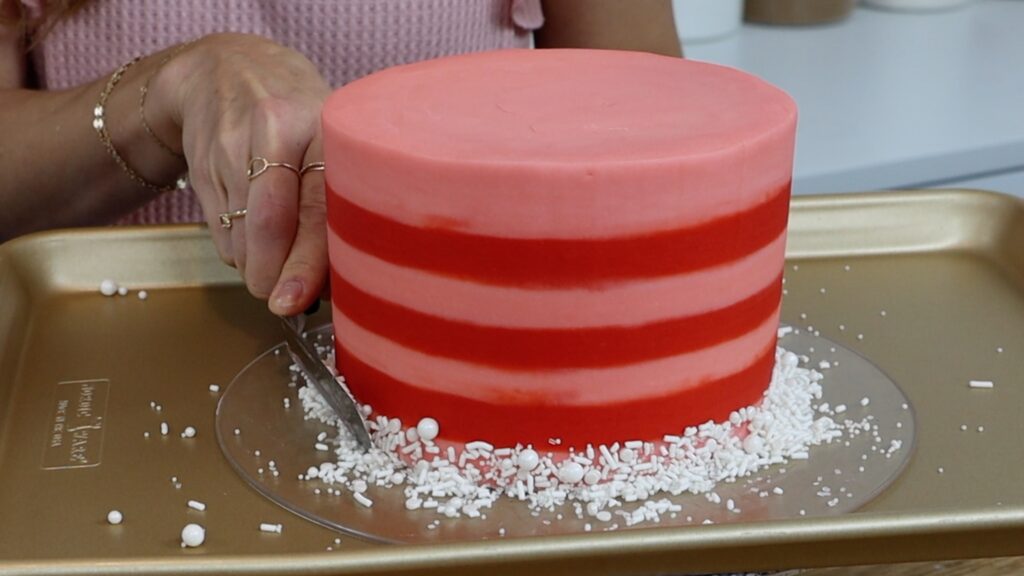
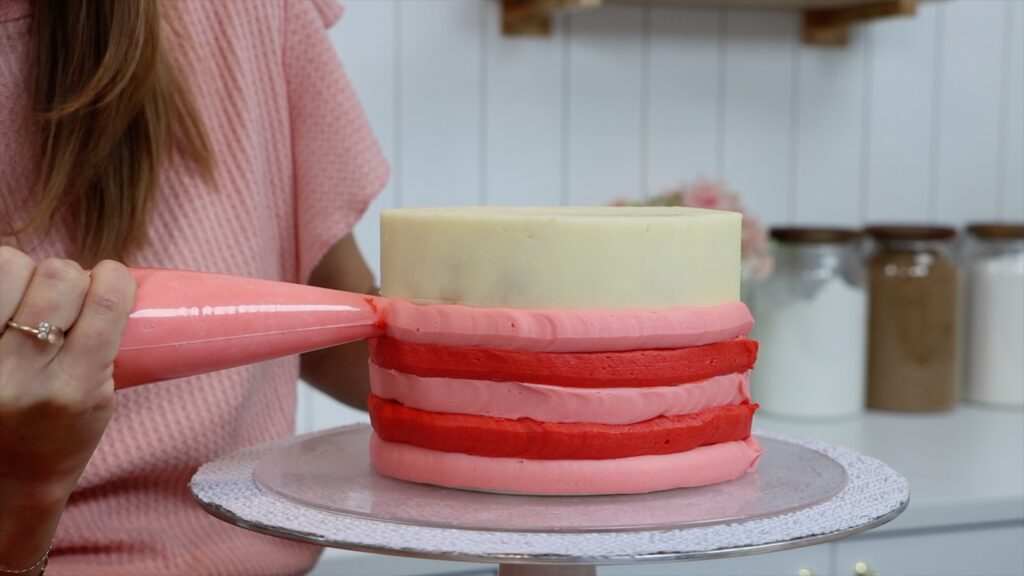
To create striped frosting without a striped cake comb, use a piping bag for each colour. Cut the ends off together so that the holes at the ends of the bags are exactly the same size. This way your stripes will all be the same width… or height I guess!
Squeeze to pipe a ring around the cake. You'll flatten the rings later to make stripes. Continue up the cake, trying to pipe each ring so that it's right against the one below so that there aren't any gaps where you can see the crumb coat of frosting underneath. This will give you the straightest stripes with the most precise division between the colours. If there are any gaps, the colours will blend together where the stripes meet.
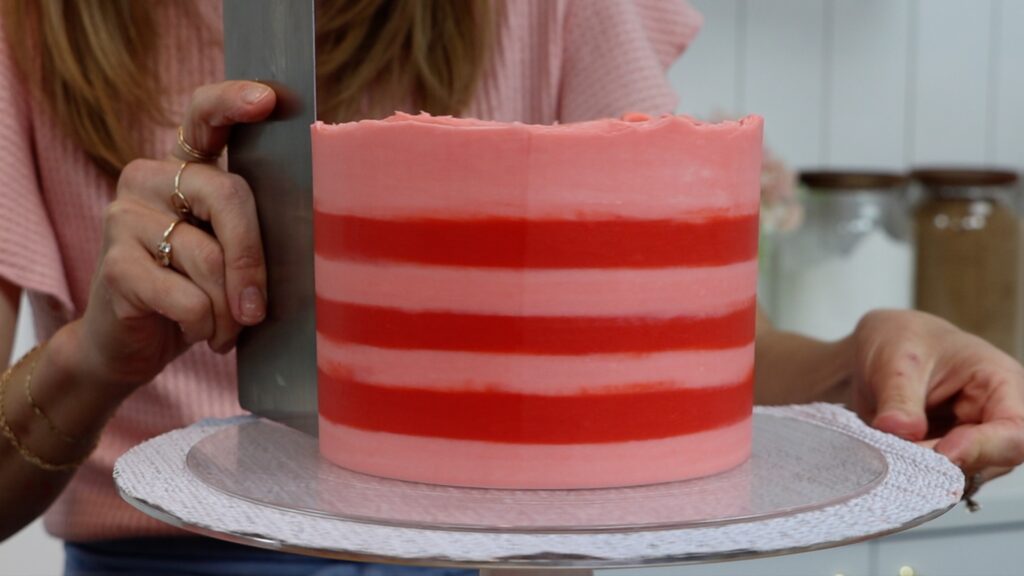
Scrape around the sides of the cakes several times with a straight edged cake comb. You'll take off the excess frosting and although the stripes won't be perfect, they'll be neat and pretty. It's much quicker and simpler to do striped frosting this way than to use a striped cake comb.
If you do have a striped cake comb, use piping bags to fill in the grooves between the stripes created by the cake comb.
Using piping bags is quick, which is key when you're making a striped cake because of temperature. The cake is cold because you have to chill it after using the striped cake comb. That means that now, you need to work fast! You don't want this buttercream between the grooves to chill and set before you scrape off the excess. Piping bags allow you to add these colours quickly so that you can achieve smooth stripes. Check out this tutorial on how to make these rainbow half stripes!
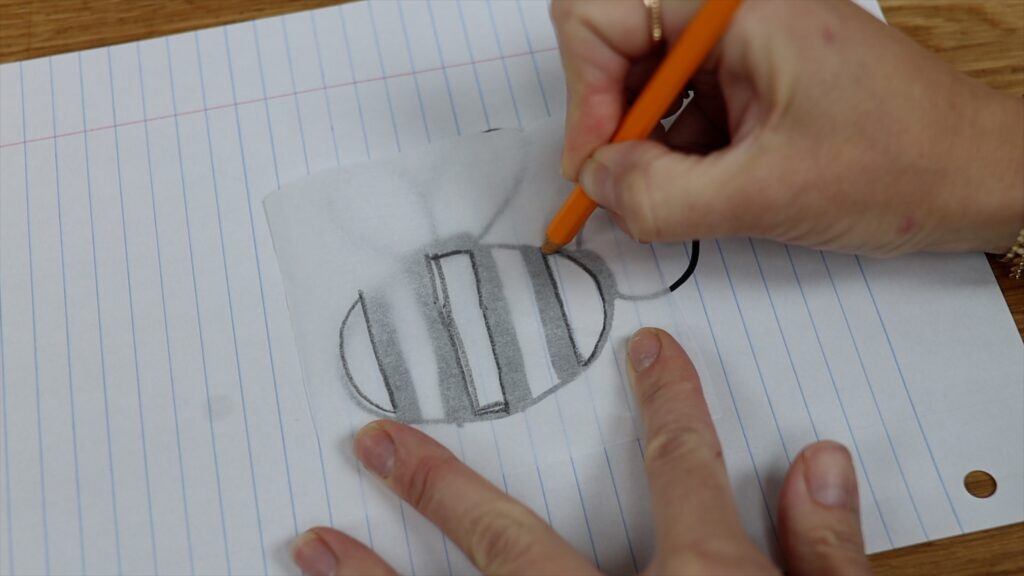
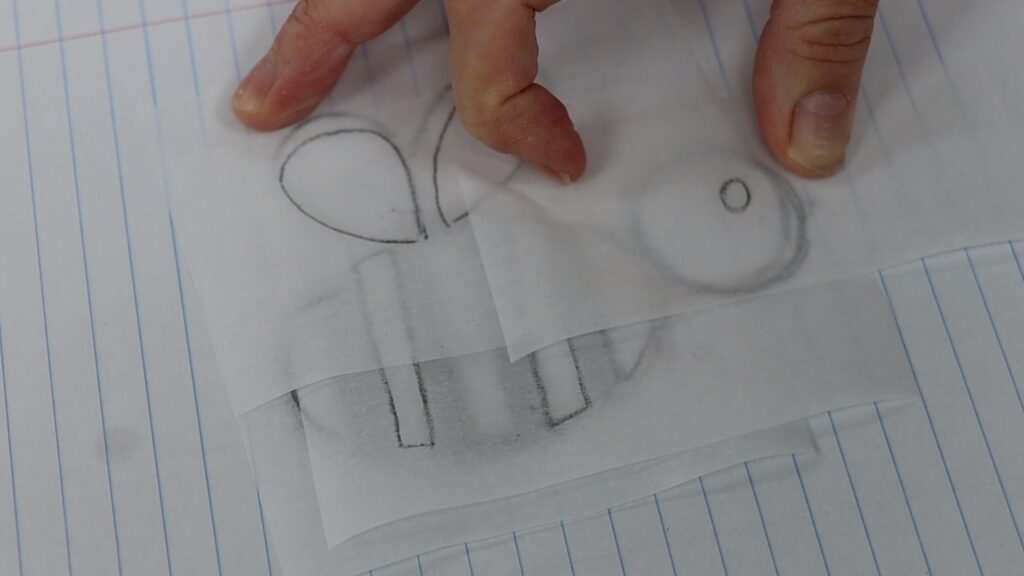
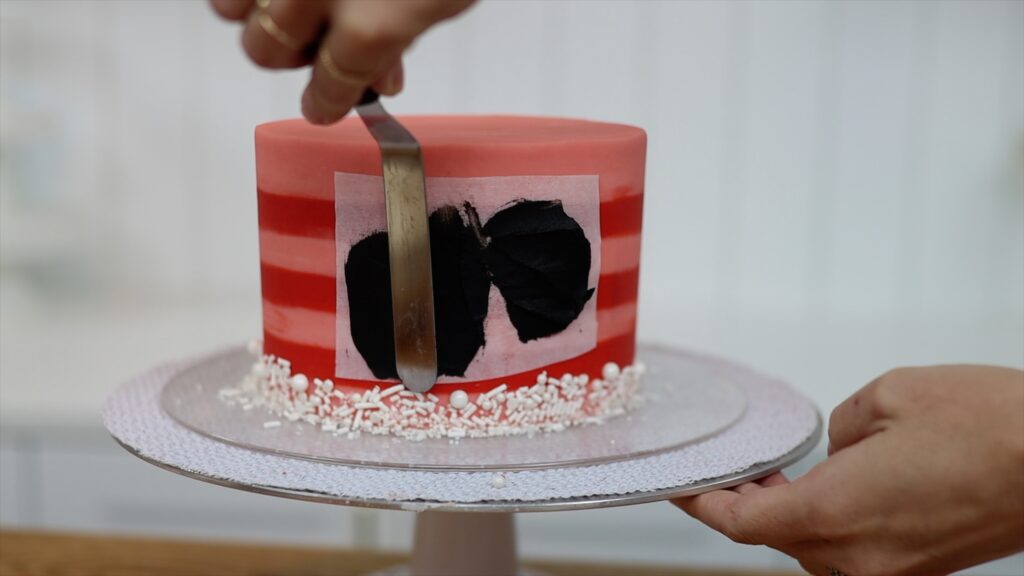
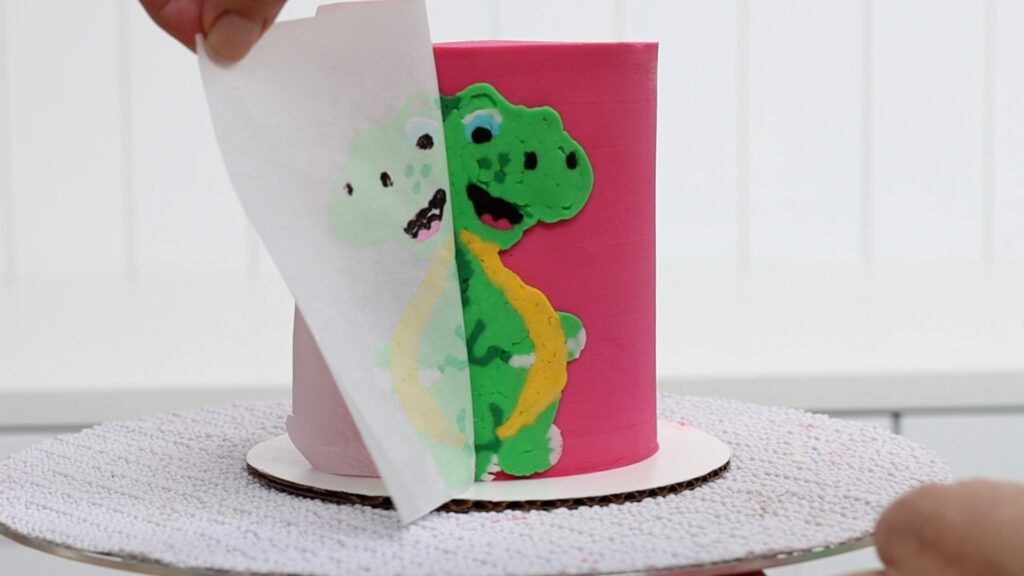
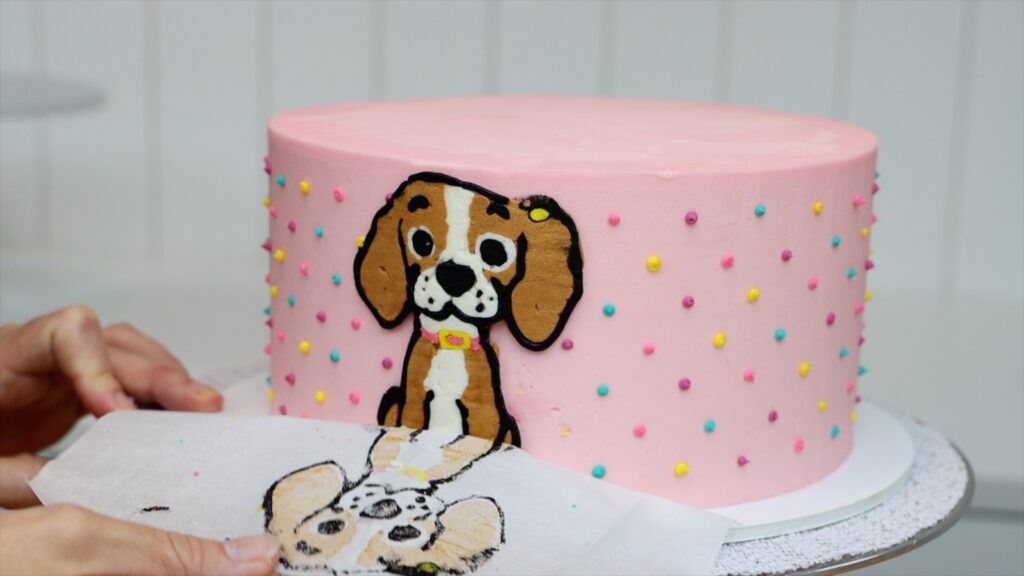
Use piping bags to make detailed characters that look like they're made with fondant. Pipe or draw your character and cover it with parchment paper or wax paper. Now trace it with buttercream in piping bags with a tiny piece of the tip cut off. Start with the small details and freeze for 5 minutes after each colour.
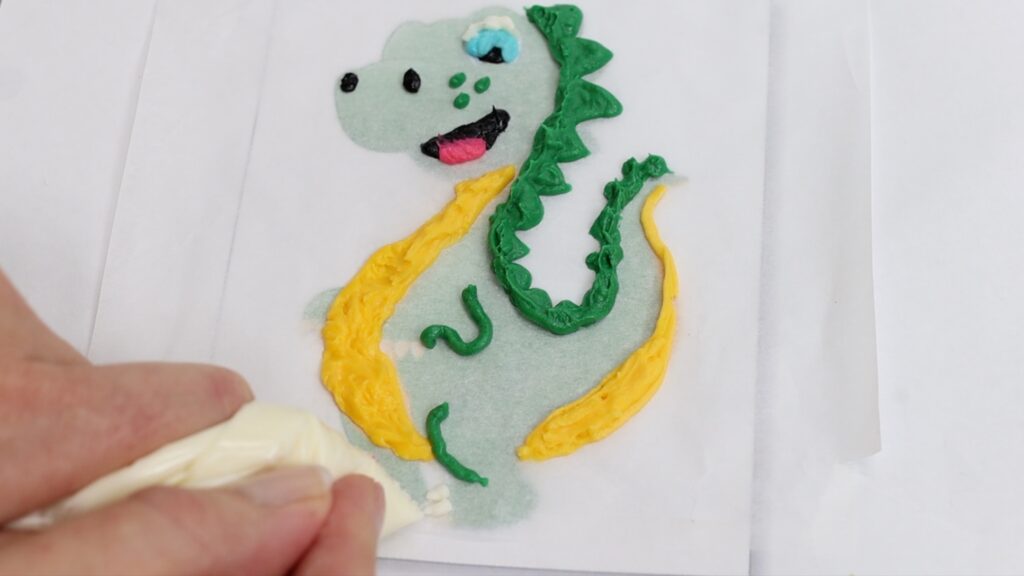
Leave the colour with the biggest surface until the end. Spread that colour flat to cover up the frozen details so that they're sticky.
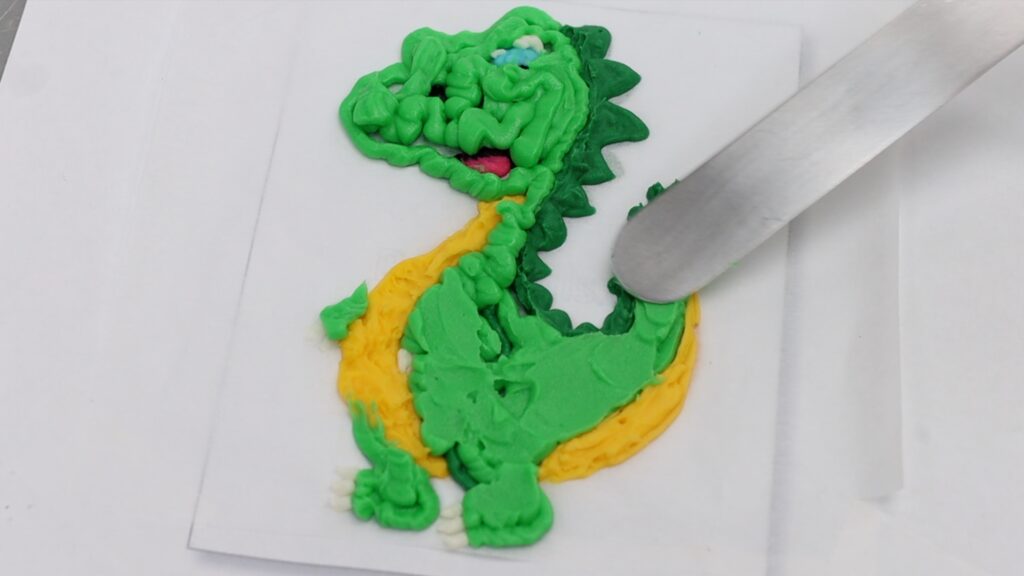
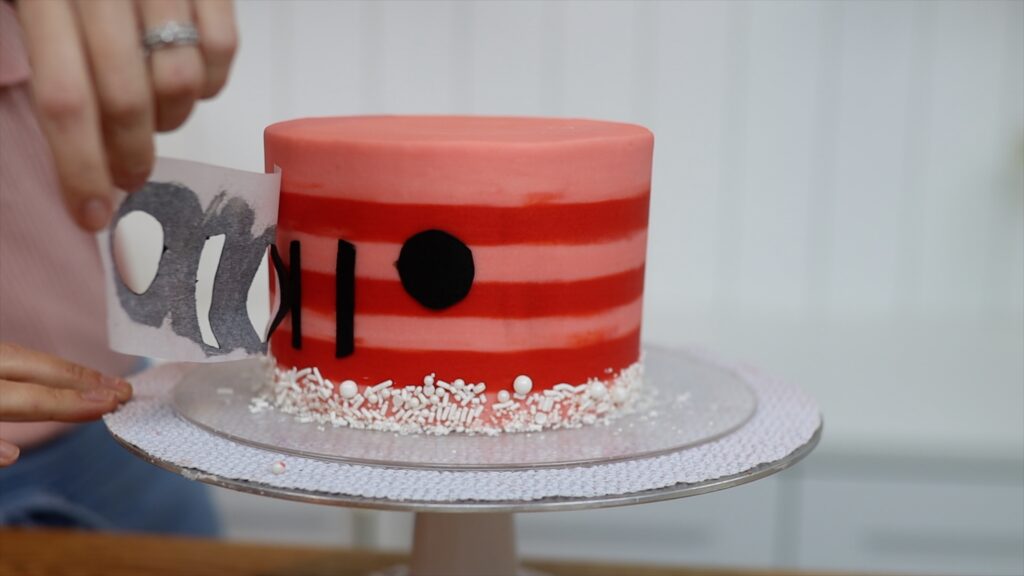
Lift the paper up and press it against a chilled cake so that it sticks. Put the cake into the freezer for 15 minutes or the fridge for an hour and then peel the paper off to leave the design behind.
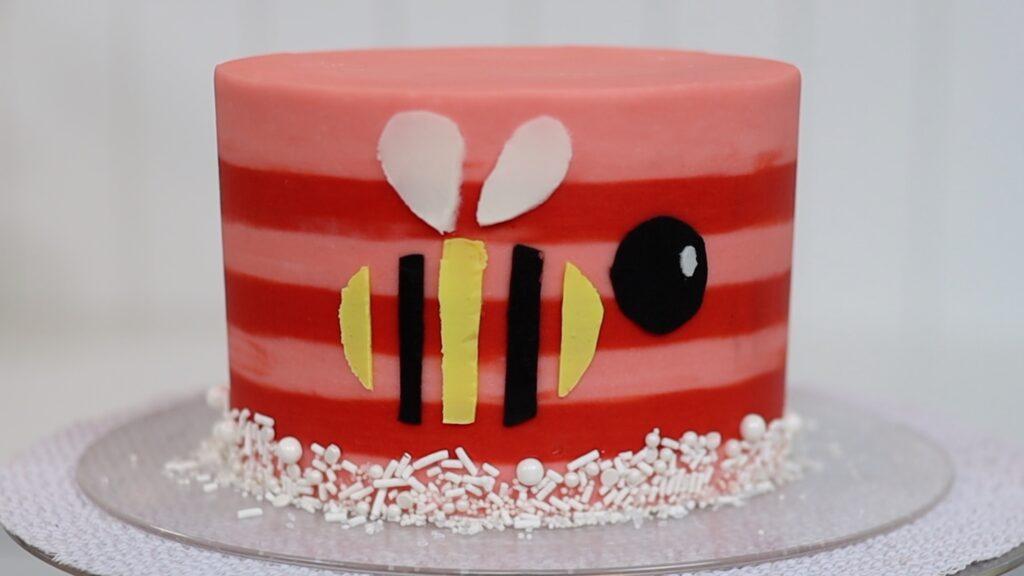
You can pipe or spread more buttercream over any air pockets to fill them in. Then scrape off the excess to leave a neat, detailed character on your cake! Here's another example:
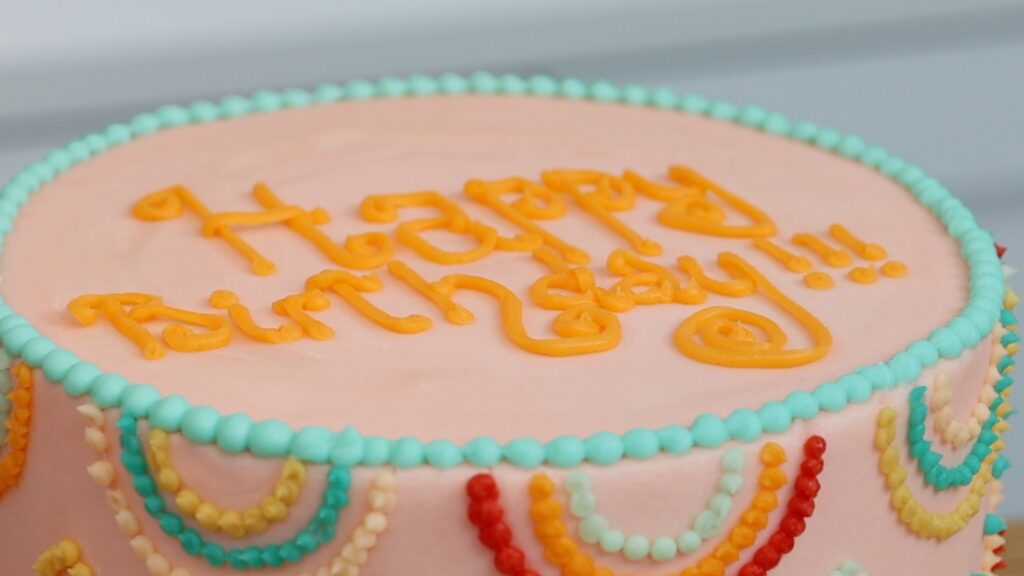
To write a message on a cake all you need is a piping bag with a tiny piece cut off the tip. The easiest way to write neatly (I think) is to use loops and swirls in your letters. Also, add a dot at the end of each line by holding still for a moment as you squeeze before lifting the piping bag away. That dot makes the line look more tidy than just pulling away suddenly.
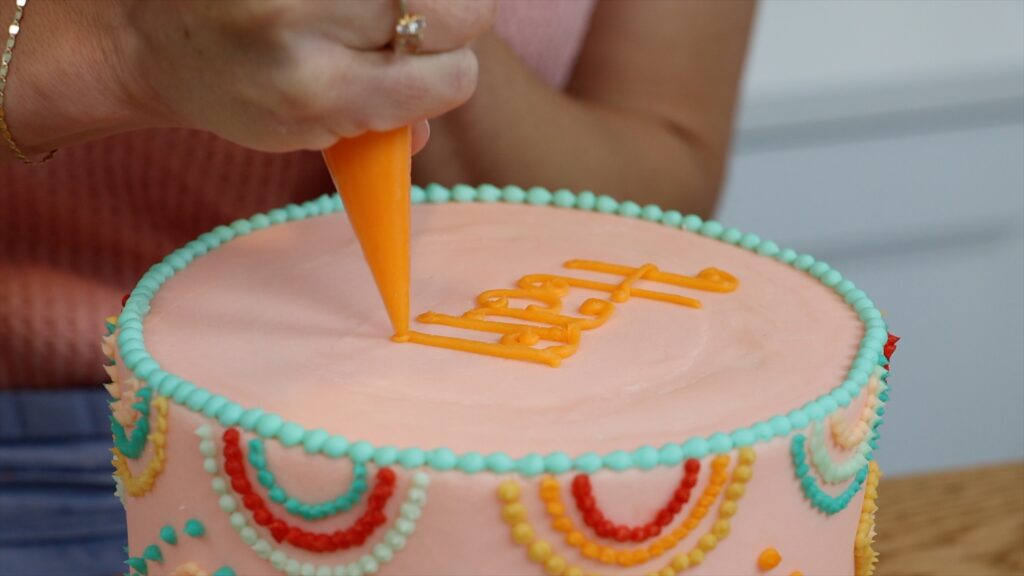
Center your messages by starting with the middle letter and working your way out in both directions. Another method is to write your message on paper first to see how much space it will take up.
I hope this tutorial has been useful. For more cake decorating techniques, tips and tricks, visit my cake school and start your 7 day FREE trial of my All You Can Cake membership, which gives you access to everything on my cake school.
You can also watch a video of this tutorial on 10 cake hacks with piping bags:
Here are three ways to make a heart cake without a heart pan! This tutorial will show how to bake, assemble, frost and decorate a heart cake.
The first way to make a heart cake is to cut a round cake into a heart. Trace around your cake layers onto a piece of paper before drawing a heart template. You can trace around the cake pan you used to bake the layers instead.

Fold the paper in half and draw half of a heart. This way when you cut the heart out it will be perfectly symmetrical. You’ll this heart as a guide to cut your cake into a heart.
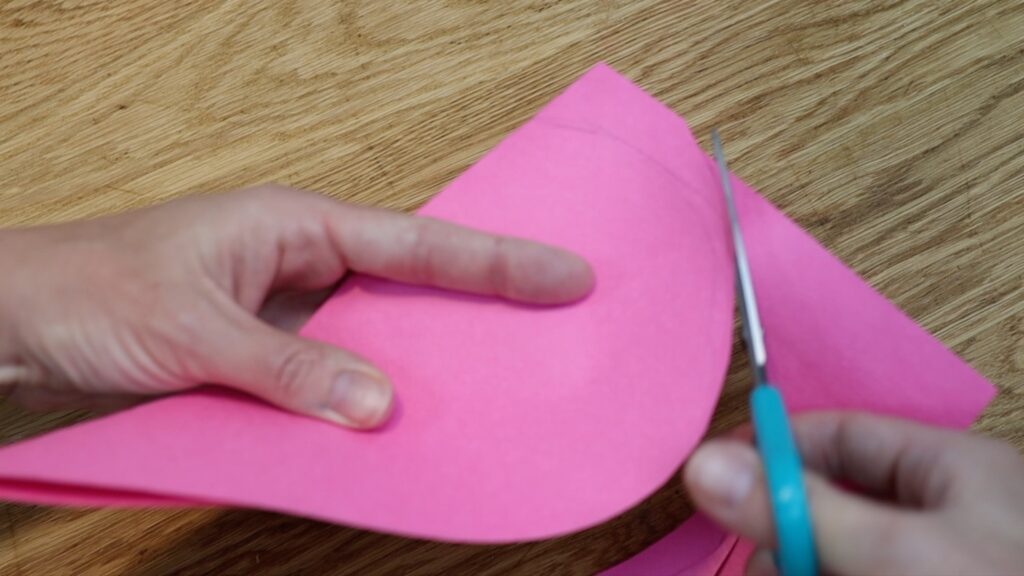
For the neatest results, chill your cake in the fridge for 30 minutes or the freezer for 15 minutes. Cold cake is less crumbly and will be easier to cut. Trim around the heart with a serrated knife like a bread knife using little sawing motions.

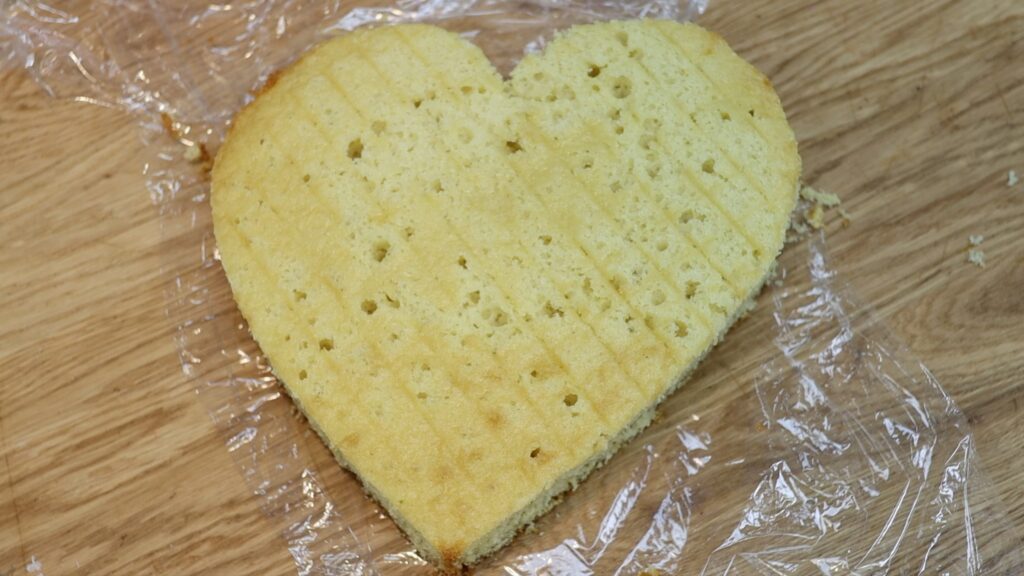
When you pull the cutoffs away you’ll leave a heart shaped cake behind!
If you're making a layer cake, cut each layer separately. If you stack them and then cut, the layers can stick together and you're more likely to cut at an angle, causing different size hearts in the top and bottom layers.
I’ll show you how to frost a heart cake later in this tutorial.
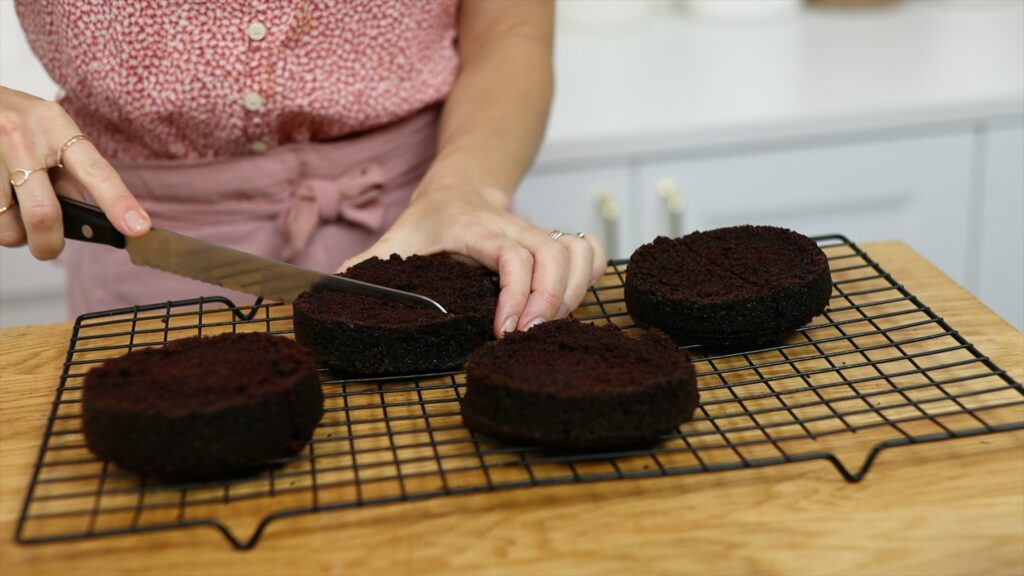
The next method to make a heart cake is to use a square or rectangular pan and two round pans. Fill them with cake batter so that the round pans are twice as full as the square or rectangular pan because you need the round cakes to be twice as tall. This is my Perfect Chocolate Cake batter and I used the 6 inch cake recipe.
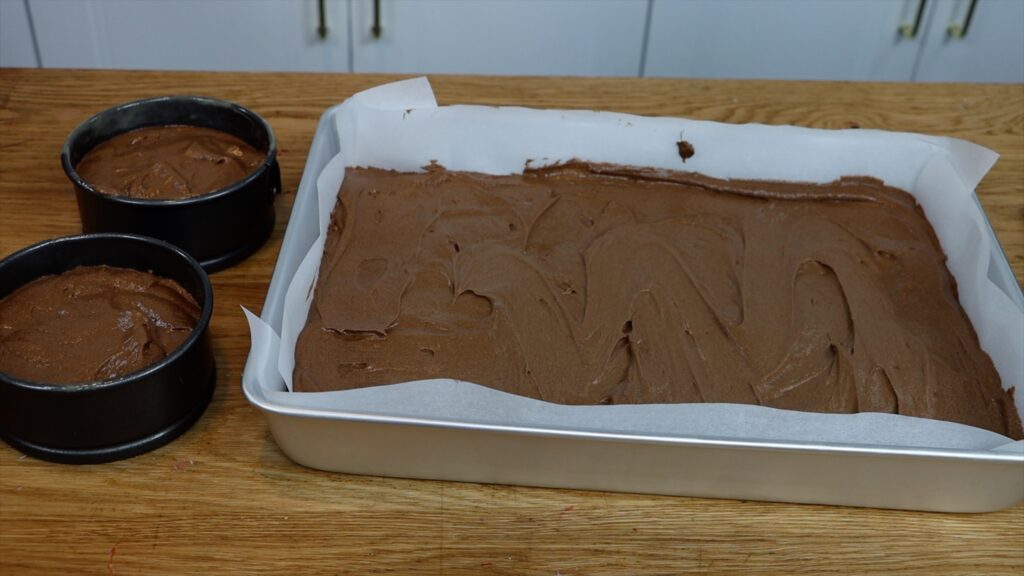
My rectangular pan is 9 x 13 inches and was 1 inch high and took 25 minutes to bake at 350F. The round pans are 4 inches wide and 2 inches high and took 30 minutes to bake. Ideally, use a square pan twice as big as the round pans, which would be 8 x 8 inches for me. With a rectangular pan you'll have some extra cake but if that's the pan you have, use it!
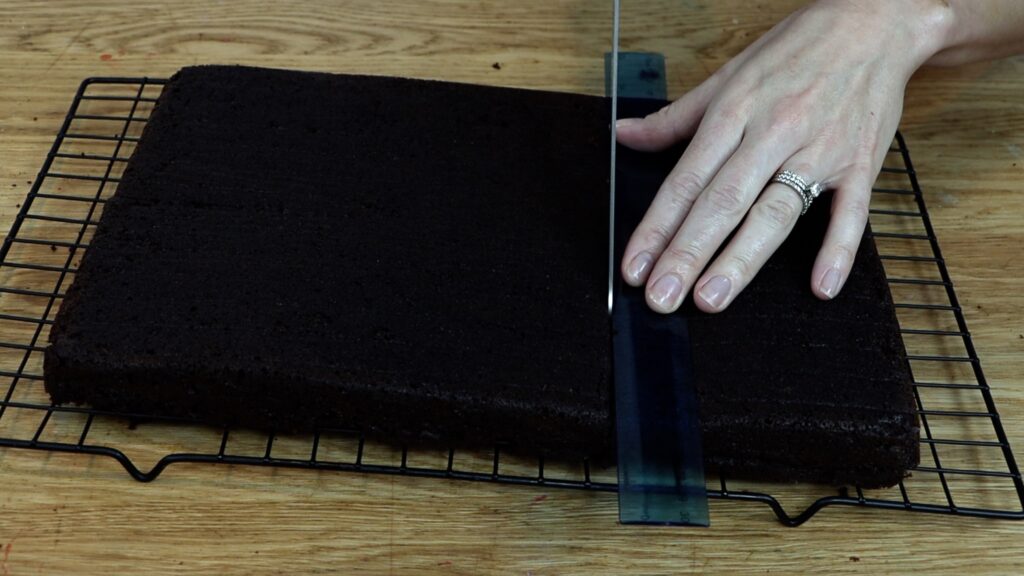
After the cakes have cooled it's time to cut them. You'll need four square cake layers, each one about the width of your round cakes. If you have a square pan, cut it in half both ways. For a rectangular pan, measure halfway along the short side and cut across the cake there.

Then measure that same amount along the long side, twice, and cut at those points.
This makes 4 cake layers, plus some leftovers if you used a rectangular pan instead of a square pan.
Next, level the round cakes so that they’re flat and then divide them in half horizontally to make two layers out of each. Now the round and square cake layers should be about the same height. Cut each of the round cakes in half to make 8 semi-circles.
To make a heart cake, spread some frosting onto a cake board to attach the first square layer. Instead of placing it in the center of the board, push it towwards one side to leave space at the top of the heart.
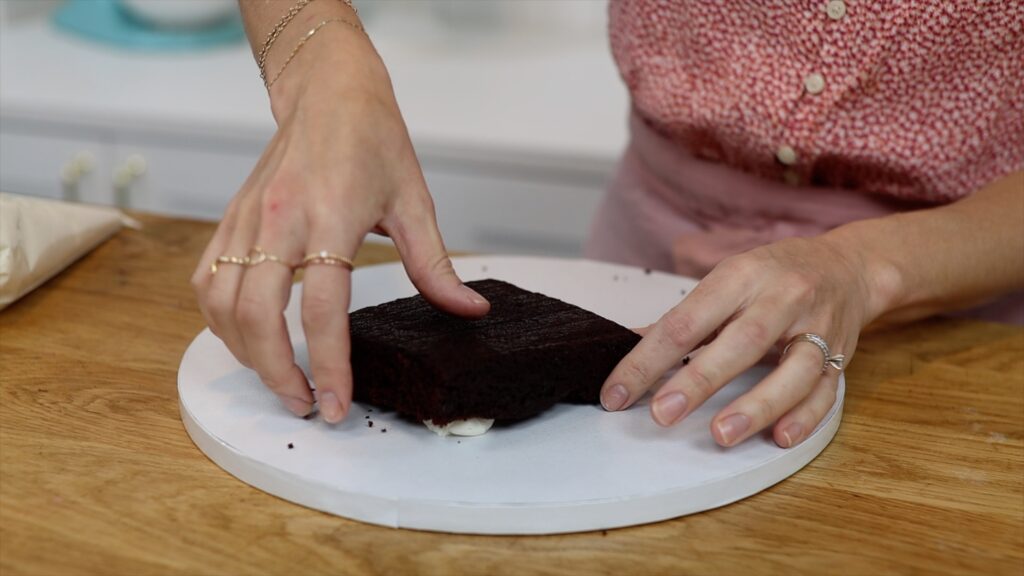
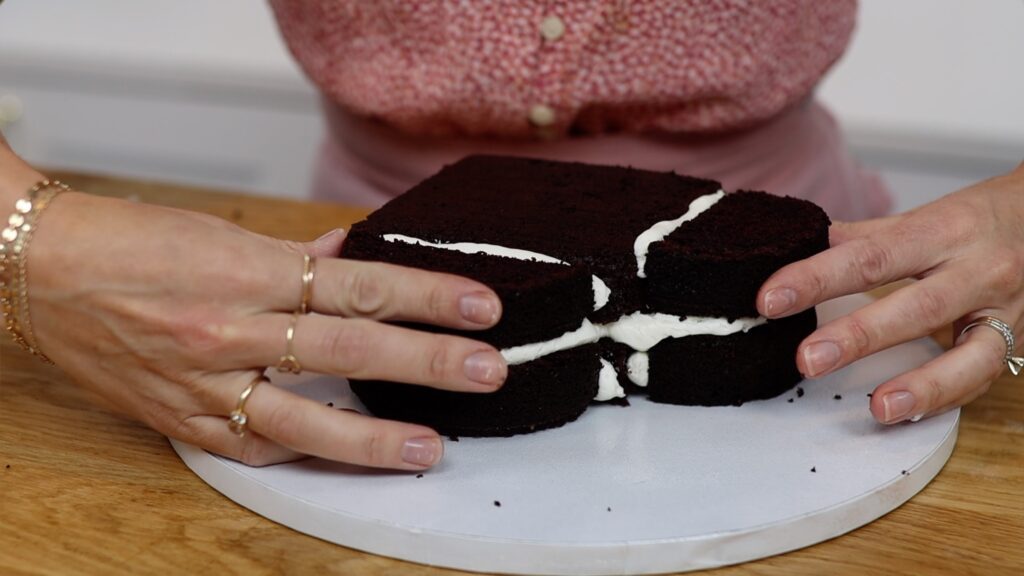
Then pipe or spread frosting along the top two sides. Add a dot on the board on each side too and attach two semi-circles of cake. The frosting will act as glue to make the cakes stick together and to the cake board below.
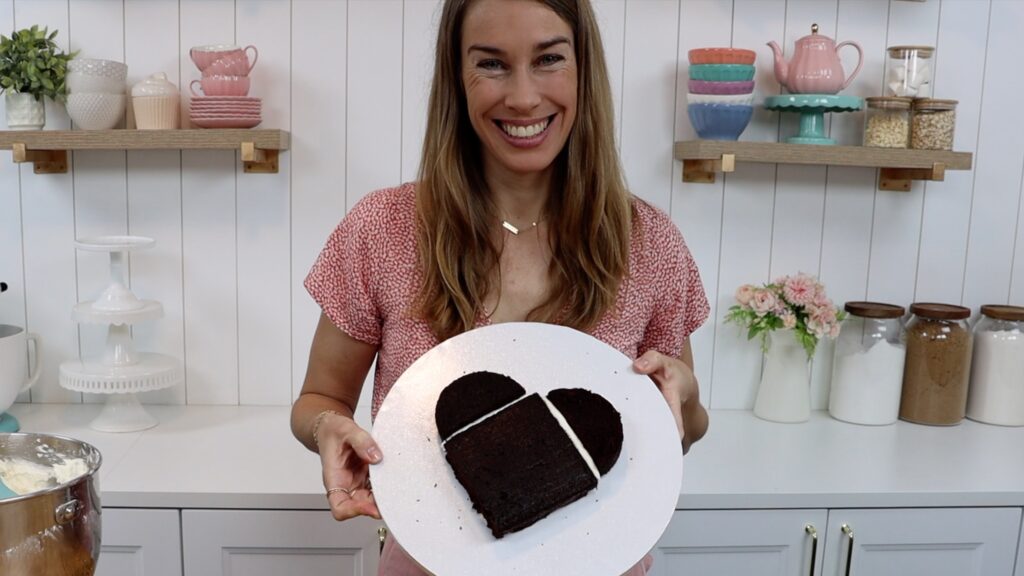
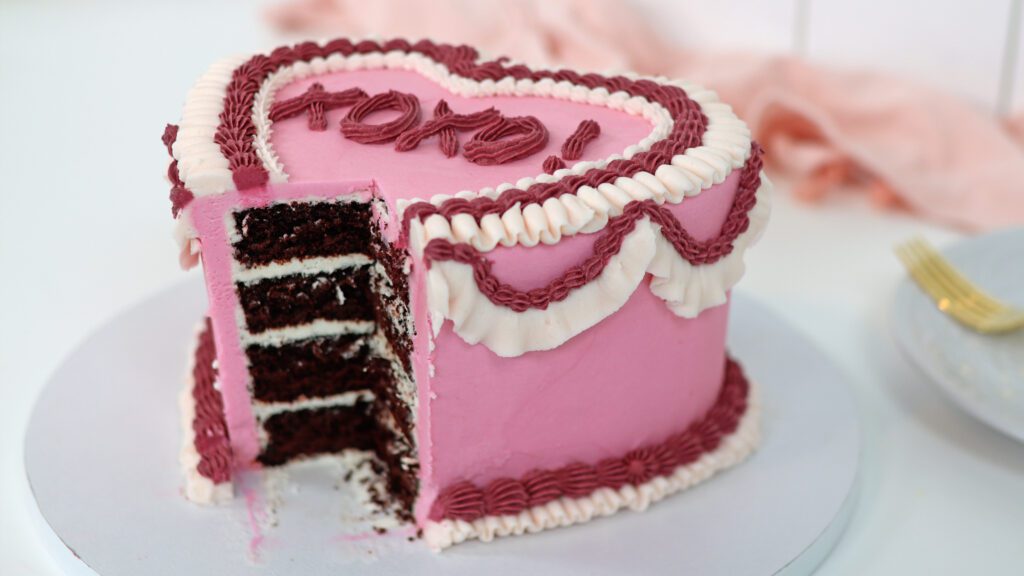
Don’t worry about imperfections because the filling and frosting will even everything out to make a neat shape by the end. Add your filling and repeat with the next square and two more semi-circles. Continue with the rest of your cake layers to make a four-layer cake in the shape of the heart!
The simplest way to make a heart cake with no waste is to bake just a round cake. First, cut two sides off to make the bottom edges of the heart:

Then use frosting to attach those to the top of the cake to make the bulges of the heart. You’ll have to push to curve and wrap them around because they won’t slot together perfectly like puzzle pieces, like the semi-circle cakes did with the previous method.
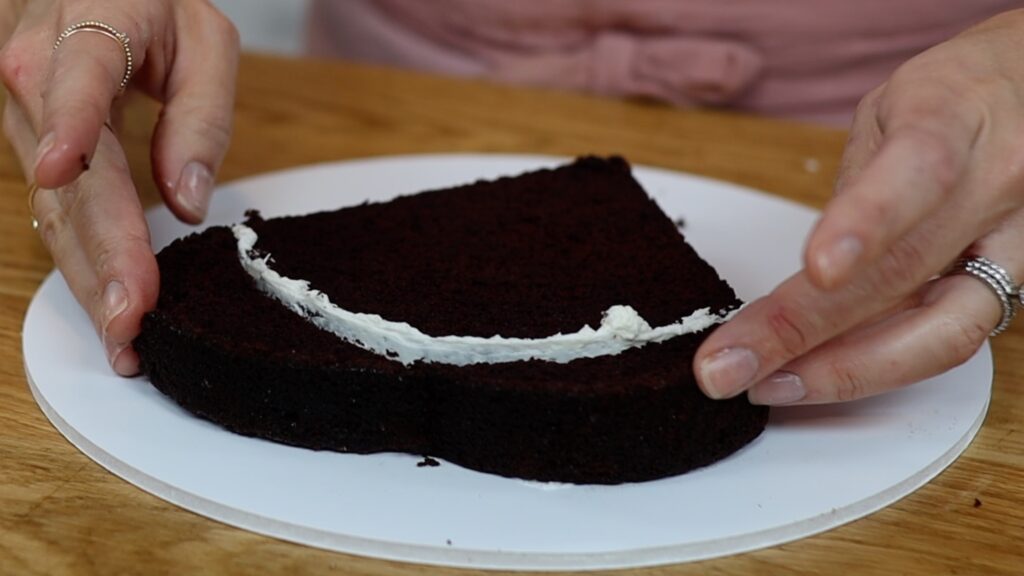
The benefit of this method is that you only have to bake a round cake, or a few round cakes if you want to make a layer cake.
There are 4 tricks to frosting a heart cake. I'm using my 4 Minute Buttercream for this cake.
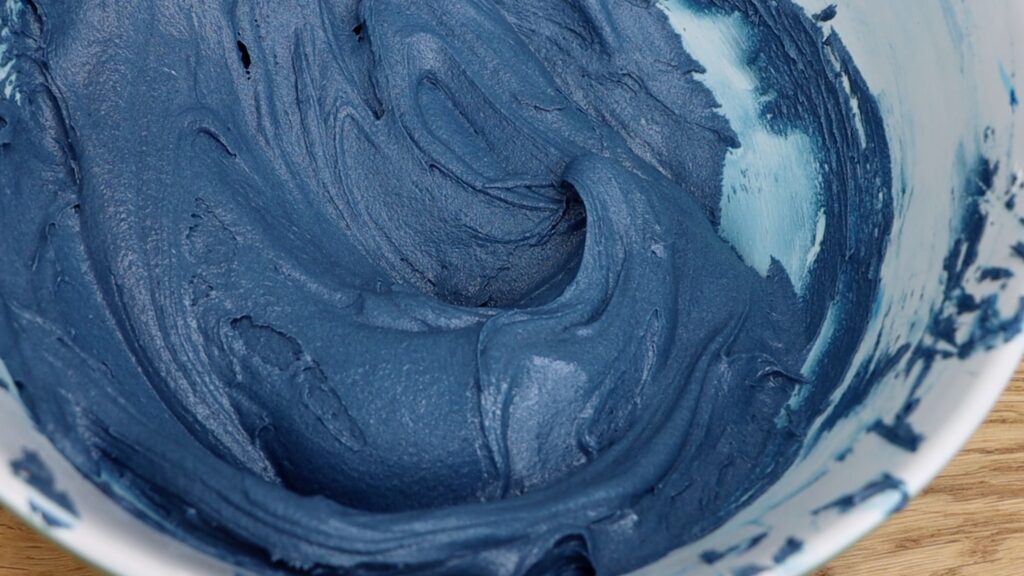
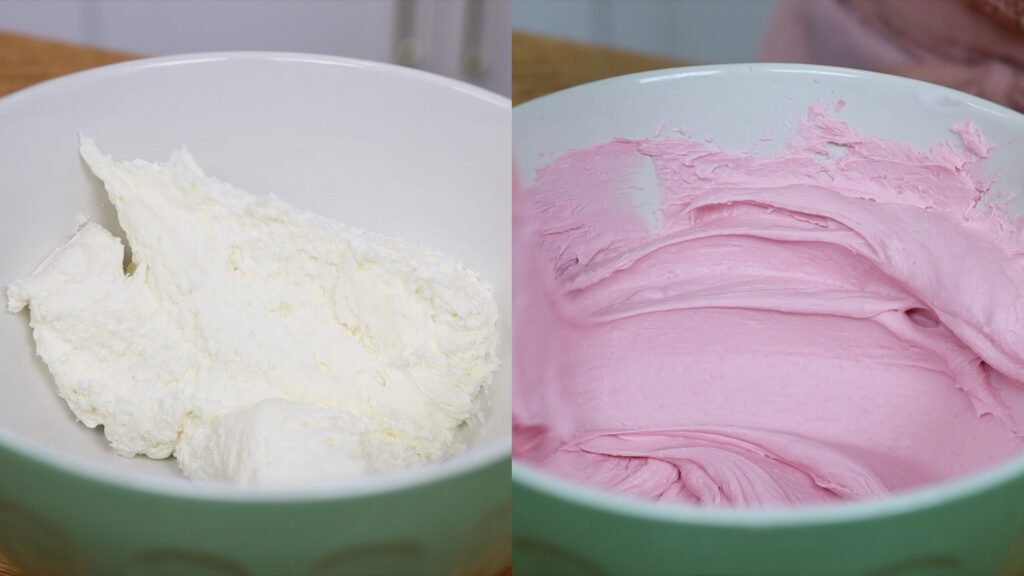
First, make sure your buttercream is a nice loose consistency so it’s easy to spread and smooth it. I like the microwave hack, where you put a third of the buttercream in the microwave for 10 seconds. Then stir it into the rest of the batch to make it silky smooth.
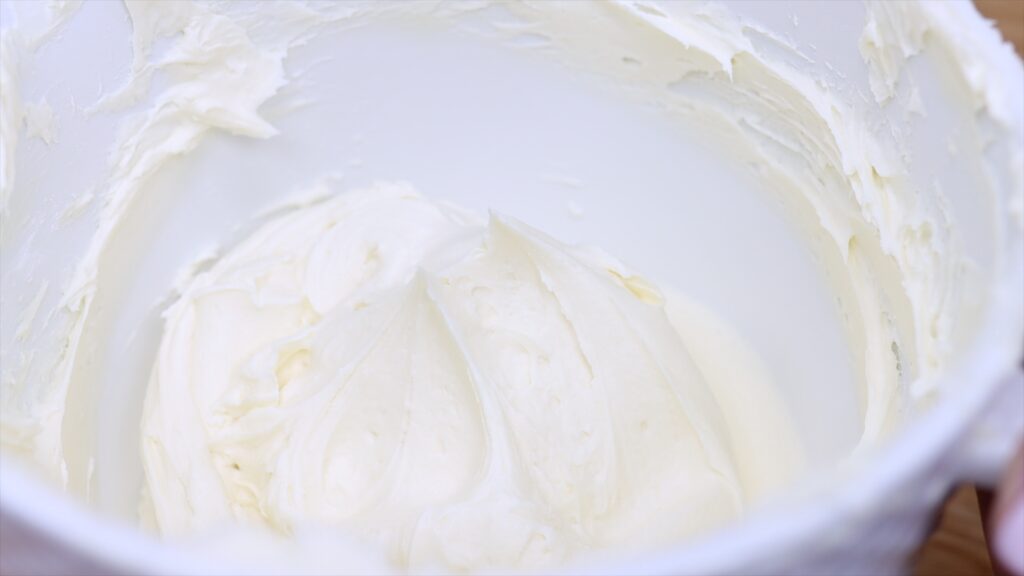
As you stir, you'll get rid of air bubbles, too. Look at the difference in this batch of frosting before and after the microwave method:
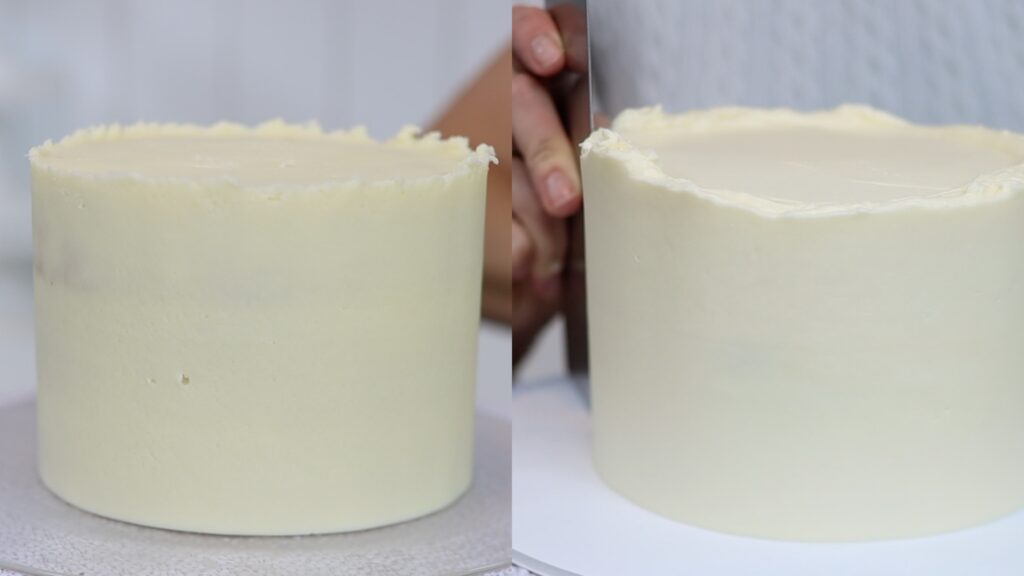
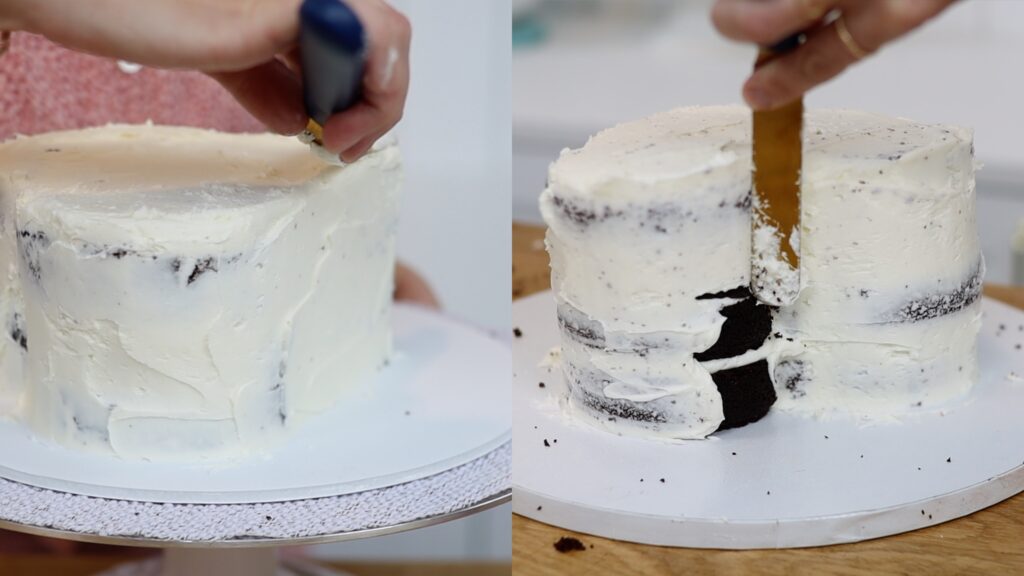
The second trick is to chill the cake before you frost it so that the layers are firm and less crumbly. The cake on the left has been chilled in the freezer for 15 minutes so the frosting glides smoothly and easily over it. The cake on the right hasn’t been in the fridge yet so the cakes are very crumbly.
After chilling cakes they'll be cold and hard. Take them out 2-4 hours before serving so they warm back up to room temperature to become just as soft as before!
The third trick for frosting a heart shaped cake is to apply a crumb coat. This is a this thin layer of frosting that traps crumbs so they don’t get into the final layer of frosting. It doesn’t have to be neat but it does have to cover the whole cake. If there are any naked areas of cake, crumbs can escape later.

For the final layer of frosting, spread the frosting beyond the pointed tip of the heart, so that it sticks out. Then scrape away from the tip of the heart and away from the dip of the heart at the top. This will create a sharp point to make these parts of the heart really angular. That's what makes the shape of the heart easily recognizable.
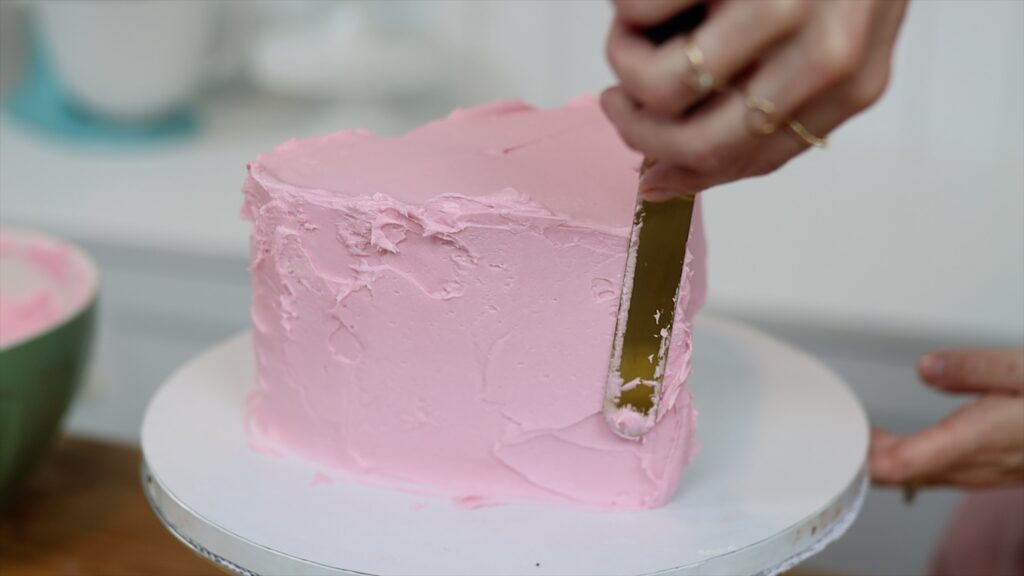
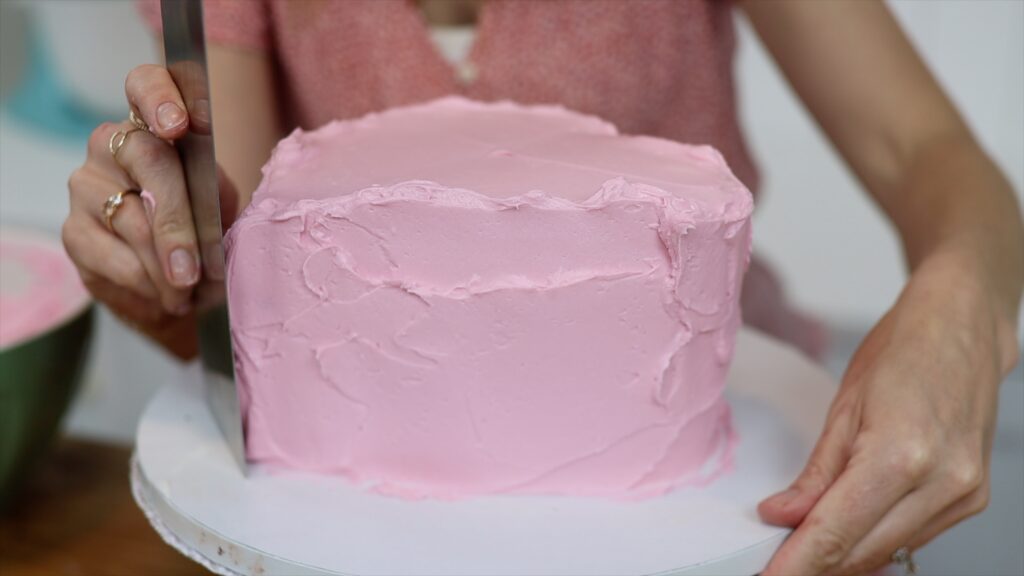
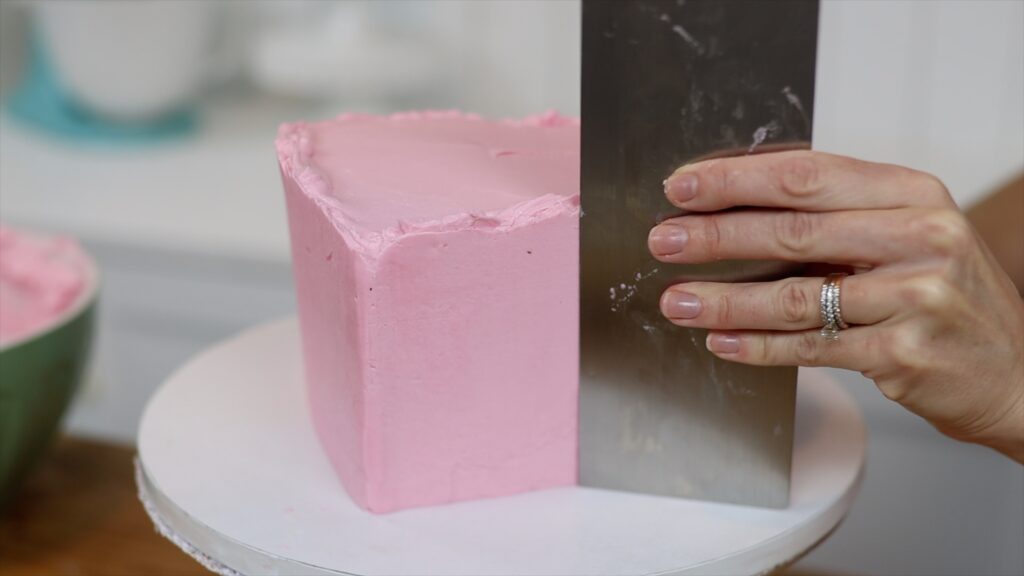
Tidy up the top edge by swiping sideways with your
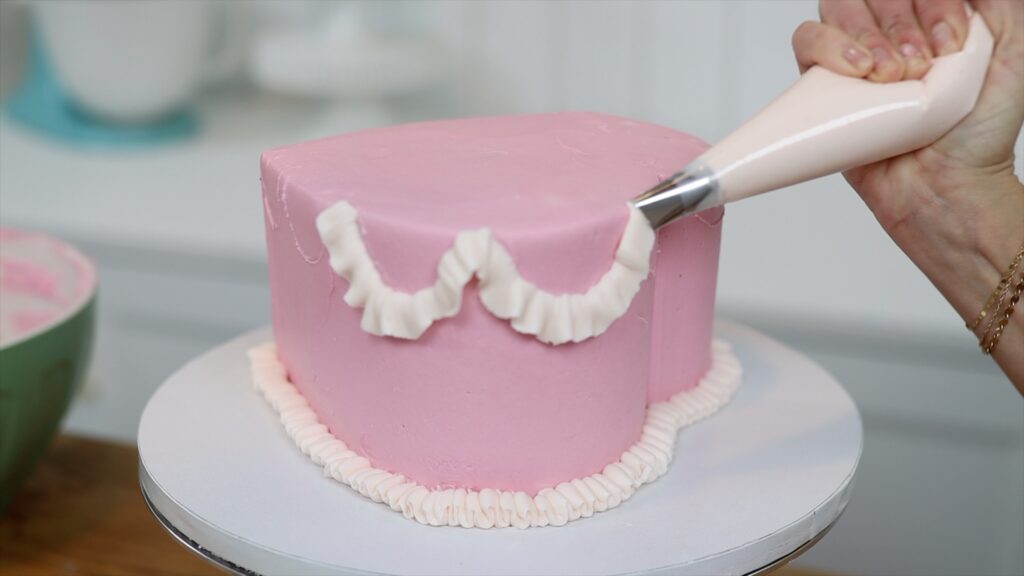
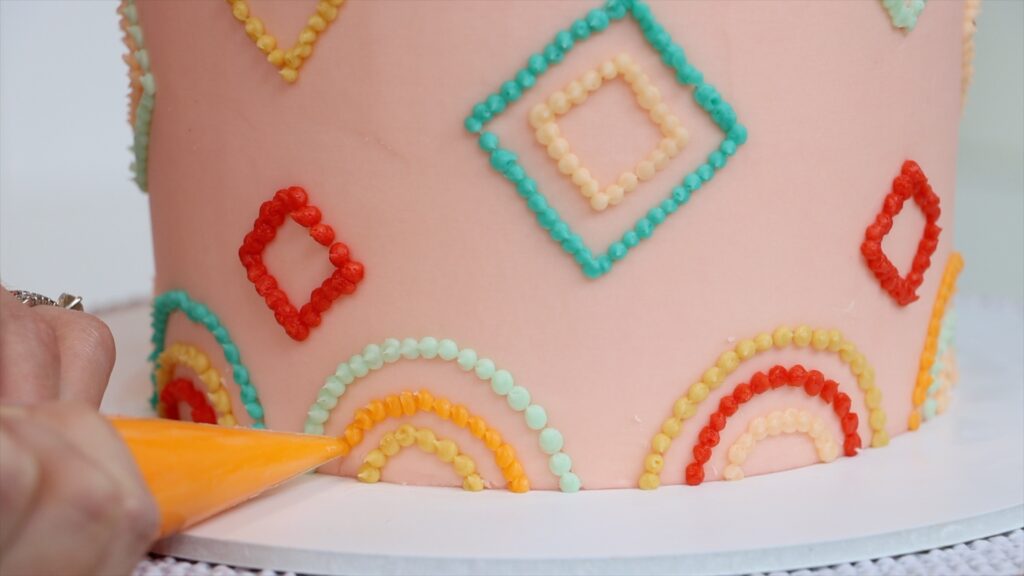
You can leave this plain or decorate it endless ways. The trendiest way at the moment is to add vintage style, over-the-top piping in different colours. Use piping tips like a petal tip for the ruffly ribbons at the bottom and the swags at the top. A leaf tip will work for these instead and add even more ruffles to the piping.
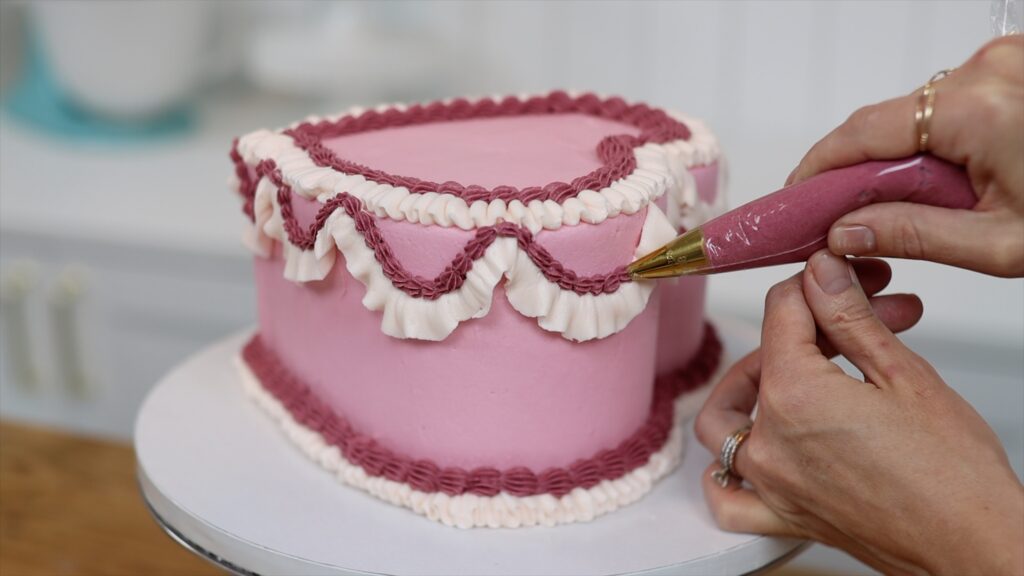
An open star tip is great for textured beaded borders, which you can layer on top of the piping you already have on the cake. Open star tips are also great for writing messages.
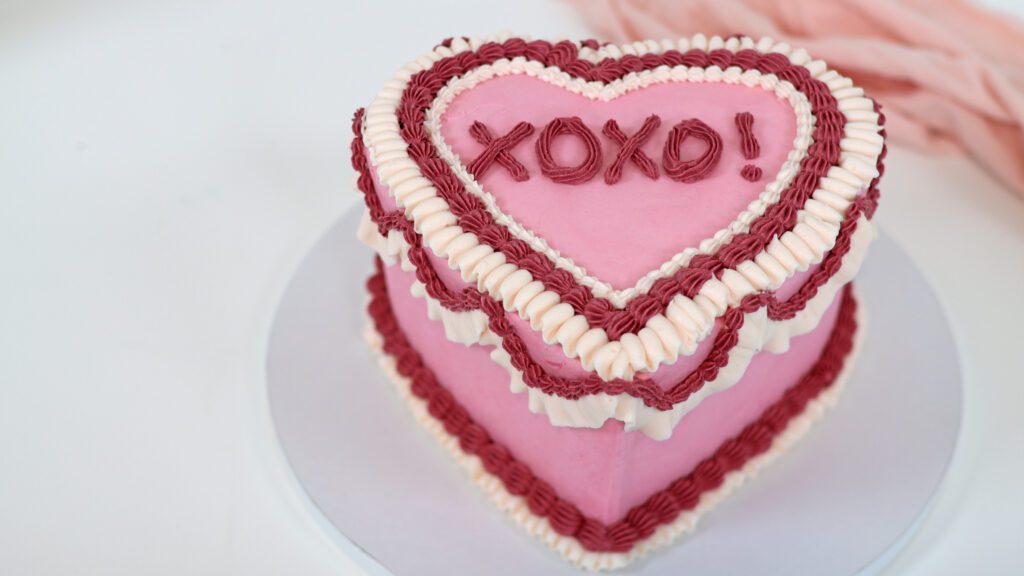
The almost excessive piping really make these vintage designs pop!
I hope this tutorial has been useful! Visit my cake school to learn hundreds of cake decorating techniques and designs with online cake decorating courses and memberships!
You can also watch a video of this tutorial on 3 ways to make a heart cake without a heart pan:
