If you could have any cake superpower, what would it be? Turning cupcakes into cakes? Making cakes truly gold? In this tutorial I share 5 cake hacks to WOW your friends, family, and customers. They’ll all ask you how you achieved these cake designs and you can choose whether to tell them or leave them guessing!
If you prefer to watch a video of this tutorial, scroll to the bottom of the page.
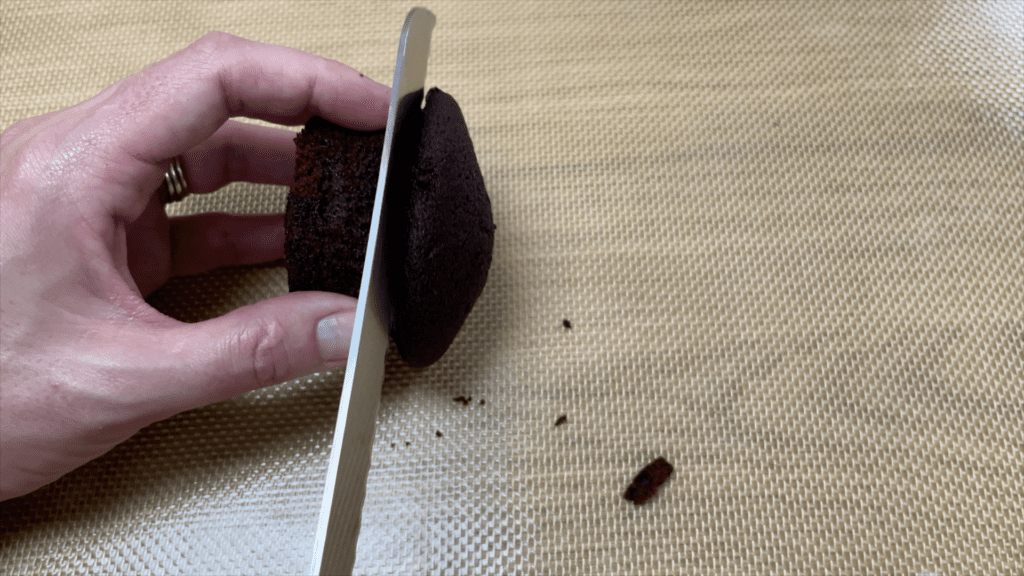
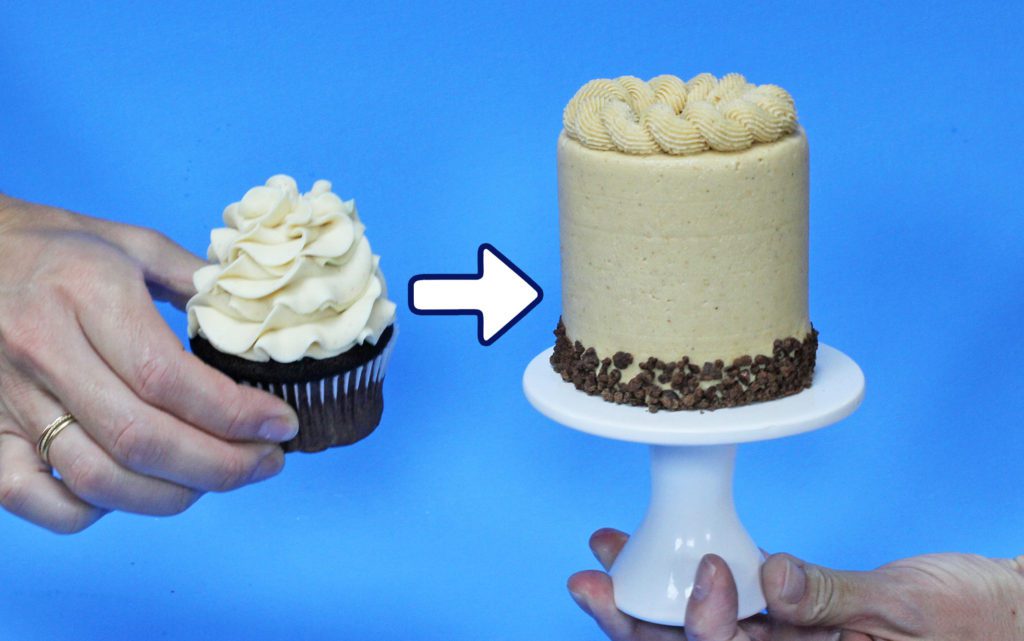
#1 Turn a cupcake into a cake with this fun trick! Peel the wrappers off two cupcakes and trim the tops so that they’re flat. Cut the cupcakes in half if you want more cake layers.
Then layer the cupcake halves with whatever filling you like, piping it like you would on a cupcake or just spread it on. Alternate between cupcake and filling to assemble a teeny tiny cake!
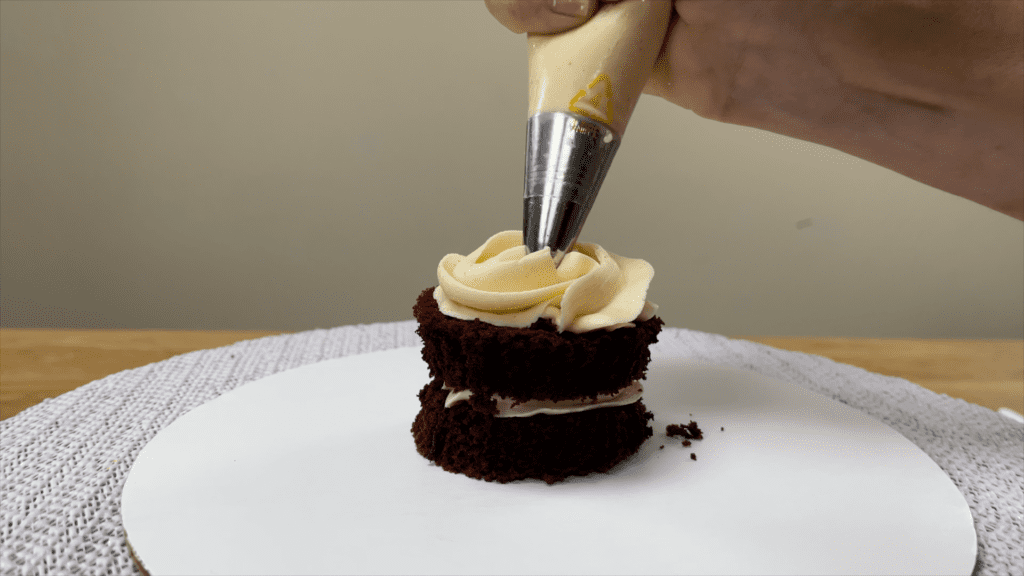
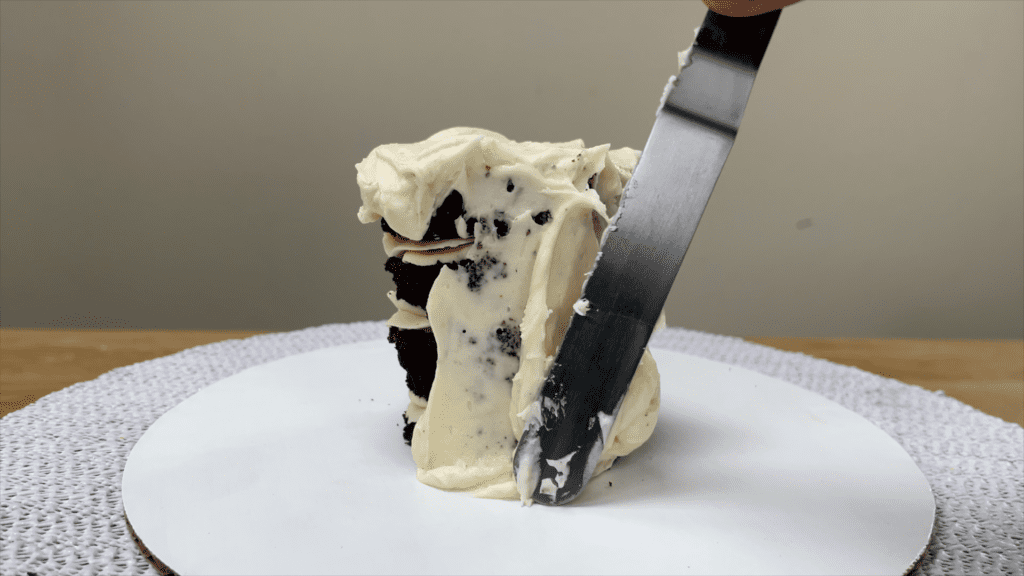
Put it in the freezer for 15 minutes before frosting it so that it’s more stable and doesn’t wobble all over the place. Use two layers of frosting for the neatest results, because the first layer will try any crumbs that come off the cupcake layers and then the second layer will be crumb-free.
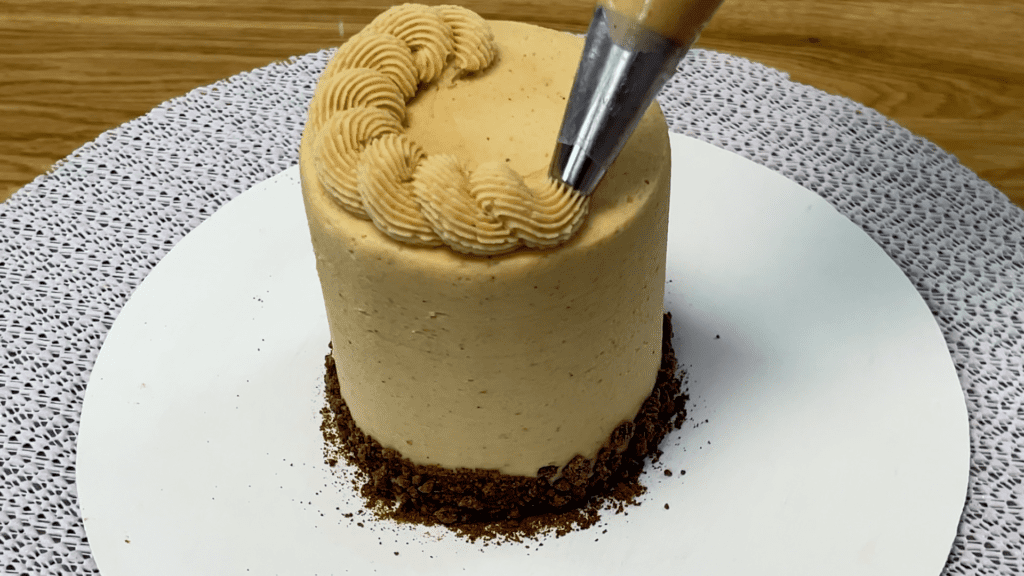
Add whatever details you like to create a dessert that looks way fancier than a simple cupcake!
#2 Achieve incredibly intricate details with flawless designs in seconds! Buy icing sheets online in thousands of different patterns – use my code EMILYBGB for 20% off here!
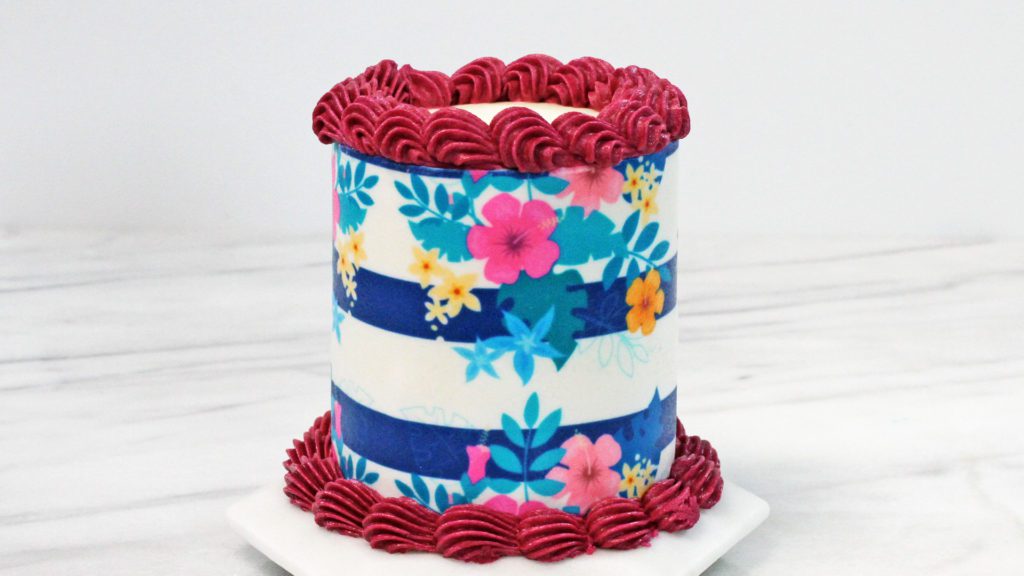
Frost a cake as normal and measure the height of the cake. Then cut an icing sheet to be the same height. If the icing sheet will wrap around the cake completely you’ll only need one strip of the sheet but if it doesn’t, you’ll need to cut two or even three strips, making sure they’re all at least as tall as the cake is.
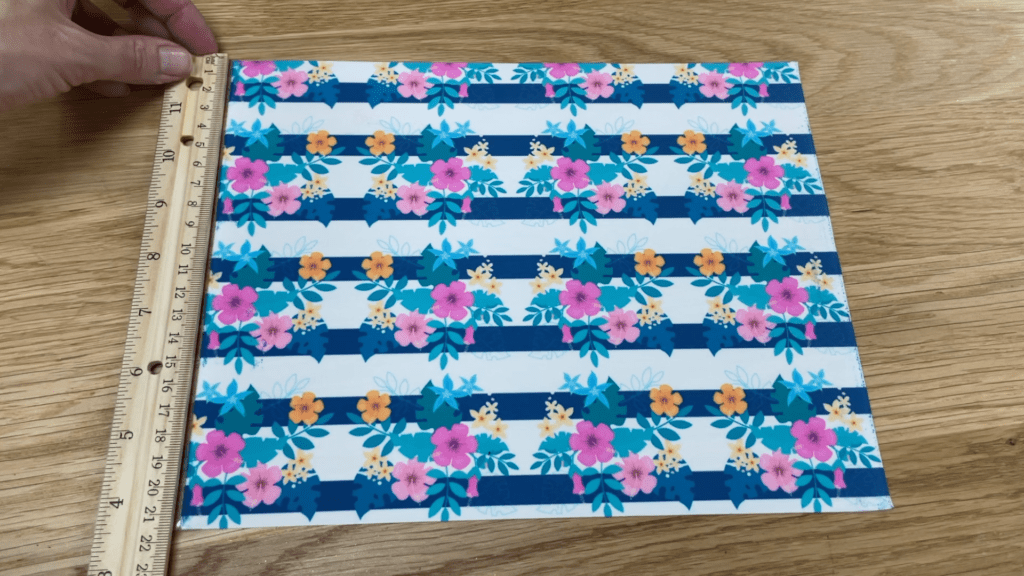
Icing sheets are attached to a plastic backing. When you’re ready to attach a sheet to the cake, peel the icing sheet off the backing and wrap it around the cake.
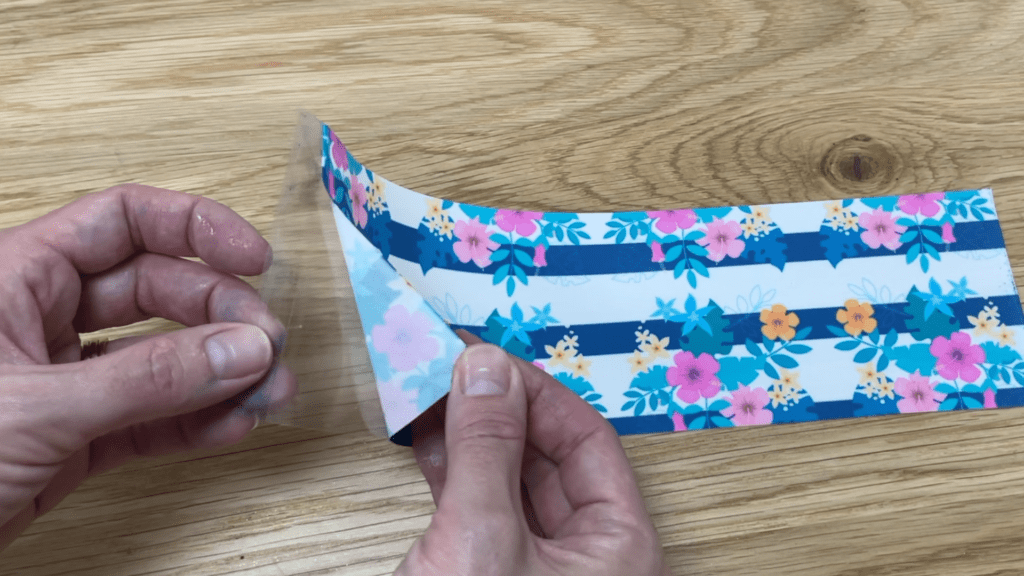
Icing sheets are slightly sticky and in my experience they are sticky enough to attach to a cake after the frosting has set. I prefer to attach the sheets at this point because the frosting is firm and you won’t risk indenting it or damaging it as you press the sheet against the cake.
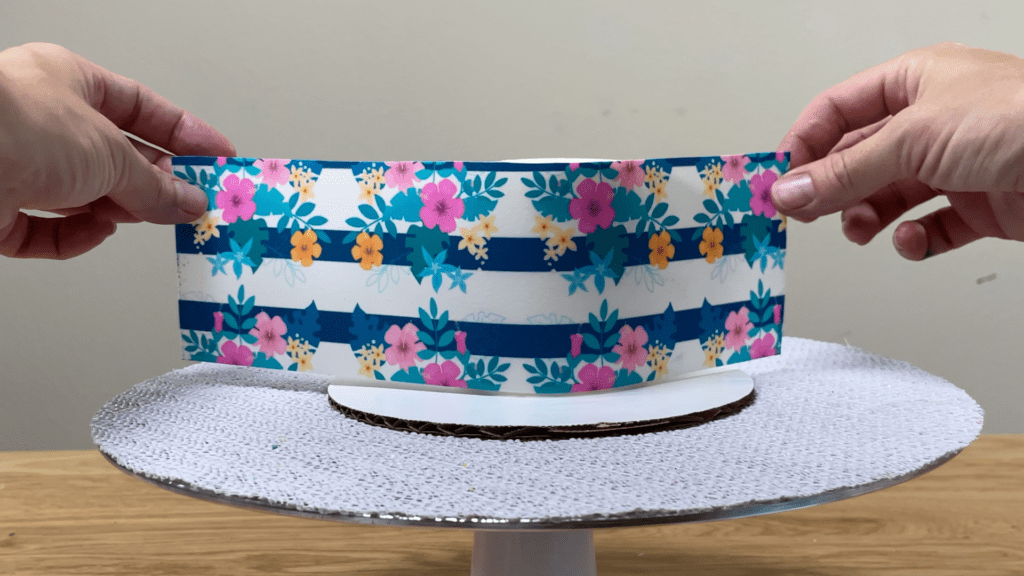
Cut the icing sheet where the two ends join so that there’s no overlap. You can also choose this side to be the back of the cake when you display it.
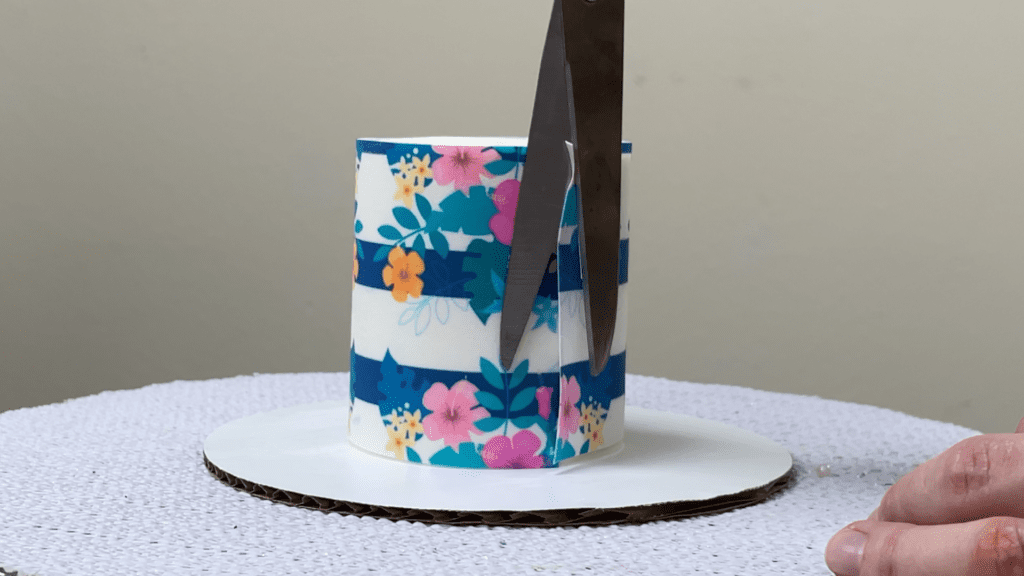
Trim the top of the icing sheet anywhere it’s sticking up above the cake. If you want to cover the top of the cake with the icing sheet you can place a piece on top and trim around it so that it fits perfectly on top of the cake.
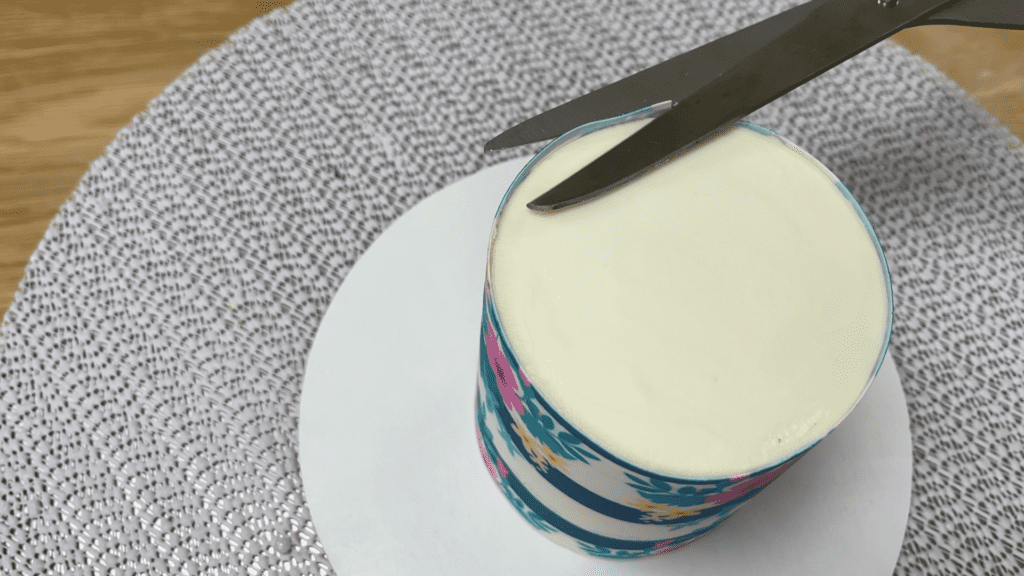
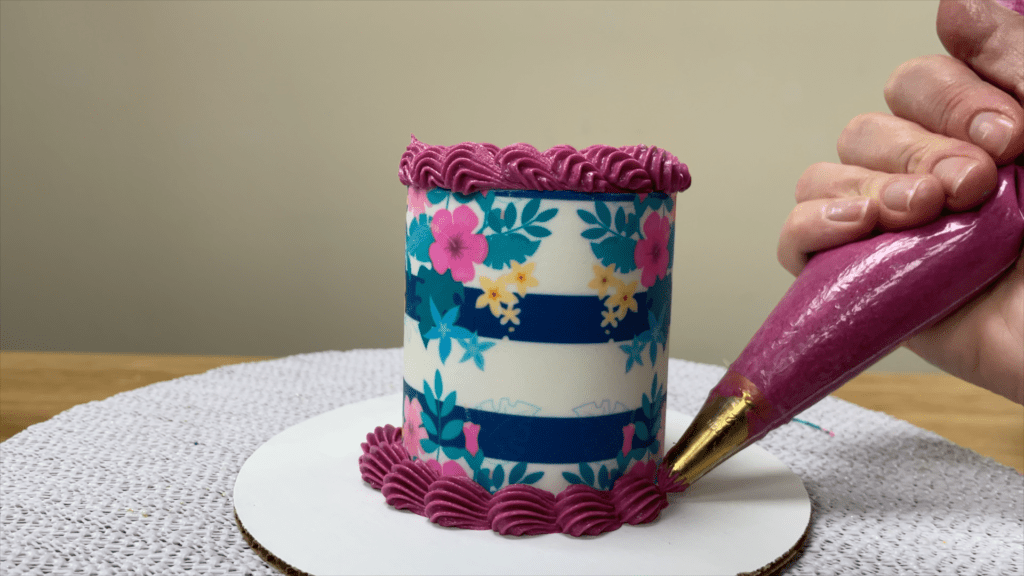
The seam where the two ends of the icing sheet meet will barely be visible amongst the busy pattern of the icing sheet. Add a pretty border on the top of the cake and around the bottom to finish it off!
#3 Make a cake gold by letting the frosting set so that it’s firm and holds its shape. Peel open a sheet of edible gold leaf, which you can buy here, and press the gold leaf into the frosting on the cake.
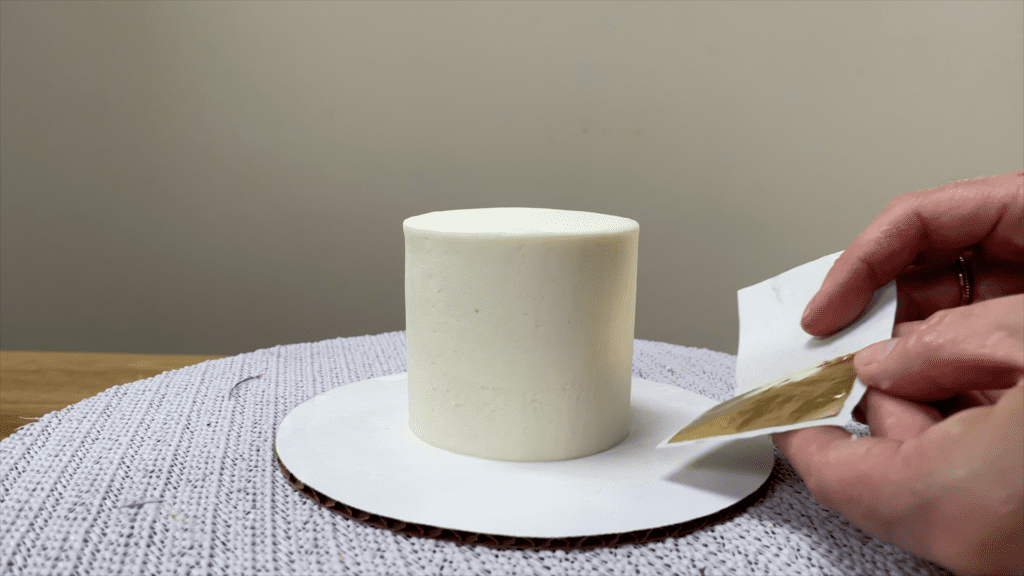
Use the backing paper to push against the cake without touching the gold leaf with your hands, since it’s very delicate and will stick to you instead of the cake.
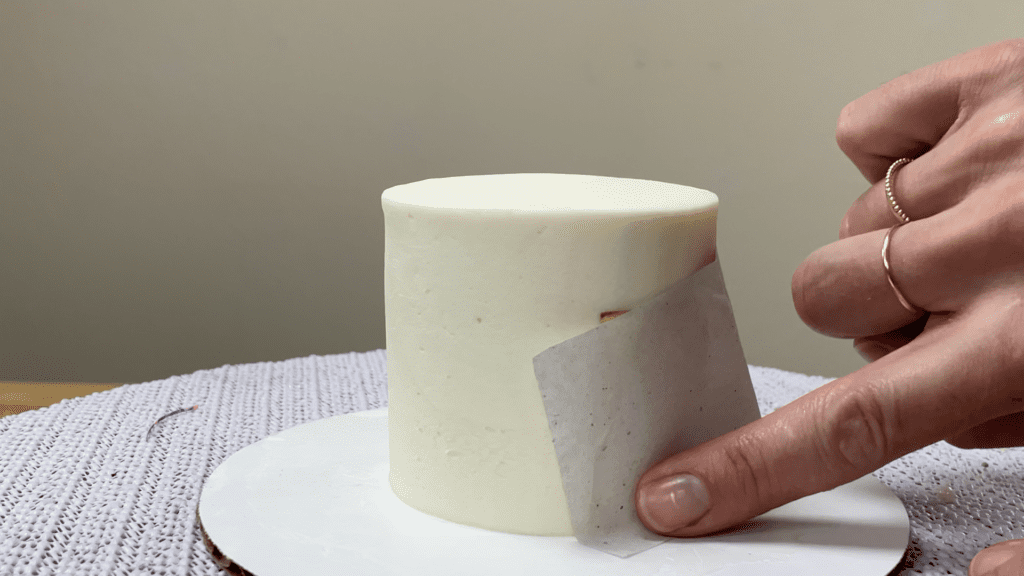
When you peel the backing paper away, the gold leaf will be left on the cake. I do this after chilling the cake in the fridge for at least an hour so that the frosting on the cake has set.
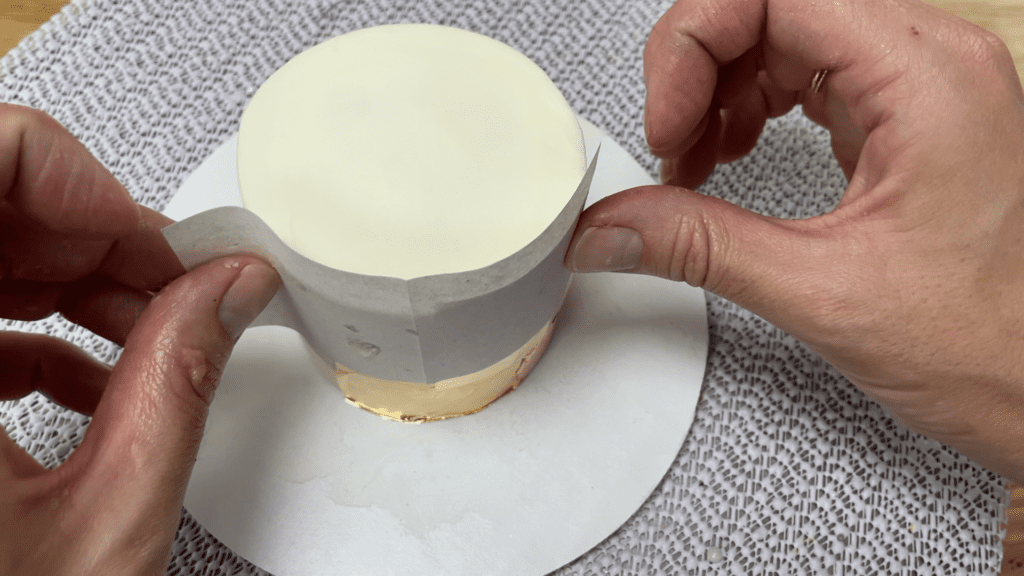
Repeat the process with several sheets of gold and they’re so thin that where they overlap they’ll blend together to form a flat layers of gold all over the cake!
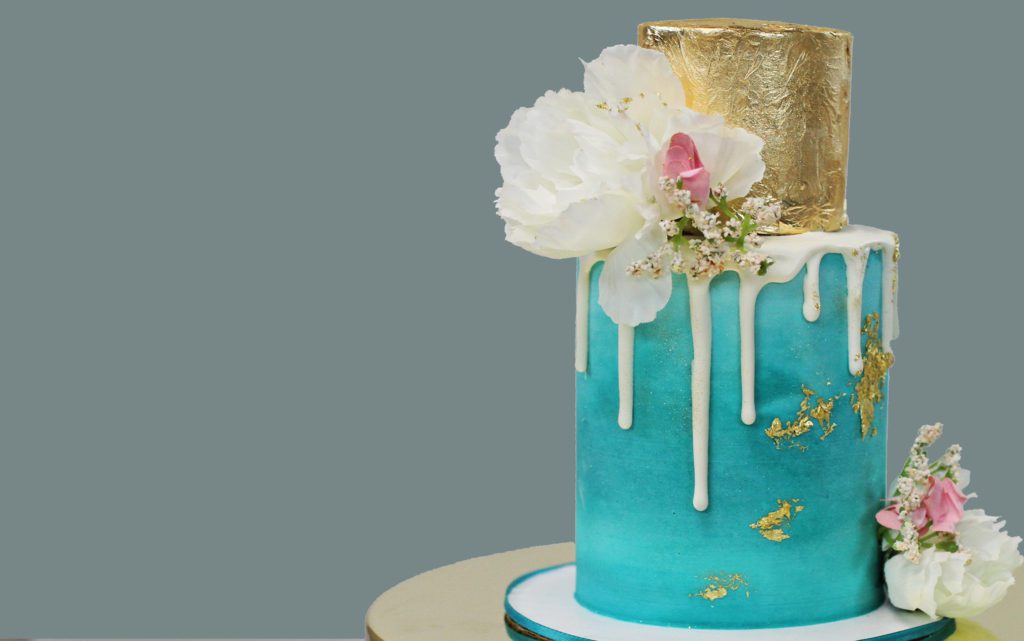
#4 Make homemade lollipops with just one ingredient! Place some paper straws in a lollipop mold and add some sprinkles if you like. Then put a hard candy like a Jolly Rancher in each circle.
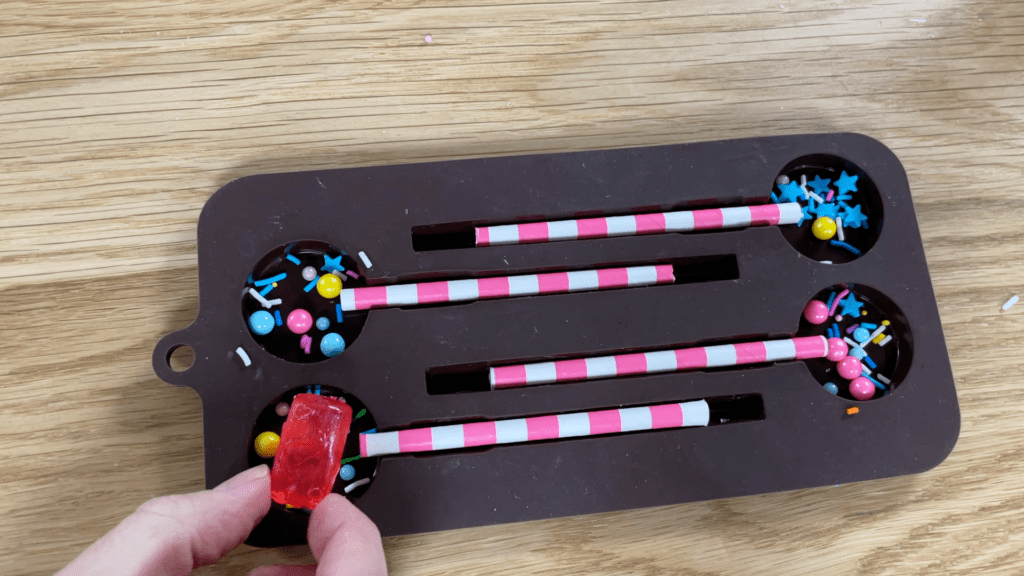
Put the mold in the microwave for 30 seconds, or until the candy is melted and bubbling. They will be HOT so be careful when you take them out of the microwave.
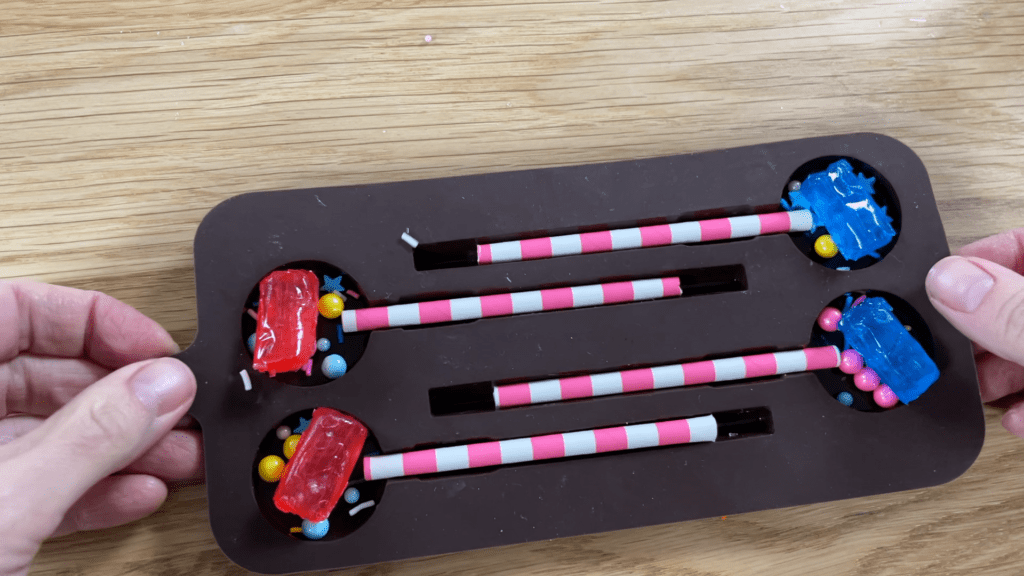
Leave them to cool for about 15 minutes and then push the lollipops out of the mold. They should release and pop out easily but if they stick to the mold, the sugar hasn’t set yet so leave them for a few more minutes before trying again.
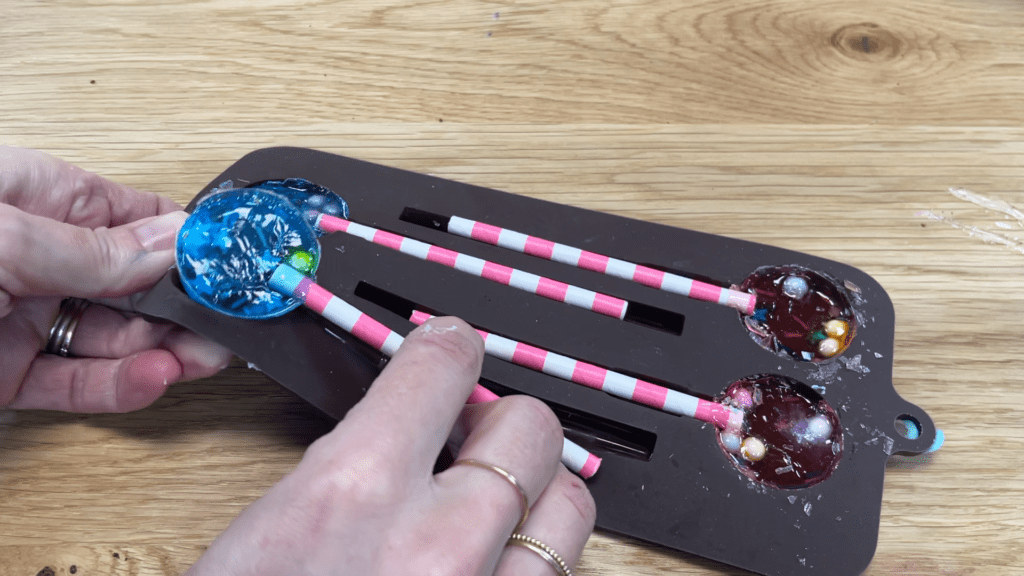
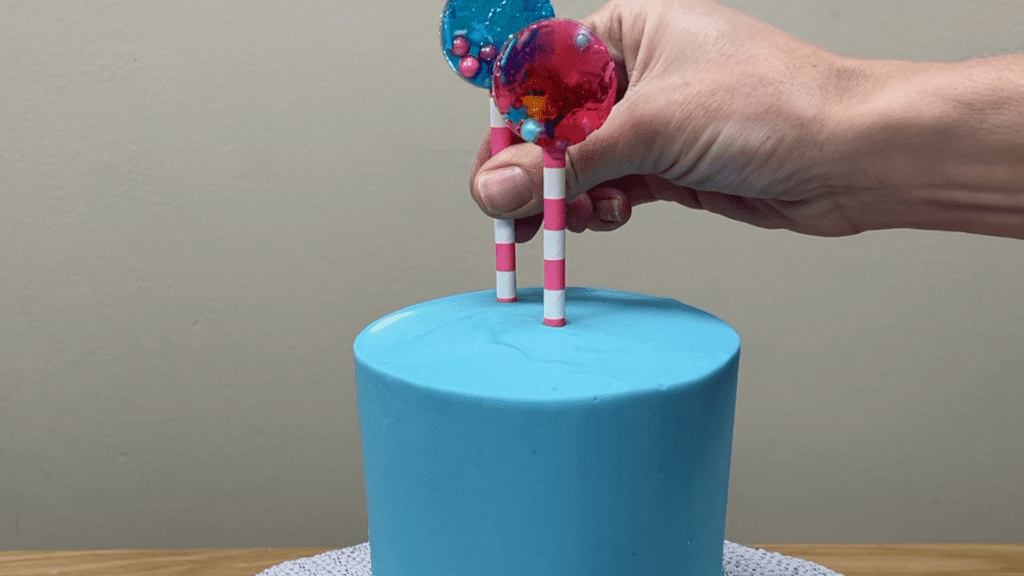
These make fun, flavoured, colourful treats or cake decorations and you can choose sprinkles and paper straws to match any colour scheme!
#5 Create REALLY bright and bold colours with chocolate by using a secret ingredient. Melt chocolate in the microwave at 80% power for 30 seconds at a time so it doesn’t overheat. Add cream if you’re going to make a drip or skip it for chocolate decorations.
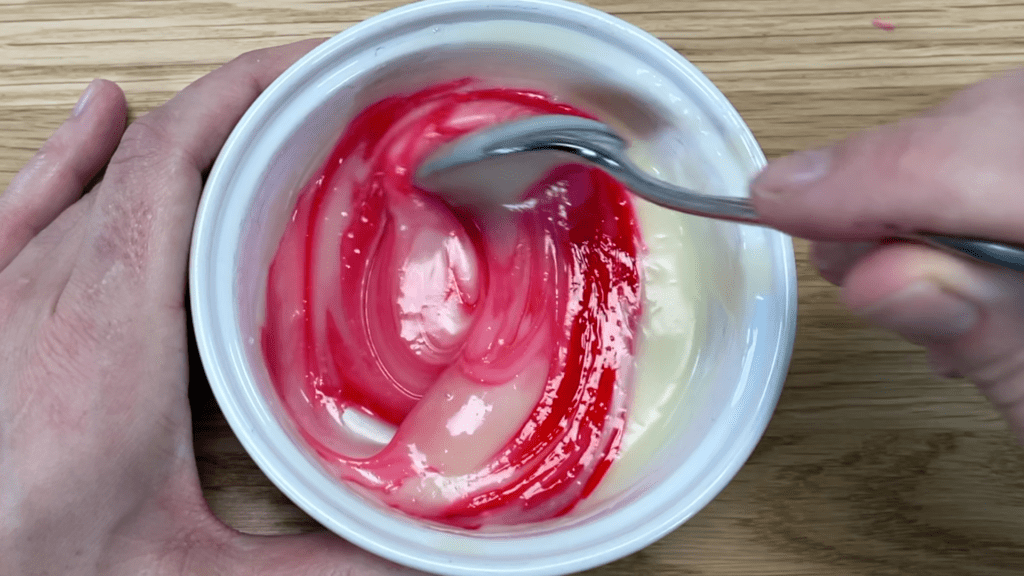
Now add colour but chocolate will seize if you use more than a drop of the gel colours intended for frostings like buttercream. Instead use OIL based colours, sometimes called candy colours, which have no water in them so they won’t make the chocolate seize up.
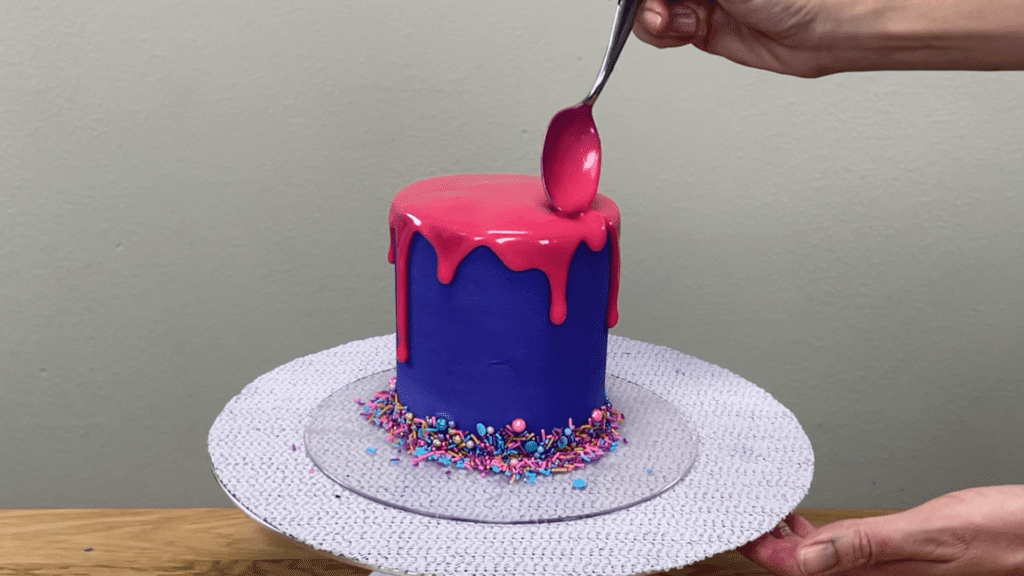
You can add as much of these colours as you like to make shades like these! This will work for chocolate drips, chocolate spheres, sails… any chocolate details on cakes!
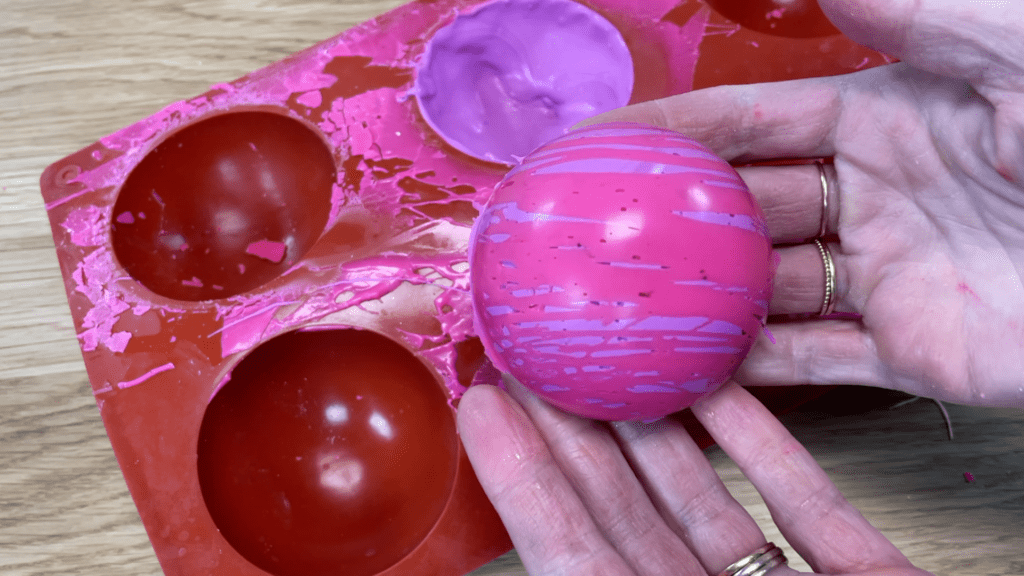
So now you can turn cupcakes into cakes, make cakes gold, create jaw droopingly bright and bold colours with chocolate, turn candy into cake toppers, and achieve flawless, intricately patterned designs!
What cake superpower do you wish you had? I’d love to be able to decorate at timelapse speed! Tell me yours in the comments!
If you’re looking for inspiration or want to learn new cake designs and techniques, join my Club+ for access to ALL of my online classes and courses as well as live online classes and Q&A sessions for members only!
Here’s the video version of this tutorial:
These are the 10 most common mistakes people make when they’re making cakes, from condensation to exploding piping bags and accidentally poking a finger into your cake. I’ll show you tricks to fix each one so it doesn’t ruin your cake!
If you prefer to watch a video of this tutorial, scroll to the bottom of the page.
#1 Cake layers fall apart
If your cake layers crumble when they came out of the pan, this is probably the simplest thing to fix so that you can still use crumble cake layers! I’ll show you how in a moment but for next time, leave cakes in the pan to cool for ten minutes before turning them out, which gives them a chance to firm up a bit.

Chill the damaged cake layers in the fridge for about an hour so that they firm up and then assemble your cake as normal. If you have any really damaged cake layers with large cracks, put them in the middle because they’ll threaten the stability of the cake if they’re at the bottom or on top.

Now frost the cake as normal and since the cake layers are cold, they won’t crumble as you spread on the frosting. As you spread, you’ll push the frosting into any cracks or holes in the cake and after smoothing the frosting, you’d never guess the cake layers weren’t perfect underneath the frosting.

#2 Buttercream pulls off cake
If your buttercream is too stiff, when you try to frost your cake you’ll find that your spatula sticks to to cake instead of gliding over it to spread the buttercream. When you use a frosting scraper you’ll probably pull the whole cake over with it!

Easy to fix – add more milk to the buttercream until you can stir it like peanut butter, leaving soft peaks behind and a smooth trail in the buttercream. Now your cake will be MUCH easier to frost!

#3 Cake shows through frosting
If you scrape off too much frosting you’ll expose the cake underneath, like here on the top of this cake where I applied too much pressure with my

Don’t panic – for the top of the cake, just spread more frosting over the entire top and smooth it again. You’ll push the frosting over the edges of the cake as you smooth so scrape around the sides fo the cake again with your frosting smoother.

Exposed cake is a common struggle with textured cake combs because the frosting needs to be thicker than the depth of the pattern on the cake comb, otherwise the grooves of the comb will go through the frosting and the crumb coat or the cake underneath will show through.

For the sides of the cake follow the same idea as for the top, spreading more frosting over the area where you can see the cake. You’ll also need to spread more frosting over the surrounding areas to make that frosting thicker too, otherwise you’ll scrape this fresh frosting straight off again.

When all of the frosting is a bit thicker, go around the cake again with your frosting smoother or textured cake comb and the frosting will be thick enough to cover up the cake.

#4 Cake condensation
Condensation is a pain, especially in hot countries. It happens with a drastic change in temperature, for example moving a cake from the freezer to a warm room. To avoid this, change the temperature gradually, moving the cake from the freezer to the fridge for a few hours, and then to room temperature.

Ideally, crank up the air conditioning to cool the room down to minimize the difference in temperature. If the frosting has set, you can dab any beads of condensation off the cake by pressing a paper towel gently against the cake to absorb it.

#5 Ugly borders
If you don’t like a border you’ve piped onto a cake, there are two ways to take it off. If the frosting on your cake has set, immediately after piping the border you can scrape the border off with an

The piped border will still be soft and sticky so it will be easy to scrape off. Since the frosting on the cake has set, you won’t damage it because it’s firm. Then you can pipe another border instead!

If the frosting hasn’t set, put the whole cake in the fridge for an hour or in the freezer for 15 minutes to set the frosting on the cake AND the border. Then use a sharp knife to cut the border off the top of the cake. You won’t damage the frosting on the cake by doing it this way but you would if you tried to scrape the border off while the frosting on the cake was still soft and sticky.

#6 Drip is too runny or thick
Until you get the hang of drip cakes, it’s easy to make your drip too runny so that the drips run all the way down to the bottom of the cake or too thick, when they don’t drip down at all! Cakes should be chilled in the fridge before applying a drip, which helps to stop the drips before they get down to the cake board but it’s also useful that the cake is cold for fixing a drip you don’t like!

Straight after you’ve applied the drip, scrape it off with an

Now apply the drip again, using your favourite method: pouring it and spreading it, dripping it with a spoon, or using a squeezy bottle. Avoid this problem next time by doing a test drip first, checking the consistency of the drip and seeing how it behaves on your cake, before applying the rest of the drip. Learn all about drips in my online course on 50 Easy Cake Decorating Techniques for ANY Skill Level!

#7 Piping tip explodes through piping bag
This one has happened to me more times than I can count! Exploding piping bags… where the piping tip pushes out through the end of the piping bag and frosting bursts out onto your cake.

This happens when the hole you’ve cut at the end of the piping bag is too big for the piping tip you’re using. When you squeeze the piping bag to apply pressure and push the buttercream out through the piping tip, that pressure pushes the piping tip out with it.

Only about half of the piping tip should stick out of a piping bag, so that when you apply pressure to the bag it will be snugly secured within the piping bag and unable to squeeze through the hole at the end.

This piping bag was cut to fit a 1M piping tip like in the photo above but for a smaller piping tip like this #3 tip, the hole is too big because almost all of the piping tip fits through the hole so it will be easily pushed out when I put buttercream in the piping bag.

To fix this, either put the piping tip in a bag with a smaller hole OR put a coupler into the piping bag. A coupler is wider than the piping tip so it will be secure within the piping bag. Place the piping tip on to the coupler on the outside of the piping bag and screw the ring on to attach it in place before piping as normal. For 4 reasons to use couplers, check out my tutorial on how to use couplers.

#8 Messy cake board
After frosting your cake you’ll have smudges of buttercream on the cake board around your cake. It’s not a mistake, it’s bound to happen, but it is easy to fix. Wrap your finger in a paper towel and wipe the smudges off the cake board.

I like to do this after chilling the cake in the fridge to set the frosting so that if I brush against the cake with the paper towel, I won’t damage the frosting since it’s firm. It does make the frosting smudges firmer through, so you’ll have to apply a bit of pressure to wipe them off.

#9 Damaged frosting
Poked your finger into a cake by mistake? It’s infuriating when it happens after you finish decorating a cake but it is possible to fix it. If the frosting has set, try wiping the indent gently with a paper towel to flatten it, or use an

This works for shallow indents but if it’s too deep, or if the frosting on the cake hasn’t set, spread some more frosting over that area and gently smooth it with an

#10 Clogged piping tips
If your frosting isn’t piping properly because the frosting is only coming through certain parts of the piping tip, for example some of the prongs of a star shaped tip, it’s because something is clogging the tip.

It could be lumps of sugar, which can happen when the butter isn’t at room temperature when you make buttercream, or it could be a chunky ingredient in the frosting like Oreo crumbs or a fruit puree like strawberry. To create a space big enough for the chunks to fit through, pry the prongs of the piping tip outwards using a knife or an

This will widen the gap that your frosting will come through. Although the piping tip itself won’t look as pretty, this will allow the frosting to pipe beautifully!

To prevent clogging, crush or blend your flavour ingredients before adding them to your frosting. For example, instead of crushing Oreo cookies by hand, blitz them in a food processor or blender to make very fine crumbs that will add flavour and colour to your frosting without creating chunks of texture that will block your piping tip.

Troubleshooting tips aren’t always the most beautiful thing to watch but I hope these are helpful! If you’ve had any cake fails that you didn’t understand or don’t want to repeat, tell me in the comments and I’ll try to help!
For more tips, techniques and cake designs, join my Club for access to ALL of my online classes as well as live online classes and Q&A sessions for members only!
Here’s the video version of this tutorial:
Cake toppers add height, colour, and texture to cakes and in this tutorial I’ll show you 5 easy ideas to try.
If you prefer to watch a video of this tutorial, scroll to the bottom of the page.
#1 Chocolate Numbers
These are perfect for birthdays. Print or draw a number and then tape a piece of parchment paper over the top, onto a cake board or a plate.
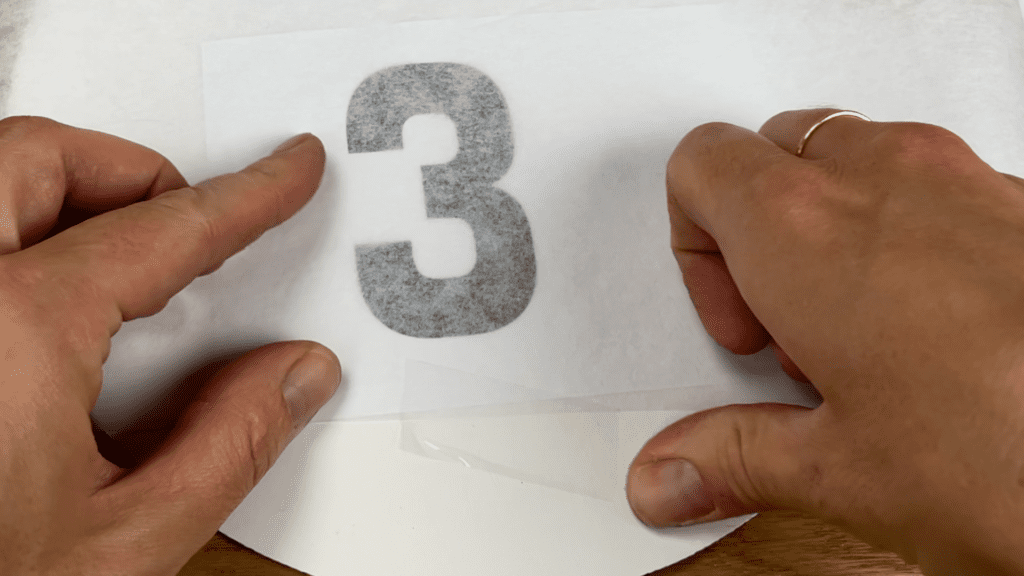
Melt chocolate in the microwave for 30 seconds at a time so you don’t overheat it and cause it to seize and spoon it into a ziplock bag. Cut a small piece off one of the bottom corners.
Squeeze the chocolate through that hole to trace the number, starting with the outline and then filling it in. You can use a toothpick or the end of a spoon to flatten ad smooth the chocolate if you want to.
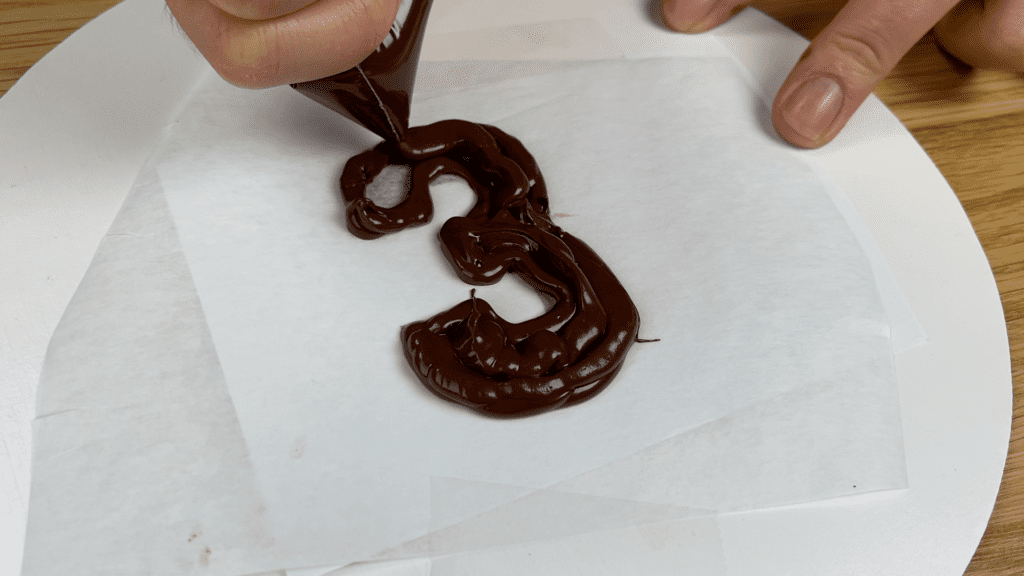
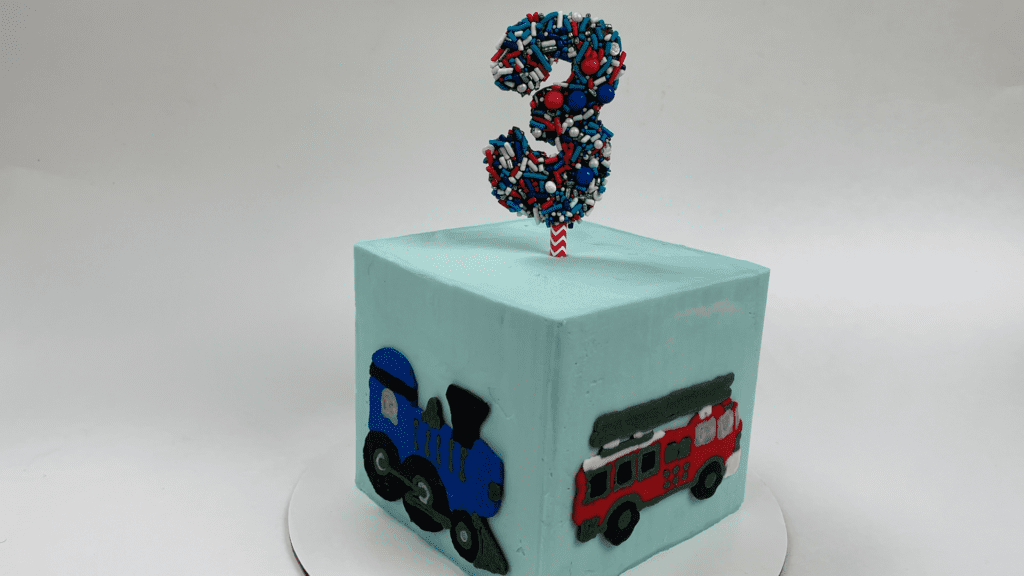
Cut a paper straw so that it’s about an inch longer than the height of the cake and press it into the chocolate number before it sets.
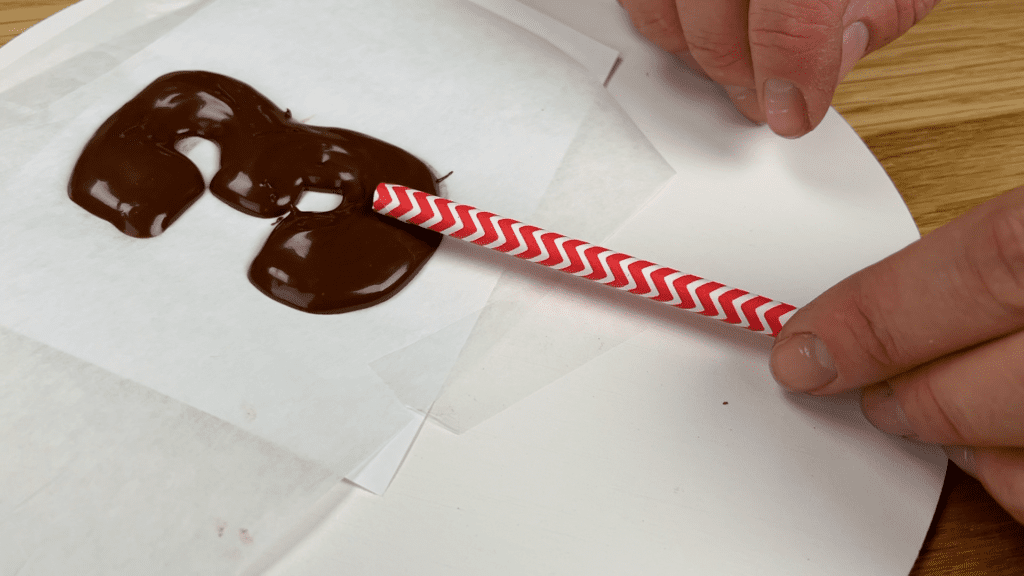
Squeeze a bit more chocolate over the top of the straw and then place the number in a bowl or and a tray and pour sprinkles over it. The tray or bowl will catch any bouncing sprinkles. Press the sprinkles gently into the melted chocolate to attach them and leave the chocolate to set.
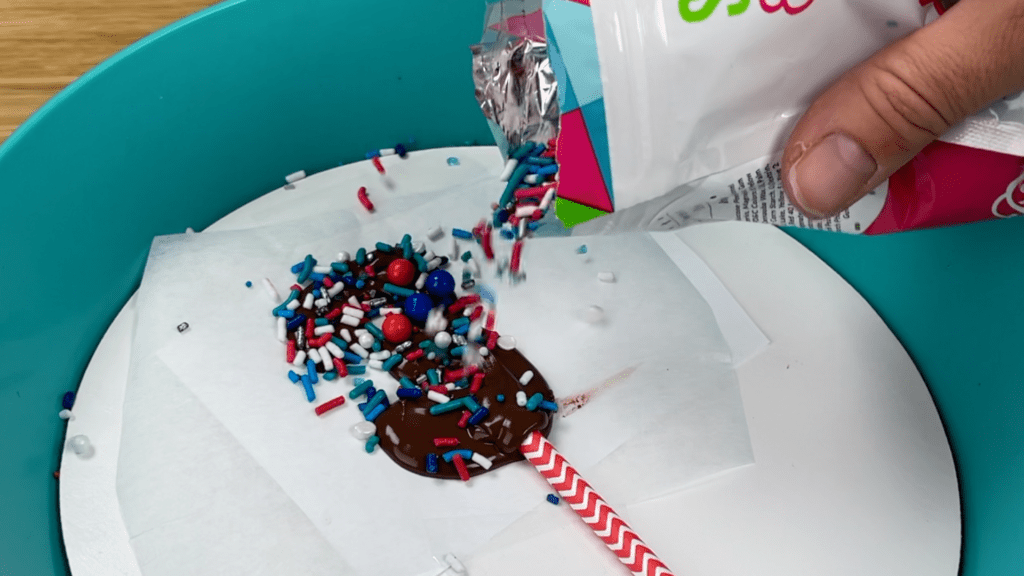
It will take about an hour for the chocolate to set in a warm room or you can speed up the process in the fridge or freezer for 5-10 minutes. Pick the cake board up, letting the extra sprinkles fall into the bowl or tray, and peel the chocolate off the parchment paper.
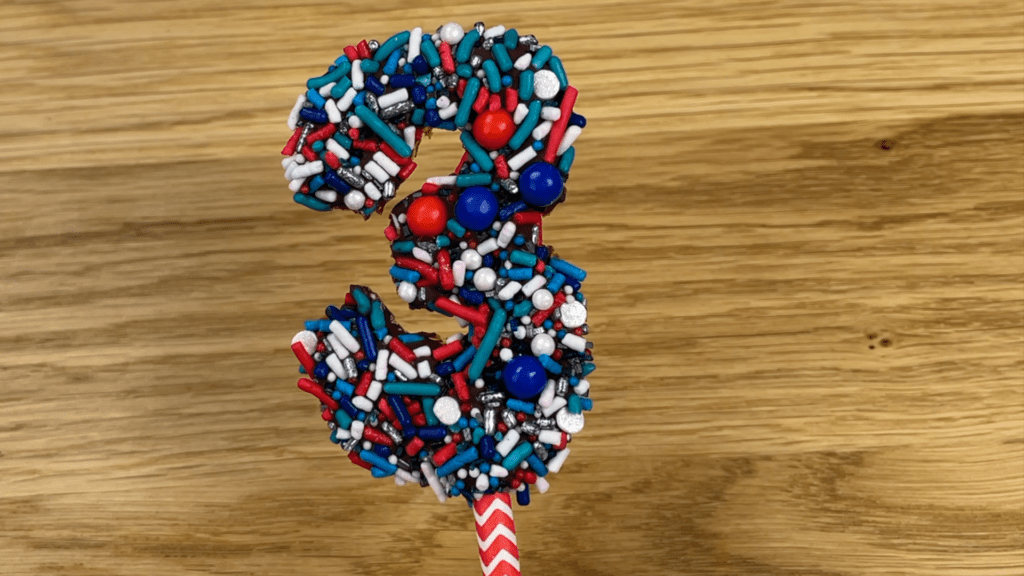
Push the straw into a cake and voila!
#2 Candy Squiggles
For shiny and delicious cake toppers, melt hard candy or boiled sweets in the microwave for 1 minute, until they’re liquid and bubbling.
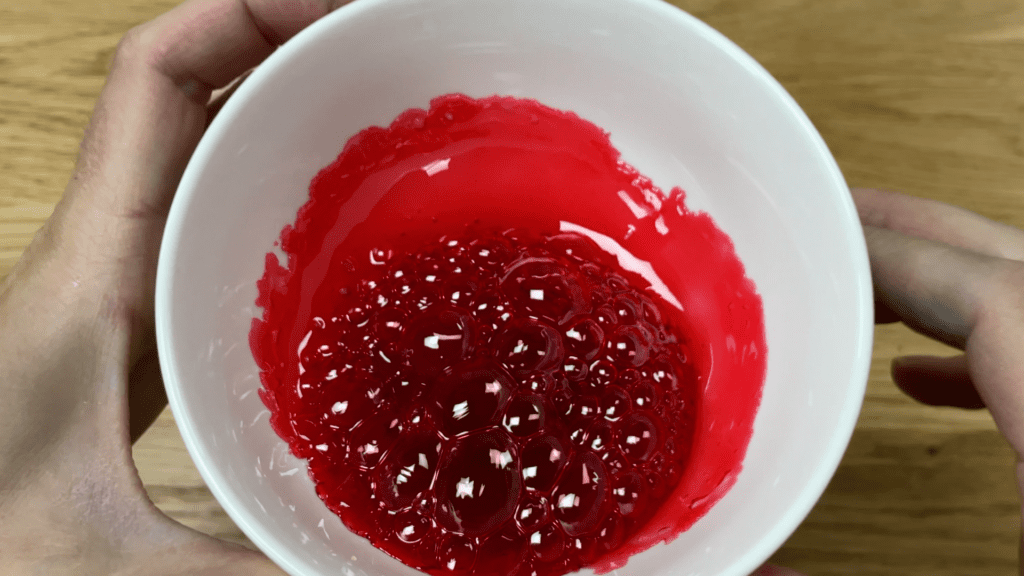
Wait about a minute for the sugar to stop bubbling and then drizzle the melted candy over a piece of parchment paper. If you use the melted candy immediately, it will spread out and pool when you pour it.
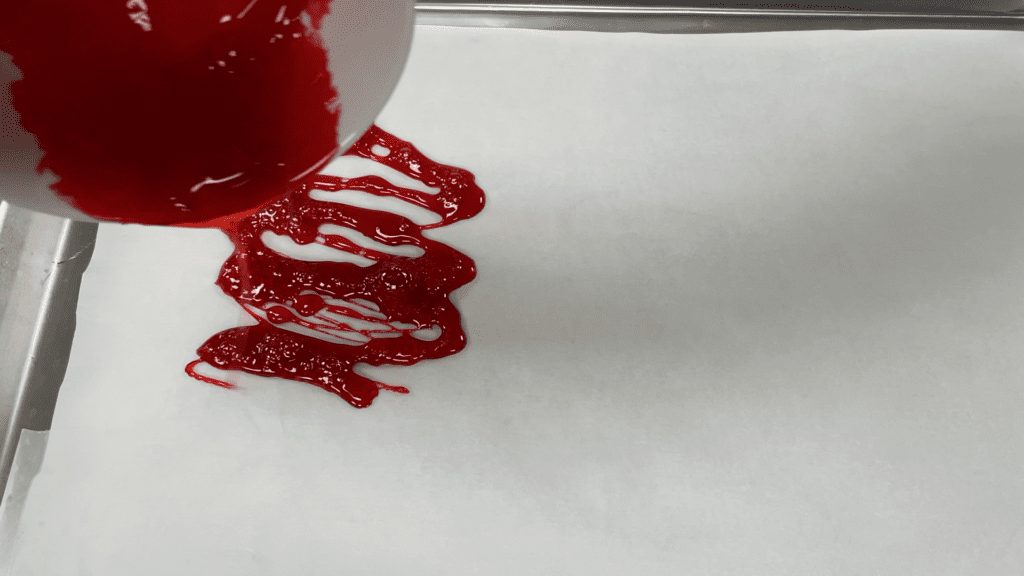
By waiting a minute, the drizzles will be thinner and you’ll have more control over the design.
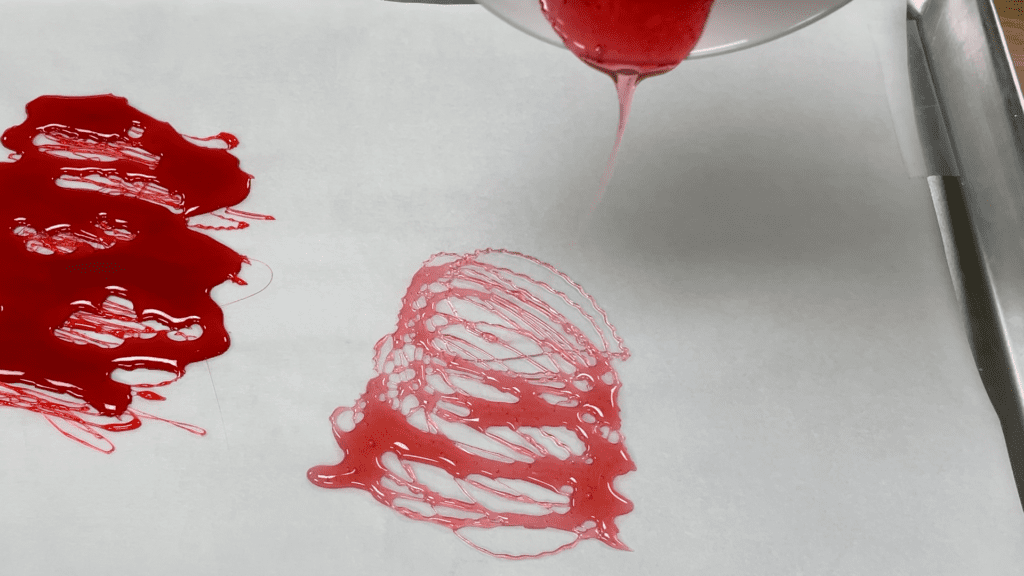
Piping is as easy way to attach these to a cake, so while the sugar cools use a piping bag of buttercream and your favourite piping tip to pipe a design onto the top of the cake.
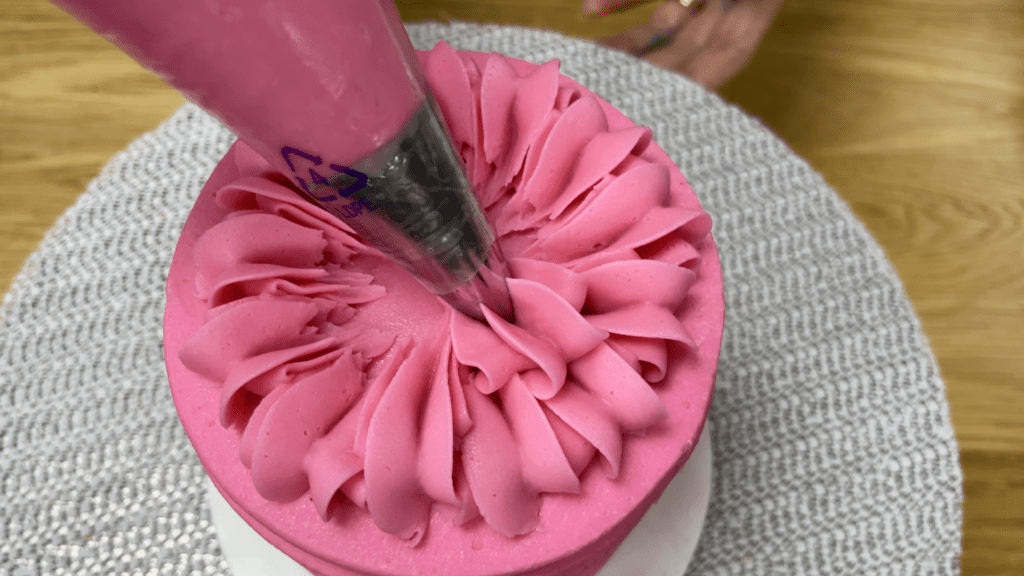
Peel the candy decorations off the parchment paper when they set and push them while the piping is still soft and sticky. When the buttercream sets, it will secure the toppers in place.
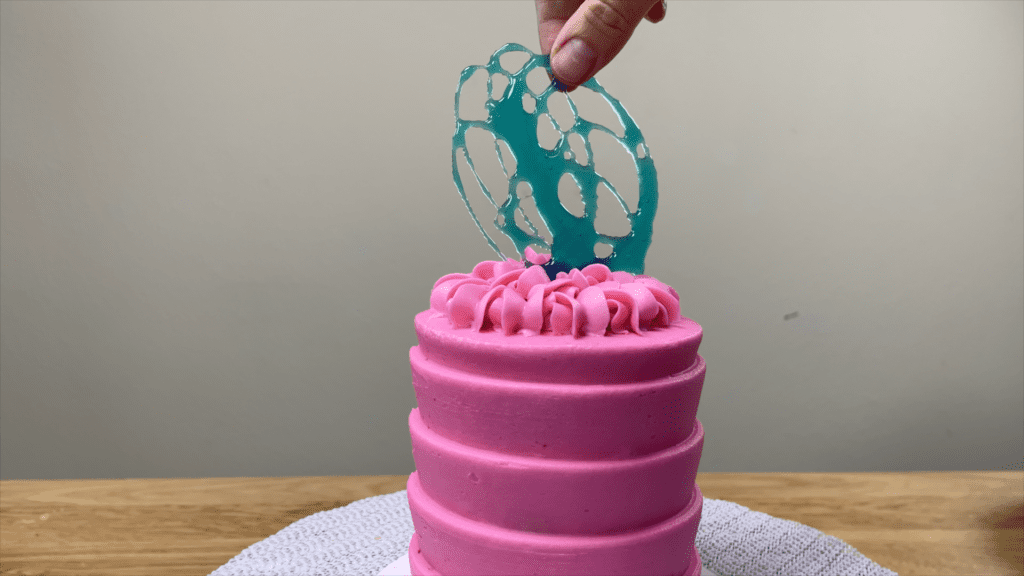
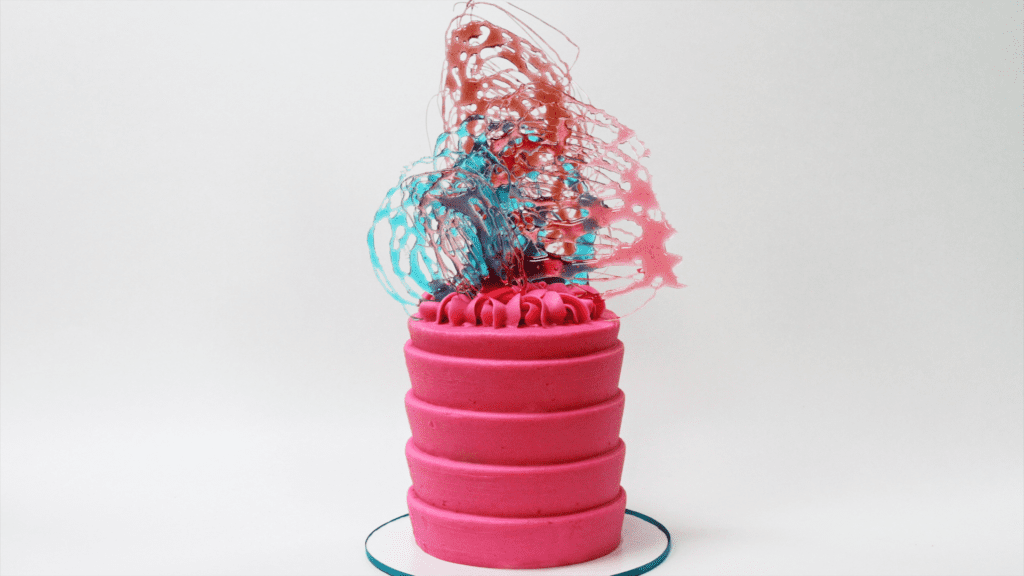
No one will guess how incredibly easy these toppers were to make!!
#3 Sprinkled Chocolates
Make dramatic, colourful toppers by pouring melted chocolate onto parchment paper or a silicone mat and spreading it around with an
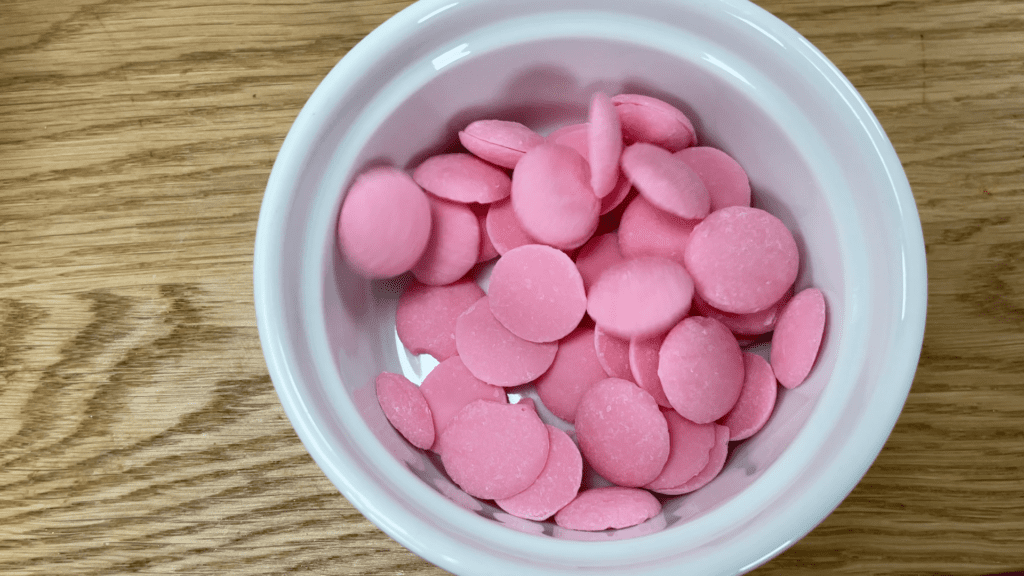
Score lines in the chocolate now, while it’s melted, so it will be easier to cut later. Scatter some sprinkles on now and they’ll stick because the chocolate hasn’t set yet.
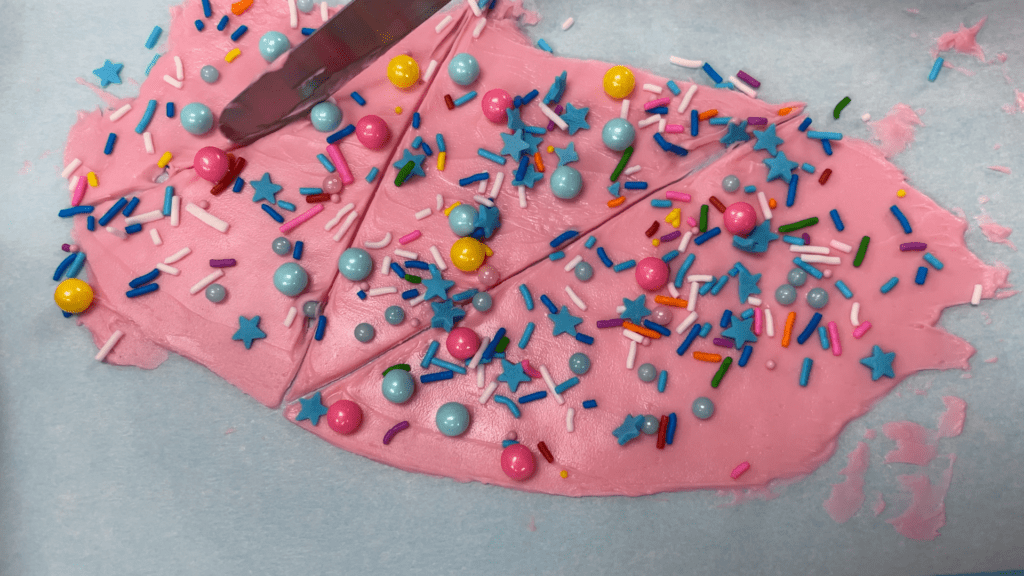
Leave the chocolate for about 30 minutes to harden, or put it in the fridge or freezer for a few minutes, and then use a sharp knife to cut along the lines you scored earlier.
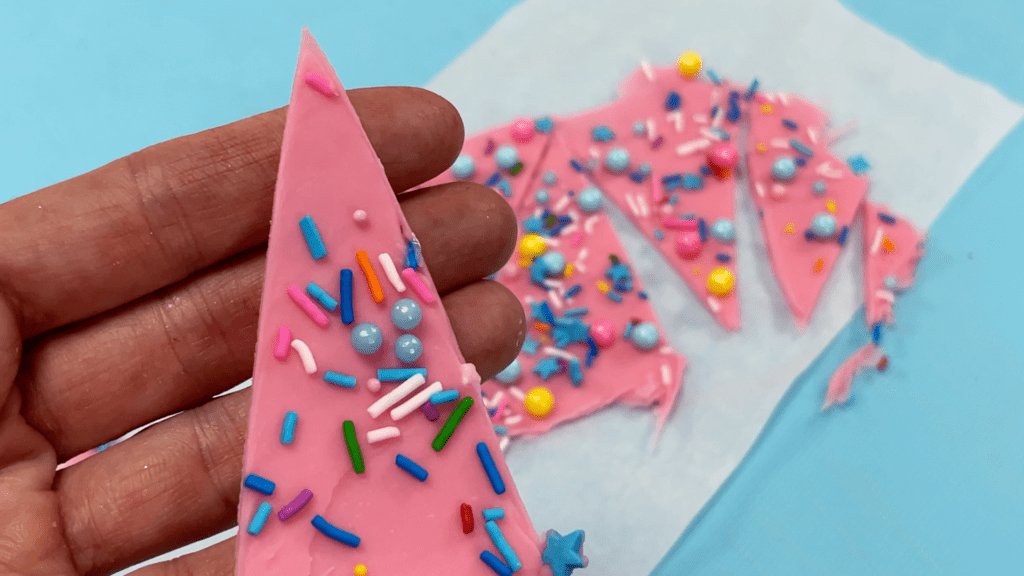
If the frosting on the cake has set and it’s too firm to be able to push the chocolates in, use a sharp knife to cut lines wherever you want to place a chocolate.
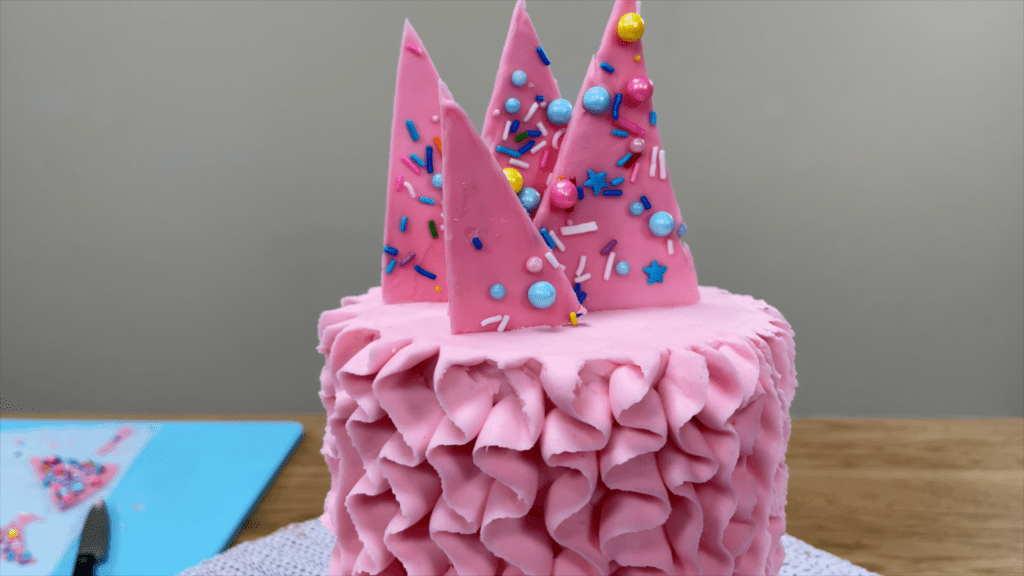
Press the chocolates into the top of the cake to add some height and colour!
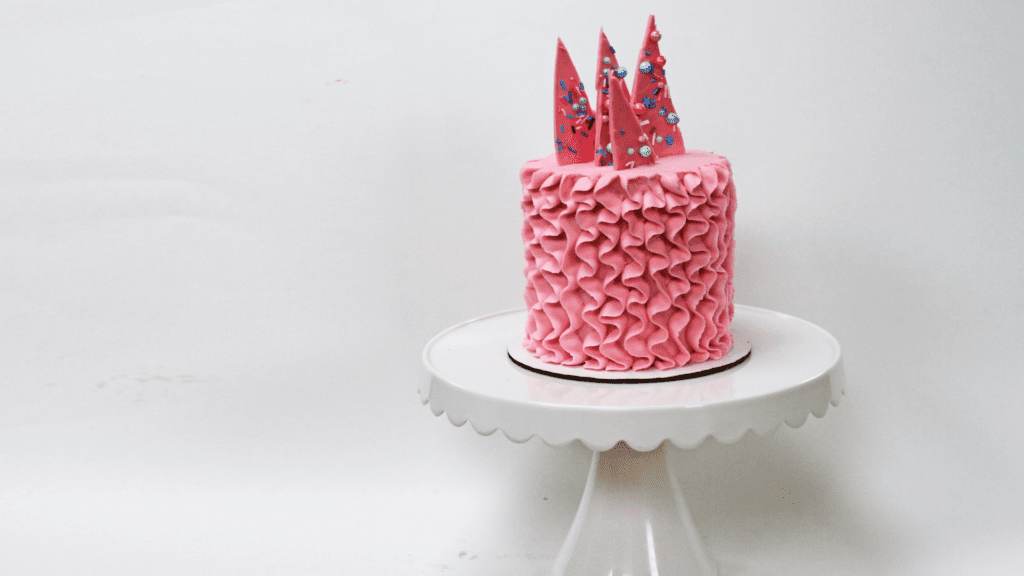
#4 Meringue Pops
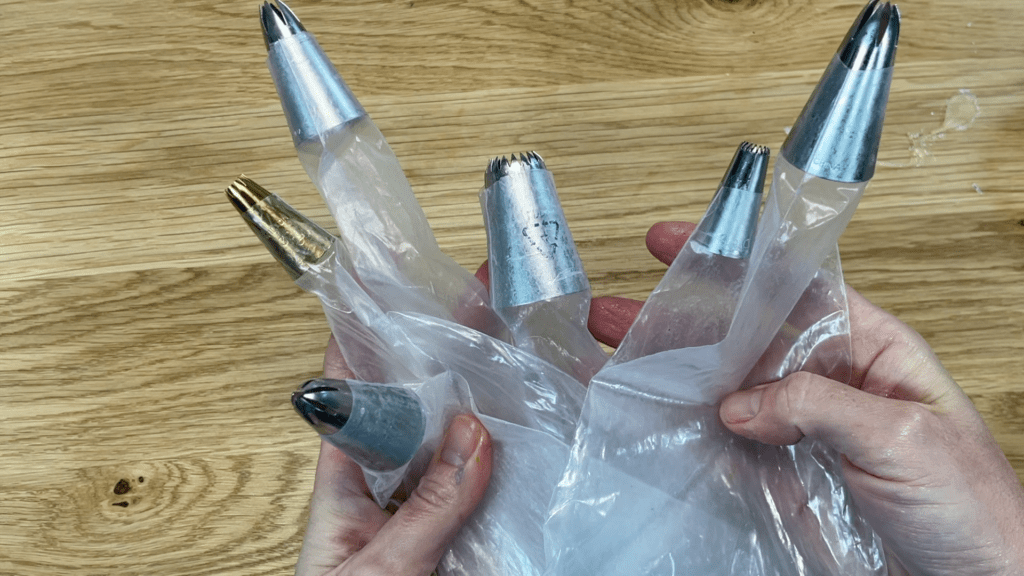
For meringue pops you’ll use the piping bags and tips you already use for frosting cakes and all you need are egg whites and sugar.
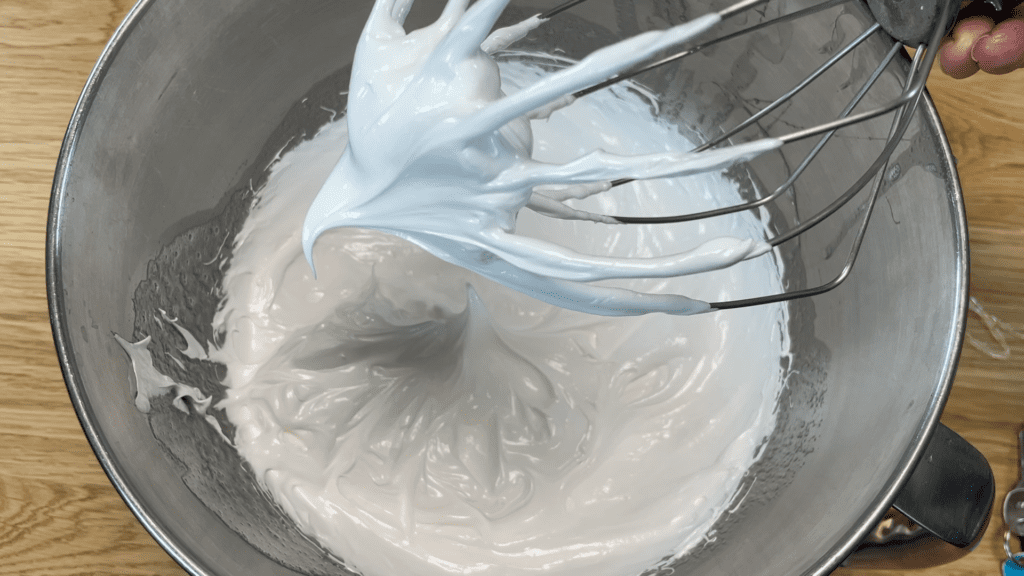
Whisk them together until stiff peaks form and I teach this in detail in my online course on 50 Easy Cake Decorating techniques, along with 49 other techniques!
Tint bowls of the meringue mixture and spoon it into piping bags. Pipe whatever shapes you like over paper straws on parchment paper or a silicone mat. You can add sprinkles if you like for some bling.
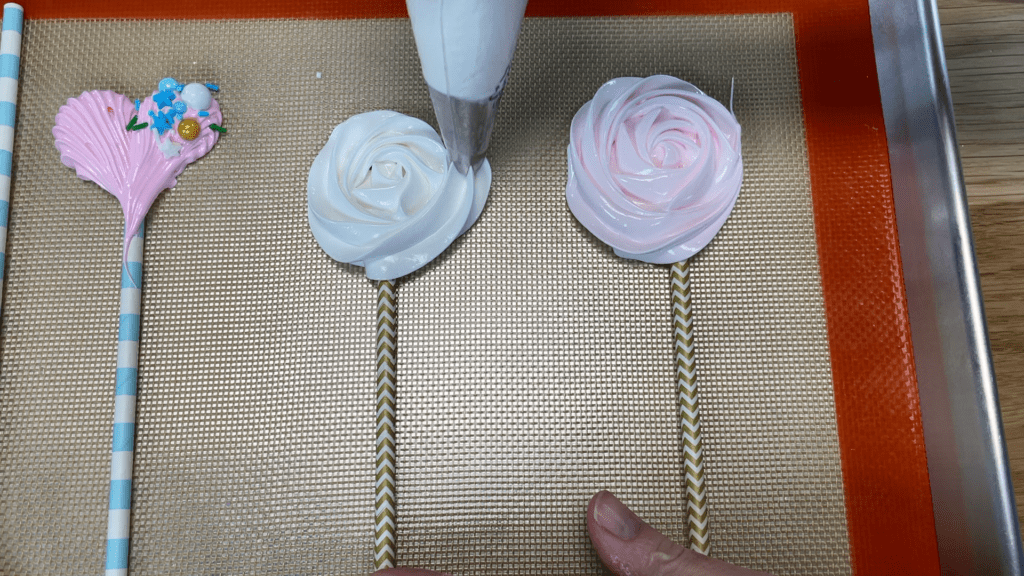
Bake them at 200F or 90C for 90 minutes. By cooking them at a low temperature you’ll prevent the meringue discolouring. After 90 minutes, touch a meringue pop and if it’s no longer sticky it’s ready but don’t take them out of the oven yet!
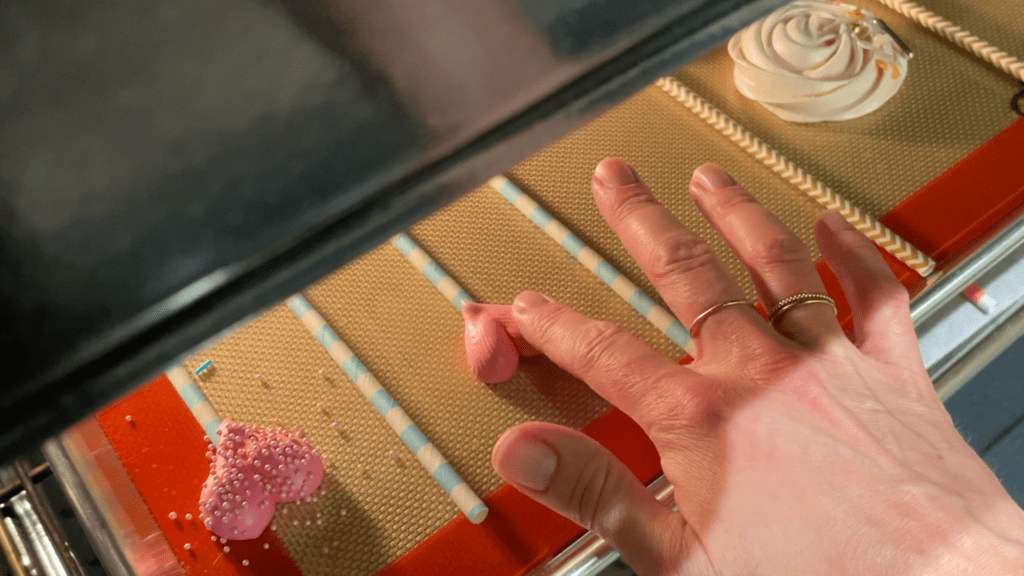
Turn the oven off but leave the meringue pops in the oven for another 2 hours and by letting them cool this gradually, you’ll prevent them from cracking.
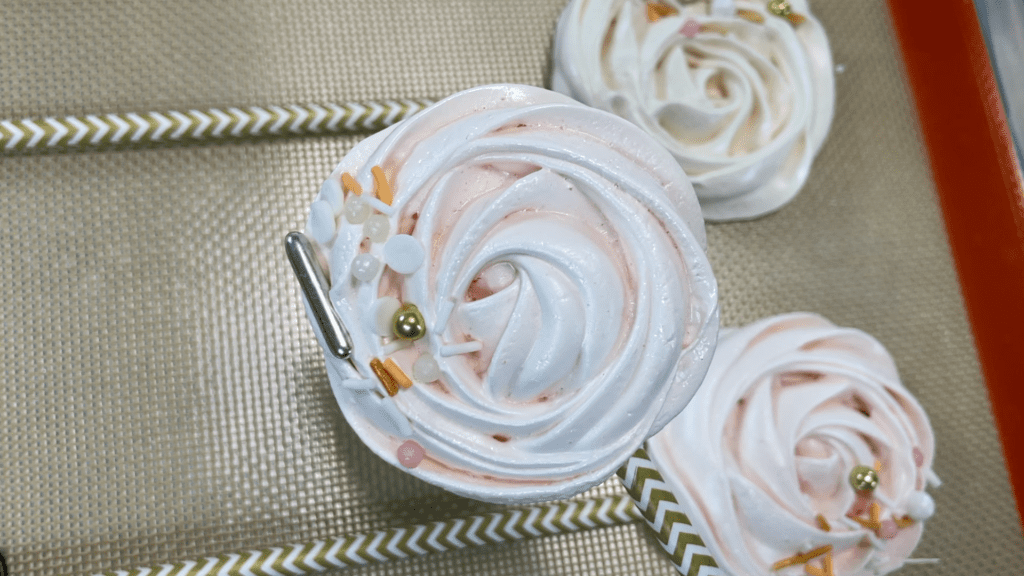
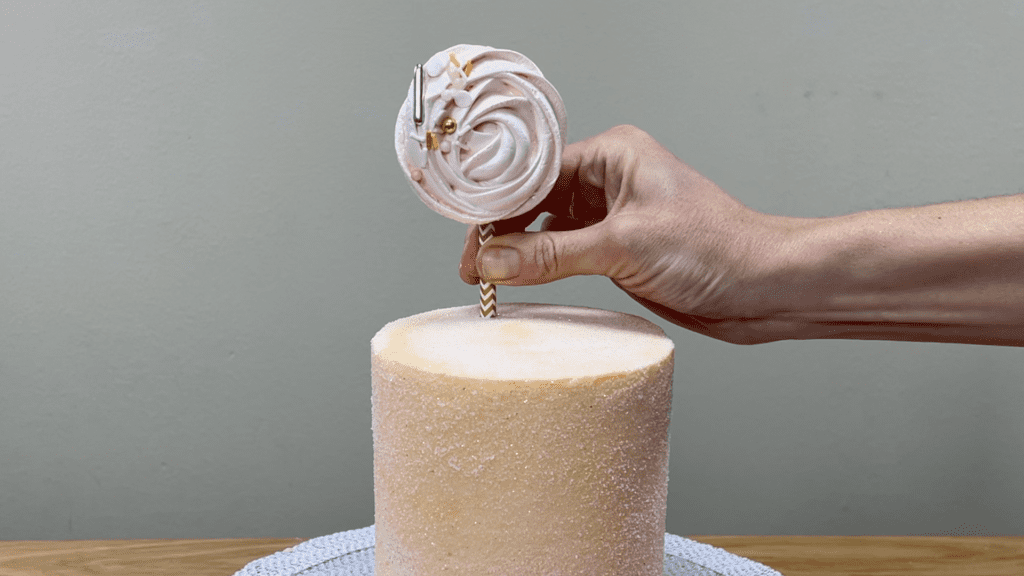
Lift the meringue pops up and push them into your cake, pushing the front ones in lower than the back ones so that they’re all visible.
#5 Metallic Chocolates
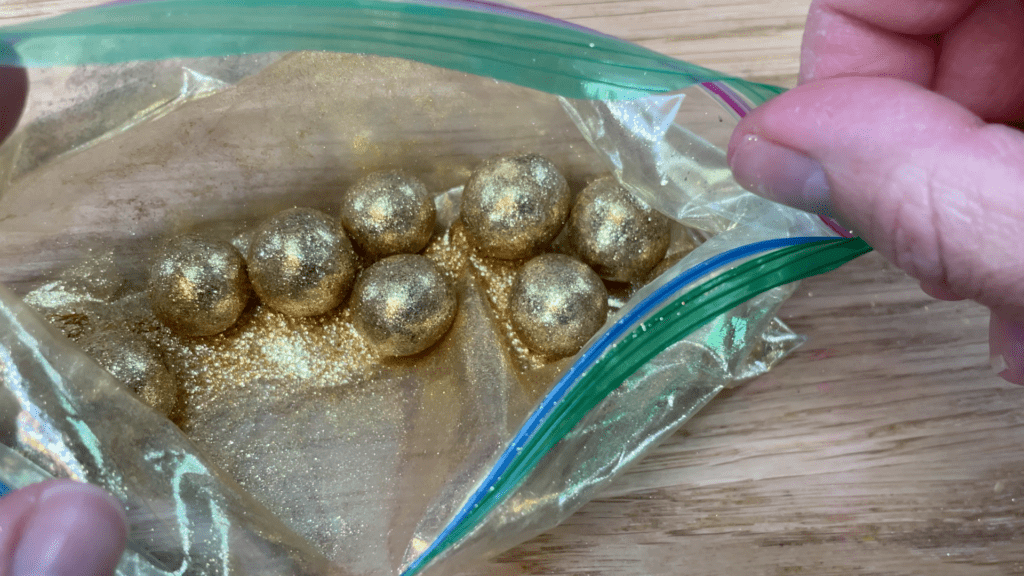
For metallic toppers, use a tiny amount of gold or silver luster dust or edible glitter in a ziploc bag and add chocolate malt balls or any other round chocolates.
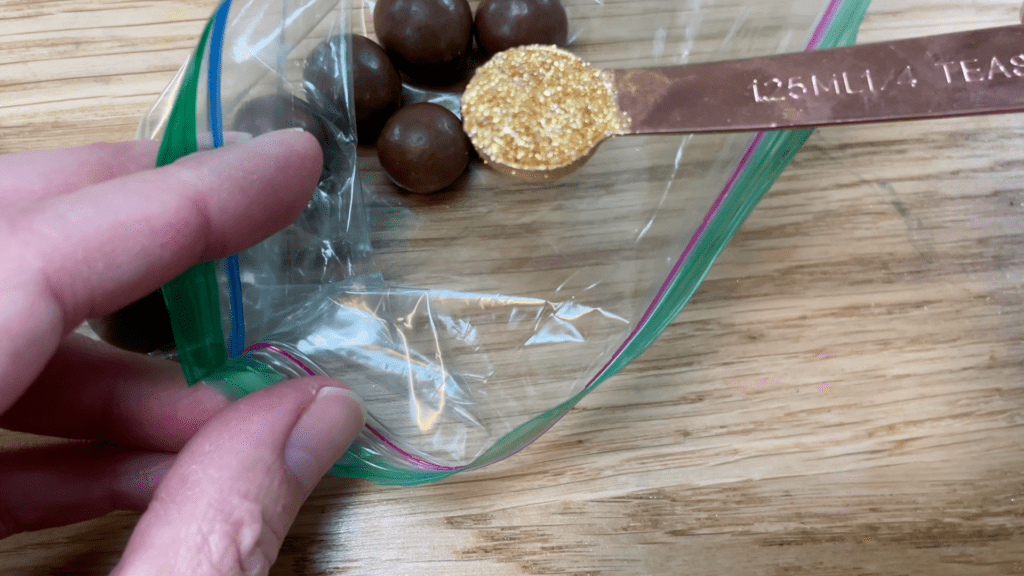
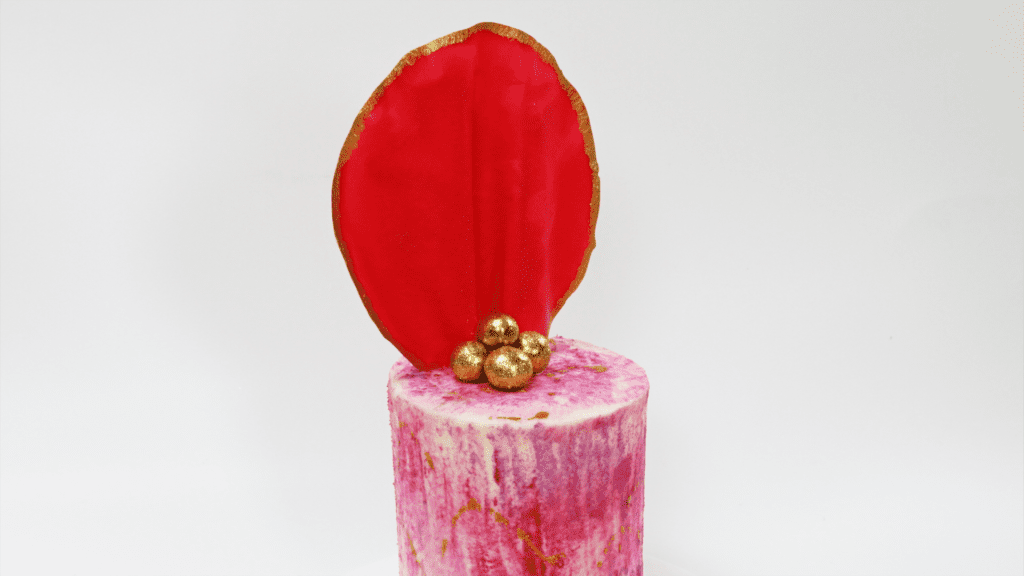
Seal the bag and shake the balls around gently to coat them in the powder. You only need about an 1/8th of a teaspoon of luster dust for this. Place the metallic balls on top of a cake for glamorous, metallic toppers!
If you’ve found this tutorial useful, for more ideas for cake toppers, borders, writing on cakes, frosting techniques, and decorative techniques, check out my online course on 50 Easy Cake Decorating Techniques.
Join my Club for access to ALL of my online classes as well as live online classes and Q&A sessions for members only!
Here’s the video version of this tutorial:
Mirror glaze is stunning and delicious AND it’s super easy to do with just two ingredients!
If you prefer to watch a video of this tutorial, scroll to the bottom of the page.
When you assemble your cake, choose a cake board that’s the same size as your cake, or trace around your cake pan and trim the board to be the same size.
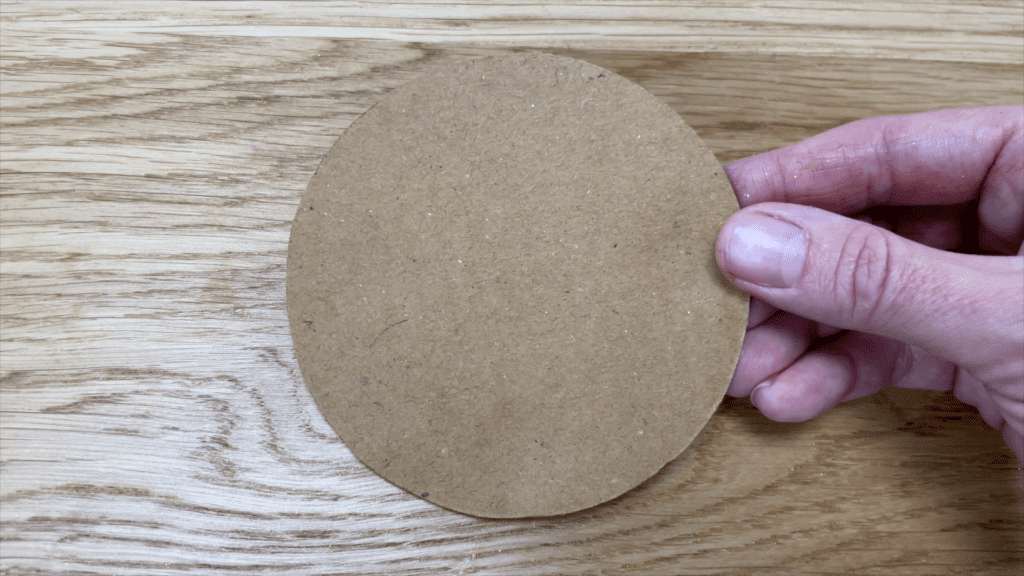
Attach the first layer of cake to the board with a dot of buttercream, which will act as glue. Your cake will never leave this cake board – it will be attached from now until serving.
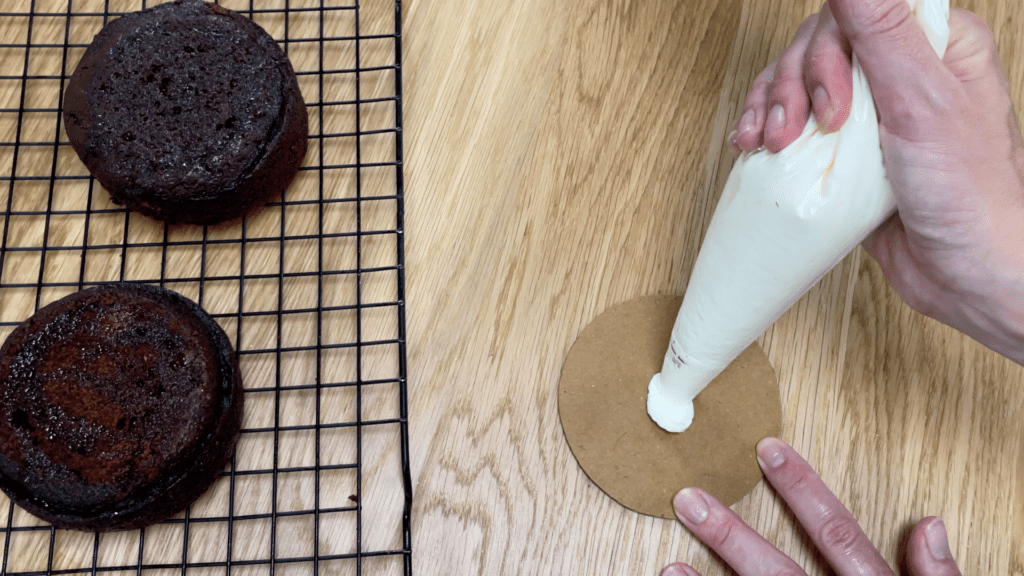
Alternate cake layers and filling to assemble your cake. Make sure the layers of cake are lined up directly above each other so that the cake doesn’t lean to one side. Shorter cakes are easier for mirror glazes because the glaze will have a smaller distance to cover.
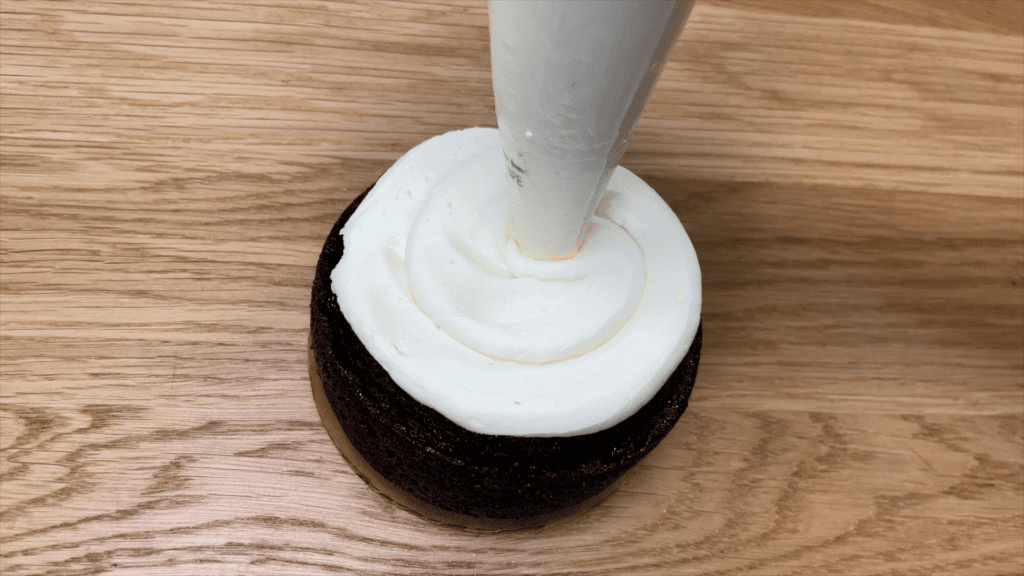
Use tape to attach the cake on its small board onto a larger board so that you can frost it more easily. You’ll detach the cake from the larger cake board later, before applying the mirror glaze.
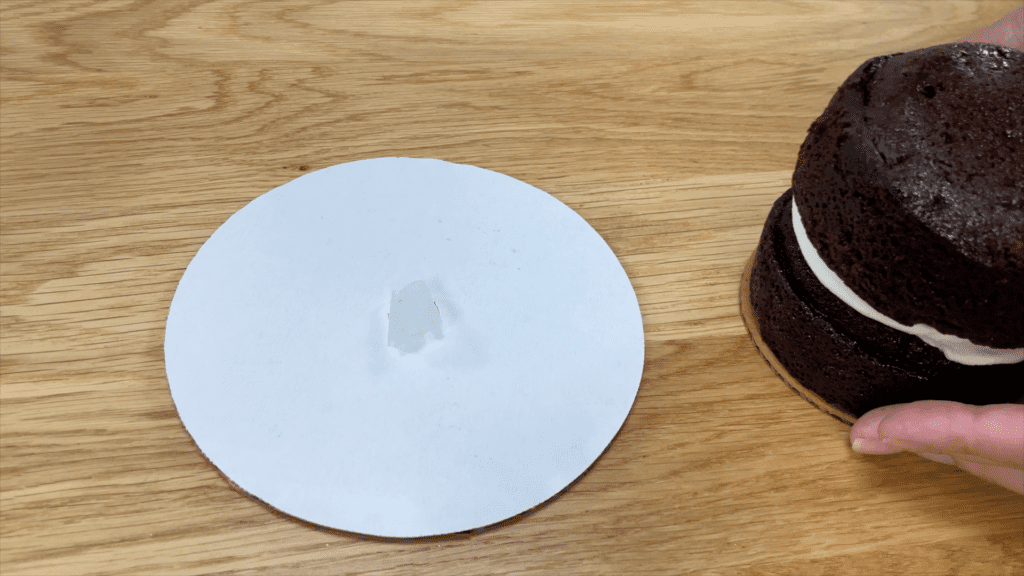
A crumb coat is really important for mirror glaze cakes because it traps any crumbs that come off the cake, so that when you spread on your final coat there won’t be any crumbs in that and you’ll have a very smooth surface on the cake. I’m using my 4 Minute Buttercream for this cake.
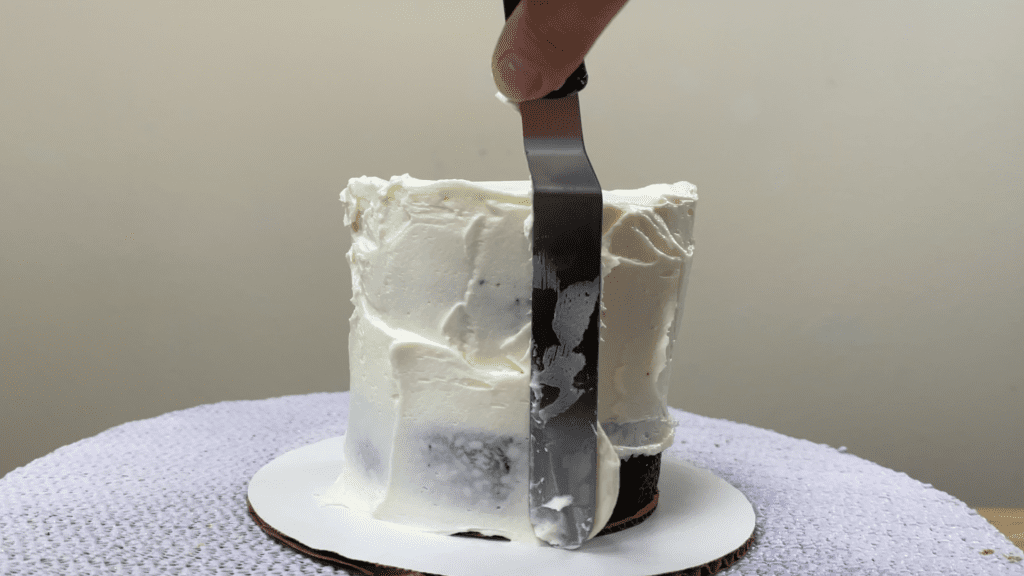
It doesn’t matter if you can see the cake layers through the frosting – it’s going to be covered up but it needs to provide a neat SHAPE for the cake. The mirror glaze will sit on top of this frosting but it only provides a very thin layer so you’ll notice any imperfections in the frosting, so you want the frosting to be as smooth as possible.
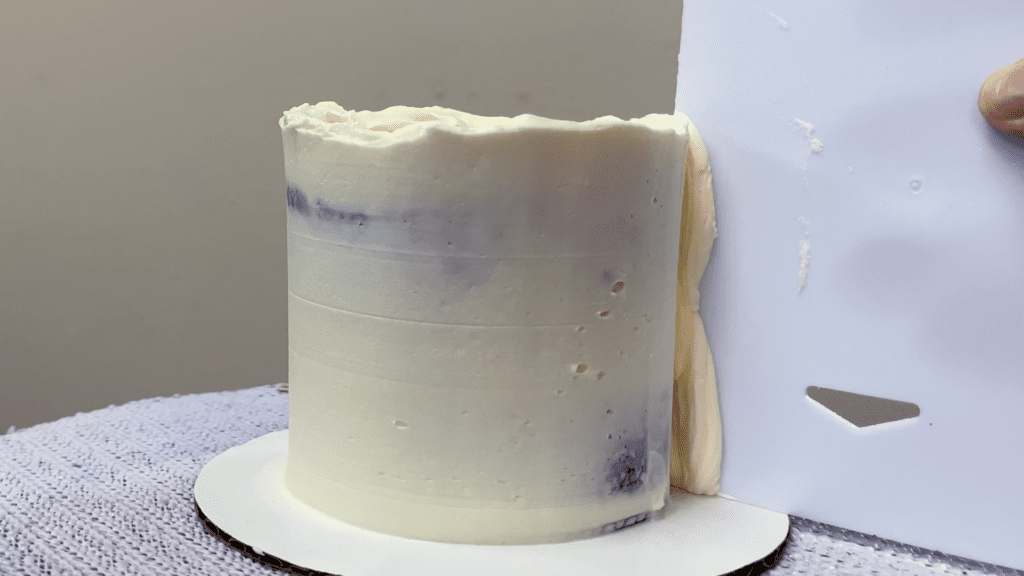
Pay special attention to the top of the cake, swiping sideways with an
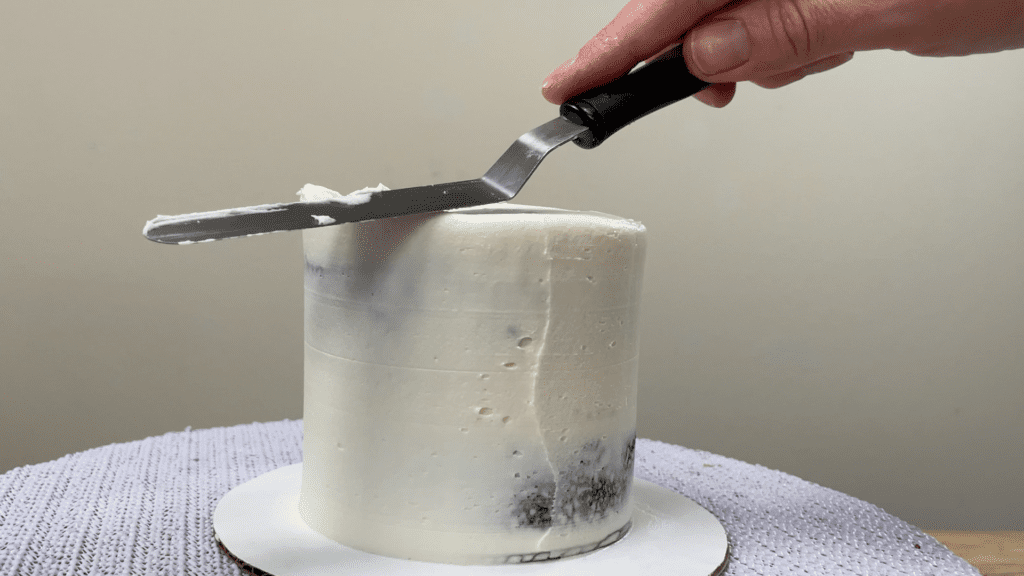
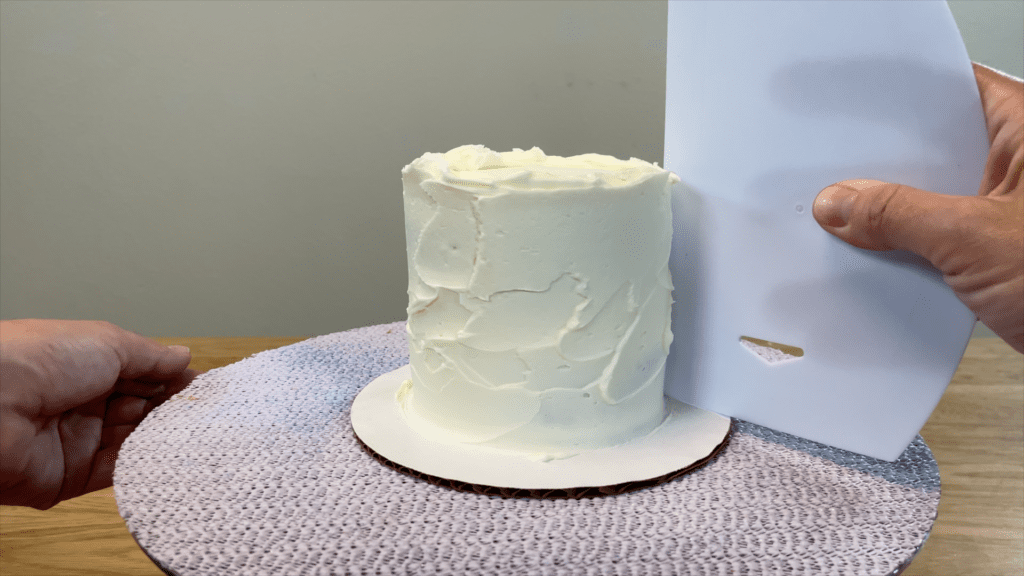
After frosting the cake, chill it in the fridge for at least an hour, or ideally overnight, to set the frosting. The frosting needs to hold its shape while you’re applying the mirror glaze and the longer it’s been in the fridge, the firmer the frosting will be and the better it will hold its shape.
The mirror glaze is VERY easy to make. All you need is white chocolate and cream at a 2:1 ratio. This means you’ll need double the amount of white chocolate compared to cream. For this 4 inch cake I’m using about 100g of white chocolate and 50g cream, which should be heavy whipping cream or double cream.
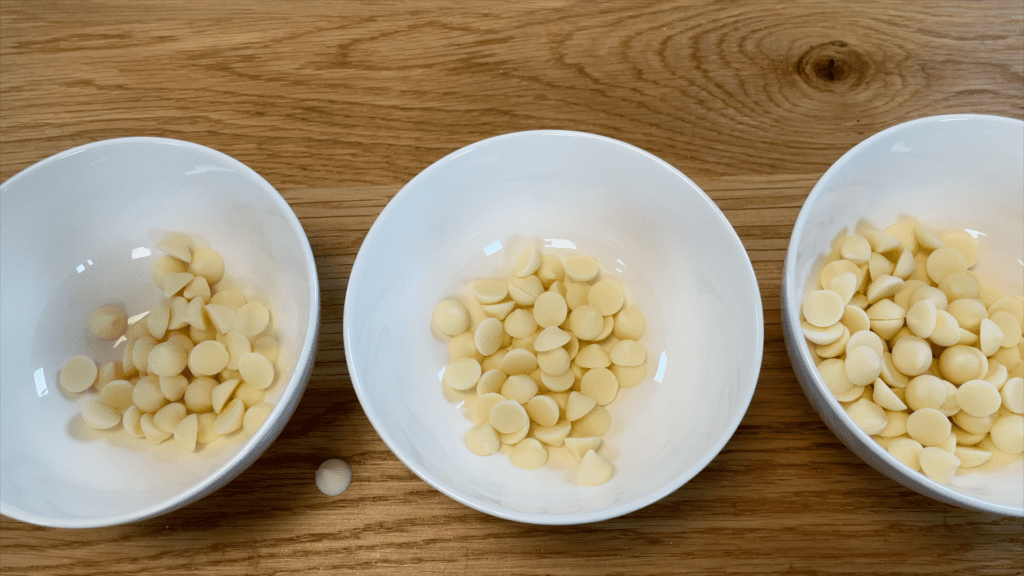
You can prepare this in separate bowls for each colour or you can use one bowl and then divide the glaze between different bowls to colour it later. Put each bowl on the scale and zero it before adding the chocolate so that you’ll only be weighing the chocolate chips. Check the weight of the chocolate, divide it in half, and add that amount of cream to the bowl.
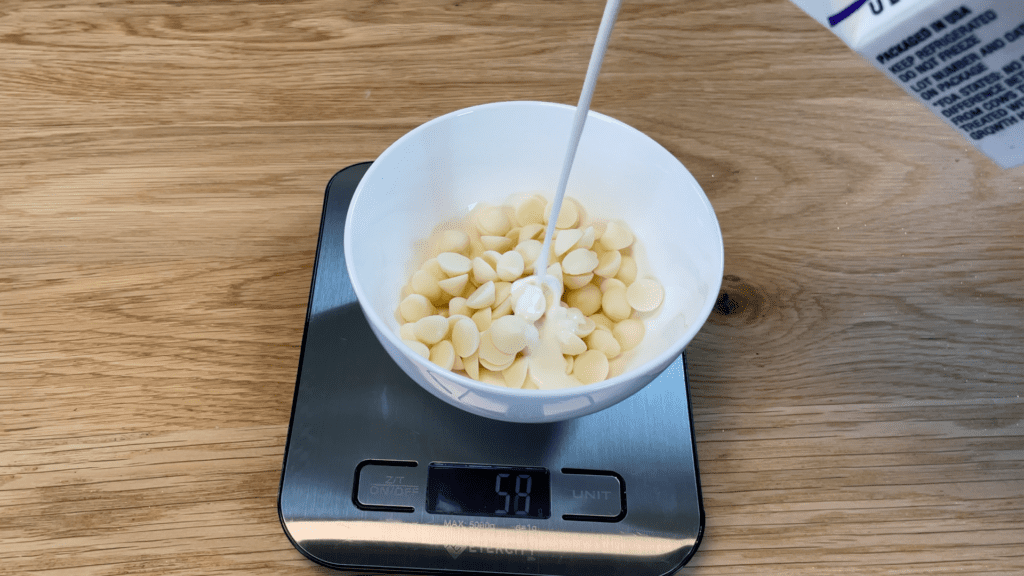
Put the bowl or bowls in the microwave at 80% power for 1 minute. Using low power and short intervals will prevent the chocolate from overheating.
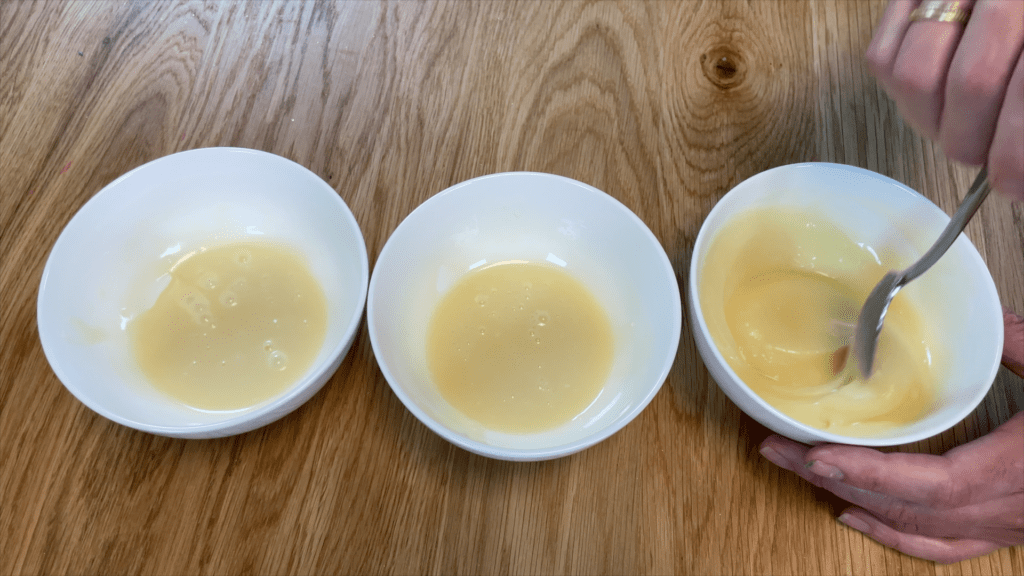
Stir the chocolate until it’s completely melted, with no lumps, to achieve a very smooth mirror glaze on the cake. You can microwave it for another 15 seconds at a time if there are still lumps.
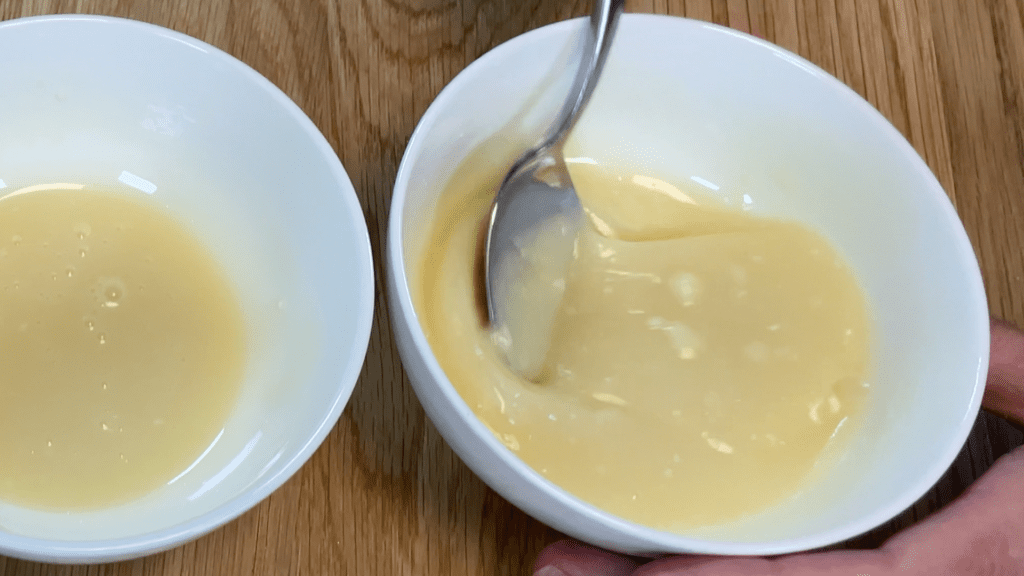
Now this is REALLY important. To tint the glaze you’ll need oil based colours, which are different to the gel or liquid colours you use to tint buttercream. Those have water in them and they’ll cause the chocolate to seize. With oil based colours you can use large amounts of them without affecting the consistency of the glaze. If you want a true white glaze you can use white icing colour.
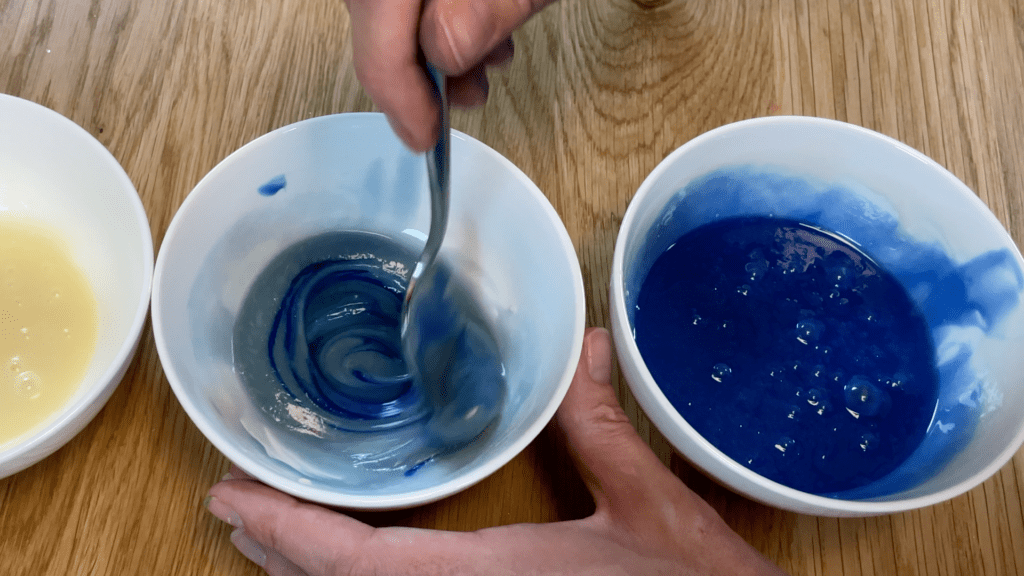
Wait for the glaze to come to room temperature before you use it because if it’s still warm it will melt the frosting on the cake and ruin those sharp edges around the top of the cake.
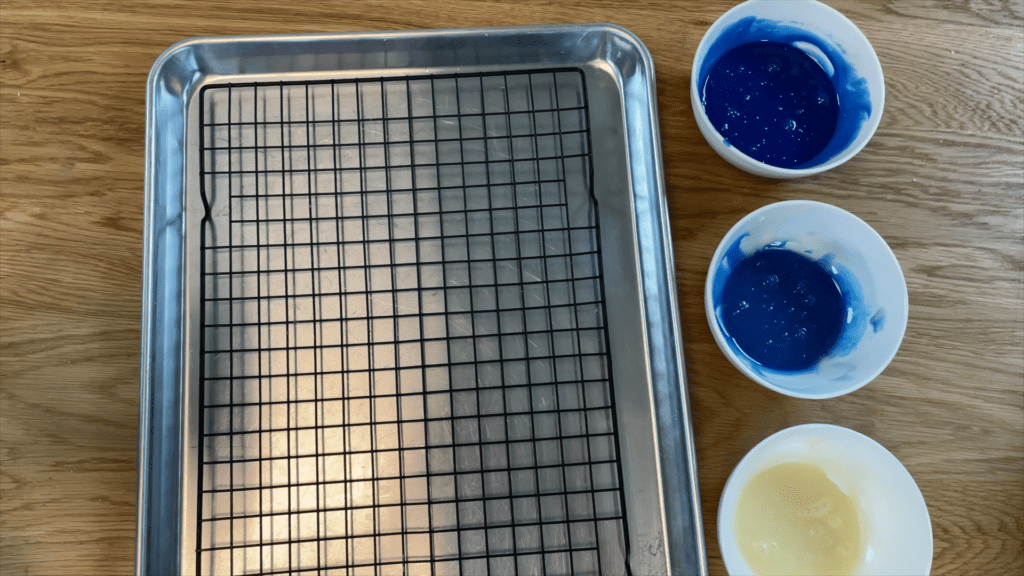
Now that the frosting on the cake has chilled and it’s firm, separate the cake from larger board. Slide an
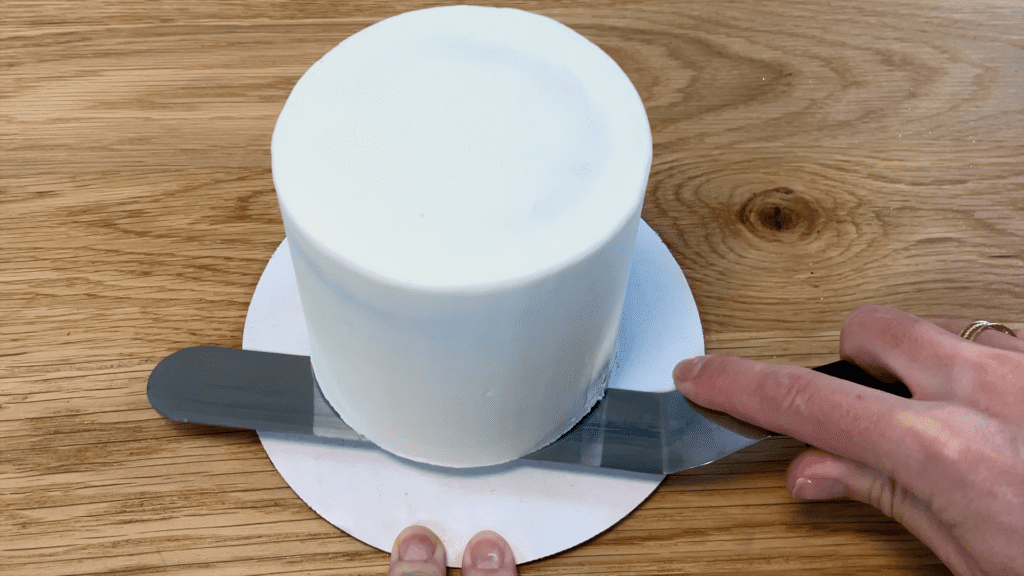
Place it on wire rack over a baking tray or bowl, which will catch the mirror glaze as it drips off the cake. You can touch the cake as you move it because the frosting has set so it’s firm.
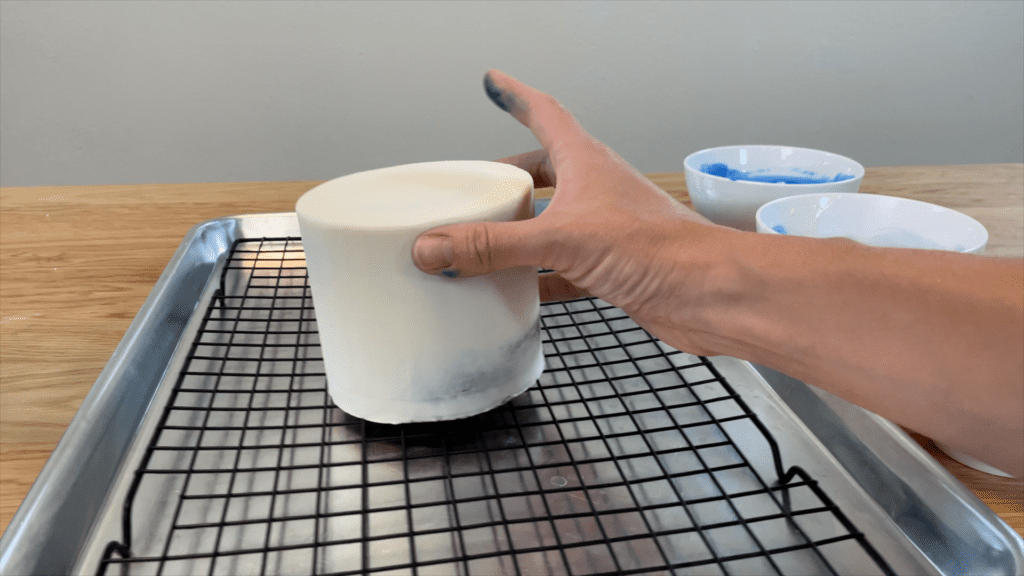
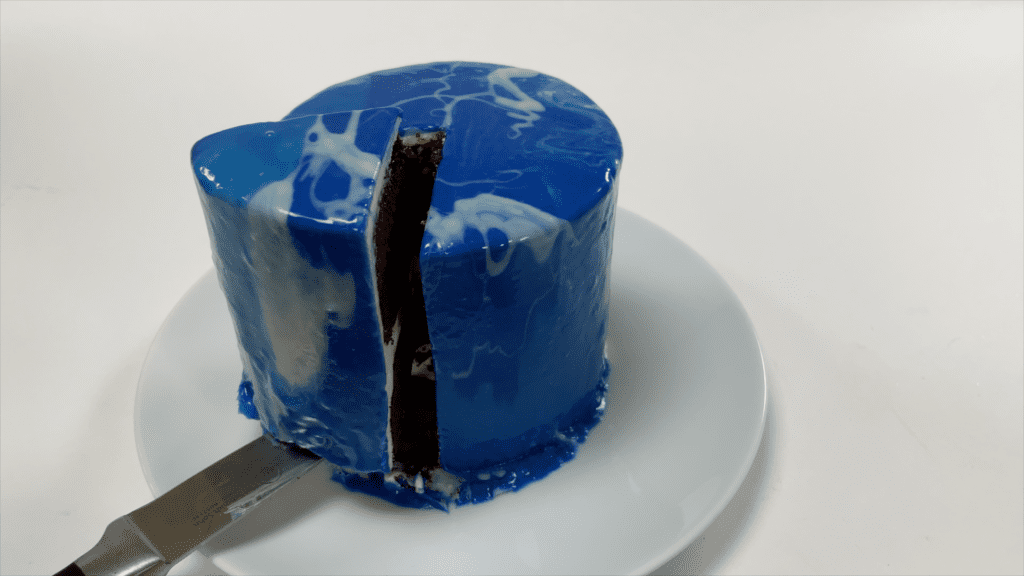
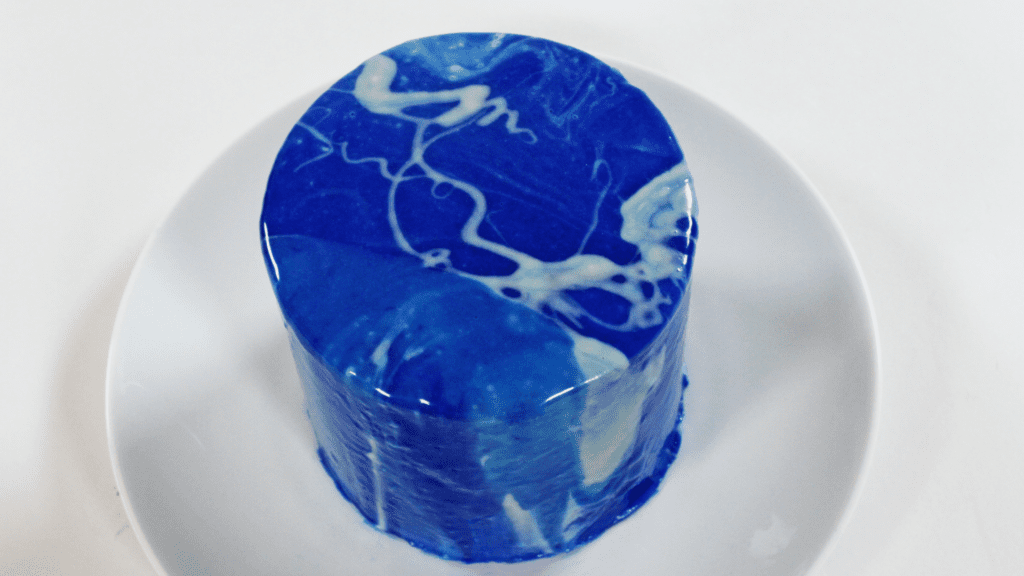
Pour the mirror glaze over the cake, drizzling it back and forth or pouring it straight down onto the top of the cake.
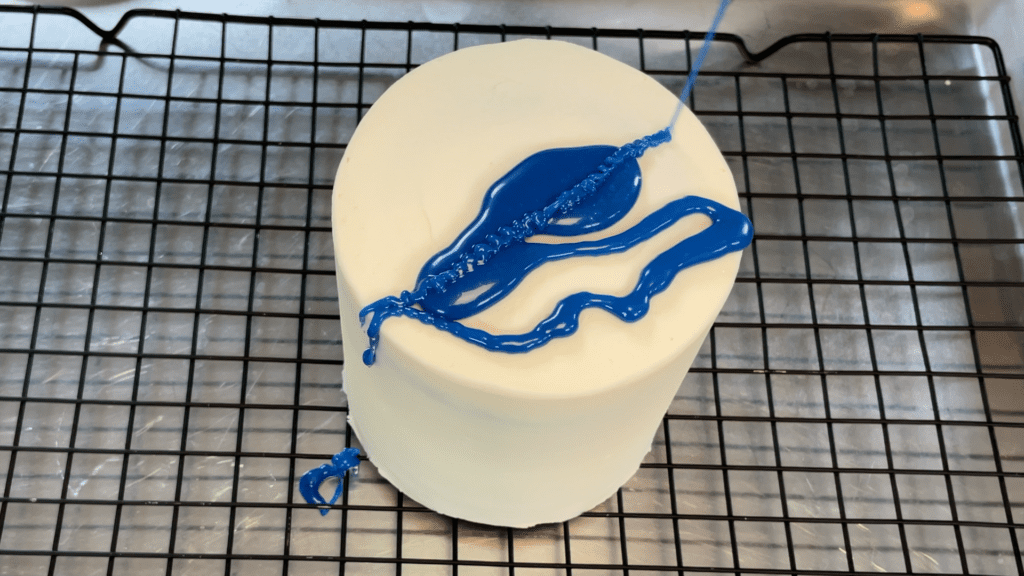
The glaze will spread out to cover the top of the cake and then spill over the edges to drip down the sides of the cake. Keep pouring the glaze until it has covered the sides of the cake all the way down to the bottom.
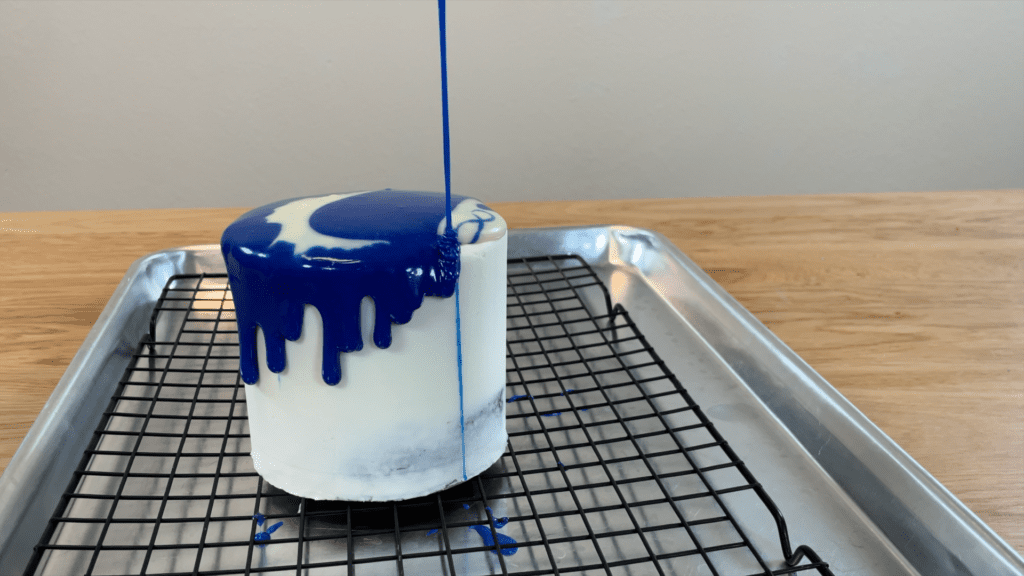
Switch back and forth between colours to create really fun effects. The consistency of the mirror glaze is really important – if it’s too thick it won’t run down the sides of the cake and you’ll create a drip instead. If it’s too liquid it will be very thin and it won’t create a bold colour or be as shiny.
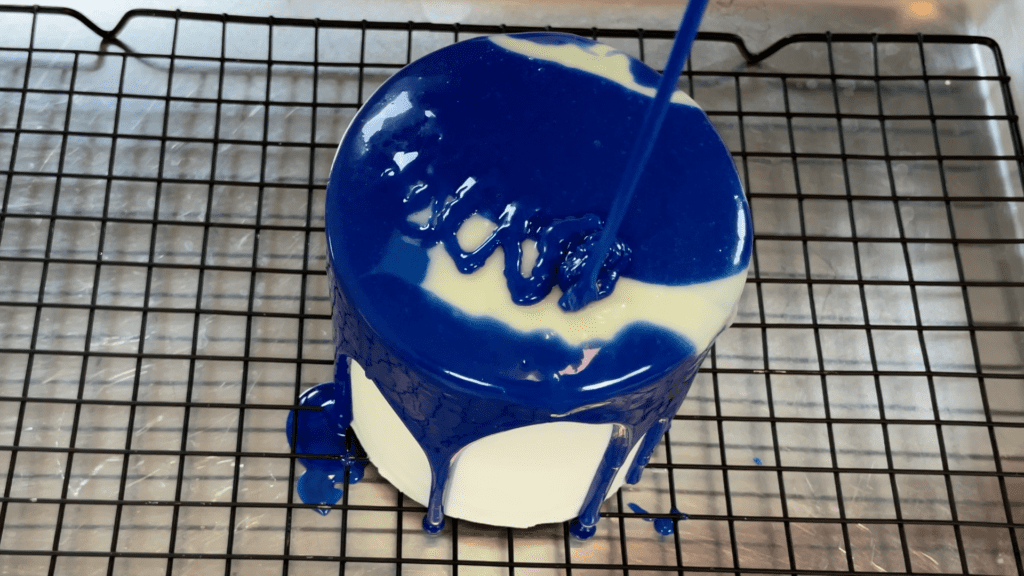
If there are any bare spots near the bottom of the cake where the frosting is visible, use a spoon to gently nudge the glaze to cover those areas.
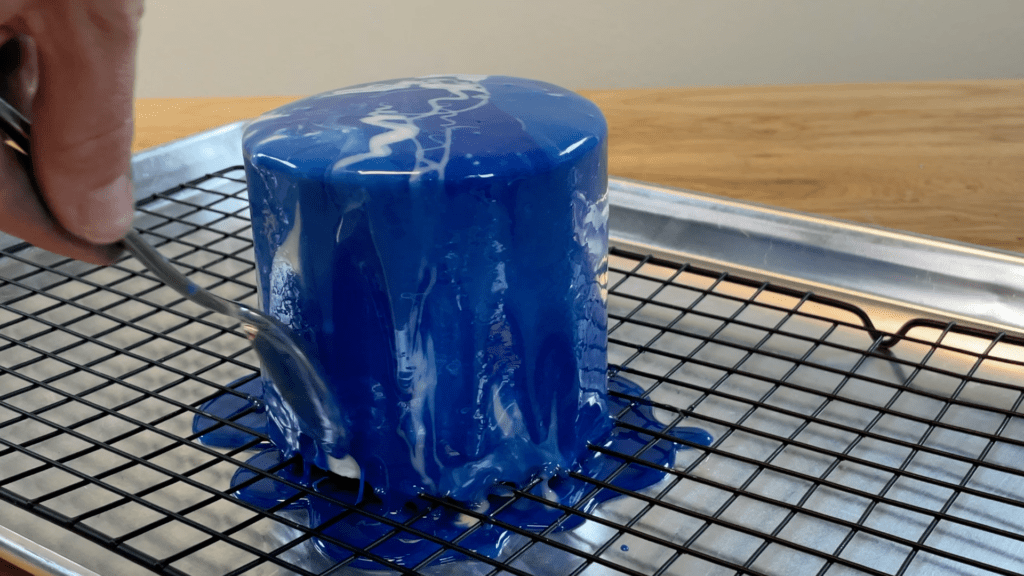
Optionally, you can refrigerate the cake until glaze chills and gets a bit thicker and more stable but it will always be sticky so you won’t be able to touch it. Use an
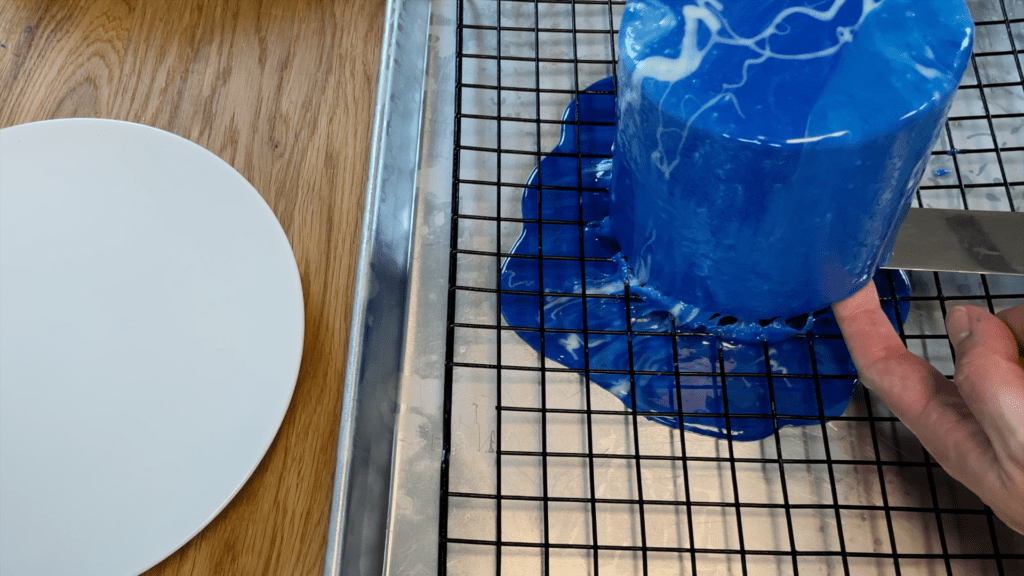
Carefully transfer the cake onto a plate or serving platter or cake stand to serve the cake on. Center it on the plate and then slowly pull your finger and
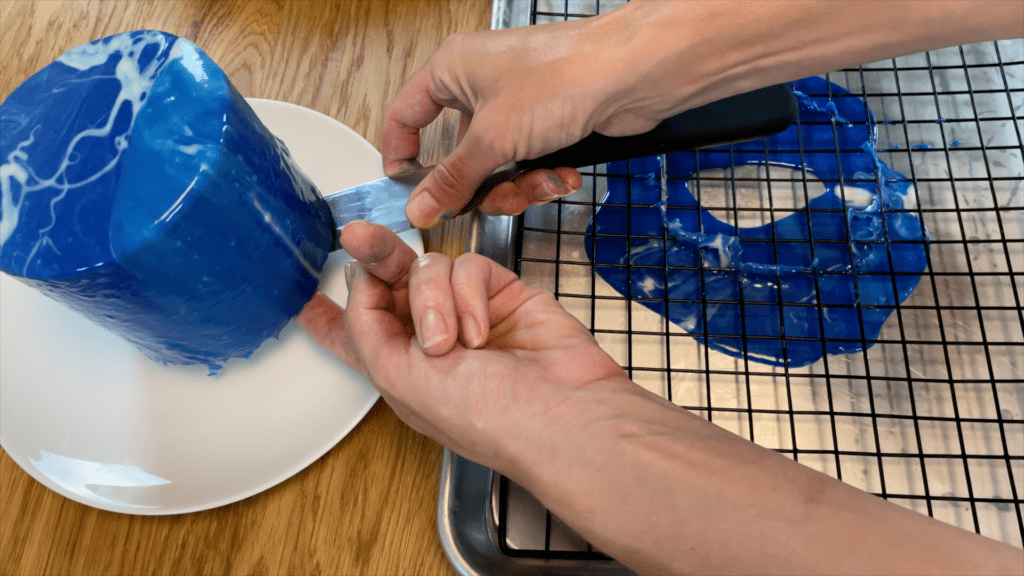
“Wow” everyone with your shiny cake that only used two ingredients, and then slice into the cake and enjoy!
If you have any questions about this method, ask me in the comments! If you’re looking for inspiration, join my Club for access to ALL of my online classes as well as live online classes and Q&A sessions for members only!
Here’s the video version of this tutorial:
You can paint on cakes using lots of different techniques and simple tools and ingredients. In this tutorial I’ll show you 5 ways to paint on cakes usinga paintbrush, sponge, palette knife, buttercream, and gel food colours.
If you prefer to watch a video of this tutorial, scroll to the bottom of the page.
PAINTING WITH BUTTERCREAM
If you use buttercream as your paint, start by tinting the colours you want to use. Two key points here: first, make sure the consistency isn’t too stiff. The buttercream needs to be easy to stir, leaving soft peaks behind your spatula and a smooth trail without air bubbles.
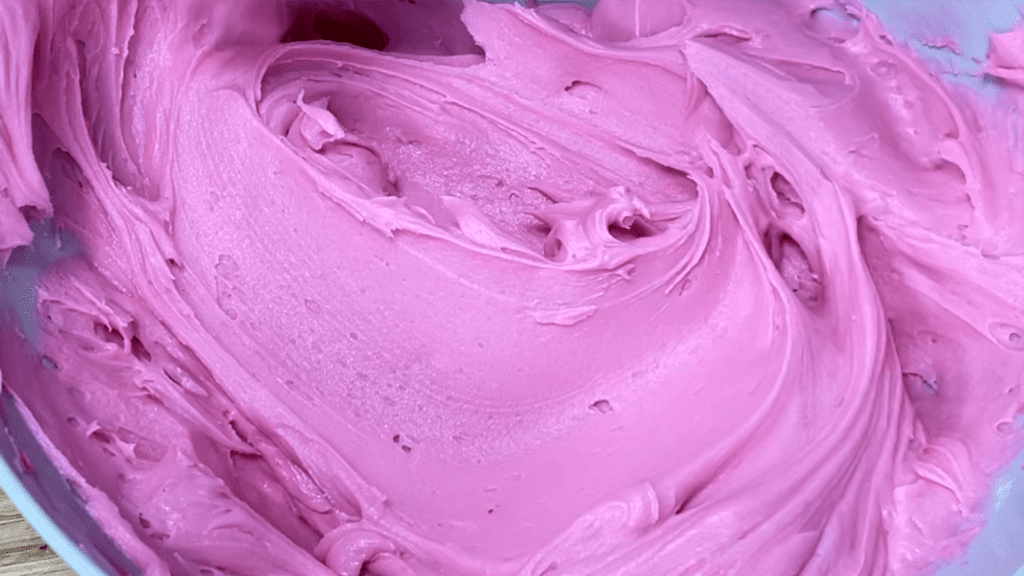
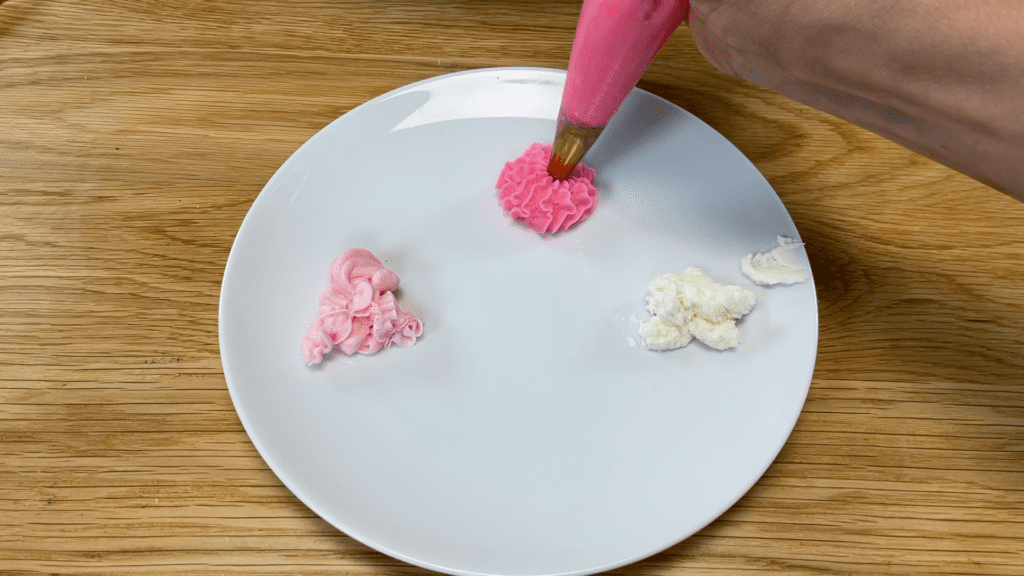
Second, remember that you don’t need a lot for painting, because even if you’re going to be covered a large surface of the cake, you’ll only be painting a thin layer so a spoonful of buttercream is probably enough.
#1 Painting with buttercream + a paintbrush
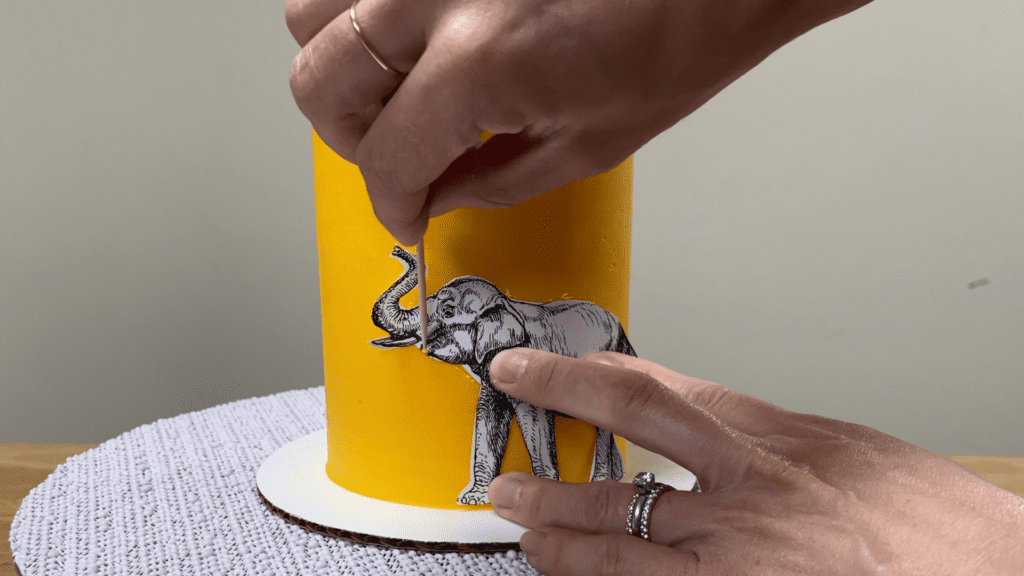
Not surprisingly, you can paint on cakes with a paintbrush! To paint an animal or a figure or any other shape, start by outlining your shape onto a cake using a toothpick. You can draw it freehand or trace around an image you’ve drawn or printed.
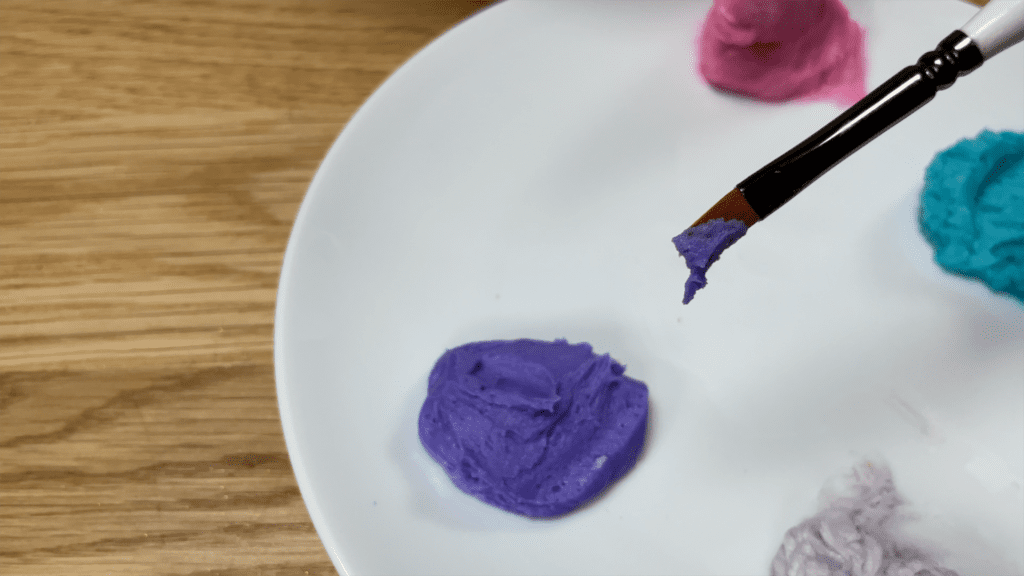
Create a palette of colours by putting some blobs of coloured buttercream on a plate and use a paintbrush to dip and then paint onto a cake. Using a small paintbrush makes it easier to stay within the outline.
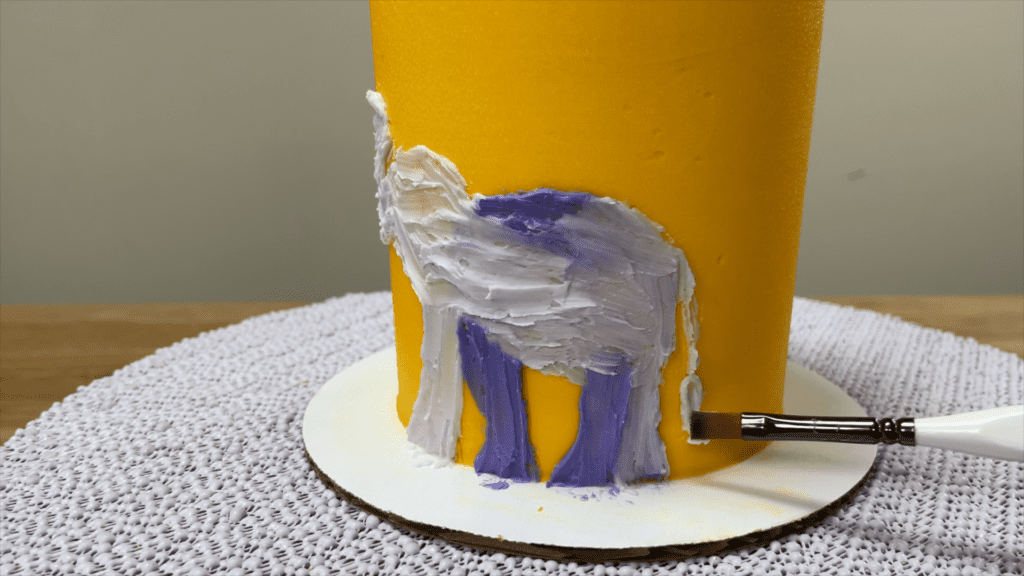
You can layer colours by brushing them on top of each other to create some shading. The frosting on the cake needs to have set before painting so that the buttercream “paint” sits on top of the frosting, instead of blending with it.
If you want to add texture to the painting, which will also clarify which parts of the buttercream are which parts of the elephant or whatever you’re painting, use a toothpick to gently scratch lines wherever there are creases or wrinkles.
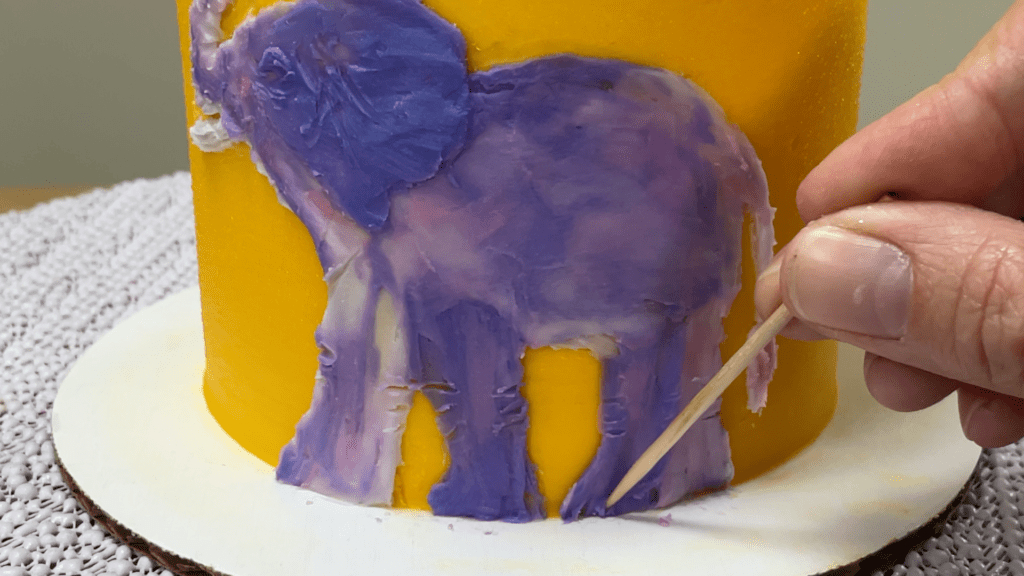
Buttercream is fun to paint with because you can add colour and texture to your cake.
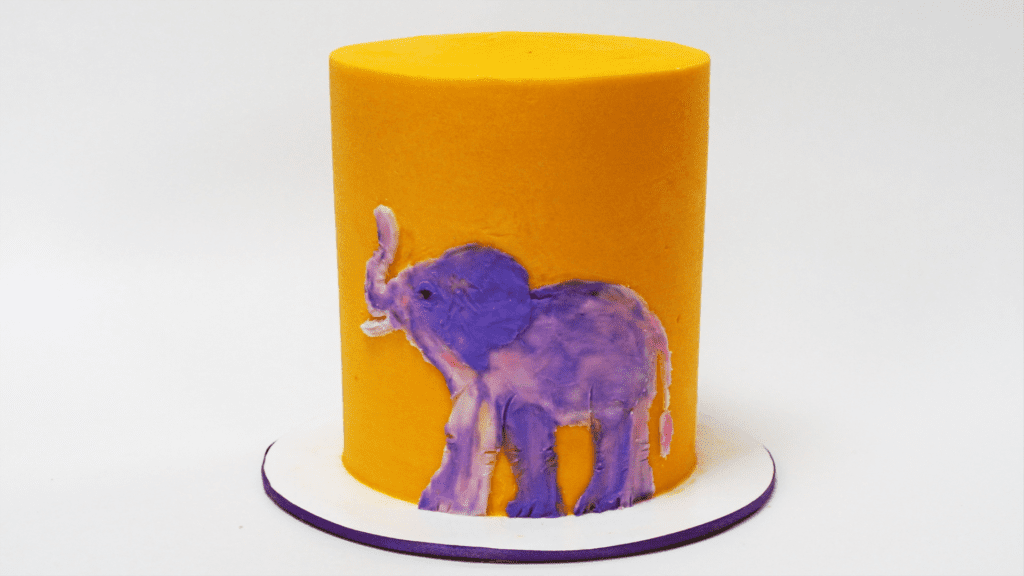
#2 Painting with buttercream + a sponge
For sponge painting, dip a sponge into your buttercream and wipe the excess off on the side of the bowl to leave a very very thin coating on the paintbrush.
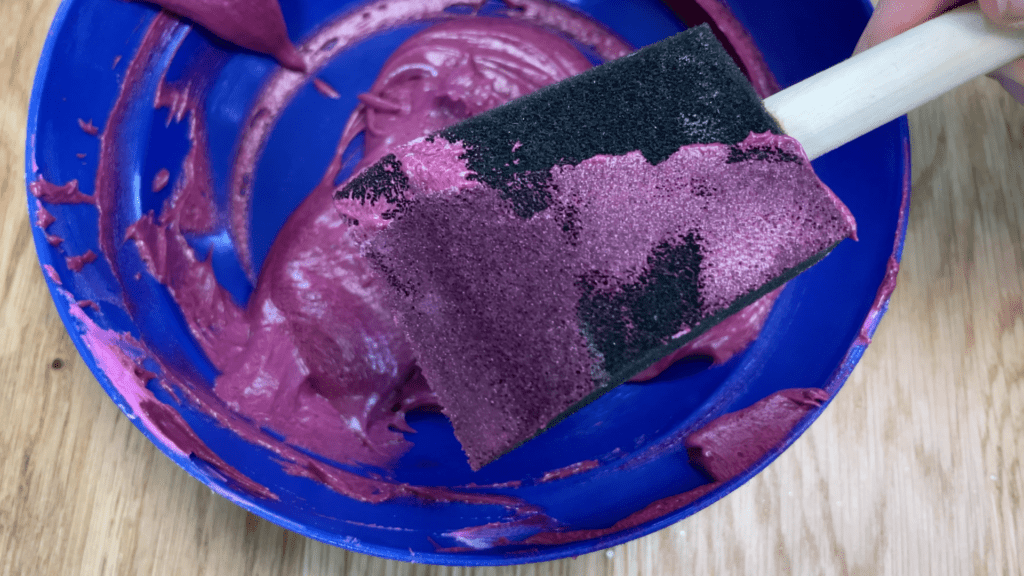
You’ll need the frosting on the cake to set before you do this, and for all of the other techniques too, so first put the cake in the fridge for an hour to firm up. Dab the sponge onto the cake to paint it.
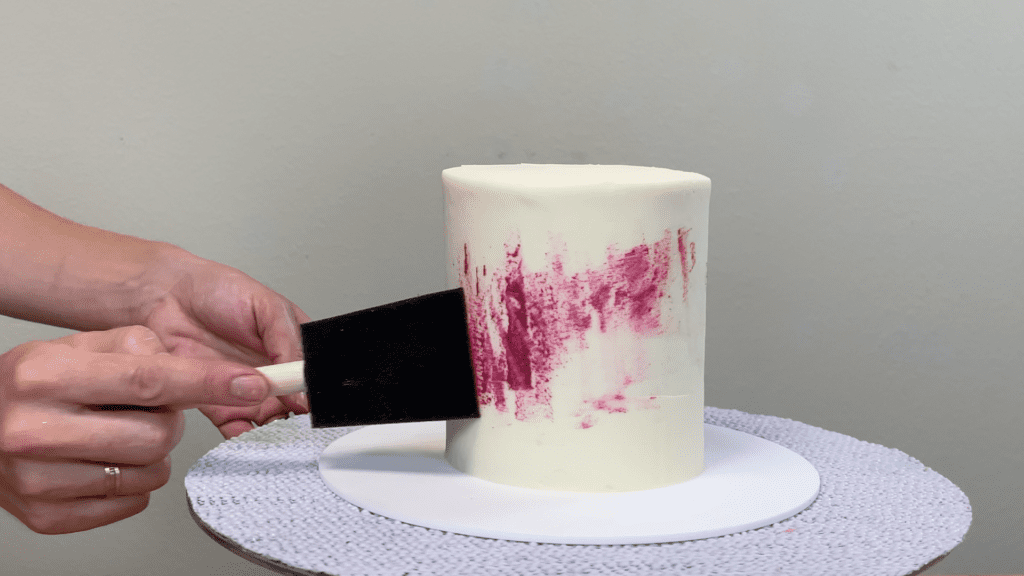
You can choose the texture or pattern you create by the angle you hold your sponge – I’m creating vertical lines all over this cake by always holding my sponge the same way, but you could vary this to create a totally different pattern.
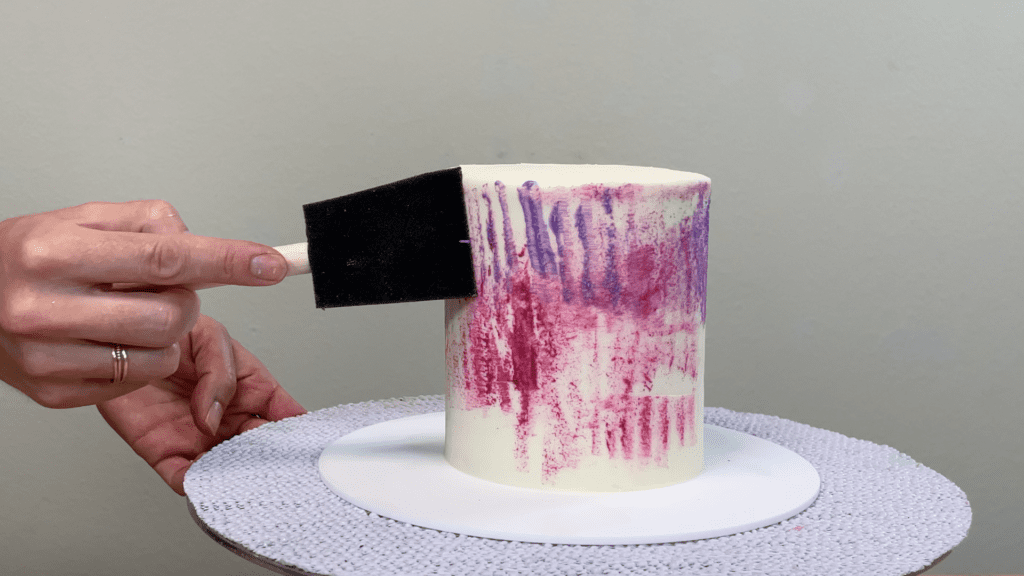
Have fun with this, overlapping and layering colours and watching the design evolve!
#3 Painting with buttercream + a palette knife
You can paint with a palette knife to achieve the effect of oil paints, and just like the other techniques, you really only need a spoonful of buttercream for this. Spread the buttercream onto the cake to create textured petals or leaves or whatever shapes you like.
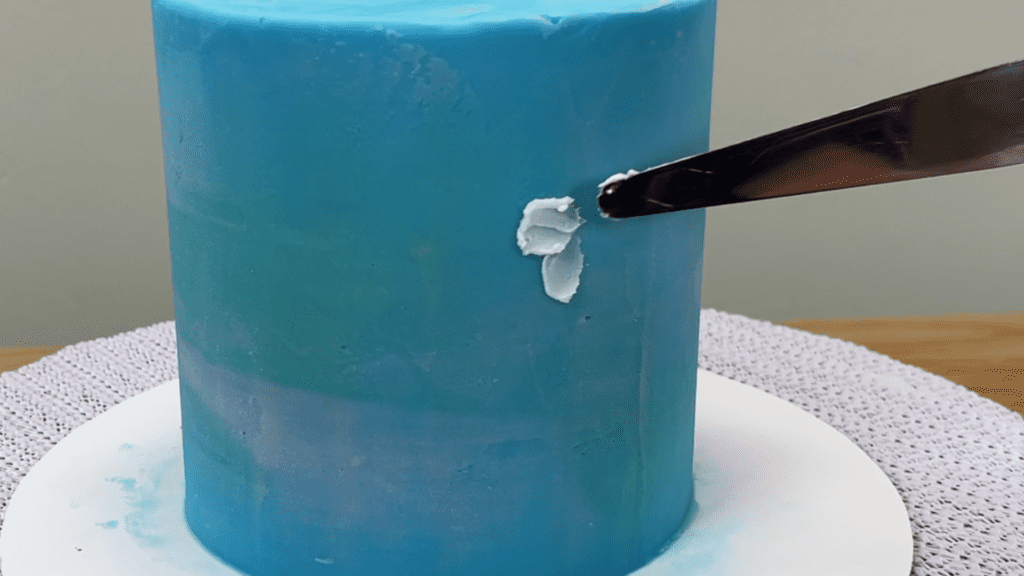
If the buttercream isn’t spreading easily, add some milk to thin it out. You can layer colours to create details and add more texture.
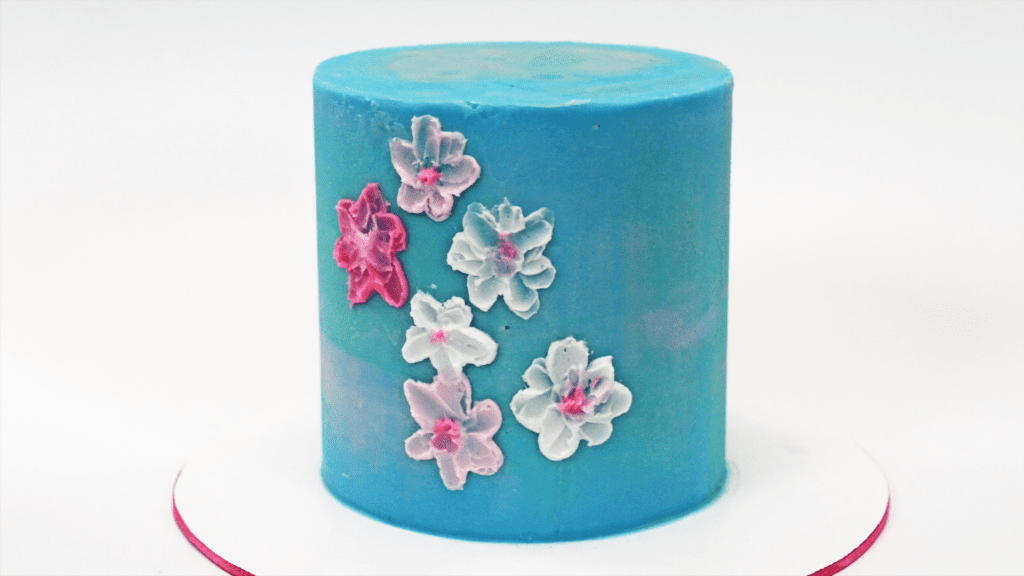
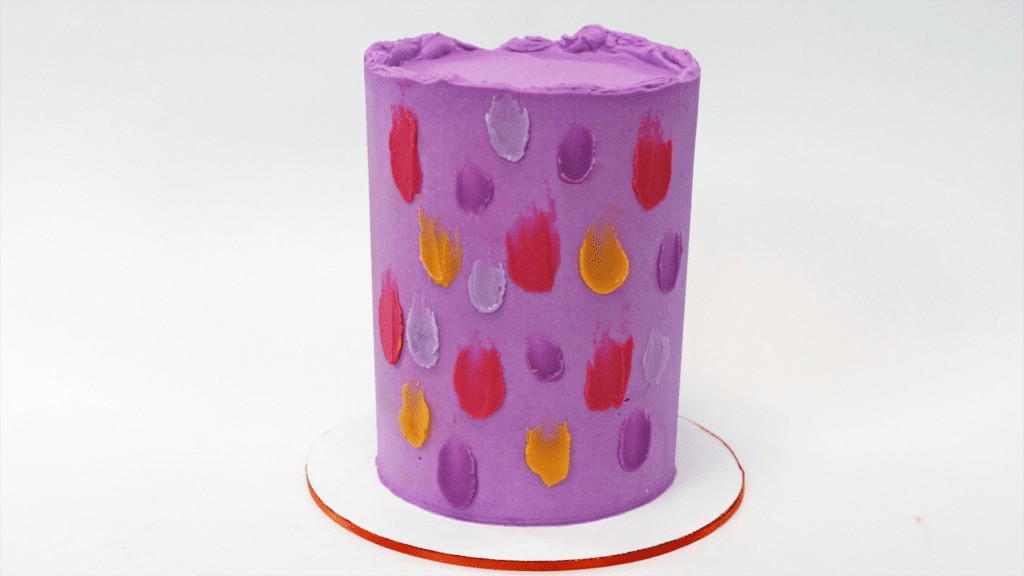
Keep this simple with swooshes of colour to create a fun, colourful design on a cake – for more ideas check out my tutorial on 5 cakes you can decorate in 5 minutes.
#4 Painting with buttercream + a combination of tools
You can create entire scenes with a combination of tools! I decorated this cake using all of the techniques I’ve shown you so far: a palette knife for the grass, a sponge for the sky, and a paintbrush and palette knife for the rest of the details of this Paris cityscape., It’s helpful to have pictures to refer to as you paint and I like to use Google Images to find simple line drawings as a starting point.
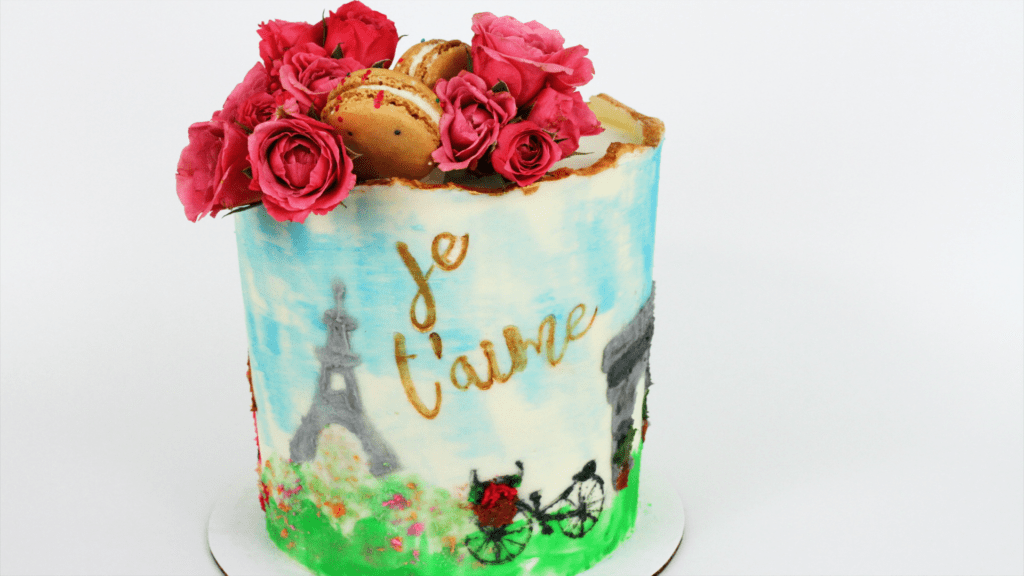
PAINTING WITH GEL FOOD COLOURS
#5 Painting with gels + a paintbrush
Painting with gel colours is easier than buttercream because you’re only creating colour, not texture, so it’s less to think about. Mix gel colours to thin them out using any clear alcohol, like vodka, or you can use clear flavour extracts like clear vanilla.
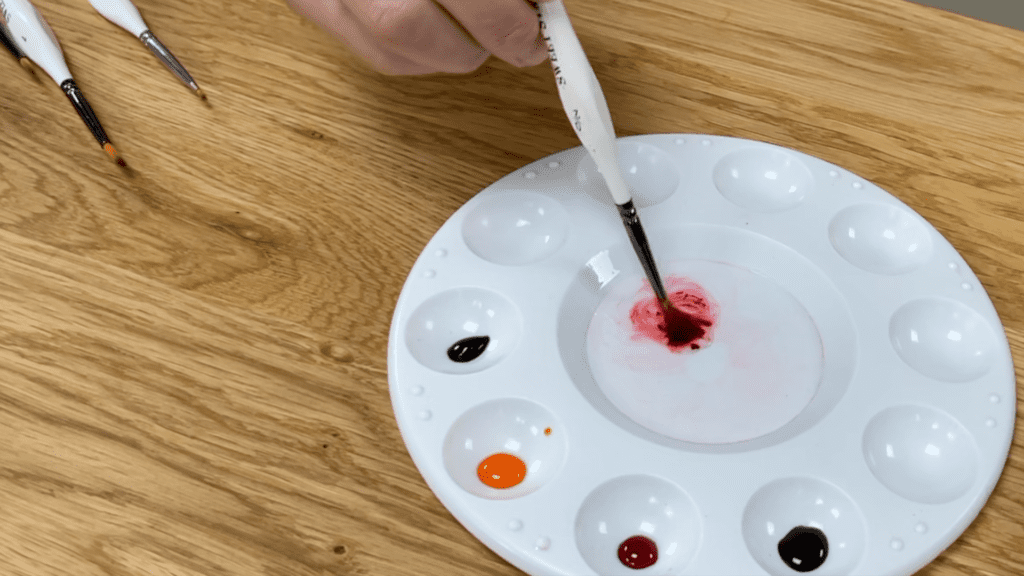
You’ll probably want to refer to a picture or a photo as you prepare your colours and while you paint – I took my kids on a little hike and took some photos to keep beside me as I painted, since I knew I wouldn’t be able to make up an entire scene out of my head.
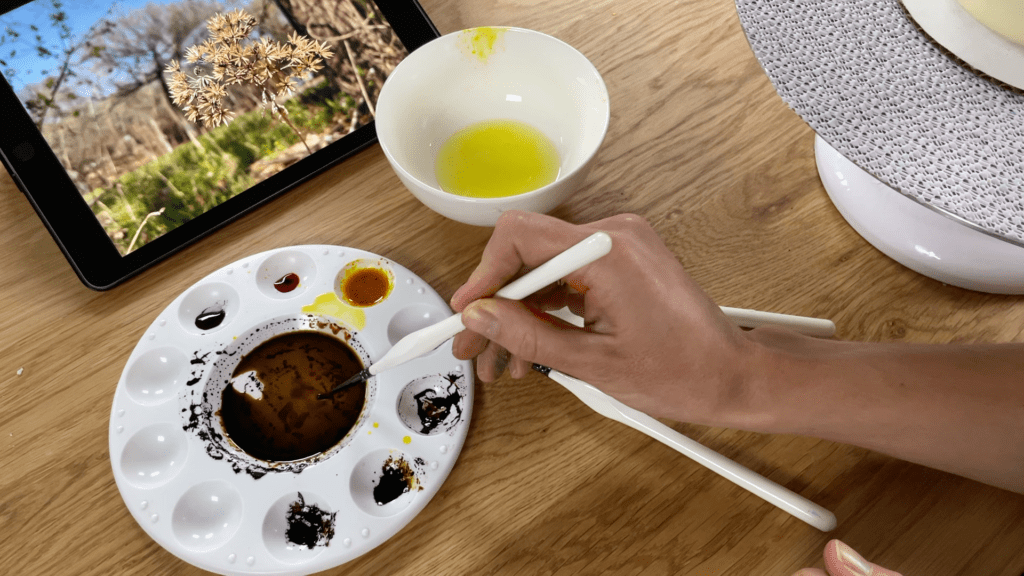
You can start by outlining shapes in the frosting on the cake with a toothpick, or just make it up as you go along. Start by painting your first basic shape, so for me this is just the stem and branches of one plant. Then add details by layering on more colours to create shading and shadows.

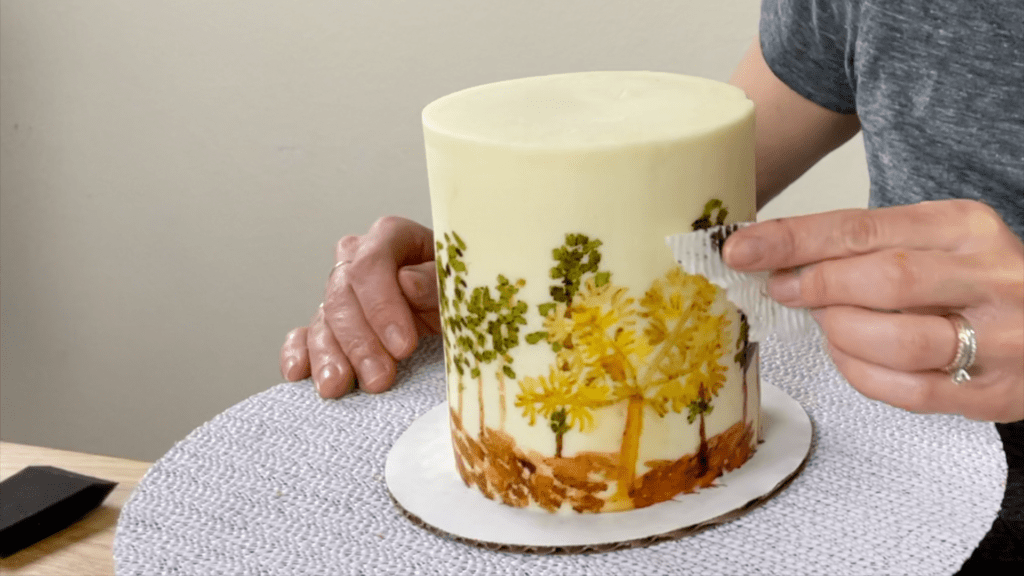
After the first basic shape or shapes, fill in the other details like the ground, and scenery, like these trees. Trees are easy. to paint because after a line for the trunk you can just paint lots of dots in different shades of green to create the leaves.
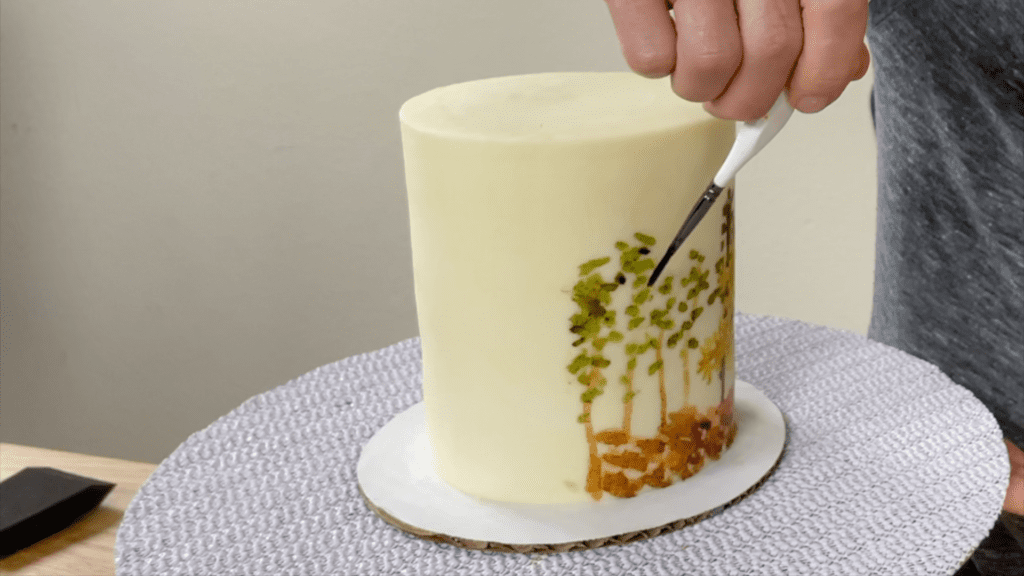
Immediately after painting part of the design you can blot the gels with a paper towel to take off excess “paint” to make the colours a bit lighter and less bold, which is useful for parts of the design that you want to fall into the background.
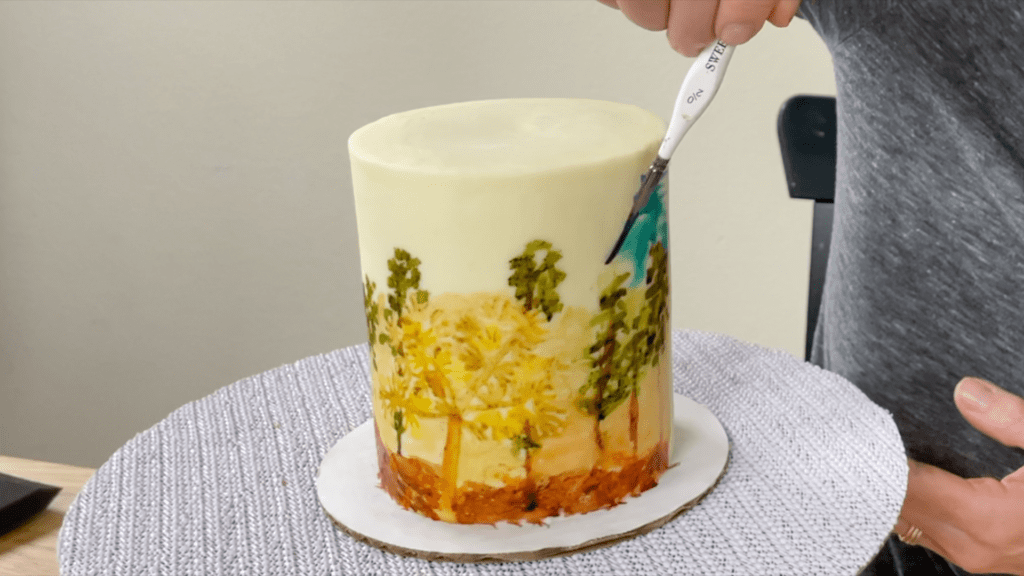
To create the background you can water down your colour by mixing in more alcohol. This will make the colour lighter, which works well if you want the attention to go to the image you painted first.
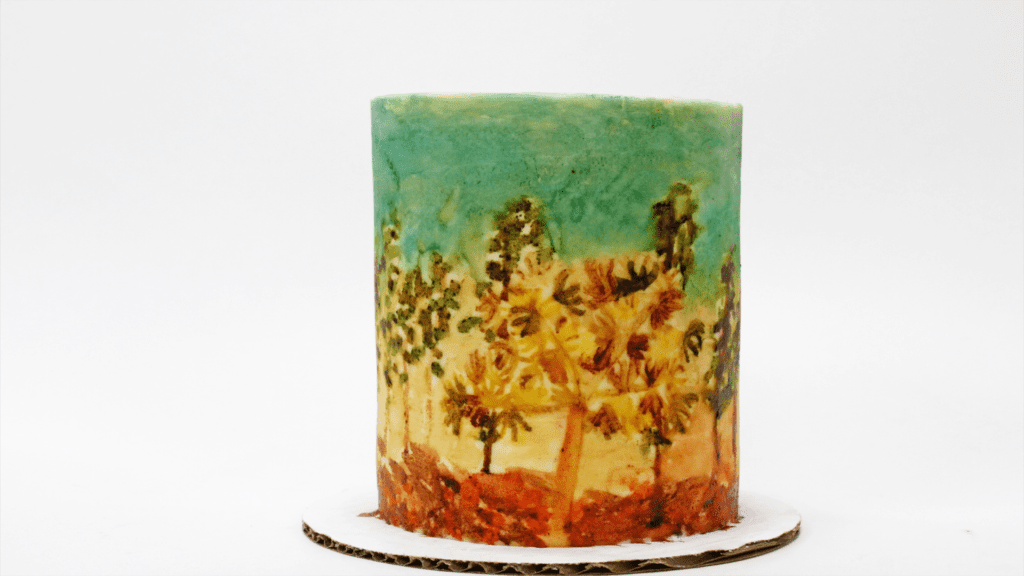
By painting one layer at a time, you can create an entire scene with just a few drops of gel colours and a paintbrush, turning a photo into a cake design!
I hope you’ve enjoyed this tutorial! Tell me in the comments if there’s a cake technique or theme you’d like me to make a tutorial about!
If you’re looking for more cake decorating techniques and designs, check out my online cake school for lots of courses and classes and join my Club for access to ALL of them as well as live online classes and Q&A sessions for members only!
Here’s the video version of this tutorial:
I’m going to share my tips for efficient cake decorating so you can really maximise your time and spend it decorating rather than cleaning up afterwards!
If you prefer to watch a video of this tutorial, scroll to the bottom of the page.
#1 Bake in bulk
Efficient cake decorating starts with baking your cake layers and to save time, bake in bulk, even if you don’t need that much cake at the moment. Let the cake layers cool completely, trim and level them if you want to, and then wrap each layer in cling film or Saran Wrap so that it doesn’t dry out.
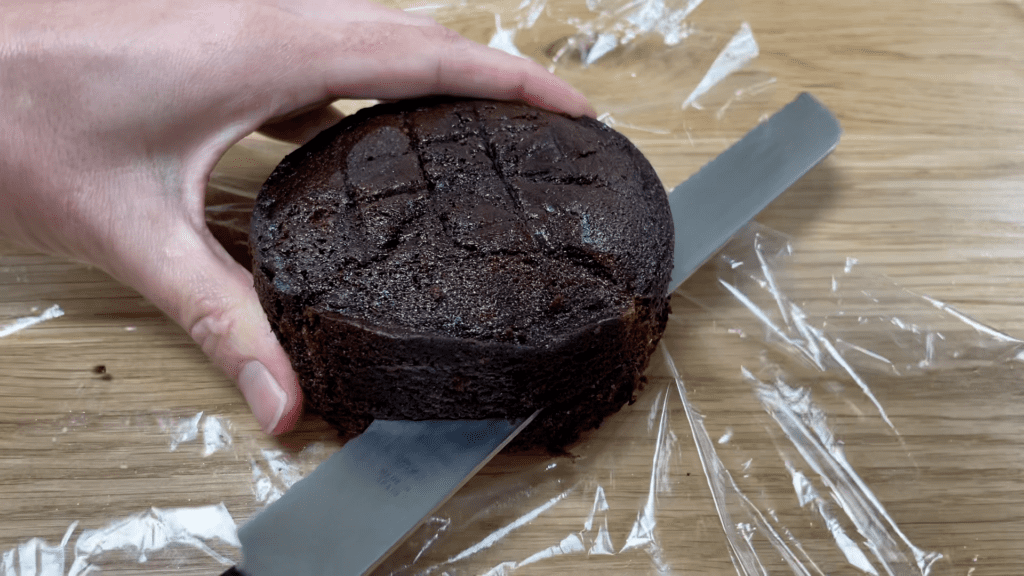
Put the cake layers in the freezer and they’ll be fine for 2-3 months! That way, the next time you want to make a cake you can pull your layers out of the freezer a few hours before you need them and they’ll thaw and be ready to assemble and decorate!
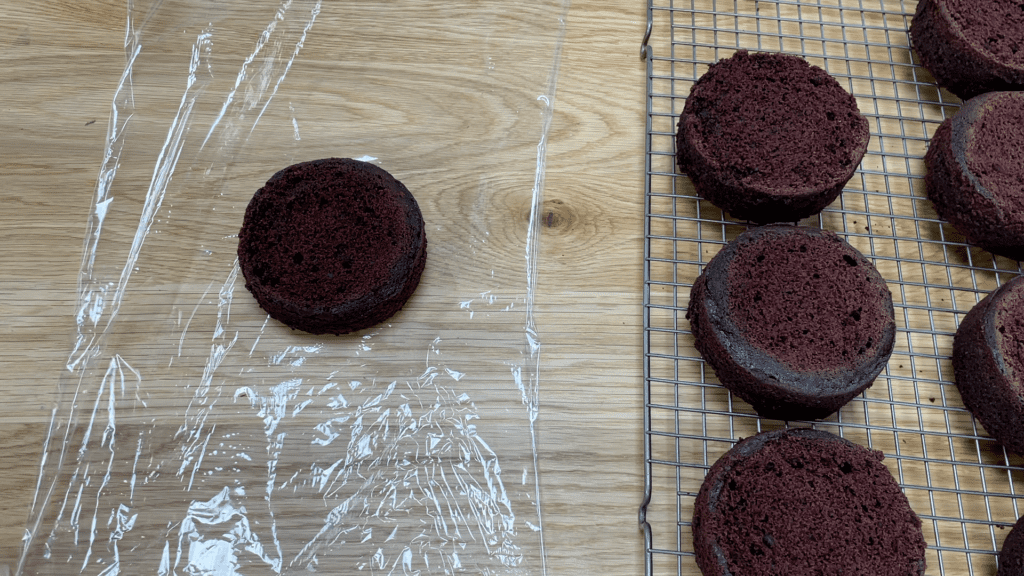
Once the cake comes to room temperature I guarantee you won’t be able to taste the difference between these layers and layers that have just cooled after baking.
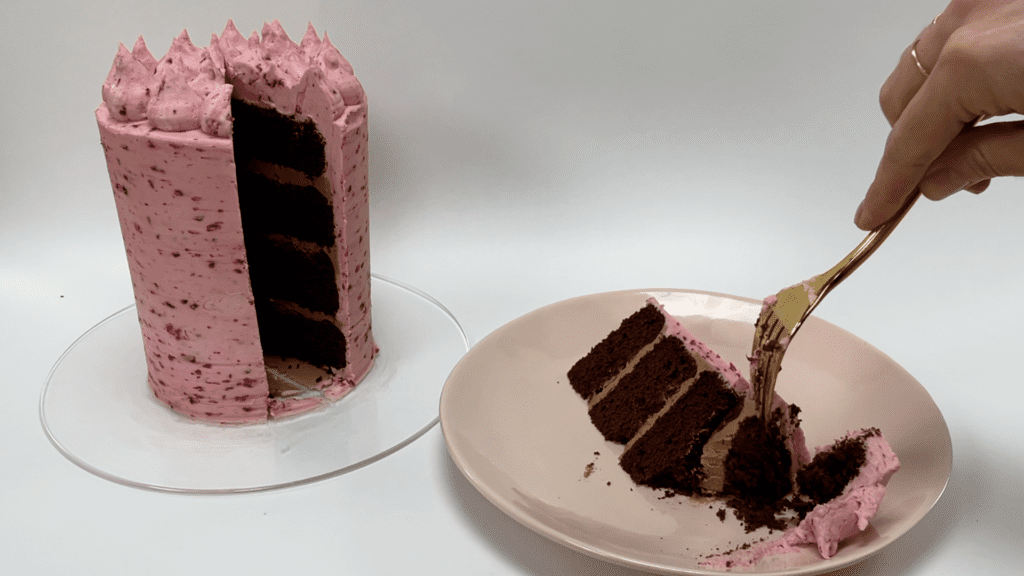
#2 Make and store extra buttercream
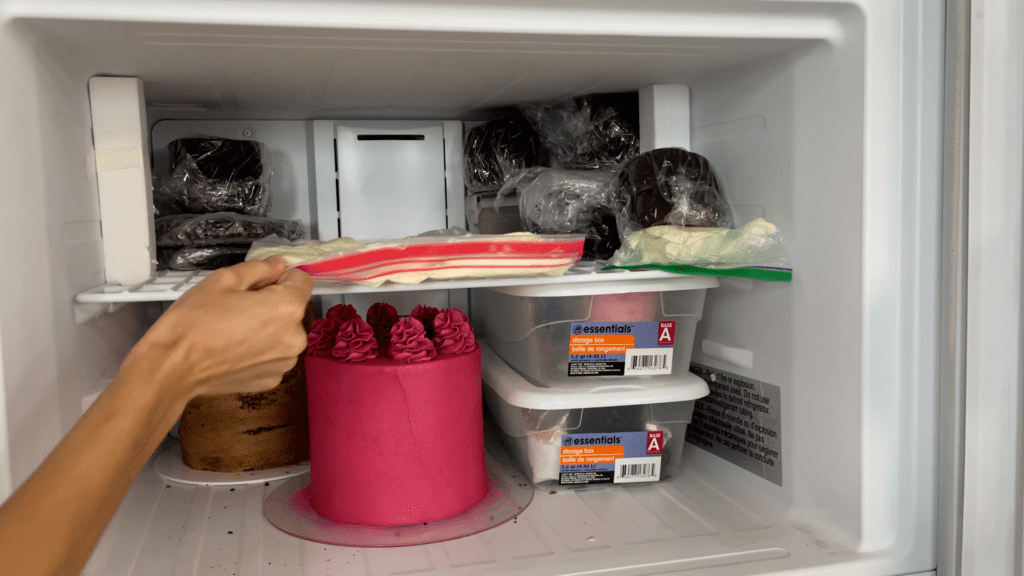
When you’re making your frosting, make the biggest batch that fits in your mixer. If you’re going to take the time to make frosting, you might as well make as much as you can and use the same batch for several cakes. Buttercream stores very well in the fridge or freezer, as long as it’s in an airtight container.
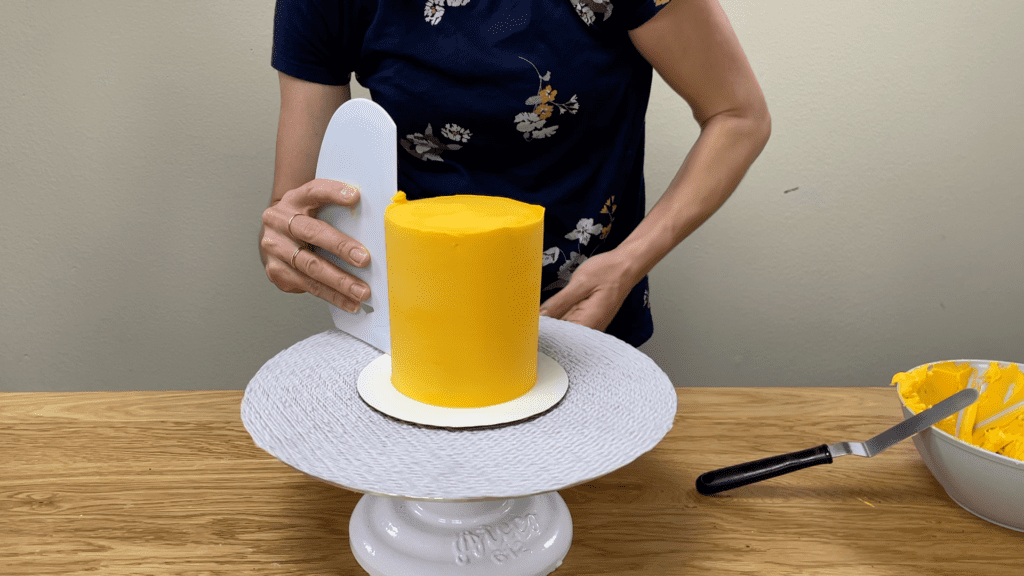
I like to put my leftover buttercream in a large ziplock bag and press it flat so that it hardly takes up any space. Buttercream will be fine for 2-3 weeks in the fridge or 2-3 months in the freezer!
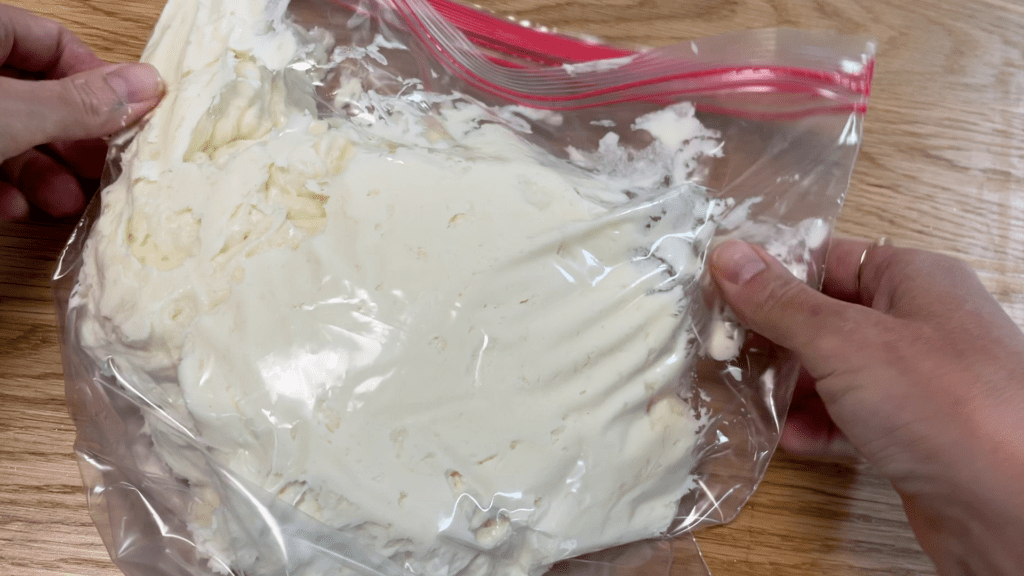
When you’re ready to use it, take it out the fridge a few hours before or if it’s in the freezer, take it out the night before and let it come to room temperature.
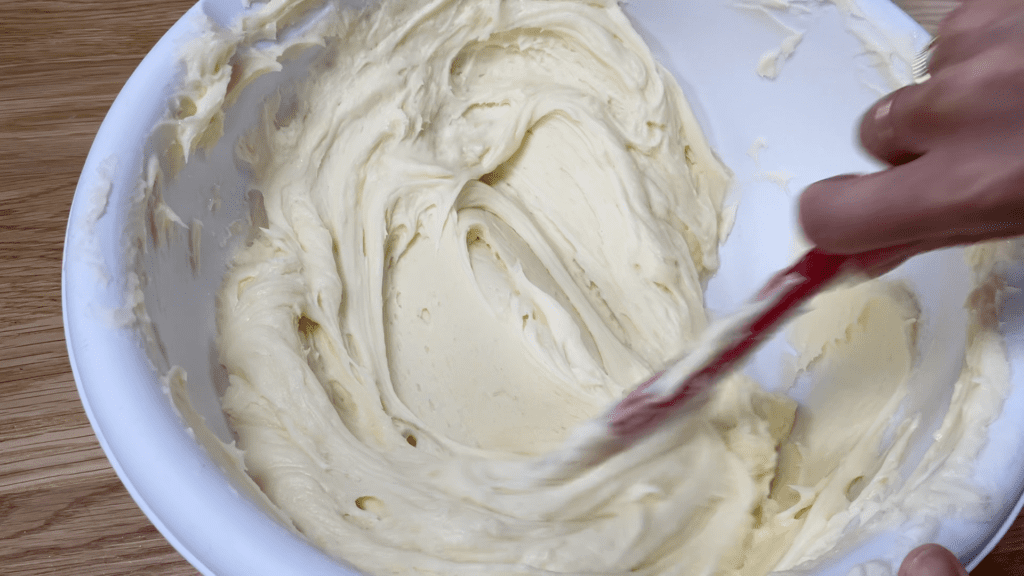
Put it in the bowl and stir it a few times before using it to knock out any air bubbles and it will have the same texture and taste as fresh buttercream!
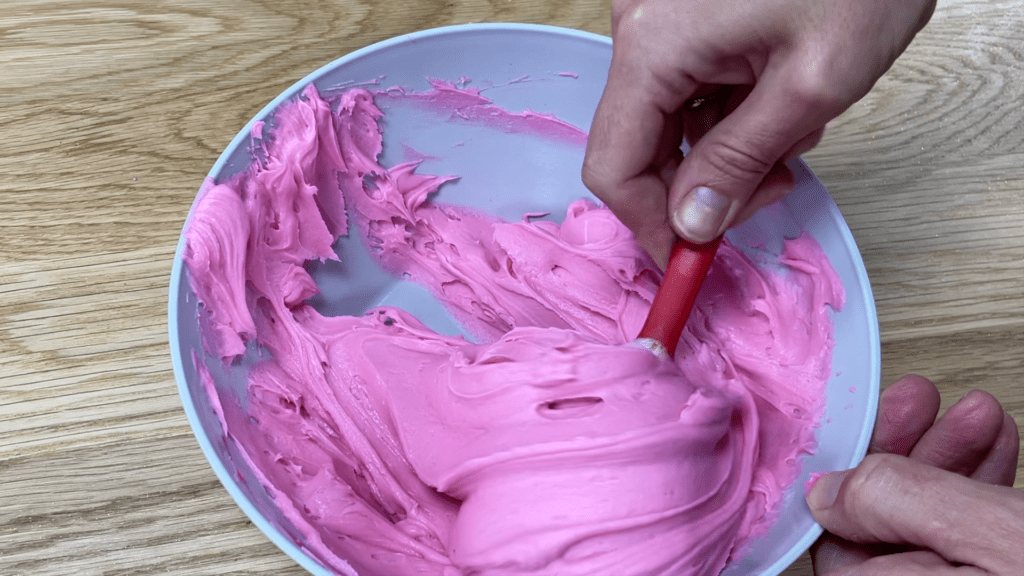
#3 Save leftover coloured buttercream
It’s almost impossible to tint exactly the amount of coloured buttercream that you need for your cake, but those leftovers are actually useful!
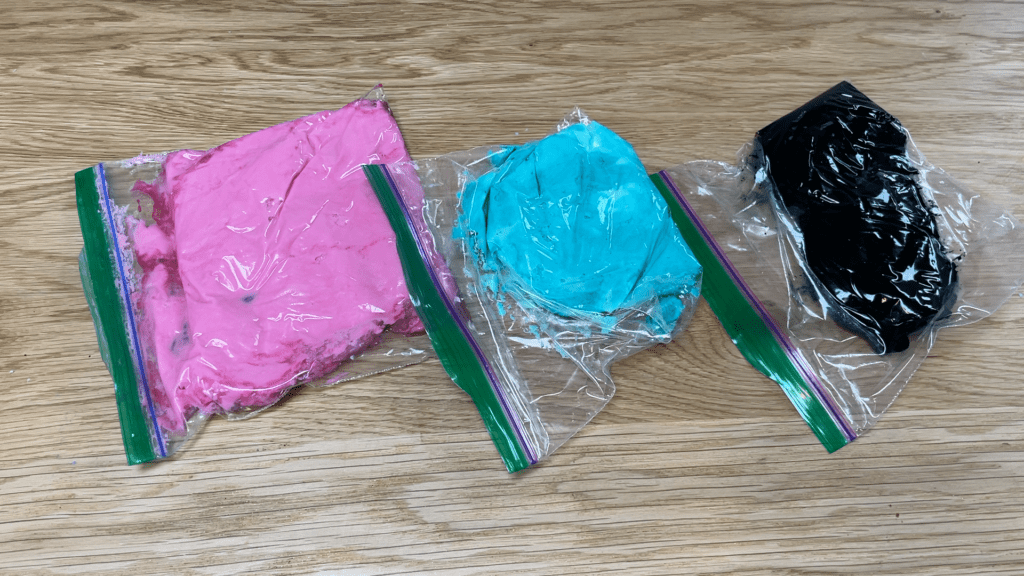
Spoon them into a ziplock bag and save them in the fridge or freezer for future cakes, when you need just a little bit of that colour for decorating. Using leftovers is MUCH faster than tinting another bowl of frosting from scratch.
#4 Refrigerate cake layers
When you assemble your cake always use cold cake layers. Cold cakes are less crumbly to move around and when you spread on your filling you won’t pull off crumbs.
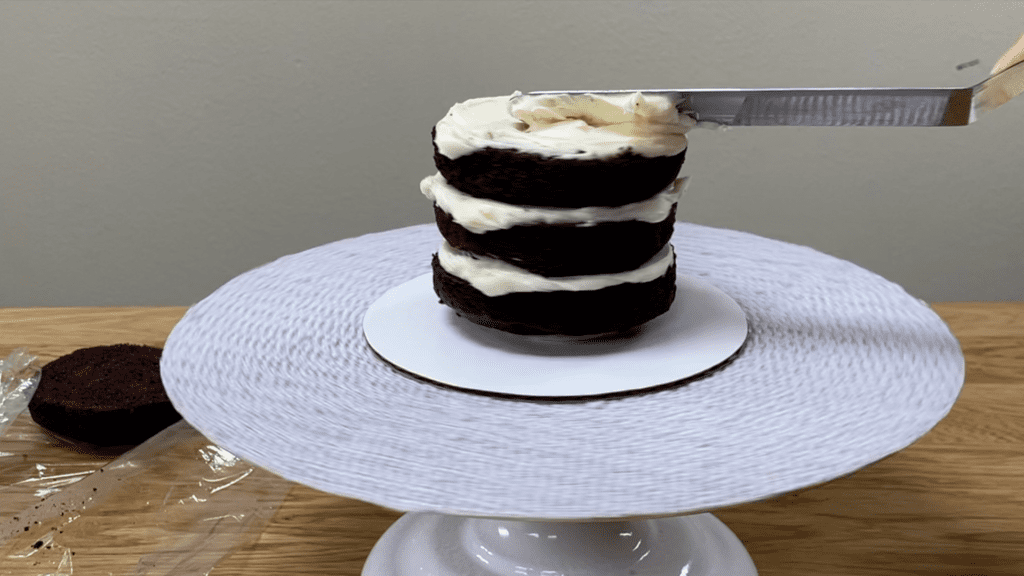
Also, when the cake is cold the frosting you spread onto it will set very quickly, so but the time you finish spreading on a crumb coat and smoothing it, the frosting will have set and you’ll be able to move straight on to your final coat without having to wait for the crumb coat to set in between!
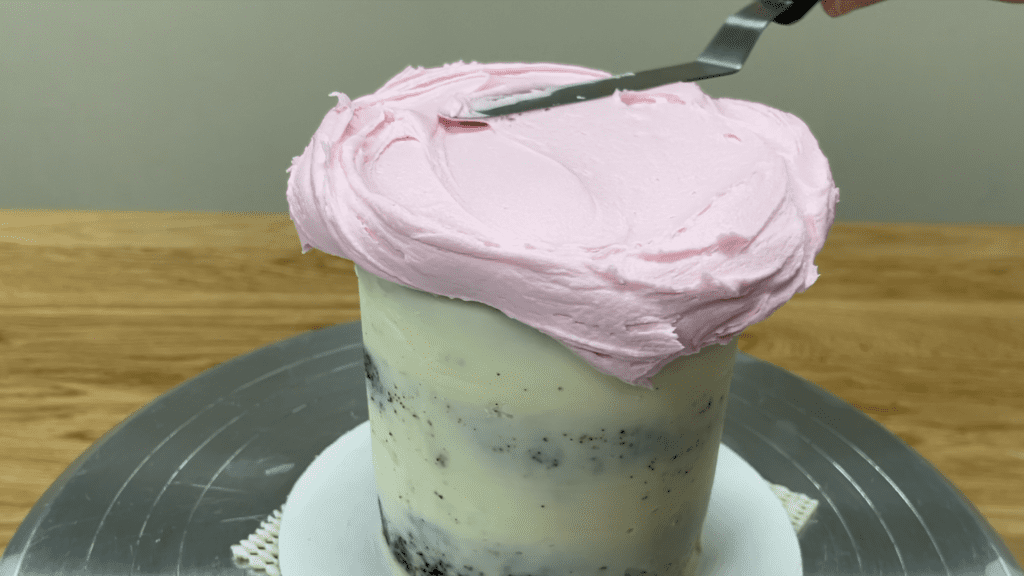
#5 Be prepared!
Before you start decorating a cake, take out all of the tools and materials you’ll need. Ideally to this at least a day in advance to give you time to go and buy anything you realize you don’t have. When it’s time to decorate, you’ll be able to dive straight in and once you start, you won’t have to waste time looking for things you need, or rushing out to buy them.

#6 Clean as you go
However you choose to decorate your cake, you’re going to start with clean tools and finish with dirty tools. If you’re not working close to a sink, have a box or tray or bucket where you can toss anything you need to wash, like a dirty
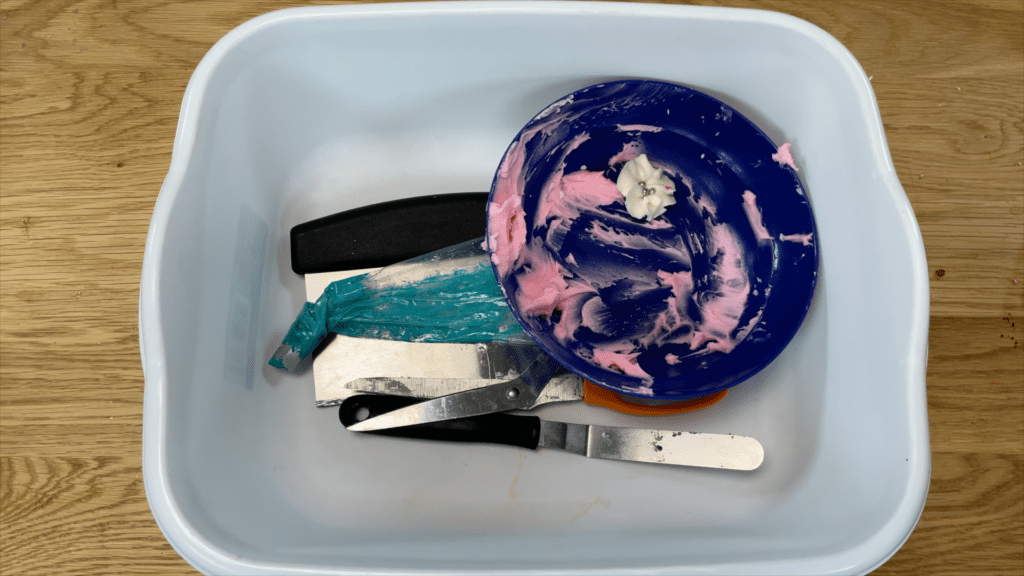
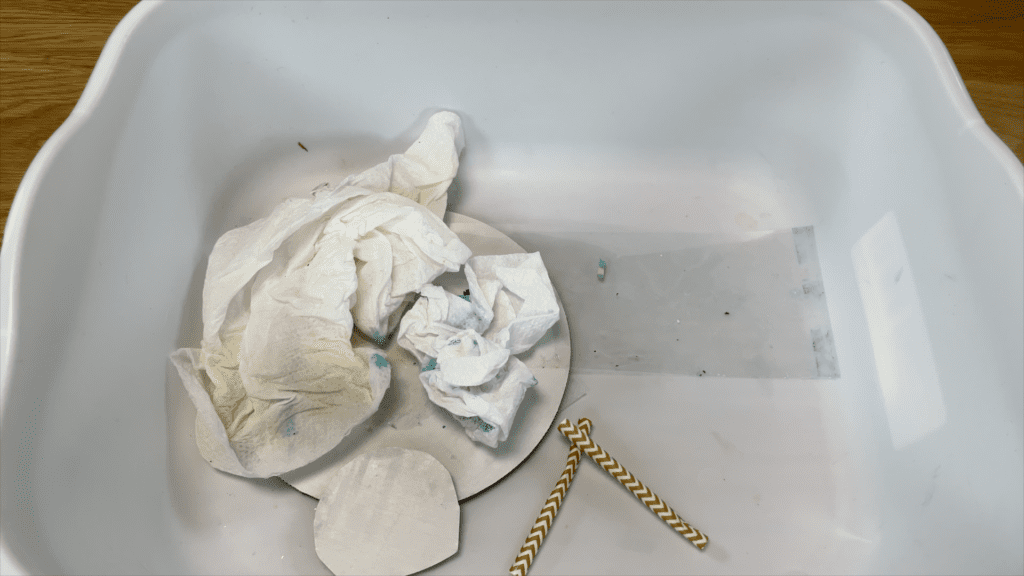
Have a sponge or cloth handy to wipe up frosting spills or smudges as you frost and decorate, and throw things away as you go, like the ends you cut off piping bags. That way you’ll keep a clear workspace and won’t have lots of picking up to do when you finish.
I have an online course called Fabulous Cakes, Fast! where I teach how to decorate 10 cakes in 30 minutes each. I’ll tell you the most efficient way to decorate each of the cakes in that course but these are some basic tricks that will help you save time on all of the cakes you decorate. Just for fun, tell me in the comments: what’s the longest time you’ve spent decorating a cake?
Here’s the video version of this tutorial:
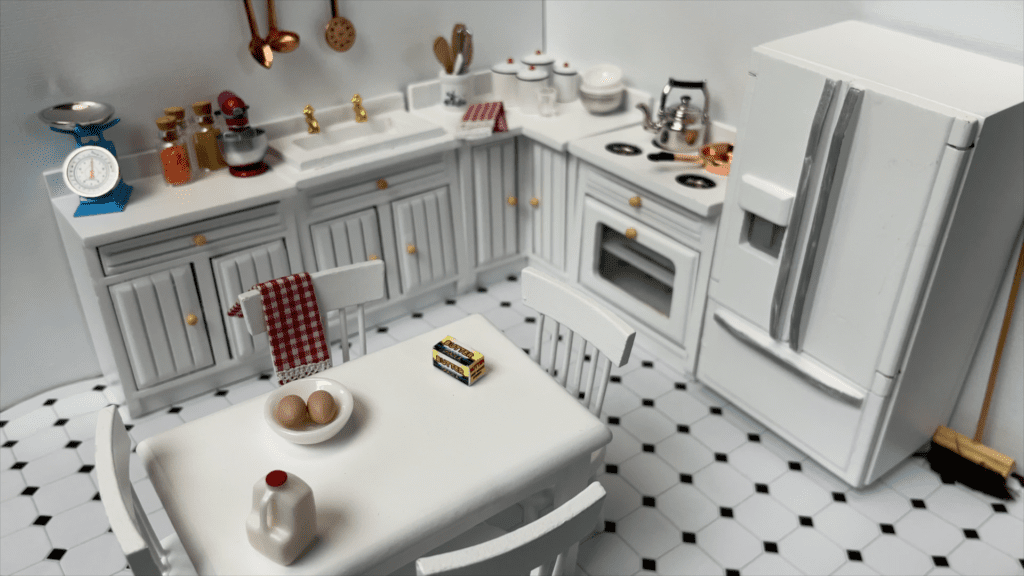
I’m going to share my top 12 tips for baking and just for fun, instead of using my kitchen I’ll show you the tips in my tiny kitchen!
If you prefer to watch a video of this tutorial, scroll to the bottom of the page.
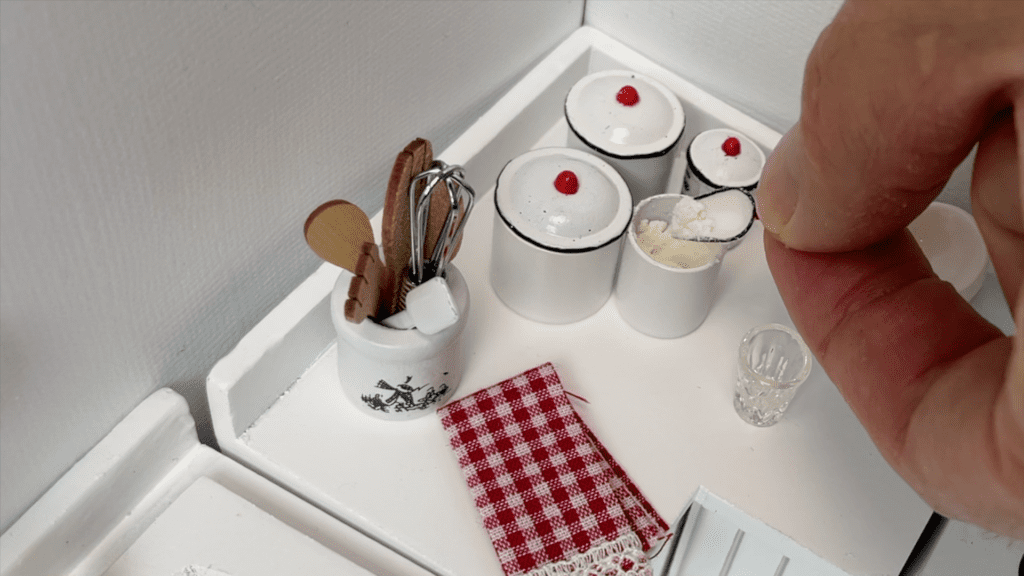
#1 If your recipe says to use room temperature ingredients, don’t ignore that! Take your ingredients out several hours or even the night before you bake so everything’s at room temperature, and this is for both cake batter and buttercream.
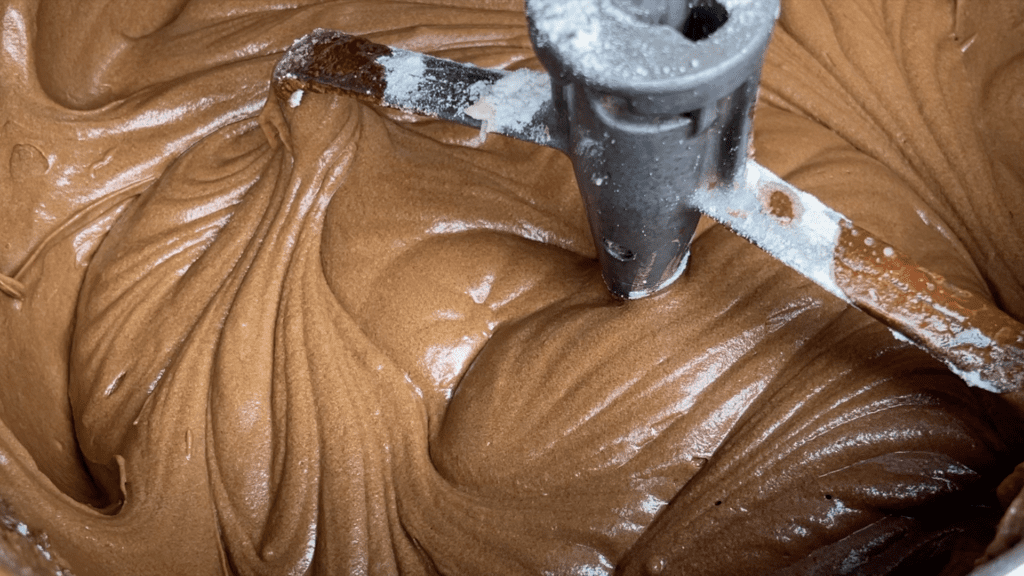
#2 For most recipes you can mix the first ingredients together for several minutes but for a light a fluffy cake, don’t over-mix the batter after adding flour.
Over-mixing the gluten will make your cake tough. Only mix until the flour is just incorporated into the batter.
#3 For cupcakes, the easiest way to divide the batter is to use an ice cream scoop, and then you won’t get batter all over the cake tin.
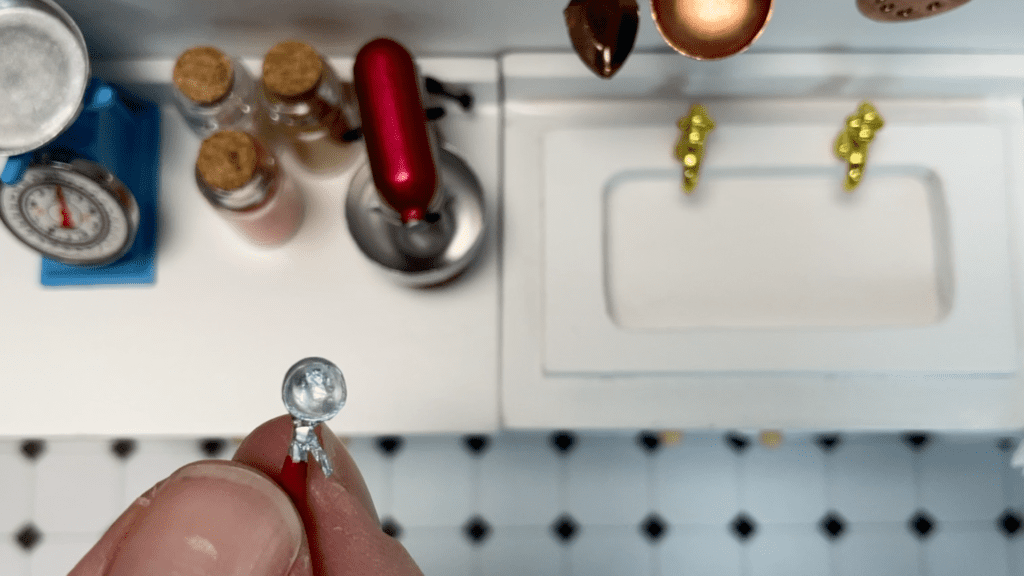
Only fill the cupcake wrappers half or three quarters full so that the batter doesn’t overflow as it rises during baking.
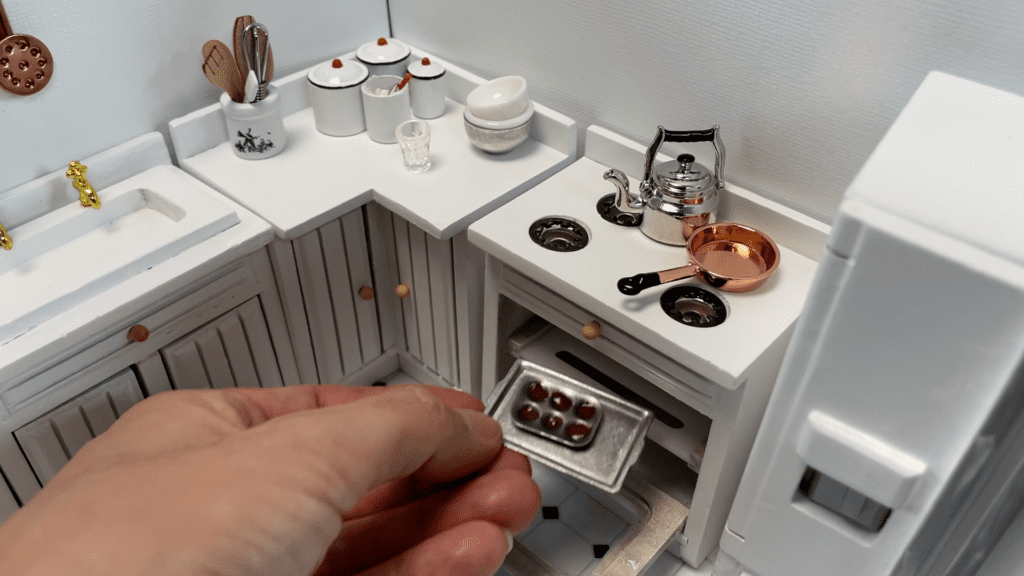
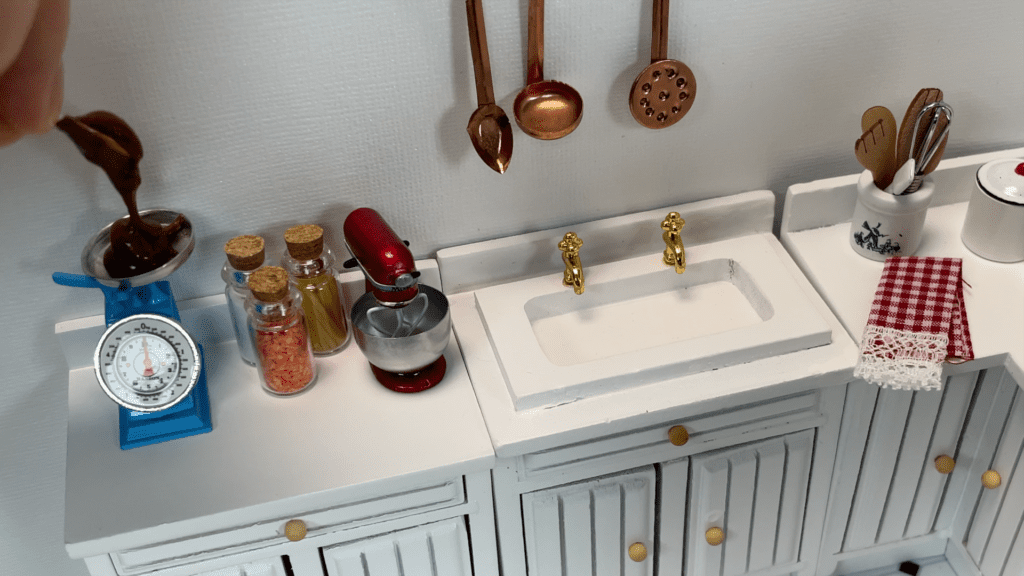
#4 For cake pans, to make sure your cake layers are all the same height you can weigh the batter in each pan before you bake it to make sure they’re all the same weight.
#5 Tap the pans a few times on the counter or table to knock our air bubbles and spread the batter evenly across the pans. This way, your cake will look perfect when you slice into it!
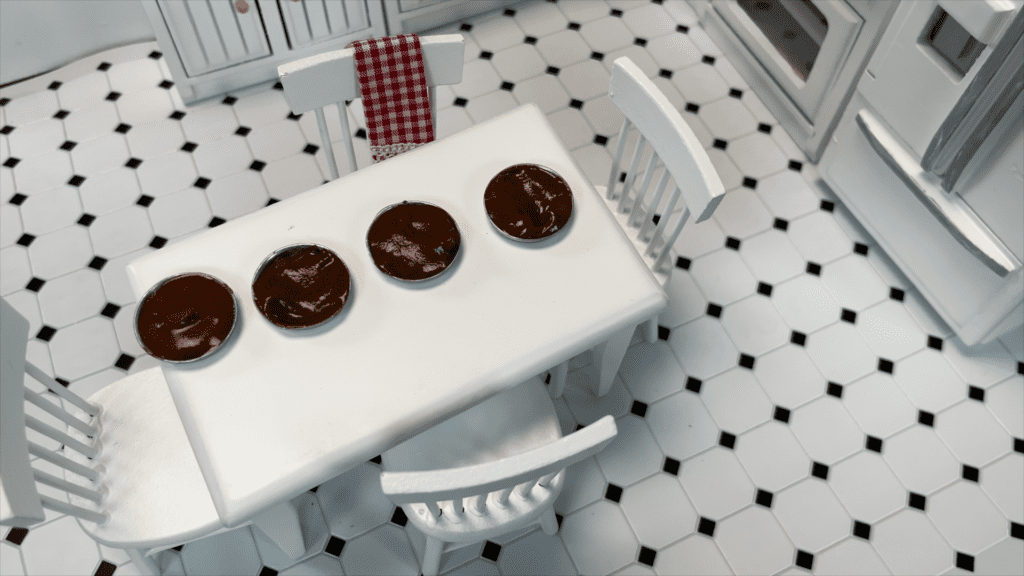
#6 You can use cupcake recipes for cakes but reduce the temperature by 25 degrees Fahrenheit. This will make the cake layers bake flat and evenly, preventing burnt edges or raw centers of the cakes.
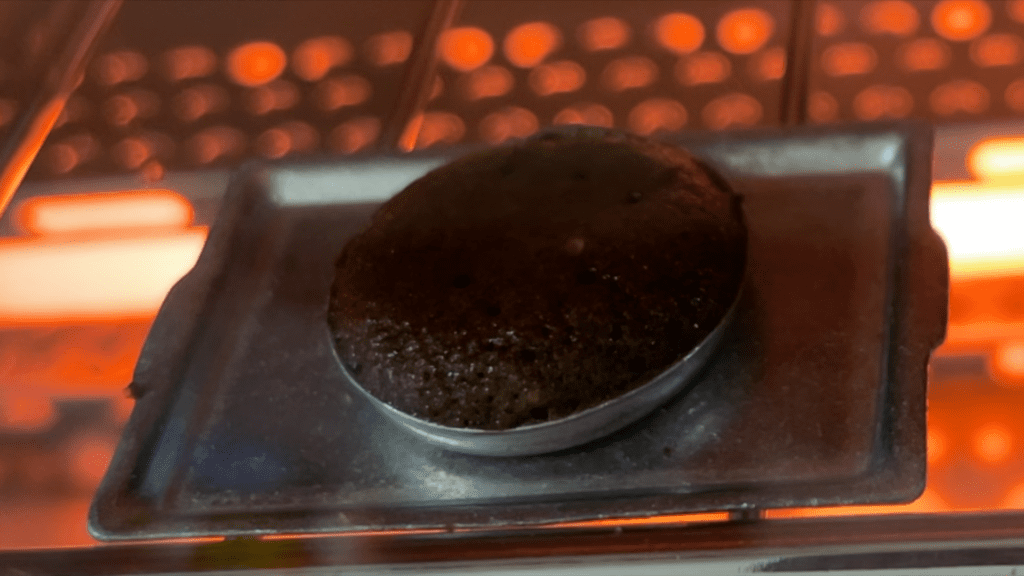
#7 Although it’s tempting to check on cakes and cupcakes while they’re baking, don’t open oven door until you think baking is complete. The rush of cold air will make cakes sink if they aren’t fully cooked.
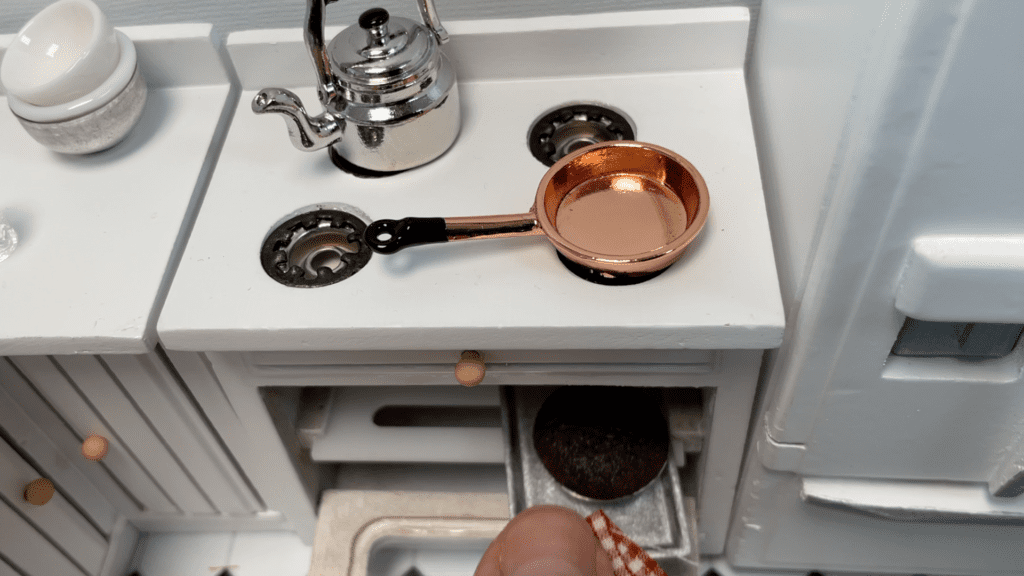
#8 When you take cakes out of the oven, let them cool in the pan for 5 minutes before turning them out, so that they firm up and don’t fall apart.
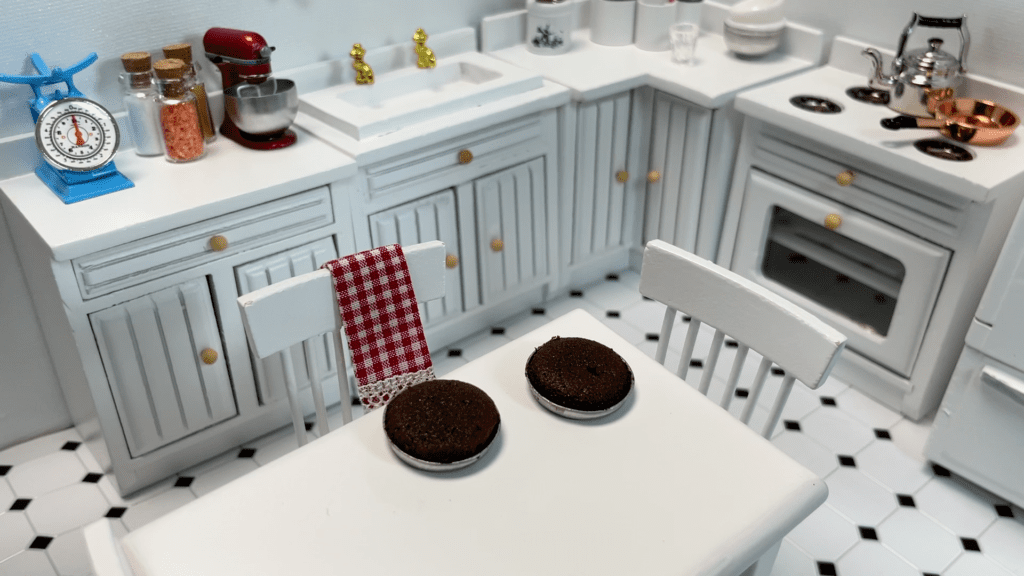
#9 Let cakes and cupcakes cool completely before you frost them, otherwise the frosting will melt!
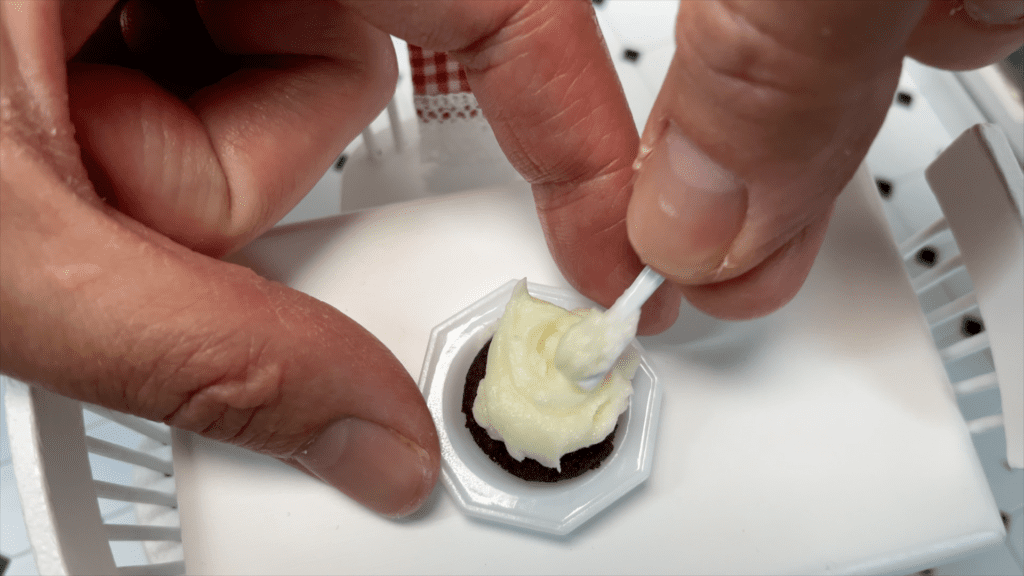
#10 If you’re using buttercream as frosting, always check the consistency before using it. If it’s too stiff you won’t be able to pipe or spread it easily. Add milk to thin it out if it’s too stiff.
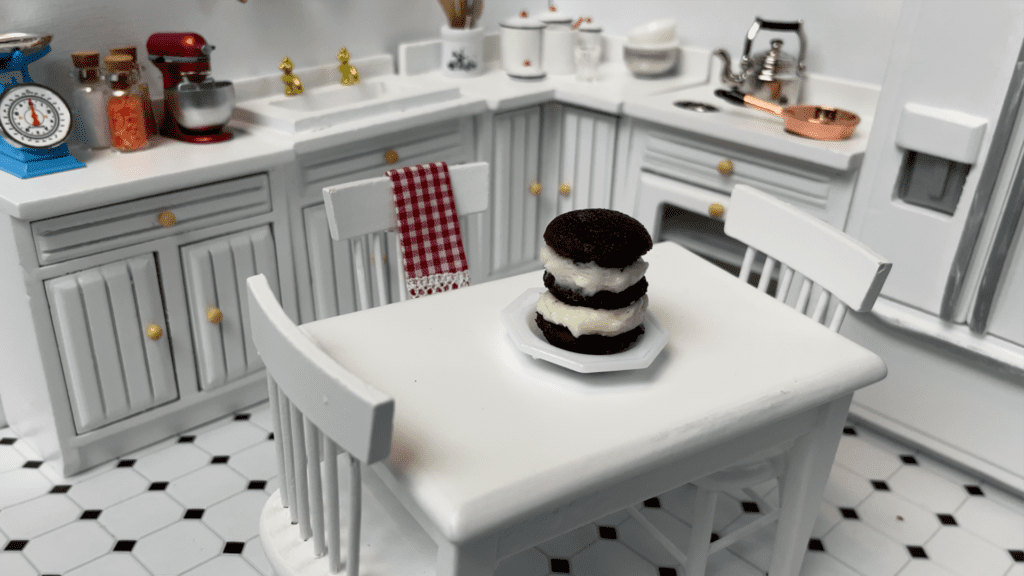
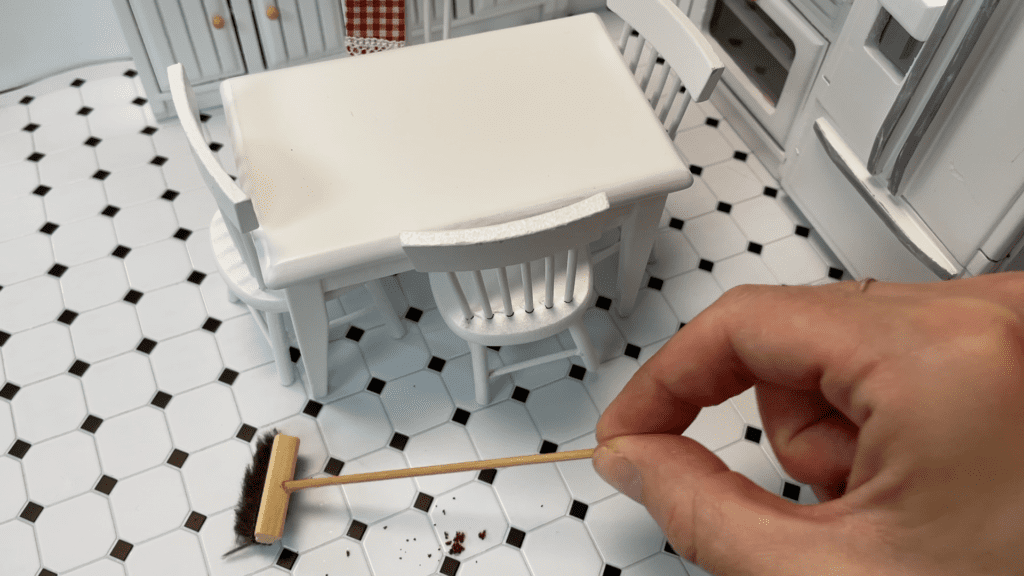
#11 To make baking less overwhelming, tidy up and put things away as you go along. That way you won’t have a huge mess to clean up at the end.
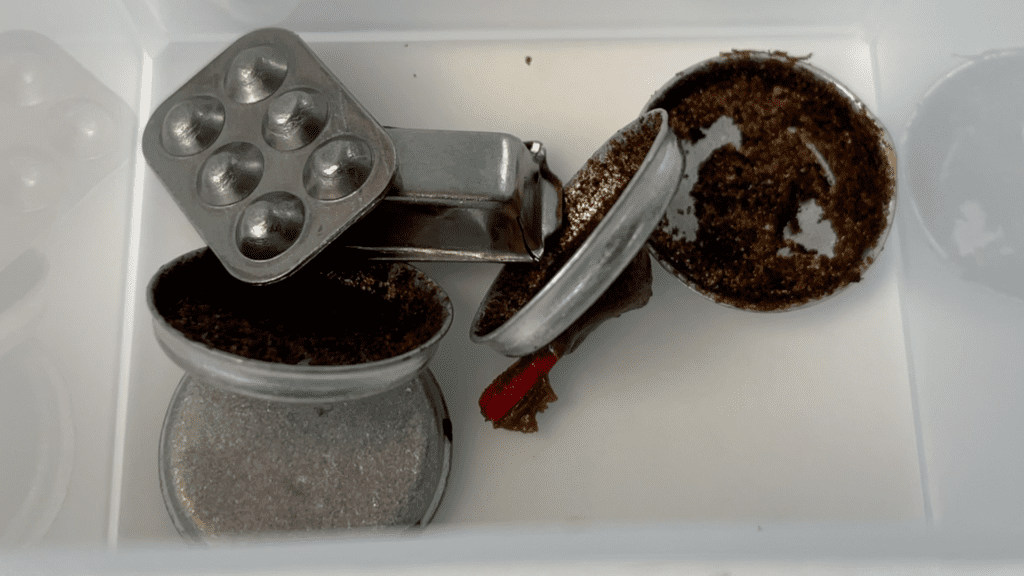
Make the most of waiting time, like while the cakes are baking in the oven or while buttercream is in the mixer, to wash any pans and utensils you’ve used.
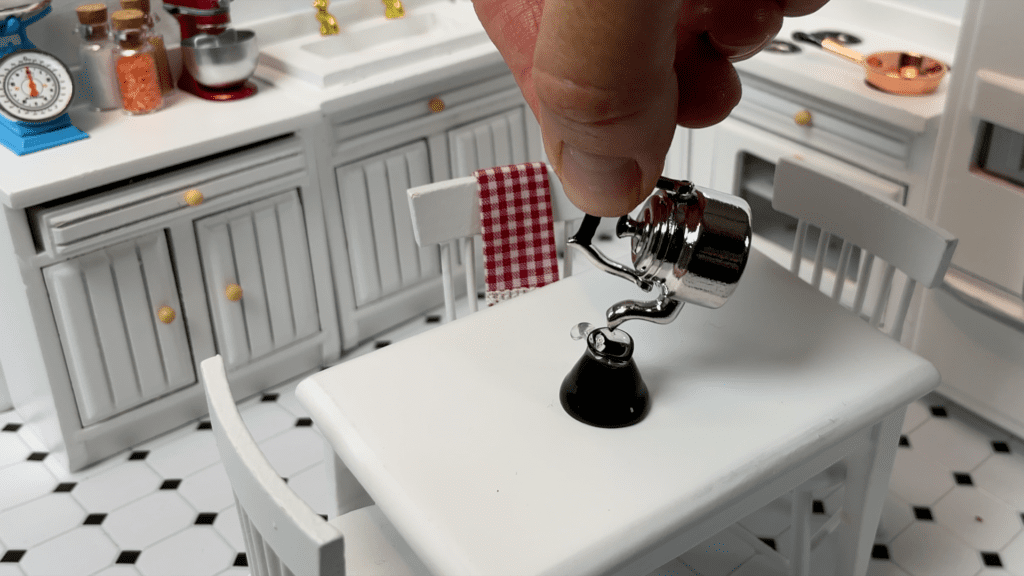
#12 Baking is a loong process so make yourself a bit pot of coffee before you start and enjoy the adventure!
What’s your best baking tip? Tell me in the comments!
Visit my online cake school for LOTS of courses and classes join my Club or ClubPLUS for access to them all!
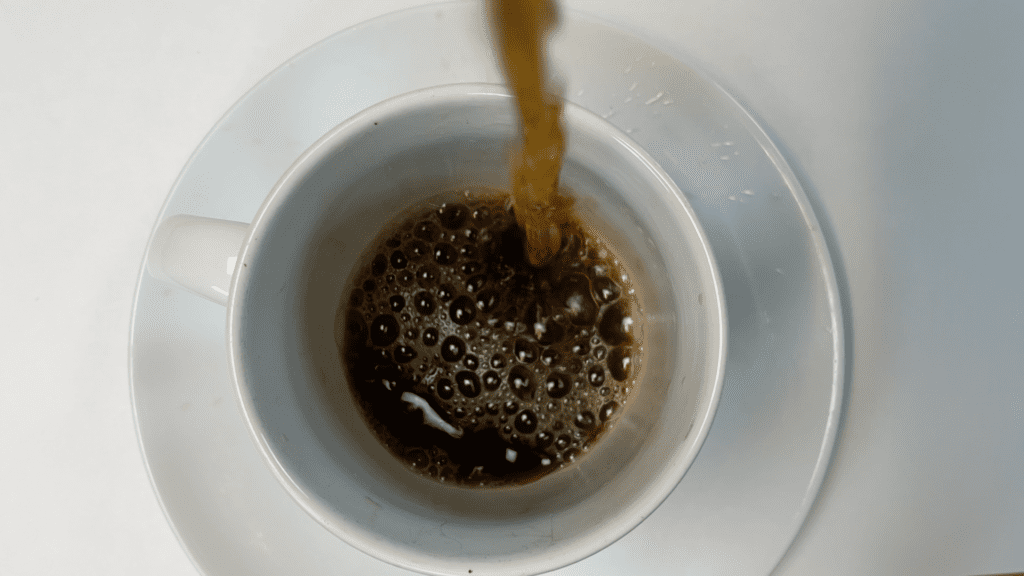
Here’s the video version of this tutorial:
Looking for ideas for a cake for a husband, dad, uncle, teacher, or friend? Here are some fun ideas that require simple tools and won’t take hours and hours to decorate!
If you prefer to watch a video of this tutorial, scroll to the bottom of the page.
An easy starting point is to incorporate any hobby into a cake.
For someone who enjoys fishing, pipe a fish onto a cake by spooning coloured frosting into piping bags fitted with small round tips or you can use ziploc bags and cut a corner off to pipe the frosting through.
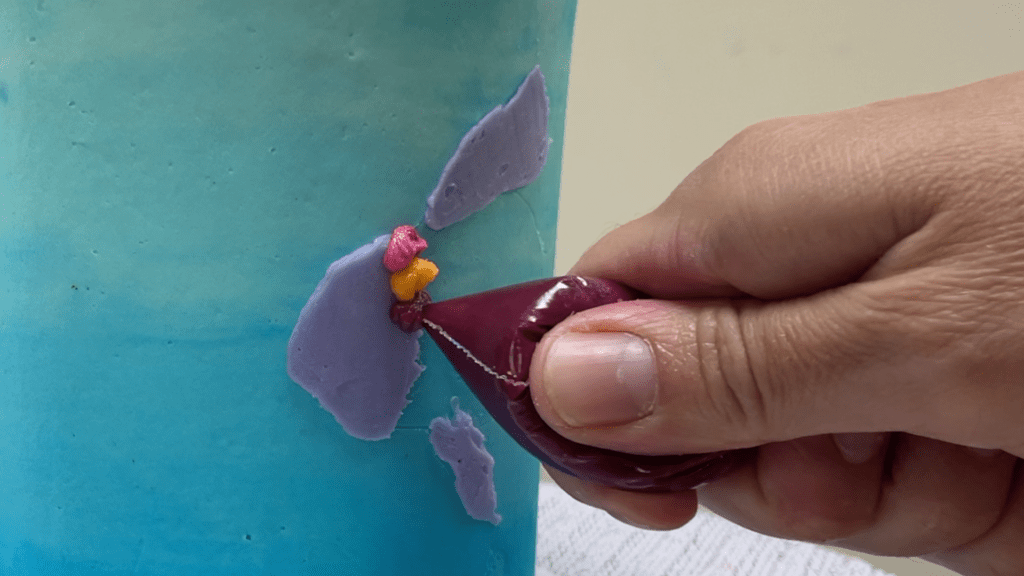
After piping each dot, use an
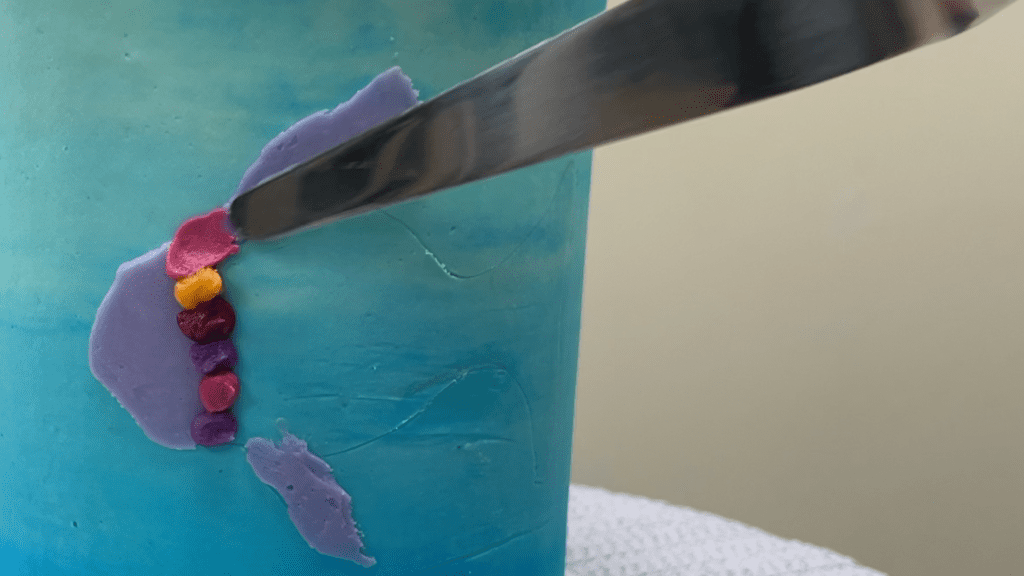
For step by step instructions to decorate this cake, check out my online cake school.

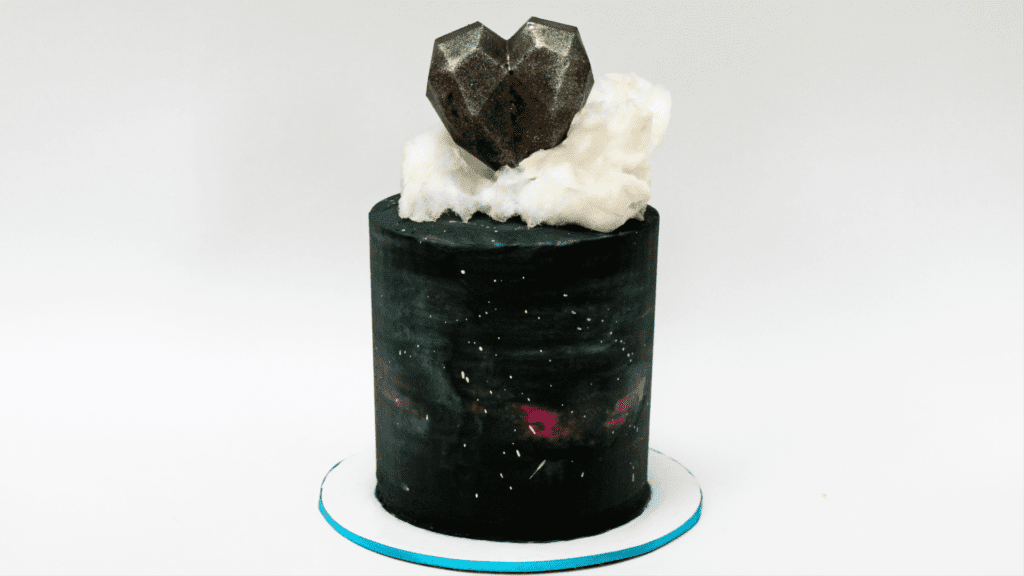
For an astrologer or someone who likes stargazing or is into space, make a galaxy cake by covering a cake with black frosting and then spread on a few dabs of brightly colours buttercream.
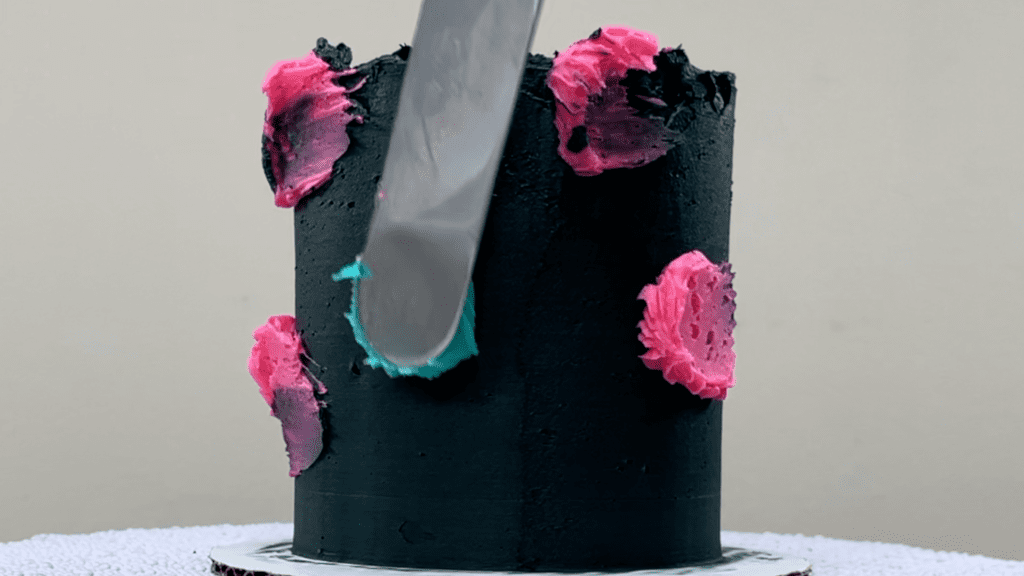
Smooth the frosting to smear the colours around the cake, blending them with the black frosting.
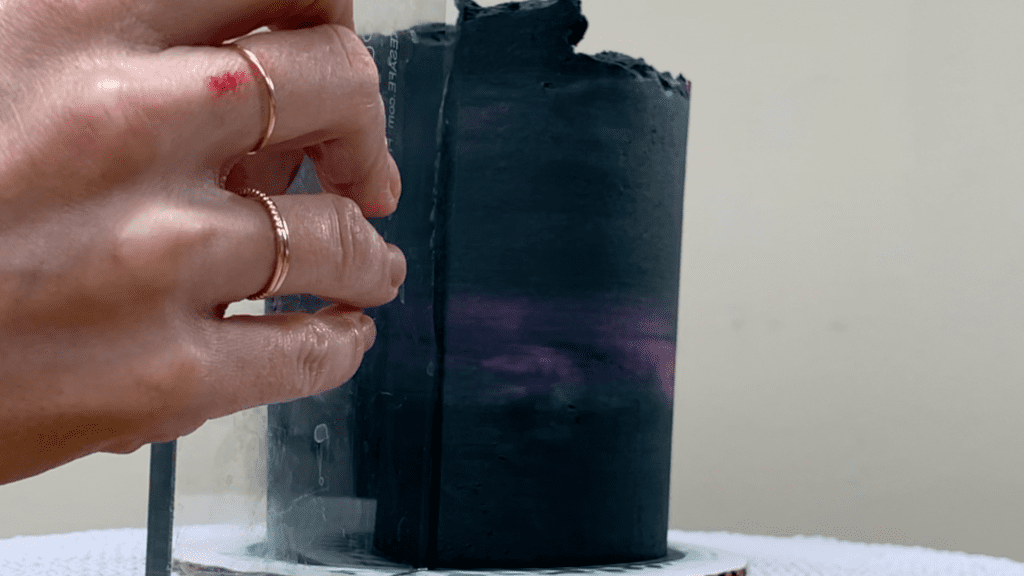
Add some constellations by dipping a paintbrush into silver luster dust mixed with vodka, or use white icing color, and flick the paintbrush towards the cake to spray out stars.
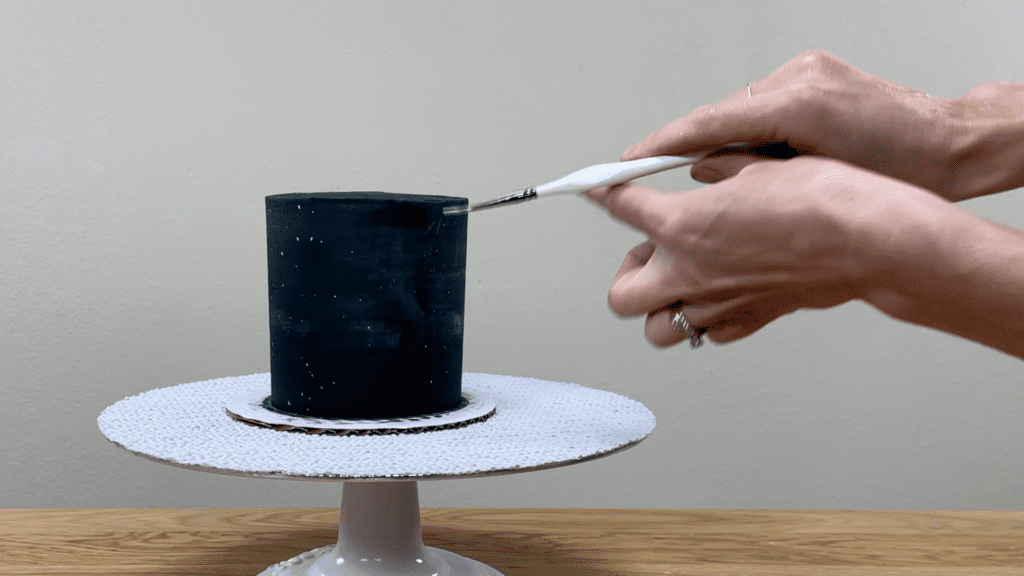
There are lots of ways to make the cake more personal, for example if they love Star Wars you could add toy figures of their favourite characters!
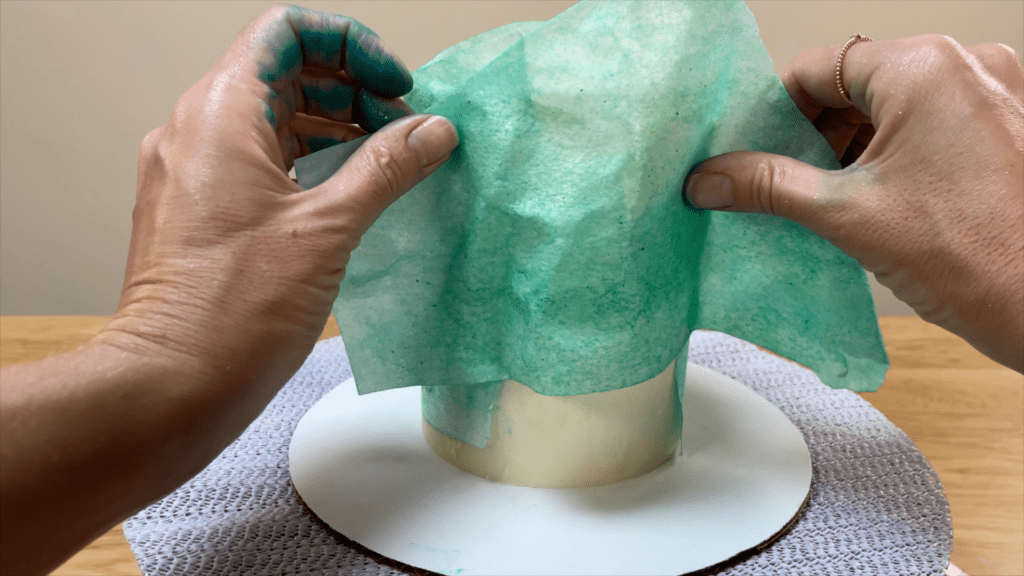
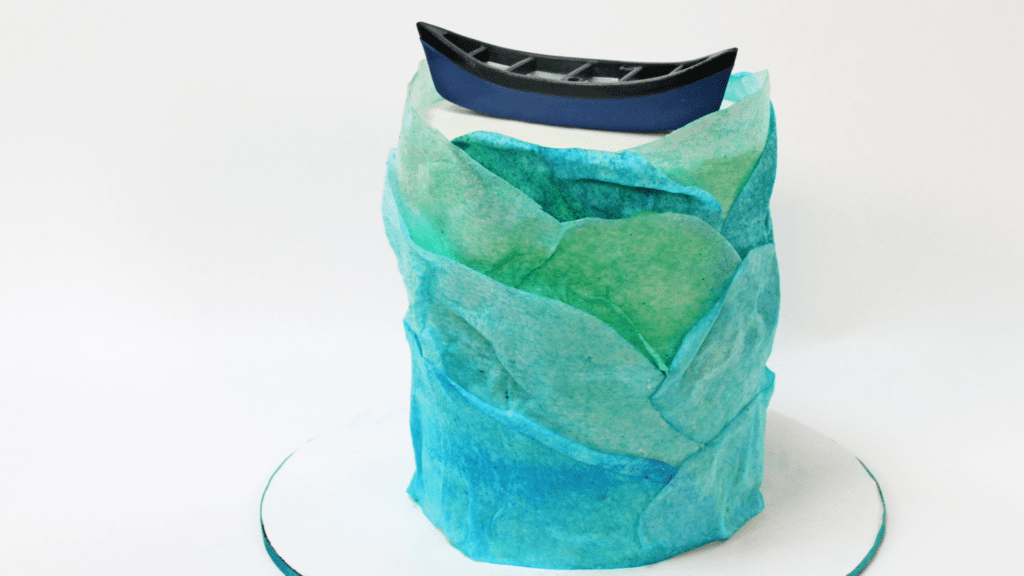
For an outdoor enthusiast, use wafer paper to create a river or lake. Brush wafter paper with gel colours mixed with vodka and leave them to absorb the liquid for about five minutes, so that the wafer paper becomes flexible.
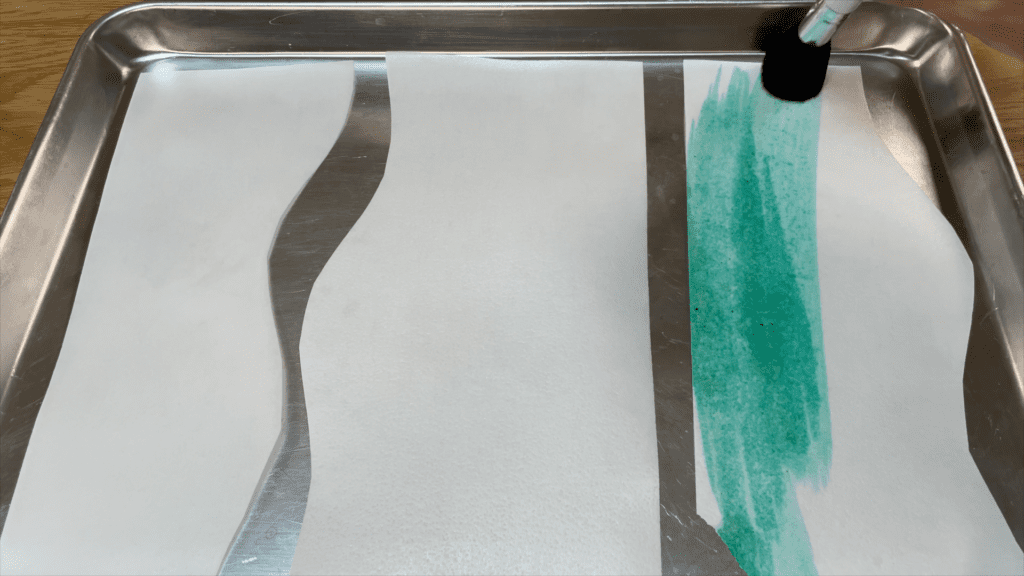
Wrap the pieces of wafer paper around a cake, overlapping them to make waves. The wafer paper will stick to other pieces while it’s wet, or you can use piping gel or pipe a few dots of buttercream to act as glue.
Add a toy kayak or fisherman instead of spending hours sculpting one out of fondant!
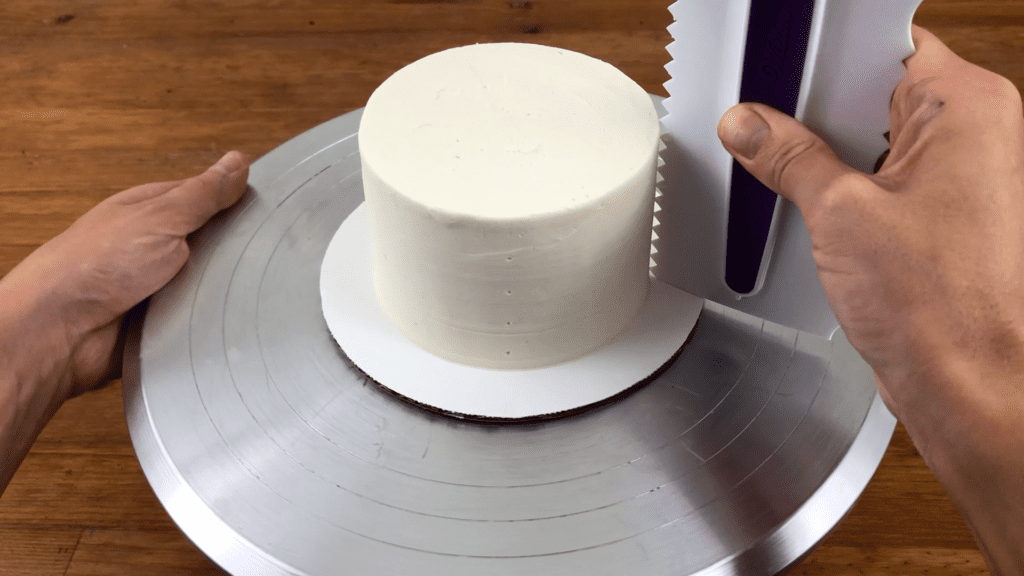
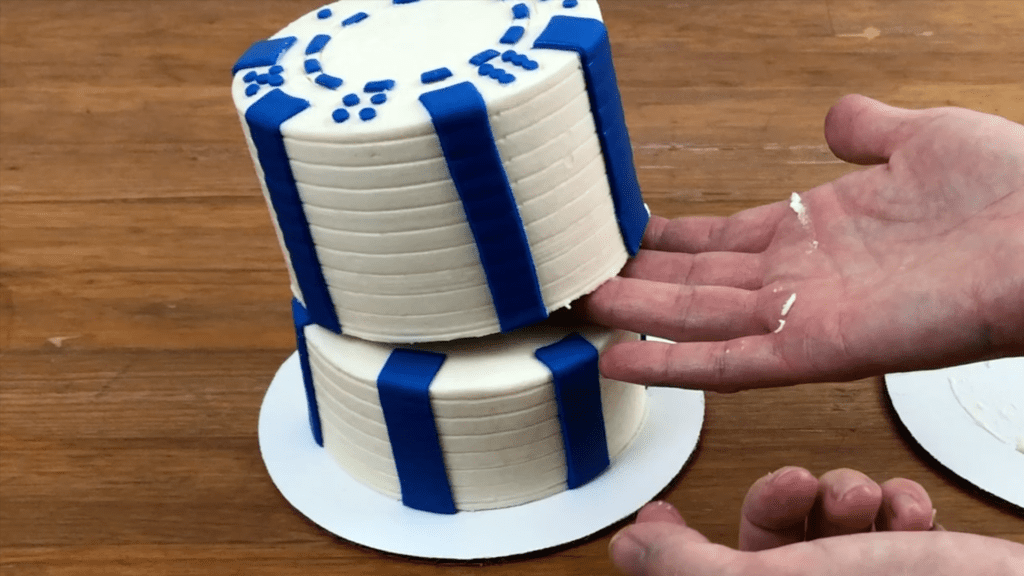
This one’s a bit more time consuming, but it’s a cake any poker player will rave about and always remember! Start by indenting grooves into the frosting on two cakes with a zig zag textured cake comb.
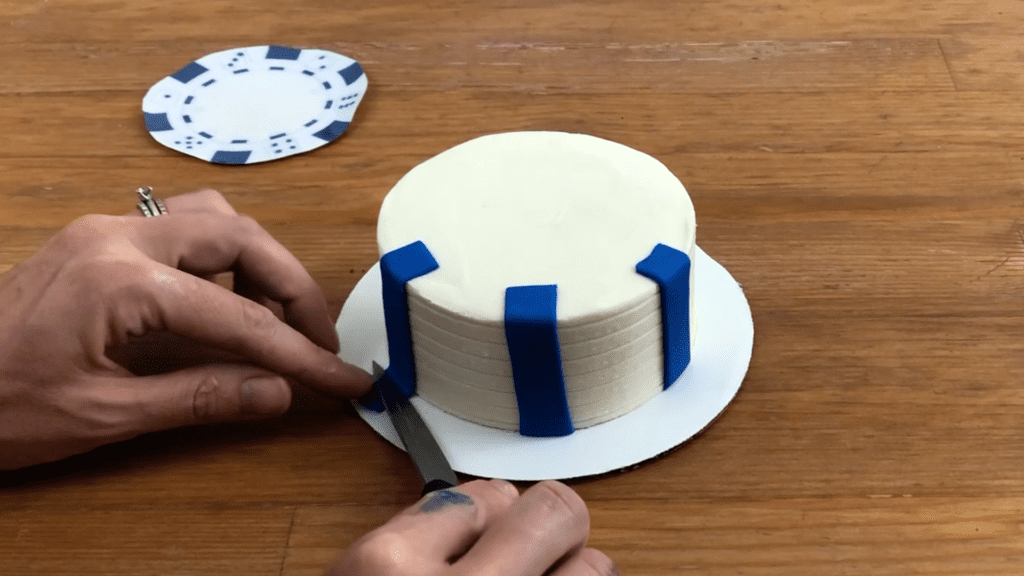
Attach pieces of fondant to create the markings on the chips, referring to an actual poker chip or print out a picture of one to look at. Use a knife to indent lines into the fondant to match the texture of the frosting, making the cake look like several poker chips piled on top of each other.
Stack the cakes and you’ll have a cake that looks JUST like a stack of poker chips! I have a full tutorial for this cake here.
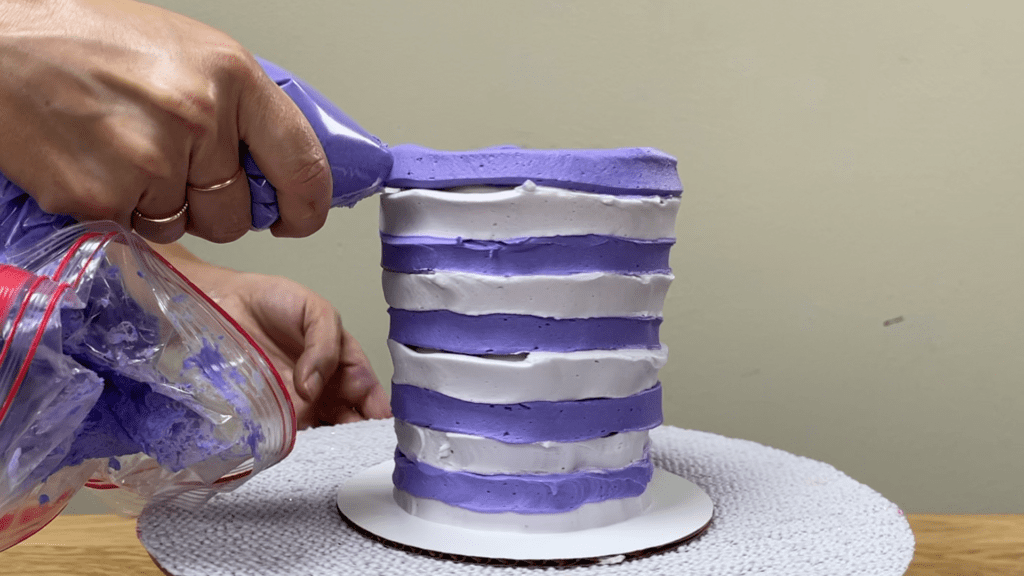
Keep things simple with a favourite colour. Use piping bags fitted with round tips or you can use ziploc bags with a corner cut off to rows of frosting onto a cake.
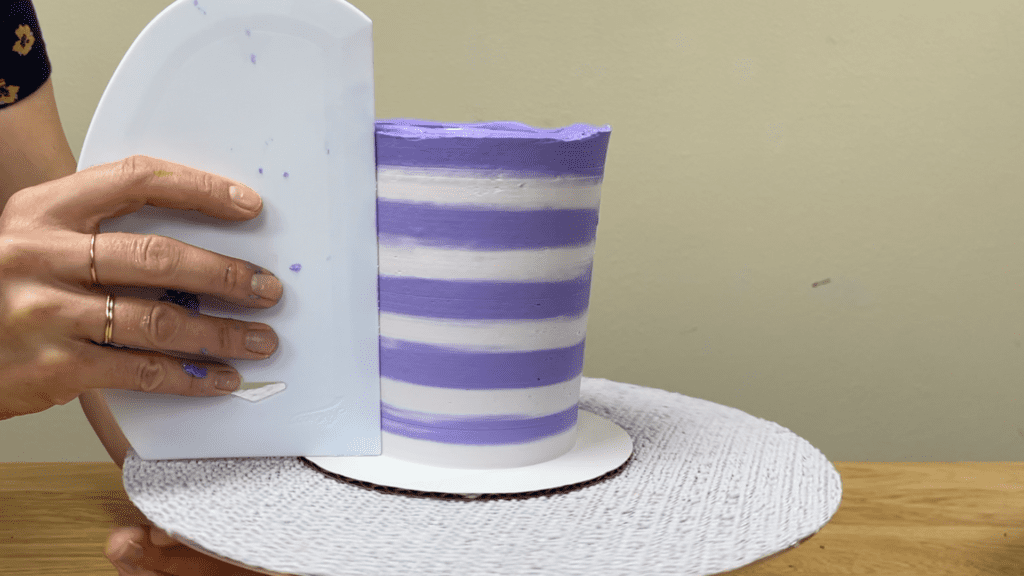
Smooth the coloured rows to make neat stripes! Get more ideas for cake decorating techniques using ziploc bags here.
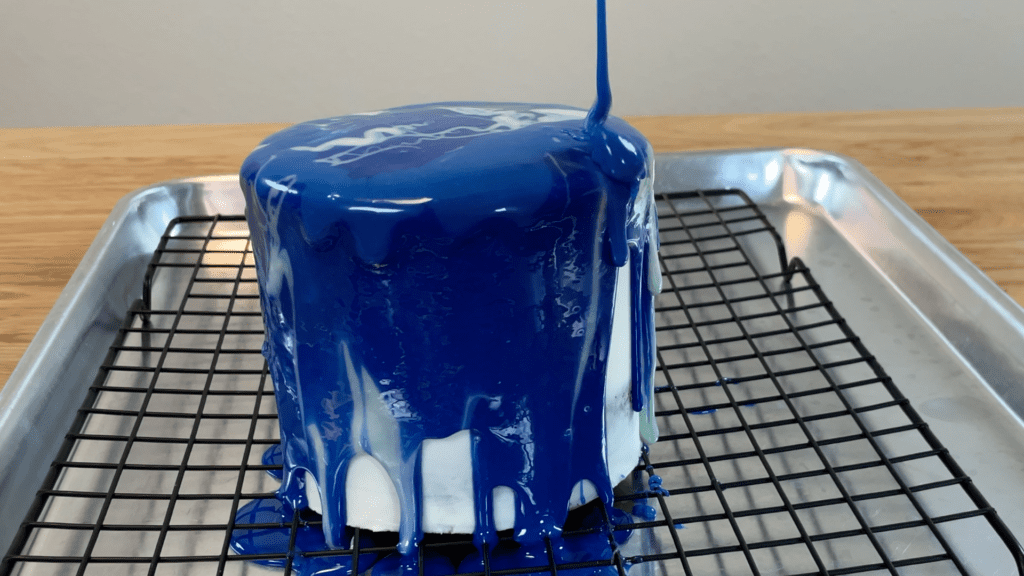
For a shiny and delicious effect, make a mirror glaze cake using his favourite colours or different shades of them.
For a sports fanatic, use the colours of the team to spread texture onto a cake after the frosting on the cake has set, so the new colours and textures will sit on top of the frosting instead of bledning into it.
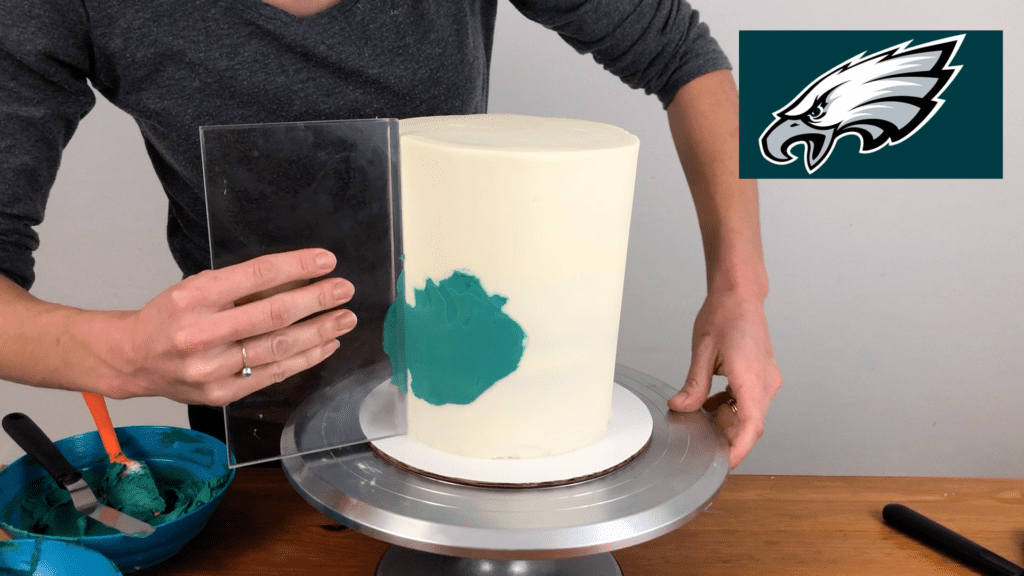
Or for easy cake toppers to match the colours of a sports team, use chocolate and sprinkles!
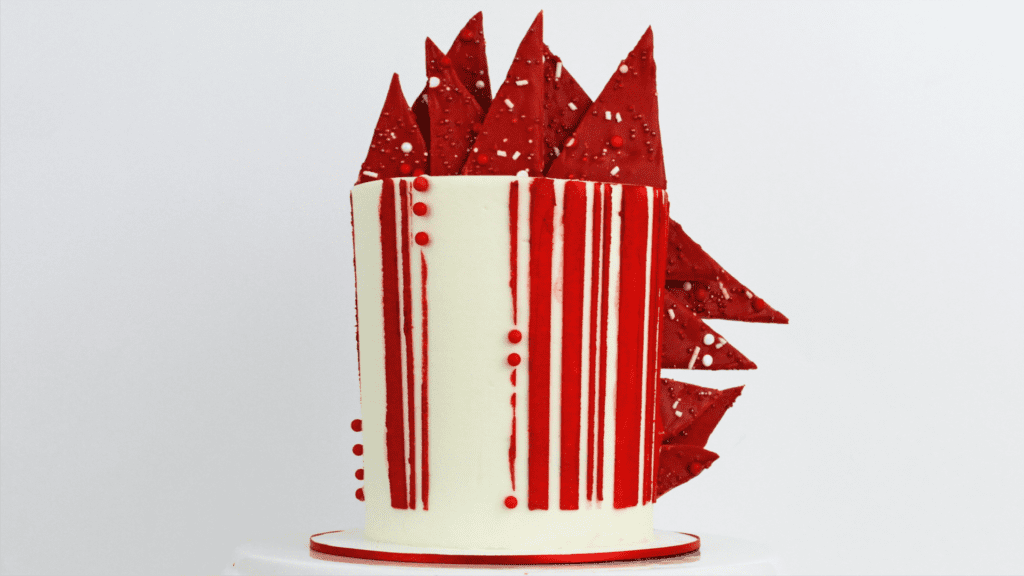
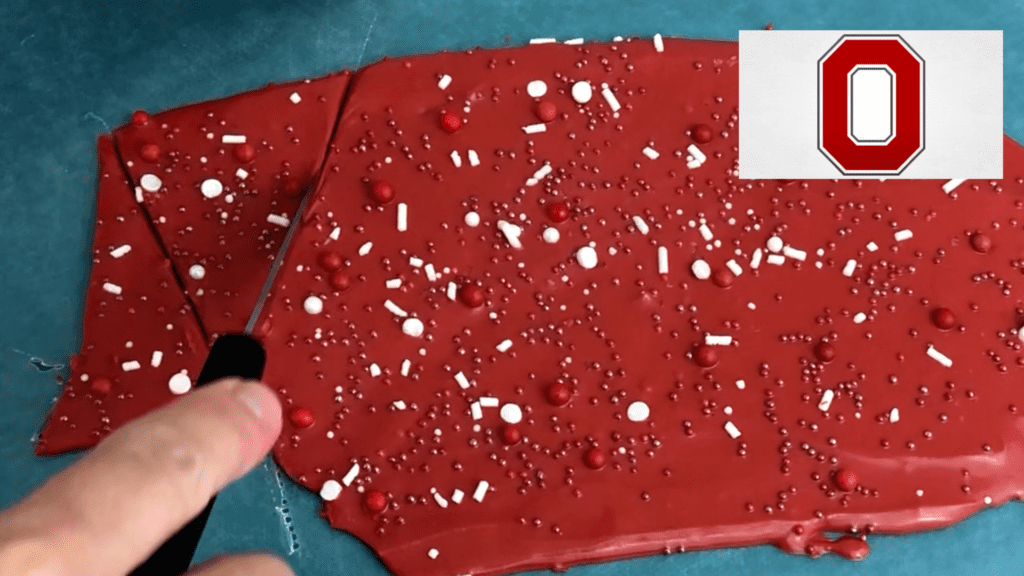
To do this, melt and tint white chocolate and spread it onto parchment paper. Scatter some matching sprinkles over the top while the chocolate is still melted and sticky and then score lines into it. When the chocolate sets, break the chocolate pieces apart and push them into your cake!
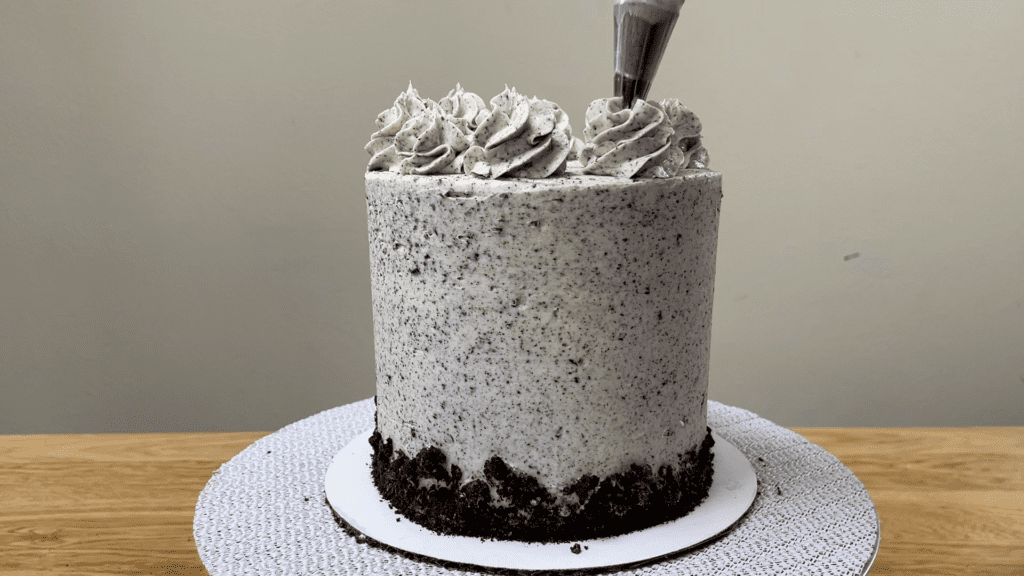
Use the birthday boy’s favourite foods in their cake, for example Oreo cookies can be crushed and folded into frosting to use as the filling or frosting on a cake, and you can use more Oreos to decorate the top of the cake, too!
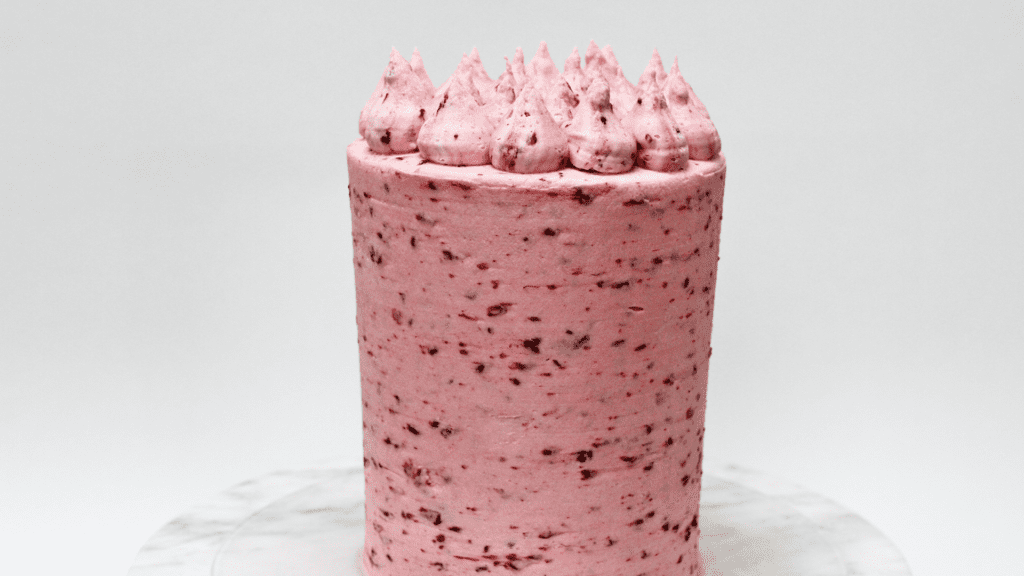
Nutella makes an indulgent filling for a cake and cooked raspberries can be stirred into buttercream to make a delicious frosting for a cake. I teach how to make this cake in my 30 Minute Cake Decorating Course: Fabulous Cakes, Fast!
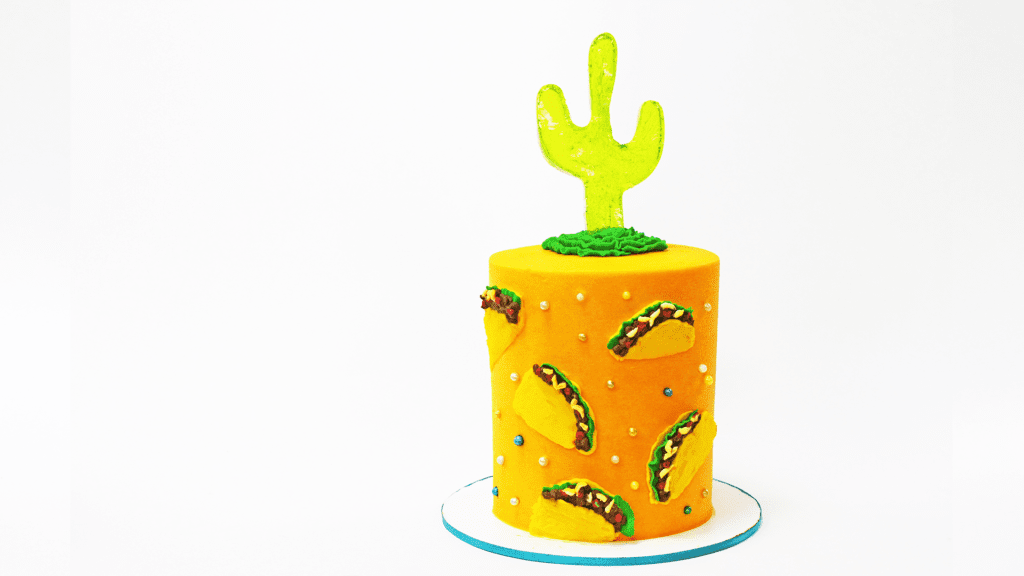
If their favourite food doesn’t pair well with cake, like tacos, pipe it onto the cake as a decoration instead! Learn how to pipe these tacos and make the cactus cake topper with just one ingredients in my Taco Tuesday Cake Class.
A favourite animal or pet can be painted onto a cake, like this elephant I’m painting using coloured buttercream and a paintbrush.
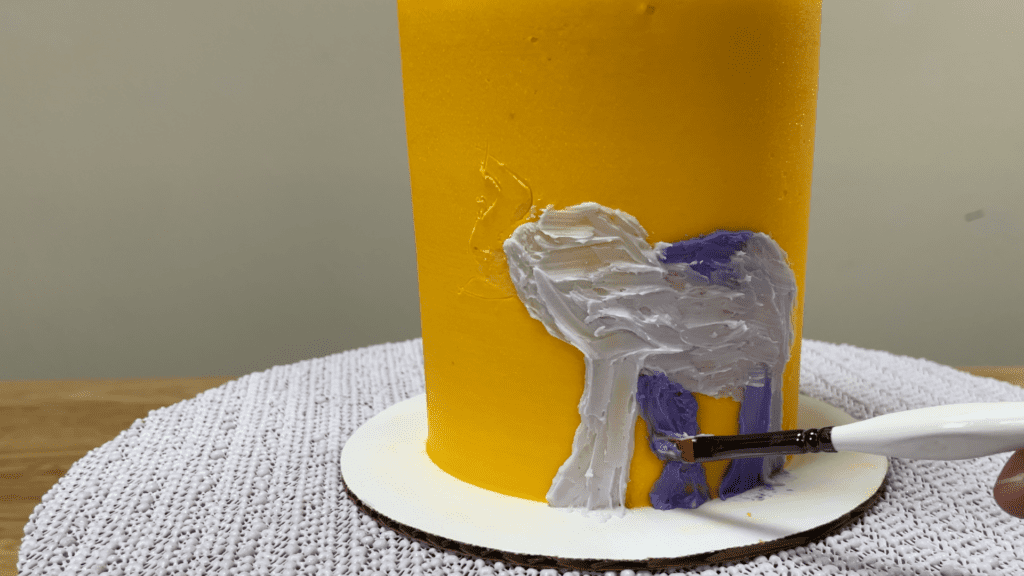
I like to outline the shape of the animal first. I print a picture of the animal and cut it out and then press it against the cake (after the frosting has set so it’s firm!) and trace around it with a toothpick.
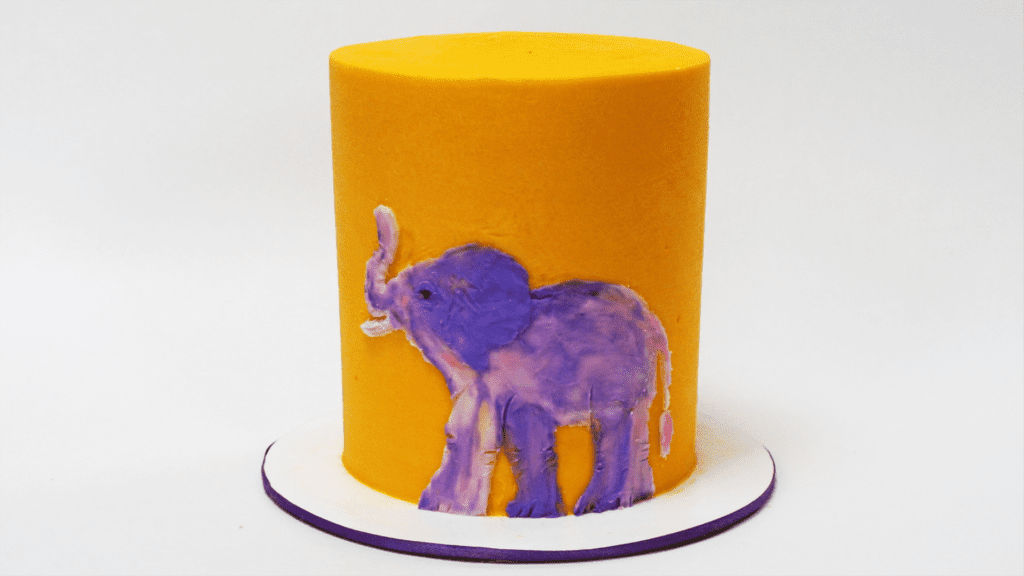
Or if you’re nervous about making mistakes, pipe the design onto a piece of parchment paper, tracing an image underneath.
Press the design onto the side of a cake and then place the cake in the fridge with the parchment paper still attached. Leave it for about an hour, so that the piped animal sets and attaches to the side of the cake. The peel the parchment paper off slowly.
The piped animal will remain on the side of the cake!
I hope you’ve seen some ideas you like. Check out my online cake school for LOTS of cake designs and courses on different buttercream techniques!
Here’s the video version of this tutorial:
Use minimal ingredients – just buttercream and jelly – with a super easy technique to create a colourful, shiny design that looks like stained glass but tastes wonderful, too! If you prefer to watch a video of this tutorial, scroll to the bottom of the page.
Before you frost your cake you’ll need to prepare your jelly. Mix 5 little packets of unflavoured gelatin, which is about 35 grams, with 1/2 a cup of water. This makes enough jelly for a tall 4″ or 6″ cake, or a short 8″ cake, but you can scale the recipe up or down depending on the size of your cake.
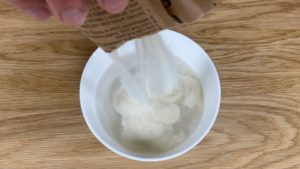
Leave the gelatin mixture for 3 or 4 minutes to bloom, which makes the gelatin smooth and strong, and meanwhile heat 1 cup of water and 1/2 a cup of granulated sugar over a medium heat until the sugar dissolves and the mixture starts to boil.
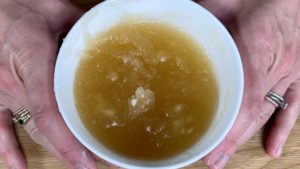
Take the pan off the heat and add the gelatin, stirring until it dissolves. Lift out any hard chunks of gelatin that are floating around and try to skim off the foam around the sides of the pan, and this will make the jelly more clear and bright. You can pour it through a sieve to catch any hard chunks of gelatin if you don’t want to scoop them out one by one.
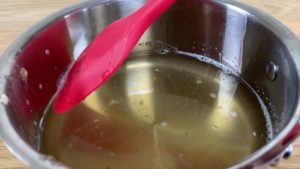
Divide the jelly into a few bowls, however many colours you want to use. I’m going to use gel colours: yellow, orange and red for autumn leaves, brown for a tree trunk and branches, and blue for the sky. Add small amounts of gel colours to each bowl to tint the jelly.
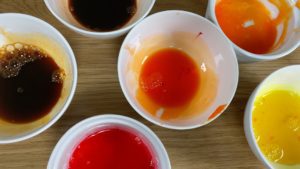
If you want light shades, dip a toothpick into the bottle of colour to get just a tiny bit on the toothpick instead of a full drop. This is also useful when mixing colours, for example mixing a drop of orange with a tiny bit of red on a toothpick to create a darker shade of orange.

The jelly might start to set as you’re colouring the bowls and if that happens, you can still mix in the colour now and then put the bowl in the microwave for 15 seconds at a time to gently reheat the jelly to make it liquid again. If you overheat the jelly you’ll damage the gelatin and it won’t set properly.
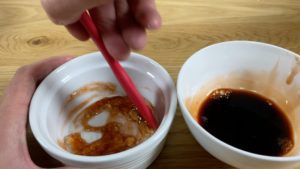
As you’re colouring your jelly, keep in mind what you’re going to use that colour for, and how much of the cake it will be covering. I’m using blue for the sky on the sides and top of the cake so I need more blue than any other colour, so I’m using the biggest bowl for this.
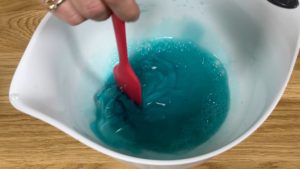
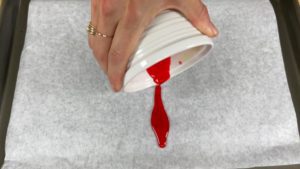
Once you’ve made your colours, line a tray or baking tray with parchment paper and pour the jelly on! It’s fine if they run into each other, and if you pour similar colours next to each other you might really like using the pieces of jelly where the colours blend into each other.
Leave the jelly for about an hour to set or you can put it in the fridge for 30 minutes and then peel sections off the parchment and cut them into little shapes.
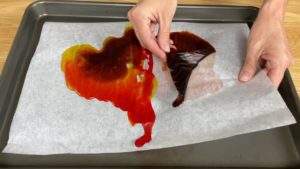
You can cut them with a pair of scissors, cutting at different angles to cut differently shapes triangles and other random shapes. They might attach to each other, to the scissor blades, or to your fingers a little bit, but they’re not sticky so it’s easy to pull them apart and place back on the parchment.
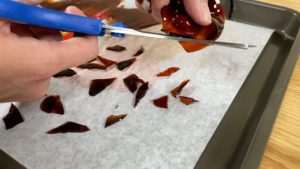
You can use a knife instead to cut the jelly, scoring random lines and then pulling the pieces of jelly apart. You can assemble and crumb coat your cake before you do this but it’s important to have all of your jelly pieces ready before you frost your cake with the final coat of frosting and I’ll show you why in a moment.
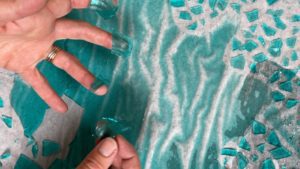
I’m using my 4 Minute Buttercream to frost my cake but this will work with meringue buttercream, whipped cream or ganache as well. Plain white frosting is best because any colours will show through your jelly pieces, tinting them and changing the colours.
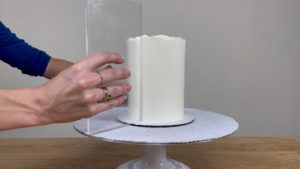
The frosting is going to be almost completely covered with jelly but you still need it to be nice and smooth, with straight sides and nice sharp edges at the top. I have a tutorial on how to get perfectly smooth frosting on cakes in case you’re struggling with that!
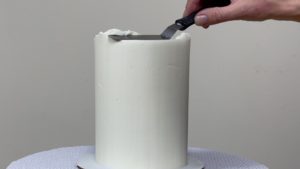
As soon as you’ve frosted your cake, start creating your stained glass design with the jelly pieces. Press each one gently into the frosting and because you’ve just frosted the cake, the frosting will still be soft and sticky so the jelly pieces will attach to it easily. Don’t worry if you nudge the frosting with a finger and cause a little dent because you can place a piece of jelly over the top to cover it up.
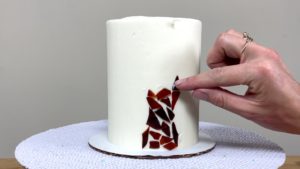
Leave a little gap between each piece of jelly and when you have a space between pieces of jelly, look for another piece that has a similar shape to that space so that it fills its much of the space as possible while still leaving a thin gap between that piece and the pieces surrounding it. You can trim pieces of jelly to fit into small spaces if you need to.
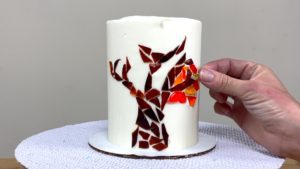
I like to build the basic shape first, so the tree trunk and branches for this design, and then fill in the rest of the design starting with the narrowest areas because you need the smallest pieces of jelly for that, and sometimes very particular shapes like a tiny triangle or a long thin piece.
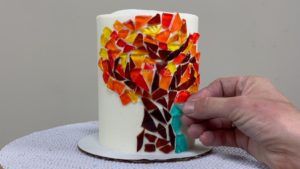
This is my favourite kind of technique because you can be creative without needing to be perfectly precise – you don’t need to measure distances between the pieces of jelly and if one piece doesn’t quite fit, you can nudge the pieces around it to create a bit more space and since the frosting is still soft you can move the pieces slightly.
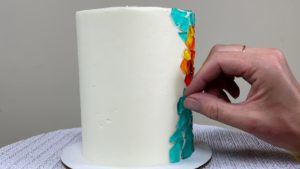
You have to work quite quickly to place all of the pieces of jelly before the frosting sets, especially if your cake is cold because then your frosting will set even faster. If it does set and the jelly isn’t sticking anymore, chill the cake to set the frosting so it’s firm and then spread a thin layer over the remaining part of the cake with no jelly on it and then press more jelly pieces onto that area. Don’t forget the top of the cake, unless you want to leave it blank.
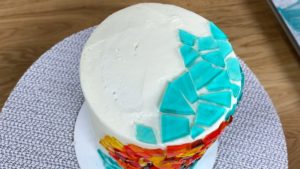
In real time, the decorating part of this cake took me 34 minutes, to place all of the jelly pieces to create the design. How do you store a jelly cake? If you put it in the fridge without covering it up, the jelly will dry out and get hard and peel off the frosting. Store the cake in an airtight container in the fridge until 2 – 4 hours before you serve it.
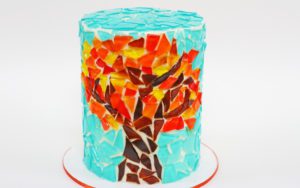
I’m excited for you to try this stained glass jelly cake technique so please tag @britishgirlbakes in your photos on instagram so I can see them!
If you’re looking for more cake decorating ideas using jelly, check out my Under The Sea jelly cake tutorial!
Here’s the video version of this tutorial:
Here are 10 easy techniques to create adorable animal cakes with NO fondant!
If you prefer to watch a video of this tutorial, scroll to the bottom of the page.
1. Use gel food colours to paint an animal onto a cake. Use the same gels you would use to tint buttercream. They’re quick to use because all you have to do is squeeze a few drops onto a plate or palette and add a few drops of vodka, or any other clear alcohol or clear flavour extract. To make a pastel colour, add white icing colour to the gel.
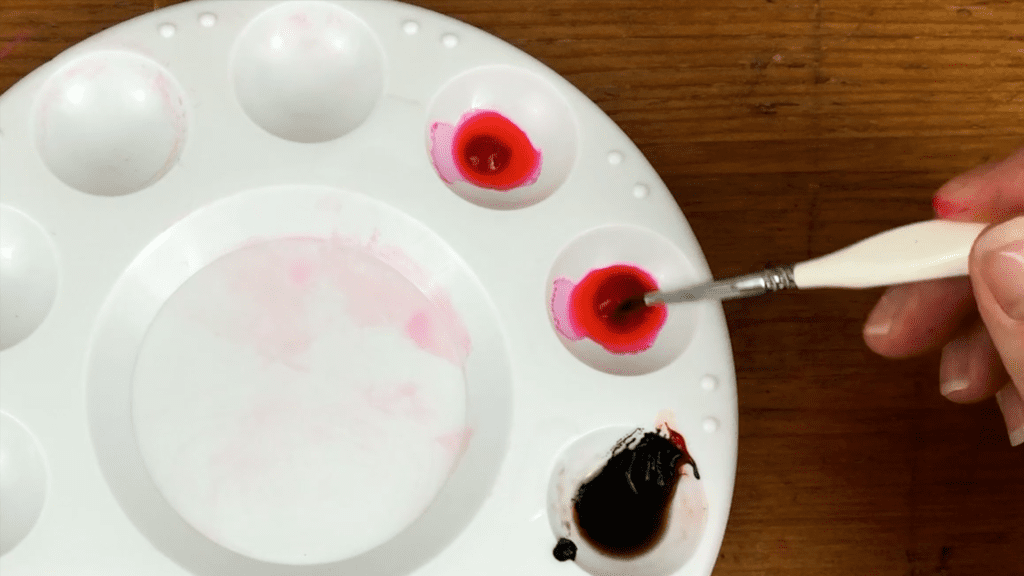
Chill your cake in the fridge first for at least an hour to set the frosting so it’s firm and then paint your animal onto the frosting. For very bold colours, like this brown, use mostly gel with just a tiny bit of vodka added, or for thinner coverage to make lighter shades just add more vodka to thin out the colour.
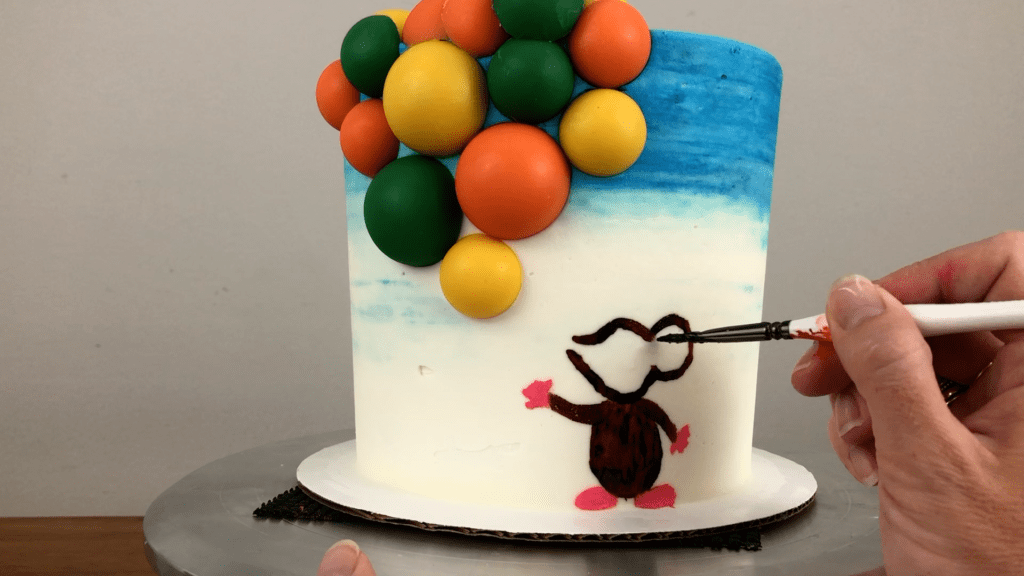
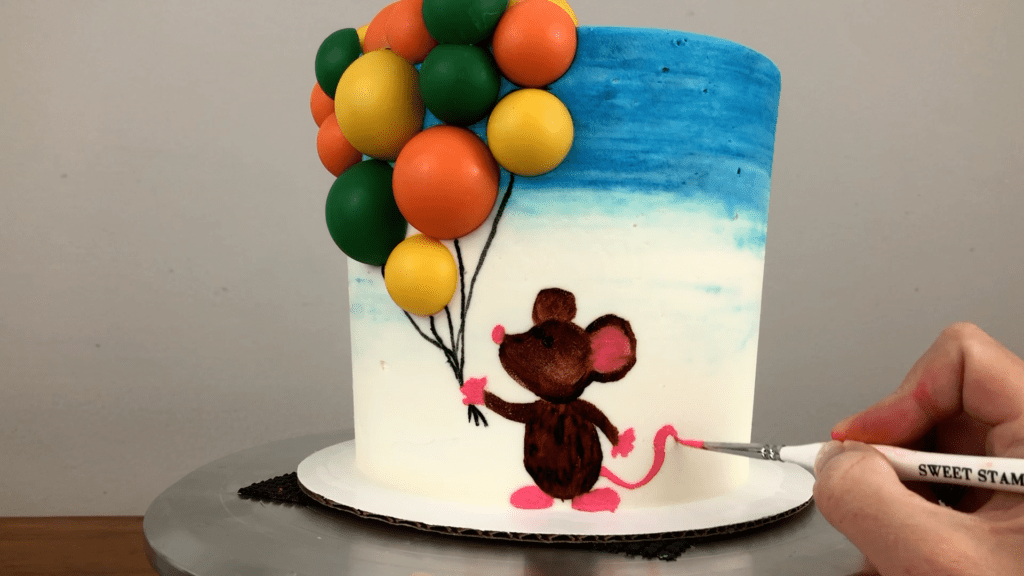
I like to start with an outline and then fill in the middle, just like you would if you were drawing a picture. It’s helpful to have a few different paintbrushes so that you don’t have to clean them as you switch back and forth between colours and it’s also much easier to do this if you have a picture to refer to. I use Google Images and choose a clip art image of whatever I want to paint, printing it out and referring to it while I’m painting.
2. Use buttercream to paint an animal onto a cake. Put a few colours of buttercream onto a plate and you’ll need a paintbrush and an
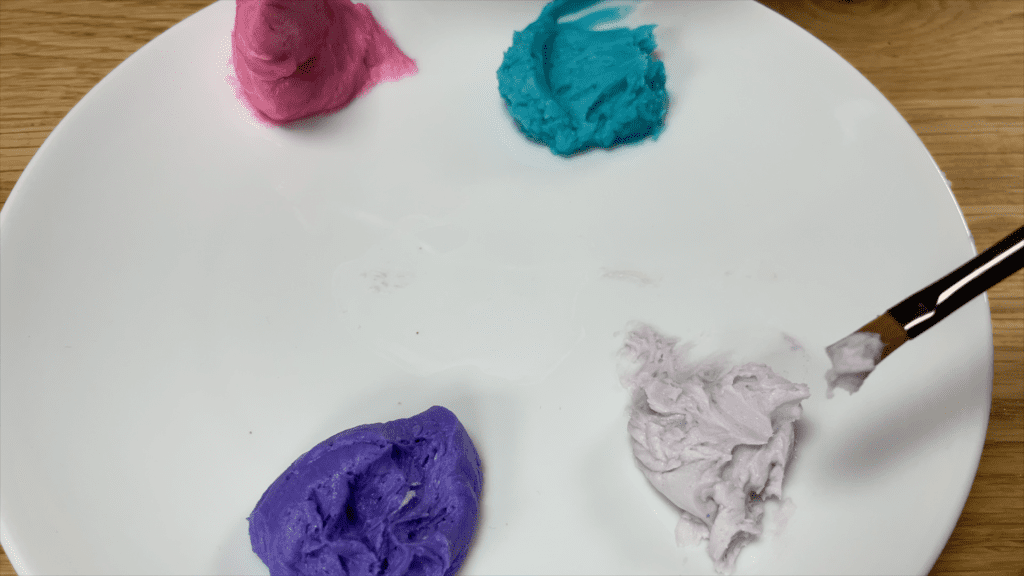
Chill your frosted cake for an hour in the fridge to set the frosting and then cut out the shape you want to paint onto your cake (either a sketch you’ve done or an image you’ve printed). Trace around the animal with a toothpick onto the frosted cake to outline it.
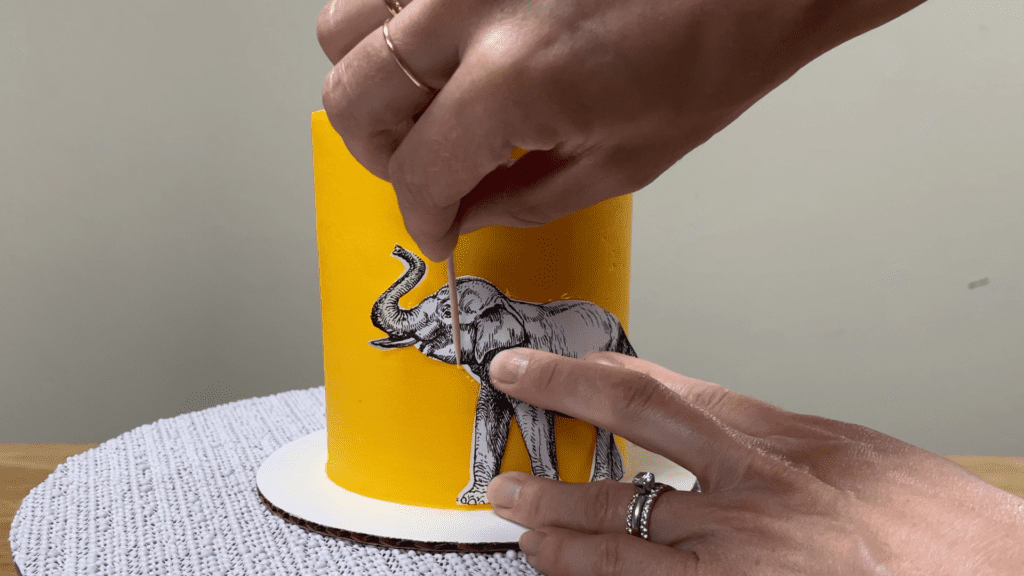
Then paint the shape with buttercream, just like you would paint with acrylic paints. Using a thin paintbrush is useful for details like a trunk or tail, to stay within the outline you traced.
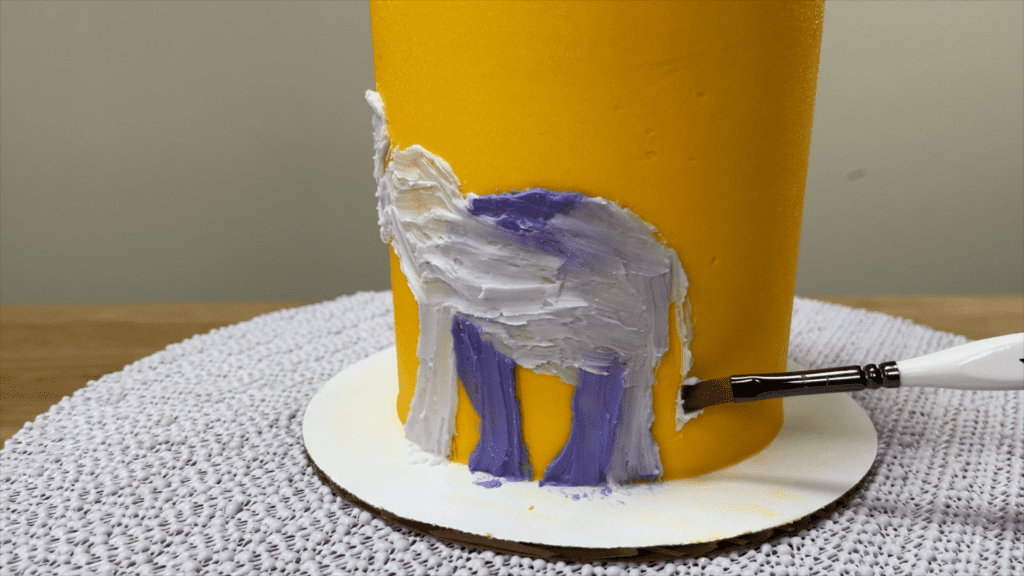
Brush on some shading with a darker shade of the same colour and add accents with different colours if you like. To add texture and to clarify which parts of the buttercream are which parts of the elephant, use your paintbrush or a toothpick to gently scratch lines where the elephant’s skin has creases or wrinkles. Buttercream is fun to play around with and it’s convenient because you already have it from frosting your cake, so you can tint the leftovers different colours to use for painting!
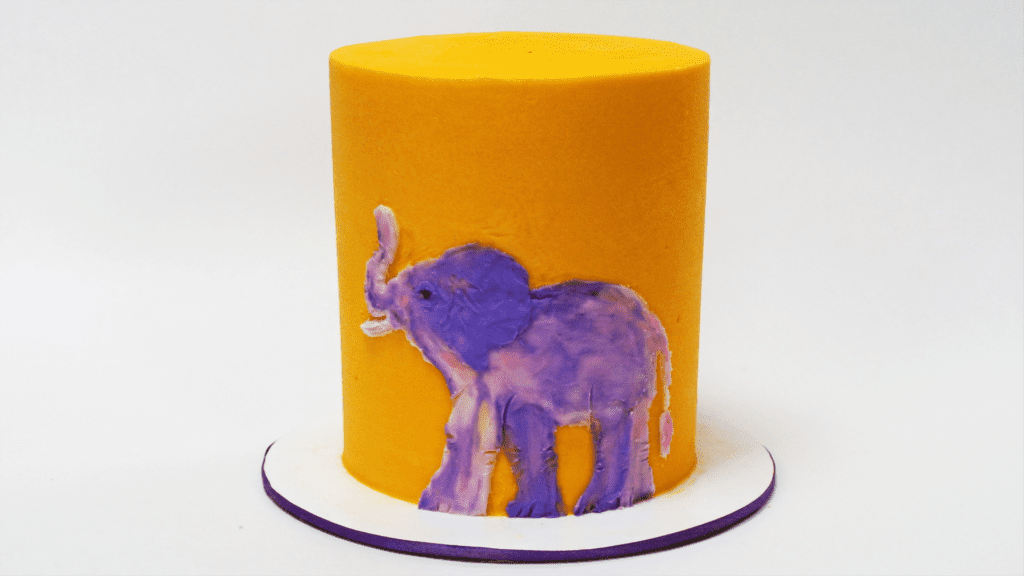
3. Pipe an animal onto a cake using any piping tip! Start by outlining you shape with a cookie cutter or use a toothpick to score the outline into the frosting like I did with the elephant in the previous technique.
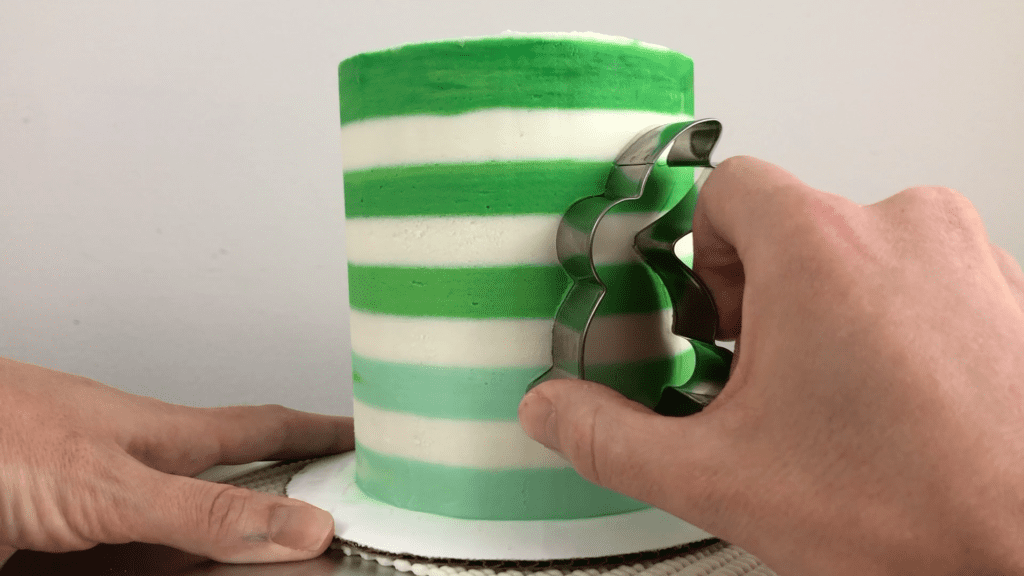
Then pipe frosting to fill the outline of the shape. Choose a piping tip small enough to be able to stay within the outline, especially around the smaller details like the feet and the ears, otherwise the outline of the animal won’t be clear and it might be difficult to tell which animal it is!
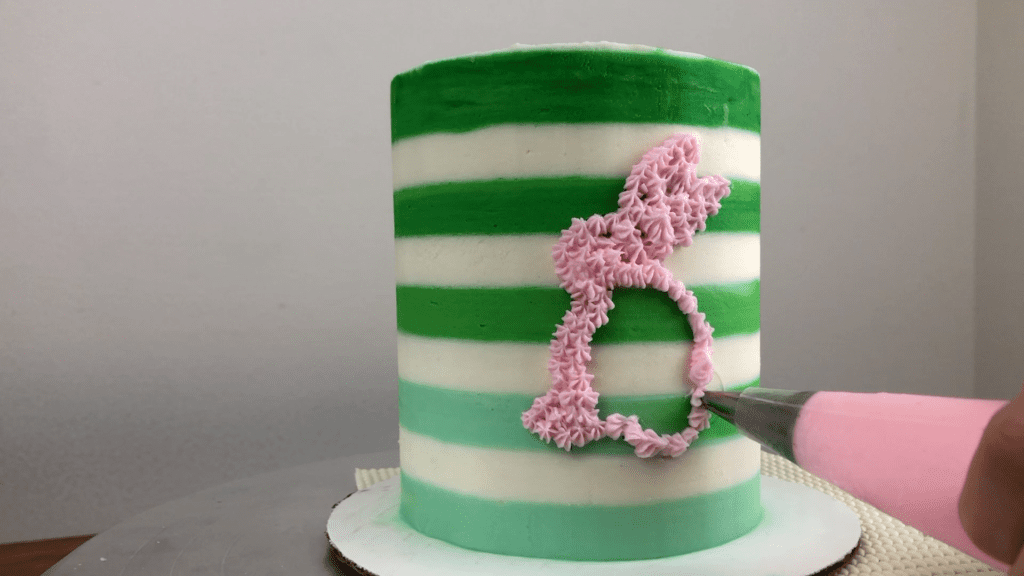
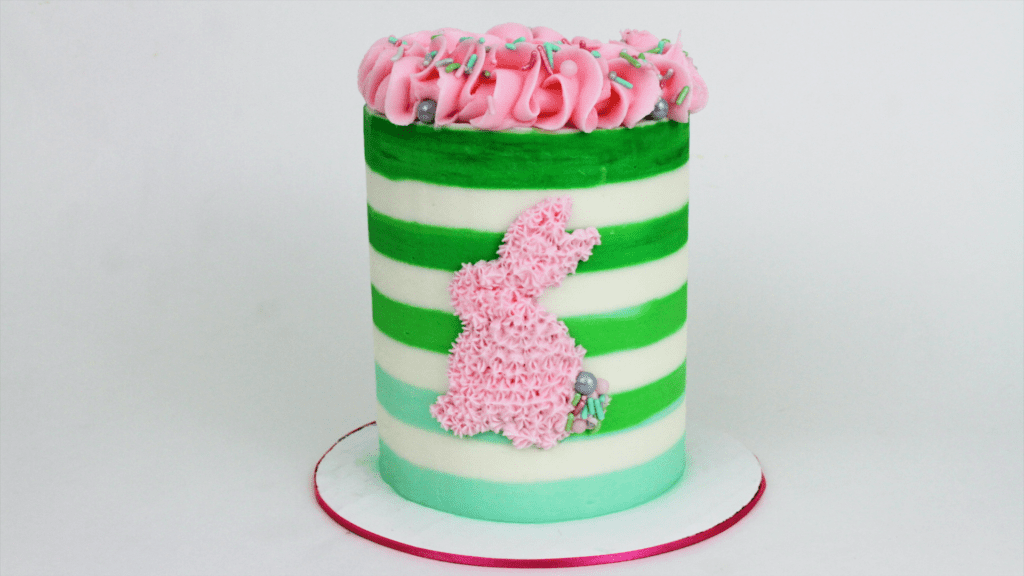
For more detail you can use sprinkles to highlight certain areas for a quick and colourful addition.
4. Spread, pipe, and paint an animal to add much more detail to your animal. Start by spreading on some frosting for the face to create a flat surface, even if the frosting on your cake is textured, like this pink frosting.
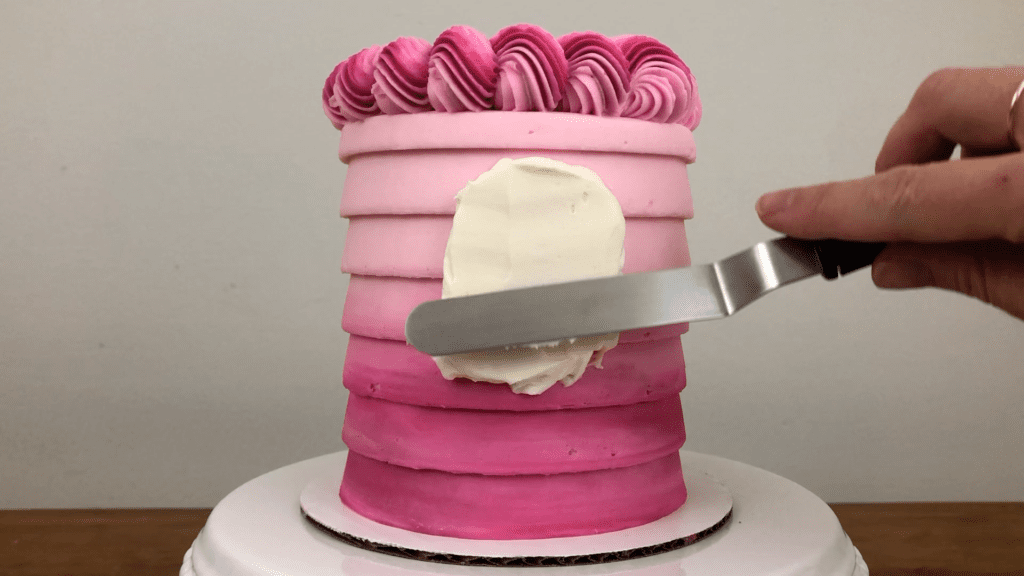
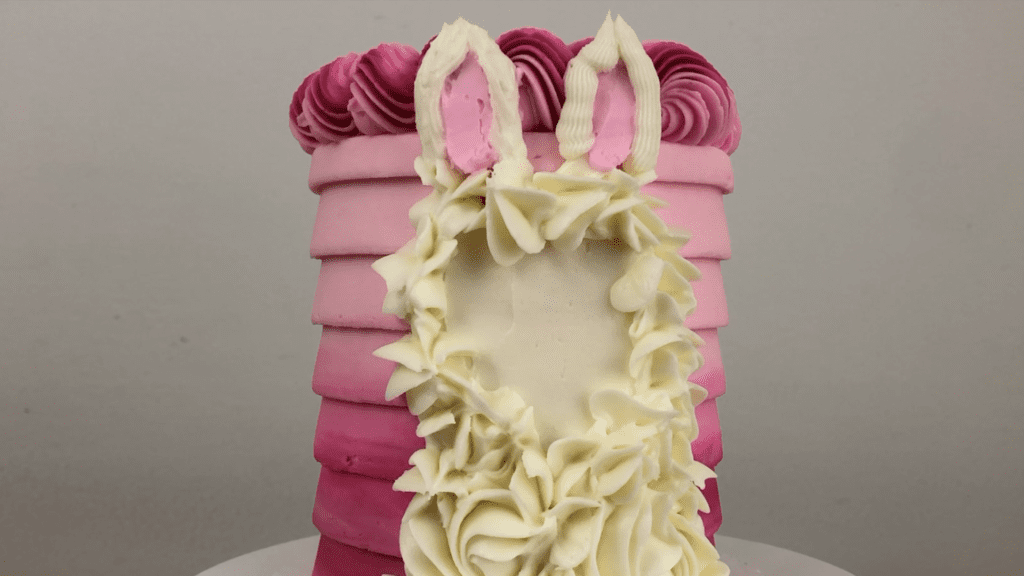
Pipe on the fur with any piping tip. You might choose a grass tip for long shaggy fur or for this llama I’m using a 1M star tip to pipe little stars and rosette swirls. The more colours and textures you add, the more detailed and interesting the design will be.
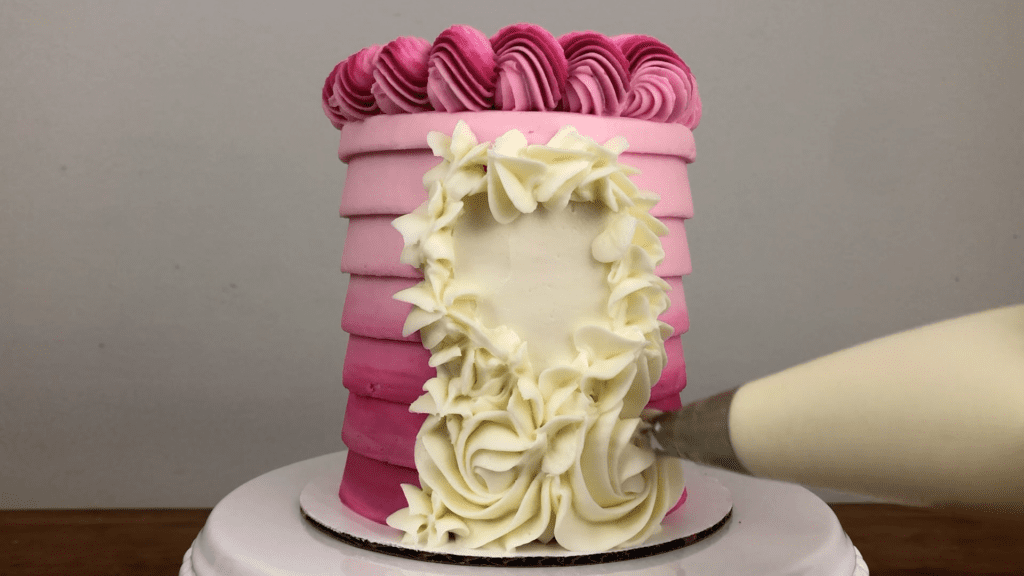
Add details like ears by piping or spreading frosting, or do both! I spread the pink frosting on first for these ears and then pipe on the white fur around them with a medium round tip, spreading it flat with a small palette knife (or you could use an
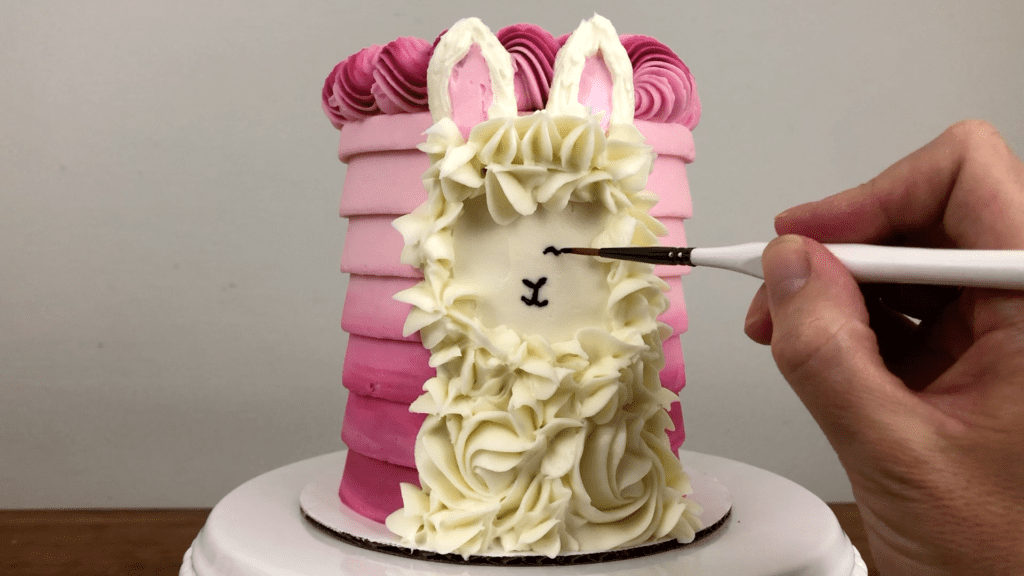
For the face, use gel food colour and a paintbrush to paint on a nose, mouth, and eyes. Using a small paintbrush will allow you to add really tiny details, like eyelashes!
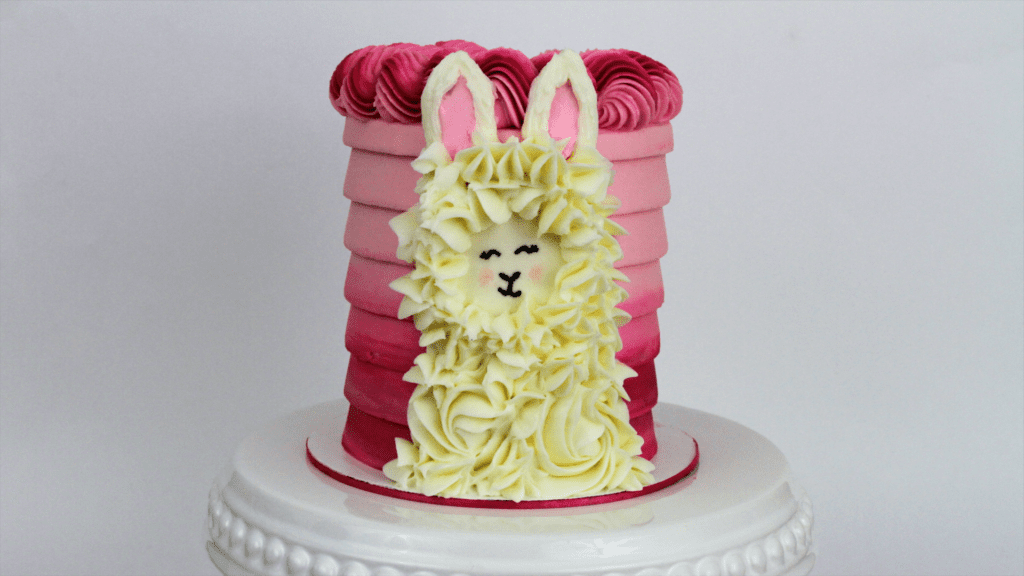
You can keep this as simple as you like. I added rosy pink cheeks to this llama by brushing on pink gel colour thinned out with vodka.
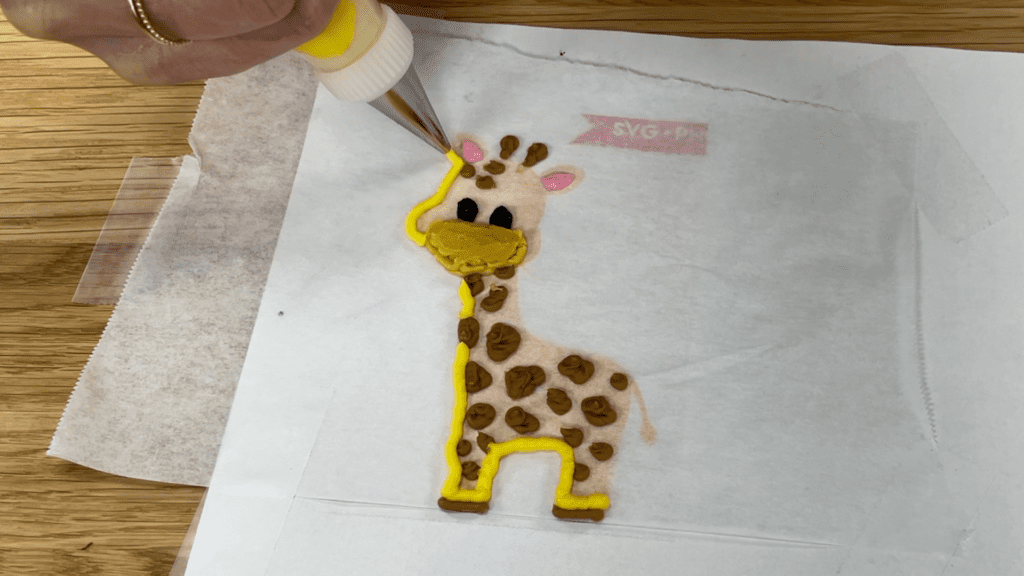
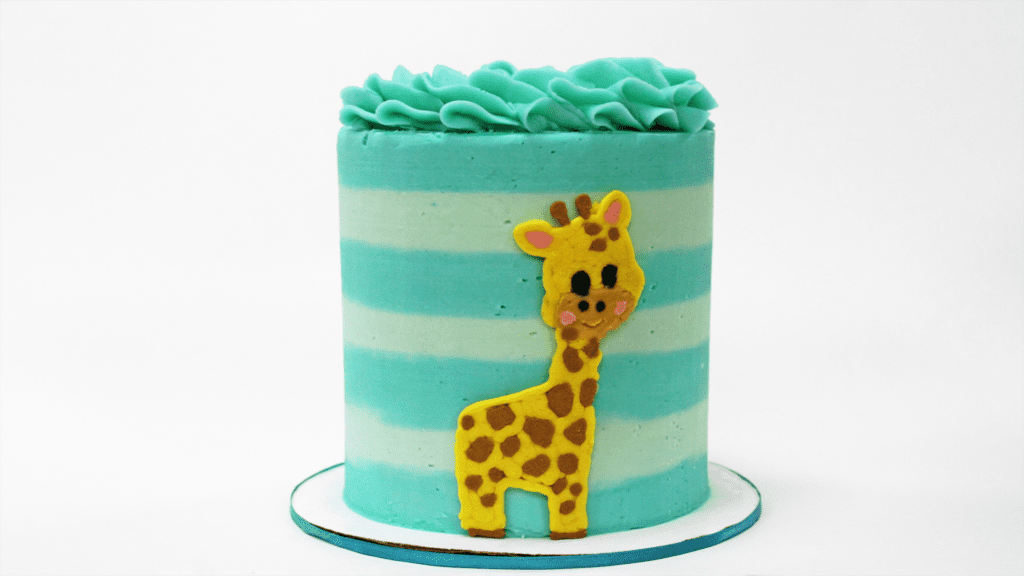
5. Pipe and transfer your animal onto a cake. By first piping it onto parchment paper you’ll create a perfectly flat shape AND it means you can trace a picture instead of drawing something free-hand. You’ll need a small round tip like a #3 or #4 to pipe the smaller details like this giraffe face, spots, and horns.
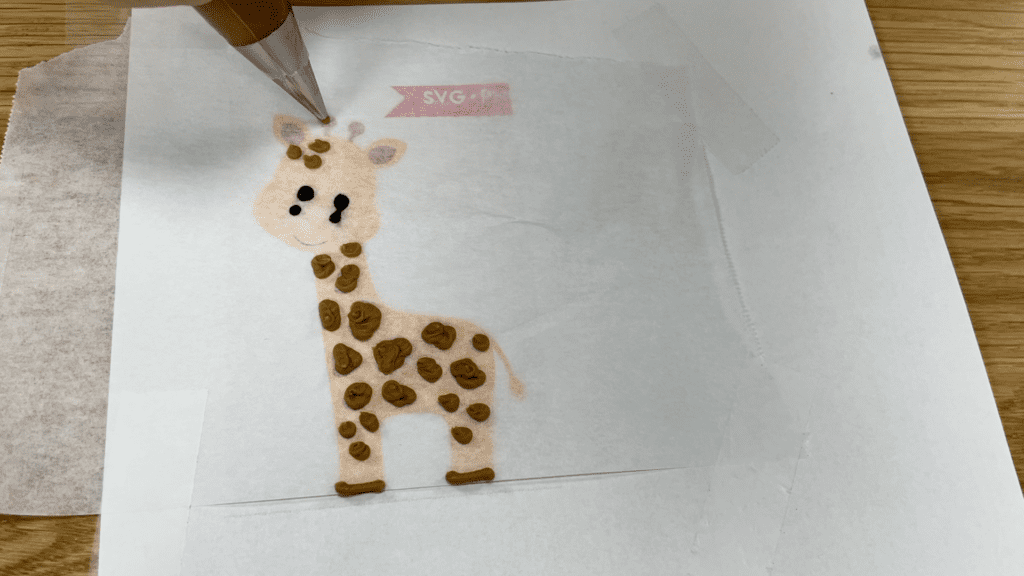
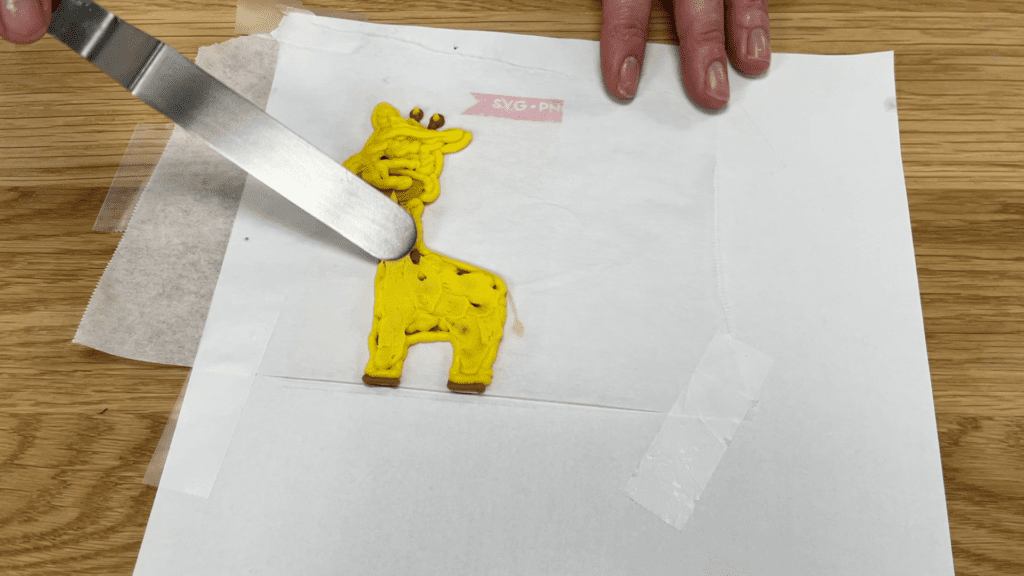
Put the parchment in the freezer for 5 minutes to set the small details and then pipe on the background colour, which is yellow for this giraffe. Spread the piping to flatten it and because the small details have frozen and hardened, you won’t blend the colours together as you spread this colour flat.
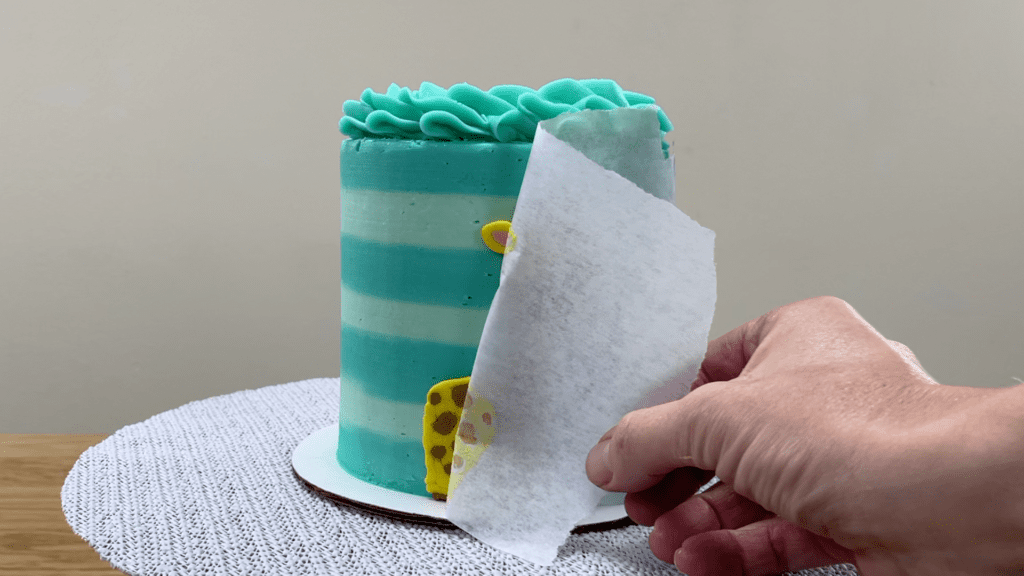
Pick the parchment up and press the piped animal against the frosting on your cake, pressing gently all over the animal and paying attention to outlying shapes like tails.
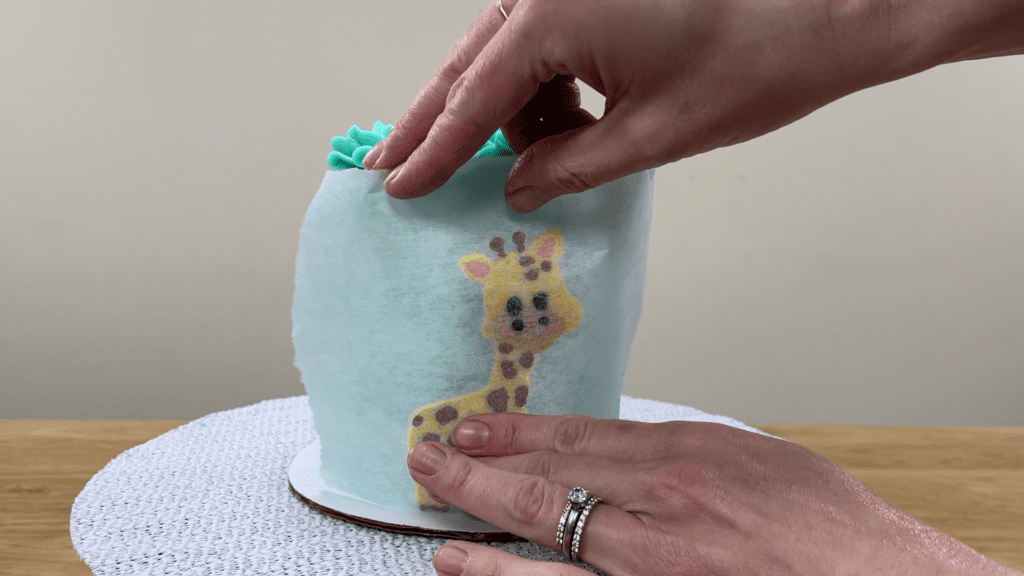
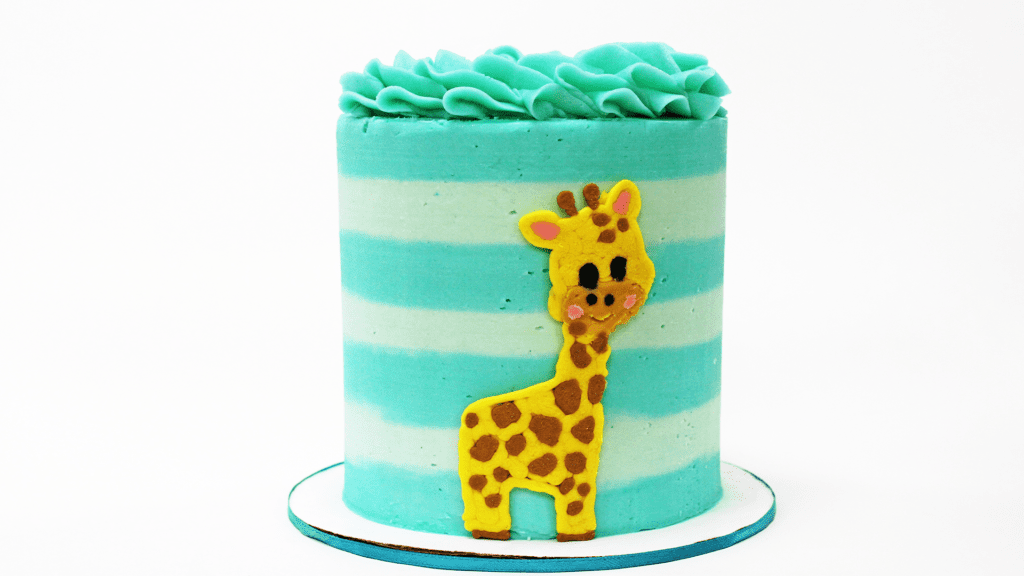
Put the cake in the fridge for an hour to set the animal. My 4 Minute Buttercream works really well for this because it gets very very firm when it’s cold. Peel the parchment off, leaving the animal behind on the cake!
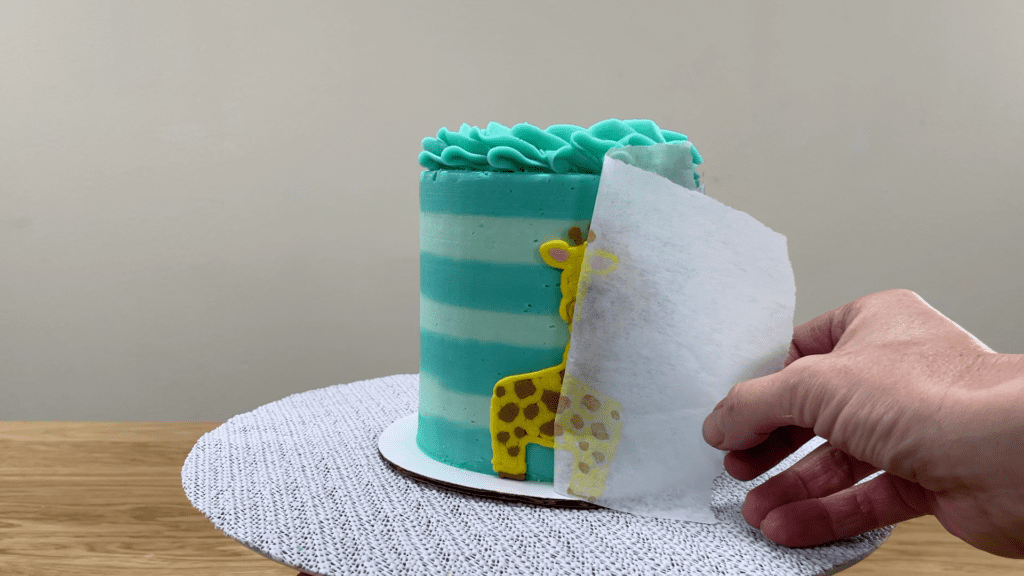
You can add more details now if you like, like painting or piping on eyebrows or other thin lines.
6. Sculpt a 3D animal and add buttercream fur and details. Sculpting a cake is much easier than you might think. Start by sketching your animal – either the top view, or the side view, or both for the most accuracy.
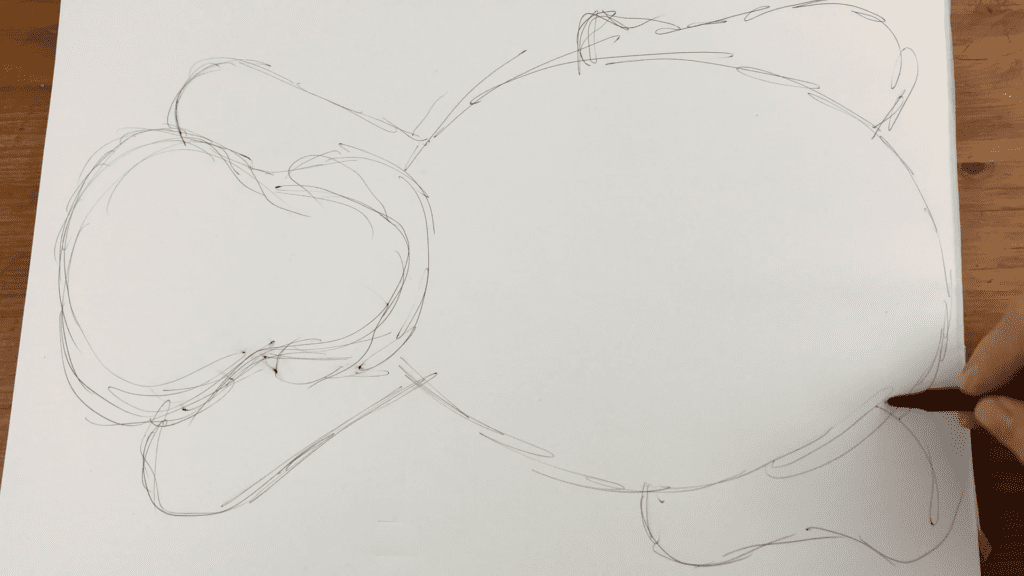
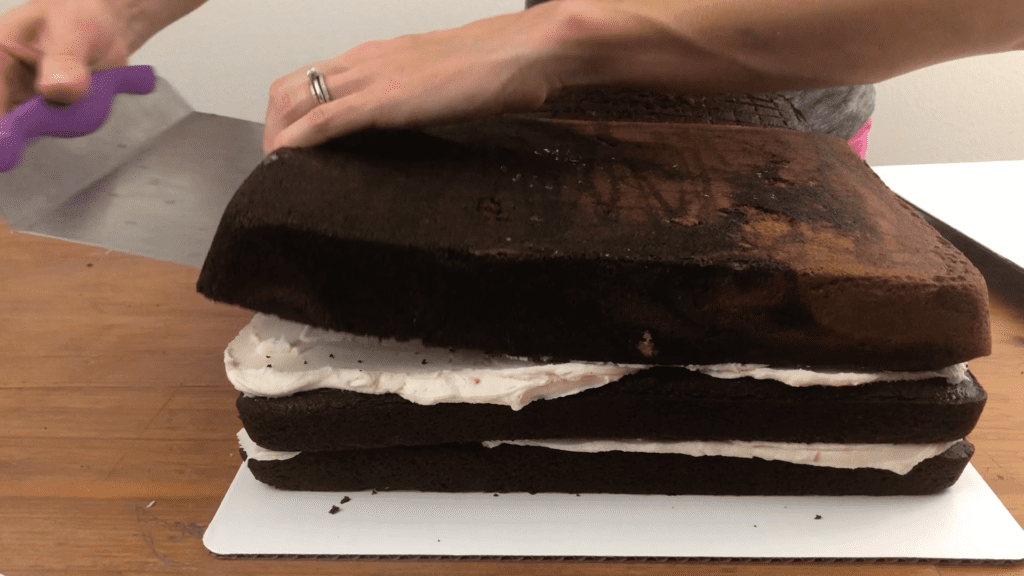
Cut the animal out and then assemble your cake by alternating cake and filling. To attach cake layers to each other, for example if you want to place them side by side, spread buttercream in between them to act as glue.
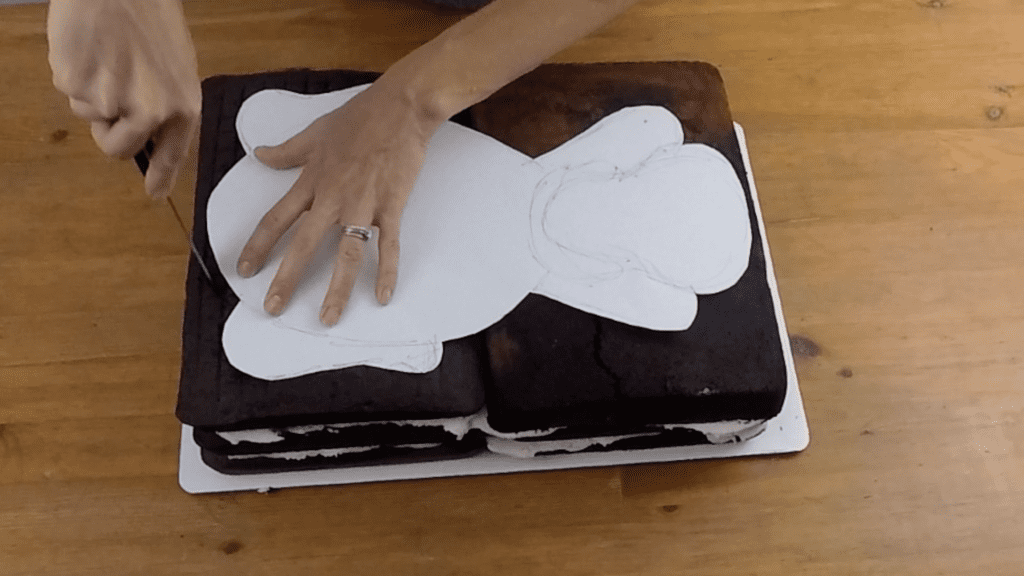
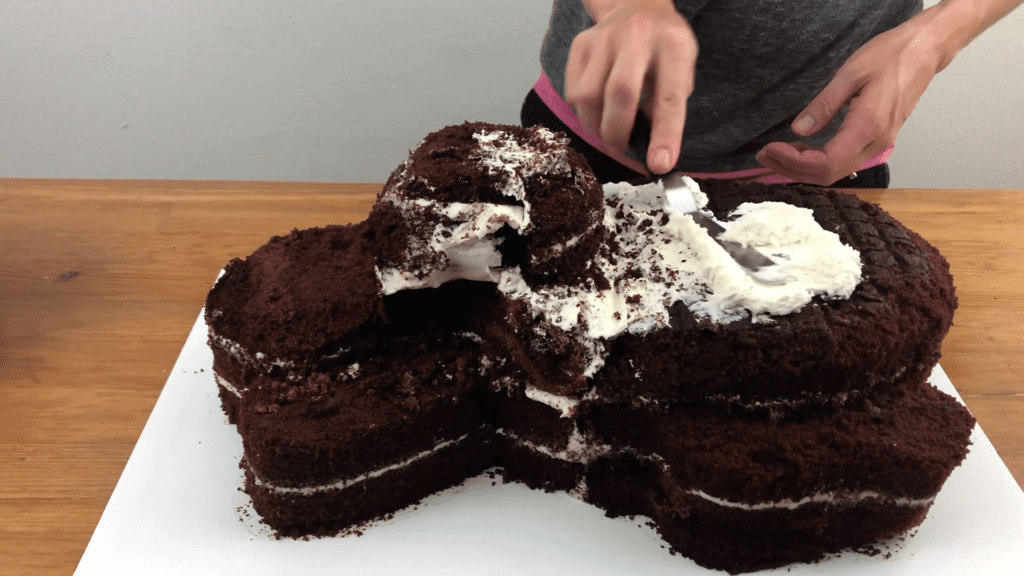
Place your sketch on the cake, either on top or hold it up against the side, and trim around it with a serrated knife like a bread knife. Save the trimmings because you’ll use them next to add the details.
To create features like this dog’s head or hind legs, you can either use cake to add the feature or carve away some cake to leave the feature behind. For this dog, I’m adding cake to create the head but I’m carving away part of two of the corners of the cake to create the hind legs. When you’re happy with the shape, cover the whole thing in a thin layer of frosting, a crumb coat.
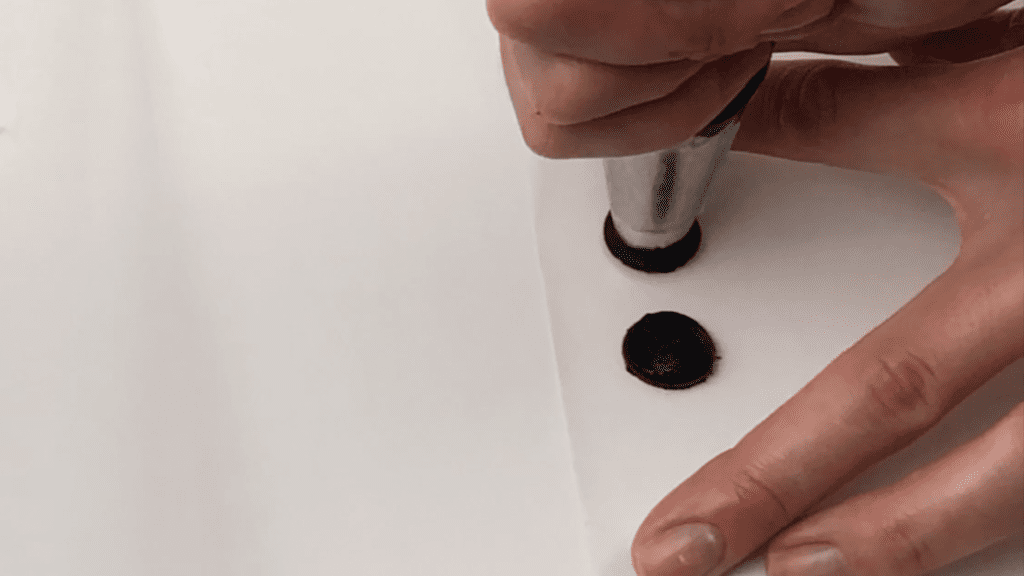
While the crumb coat sets, pipe details onto parchment paper like eyes and a nose with black buttercream. Put these in the freezer to chill and harden. You can pipe the white parts of the eyes and then attach the black pupils if you want to.
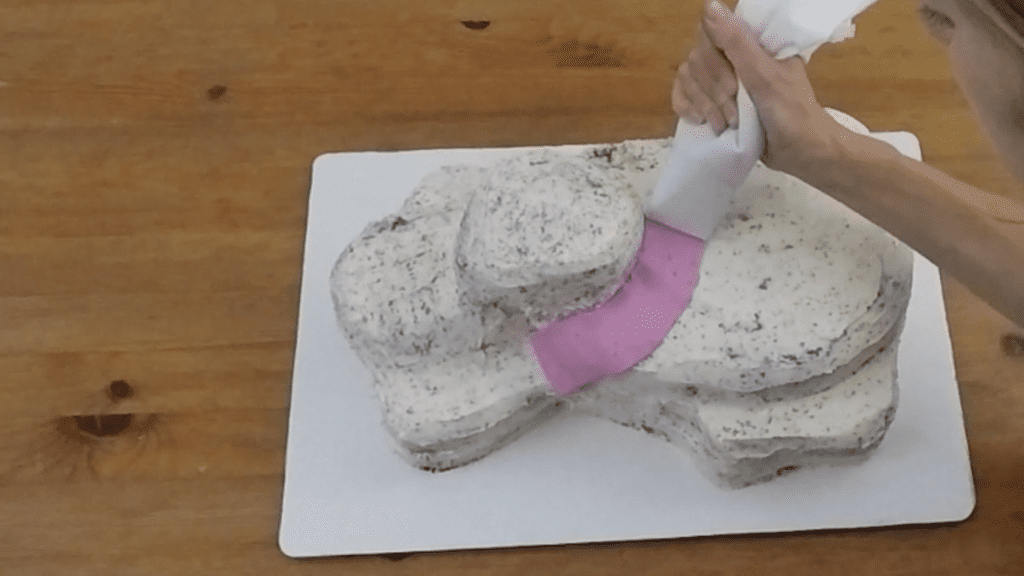
If your animal has a collar, add that before piping on the fur using a ribbon tip.
Attach the eyes once they’re frozen, sticking them onto the cake with a dot of fresh buttercream if the crumb coat has already set. Then pipe the fur on, starting at the bottom to make sure the fur goes all the way down to the cake board and then working your way up and across the animal.
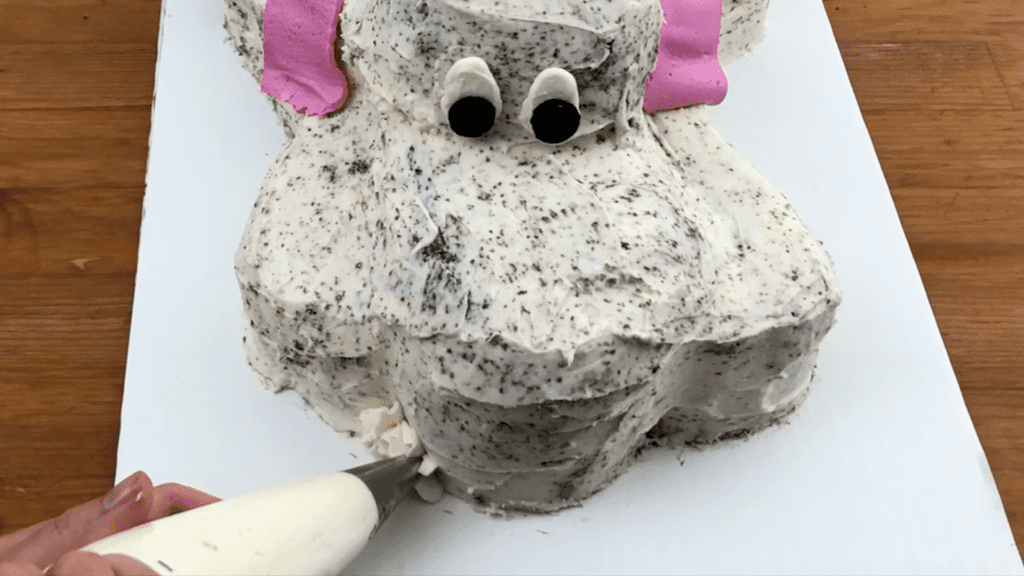
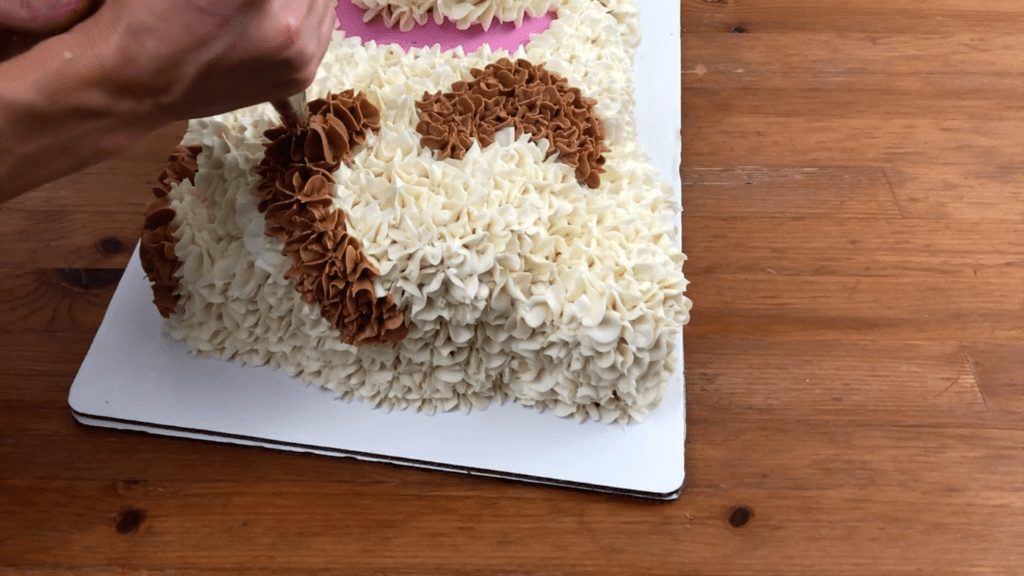
If you’re using more than one colour it’s helpful to have a piping bag and tip for each colour of frosting so you can switch between the colours easily.
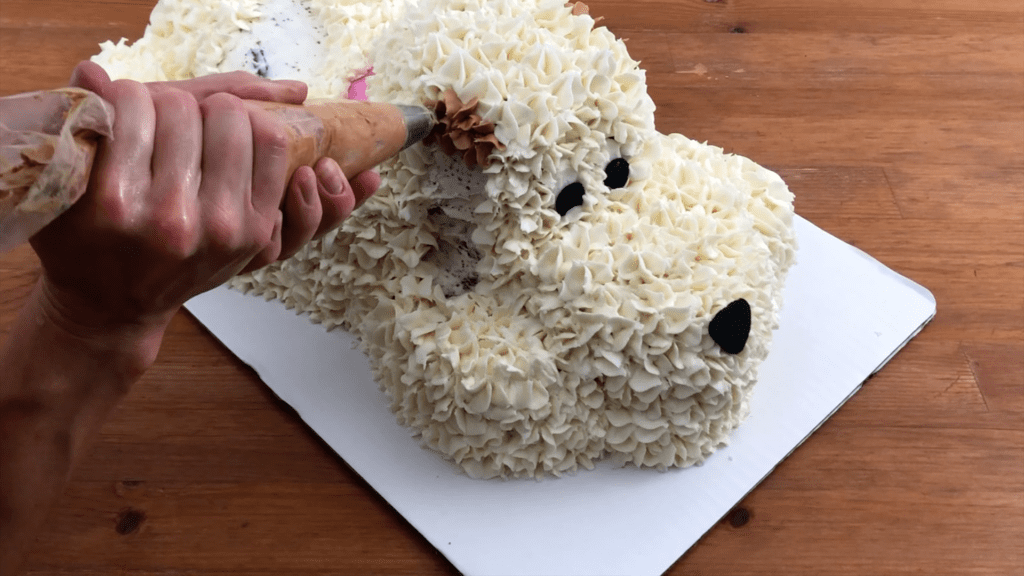
For details that you want to stick up, like the tail, pipe another layer on top to give it some height. Piping the fur is time consuming but it gives it a realistic shaggy texture.
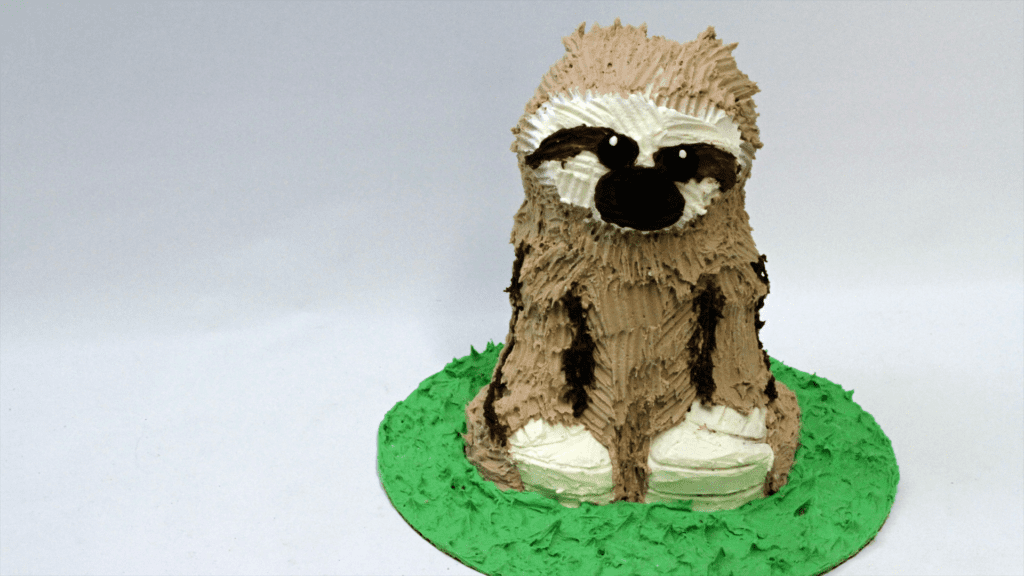
7. Sculpt a 3D animal and add textured fur with a cake comb. Using a cake comb is a quicker way to add texture to the fur than piping it. Start by sculpting your cake and then cover it with a crumb coat and a final coat of frosting.
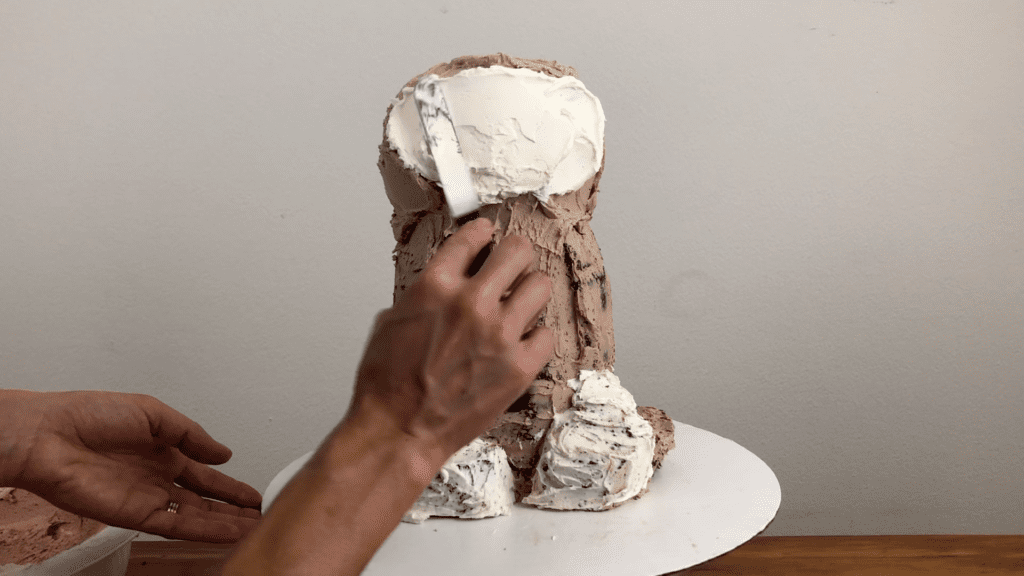
Then use a zig zag cake comb to imprint grooves in the frosting that look like fur. You could use a fork instead -iImprovise and use whatever tools you have available!
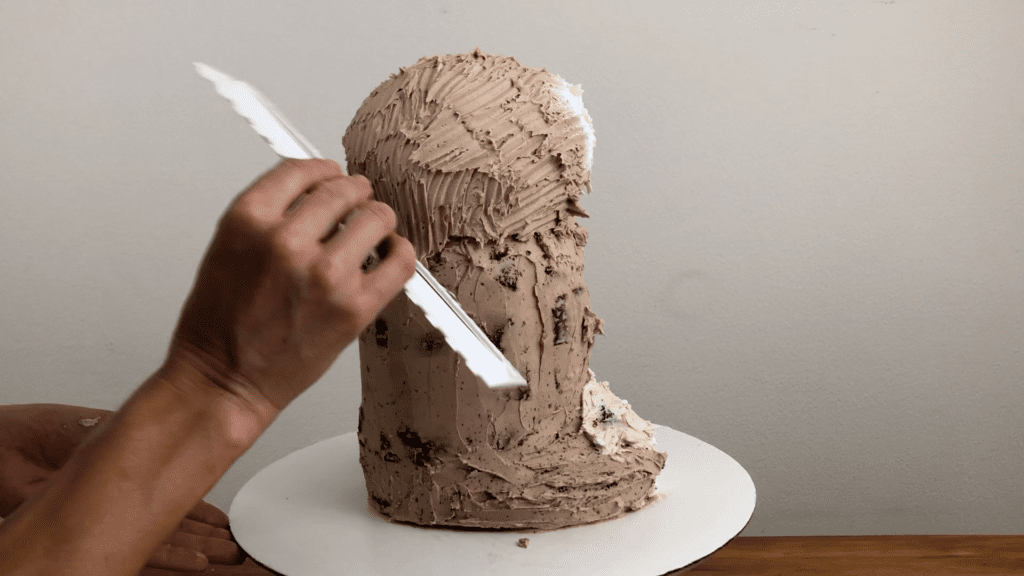
I used the same technique as I did for the dog to pipe and transfer the eyes and nose onto this sloth. I have a very detailed tutorial on how to make this sloth cake here.
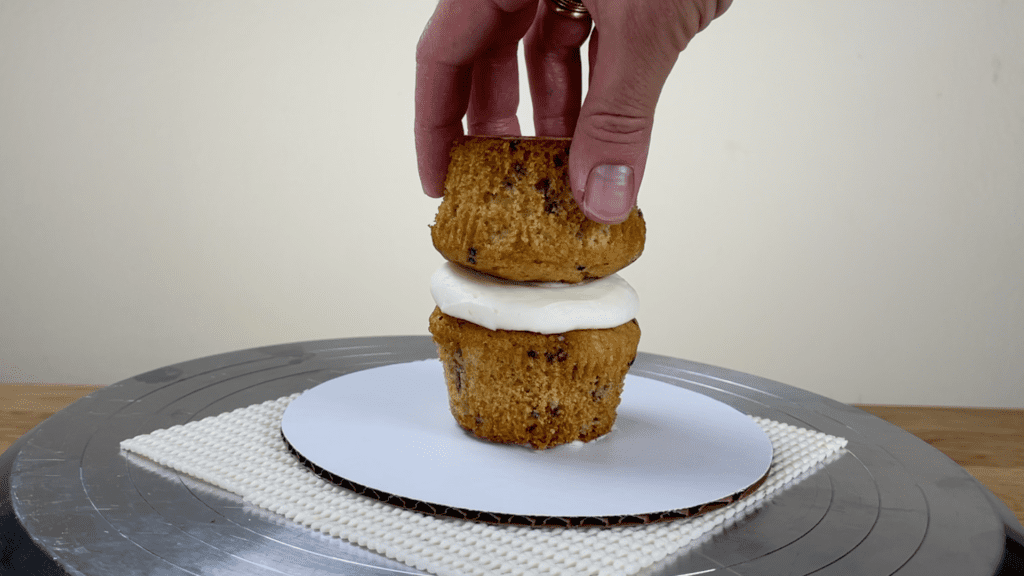
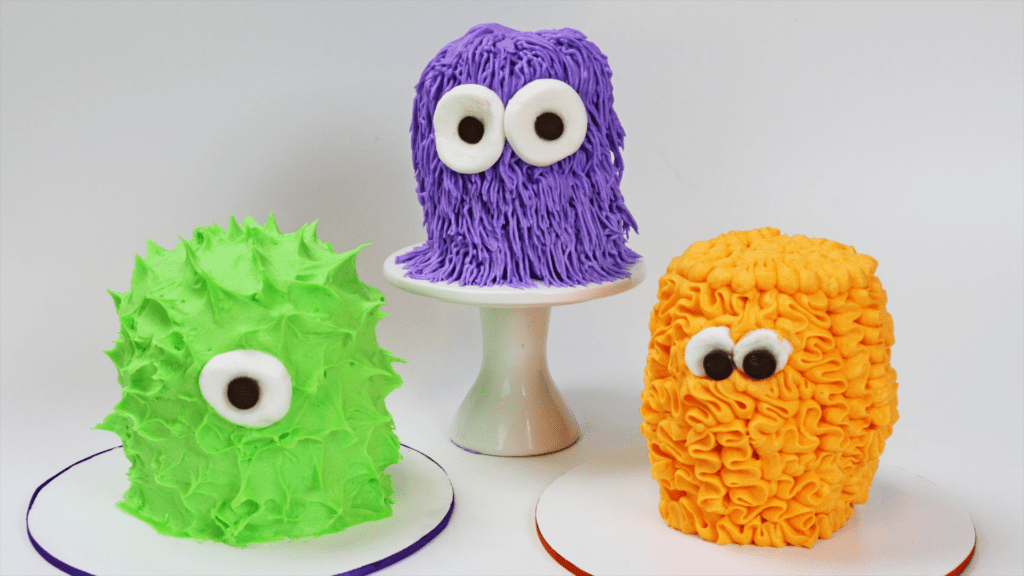
8. Create an animal cake with cupcakes! If sculpting a cake looks like too big of a project, using cupcakes is a really quick and easy way to make ADORABLE little animals! Stack cupcakes to create a tall cake, piping or spreading a layer of filling in between them to attach them together.
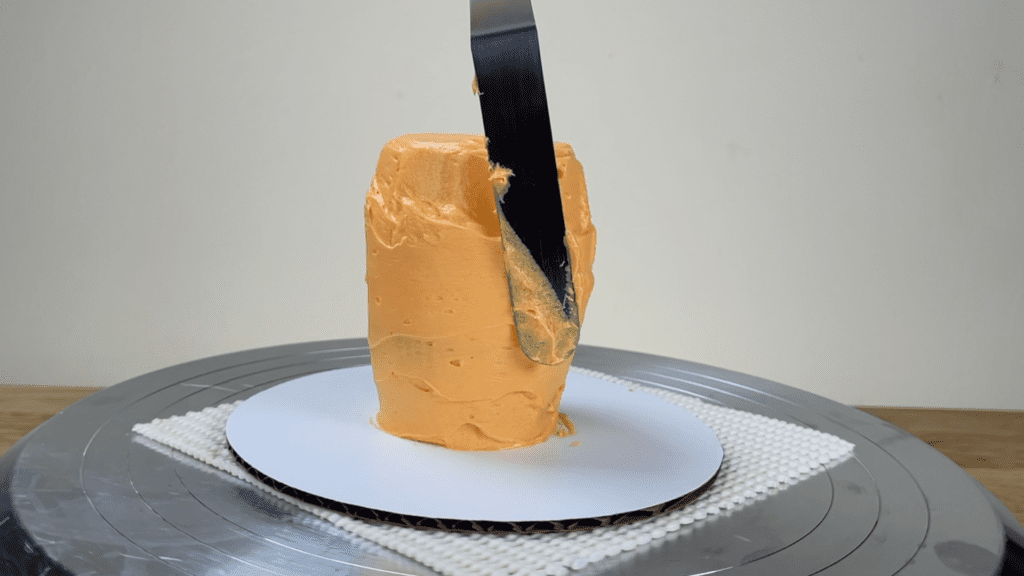
Cover the stacked cupcakes with a crumb coat of frosting to catch any crumbs and to lock the moisture into the cake.
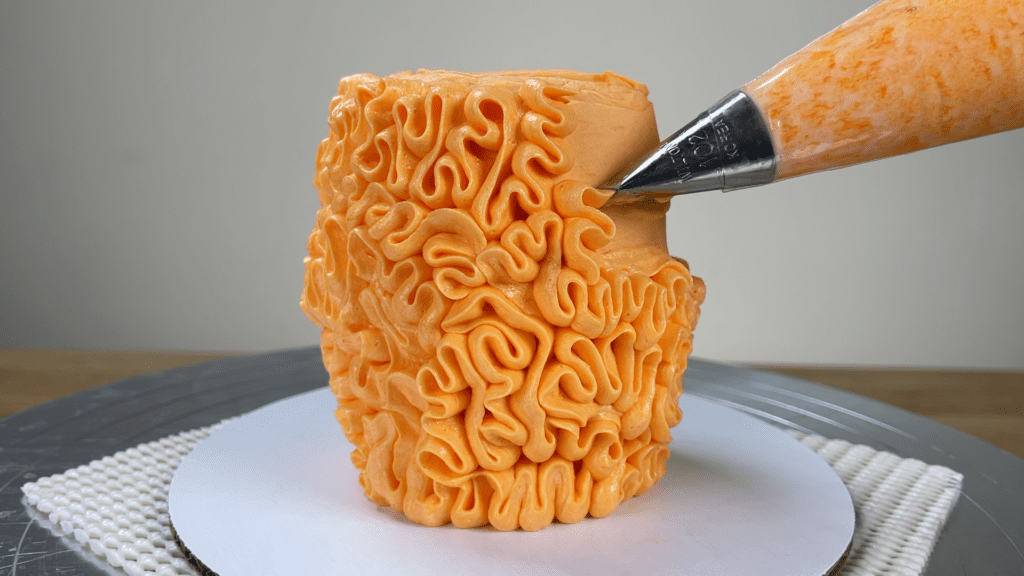
Then pipe fur onto your animal using whatever piping tip and technique you like. I’m piping these ribbons with a #104 petal tip, with the narrow end pointing outwards and the wider end pressed against the crumb coat.
Make easy eyes with marshmallows, cutting a thin piece off each end and to make it smaller, cut a circle out of it with the end of a piping tip.
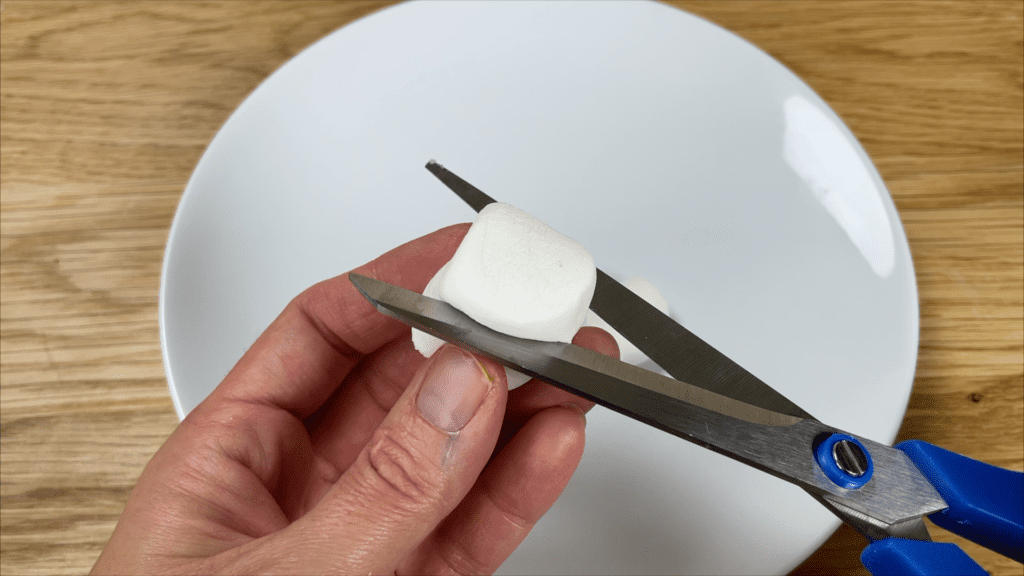
Poke a hole in the middle of each piece of marshmallow with the end of a pair of scissors and then press a chocolate chip into the hole, so that the flat base of the chocolate chip becomes the middle of the eye. Press these into the frosting fur on the cake and you have a little animal, or a monster in this case!
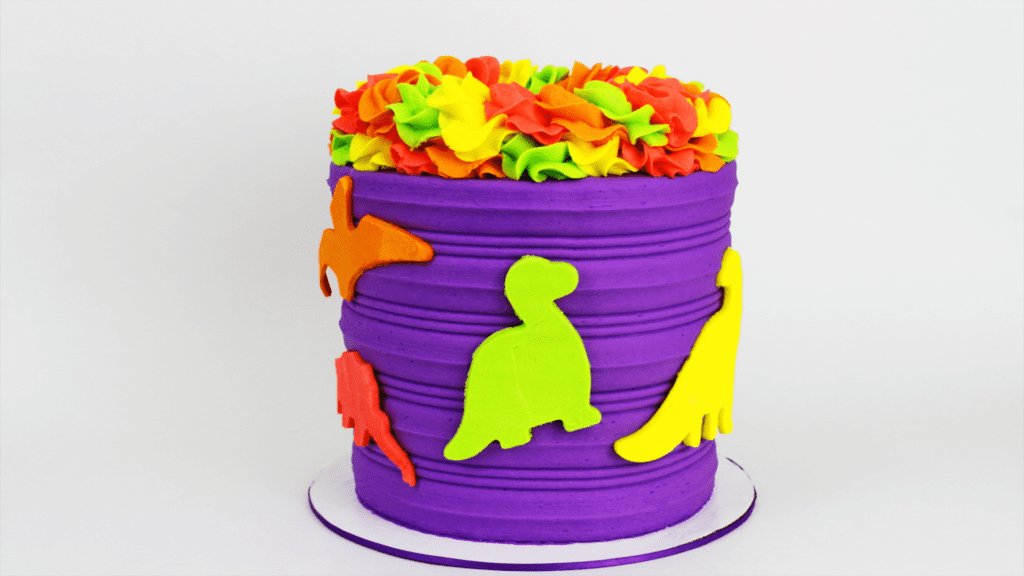
9. Cut your animals out of buttercream. Spread coloured buttercream onto parchment as thinly as you can and smooth it with your
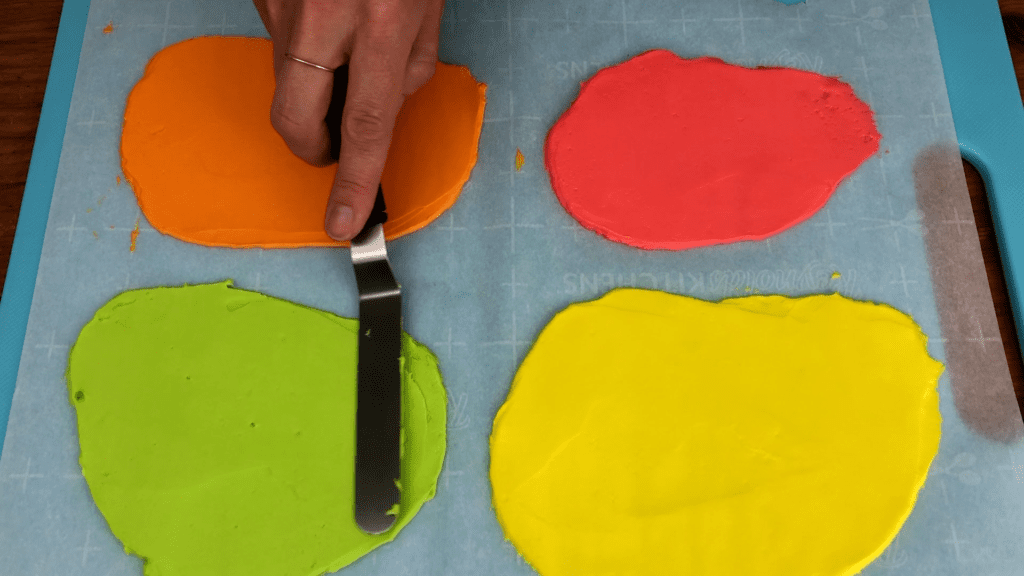
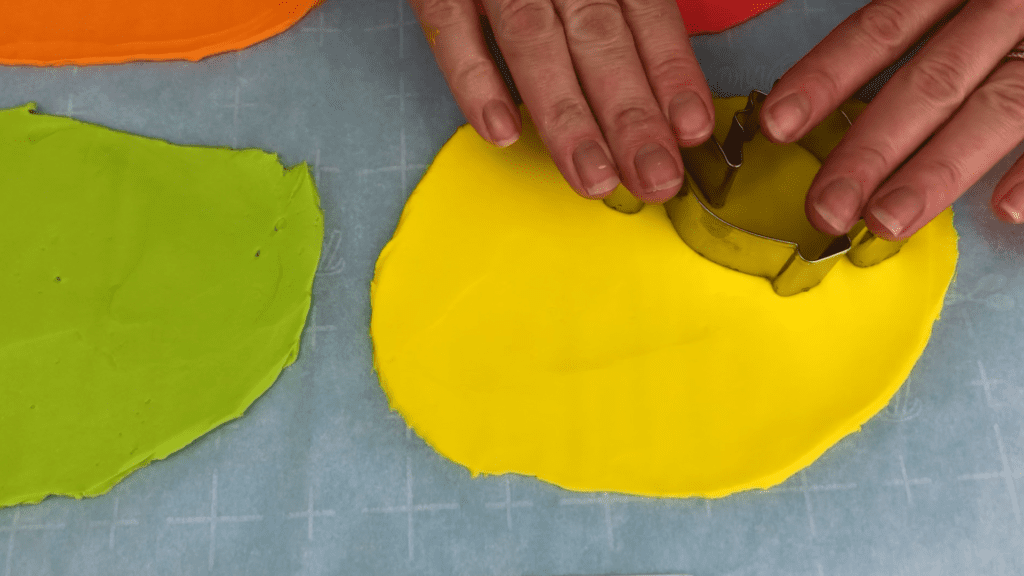
Use cookie cutters to cut shapes out of the frozen buttercream. You can cut simple, angular shapes out with a sharp knife but for more detailed outlines it’s much easier with a cookie cutter. .Pull away the surrounding buttercream, freeze the shapes for another 5 minutes so they get very hard again, and then lift them up and press them into the frosting on your cake
You can curve the shapes around the cake by wrapping them with parchment paper and then let the cake sit at room temperature for a few minutes so that the buttercream shapes start to warm up and soften, Then you can press them gently through the parchment paper to wrap them around the cake so that they sit flat against it.
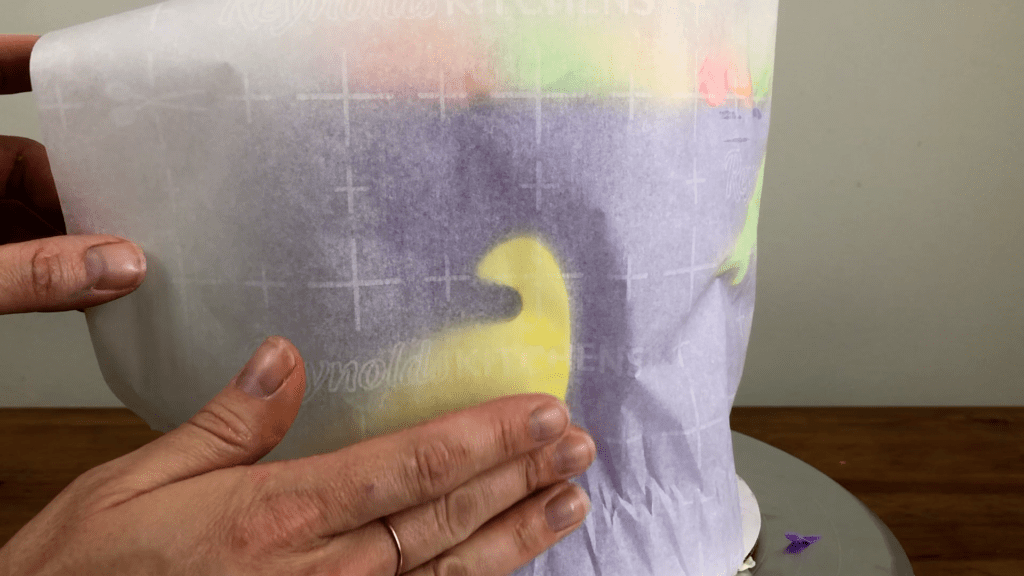
Put the cake in the fridge or freezer for a few minutes for the shapes to harden again and then peel the parchment paper off!
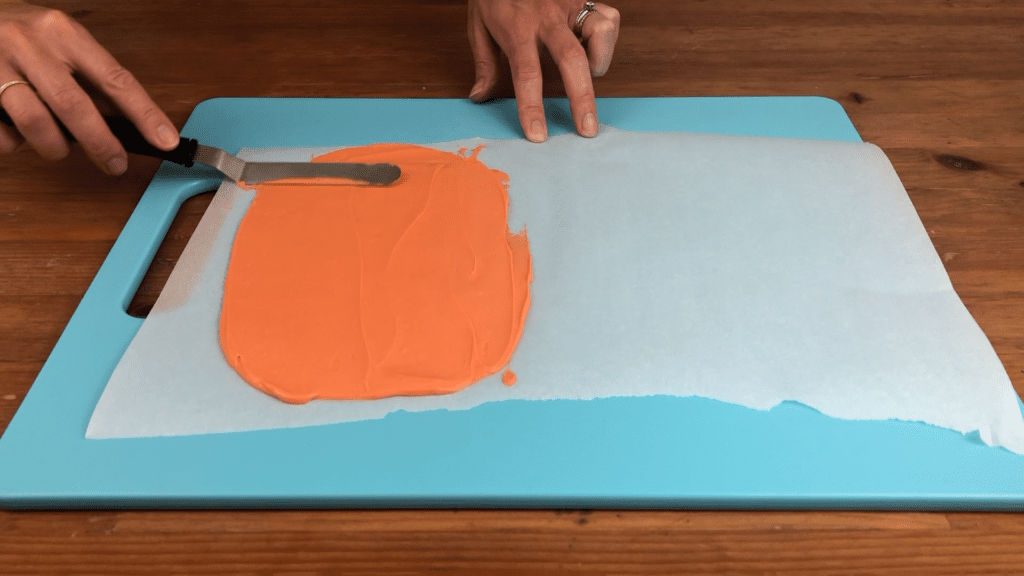
10. Add animal features to a cake using chocolate. To create an animal by adding its features to a plain round cake, melt candy melts and spread them onto parchment paper. You can use white chocolate instead, melting it and then addding oil based gel colours to tint it. Spread the chocolate onto parchment paper as thinly as you can and smooth it with your
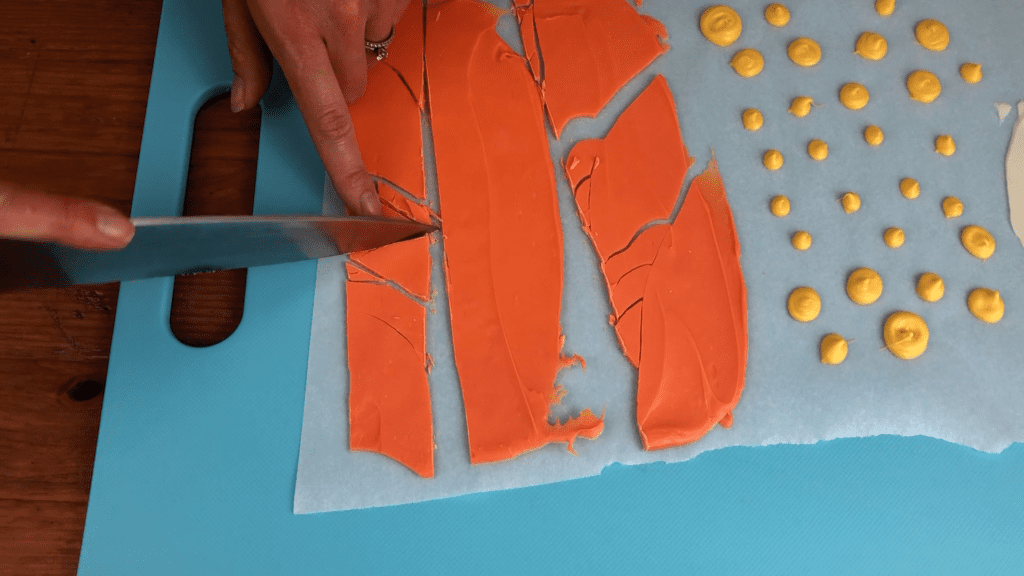
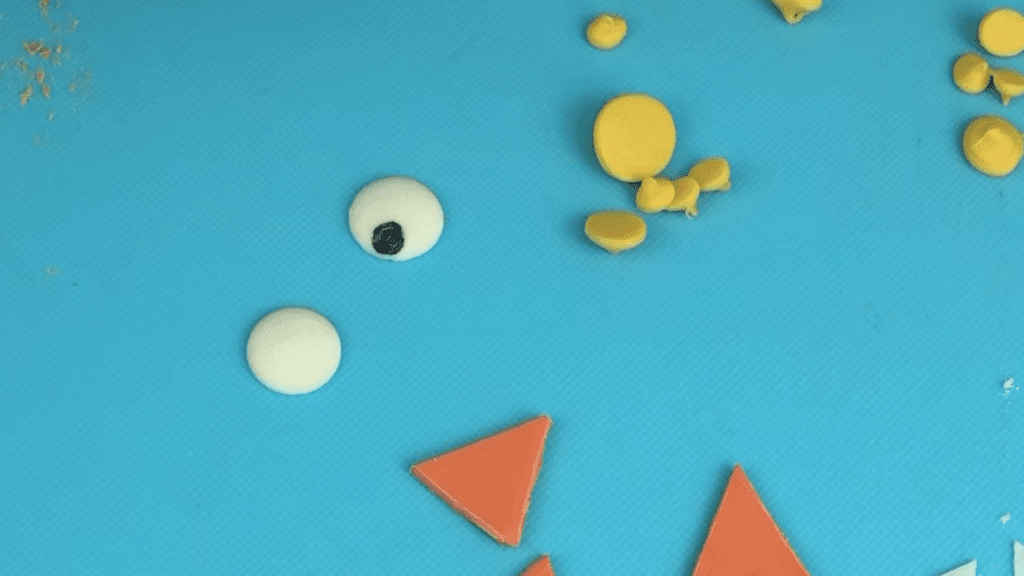
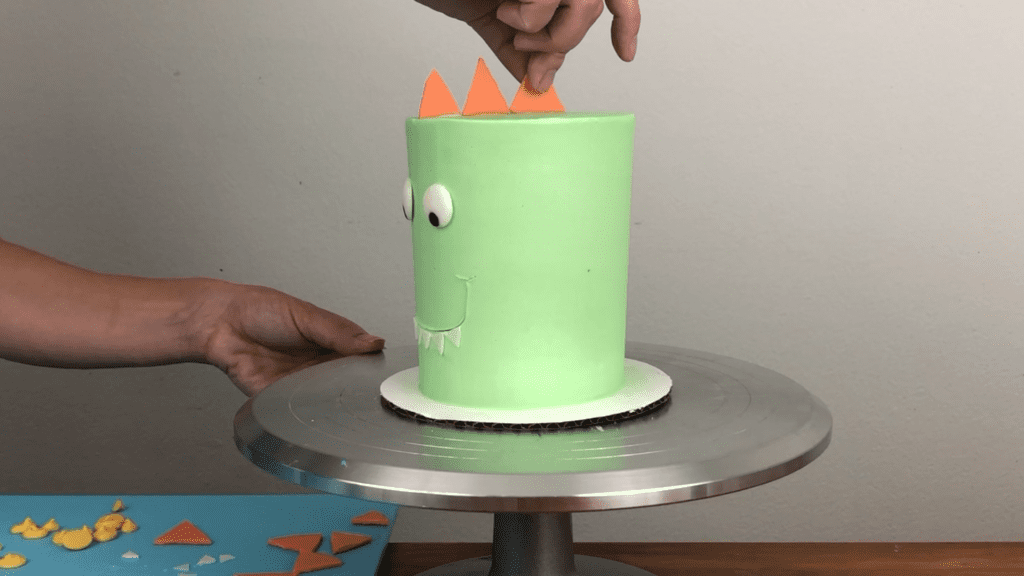
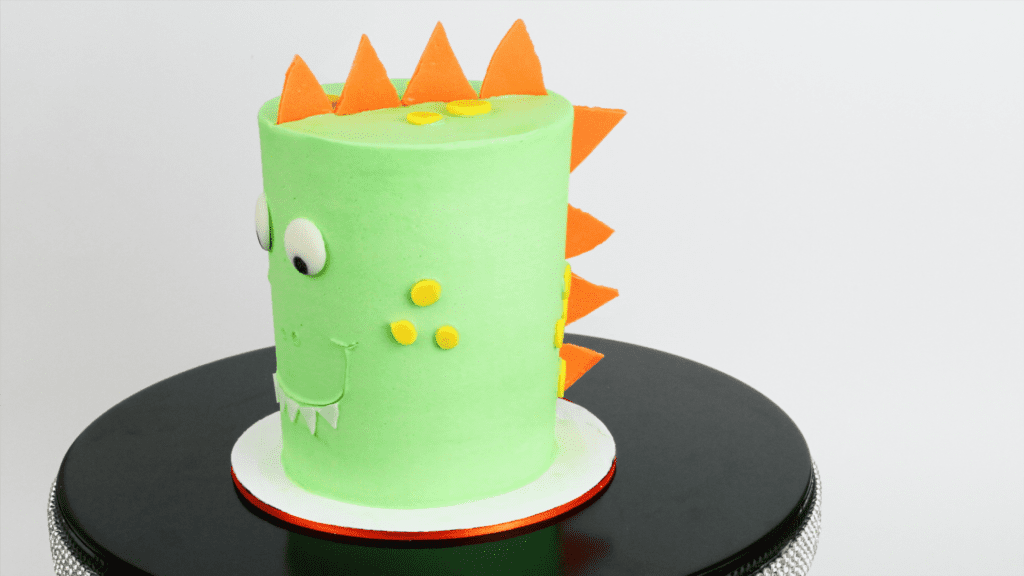
Freeze the chocolate for 5 minutes and then use a sharp knife to cut out the pieces you need. I’m cutting out large orange triangles to create dinosaur spikes and I’ll also cut out small white triangles to be teeth. I’ve piped yellow chocolate dots to make spots on the frosting of my cake, which will be the dinosaur’s skin.
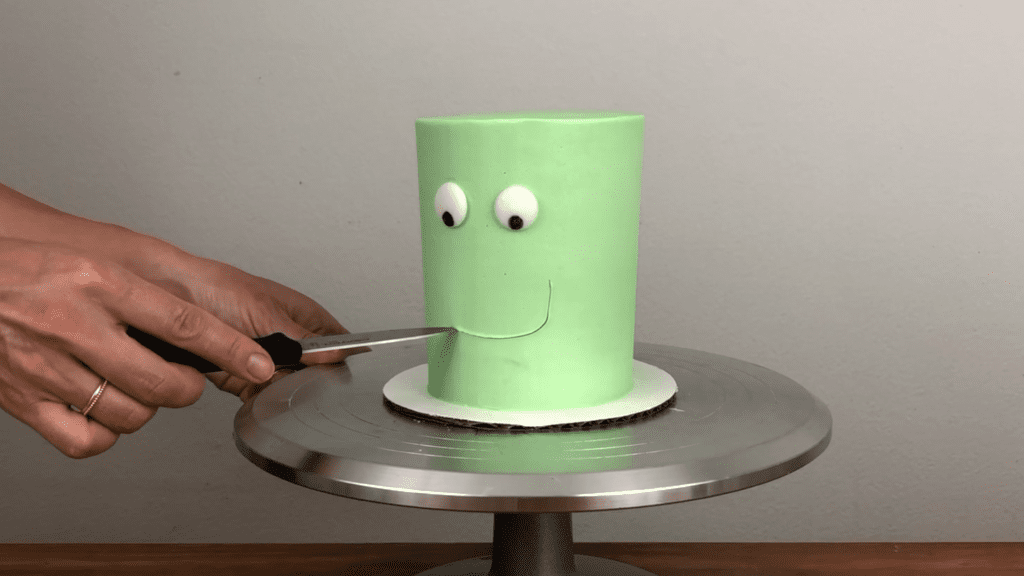
To make eyes, pipe two white chocolate circles or use discs of Candy Melts. Use an edible black pen to draw on the pupils or use a paintbrush and some black gel colour.
Frost your cake and immediately afterwards, while the frosting is still soft and sticky, press the features into the frosting. You can draw details like a smile with a sharp knife in the frosting.
The chocolate details will stick to the fresh frosting and when the frosting sets, it will secure them in place. This technique is quicker and easier than sculpting a cake but it’s just as cute!
I hope this tutorial has given you some fun ideas to try! Please tag @britishgirlbakes in your photos on instagram so I can see your creations! If you’re looking for inspiration, join my Club+ for access to ALL of my online classes and courses as well as live online classes and Q&A sessions for members only!
Here’s the video version of this tutorial: