I'll show you exactly how to make a tiered cake from start to finish in this step-by-step guide for beginners. Once you understand the structure behind a tiered cake, it's much simpler than it looks!
In this tutorial you'll learn how to frost a cake smoothly, create sharp edges, add supports, stack it safely, and transport it without disaster. These techniques will help you create a tiered cake that is straight, stable, and professional-looking as a wedding cake, birthday cake, or celebration cake.
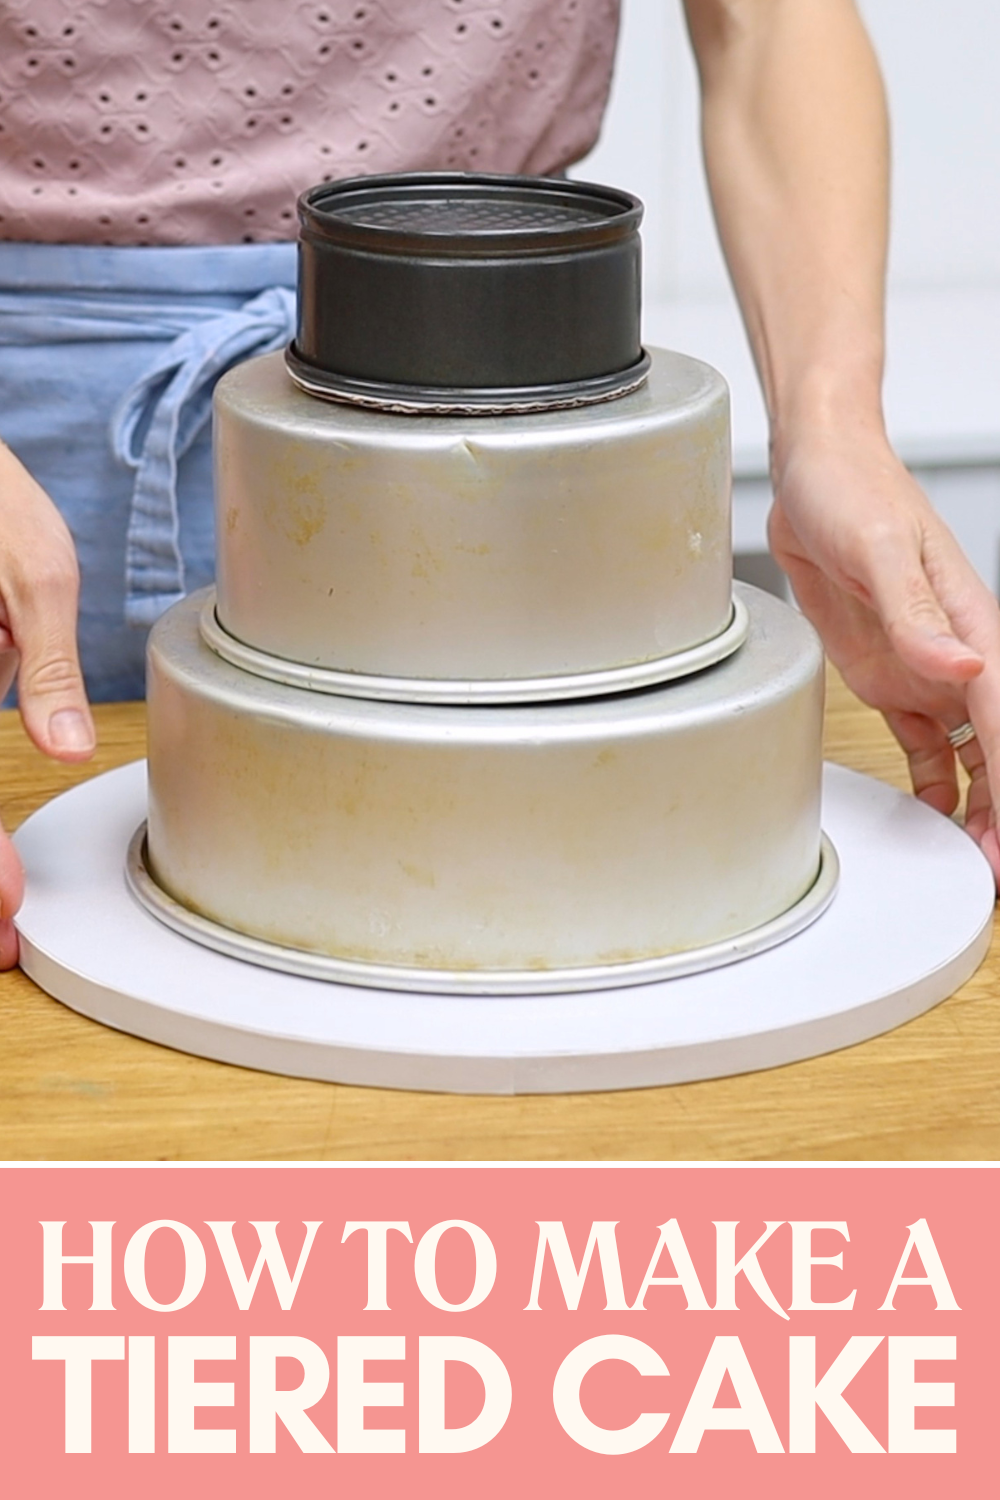
The first step in learning how to make a tiered cake is choosing the sizes of your tiers. Each cake should be at least 2 inches smaller than the tier beneath it. This allows each tier to remain visible after stacking and creates the classic tiered-cake appearance.
For this cake, I'm using an 8 inch bottom tier, 6 inch middle tier and 4 inch top tier.
Affiliate disclosure: Some links on this page are affiliate links. If you purchase something through one of these links, British Girl Bakes may earn a small commission at no additional cost to you.
You can use larger or smaller sizes, but maintaining at least a 2-inch difference between tiers will give you the best visual result.
Before you begin assembling your cakes, you'll need a few important supplies. I'll talk about what you'll need for stacking the cakes later, but for now you'll need:
Your bottom tier should sit on a thick, sturdy cake board, ideally a cake drum. Choose one that is between 4 and 8 inches wider than your bottom tier. For an 8 inch cake, I think a 12 inch cake drum looks perfect. The extra space provides room for decorations around the cake and gives you somewhere to safely hold the cake when lifting or moving it.
Each upper tier needs its own cake board that is exactly the same size as the cake it will support. I call these "invisible cake boards" because they disappear completely once the cake is assembled. These boards support the weight of each tier and prevent the cakes from sinking into one another.
Cardboard cake boards work well because they are strong enough to support cakes and easy to trim to size if necessary. Choose something greaseproof so they won't absorb moisture from the cake.
If you don't have the exact size board you need, you can make one by tracing around your cake pan onto a larger board and cutting it out.
Attach the first cake layer to the cake board with a small amount of buttercream. I use my 4 Minute Buttercream for all of my cakes! Think of the buttercream as glue that prevents the cake from sliding around.
For the bottom tier, assemble the cake directly on the cake drum. For upper tiers, assemble the cakes on their invisible cake boards.
If your cakes have domed tops, trim them so that they're flat and level. Level cake layers create better structure, more stable stacking, and straighter finished cakes.
Spread your filling over the top of each cake layer and place the next layer on top. Pay close attention to centering each layer so that it sits directly above the layer beneath it. Even a small shift can create a leaning cake later.
If filling bulges out around the sides, flatten it with an
At the end of this step, you should have your bottom tier assembled on the cake drum and each upper tier assembled on its own invisible cake board,
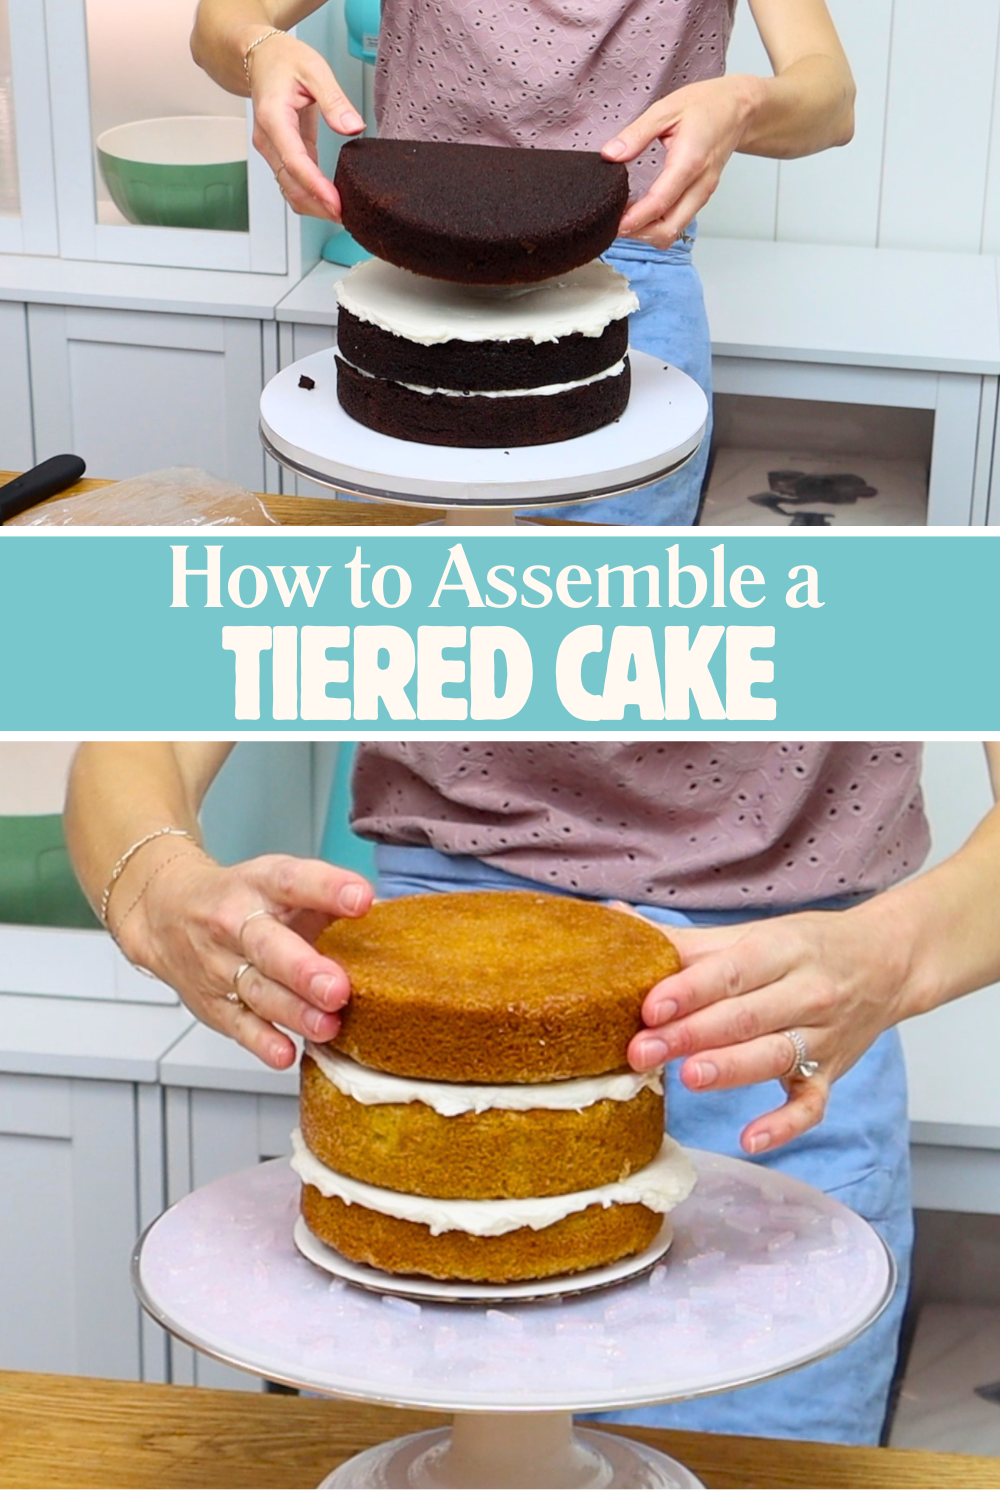
Once assembled, chill all of the cakes for 15 to 30 minutes. This step is incredibly important!
Cold cakes are:
Many frosting frustrations disappear simply by chilling the cakes first.
A crumb coat is a thin layer of buttercream that traps loose crumbs. Without a crumb coat, crumbs can mix into your final layer of frosting and will be visible at the end.
Cover each cake completely with a thin layer of buttercream. Don't worry about making it look pretty. The goal is simply to seal in the crumbs.
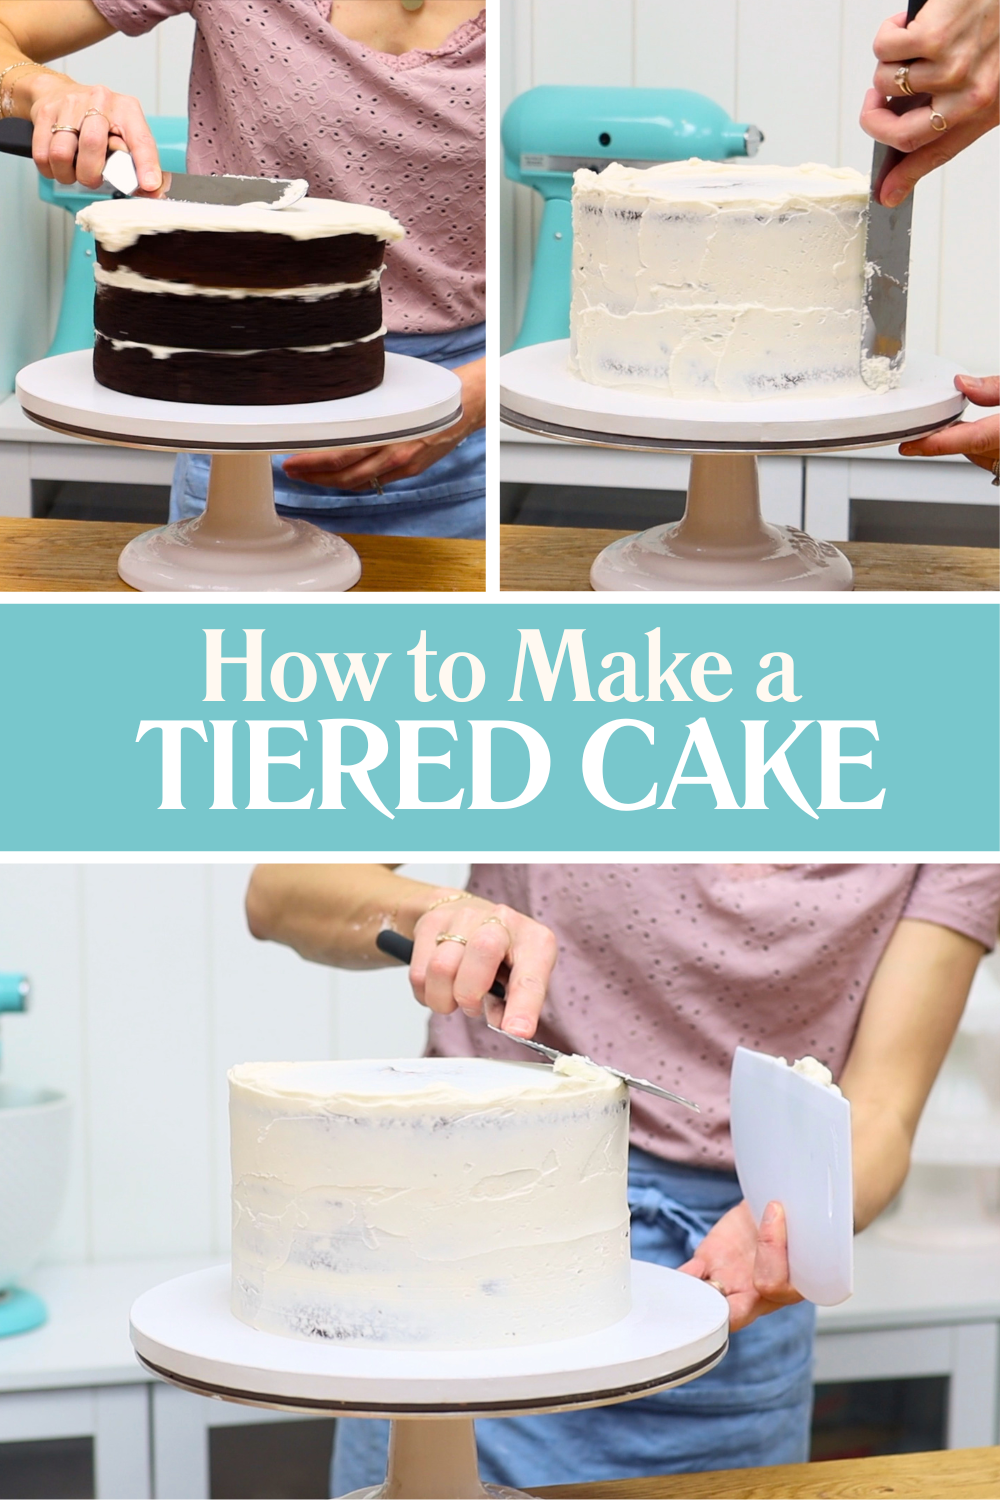
For upper tiers, place the cakes on larger cake boards while frosting. This gives your cake scraper somewhere to rest as you smooth the frosting. To prevent sliding, place a non-slip mat or tape between the boards.
Smaller cakes are especially lightweight and can move around while frosting. You may need to push against the cake board with one hand on the side opposite to where you're spreading. (Larger cakes are usually easier because their weight helps keep them stable.)
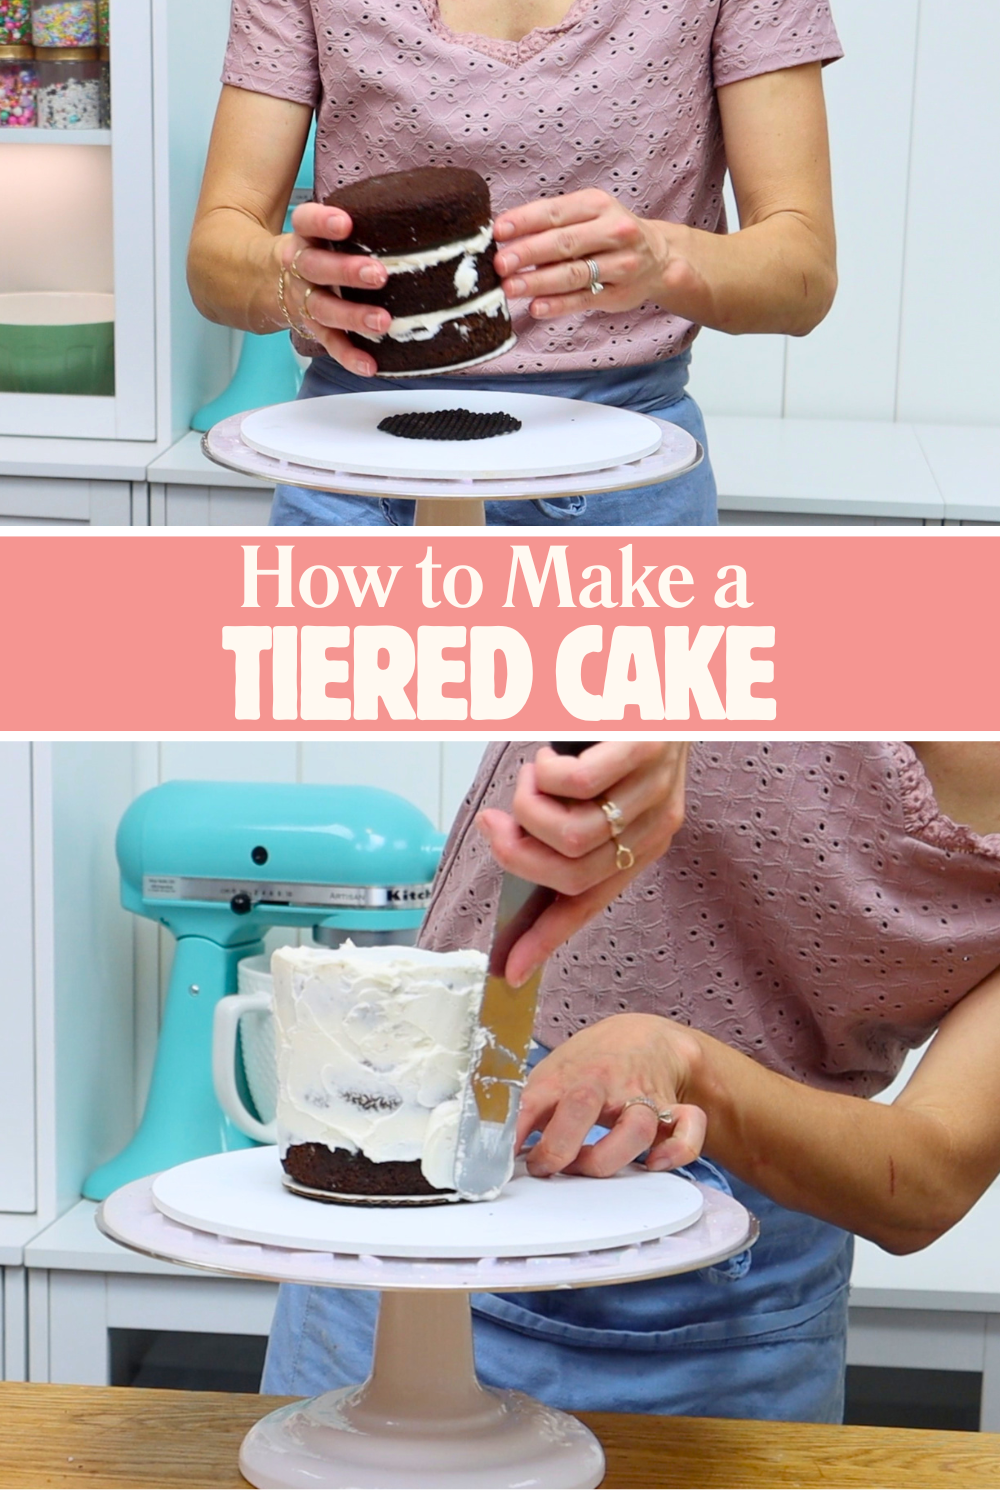
Although the crumb coat doesn't need to be perfectly smooth, try to smooth out any buttercream sticking up above the top edge or bulging from the sides. Those bumps will show through your final coat of frosting later.
After crumb coating, chill the cakes again for about 30 minutes in the fridge.
Once the crumb coat is firm, apply your final layer of frosting. This can be smooth or textured.
The reason for chilling the cake after the crumb coat is so that this final layer of frosting sits on top of that. If you don't chill the cake, this layer will mix with the crumb coat and you'll get crumbs into this layer.
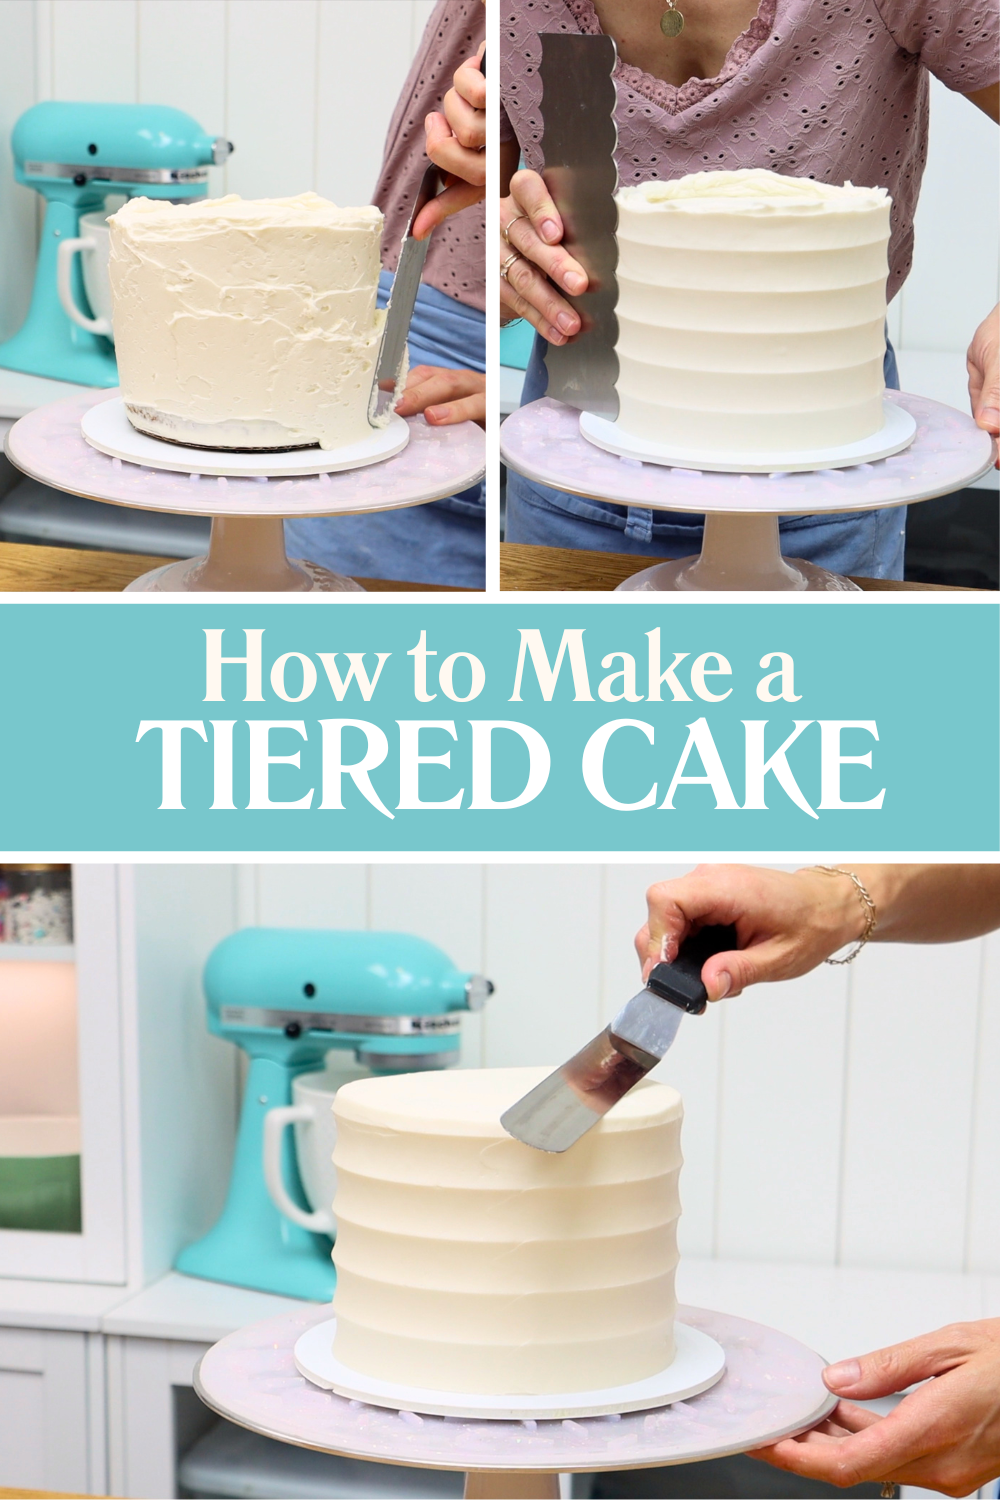
One of the biggest challenges when learning how to make a tiered cake is achieving smooth frosting. Here are three techniques that make a dramatic difference.
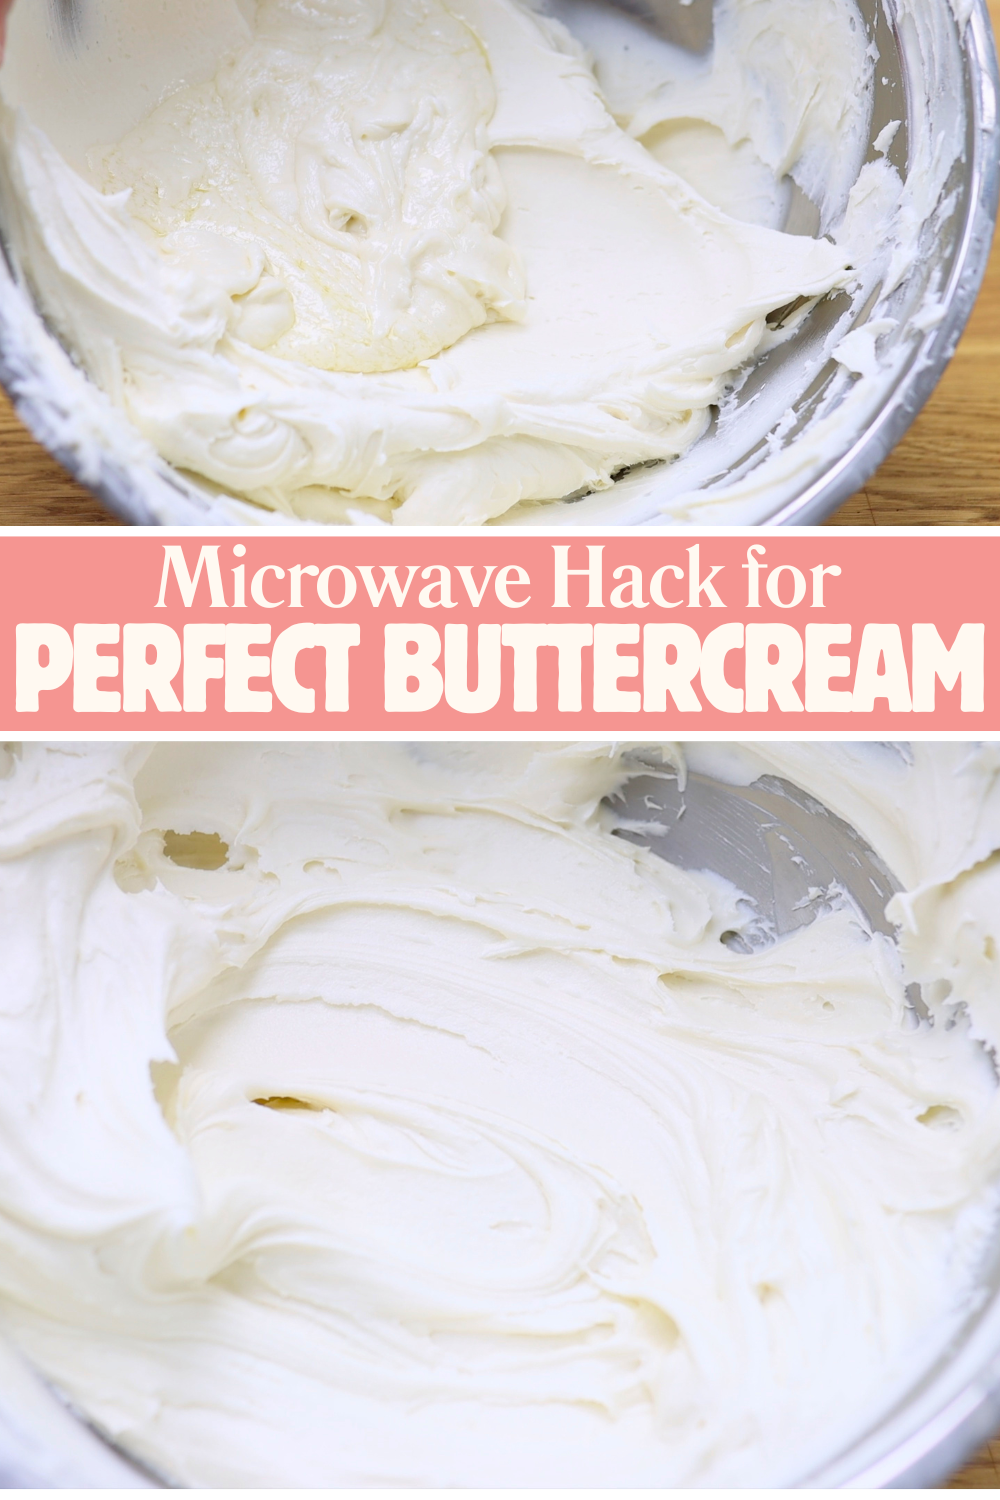
If your buttercream feels stiff, difficult to stir, or full of air bubbles, it's too thick. Thick buttercream creates air pockets and rough surfaces.
To fix it:
This simple microwave hack melts away air bubbles and transforms the texture. Buttercream becomes silky, smooth, and much easier to spread.
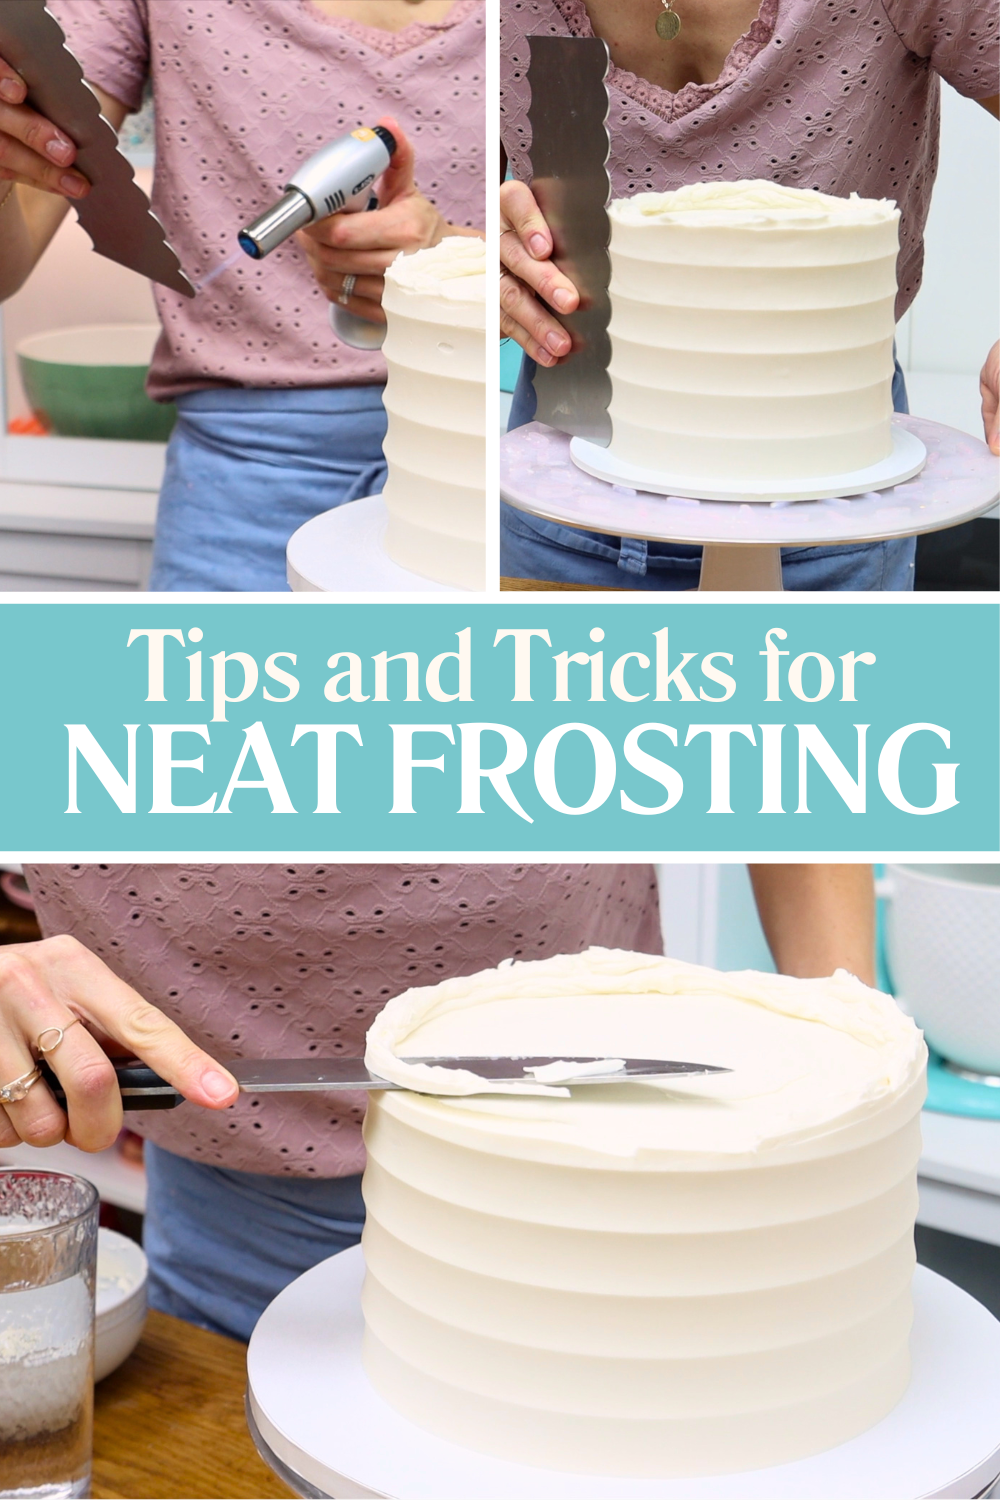
While you're frosting the cake, you may notice tiny air bubbles and shallow imperfections on the surface.
Warm your cake comb using hot water, a hair dryer, or a blowtorch. The comb should be warm, not hot.
Scrape around the cake and the warmth will gently smooth out imperfections, leaving it much smoother. This works for both smooth and textured cake combs!
Sharp edges instantly make cakes look more professional. Here's my favourite way to achieve them.
After frosting, chill the cake for 30 minutes in the fridge or 15 minutes in the freezer. Test the frosting by gently touching the top edge. If the frosting holds its shape, it's ready.
Dip a knife into a cup or glass of warm water and dry it with a towel or paper towel. Use the warm knife to carefully slice away any buttercream sticking above the top edge. Clean the knife between cuts by scraping any buttercream into a bowl and then dipping the knife back into the warm water and drying it off.
This method creates much sharper edges than swiping with a spatula while the buttercream is still at room temperature.
Now comes the step that can be intimidating before you've done it successfully. The secret to stacking a tiered cake is internal supports.
You can use boba straws, plastic dowels, or wooden dowels. I prefer boba straws because they're sturdy while still being easy to cut.
These supports act like hidden pillars inside the cake, holding up the cake board above it.
You do not need supports inside the top tier.
Make sure all of your cakes are well chilled before stacking. An hour in the fridge should make the buttercream firm enough so that you don't damage it during the stacking process.
Start with your bottom tier on its cake drum. Take the cake pan from the next tier up and lightly score around it with a toothpick to draw a circle in the frosting. This marks exactly where the next cake will sit.
Push a straw or dowel about 1 inch inside the scored circle, pushing down until it touches the cake drum beneath the cake. Pinch the straw at the height of the frosting and pull it out. Cut it where you pinched it. This creates a support that is exactly the height of the cake.
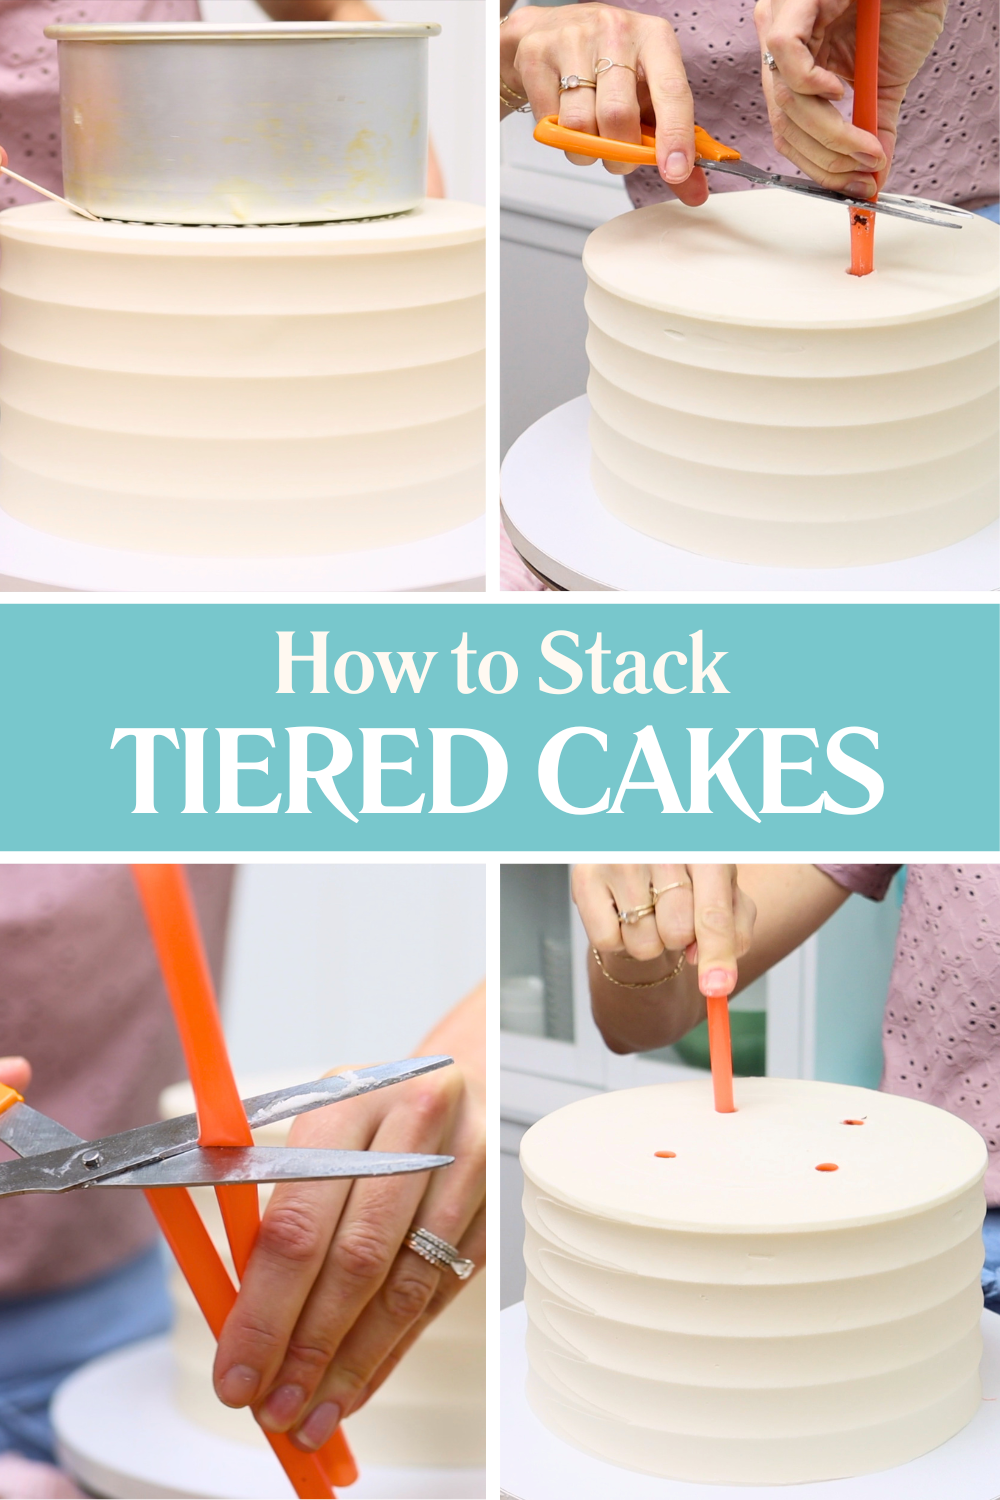
Use that first support as a template and cut three more supports the same length. Insert all four supports into the cake. They should all be within the circle you drew, spaced evenly to make a square formation.
Next, spread some buttercream over the tops of the supports. This acts like glue for the next tier.
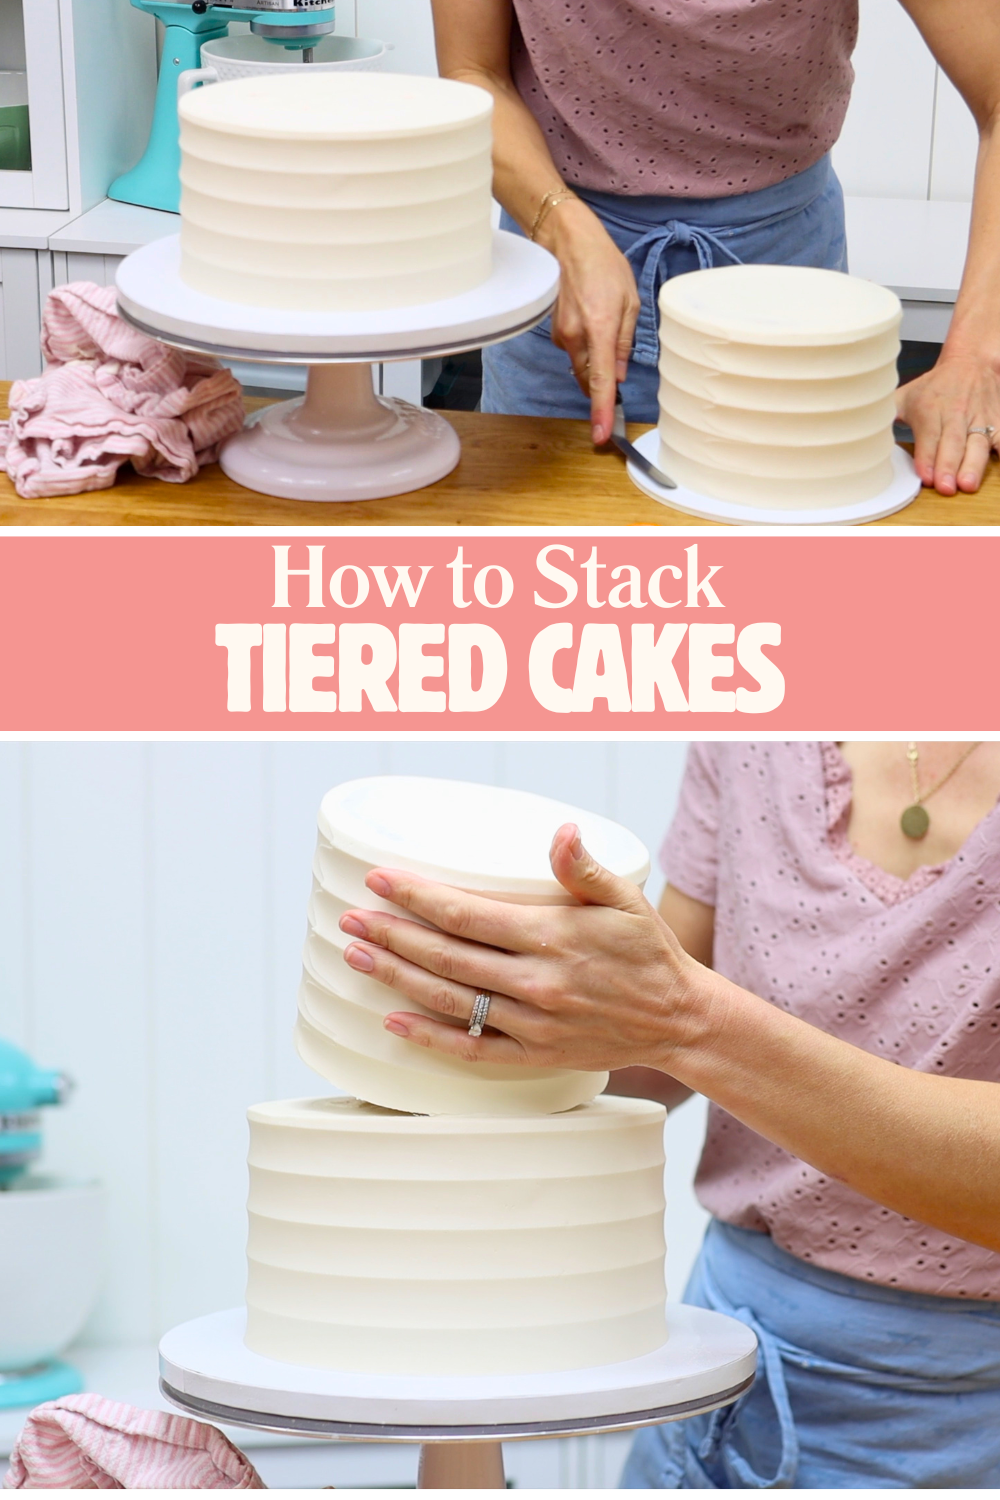
Remove the second tier from the fridge. Slide an
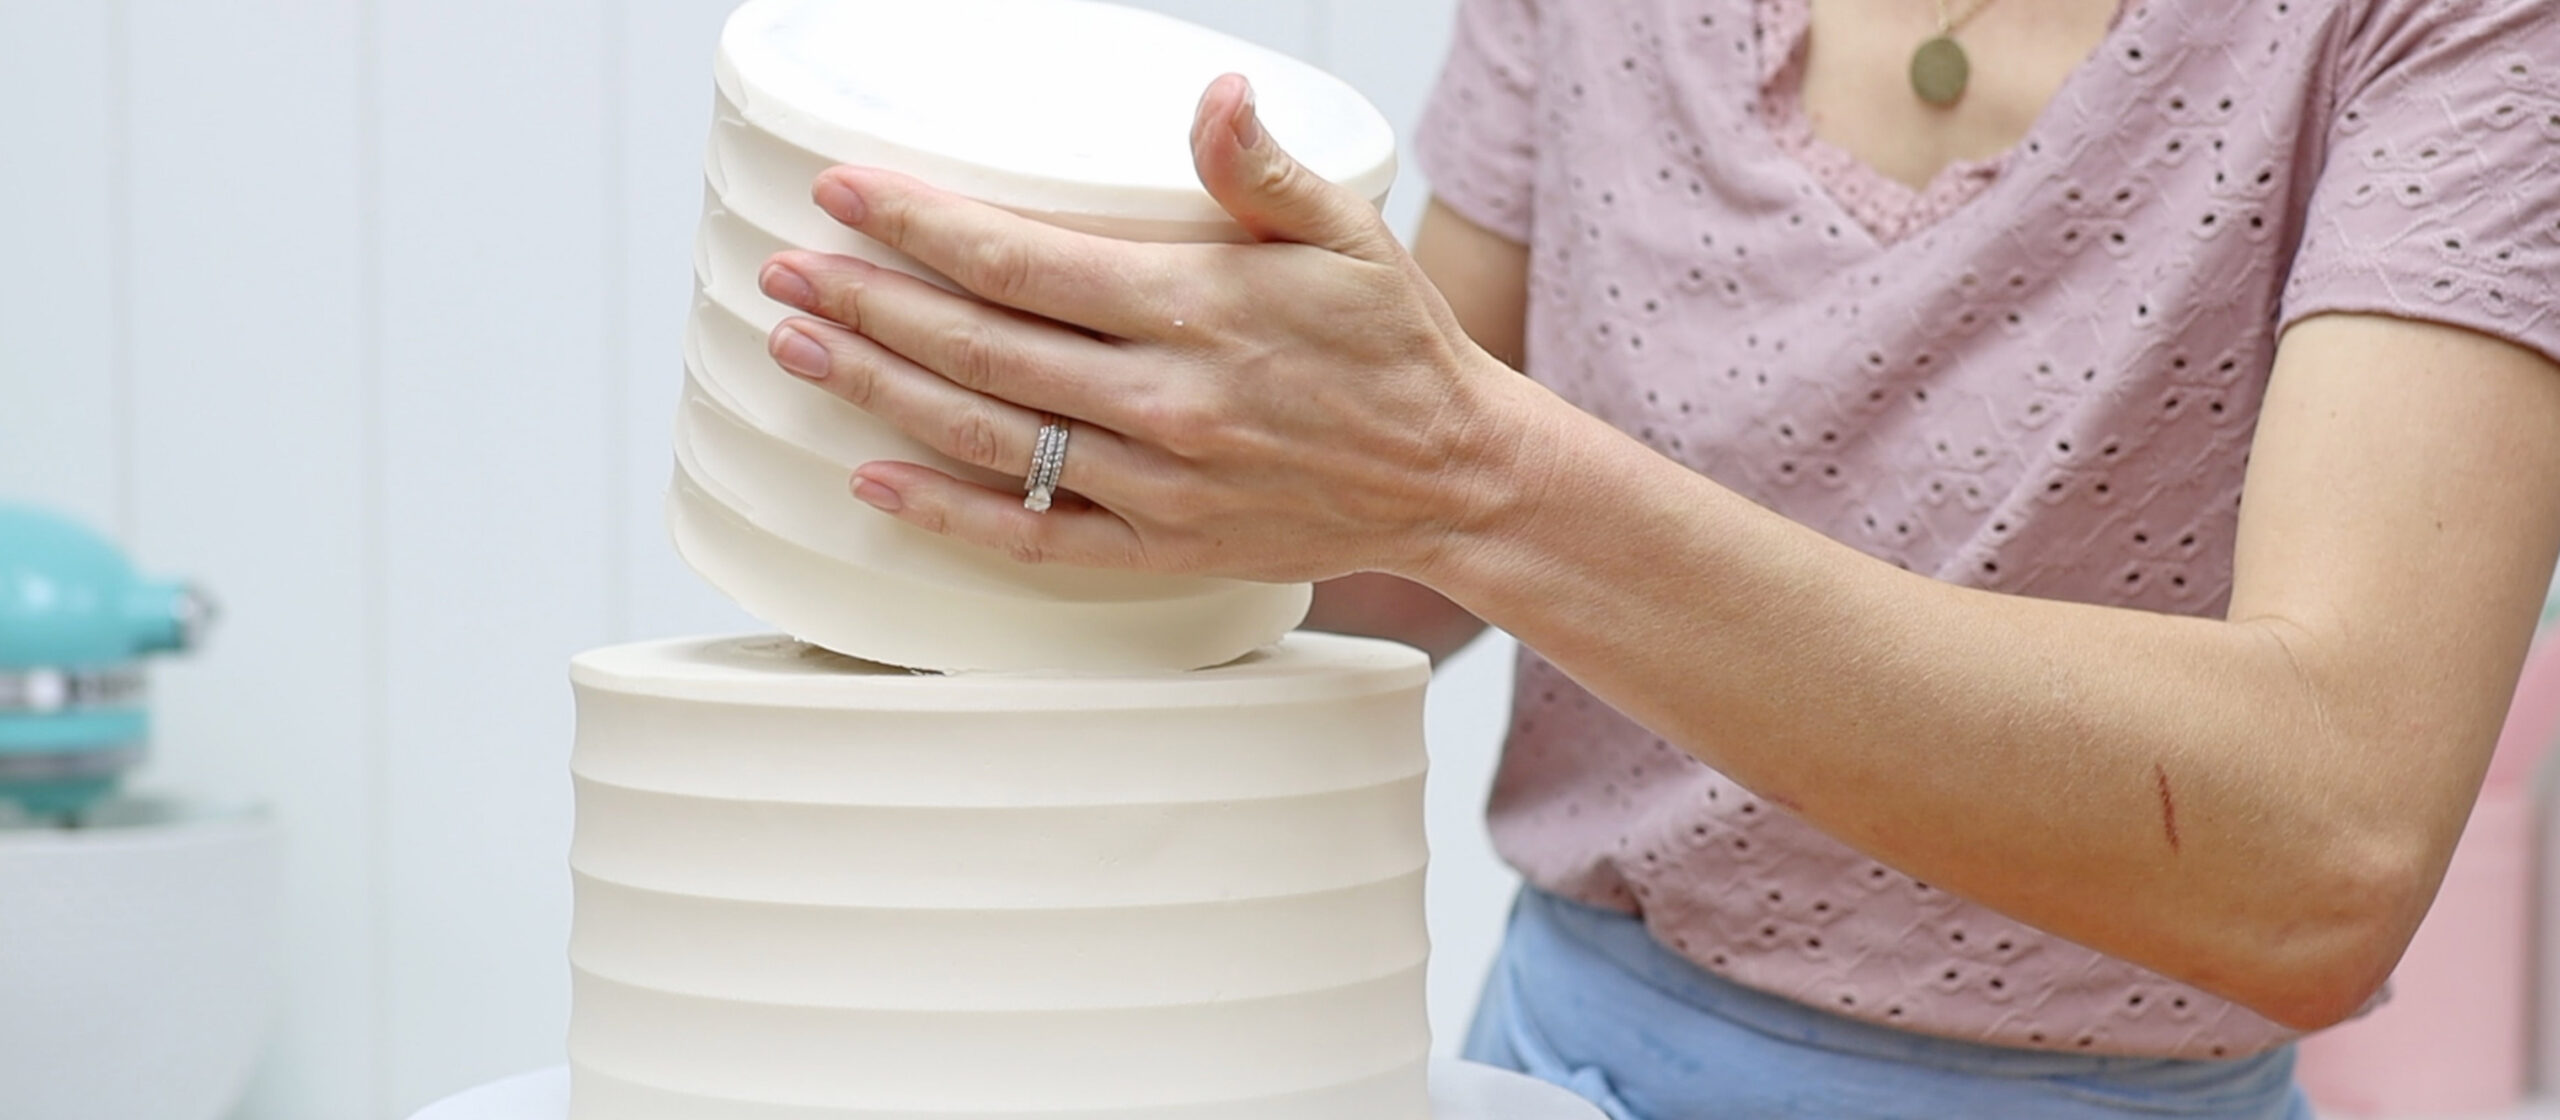
Carefully lower the cake onto the bottom tier, centering it within the marked circle. Since the cake and buttercream are cold and firm, it's ok to touch the cake as you lower it and position it. Fortunately, cold cakes are much sturdier than most people expect!
If you're making a three tier cake, you'll need to add supports to this tier, too. Repeat the same support process: use the top tier's cake pan to score a guide circle and then insert one support, pinch it, pull it out, and cut it. Then use it to measure and cut three more supports that are exactly the same length/height.
Insert all four supports into the second tier and spread buttercream over the top.
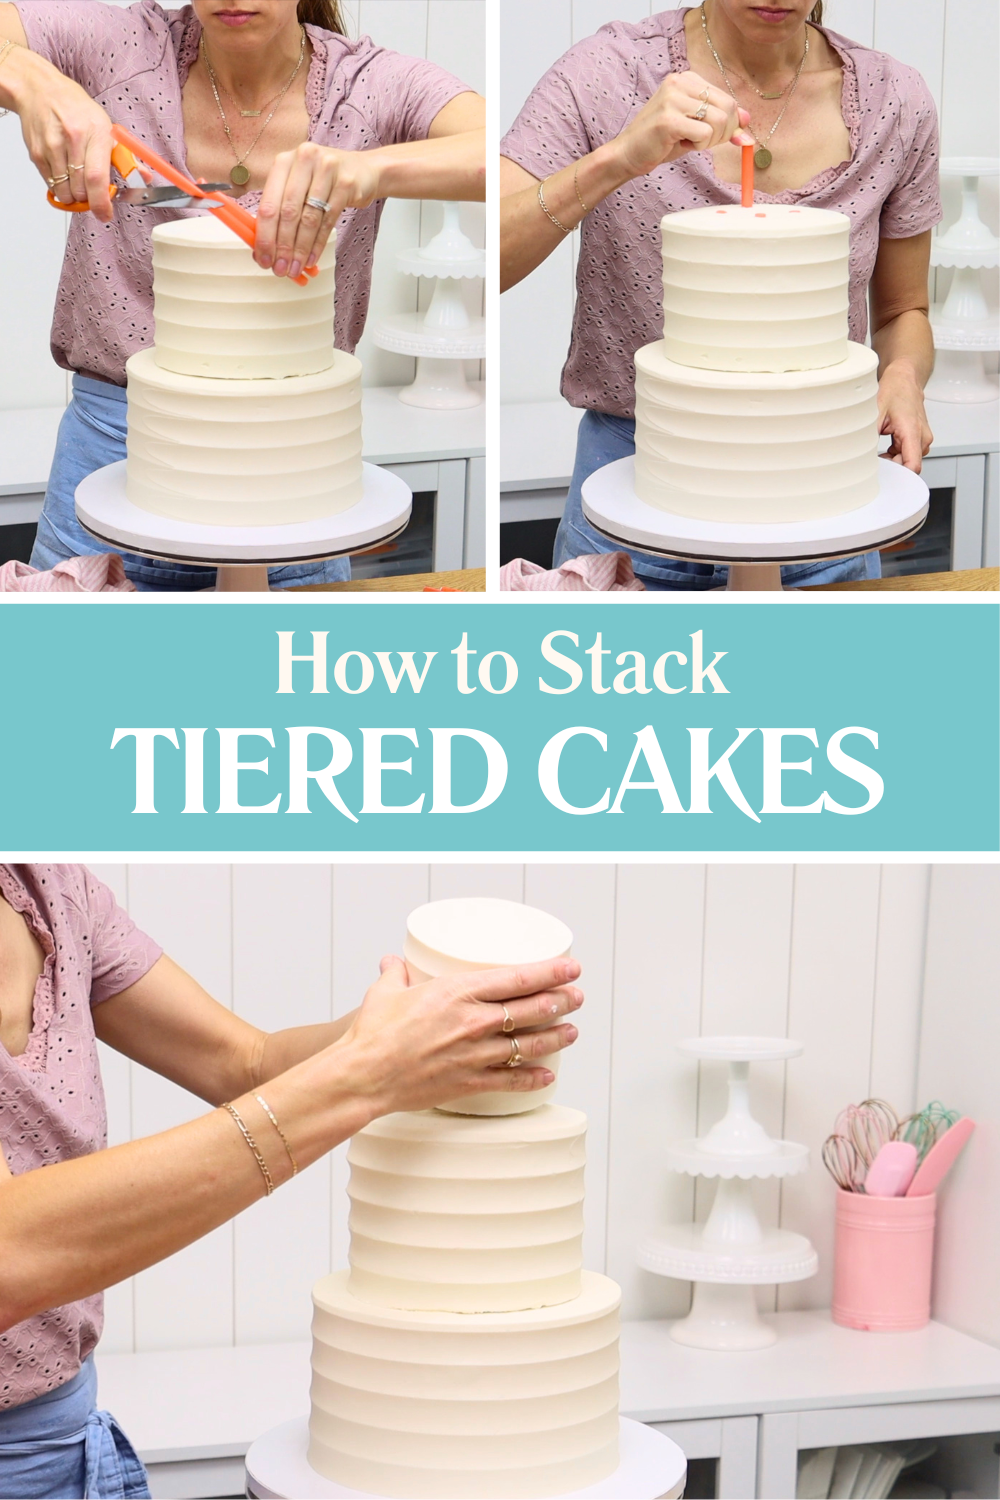
Remove the top tier from the refrigerator. Separate it from the larger board underneath and lower it onto the middle tier.
At this point, your invisible cake boards are completely hidden, creating the illusion that the tiers are stacked directly on top of one another.
Here are a few finishing touches that can dramatically improve the appearance of your cake.
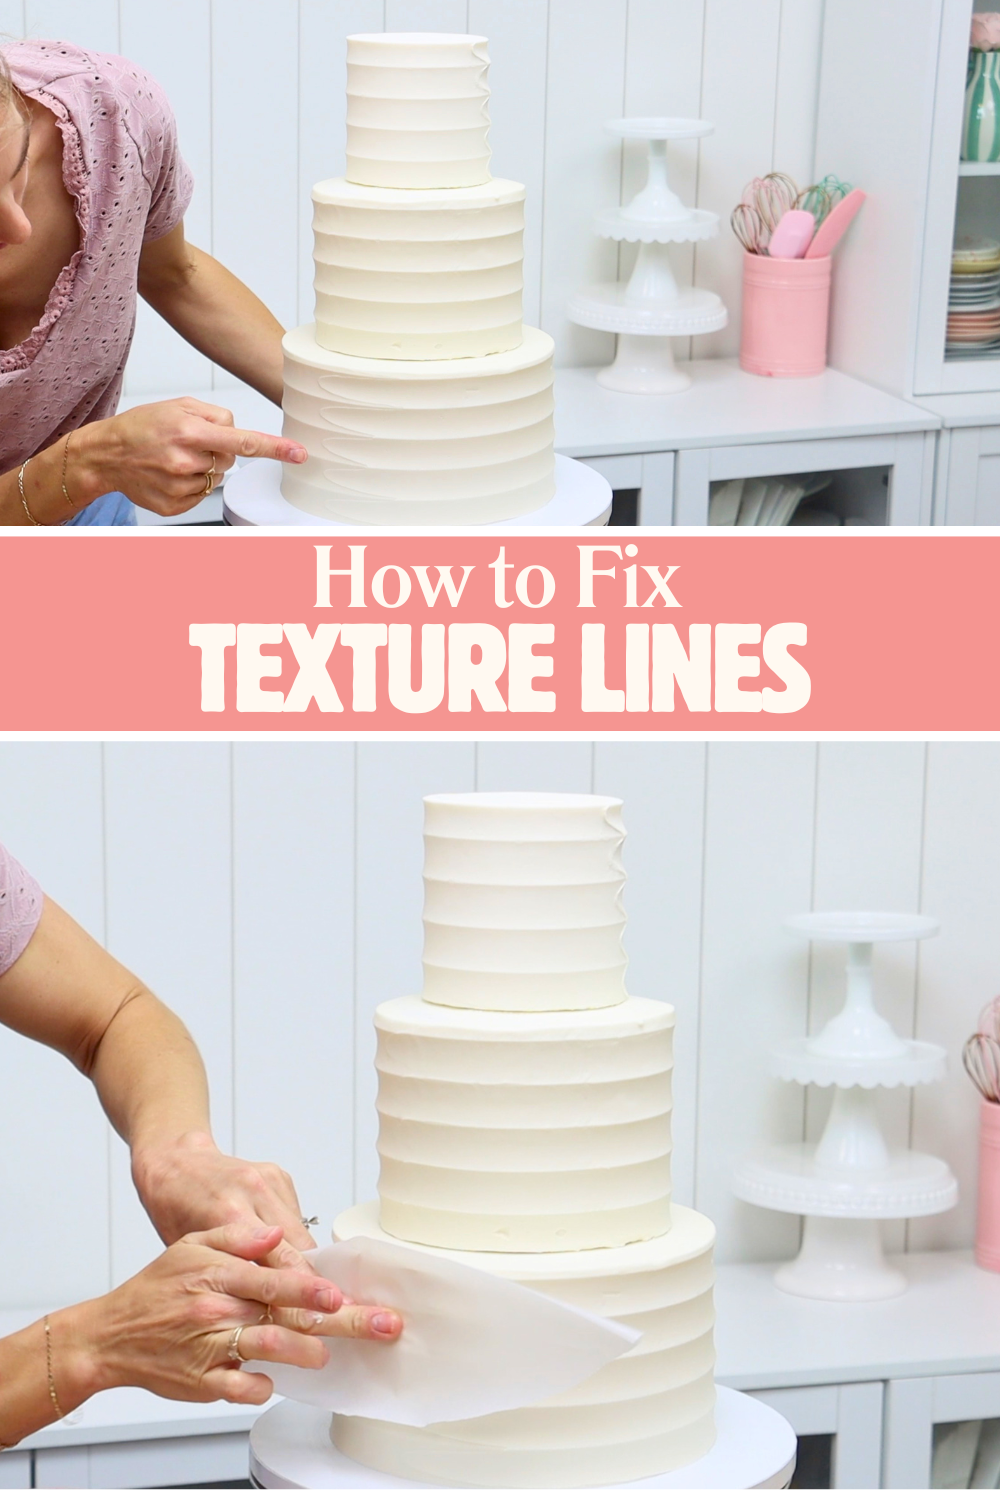
Cake scrapers and textured cake combs leave seams where the scraper lifts away from the buttercream. You can position all seams at the back, or use this trick to blend them away. The buttercream needs to be cold and firm to do this, so chill the cake in the fridge for at least an hour first.
To blend seams, place parchment paper or wax paper over the seam and gently press through the paper with your finger. Rub back and forth a few times to soften and smooth the seam.
Before adding final decorations, chill the cake for at least 30 minutes. You may need to remove refrigerator shelves to make room for the cake's height. The firmer frosting makes decorating much easier and prevents accidental damage.
Borders hide the joins between tiers, where the edges of the invisible cake board may be noticeable.
For tiered cakes, my favourite type of border is a beaded border. It adds subtle detail without distracting from the rest of the design or decorations. For this cake I'm using a Wilton #8 round piping tip:
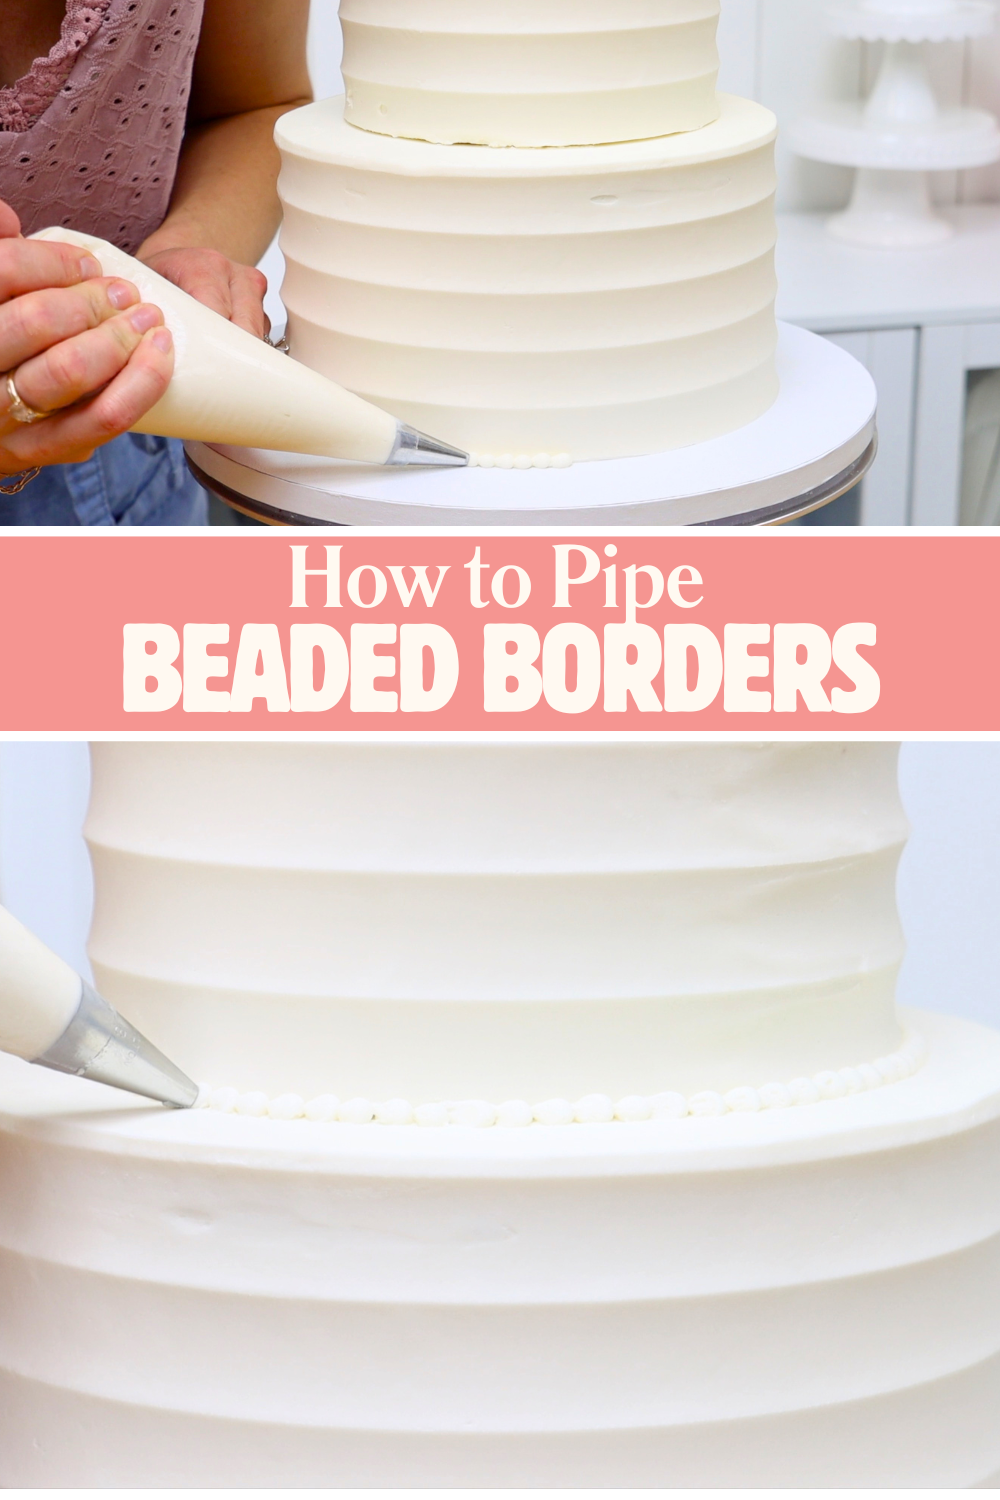
Fill your piping bag about two-thirds full so it's comfortable to hold.
Rest the piping tip on the cake board or lower tier while piping. This helps steady your hand and keeps the border even. Because the cake is chilled, resting the piping tip against the frosting won't damage it.
Instead of facing the cake to pipe each bead and pulling straight away from the cake, pipe sideways. This creates smooth, elegant beads without peaks. Squeeze the piping bag until the buttercream bulges out to form a ball shape and then release pressure on the bag and swipe away sideways.
Position your piping tip beside the previous bead so that the next bead overlaps the little tail left behind.
Chilled frosting is surprisingly forgiving. If you accidentally touch the cake or create a small mark, you can pipe some buttercream over that area and blend it using your cake comb or scraper.
A tiered cake shouldn't just look stable, it should actually survive the drive to its destination.
Always transport tiered cakes cold. Cold cakes are more stable and resistant to vibrations. They're also less likely to shift during sudden stops or turns.
The combination of internal supports and chilled frosting makes transporting cakes a breeze! I've driven a tiered cake for four hours on very bumpy roads to Yosemite and thanks to the support structure and proper chilling, it arrived perfectly intact.
I don't recommend leaving a decorated cake uncovered in the refrigerator overnight. Cakes can absorb refrigerator odors and develop condensation from the moisture in the fridge.
Instead, place the cake inside a box before putting it into the fridge.
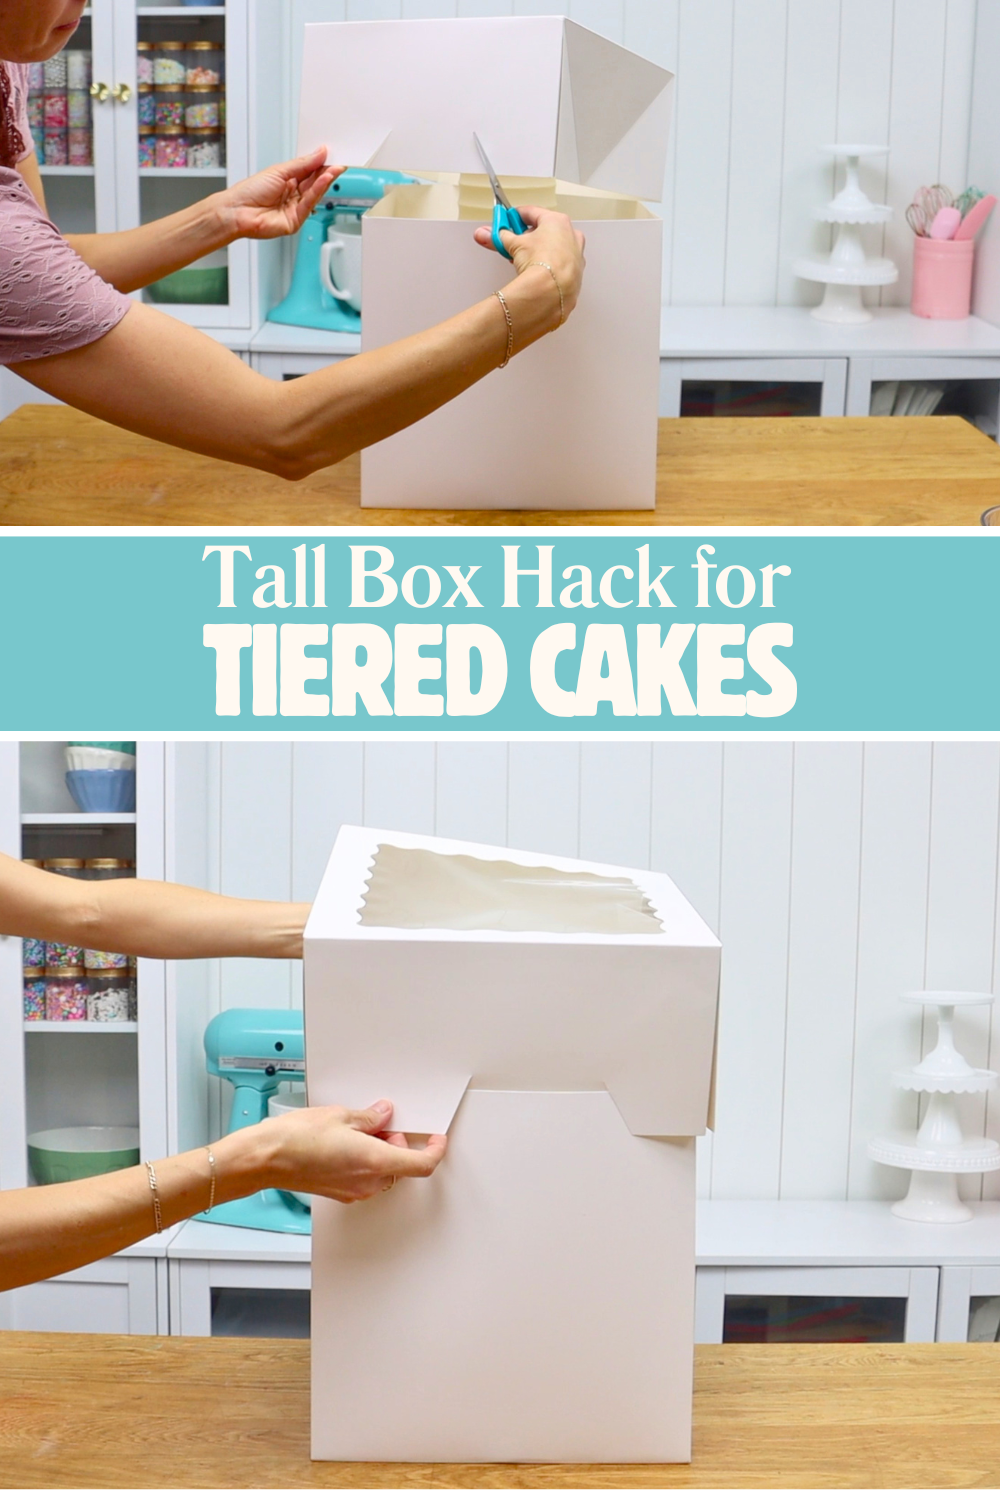
If your cake box isn't tall enough, take the lid or a second box turned upside down. Cut two diagonal slits into one of the sides and also the opposite side. Lower the line or upside-down box onto the box that the cake is in. Push the center flap inward while leaving the outer flaps outside. This creates extra height, allowing the box to be covered.
Tiered cakes can look complicated but once you understand the structure behind them, they become much more manageable.
Here are the key take-aways from this tiered cake tutorial:
The more tiered cakes you make, the less intimidating they become. Once you feel confident you can focus on the fun part: decorating them!
You can watch a video of this tutorial on how to make a tiered cake: