Stacking a cake can be nerve-wracking but in this tutorial I'll show you how to make a tiered cake, sharing tips and tricks so that you can assemble, frost, and stack a two or three tiered cake confidently!
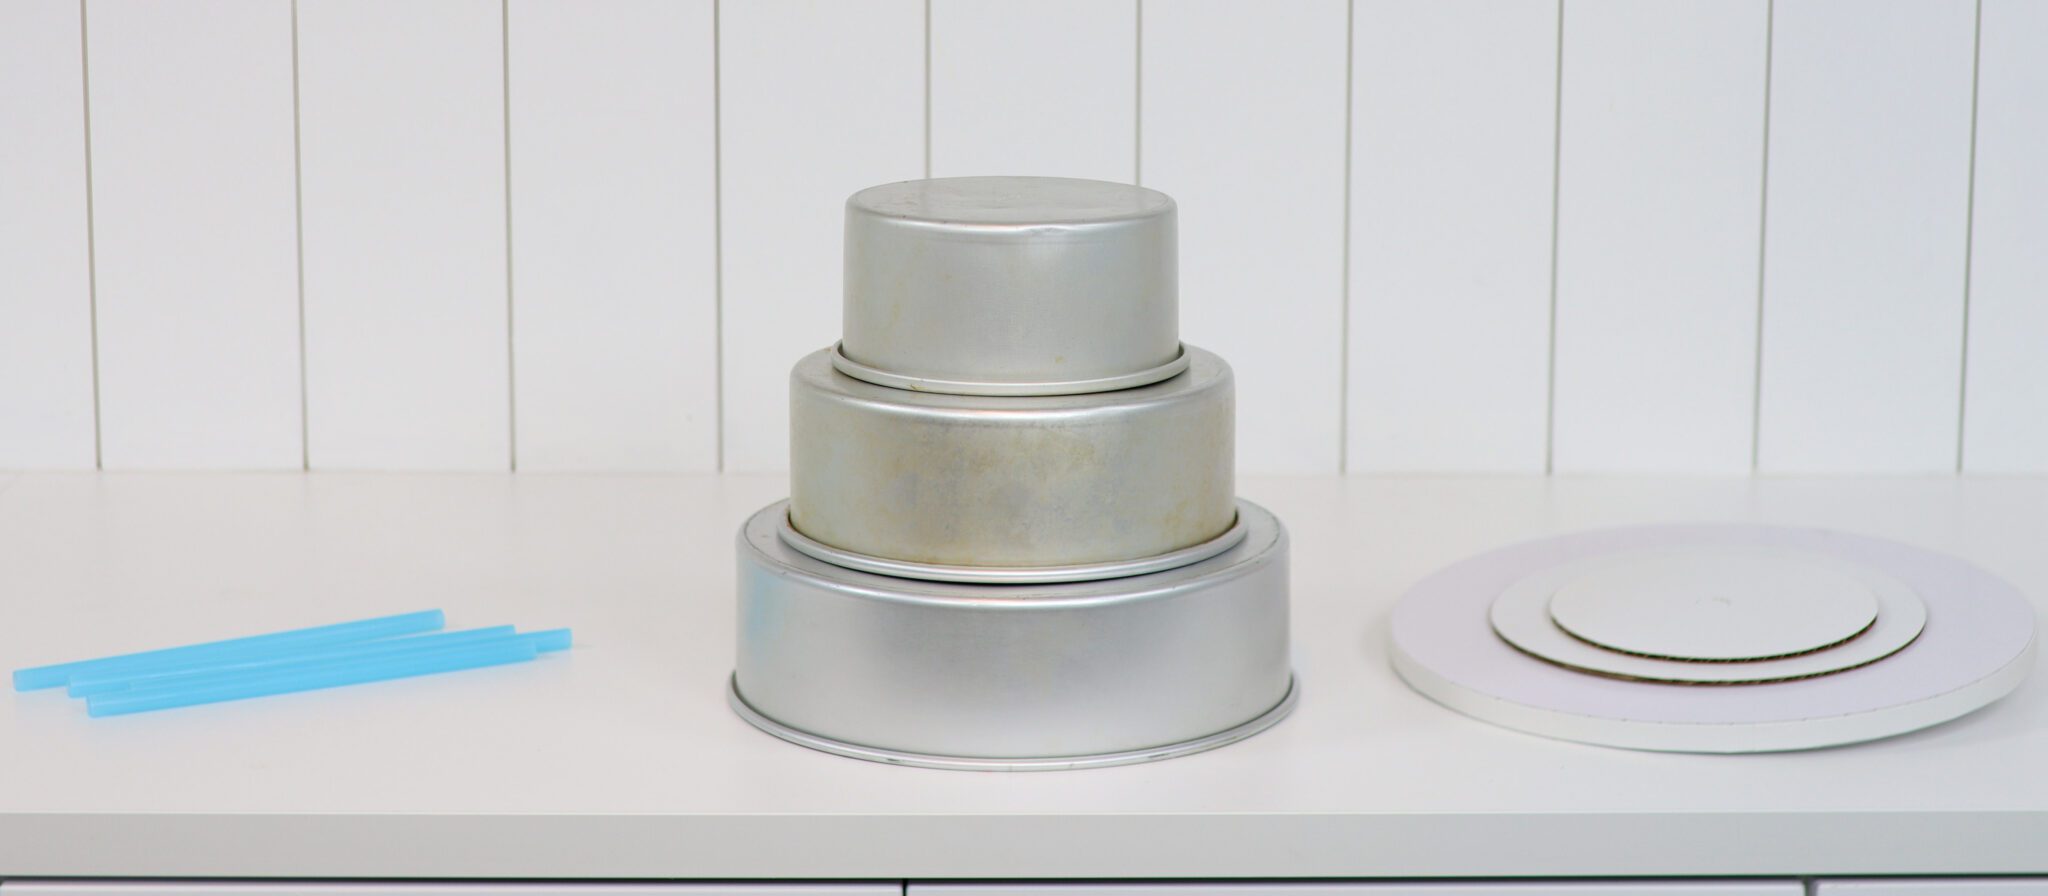
The first step is of course to bake your cakes. I’m using my Perfect Chocolate Cake batter for a standard height 8 inch cake and a tall 4 inch cake. For my middle tier, I'm using my Small Chocolate Cake recipe for a short 6 inch cake. My Perfect Chocolate Cake recipe has a table with the ingredient conversions for different sizes and heights of cakes.

After baking, leave your cakes in the pans for 10 minutes to cool slightly. Then turn them out onto wire racks and leave them to cool completely which takes about 2 hours. After they cool, I really recommend chilling them and you’ll see why in a moment. You can put them into the freezer for 30 minutes or the fridge for an hour. If you prefer, wrap them with plastic wrap and leave them in the fridge overnight.
You'll need a cake drum to support the weight of a tiered cake. A cake drum is a type of cake board that's thicker and stronger than cardboard. It should be at least 4 inches wider than your bottom tier so that there's space for frosting and decorations. I'll show you how to assemble the bottom tier straight on the cake drum. If there isn't space in your fridge for it, you can use a smaller cake board and transfer it later.
Even if you've never made one before, you're probably already familiar with several of the steps for how to make a tiered cake.
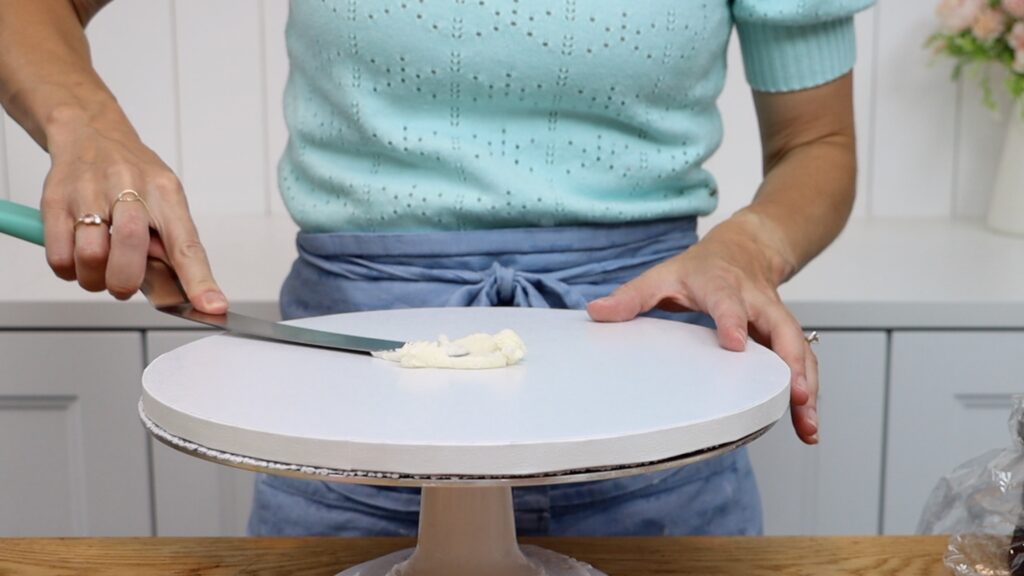
Start by assembling your largest cake, which will be the first or bottom tier. Spread buttercream onto the middle of the cake drum and push the first layer of cake down onto it. The dot of buttercream will stop the cake from sliding around as you frost and decorate it.
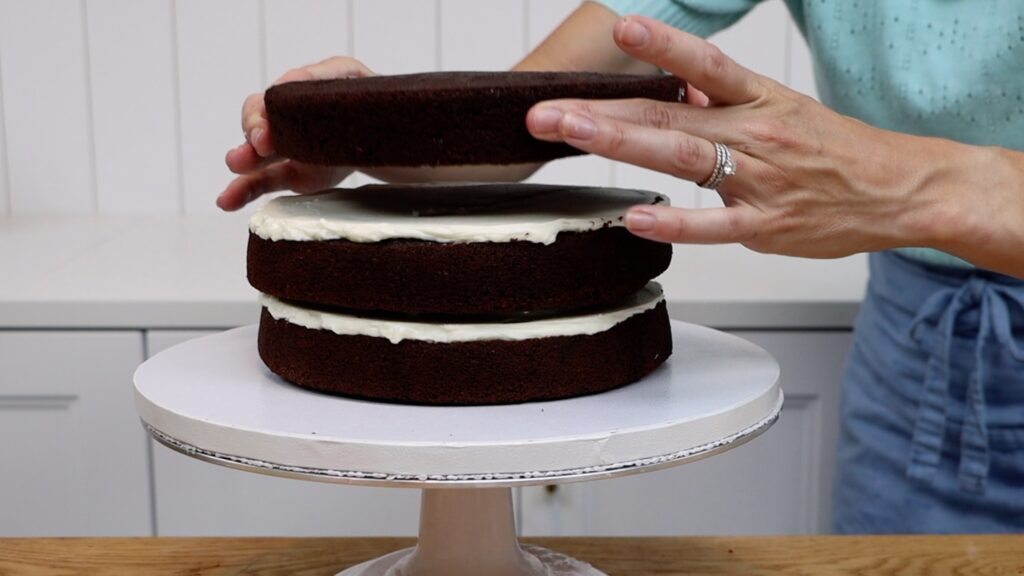
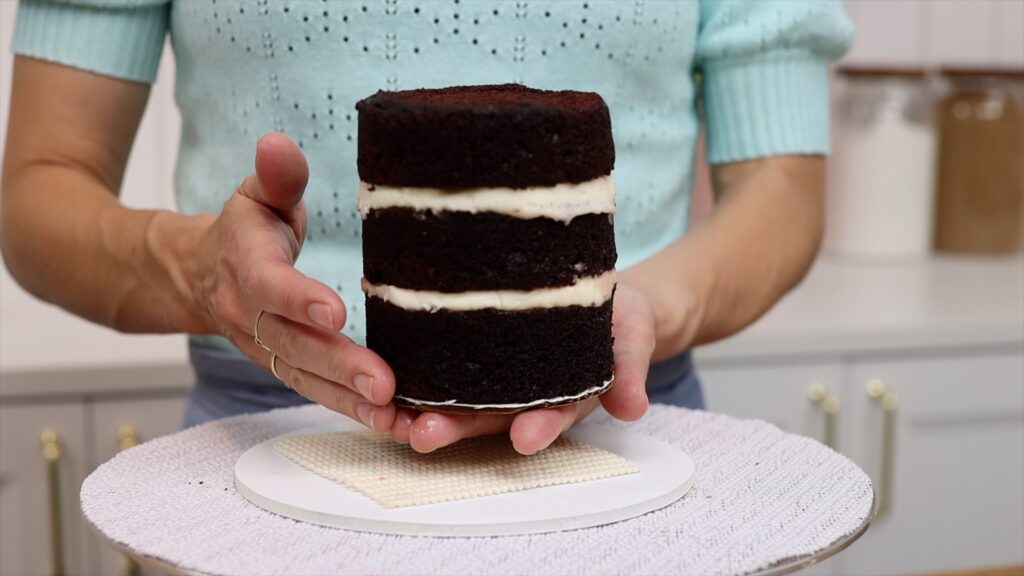
Spread or pipe your filling onto this first layer of cake. Then alternate between cake and filling. As you place each cake layer on the cake, take your time to line it up above the layer below. Make sure the sides of the cake are straight and it’s not leaning. My layers are very firm because they’re cold so I can lift them and move them around without them cracking or crumbling.
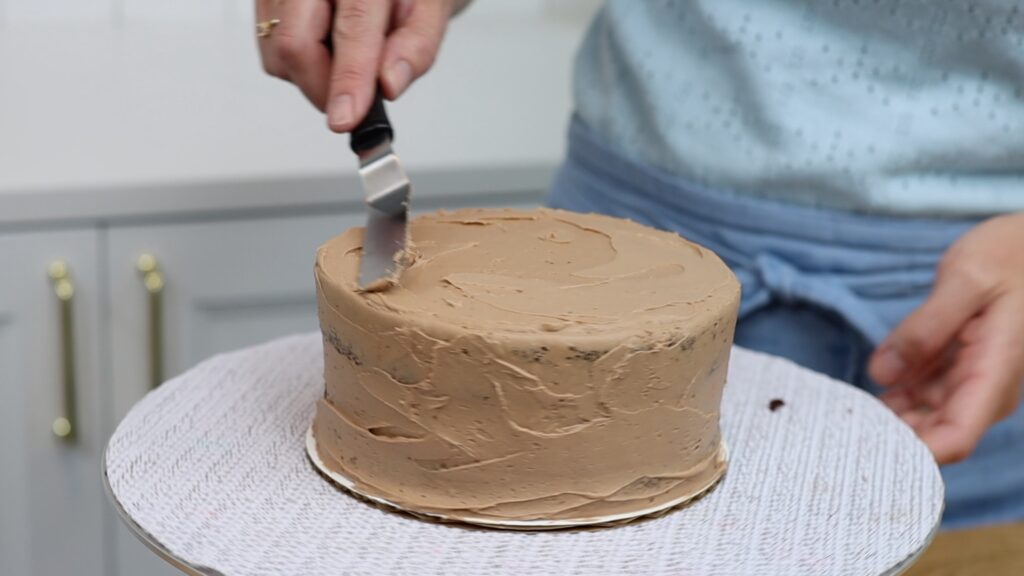
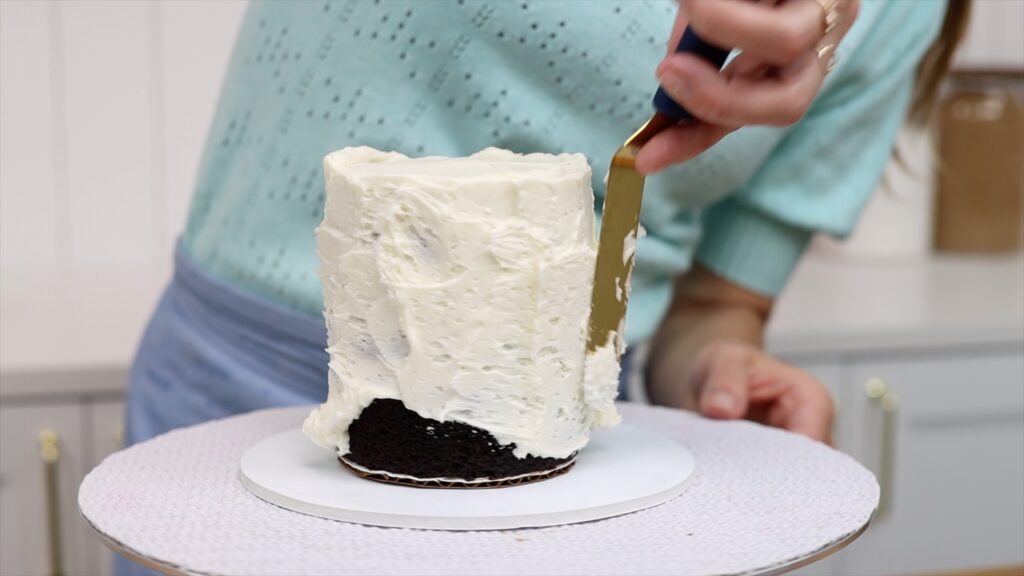
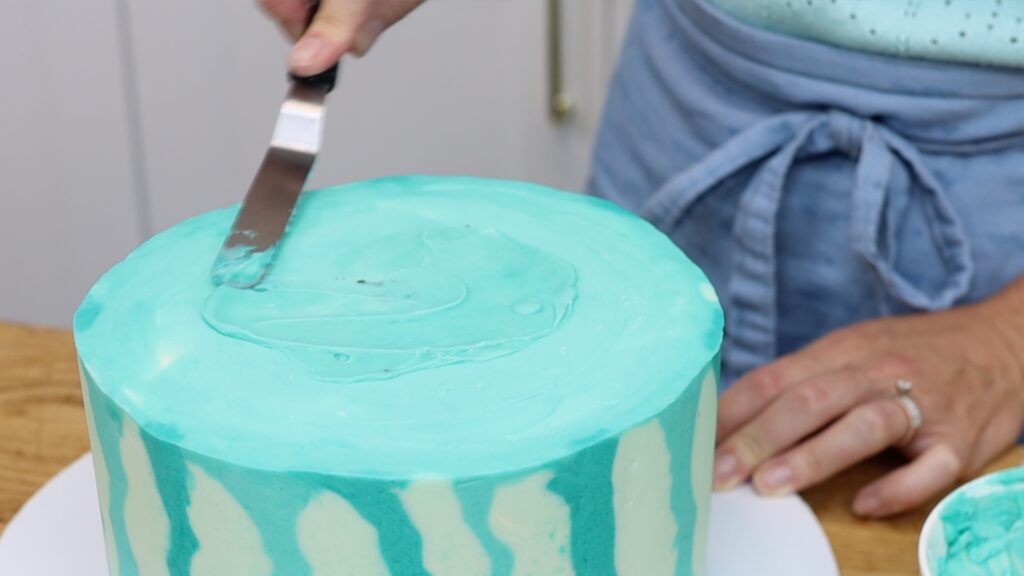
Cover the cake in a thin layer of frosting. This is called a crumb coat because it’s meant to catch any crumbs that come off the cake. I like to start with the top, spooning on a generous amount of buttercream. Spreading it all over the top of the cake. Push it out beyond the edges of the cake to prevent a domed top later. Hold your
Move down to the sides of the cake, spreading from side to side to cover the whole cake with frosting. Make sure that the frosting sticks up above the top edge of the cake, which will prevent drooping edges.
Frosting a cake is definitely easier to do when your cake layers are cold compared to room temperature cake layers. Cold layers are firm so the cake won’t wobble when you apply pressure to it as you frost it. Also, cold layers are less crumbly so you won’t pull off pieces of cake as you spread your sticky frosting. I'm using my 4 Minute Buttercream.
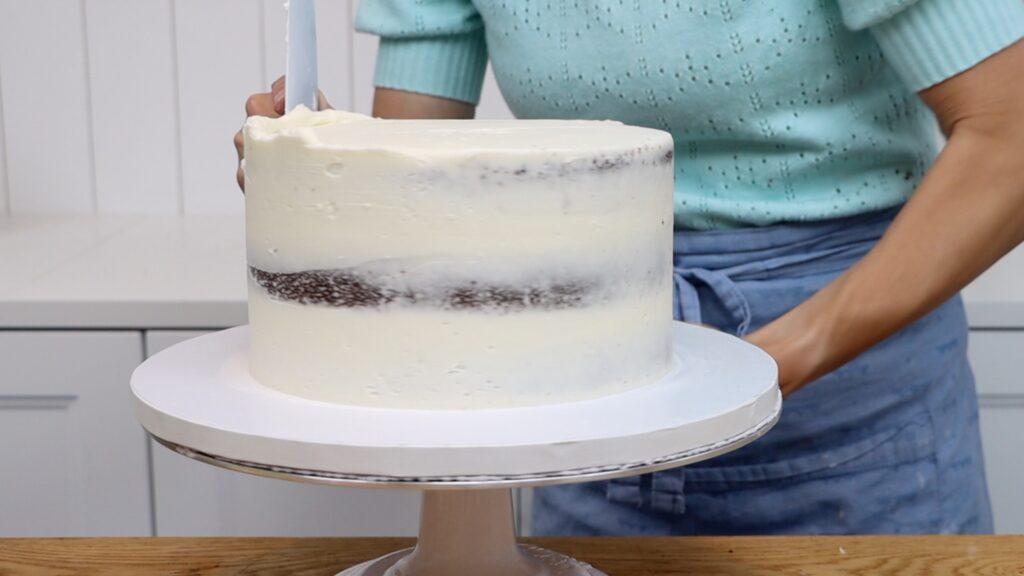
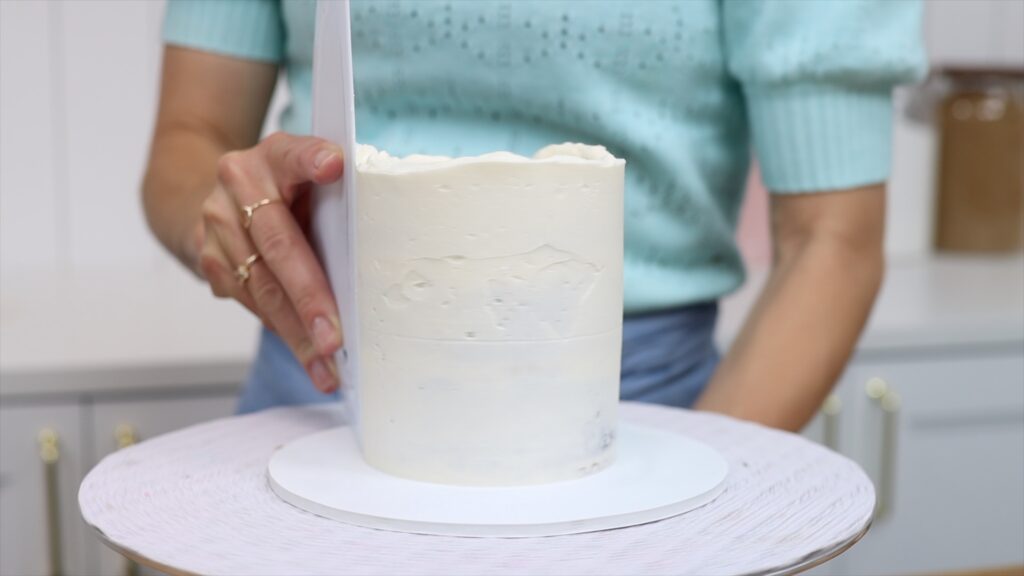
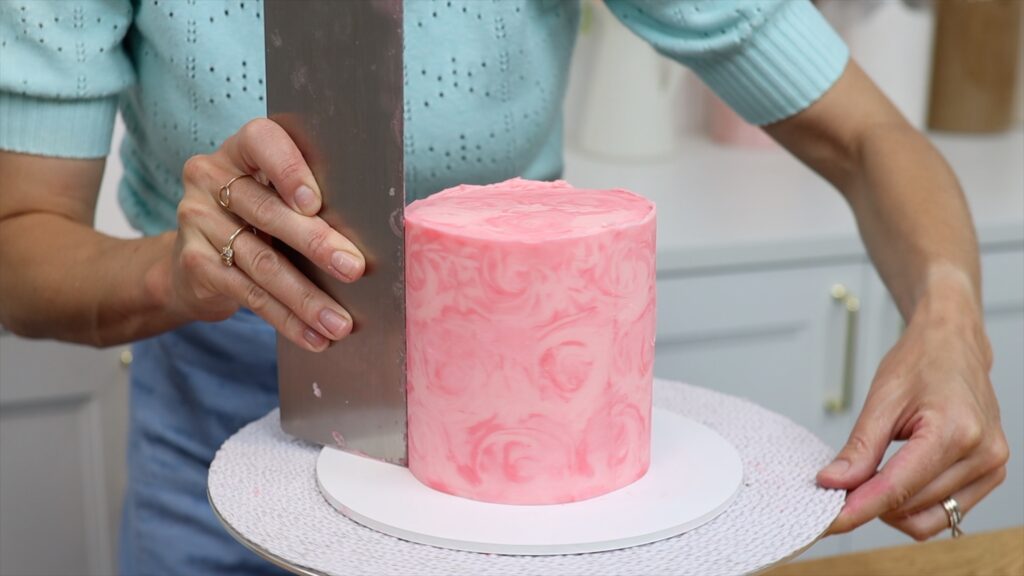
Scrape around the cake a few times with a straight edged cake comb or frosting smoother. The crumb coat doesn’t have to be perfectly smooth because it's going to be covered up but make sure it gives the cake a neat outline. Focus on getting straight sides and a level top and, very importantly, make sure there’s no exposed cake. You need this layer of frosting to cover the whole cake so that it traps every crumb that might come off the cake.
Use your
Put this cake on its cake drum or cake board in the fridge while you assemble the other tiers.
For the next tier of the cake, choose a cake board that’s the same size as the cake. If you don't have one, choose one as close to that size as possible. If it's more than 1/2 an inch bigger you'll need to trim the board with scissors. This is a 6 inch cake on a 6 inch board:
Attach the first layer to the board with a dot of buttercream and add your filling. Repeat to assemble the cake. Cover this cake in a crumb coat, which is typically the same colour as your final layer of frosting. Alternatively, you might choose to use something different if you want to incorporate another flavour. I'm doing that here, using chocolate buttercream for the crumb cot and then I'll use vanilla for the final coat. Put this cake in the fridge to chill and repeat the process with the rest of your cakes.
Once you know the steps of how to make a tiered cake you can create as many tiers as you like. Mine will be three tiers with this little 4 inch cake at the top. For every tier except the bottom, the cake needs to be on a board the same size as the cake. I didn't have one small enough for this cake so I trimmed a cardboard cake board. The board needs to be the same size as the cake so that it will be invisible after frosting, stacking and decorating the tiered cake.
To frost a cake on a board the same size as the cake, use a larger board as well. Put a non-slip mat or masking tape on the larger cake board, placing the cake (on its small board) on top. This way, the frosting won’t get all over your
I mentioned earlier that you don’t have to assemble your bottom tier on a cake drum. If you prefer, assemble it on a board the same size as the cake, like I’m doing for this cake. Later you can attach that board to the cake board with a ring or masking tape.
To set the crumb coat, leave the cake in the fridge for about 30 minutes.
Chilling the crumb coat makes it firm so it doesn't mix with this final layer of frosting. This means the colours will stay separate instead of blending. Also, any crumbs within the crumb coat frosting won’t get into this final layer of frosting. This ensure that there are no crumbs visible on the final decorated cake.
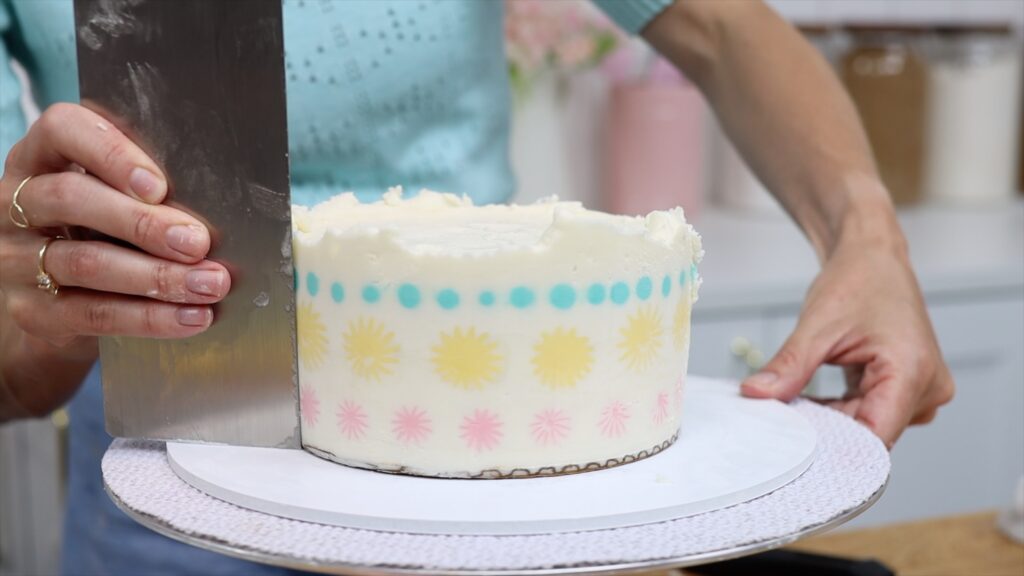
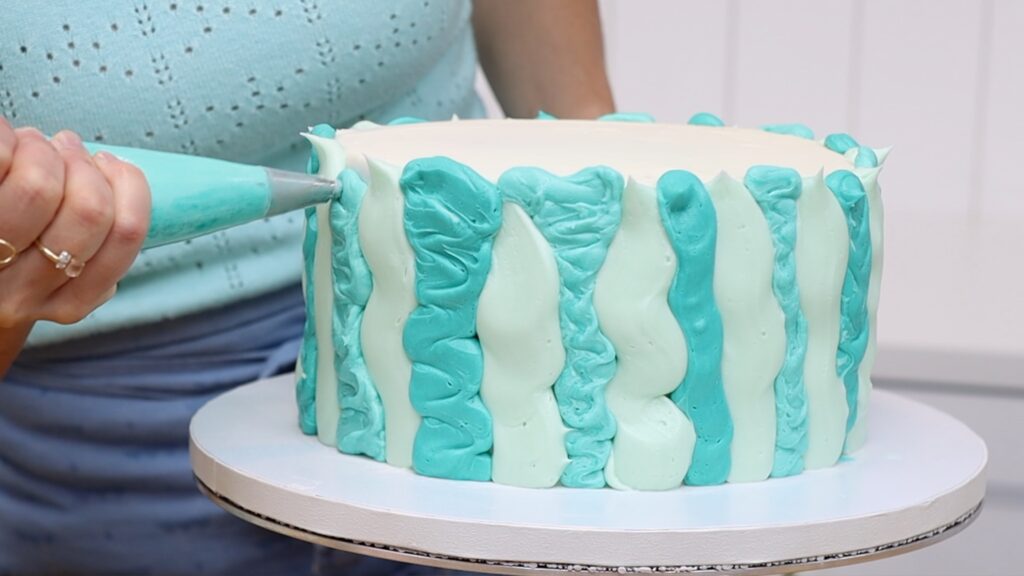
Frost your cakes but I don’t recommend adding any decorations yet, like piped borders or texture or wafer paper. When you stack the tiers, these decorations might get damaged. It’s best to add them right at the end, when the cake is tiered. I’m using my facelift frosting technique on all of these cakes.
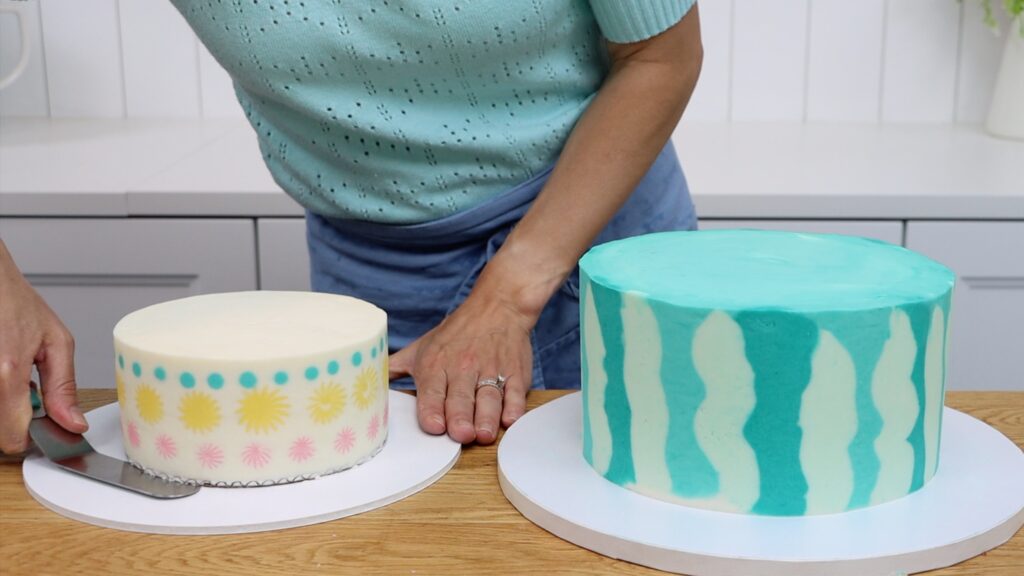
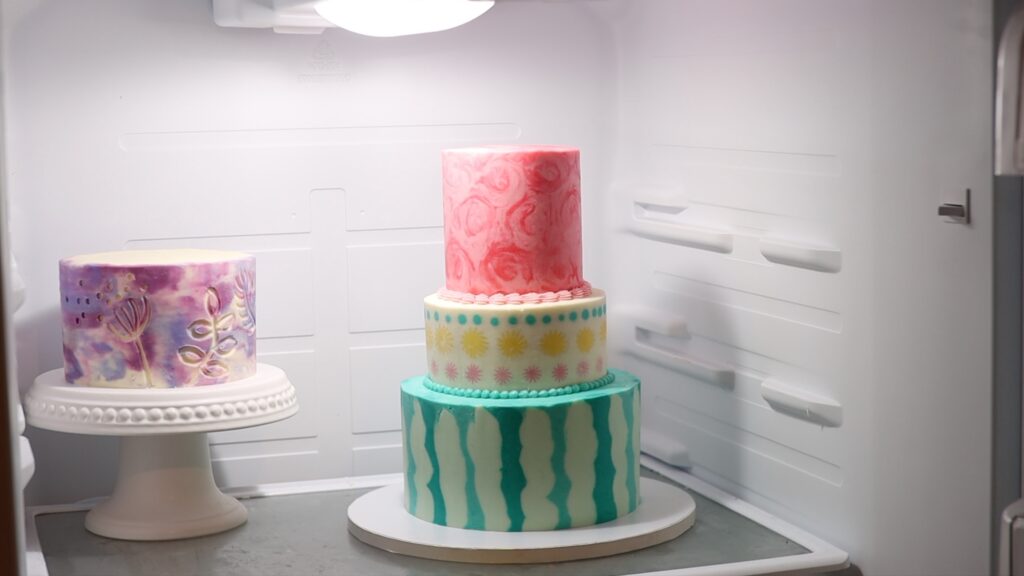
Note that your cakes don’t all have to be the same height! The pink cake is about 5 inches tall but the white cake is only about 3 inches tall. Sometimes it’s nice to vary the heights of each cake. You’ll see at the end that this design is so dramatic and colourful that the different heights really adds to the effect. For a more traditional design you might choose to use the same height for each cake. The conversation table for my Perfect Chocolate Cake recipe has measurements for both standard and tall cakes. Whatever width your cakes are, the heights will be the same, either standard or tall.
It’s fine if you can see the cake board at the bottom of the cake, like you can on these. I’ll show you how to cover that up during the stacking process. When you finish each cake, put it back into the fridge to chill and set the frosting.
I’m using lots of colours of buttercream for my cake but you might be using just one. However many colours you’re using, it’s important to save any leftovers for the stacking process. Cover any bowls of leftover buttercream with plastic wrap so the buttercream doesn't dry out. If you’re using piping bags you can leave the leftovers in those. Put the whole bag into a Tupperware or twist the end to keep it tight and wrap the piping tip with plastic wrap. This will prevent the exposed buttercream from drying out and crusting.

Take your time to make the top edge of each cake neat because they'll be very noticeable when the cake is stacked. Sharp angles from the sides onto the top makes the cake look much neater than a rounded top edge. My tutorial on 15 frosting mistakes you’re making and how to fix them will help improve your frosting technique!
Put all of your cakes in the fridge for at least two hours before stacking them.
At this point, your bottom tier should be on a cake drum at least 4 inches wider than the cake. All of the other tiers should be on cake boards the same size as those cakes. It’s fine if the boards are visible for now!
A tiered cake needs an internal support structure to hold the upper tiers up. This sounds a bit intimidating but it's much simpler than it seems! All you need are some boba straws and a pair of scissors. Boba straws are thicker and wider and stronger than normal straws. They're much easier to measure and cut to size than wooden dowels.
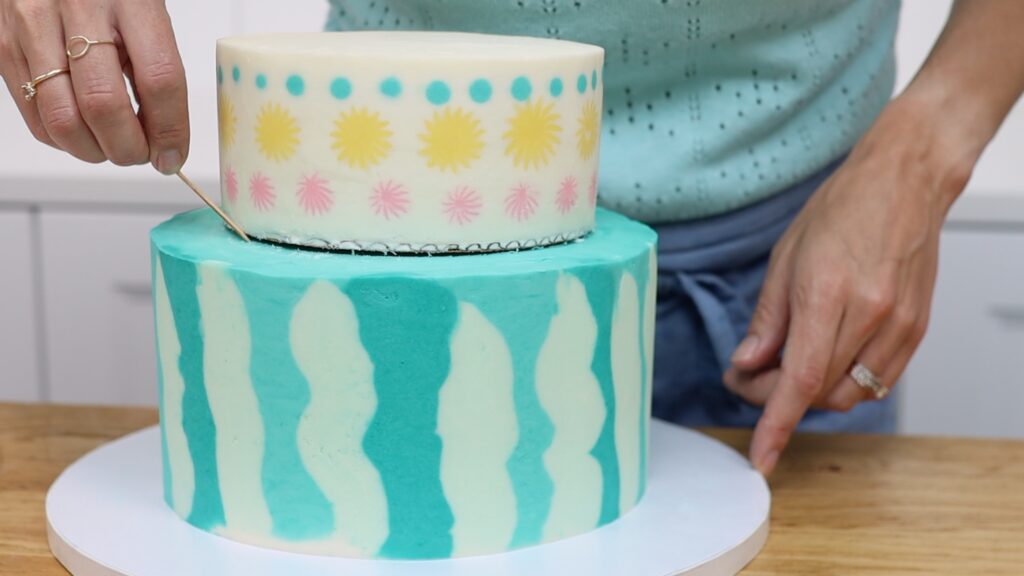
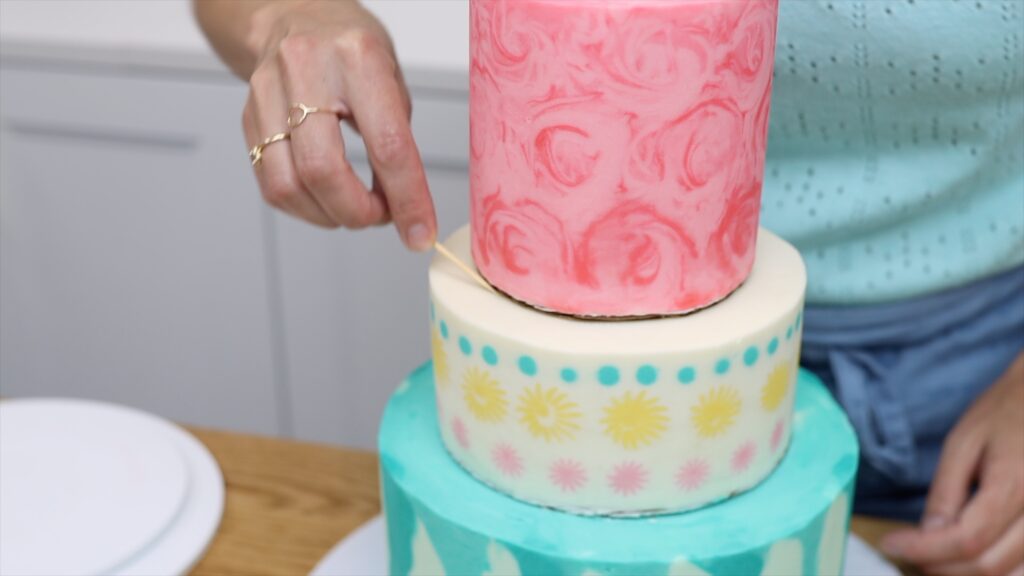
Start with the bottom tier and before adding any supports, you need to know where to place those supports. Take the next tier out of the fridge, the one that will sit on top of it. Separate the cake on its little cake board from the large cake board by slicing in between the boards with an
Lift the cake up on its little cake board and place in on the bottom tier. Adjust it to center it and then trace around it with a toothpick or your
Take the top cake off and put it back into the fridge so that the frosting stays cold and firm.
Before seeing how to make a tiered cake by stacking the tiers, you need to add support to the cake. For this you’ll need your boba straws. They all need to go within the line you traced around the cake. For cakes 8 inches or larger, I start with one straw in the middle. Push it down until you feel it hit the cake board. Then pinch it level with the top of the cake. Pull it up and cut where you pinched it. Now it’s exactly the same height as the cake.
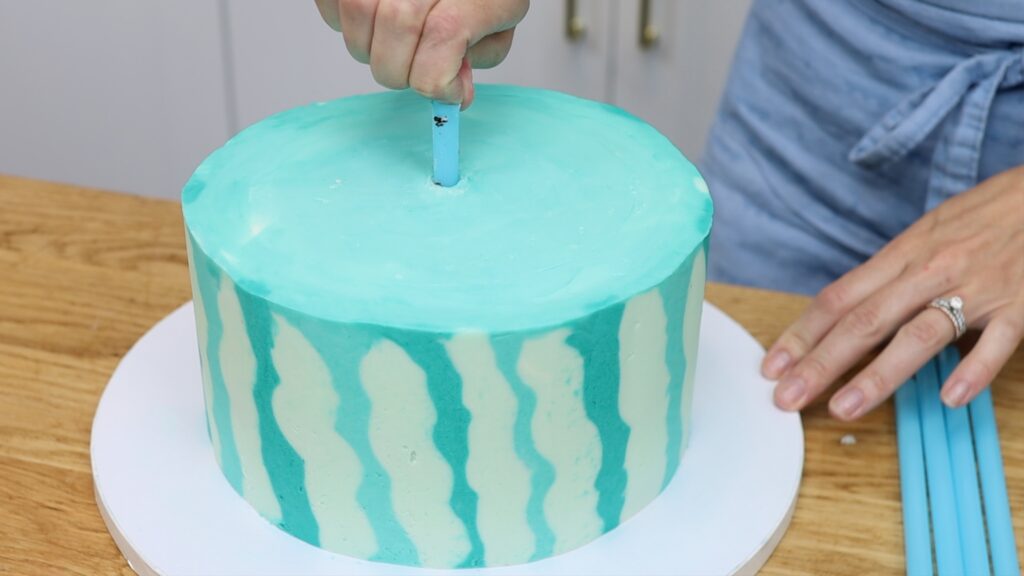
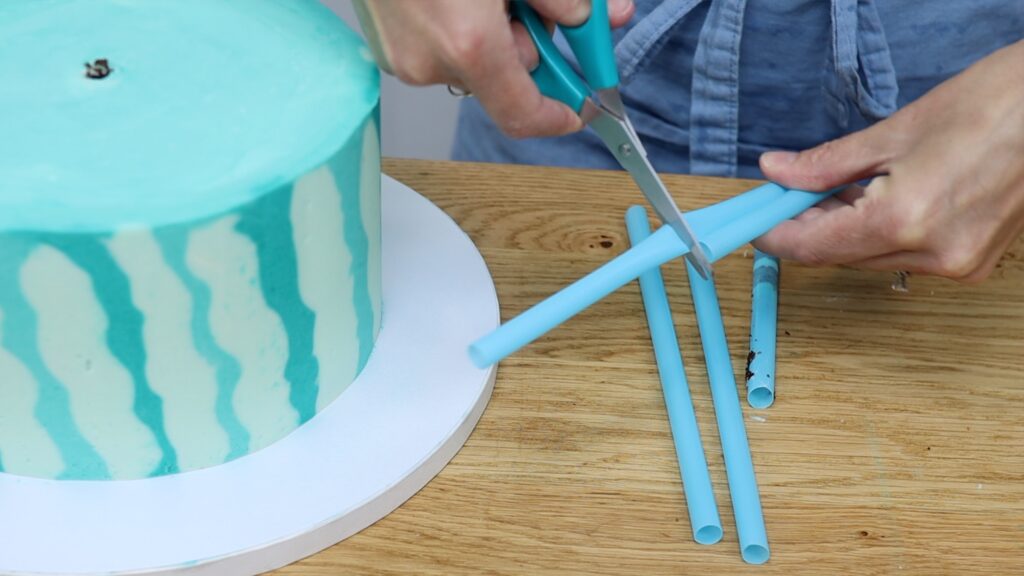
Use this piece of straw to measure the rest of the straws, cutting them to be the same height.
Poke your first straw back into the first hole. Then place the next one halfway between that first straw and the circle you drew around the top cake. Push it down until you feel it hit the cake board at the bottom. Then place the next straw 2 inches away, also halfway between the middle straw and that outer line. Continue with the rest of the straws.

This is an 8 inch cake and I can fit 4 straws if I place them all 2 inches apart from each other, plus the straw in the middle. To push the straws as far down as you can, use the handle of your
Remember the leftover buttercream you saved from frosting your cakes? Spread some of that onto the top of the cake within the circle you drew. This will act as glue to attach the next tier of cake. It will stop it from sliding around when you move the cake.
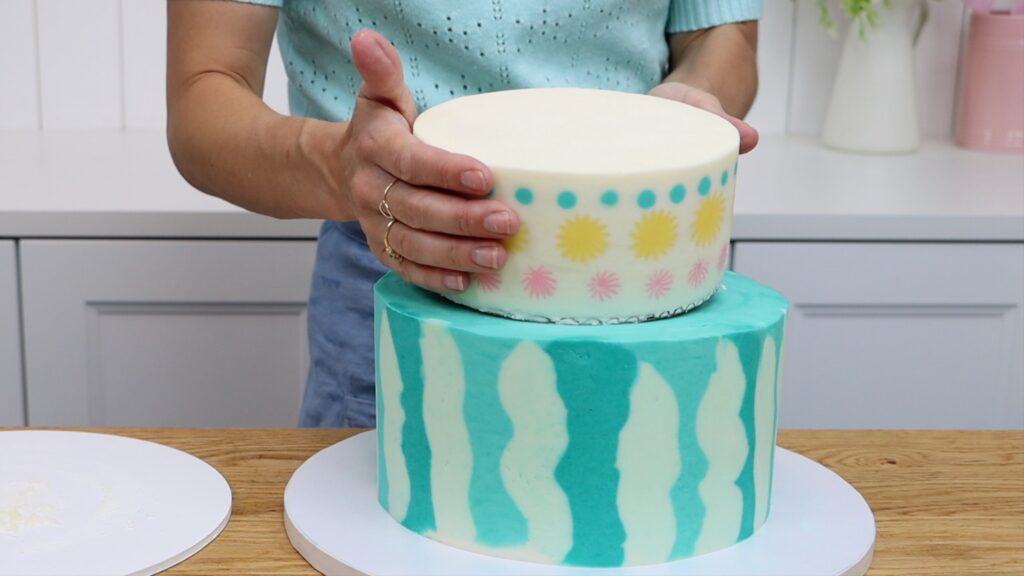
Take your next cake out of the fridge and place it, still on its cake board, onto the bottom tier. Press it down to attach it to the frosting you just spread. Don’t worry that the cake board is still visible because we’ll fix that soon.
If you're making a three tiered cake, this second tier of cake needs supports, too. The supports will allow it to hold up the third tier of cake. Place the third tier on top, center it and trace around it. Then put the top cake back in the fridge. Keeping it cold is important so that the frosting stays firm even when you touch it as you’re stacking it.
Follow the same steps to measure and cut and arrange your straws. My top tier is a 4 inch cake and for the straws to be 2 inches apart from each other I can only fit 4 straws into the 6 inch cake below it.

One of the frequently asked questions I get about tiered cakes is why I don’t use a central dowel. I don’t find them necessary for a 3 tiered cake. The buttercream you spread onto the top of each cake will attach the cake above it. It prevents it from sliding around. Keeping the cake cold until you transport it will make sure it’s stable even with the movements and vibrations of a car. More about that in a moment!
Spread a little bit of leftover frosting to cover the straws. Keep it within the circle you drew so that the next cake will hide this extra frosting. Then place the next cake on top. Center it and push down to secure it to the frosting you spread on.
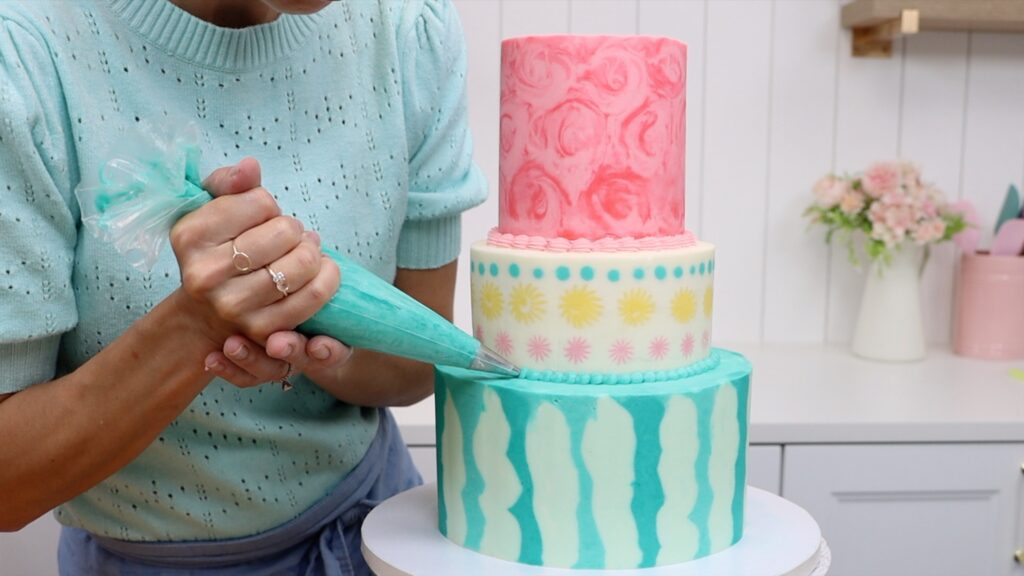
The joins between each tier won't look very nice yet. You'll be able to see the cake boards under the top tiers. This is easy to fix! Put the cake on a
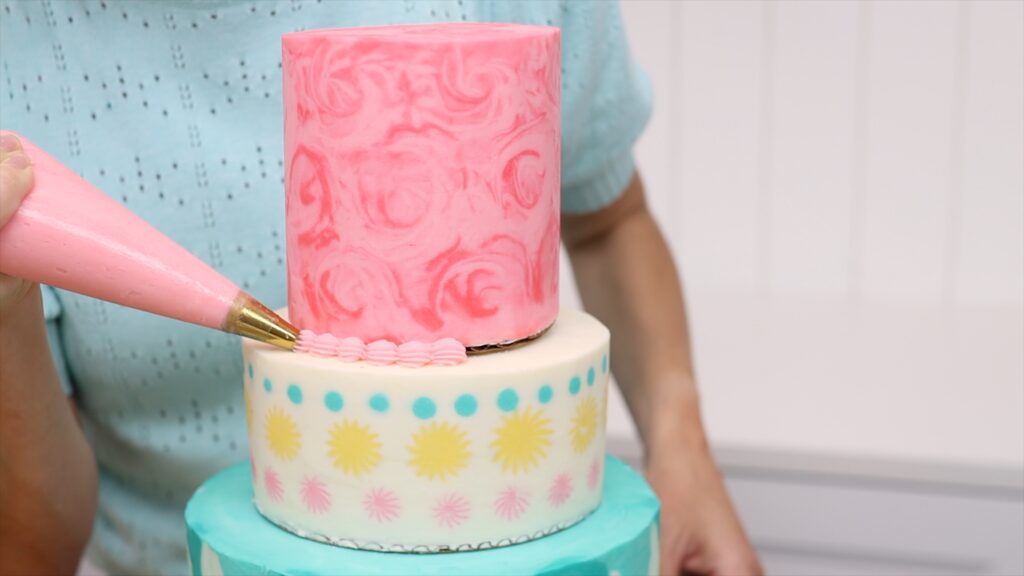
This is an open star tip and the next one is a round tip. I’m choosing to pipe borders because I want the extra decoration and because all of the cakes are different colours. If they’re the same colour you can pipe or spread buttercream around the bottom of each tier. Then use a cake comb to scrape off the excess to leave a thin layer flat against the cake. This will disguise the join or seam. I demonstrate this technique in my tutorial on how to make a semi-naked wedding cake.
For hundreds of cake decorating designs and techniques, visit my online cake school!
Now the cake has a stable support structure inside it and it looks stunning on the outside. It’s ready to store, transport or serve! I recommend refrigerating the cake until you transport it. Keep it in the fridge until 2-4 hours before serving it, depending on the temperature of the room where it will be on display.
Ask me any questions in the comments! You can watch a video of this tutorial on how to make a tiered cake as well:


Thank you for this tutorial, I really understand everything.
So happy to hear that! Thanks for your comment!
What’s is the total weight of the cake and weight each layer