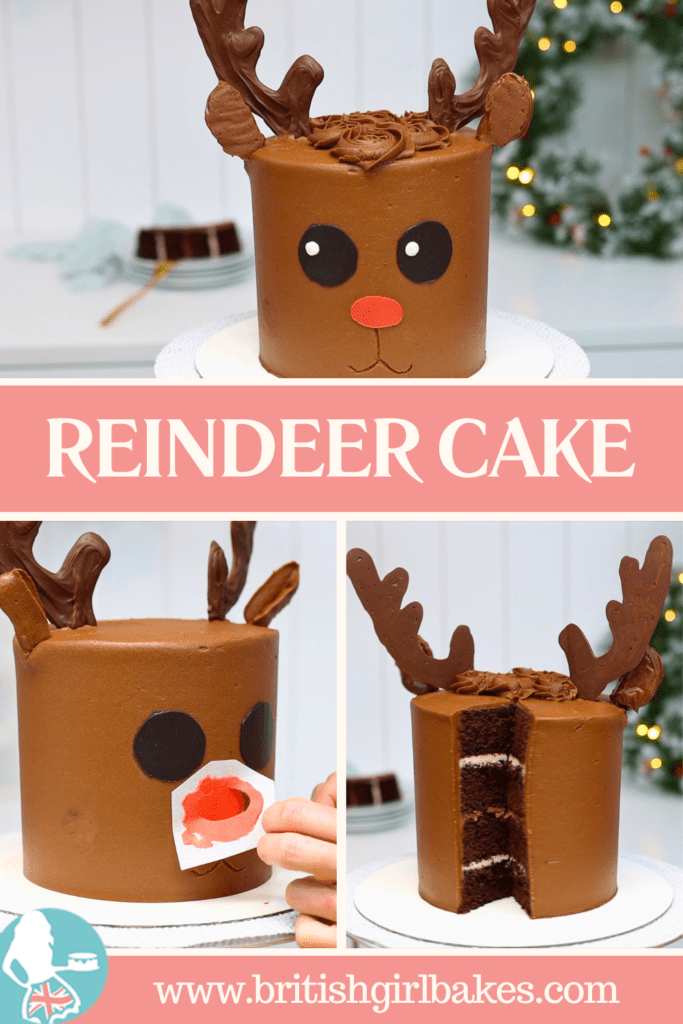
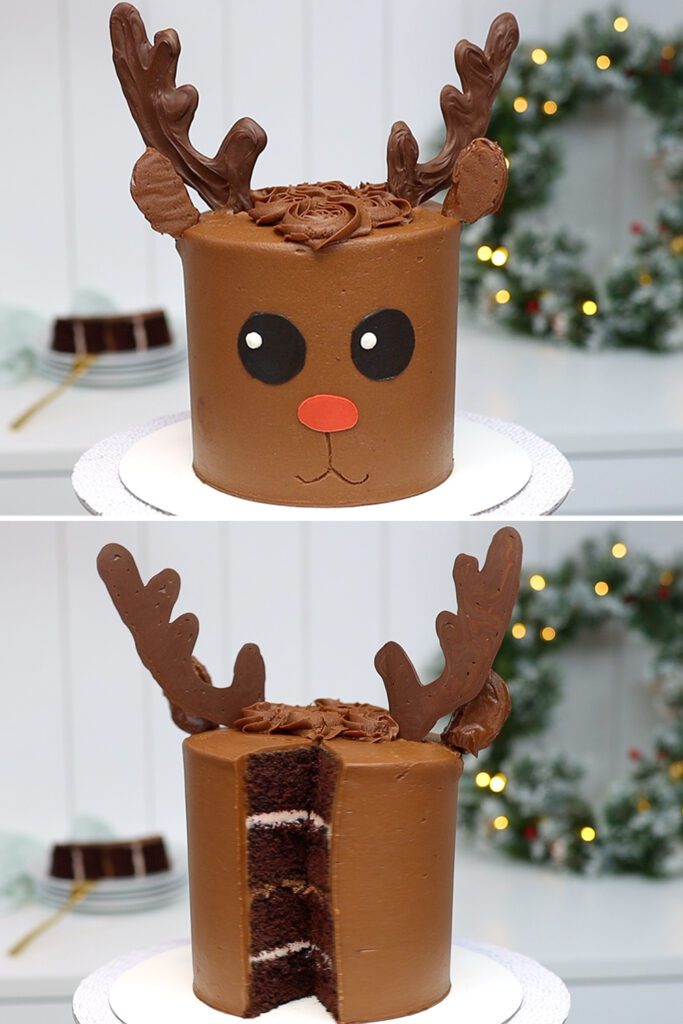
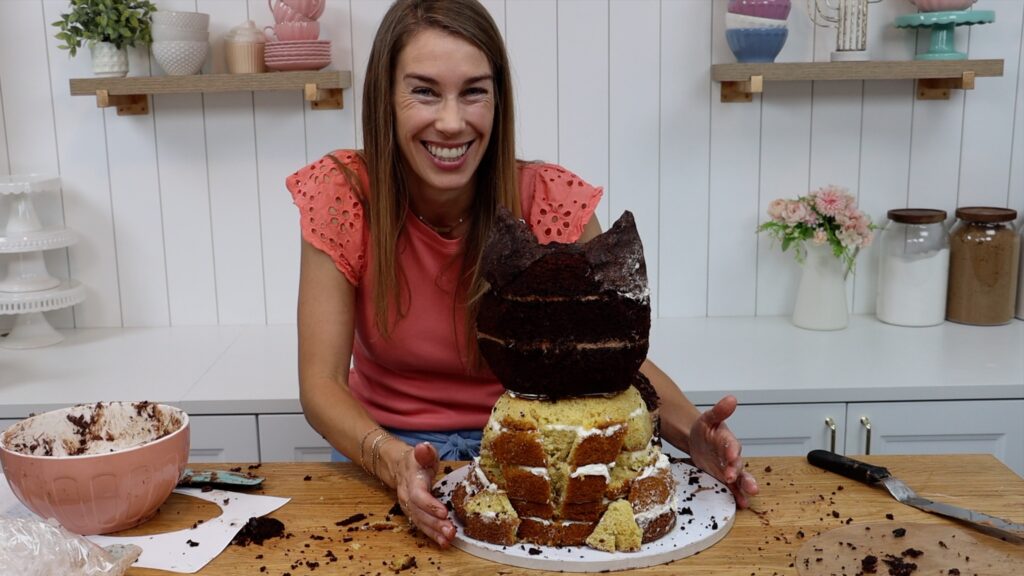
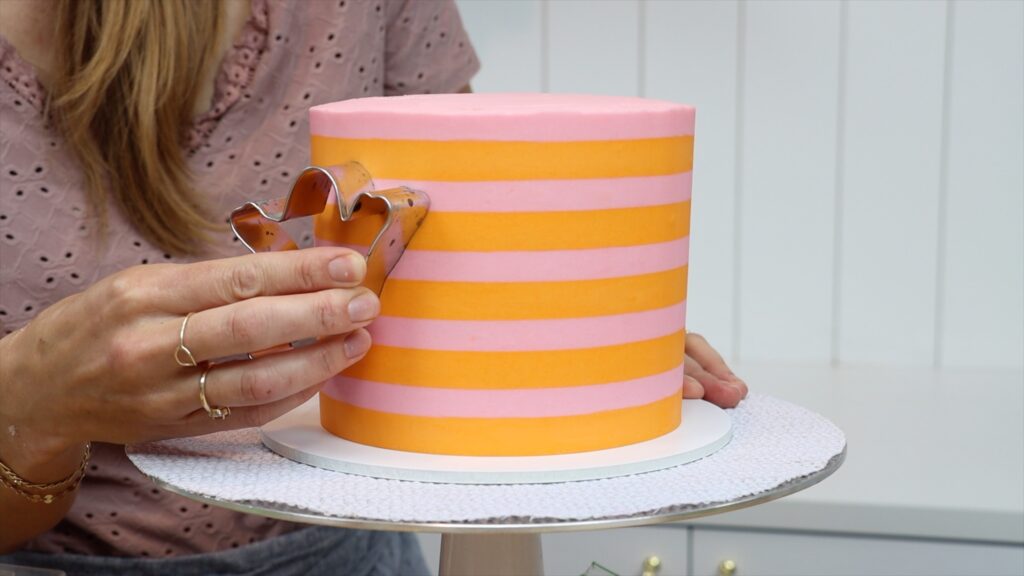
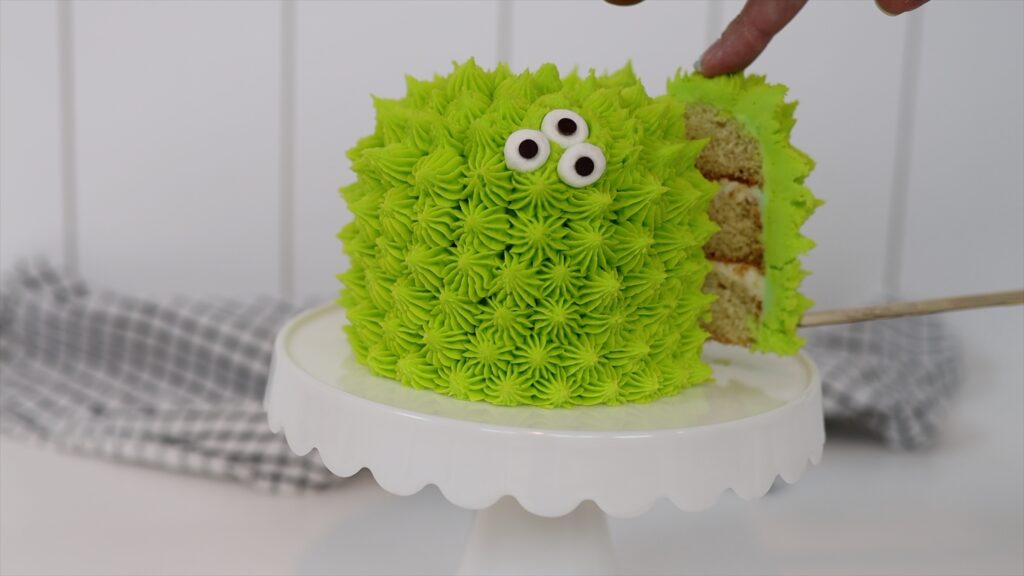
This adorable reindeer cake is so easy to make! Use chocolate chips, an Oreo cookie and some parchment or wax paper for the decorations.
Bake the reindeer cake layers
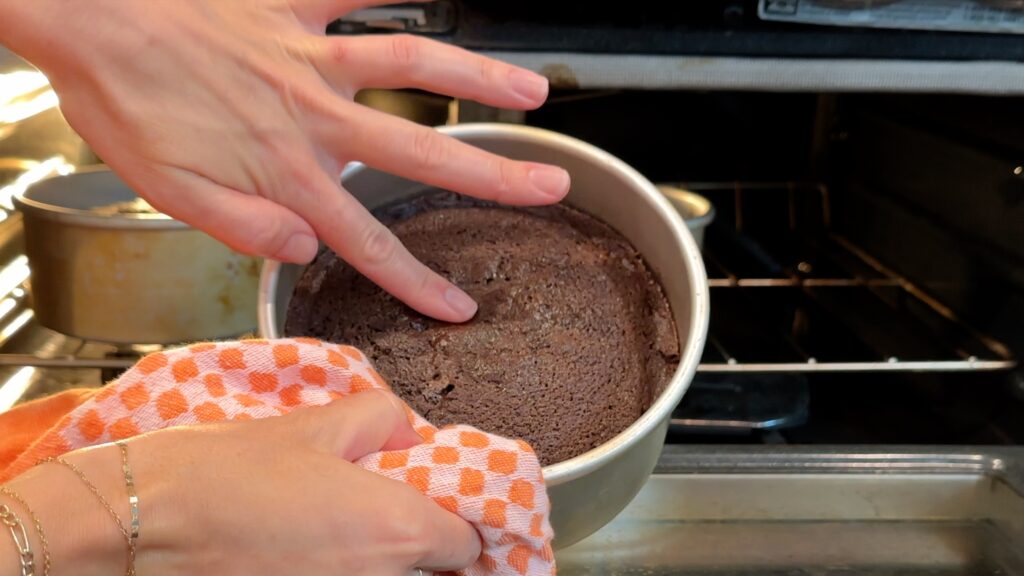
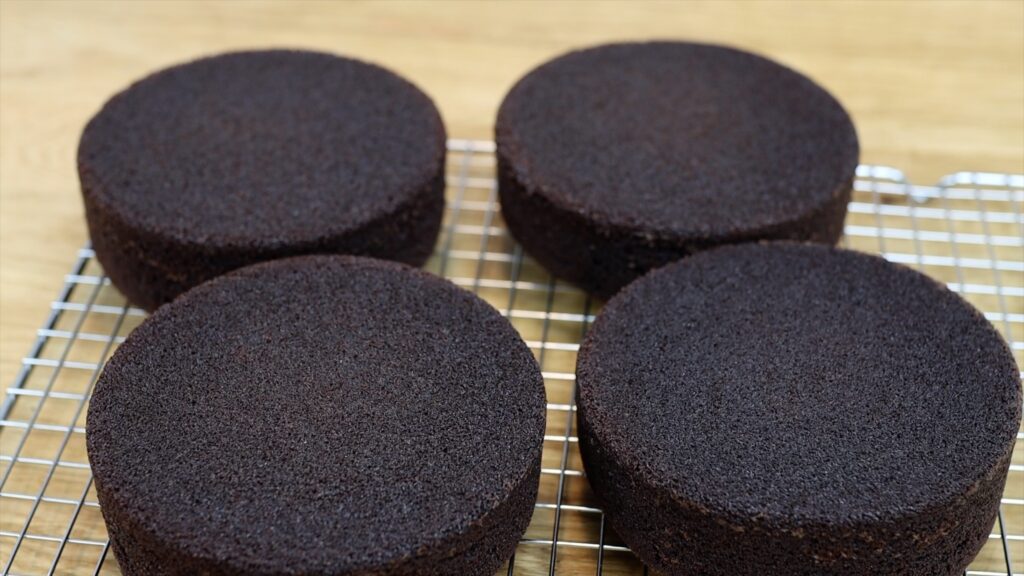
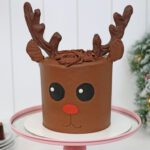
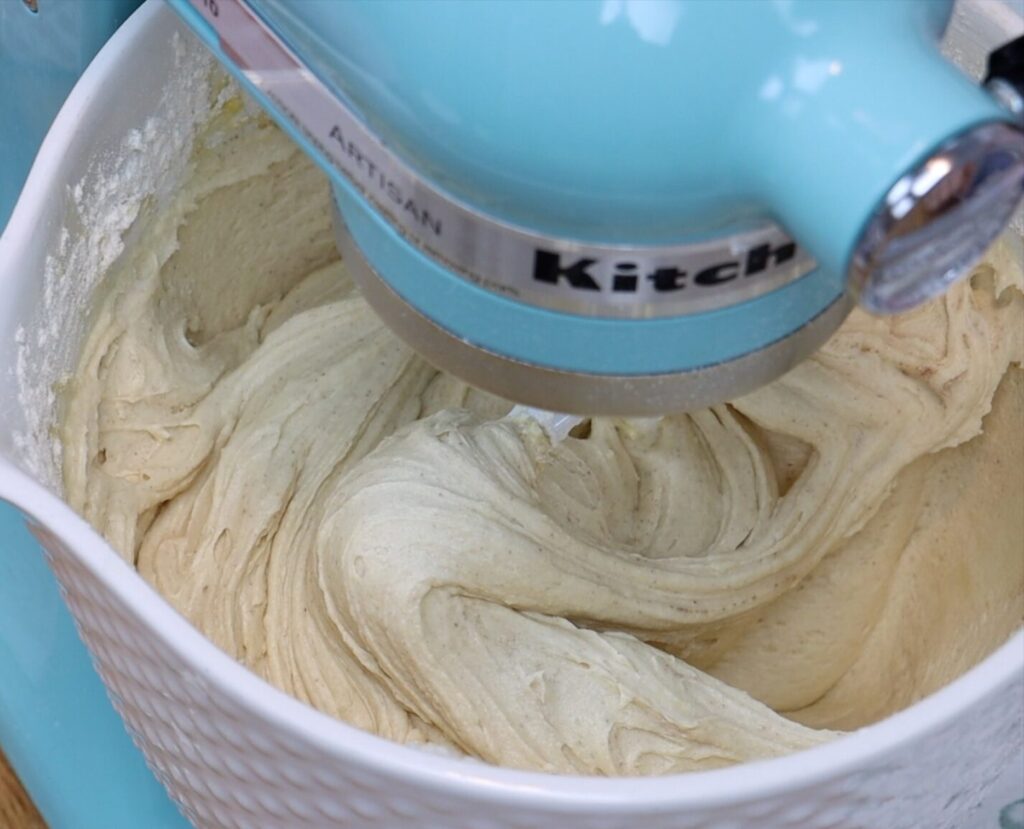
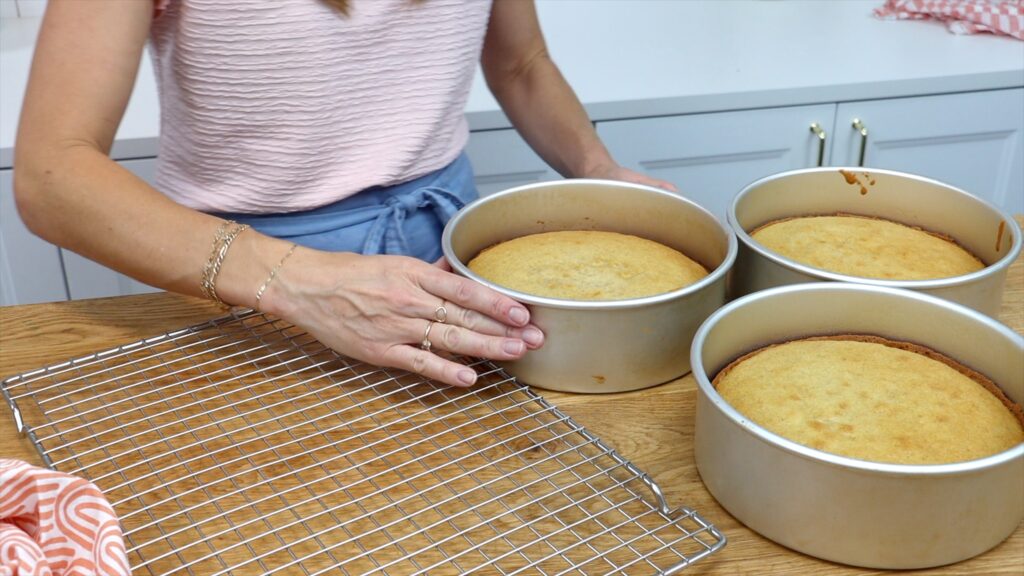
I started with my Perfect Chocolate Cake recipe. The ingredients and recipe are in the recipe box at the bottom of this page. I baked the batter in four 6 inch pans to make a nice tall cake. While the layers cool, make your filling and frosting.
Make the filling and frosting
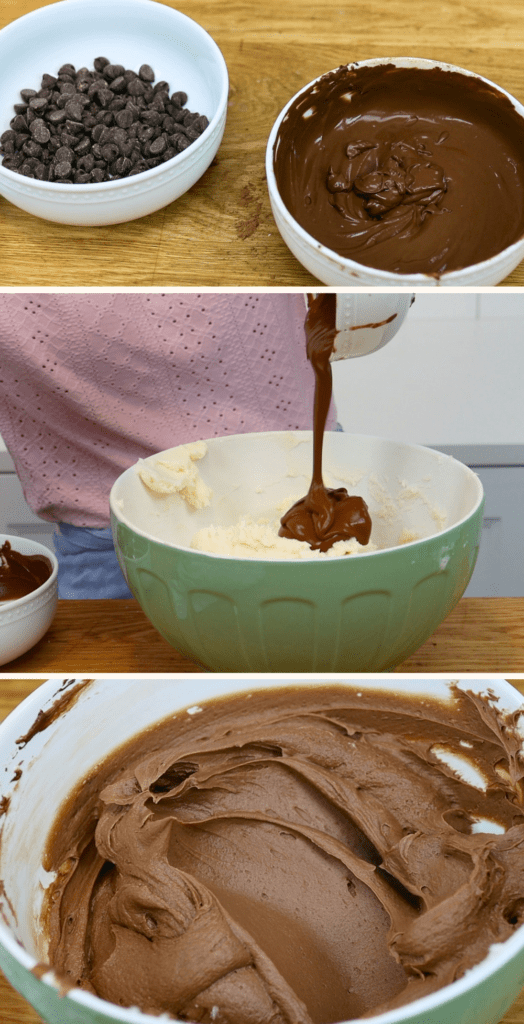
Use chocolate chips and cocoa powder to make a really chocolatey buttercream for the reindeer’s fur. Start by making my 4 Minute Buttercream, which is an easy and delicious base for hundreds of different flavours. In a small bowl mix cocoa powder with hot water to make a thin paste. In another bowl melt the chocolate chips in the microwave or a double boiler. Let the chocolate and cocoa paste cool. Set aside 2 tablespoons of the buttercream in a small bowl to make the reindeer's eyes and nose later. Cover the bowl with cling film or Saran Wrap so the buttercream doesn't dry out and crust.
When the chocolate and cocoa paste have cooled, stir them into the buttercream. Mix it all together by hand or with a mixer. The chocolate buttercream will be smooth and the perfect consistency for frosting!
You can use this for the filling as well as the frosting. Or to add another flavour, scoop out half a cup of buttercream before adding the chocolate. Blend 3 peppermints or any other mint candy to make a fine powder. Or put the mints in a sandwich bag and crush them by banging them with a rolling pin. Add these to the half a cup of buttercream along with a spoonful of cream cheese. This makes a creamy peppermint filling that pairs perfectly with the chocolate!
Assemble and frost the reindeer cake
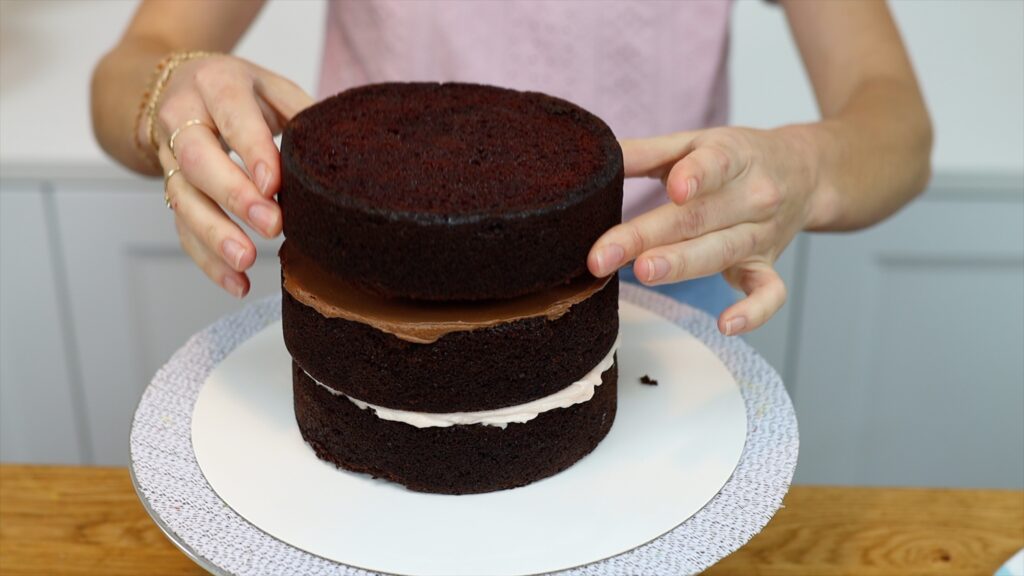
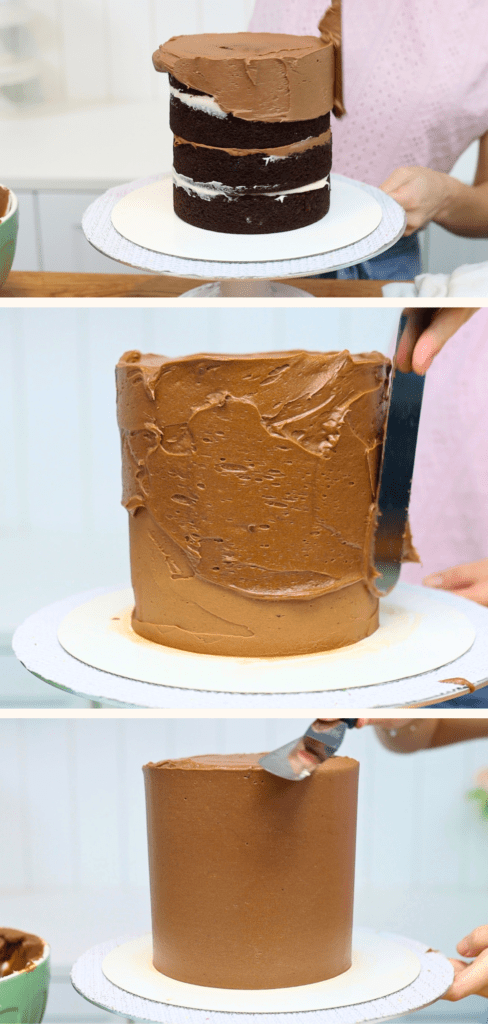
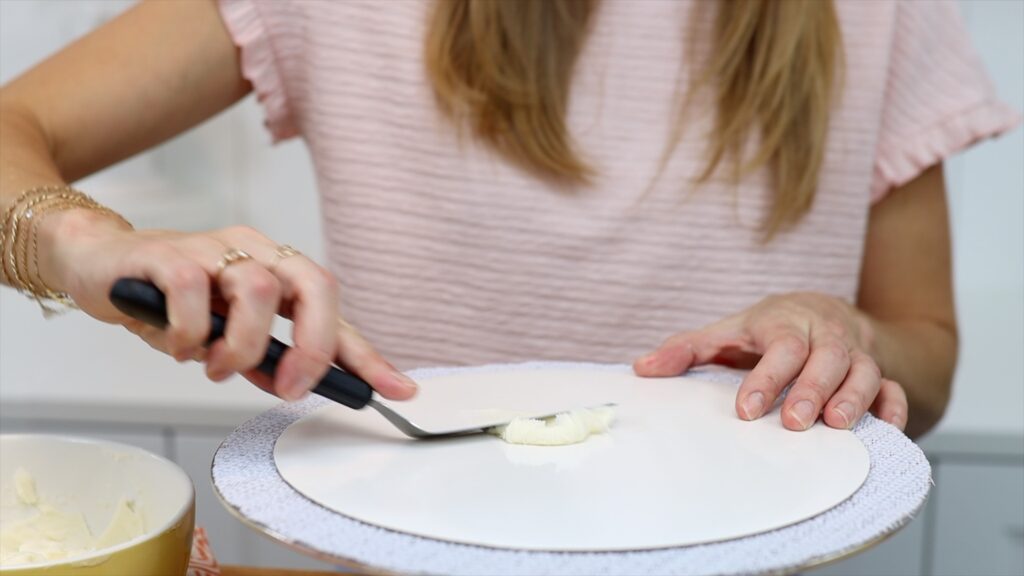
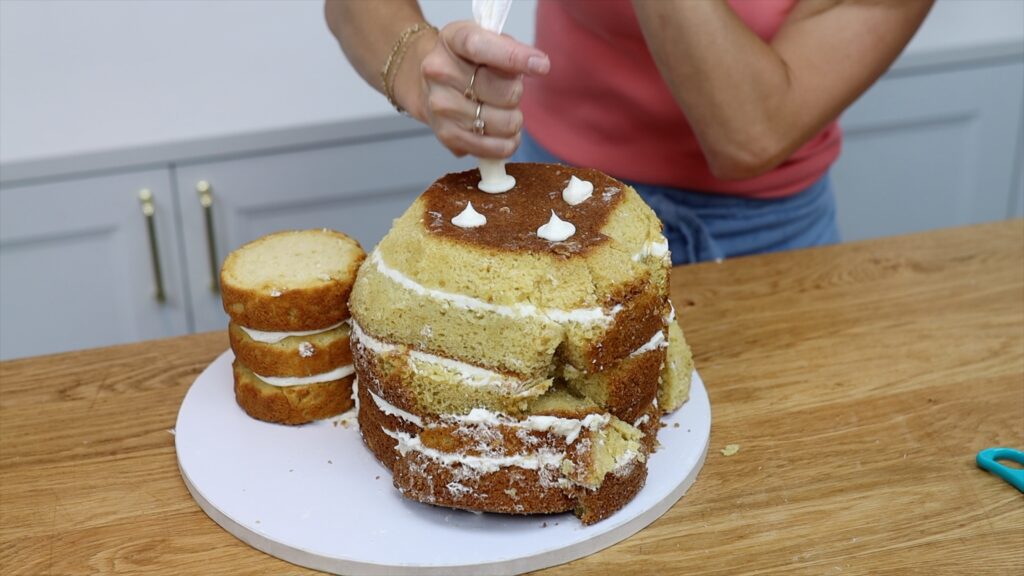
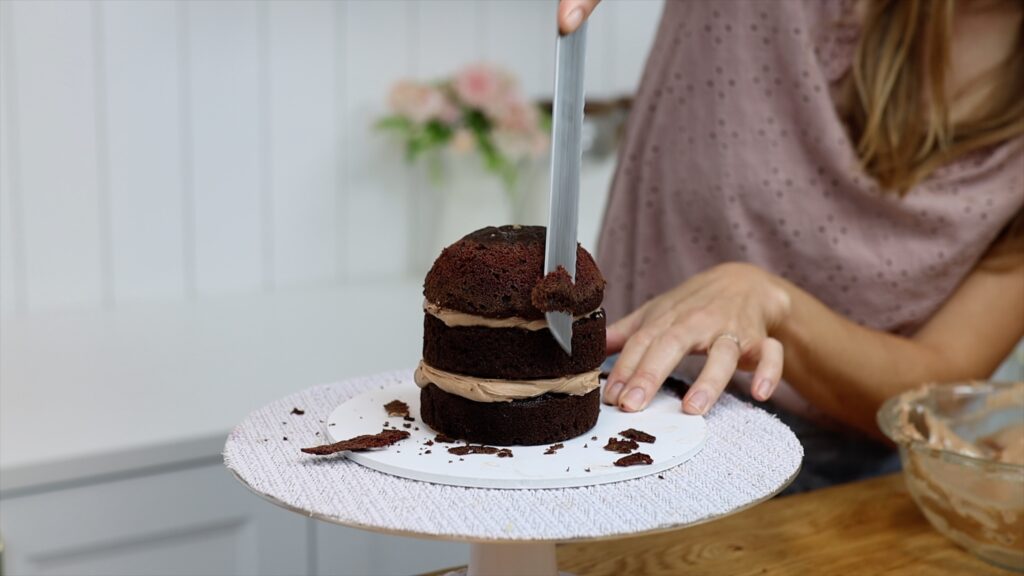
To assemble the reindeer cake, spread some buttercream onto the middle of a cake board to act as glue. Press your first cake layer down onto it, centering it on the board. The buttercream will attach it there while you frost and decorate the cake.
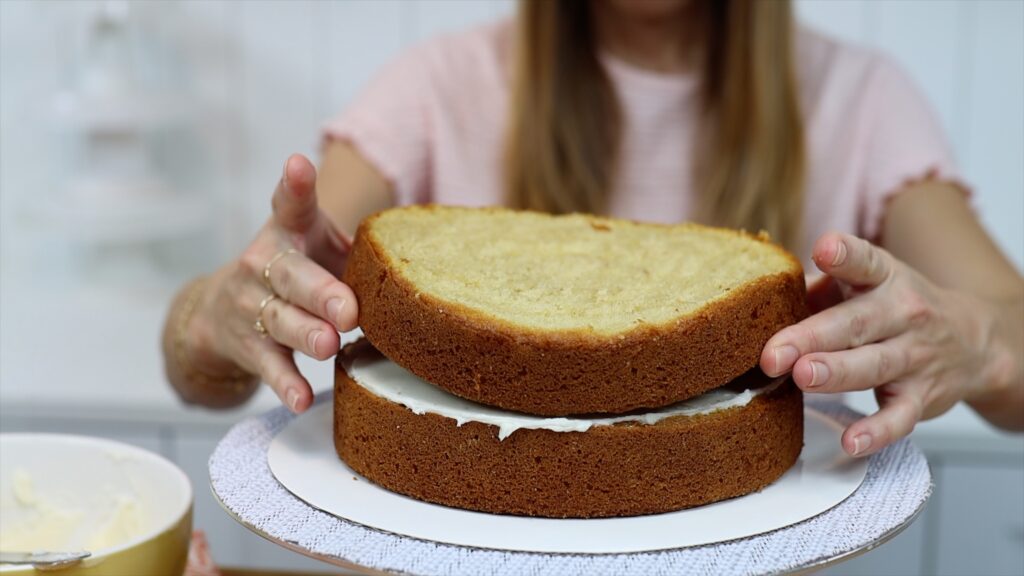
Spread on a layer of filling and then place another cake layer on top. Layer more cake and more filling, finishing with the final layer of cake. I alternated between the peppermint cream cheese and chocolate buttercream.
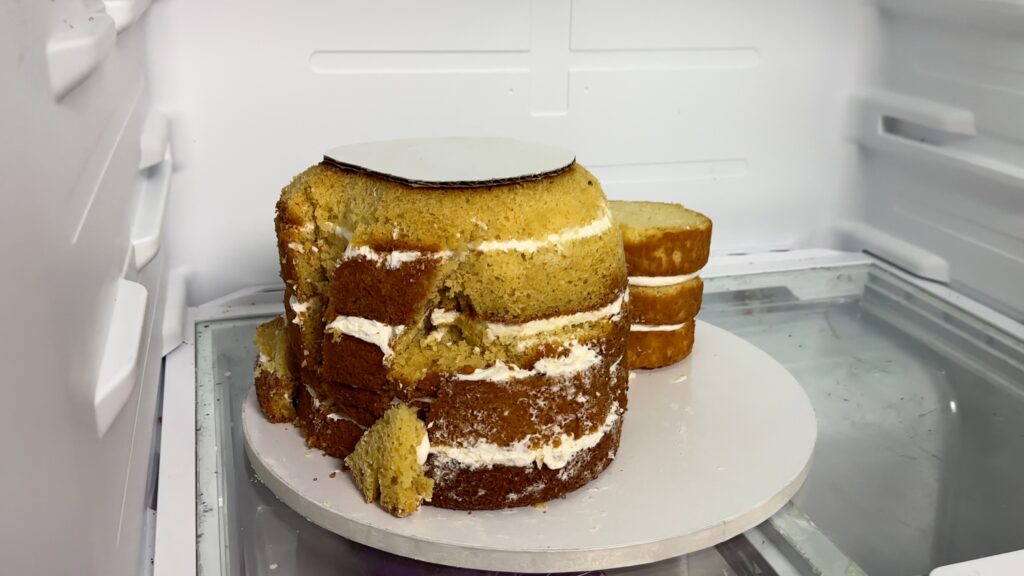
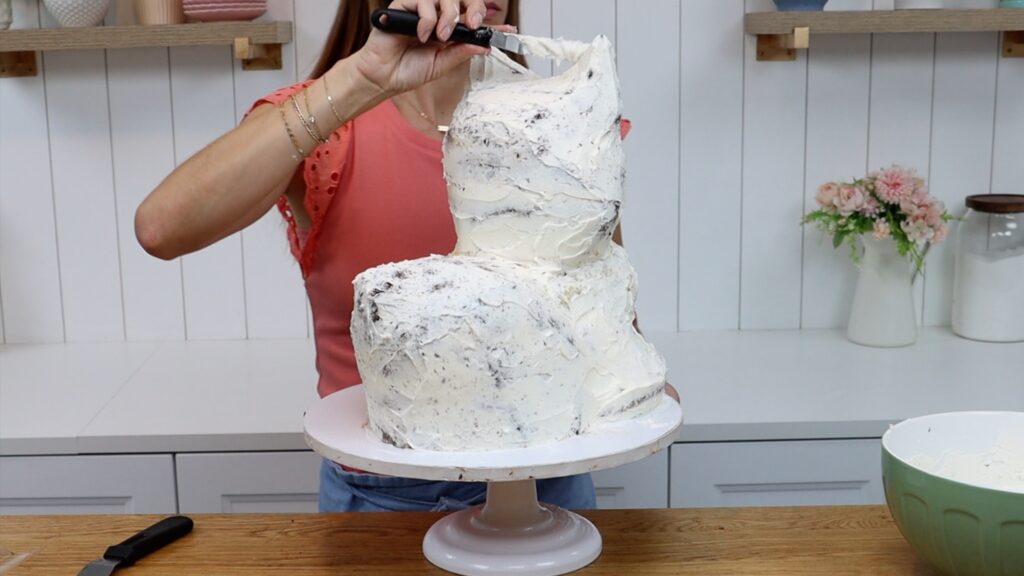
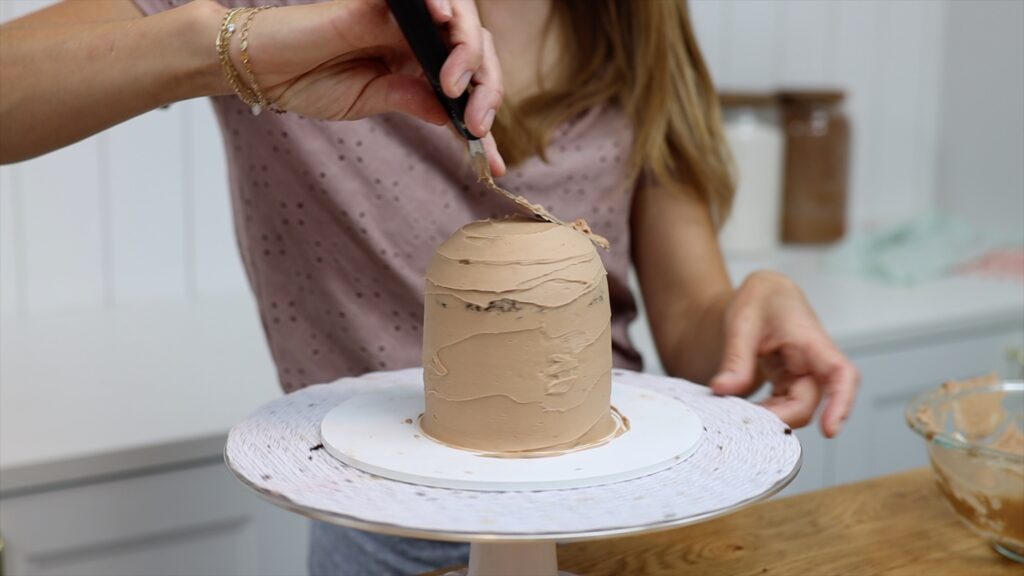
Put the cake into the fridge for 30 minutes or the freezer for 15 minutes. The cold will set the filling to keep the cake stable while you frost it. Spread half of the chocolate buttercream onto the cake, covering the top and the sides. This is a crumb coat and it’s going to be covered up so it doesn’t need to be really neat. It needs to cover the cake so there’s nowhere from crumbs to sneak through. It’s much easier to do this when the cake is cold, so that the layers don’t slide around.
Pop the cake back into the fridge for another 30 minutes or the freezer for 15 minutes. This will set the crumb coat. Then spread on another layer of frosting, which is the final layer. You want to get it as neat as possible so use a straight edged cake comb to smooth it. I have lots of free tutorials on how to get smooth frosting in case you need tips for this part! Put the cake into the fridge and save your leftover chocolate buttercream for later, covering the bowl with plastic wrap.
Make antlers and ears
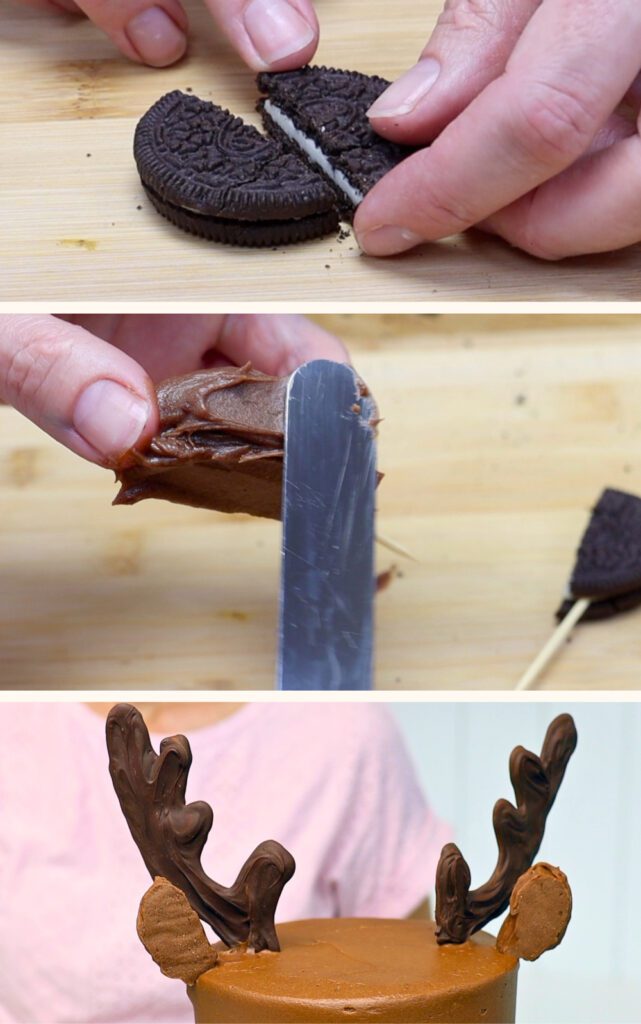
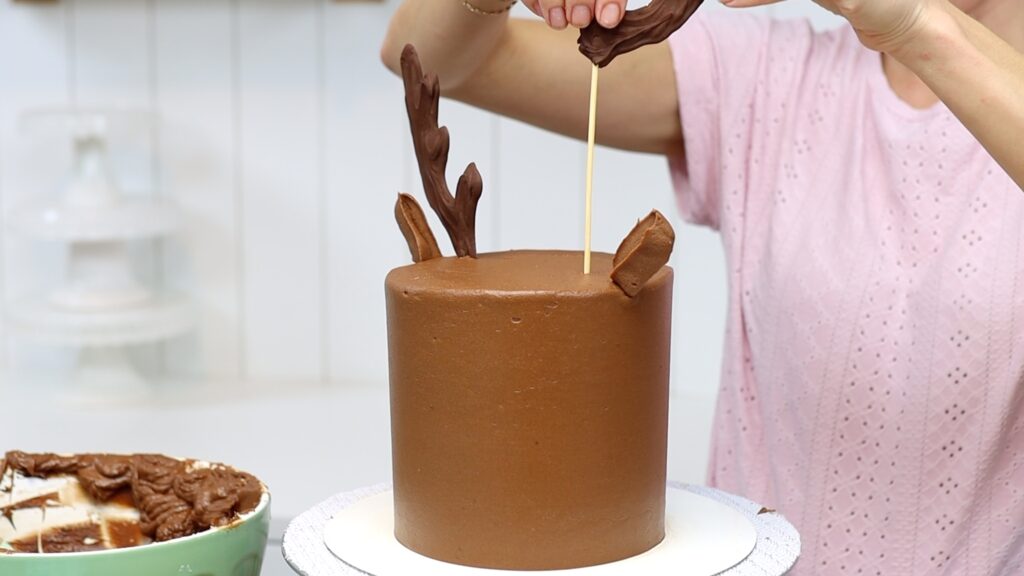
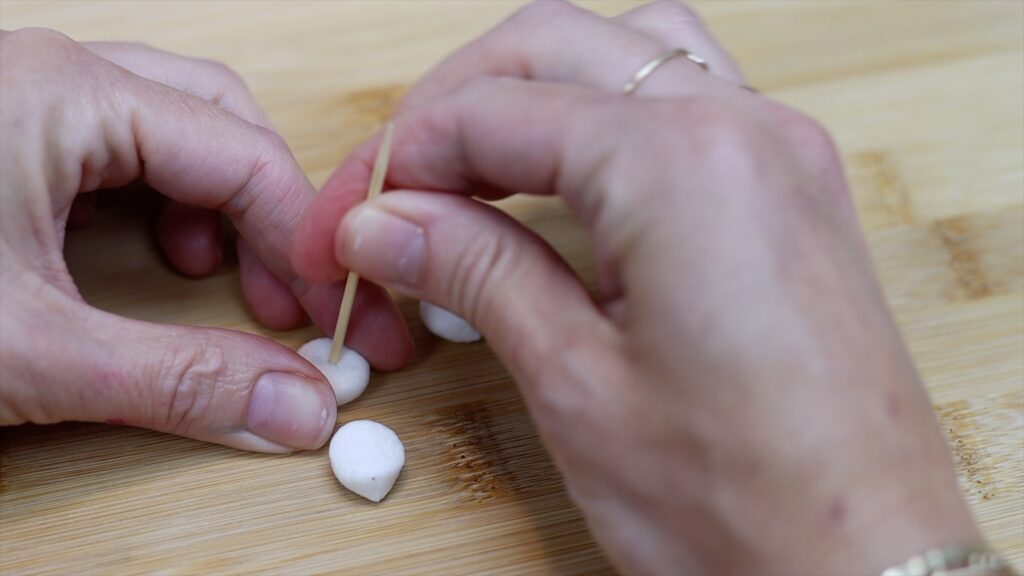
Now for the fun part - making the reindeer’s face. For the ears, cut an Oreo in half and push a toothpick into the filling in the middle. Spread some of the leftover chocolate buttercream to cover these and smooth it with an offset spatula or palette knife. Then place them on parchment or wax paper and put them in the fridge to harden. When the chocolate frosting is firm, push the toothpicks into the cake to attach the ears.
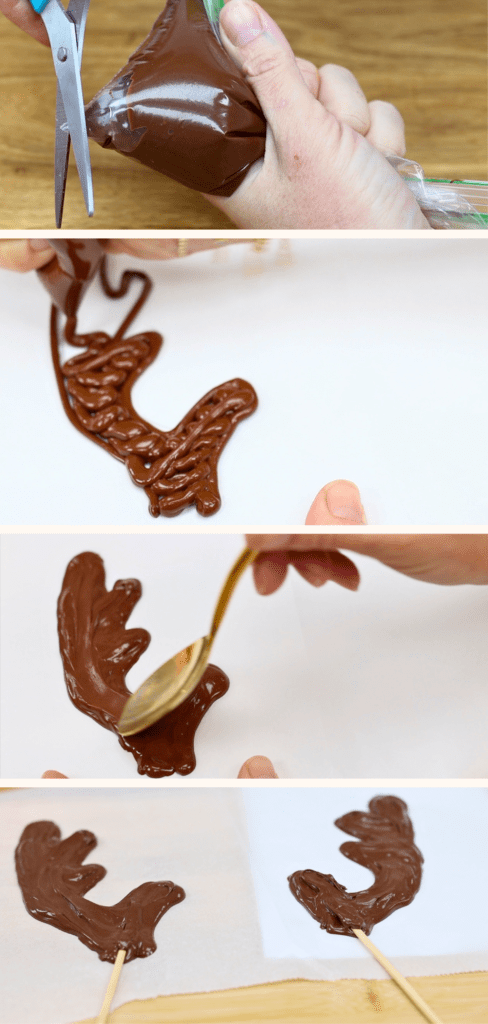
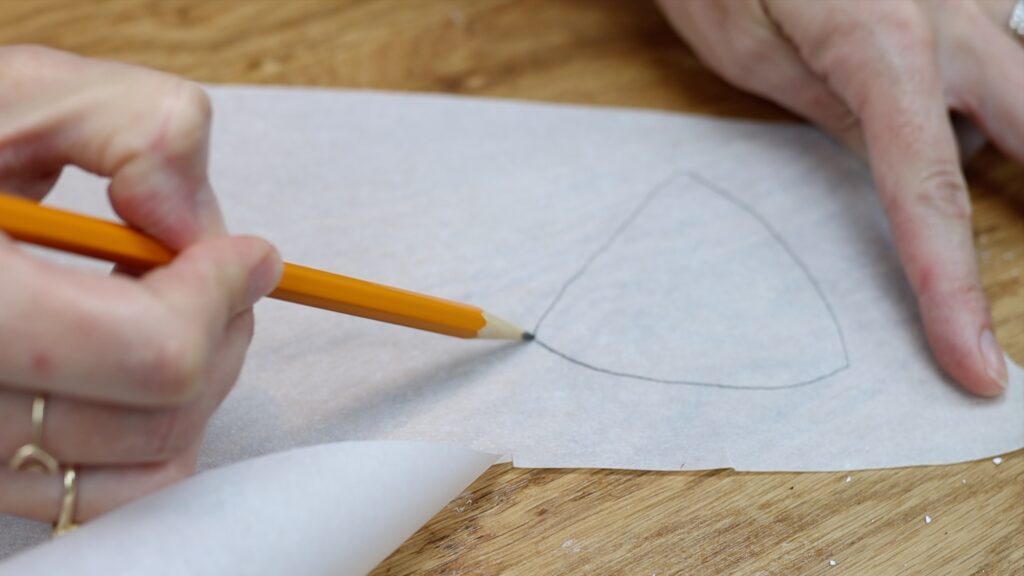
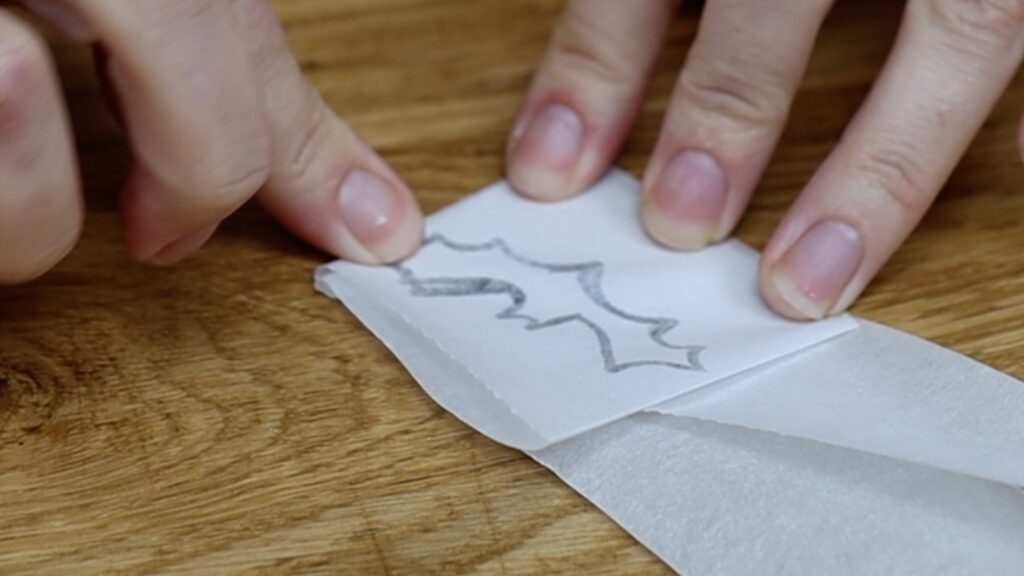
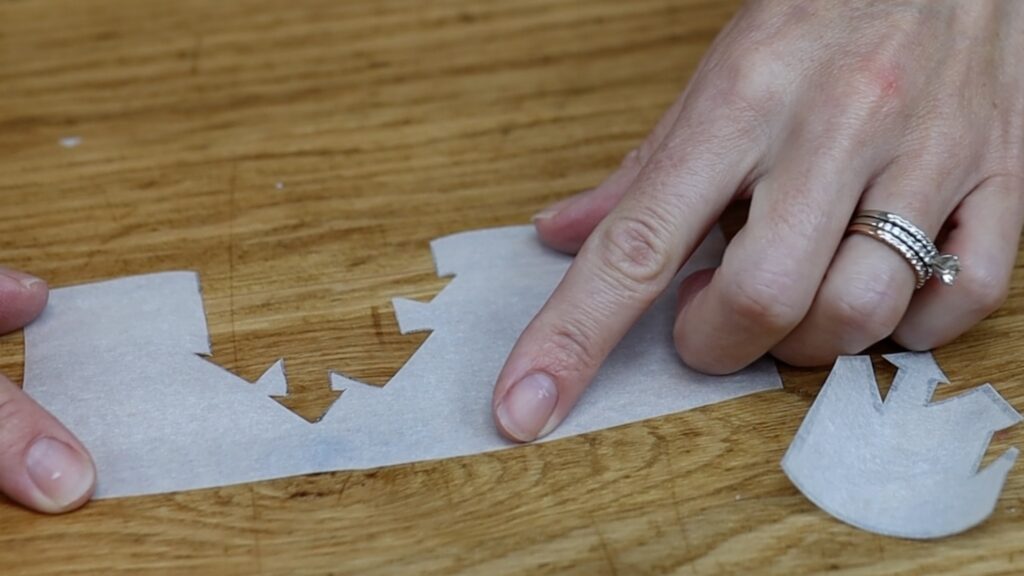
Draw the antlers onto a piece of paper or print an image to trace. Melt half a cup of chocolate chips in the microwave or double boiler. If you overheat chocolate it will seize or burn or get ugly white markings after the chocolate sets. To prevent this, microwave for 30 seconds at 60% power, stir, and repeat. This heats the chocolate gently and gradually.
Spoon the chocolate into a ziplock bag and cut a little piece off one corner. Put a piece of parchment or wax paper over the antler outline and place these on a cutting board or tray. This will make it easier to lift the antlers up later. Squeeze the chocolate through the hole you cut to trace the antlers and fill in the outline. Use a spoon to smooth the chocolate and then push a wooden skewer into the bottom of the antler. It should go up a few inches into the antler and the rest will stick out the bottom of the antler. Cover the part within the antler with more chocolate.
Put the antlers into the fridge to set. When they have hardened after about 30 minutes, lift them up and push the wooden skewers into the cake.
Add details to the reindeer's face
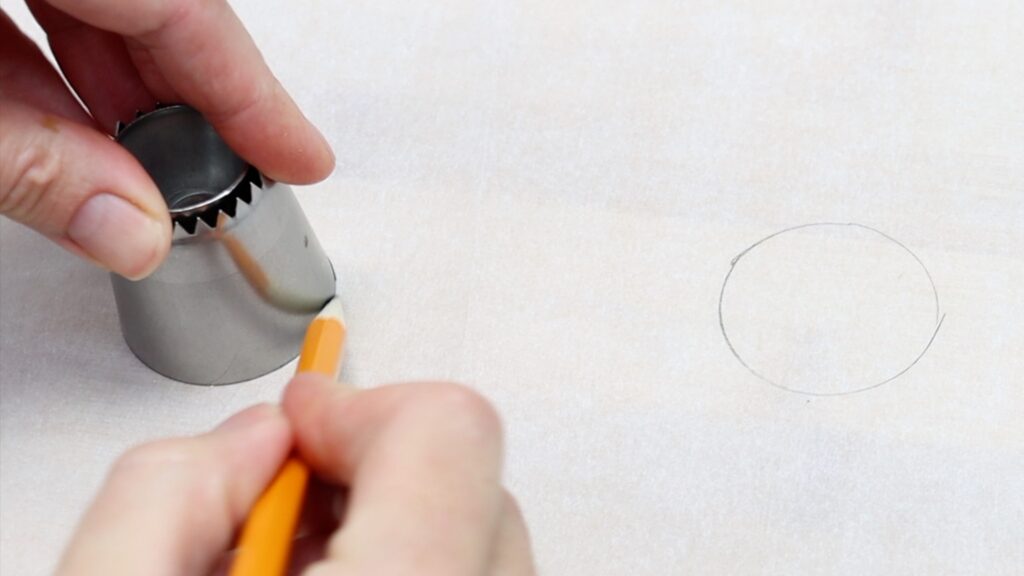
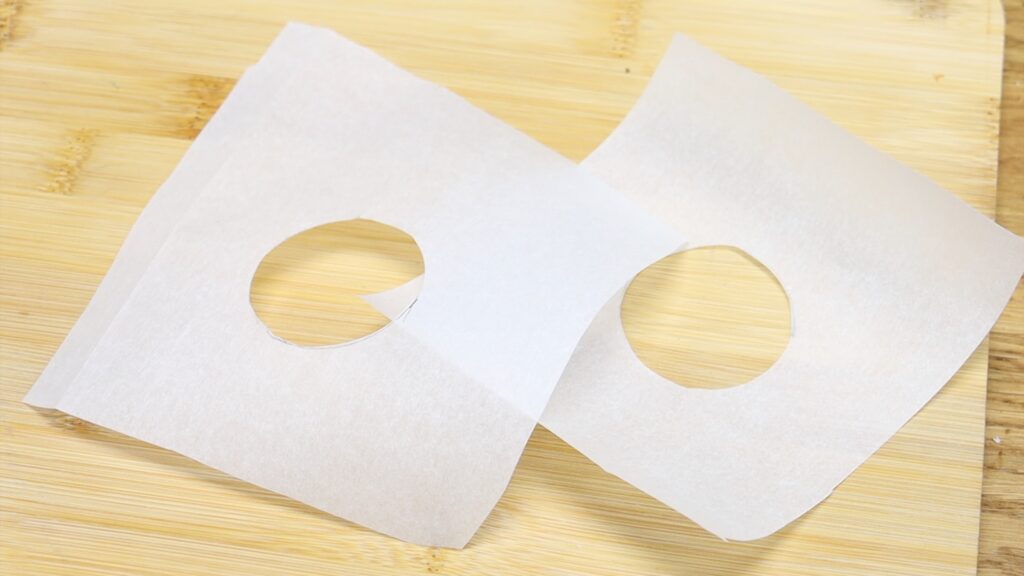
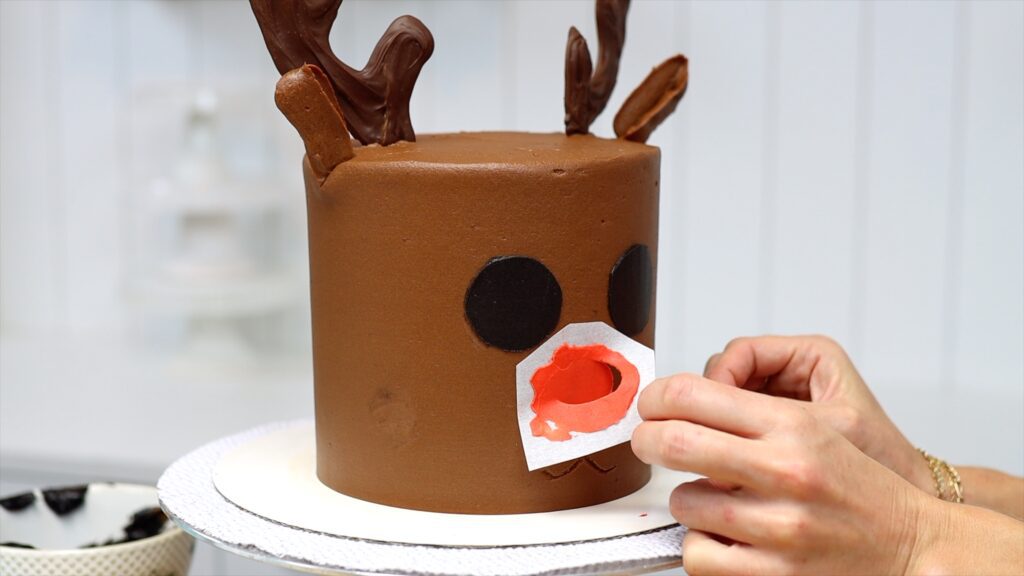
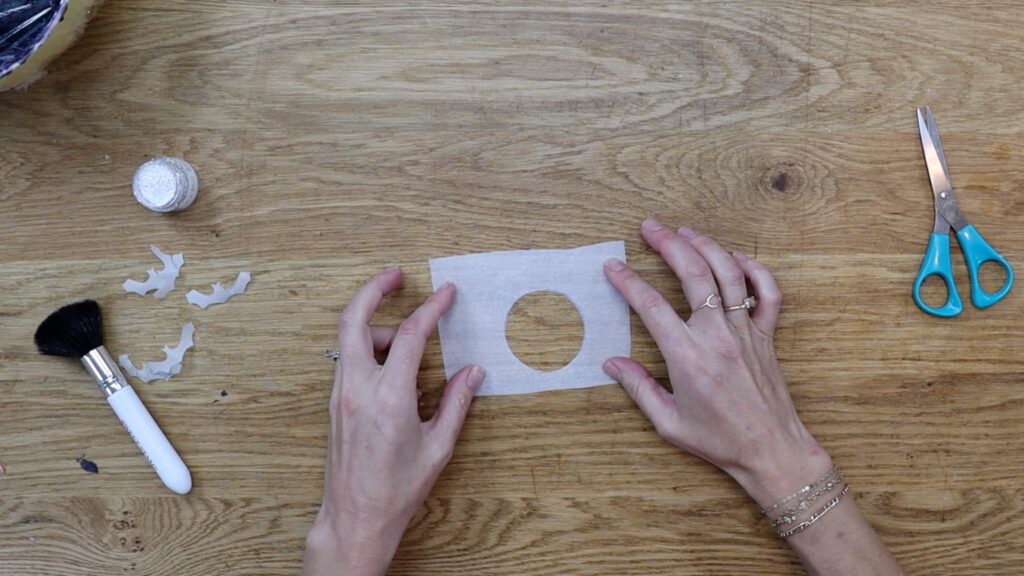
Next, make stencils for the eyes. Trace around something round like a large piping tip onto parchment or wax paper. Cut out the circle leaving the paper around it intact. Leave a bit of space around each eye for your stencils.
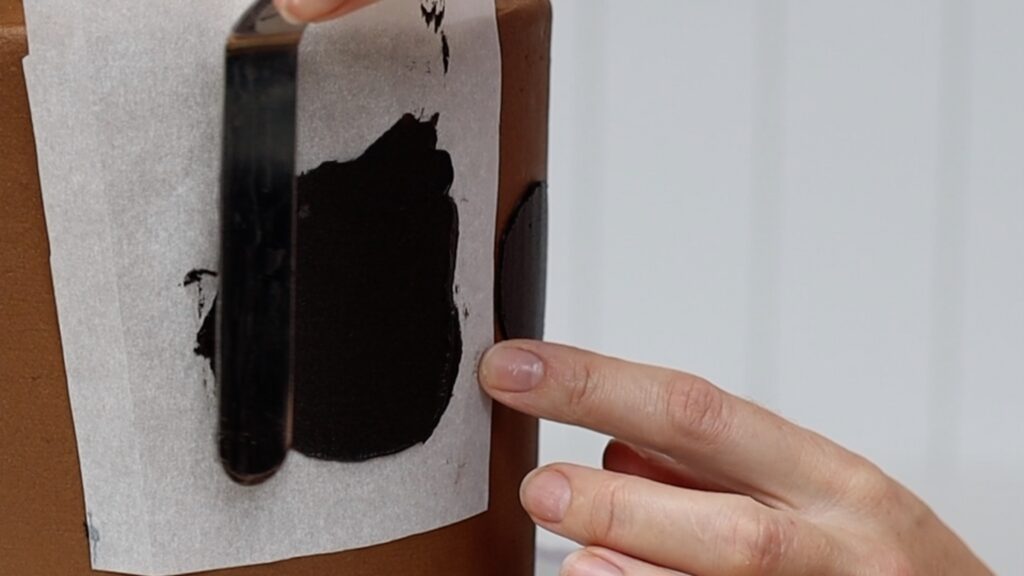
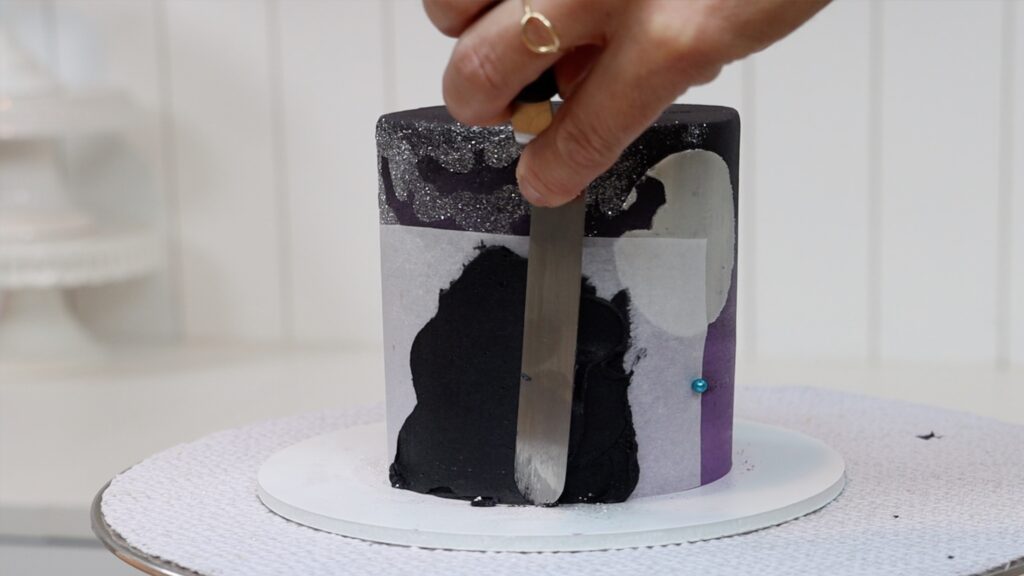
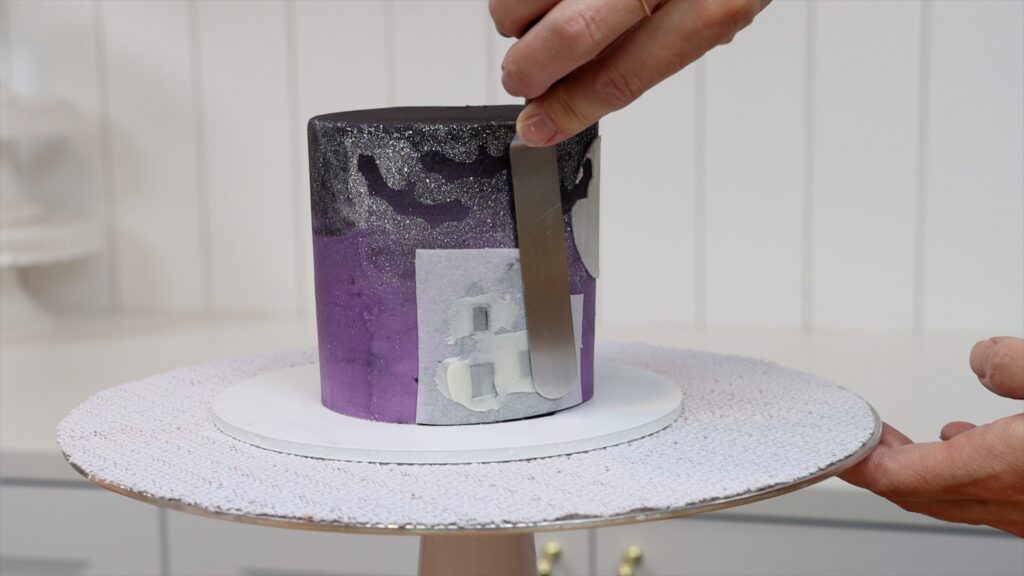
Put about 2 tablespoons of the leftover chocolate buttercream into a bowl and add some black gel colouring. When the frosting on the cake has set in the fridge, take the cake out. Press the eye stencils against the cake and spread the black buttercream over them. Scrape the black buttercream to take off the excess to leave a thin, smooth layer behind. Then peel off the stencil. Do the same for the other eye. You can touch up any smudges around the edges of the eyes with a toothpick.
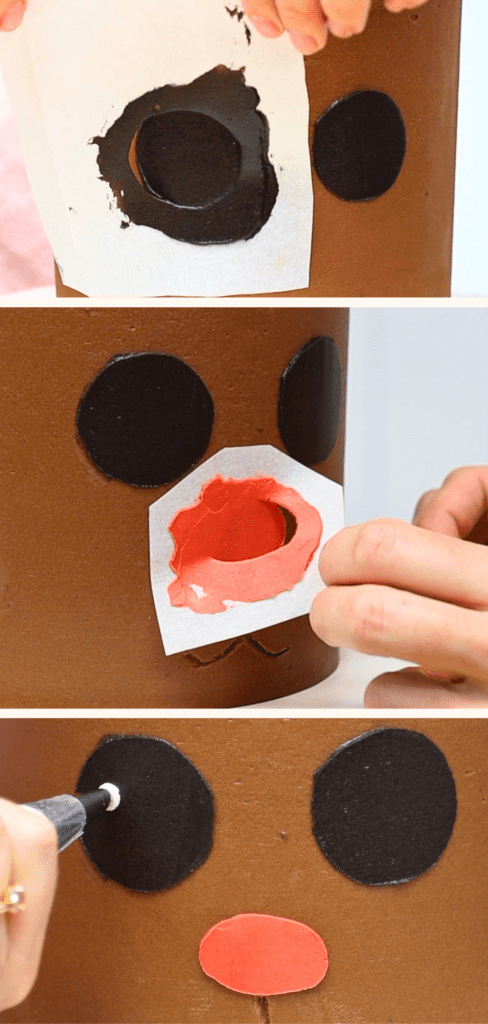
Next you'll need the 2 tablespoons of white buttercream you set aside earlier. Spoon it into a piping bag with a small or medium round piping tip. Pipe a little white dot in the same place on each eye.
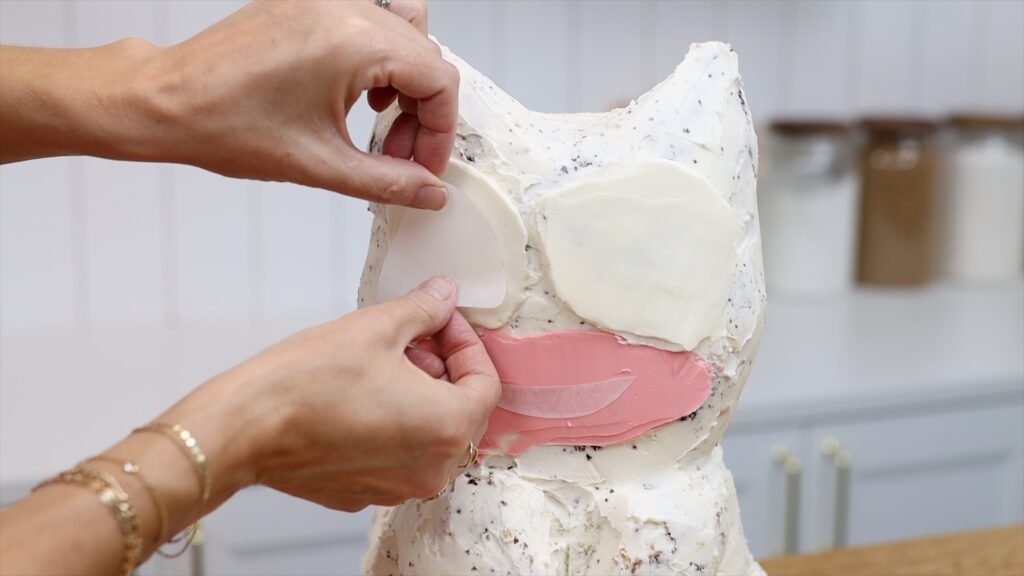
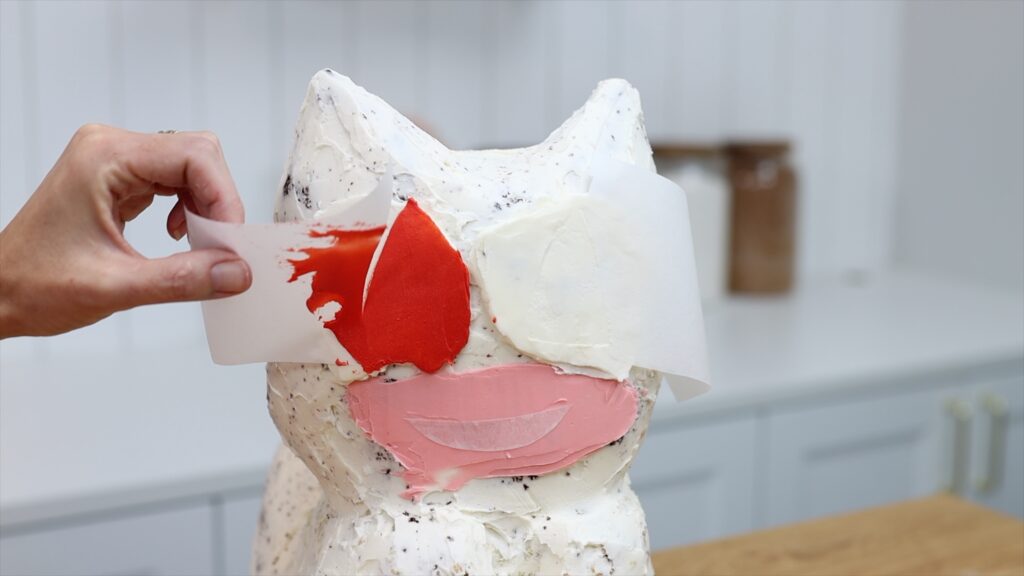
Squeeze the rest of the white buttercream out of a piping bag into a bowl. Add red gel to tint it red for the nose. (If you prefer a brown nose, melt a spoonful of chocolate chips and mix it with a spoonful of the leftover chocolate frosting instead.) Make another stencil for the nose that's oval shaped instead of round. Press the stencil against the cake and spread the red buttercream over it. Smooth the buttercream and peel the stencil off.
For the mouth, carve a smile using a petal piping tip. You could pipe it with black buttercream but my hands are too shaky to do that neatly! If you carve it, a toothpick is great for picking off any crumbs of buttercream along the carved lines.
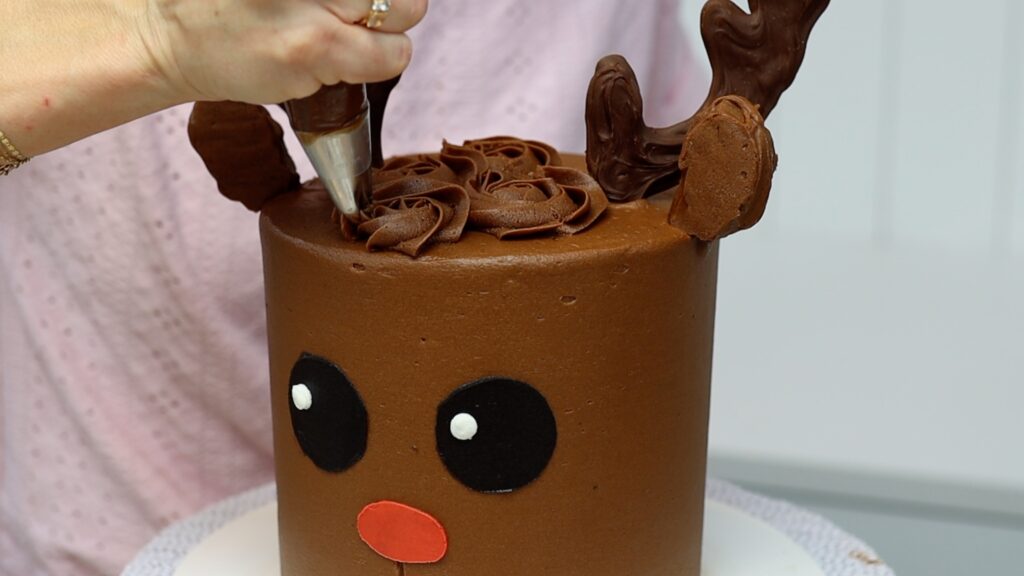
Put the rest of the chocolate buttercream into a piping bag with a star piping tip. I used a 1M. Pipe a few rosettes or swirls onto the top of the cake to make a mane.
How to serve this reindeer cake
The cake is safe to transport because the ears and antlers are secured with skewers so they won’t topple over. I do recommend storing this cake in the fridge to keep everything fresh and stable. Take it out of the fridge two hours before you serve it, so the cake and filling and frosting come to room temperature. That’s when they taste the best!
This reindeer is so cute and also so delicious! If you have any leftovers, press plastic wrap against the cut surfaces to seal them so they don’t dry out. Then put the cake into the fridge and it will stay moist for up to a week!
Watch a video showing how to make this reindeer cake:
Save this tutorial for later by pinning this to Pinterest:
This adorable reindeer cake is delicious and so easy to make!
Ingredients
UnitsScale
For the cake layers:
2cups hot water
1cupcocoa powder
1cupunsalted butter
2 1/4cupswhite sugar
4 eggs
2 teaspoons vanilla extract
2 2/3cupsplain flour
1/4 teaspoon baking powder
2 teaspoons baking soda
1/4 teaspoon salt
For the filling and frosting:
2 1/2cupsunsalted butter at room temperature
2lbpowdered sugar
1/2 teaspoon salt
1/2 tablespoon vanilla extract
1/2cupchocolate chips
1/4cupcocoa powder
5 tablespoons hot water
1 tablespoon cream cheese
3 peppermint candies
For the decorations:
1/2cupchocolate chips
1 Oreo cookie
Instructions
To make the cake layers:
In a bowl, whisk together hot water and cocoa powder until the cocoa has dissolved. Set aside to come to room temperature.
In a mixer with a beater (paddle) attachment, mix butter with sugar on medium speed until pale and creamy, about two minutes. Scrape down to the bottom of the bowl once during mixing to make sure no butter is stuck at the bottom.
Add eggs one at a time, mixing on the lowest speed after each addition until incorporated, about 30 seconds.
Add vanilla and mix on lowest speed for about 30 seconds to combine.
In a bowl sift flour, baking soda, baking powder and salt. Add a third of the flour mixture to the mixing bowl and mix on lowest speed to incorporate.
Add half of the cocoa mixture to the mixing bowl and mix on lowest speed to incorporate. Repeat with another third of the flour mixture, then the remaining cocoa powder mixture, and then the remaining flour mixture. Mix just until the ingredients are combined.
Grease the inside (base and sides) of four 6" pans with non-stick spray, butter or oil. Divide batter between the cake pans.
Bake at 160ºC or 325ºF for 35 minutes, or until a toothpick inserted into the middle of the cake comes out clean.
Let cakes cool in their pans for 10 minutes. Use a spatula to loosen cake from the edges of the cake pan and then turn onto a wire cooling rack. Leave to cool completely.
To make the filling and frosting:
Sift the sugar to remove any lumps and check that the butter is at room temperature - you should be able to slice through it easily with a spatula.
In a mixer with a beater (paddle) attachment, mix butter for a few seconds until smooth. Add a quarterof the powdered sugar and salt (if using) and mix on the lowest speed until incorporated, about one minute.
Scrape down to the bottom of the mixing bowl with a spatula to loosen any butter and sugar and add the next quarter of powdered sugar and mix for another minute on low.
Scrape down to the bottom of the bowl, add another quarter of the powdered sugar, mix for one minute on low, scrape, and add the final quarter of the powdered sugar. Mix for one more minute on low, adding the vanilla once everything is mixed together and continuing to mix until it's incorporated.
Set aside 2 tablespoons of buttercream to for the eyes and nose later, adding a few drops of milk to thin it out slightly.
Optionally, set aside 1/2 cup of buttercream. Blend peppermints in a mixer or food processor or put them into a sandwich bag and bang them with a rolling pin to crush them. Add them to the buttercream along with the cream cheese and stir to combine. Set aside to use for the cake filling.
Pour chocolate chips into a small, microwave safe bowl. Microwave for 30 seconds at 60% power. Stir and repeat until the chocolate is smooth. Let is cool to room temperature.
In another small bowl, mix cocoa powder and hot water to make a thin paste. Leave to cool.
Add melted chocolate and cocoa mixture to the remaining buttercream and stir to combine. This will be your filling and frosting.
To put the cake together:
Spread some buttercream onto the middle of a cake board and press your first cake layer down onto it to attach it.
Spread on a layer of peppermint cream cheese filling and then place another cake layer on top. Spread on a layer of chocolate buttercream and then place another layer on top. Finish with another layer of peppermint cream cheese filling and then the final cake layer.
Put the cake into the fridge for 30 minutes or the freezer for 15 minutes to set the filling.
Spread half of the remaining chocolate buttercream onto the cake as a crumb coat.
Return to the fridge for another 30 minutes or the freezer for another 15 minutes.
Spread on another layer of chocolate buttercream. Smooth the frosting, saving the leftovers by covering the bowl with cling film until later. Put the cake Ito the fridge to set the frosting while you make the decorations.
To make the decorations:
For the ears, cut an Oreo in half and push a toothpick half way into the filling in the middle. Spread some of the leftover chocolate buttercream to cover the Oreo halves, smoothing it. Then place on a cutting board or plate lines with a piece of parchment or wax paper and put into the fridge to chill and harden.
Draw an antler onto a piece of paper and trace it to make a reverse image. Cover with a piece of parchment or wax paper. Melt chocolate chips in the microwave for 30 seconds at 60% power. Stir and repeat until smooth. Spoon into a ziplock bag and cut a small piece off one of the bottom corners. Squeeze the chocolate through the hole to trace the outline of the antlers onto the parchment or wax paper. Fill in the antlers with more chocolate and use a spoon or offset spatula or palette knife to smooth the chocolate. Press a wooden skewer into the bottom of each antler so that about 2 inches of the skewer is over the chocolate and the rest is sticking out below. Cover the top part of the skewer with more chocolate. Put into the fridge to chill and set.
When the ears and antlers have set, lift them off the parchment or wax paper and push the wooden skewers of the antlers and toothpicks of the ears into the top of the cake.
Make stencils for the eyes and nose by cutting three squares of parchment or wax paper about 6 inches wide. Draw or trace a circle (about 1 1/2 inches wide) onto the middle of two pieces of paper and an oval (about 2 inches wide) onto the other. Cut out the shapes leaving the paper around them intact.
Put about 2 tablespoons of the leftover chocolate buttercream into a bowl and add some black gel colouring.
When the frosting on the cake has set in the fridge, take the cake out. Press the eye stencils against the cake and spread the black buttercream over them. Smooth the black buttercream to take off the excess, leaving a thin, smooth layer behind. Then peel off the stencil. Do the same for the other eye. You can touch up any smudges around the edges of the eyes with a toothpick.
Find the 2 tablespoons of white buttercream you set aside earlier. Spoon it into a piping bag with a small or medium round piping tip. Pipe a little white dot in the same place on each eye.
Squeeze the rest of the white buttercream out of a piping bag into a bowl. Add red gel to tint it red for the nose. Press the oval stencil against the cake and spread the red buttercream over it. Smooth the buttercream and peel the stencil off.
For the mouth, carve a smile using a petal piping tip. Use a toothpick to pick off any crumbs of buttercream along the carved lines.
Put the rest of the chocolate buttercream into a piping bag with a star piping tip like a 1M. Pipe a few rosettes or swirls onto the top of the cake.
To store and serve this cake:
Store the cake in the fridge for up to a week. Take it out of the fridge 2 hours before you serve it to let the cake and filling and frosting come to room temperature. This tastes best and makes it easiest to serve!
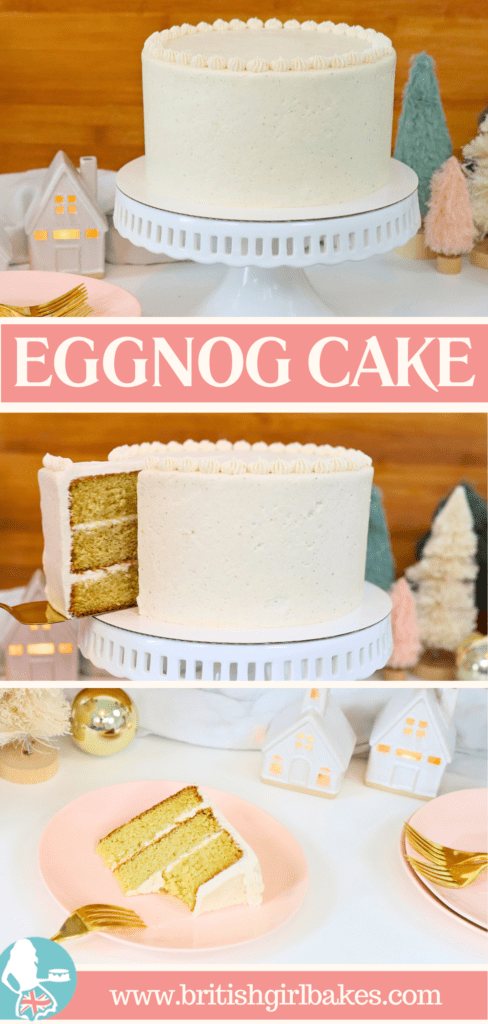
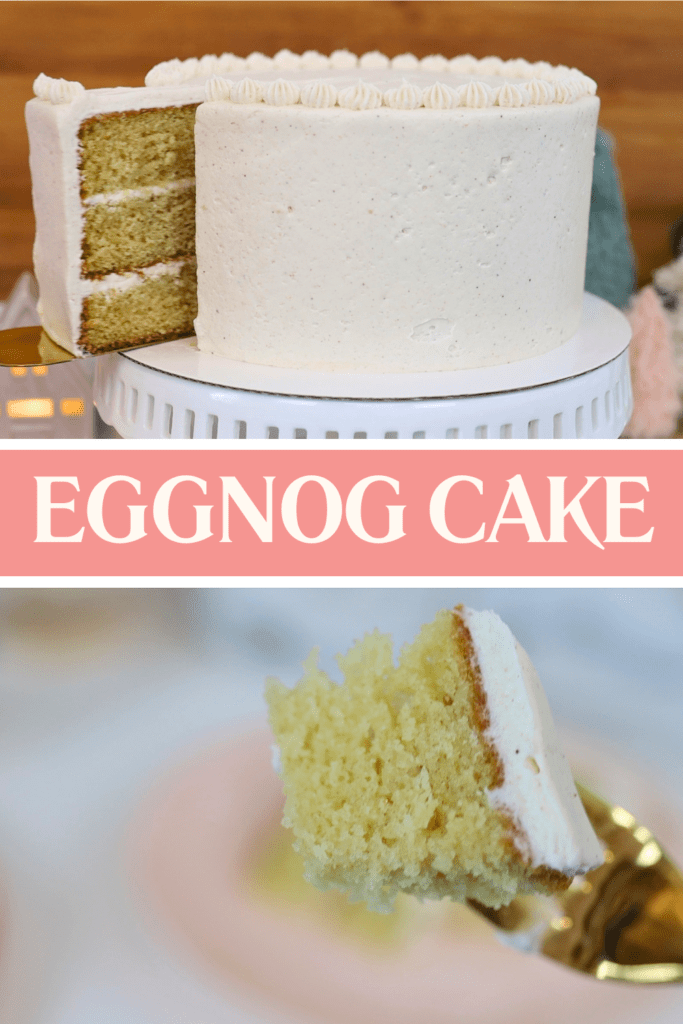
This eggnog cake is festive and decadent! The eggnog frosting is rich, creamy and not too sweet. Buttery vanilla cake layers are optionally spiked with brandy or rum. The combination of flavours is incredible! You'll find the video of how to make this cake at the bottom of the page.
Bake the cake layers
The vanilla cake starts with butter and sugar, eggs, and vanilla. Then add buttermilk and a little bit of oil to keep it moist. Finish with the dry ingredients: flour, baking powder, baking soda and salt.
These bake in three 8” pans at 325F or 160C for 35 minutes. You'll know they're baked when yo poke the middle of the cake and it bounces back up. Let the cakes cool in the pans until you can lift the pans without burning yourself, about 10 minutes. Turn them out onto a wire rack and leave them to cool for about an hour.
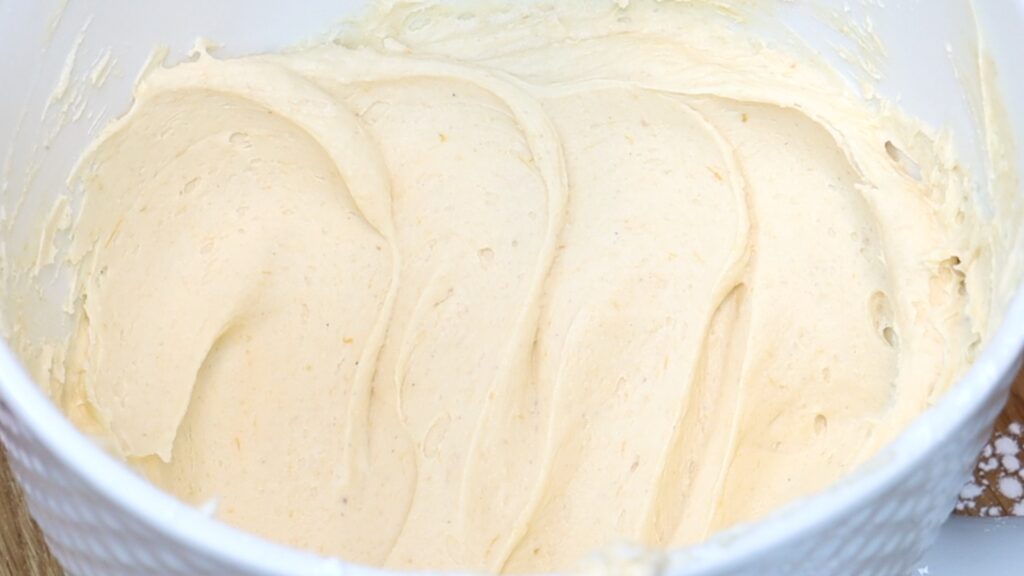
Make the eggnog frosting
Meanwhile, make the eggnog frosting, which is one of my favorite things ever. This is an ermine frosting or boiled milk frosting or cooked flour frosting. All of the names sound awful but trust me, you definitely need to make this!
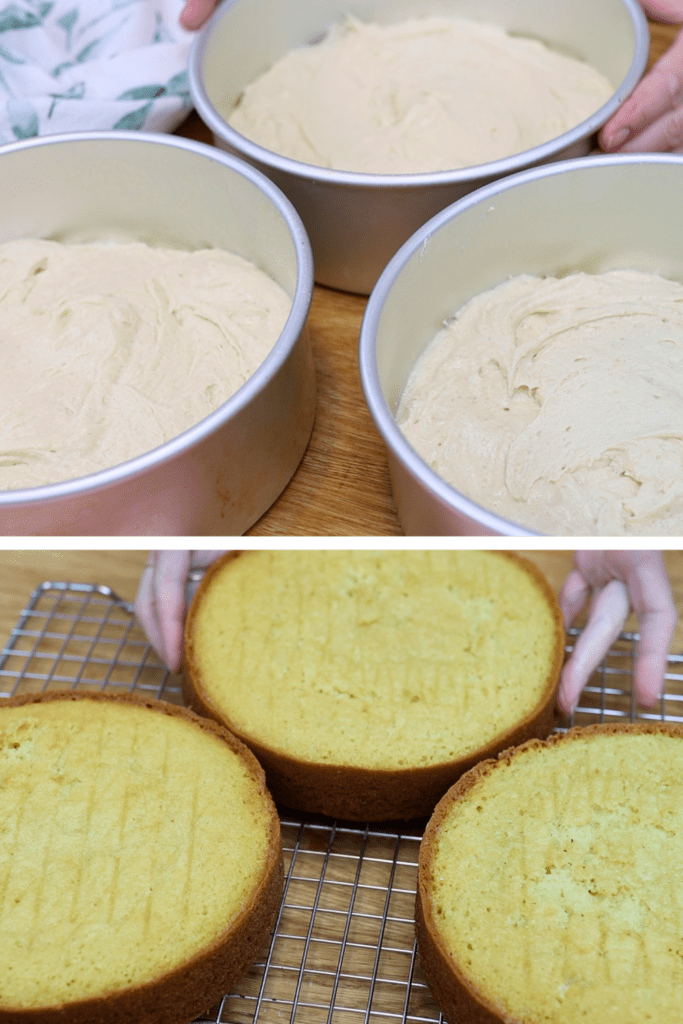
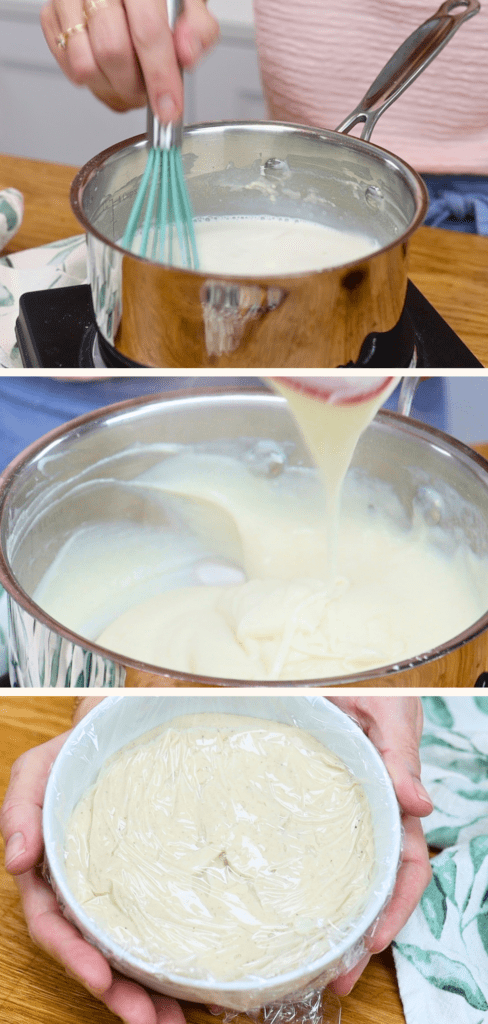
Put flour, milk and salt in a pan and cook over medium heat for about 5 minutes. Whisk it constantly until it simmers so it doesn’t get lumpy. The mixture will thicken suddenly so don't stop whisking for a moment!
As soon as it starts to thicken, switch to a spatula. Scrape along the bottom and sides of the pan. Stir for about two minutes until the mixture thickens enough to leave ribbons when you lift the whisk. It needs to be quite thick - somewhere in between being liquid and solid. Remove the pan from the heat and add vanilla, nutmeg and cinnamon. Mix that in and then pour it all into a bowl. Cover it with plastic wrap and put it in the fridge for about an hour to cool to room temperature.
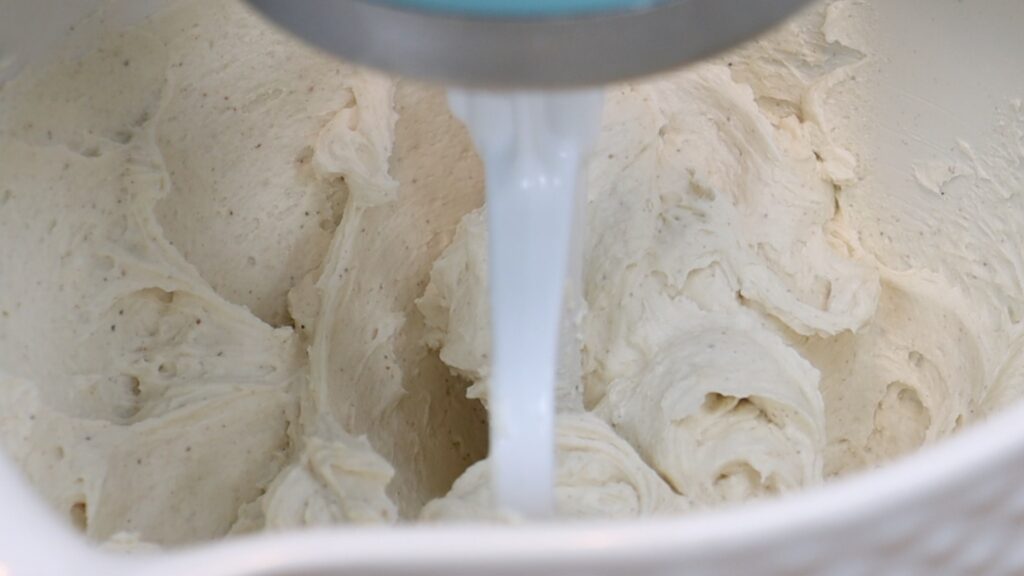
When you take the cooked flour mixture out of the fridge it should have thickened to a pudding-like consistency. Cream together butter and sugar by mixing for 3 minutes, until creamy and lighter in colour. Scoop the flour mixture into the mixing bowl and mix for another minute or two, until smooth.
This frosting is even better than eggnog, in my opinion! It was one of the bestselling flavors when I had a cake shop. If you like this frosting, you’ll love my cookie dough cake, which has a brown sugar version of this frosting!
Optionally, make a spiked simple syrup
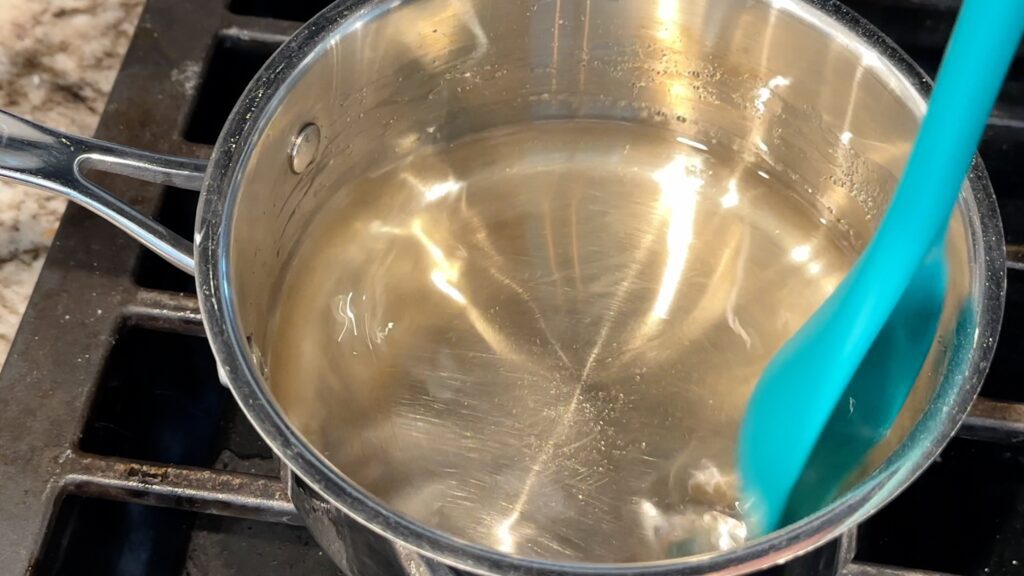
While the eggnog frosting is cooling, make a spiked simple syrup. I don't like to drink brandy or rum but I love the flavour in this cake! Making the syrup is quick and easy. Mix water, sugar and half a tablespoon of rum in a pan. Bring it to a simmer over medium heat, stirring occasionally until the sugar dissolves. Then let this cool.
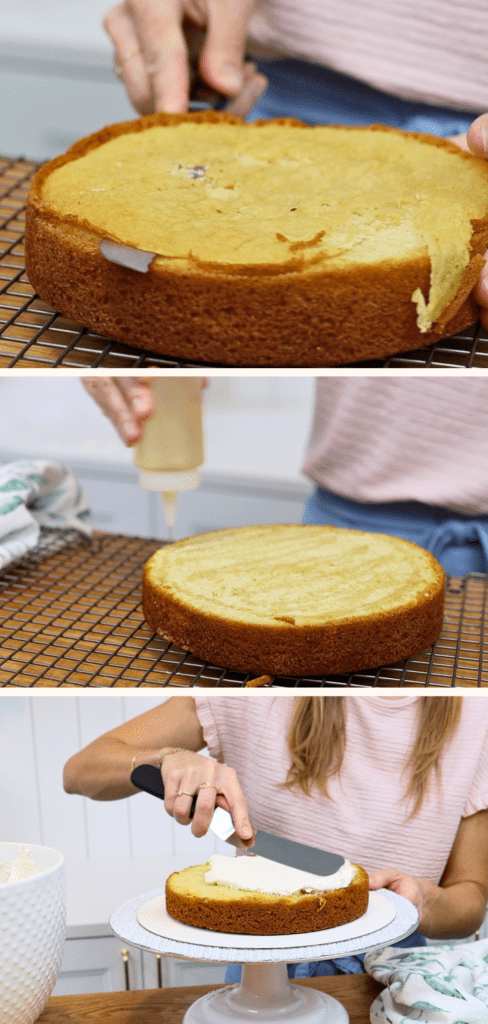
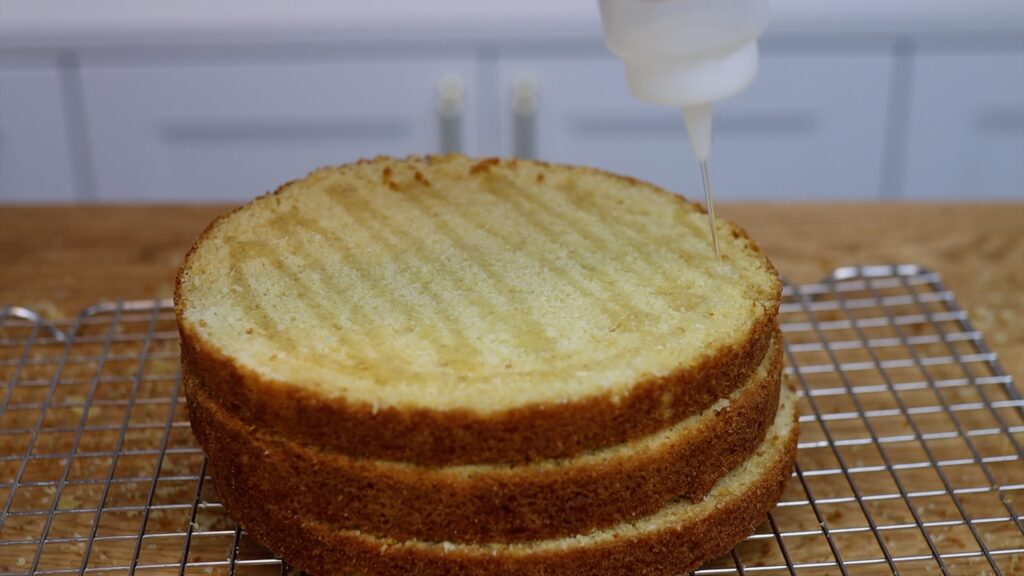
Pour the spiked simple syrup into a squeezy bottle or use a pastry brush and pour it into a bowl instead. Drizzle or brush this generously over your cake layers.
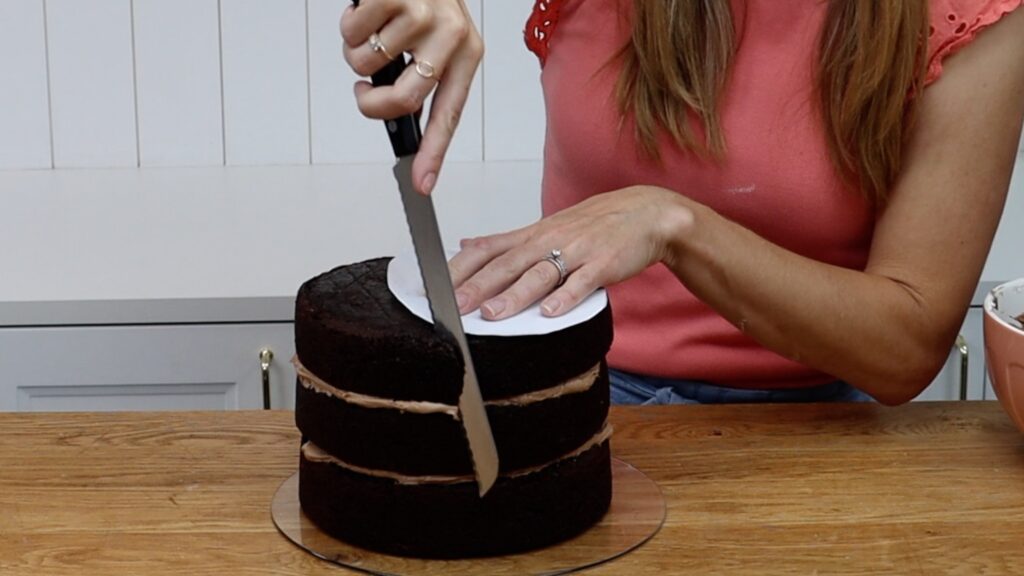
For the best results, level the tops of your cake layers by trimming them with a serrated knife. The syrup will absorb much better into the cake this way.
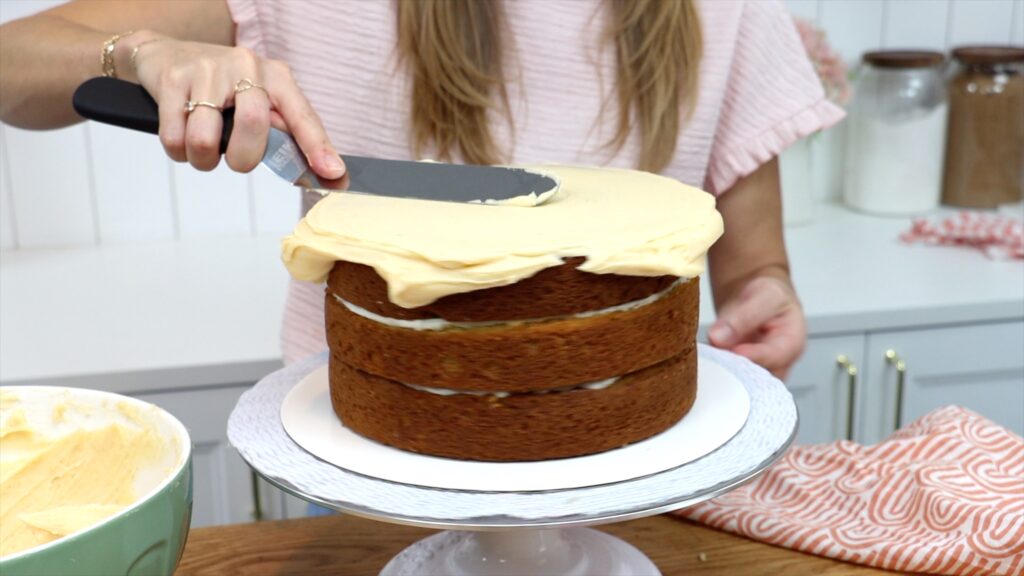
Put the eggnog cake together
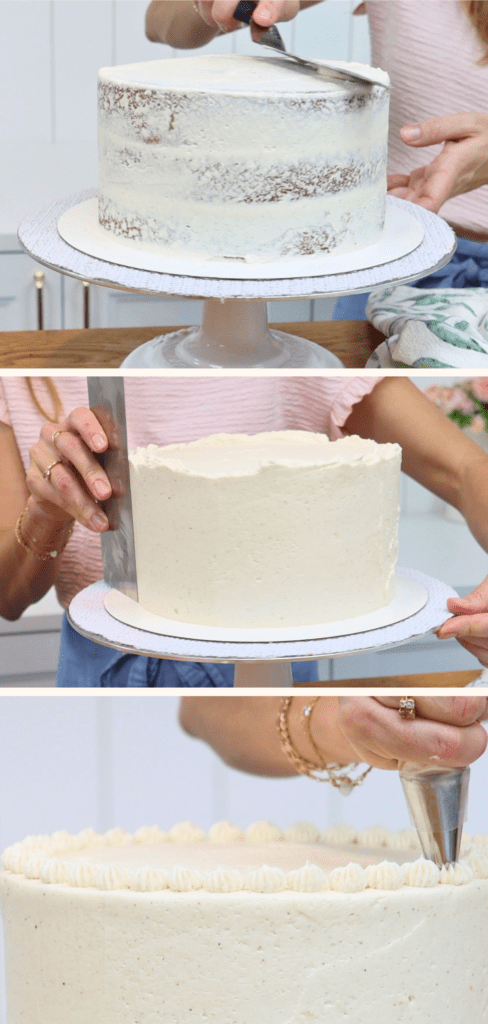
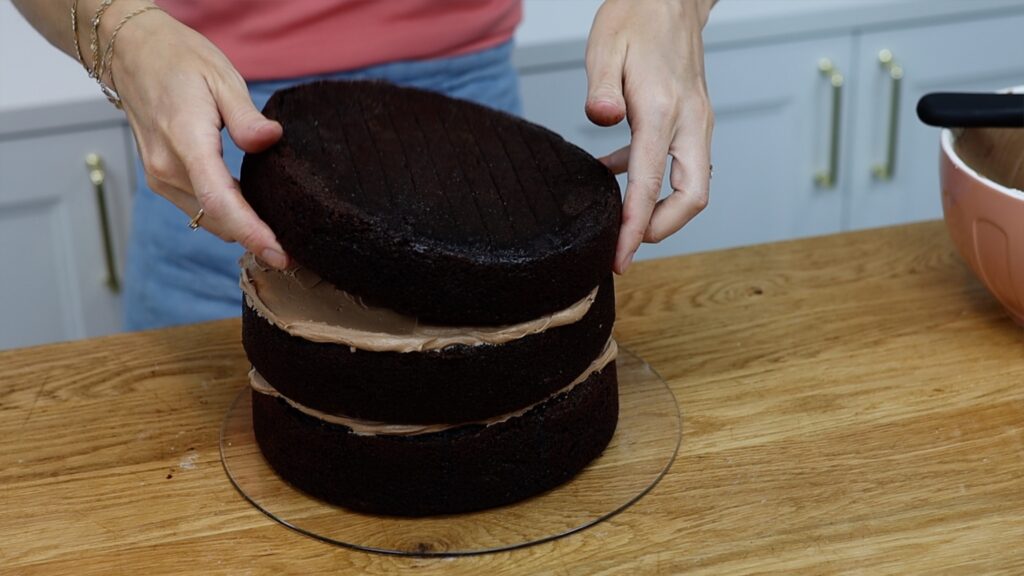
Attach the first cake layer to a cake board with a blob of the eggnog frosting. Now layer the cake with more eggnog frosting. It’s on theinside ofthe cake and also on the outside. Yum!
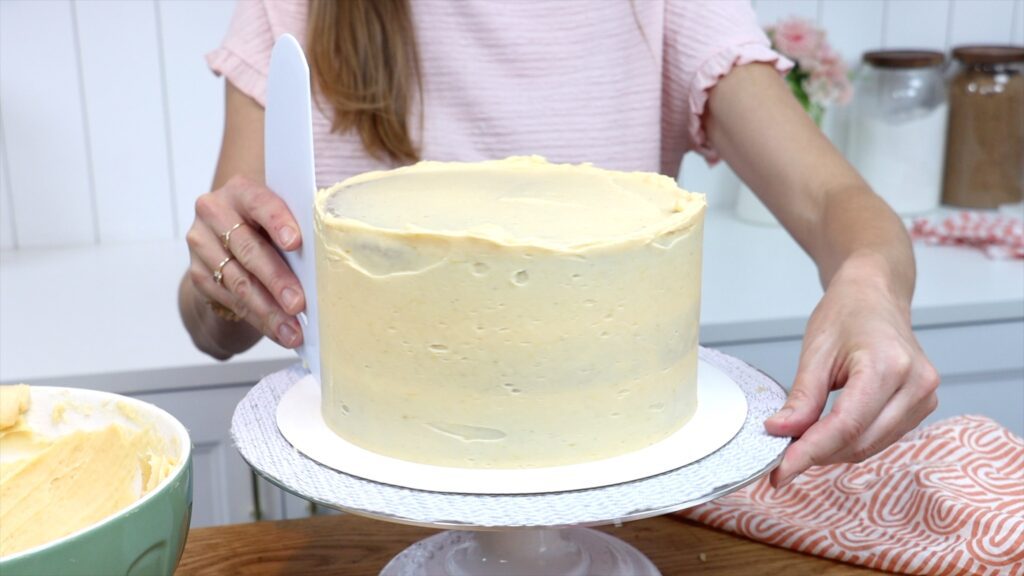
Cover the cake with a thin layer of frosting, called a crumb coat. This will trap any crumbs that come off the cake. I like to chill the cake in the fridge for 30 minutes or the freezer for 15 minutes before this. This way the cake is firmer and less crumbly, which makes it easier to frost. Smooth the crumb coat but it doesn’t have to be perfect because it’s going to be covered up soon.
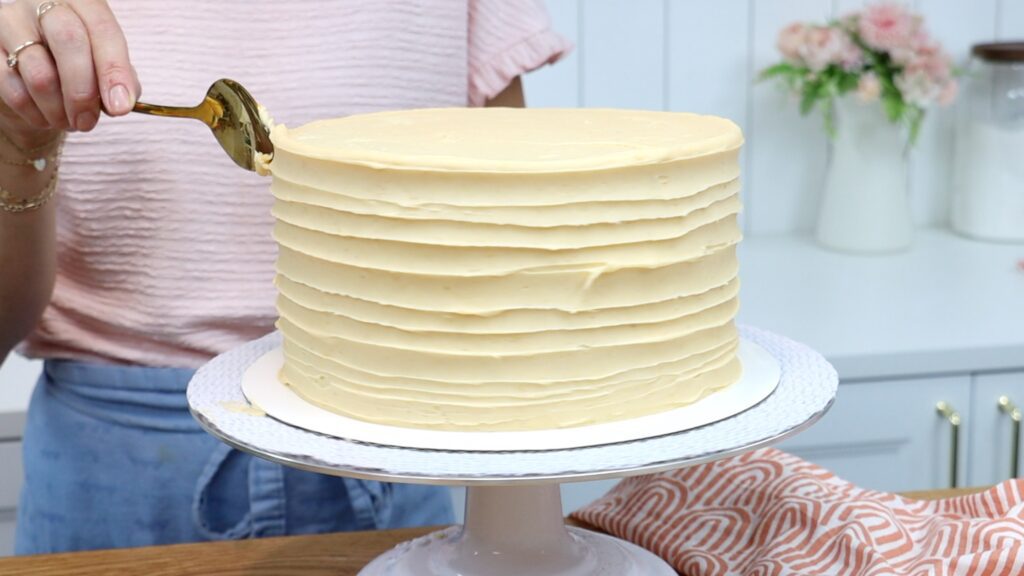
Put the cake in the fridge for 30 minutes or the freezer for 15 minutes to chill and set the crumb coat. Then add another layer of frosting, the final layer. You can smooth this with a cake comb or use a textured cake comb. Or use a spoon to create texture like I did for this Pumpkin Spice Cake!
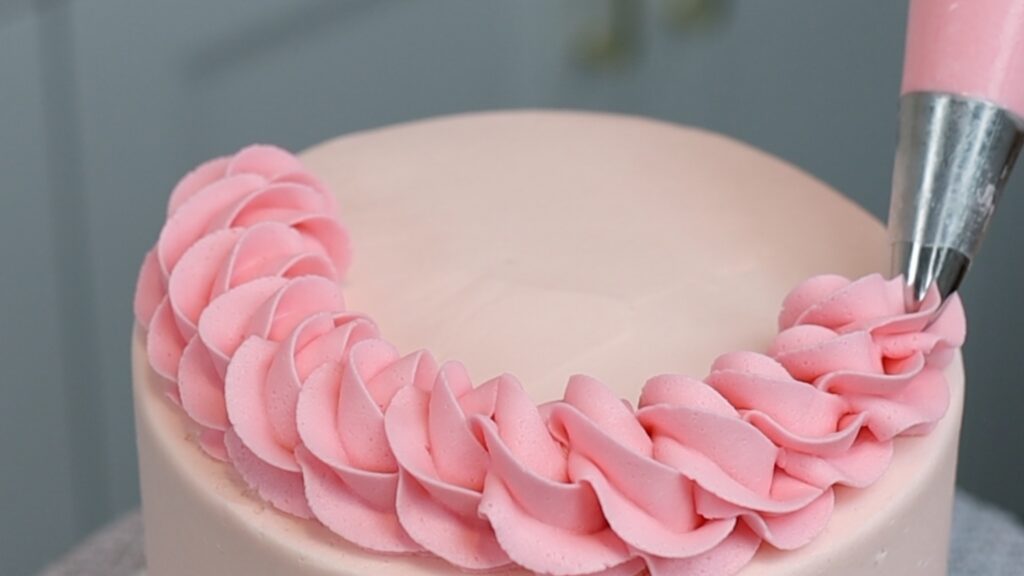
I added little rosettes of eggnog frosting on top using a #32 piping tip, which has a small star shape. However you decorate it, it’s going to taste amazing!
How to store and serve this eggnog cake
Keep the cake in the fridge but take it out about 2 hours before you serve it. This will give it time to come to room temperature. The cake and frosting will soften and not only be easier to slice, but also taste their best!
This is the perfect flavour combination for December cakes! If you want to save a slice for later, put it into the freezer for 30 minutes to set the frosting. Then wrap each slice in cling film or Saran Wrap and freeze for up to 2 months. This is perfect is you crave eggnog in January or February! Just pull a slice out and leave it on the counter for a few hours to thaw. It will taste just as good as when it was freshly baked!
Are you going to make this? Tell me in the comments and please leave a recipe review below! I hope you love this cake as much as I do!
This cake is festive and decadent! The eggnog frosting is rich, creamy and not too sweet and the vanilla cake layers are buttery and optionally spiked with brandy or rum. The combination of flavours is incredible!
Ingredients
UnitsScale
For the cake layers:
1 1/2cupsunsalted butter
2cupswhite sugar (granulated sugar)
6 eggs
1 tablespoon vanilla extract
3/4cupbuttermilk
3 tablespoons vegetable oil
3 1/2cupsplain flour (all-purpose flour)
1 tablespoon baking powder
1/2 tablespoon baking soda
1/2 teaspoon salt
For the eggnog frosting:
1cup whole milk
1/3cupall-purpose flour (plain flour)
1/2 teaspoon salt
2 teaspoons vanilla
1/4 teaspoon nutmeg
1/8 teaspoon cinnamon
1cupunsalted butter
1cupgranulated white sugar
For the spiked simple syrup:
1/2cupgranulated white sugar
1/2cupwater
1/2 tablespoon brandy or rum or bourbon
Instructions
To make the cake layers:
Using a mixer with a beater/paddle attachment (not a whisk), beat room temperature butter and sugar on medium speed until pale and creamy, about 3 minutes. Scrape down to the bottom of the bowl once during mixing to make sure no butter or sugar is stuck at the bottom.
Add room temperature eggs one at a time, mixing on the lowest speed after each addition for 30 seconds. Scrape down to the bottom of the bowl to make sure everything is incorporated before adding the next egg.
Add vanilla and mix for about 30 seconds to combine. Add room temperature buttermilk and oil and mix on the lowest speed to incorporate.
In a bowl, sift flour, baking soda, baking powder and salt. Add to the mixing bowl and mix on lowest speed to incorporate, scraping down to the bottom of the mixing bowl to check that batter is evenly mixed.
Grease three 8" baking pans with non-stick oil spray or butter. Divide batter equally between the cake pans.
Bake at 160ºC or 325ºF for 35 minutes or until the cake bounces back up when you poke it.
Leave cakes to cool in their pans for 10 minutes. Use a spatula to loosen the cakes from the edges of the pans and then turn onto a wire cooling rack. Leave to cool completely.
Optionally, when the cakes have cooled you can use a serrated knife like a bread knife to trim off any domed tops of the cake layers to leave them level.
To make the eggnog frosting:
Put flour, milk and salt in a pan and cook over medium heat for about 5 minutes. Whisk it constantly until it simmers to prevent lumps. When the mixture thickens, switch to a spatula. Scrape along the bottom and sides of the pan, stirring for about two minutes until the mixture thickens enough to leave ribbons when you lift the spatula.
Remove the pan from the heat and stir in vanilla, nutmeg and cinnamon. Pour the mixture into a bowl and cover it with plastic wrap (e.g. cling film / Saran Wrap), pressing it down to touch the surface of the mixture. Put it into the fridge for about an hour to cool to room temperature.
Mix butter and sugar at medium speed until creamy and lighter in colour, about 3 minutes. Add cooled flour mixture and mix for another minute, until smooth.
To make the spiked simple syrup:
1. Mix water, sugar and rum, brandy or bourbon in a pan. Bring it to a simmer over medium heat, stirring occasionally until the sugar dissolves. Let this cool and then drizzle generously over cake layers with a squeezy bottle or brush with a pastry brush.
Then pour it into a squeezy bottle or use a pastry brush to drizzle or brush this over your cake layers. You can do this on the top of the layers as they are, or if they’re domed, level the tops with a serrated knife and the syrup will absorb much better like this.
To put the eggnog cake together:
Spread a bit of eggnog frosting onto the middle of a cake board or plate and press your first cake layer down to attach it. Spread eggnog frosting to cover the top of the cake and then place another cake layer on top. Repeat with another layer of eggnog frosting and the final cake layer.
Put the cake in the fridge for 30 minutes or the freezer for 15 minutes to chill and set. Then spoon half of the remaining eggnog frosting on top and spread with an offset spatula or palette knife to cover the cake. Use a straight edged cake comb or frosting smoother to smooth the frosting but it doesn't need to be perfect yet! Chill in the fridge for another 30 minutes or freezer for 15 minutes to set this crumb coat of frosting.
Spoon the rest of the eggnog frosting onto the cake and spread to cover the cake. Smooth with a cake comb and optionally, add piping around the top using a star shaped tip like a #32.
You can refrigerate this cake for 2-3 days but take it out 2 hours before serving so that the cake comes to room temperature.
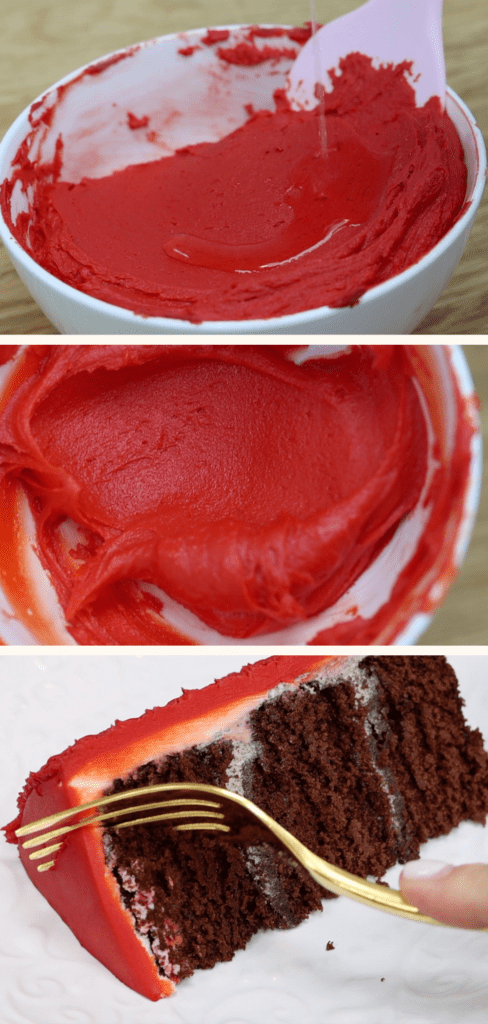
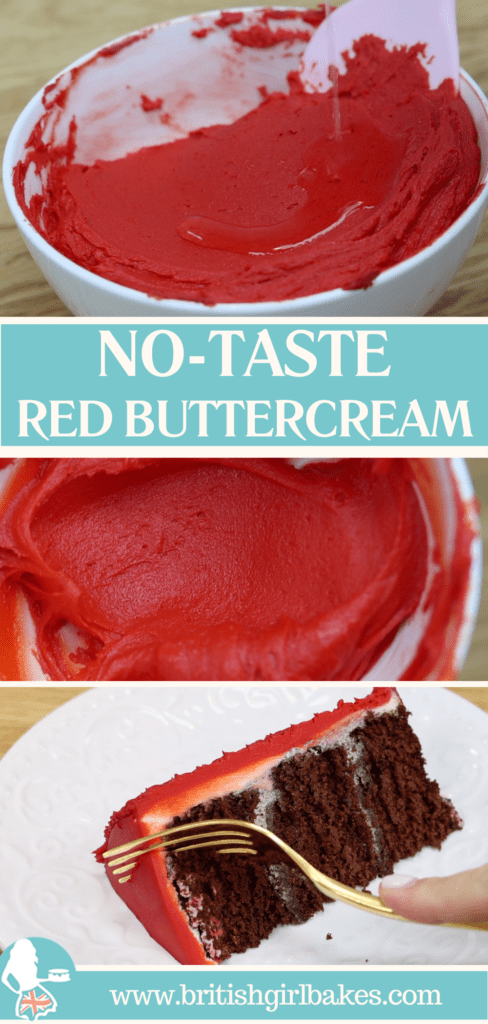
Here are 7 tips for how to make red buttercream that's truly bright red. Use this for cakes at Christmas, Valentine's Day cakes, or any other occasion!
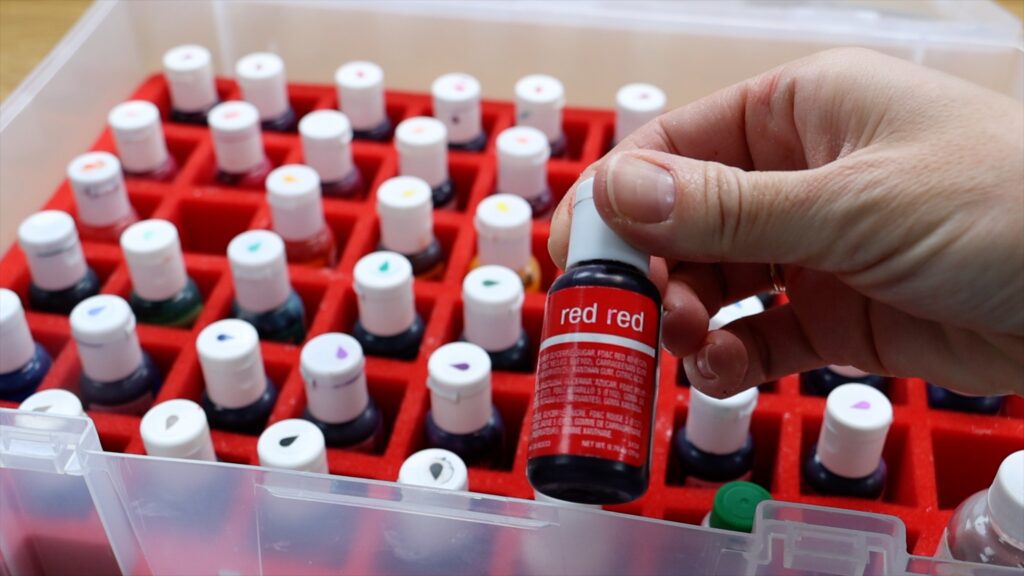
#1 Choose gel colouring over liquid colouring
First of all, I don’t recommend using liquid colours to make red. Liquid colours are watered down so your frosting will be light, even if you use a lot. Using too much liquid colour will make buttercream runny and difficult to work with.
Use gel colouring instead, starting with white buttercream or adding it to leftover orange or pink buttercream. Gels are much more concentrated than liquids and can tint buttercream with just a few drops.
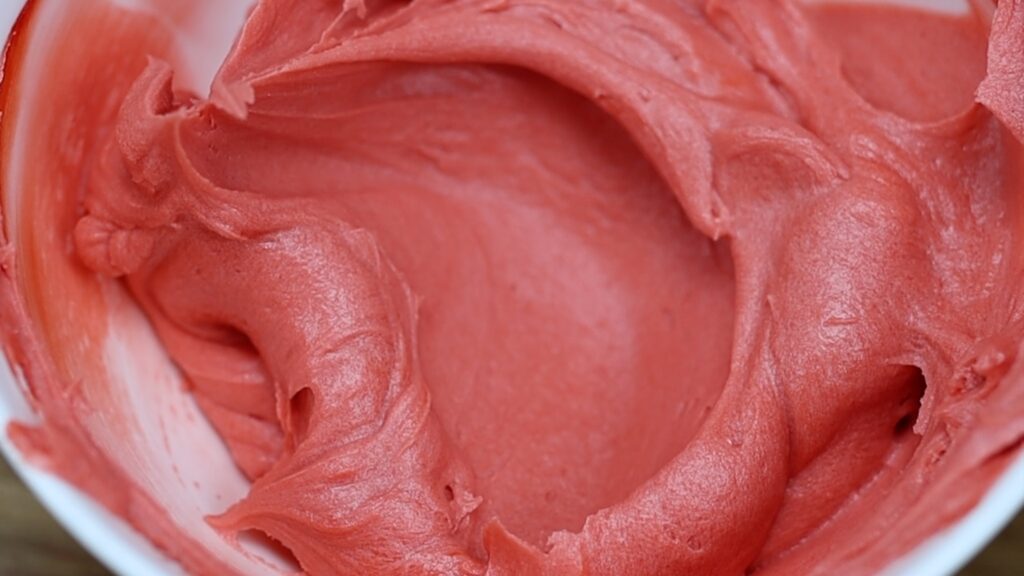
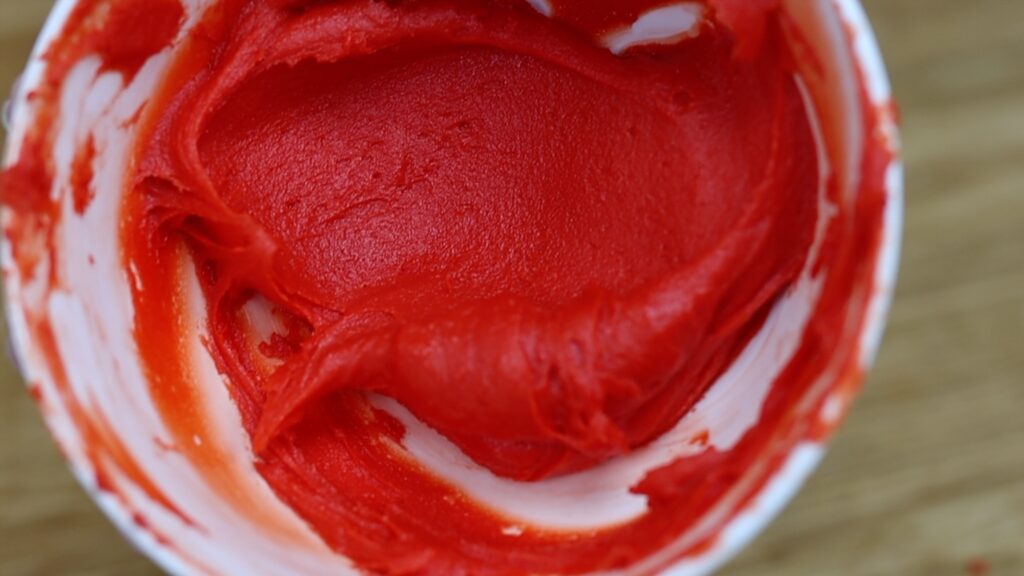
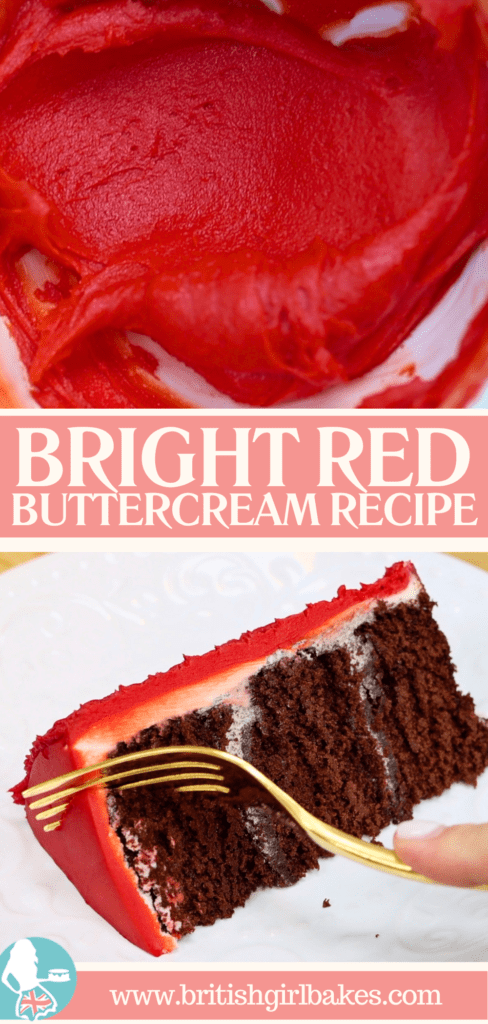
#2 Start with a lighter red than you eventually want
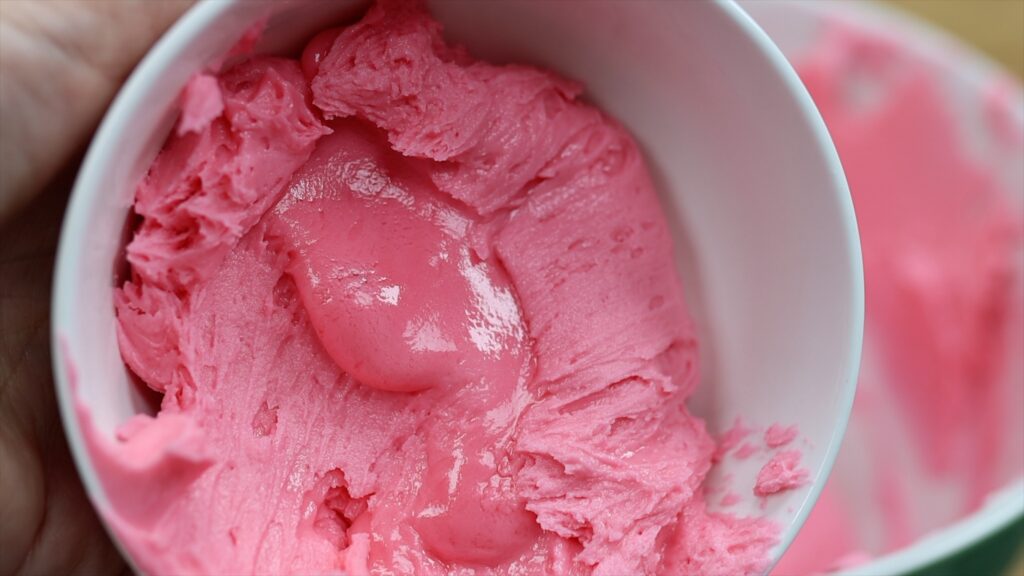
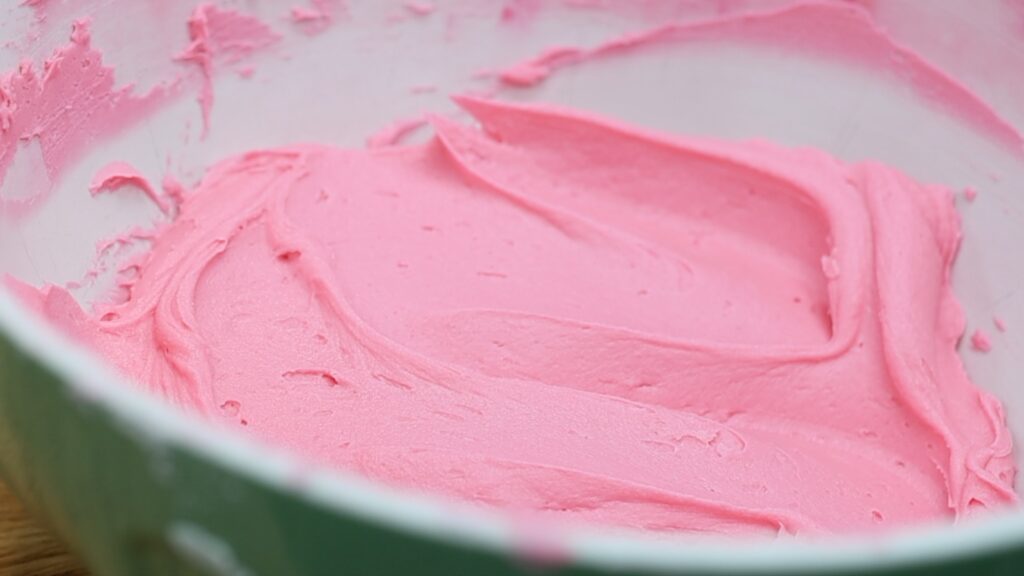
Tint your buttercream to be much lighter than you want it to be. The coral shade above is perfect. With the next few tips you'll make this red much brighter without needing to use any more gel. If you make your perfect shade of red, keep in mind that it will darken significantly!
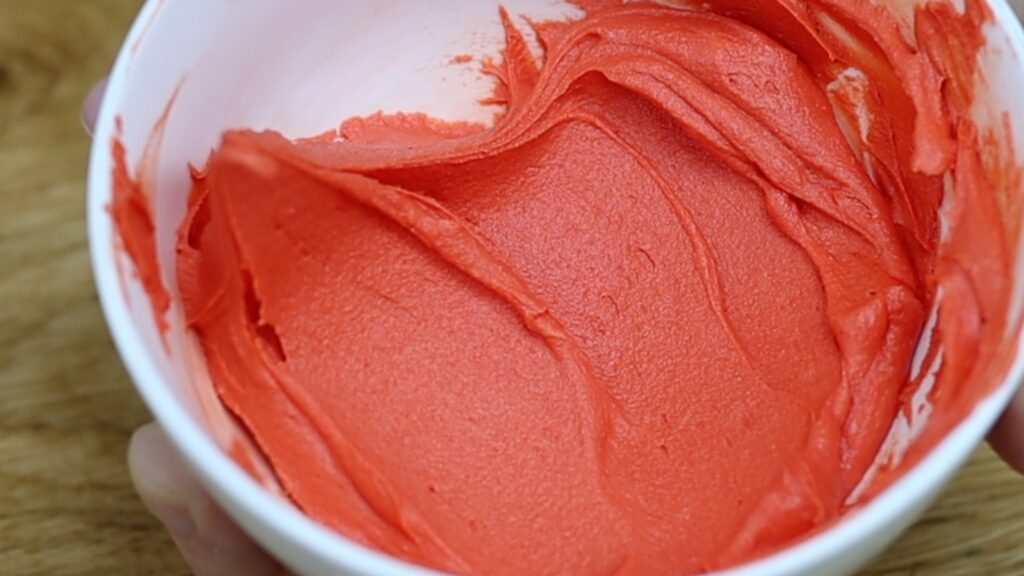
#3 How to make red buttercream darker with heat
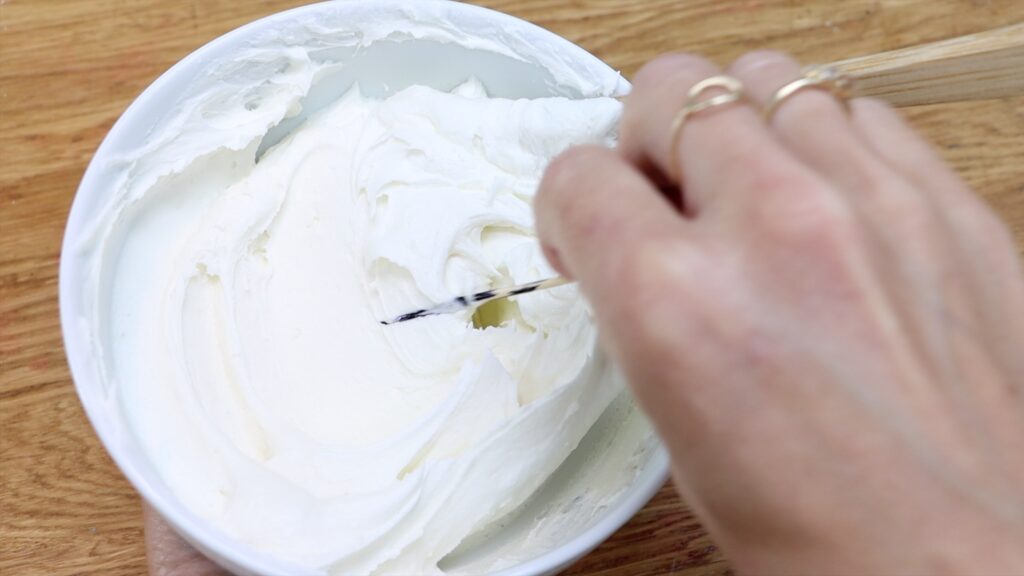
Next, microwave the light red buttercream for 5 seconds for a small bowl or 10 seconds for larger quantities. You can use a double boiler to do this over a pan of simmering water on the stovetop instead. You’ll melt the butter in the buttercream and the heat makes it much darker!
Obviously, melted buttercream is not the right consistency to frost a cake or pipe with. So after stirring, move on to the nex tip for how to make red buttercream that's truly red!
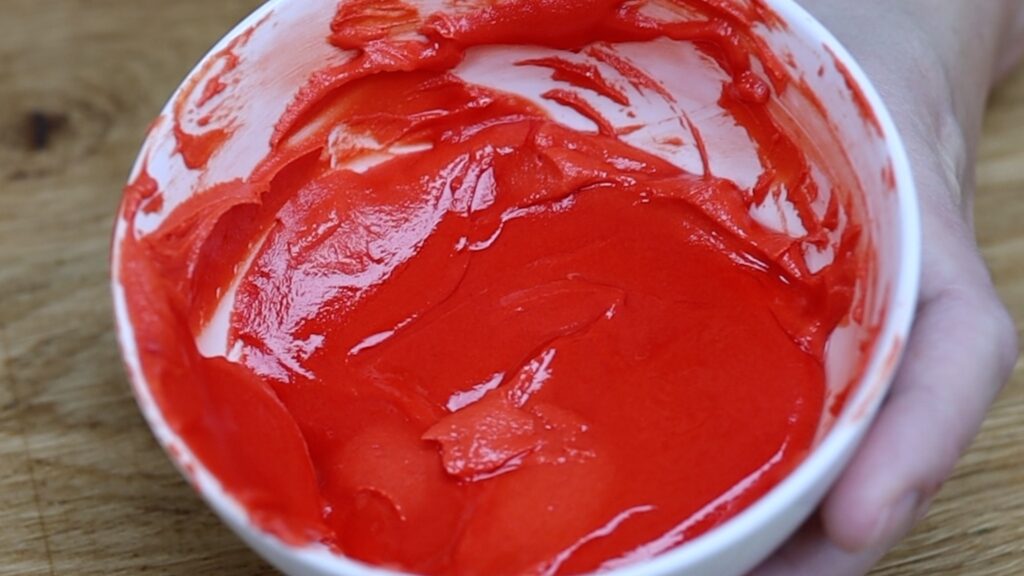
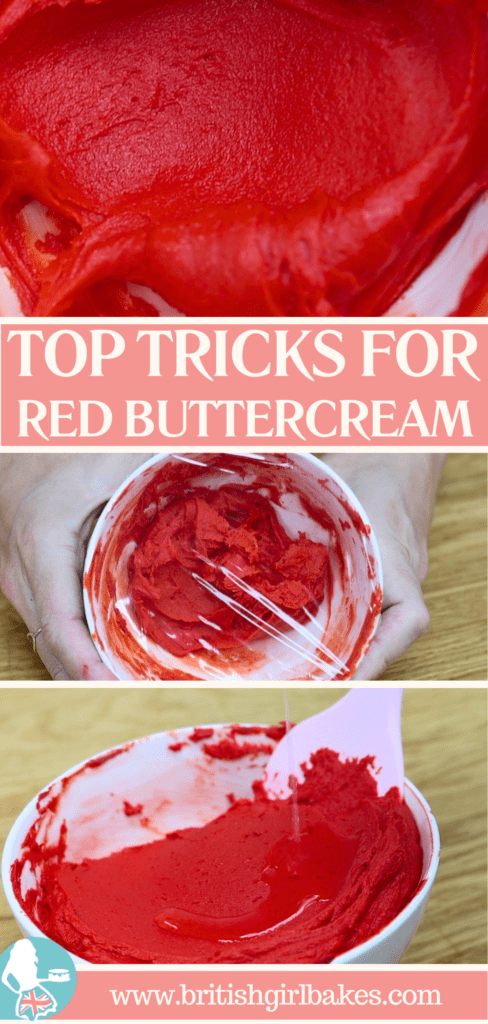
#4 How to make red buttercream darker with cold
Put the bowl of melted red buttercream into the freezer for 5 minutes. The cold will darken the red colour even more. It will also thicken the buttercream so it comes back to the right stiffness or consistency.
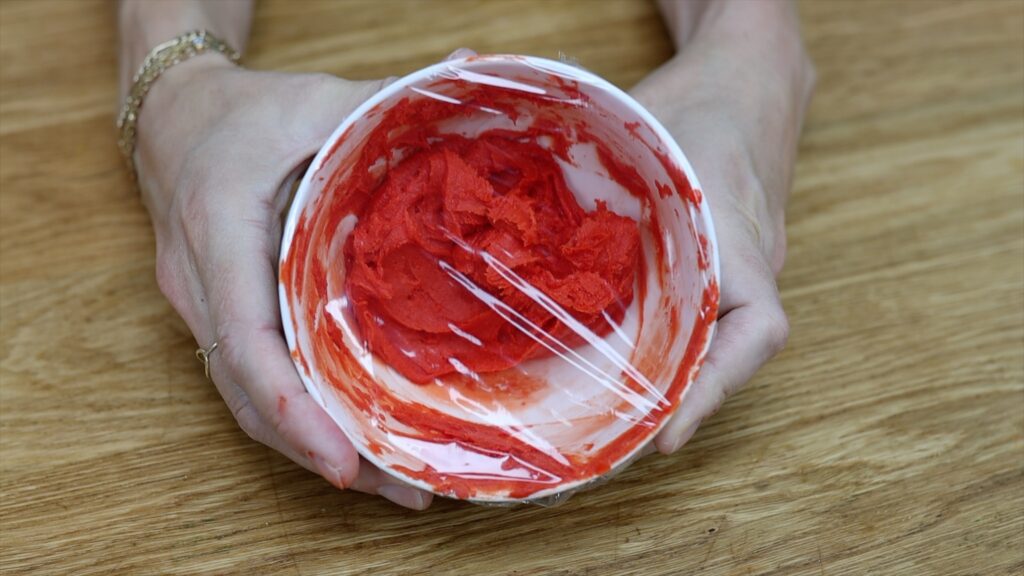
#5 Let red colouring develop in the buttercream
Time alone will make red buttercream darker! Cover the bowl with cling film or saran wrap and leave it for a few hours. While the buttercream rests, the colour will develop further. You’ll notice it happen after an hour or two.
#6 Don't use too much gel colouring
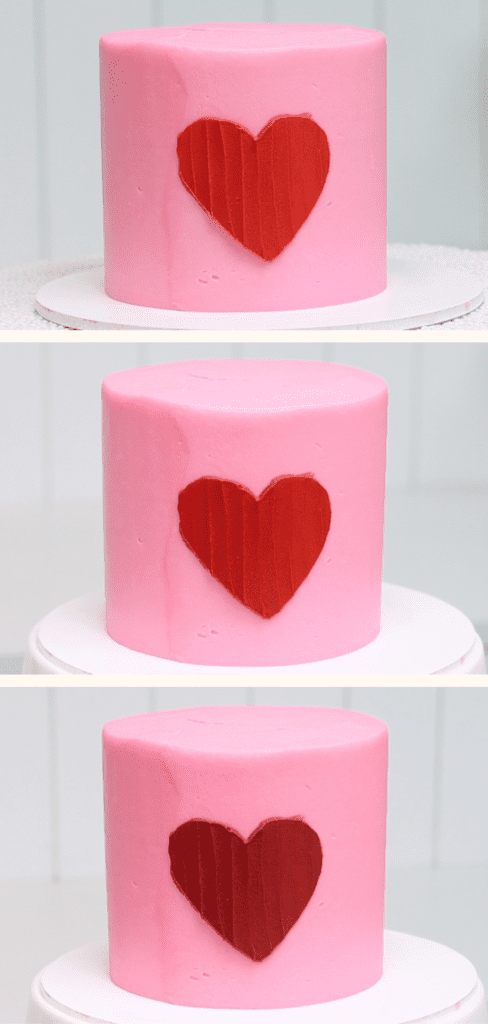
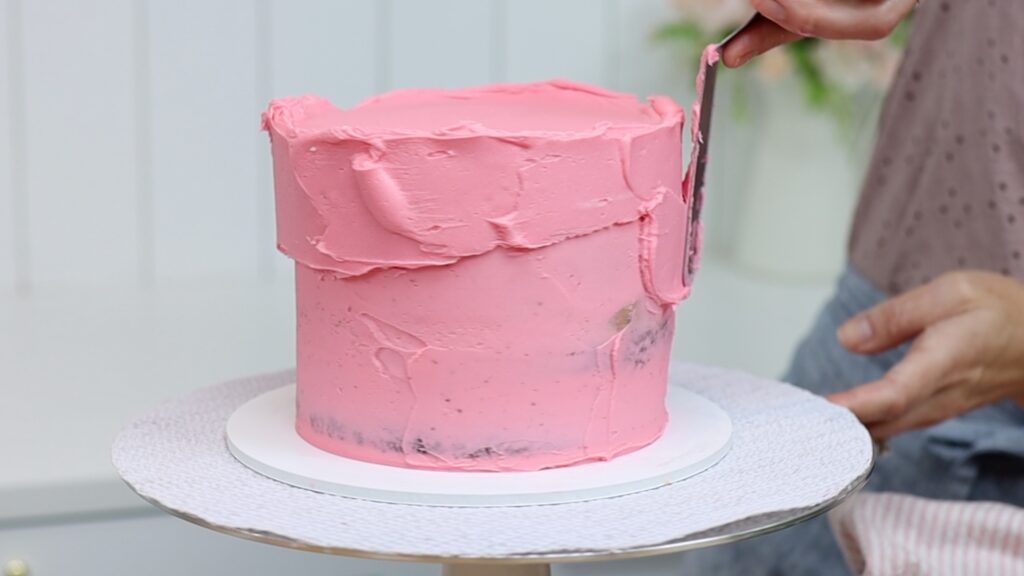
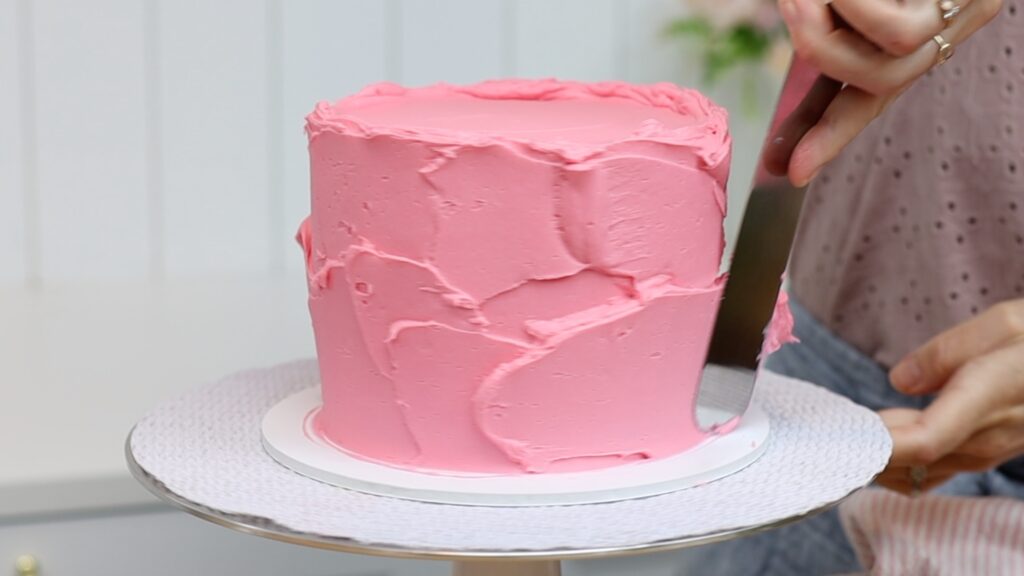
If you tint buttercream the exact shade you want, it will only stay that shade for a short time. Without using the microwave, freezer, or resting period, the colour will develop and darken while you decorate the cake.
For example, within a few hours this heart went from bright red to ruby red to burgundy! So if you skip tricks #3, #4 and #5, tint the buttercream a bit lighter than you want it to be. By the time you finish decorating the cake, the red will be much brighter.
#7 Avoid the aftertaste of colouring
A common question about red buttercream is whether it has an after-taste. If you use the microwave and freezer and resting hacks, you will need minimal gel. Red details and accents won't have a noticeable flavour.
But if you use a lot of gel or if the whole cake is covered with red buttercream, you will probably notice a gel after-taste. For these cakes I recommend adding another flavour to disguise it. Clear vanilla and clear almond extracts are my go-to choices. They pair well with almost any flavor of cake and the do a great job of masking unwanted gel tastes without really changing the flavour of the cake.
Here are some pins from this tutorial to save to Pinterest for later:
Don’t let a December birthday get swallowed by Christmas or Hanukkah or New Year’s with these December birthday cake ideas!
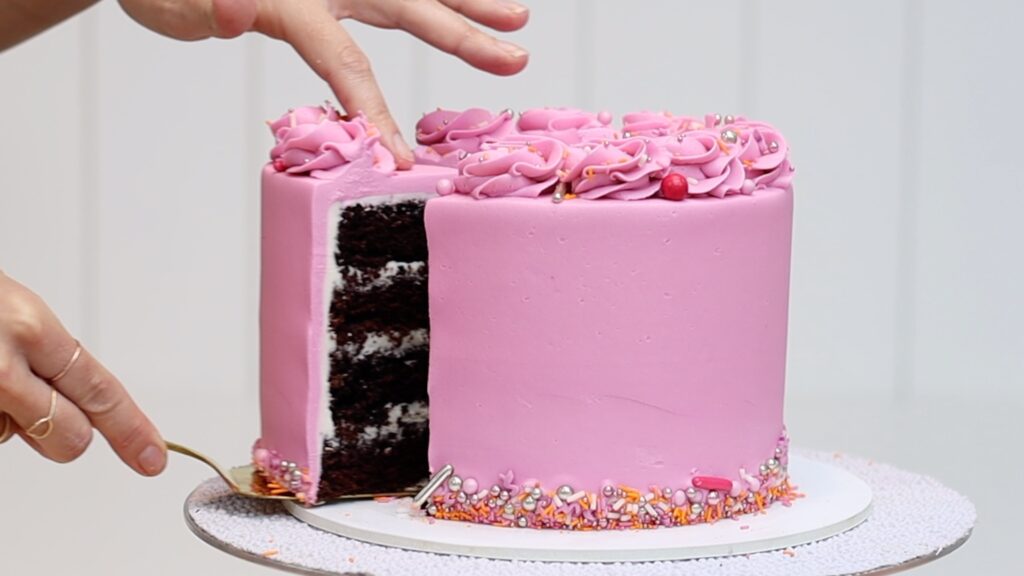
#1 Make a traditional birthday cake
Of course, you can ignore the December holidays completely and make a standard birthday cake. Piped swirls and cheerful sprinkles are fun but they're not unique to December birthday cakes. You’re not reading this for an obvious idea like that!
If you want to incorporate elements of December in a birthday cake, you’ll prefer the next ideas.
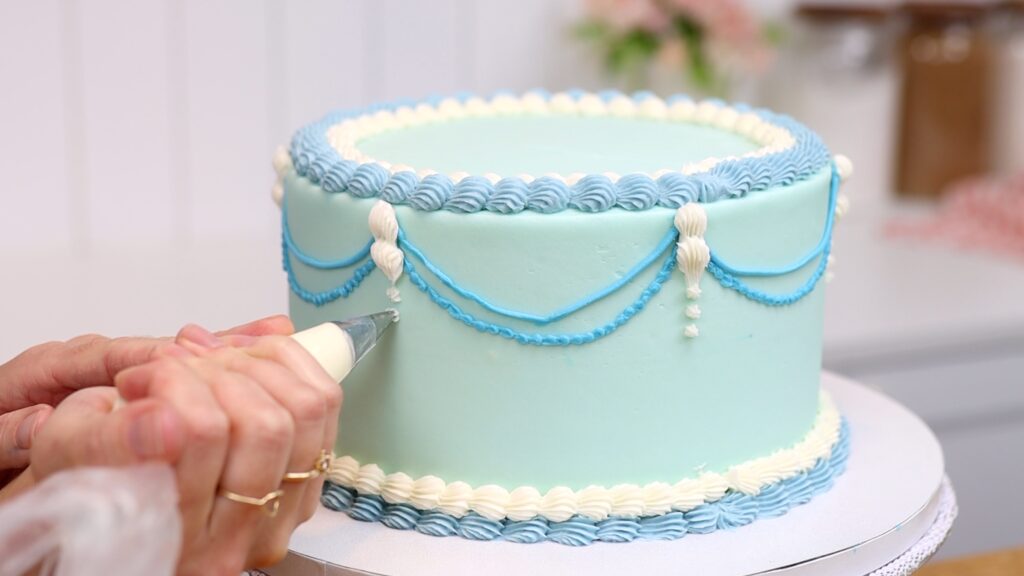
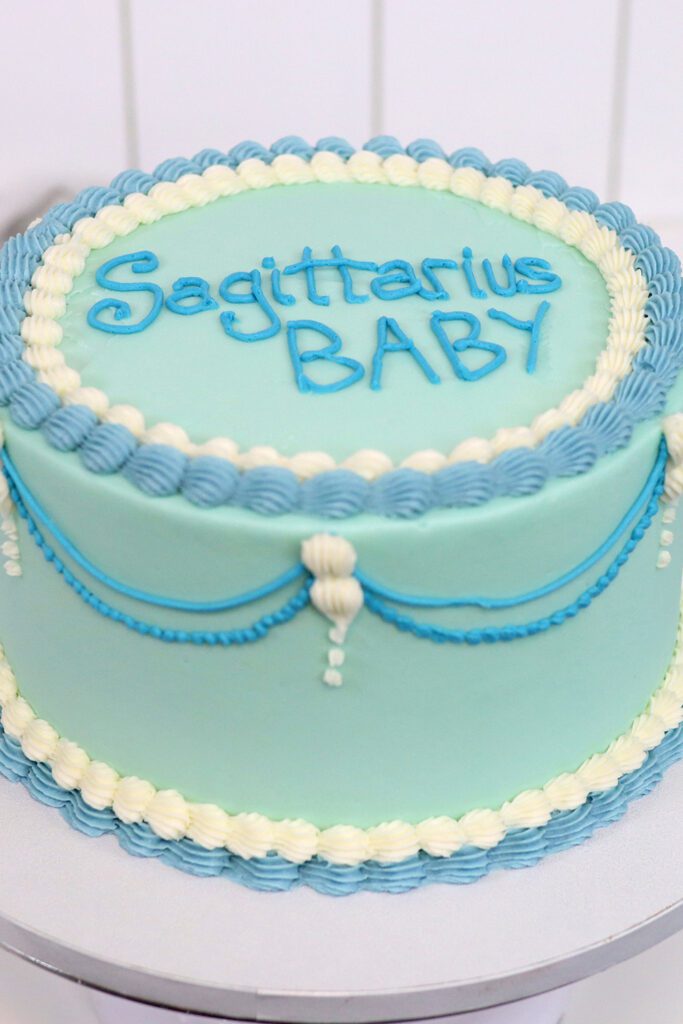
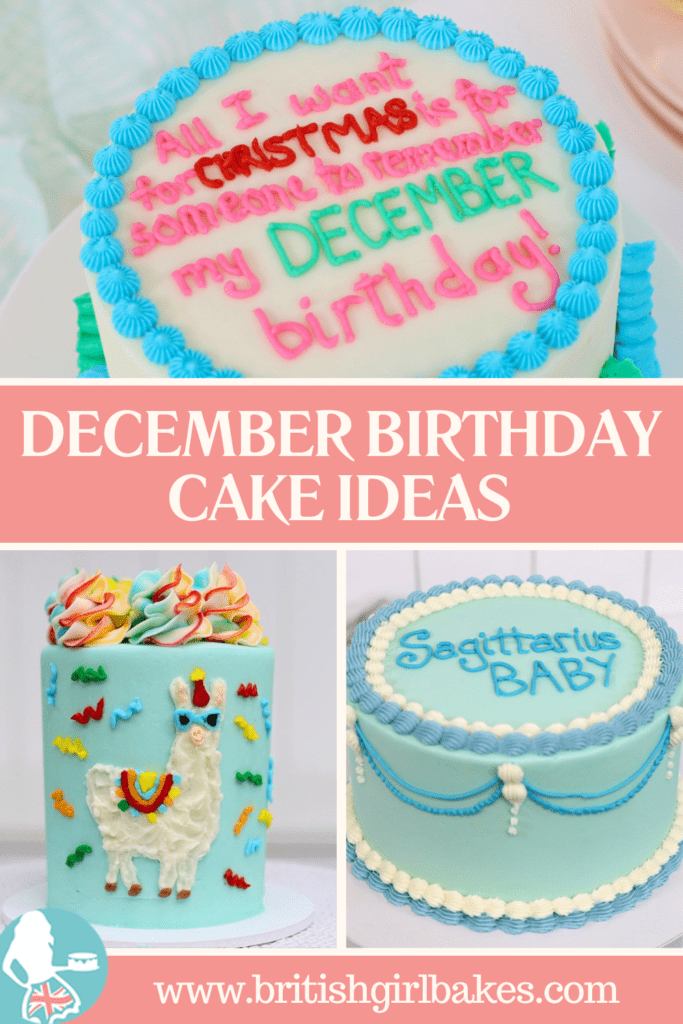
#2 Zodiac vintage cake for a December birthday cake
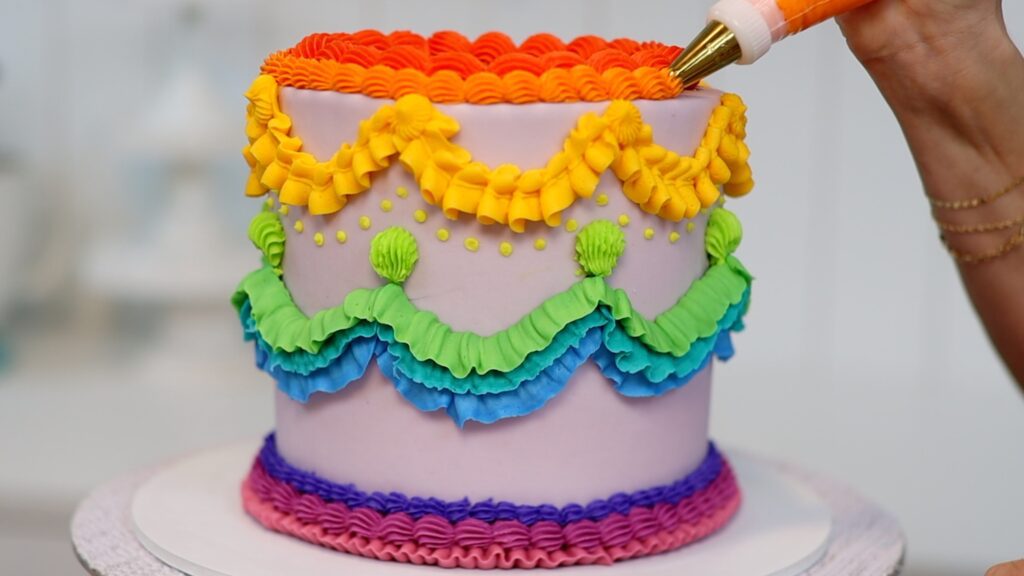
Zodiac cakes are really trendy, with catchy messages combined with the vintage or lambeth style of excessive piping. Use different colours and different piping tips to create elaborate designs.
Popular piping tips for vintage cakes are star tips like a 4B or #32. For more details, check out my tutorial on 10 secrets for vintage cakes.
Check the zodiac calendar because December birthdays could be either Sagittarius or Capricorn!
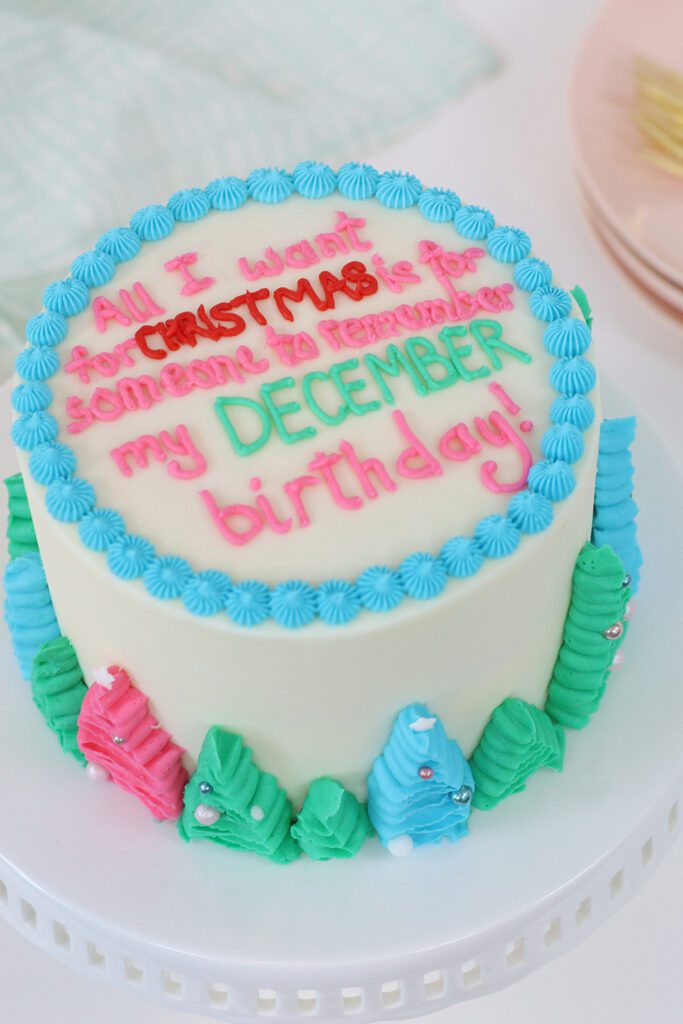
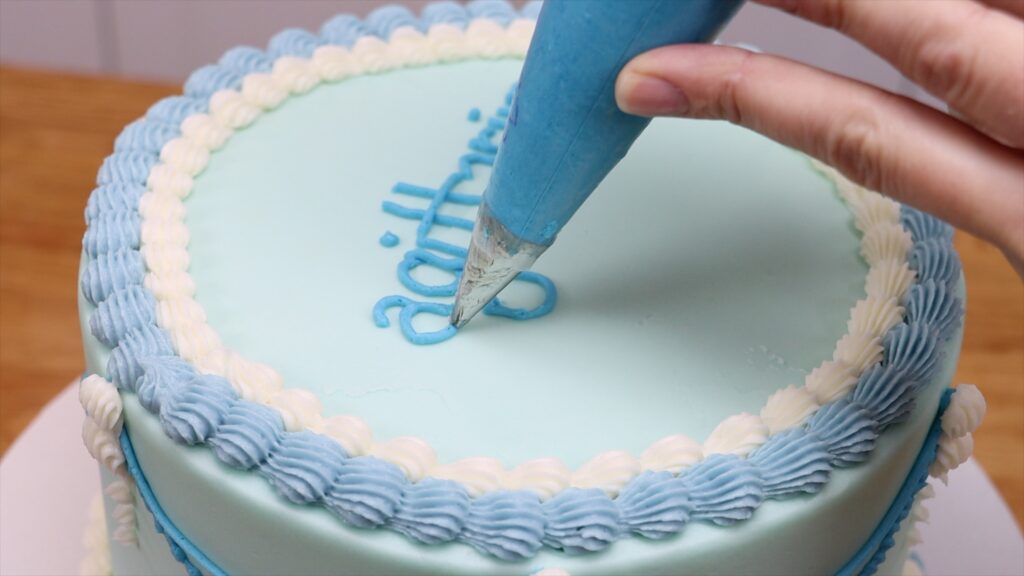
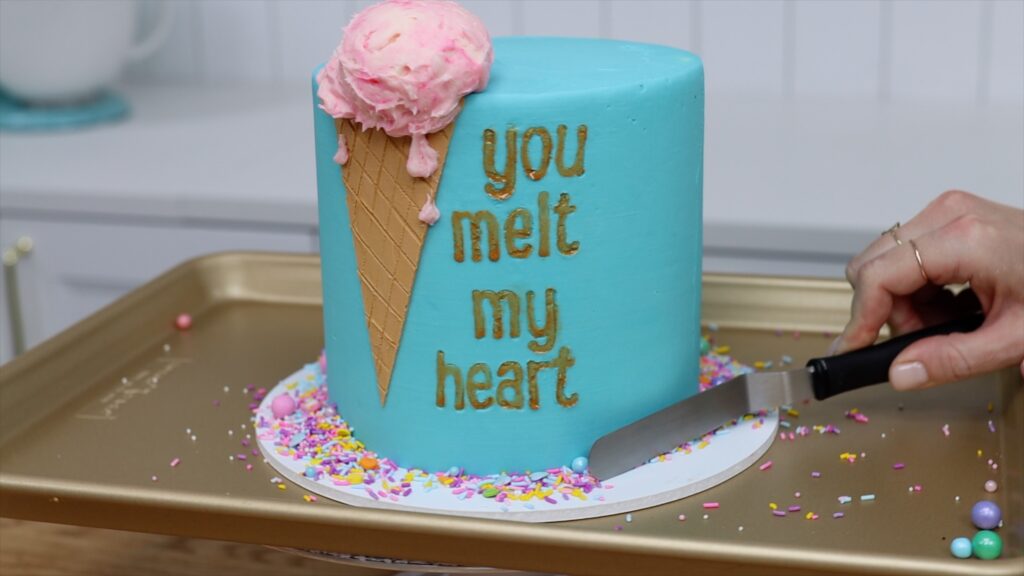
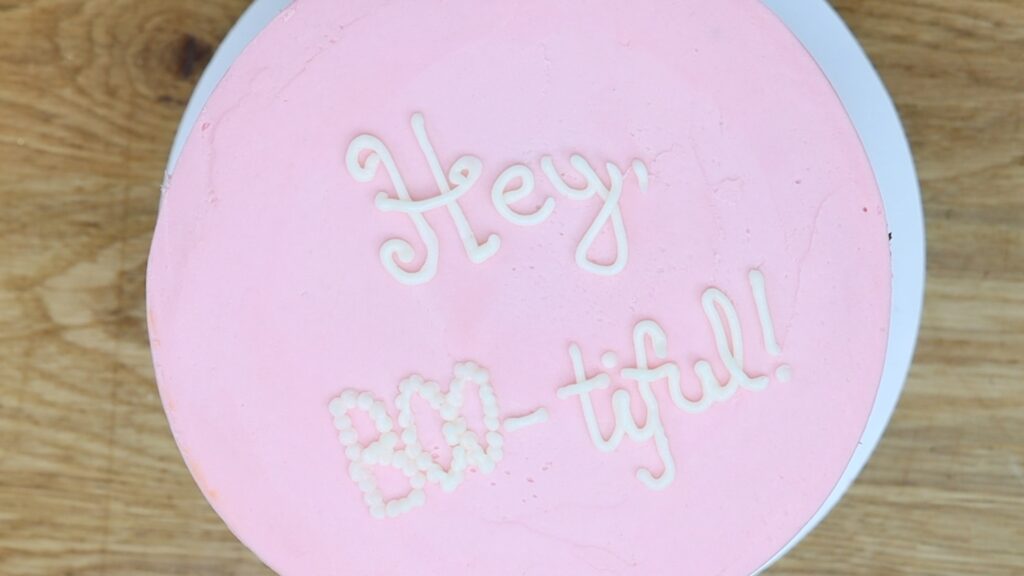
#3 Add a funny December birthday cake message
Turn the birthday date into a joke with this funny message! Use a small round piping tip to pipe thin lines for the letters.
Here are some tips for piping messages. Use a toothpick to scrape off any lines you don’t like or an offset spatula for several letters. This works best if you chill the cake before piping the message so the frosting underneath is firm. To fit a word into a gap or space, start with the middle letter and work your way out. And leave piping borders until the end so you don’t knock them as you pipe!
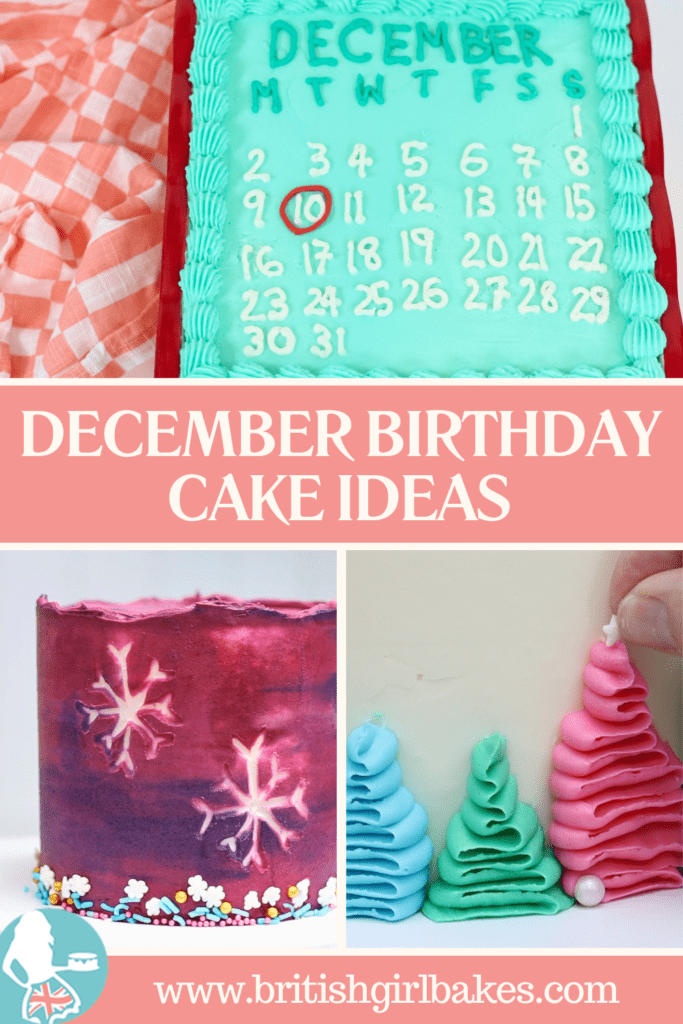
#4 Combine Christmas and a birthday on a cake
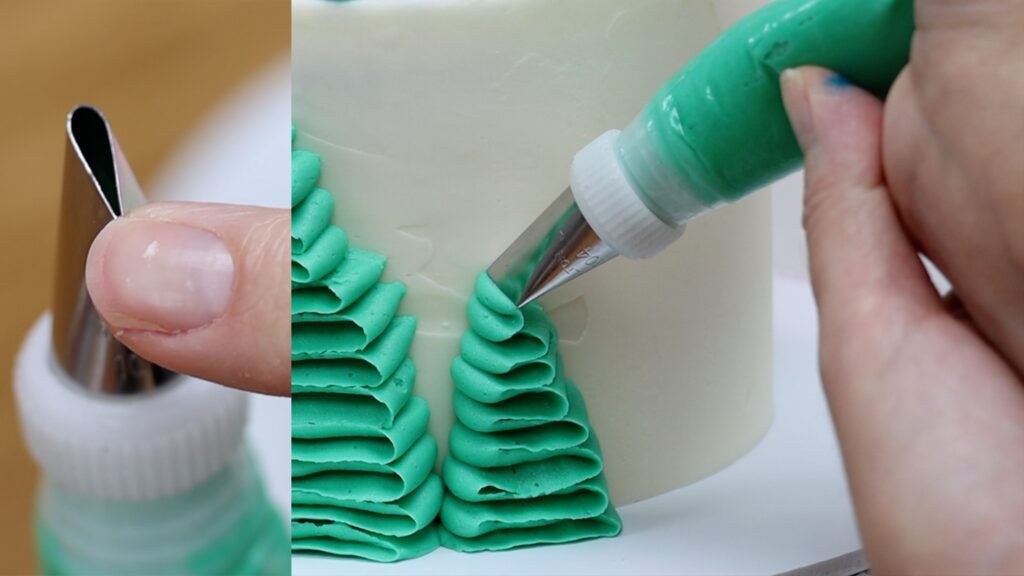
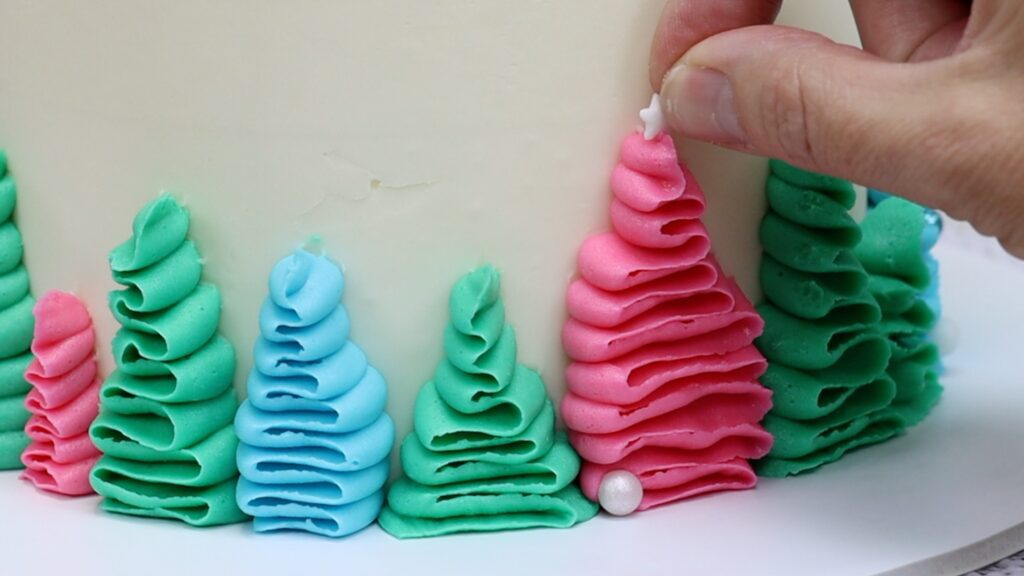
Blend Christmas with birthday vibes with this fun, colorful design. Pipe zig zags with a petal tip like a #104 or #125. Hold the wide part of the tip against the cake with the pointed side facing outwards, wiggling back and forth. Make the lines shorter and shorter as you go up, to make Christmas trees.
If you’re using several colours it’s quickest to pipe all of the trees of one colour first. Then switch the piping tip to another piping bag with the next colour to pipe all of those trees. Add sprinkles to make it even more celebratory, attaching them now while the buttercream trees are still soft and sticky.
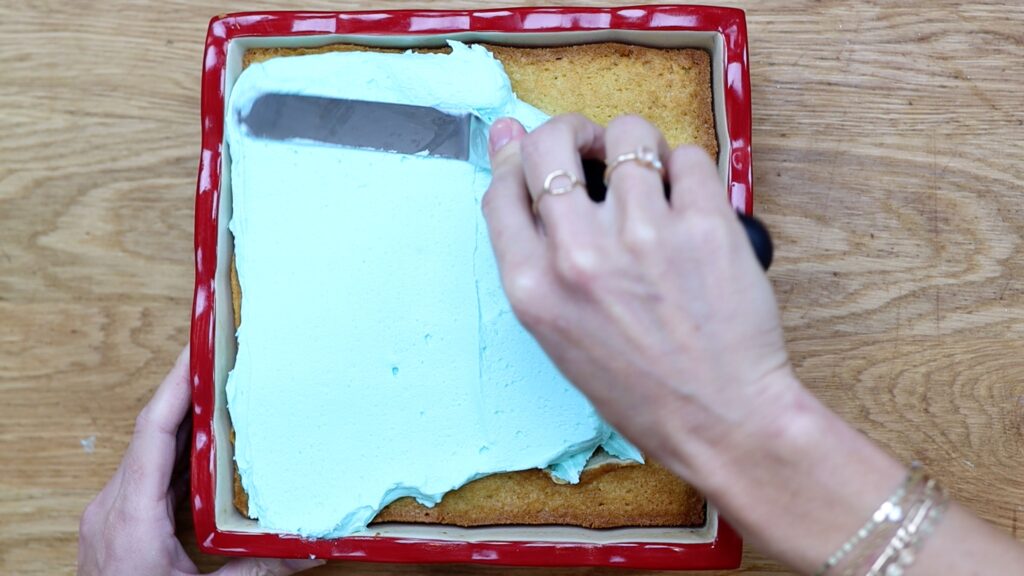
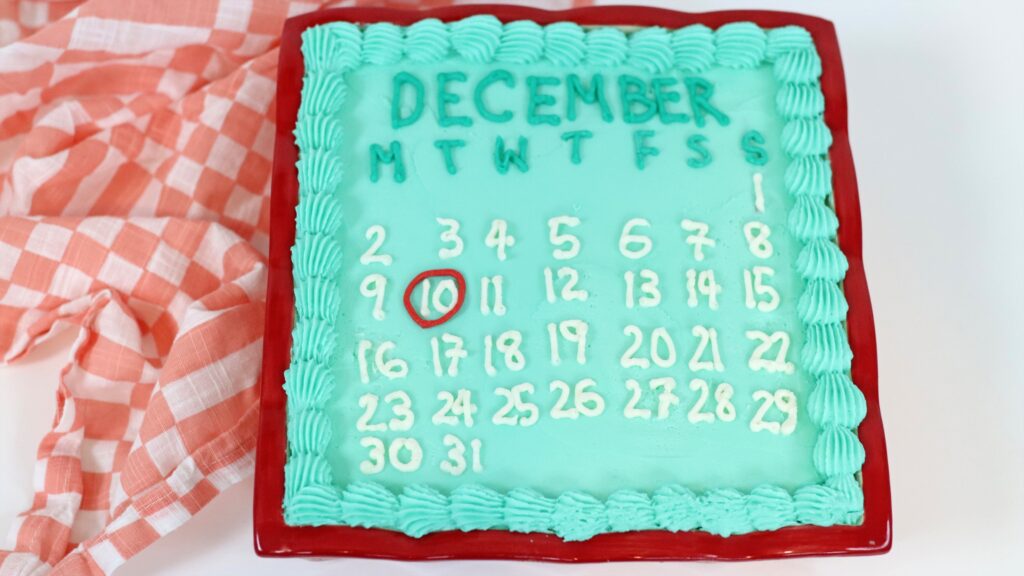
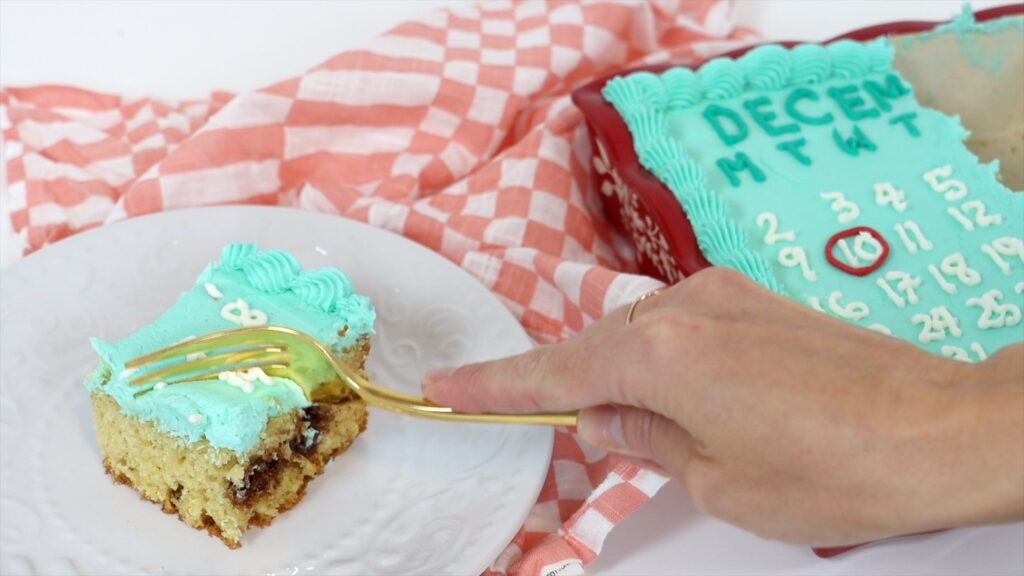
#5 Make a tray bake calendar cake
For a low effort cake that still delivers all of the flavour, bake your cake in an oven-proof dish . After it cools, decorate it right there in the dish! You can pipe the frosting on or spread it and smooth it.
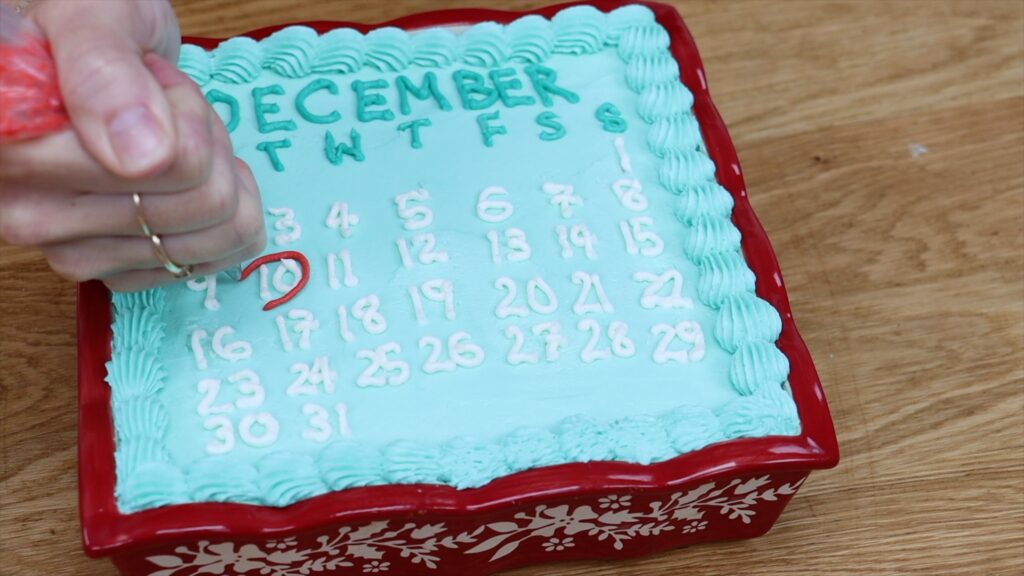
Make a calendar by piping the days of the month and circling the birthday date. You can add letters for the days of the week at the top, if you like.
Good news: this tray bake cake will be just as effortless to serve as it was to make!
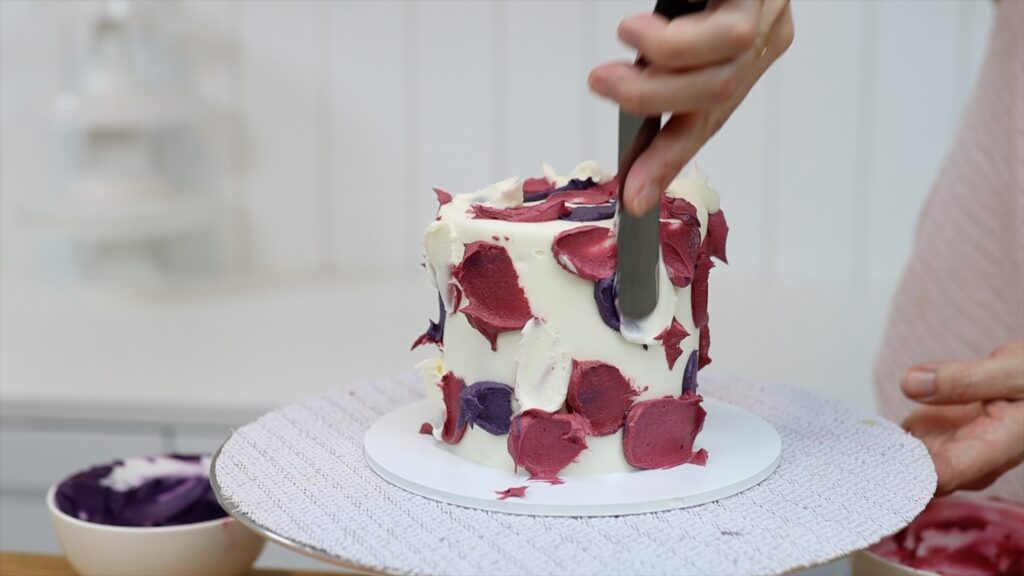
#6 Make a winter themed cake
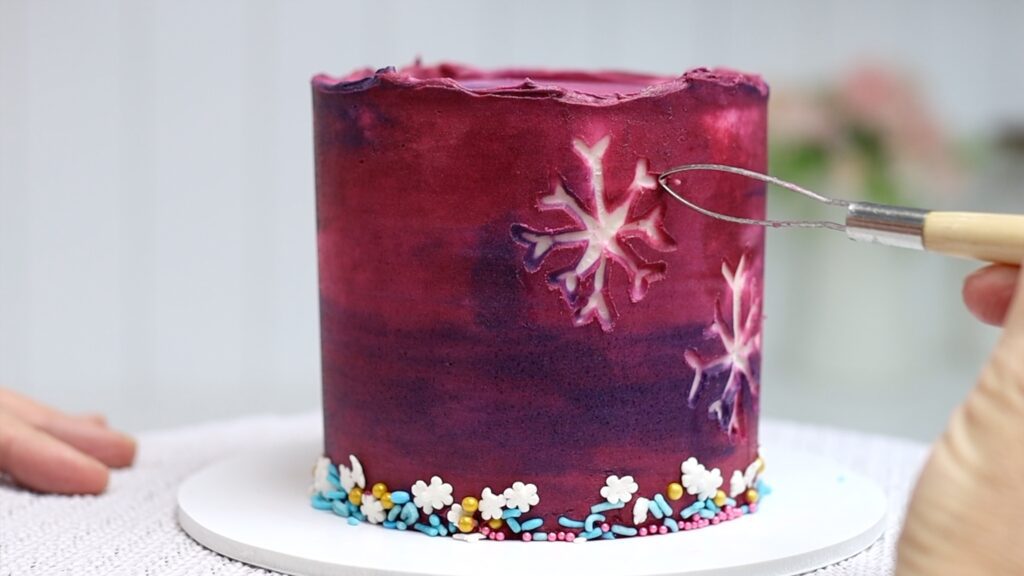
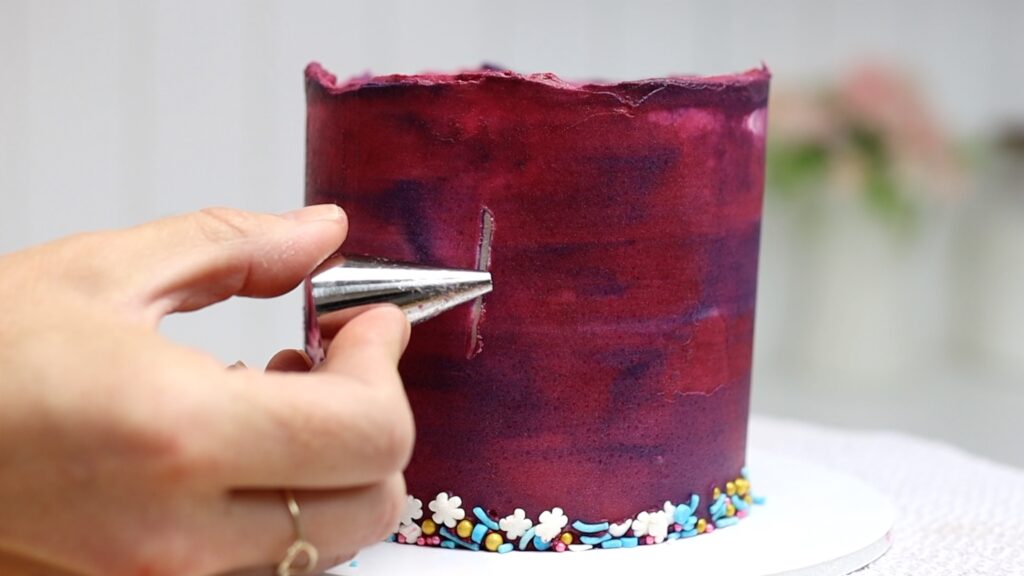
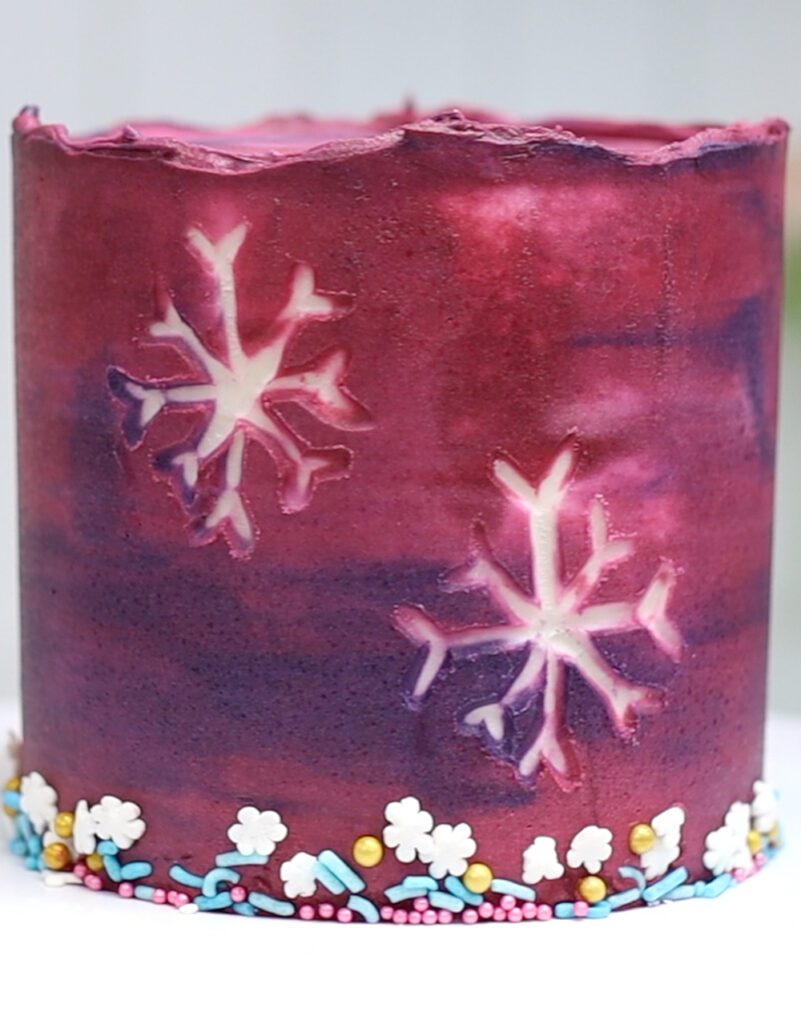
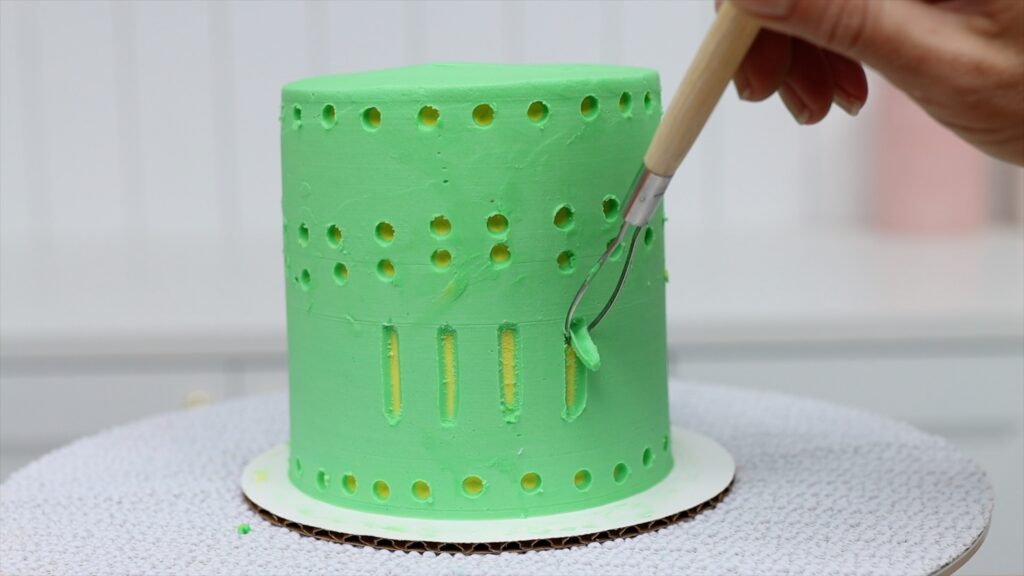
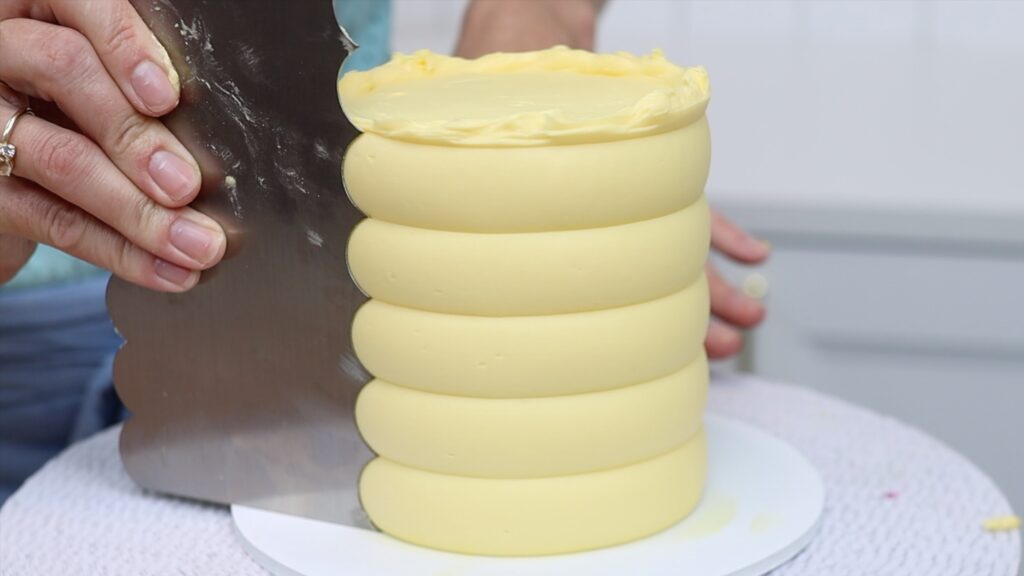
Focus on winter with a cake decorated with snowflakes. I think the most striking was to do this is with buttercream carving. Cover a cake with a crumb coat and then another layer of frosting, which will be the colour of the snowflakes. Let it chill and set in the fridge for at least an hour and then add another colour on top. Or several colours, like with this watercolor style:
I teach watercolour frosting in my free online course on 10 Frosting Techniques. Chill this frosting for another hour in the fridge. Then carve the buttercream using a petal piping tip or a special tool. Clay modeling tools are ideal and you can buy them on Amazon.
Dip the metal into warm water before carving for the neatest results. Dry it off before using it because water on the cake can make the colours run.
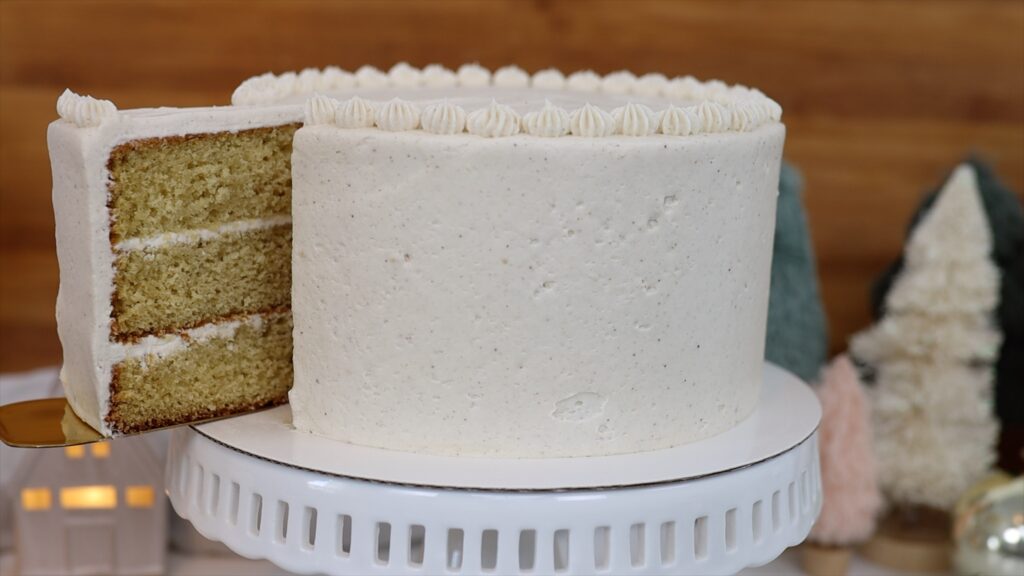
#7 Use seasonal ingredients for a December birthday cake
Use seasonal ingredients in your cake, for example eggnog. This eggnog cake has decadent eggnog filling and frosting that tastes even better than the drink!
Peppermint is another great seasonal flavour for cakes. I like to crush and add them to cream cheese buttercream for a delicious filling between cake layers.
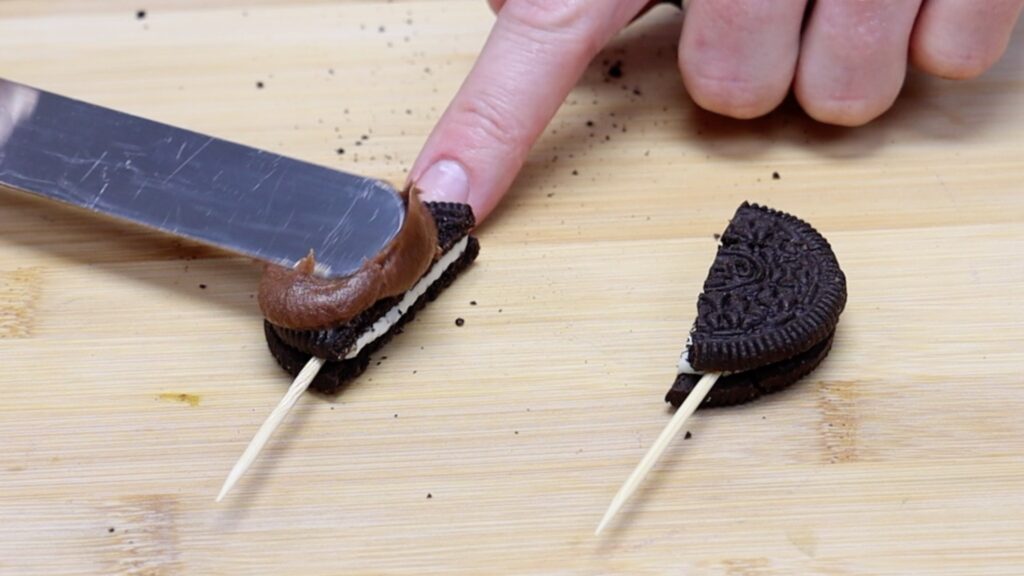
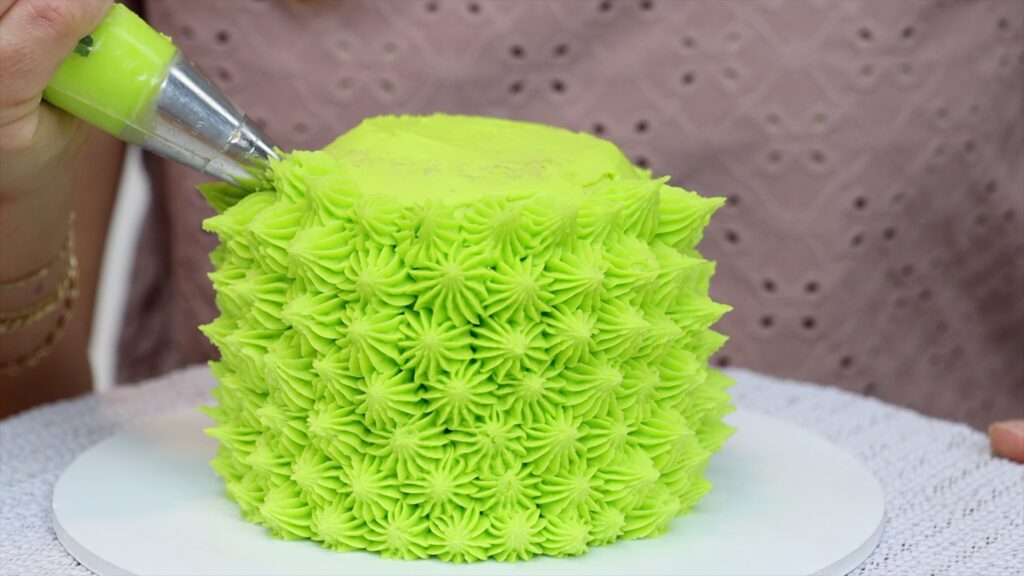
#8 Make a seasonal figure or character cake
Make a December figure cake, like a Gingerbread man or snowman or reindeer. I used my Best Chocolate Buttercream to frost this cake to turn into a reindeer. For ears, frost two halves of an Oreo cookie with a toothpick stuck in the middle of each half.
The antlers are made out of melted chocolate, piped through a ziplock bag with a hole cut off the corner. Use a wooden skewer so that after they set you can poke them into the cake.
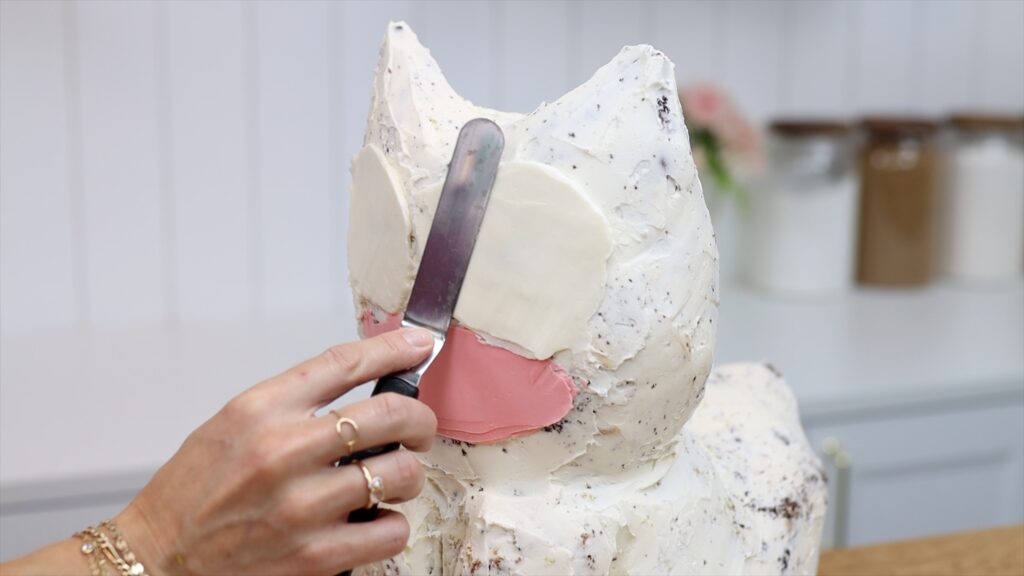
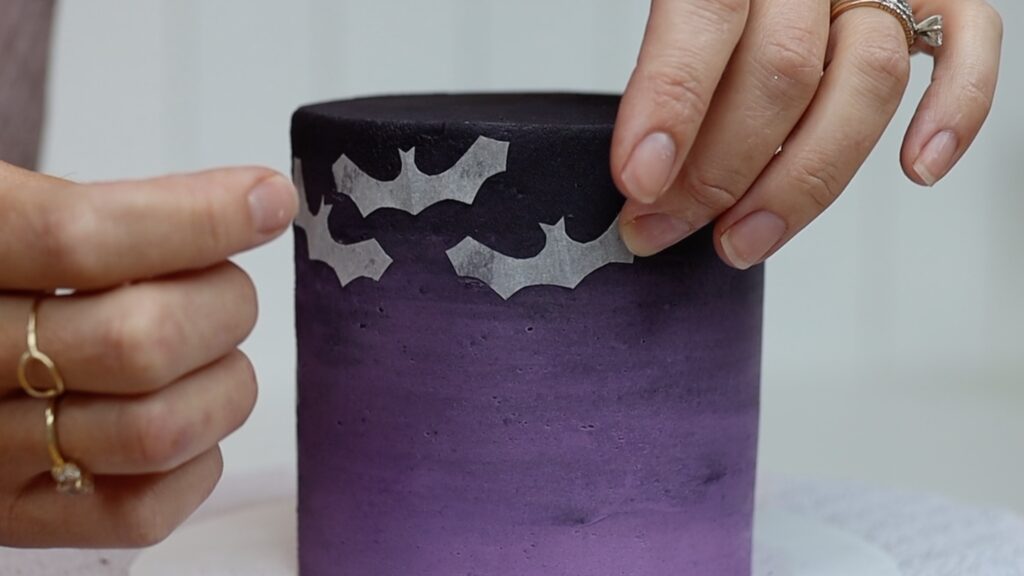
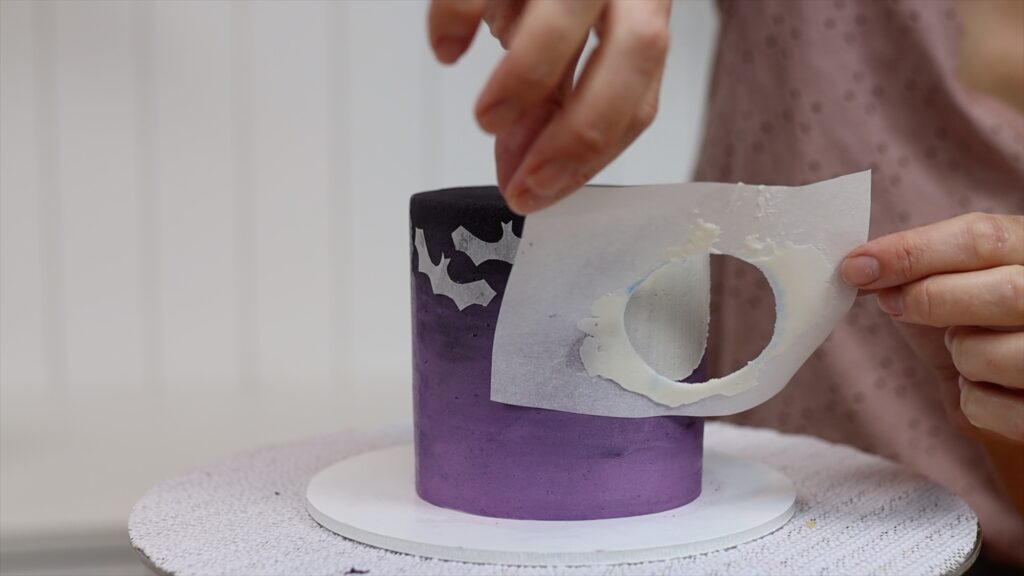
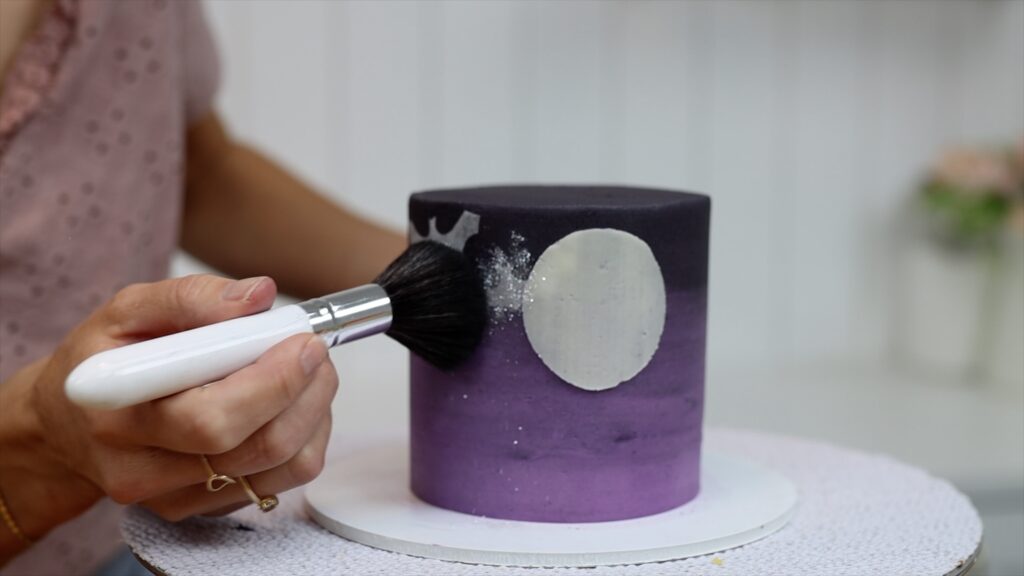
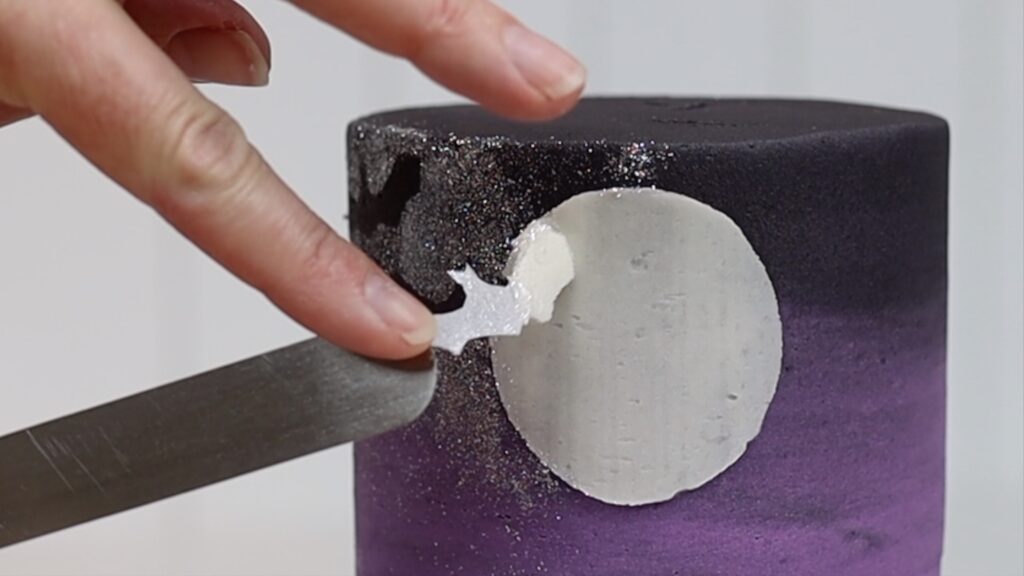
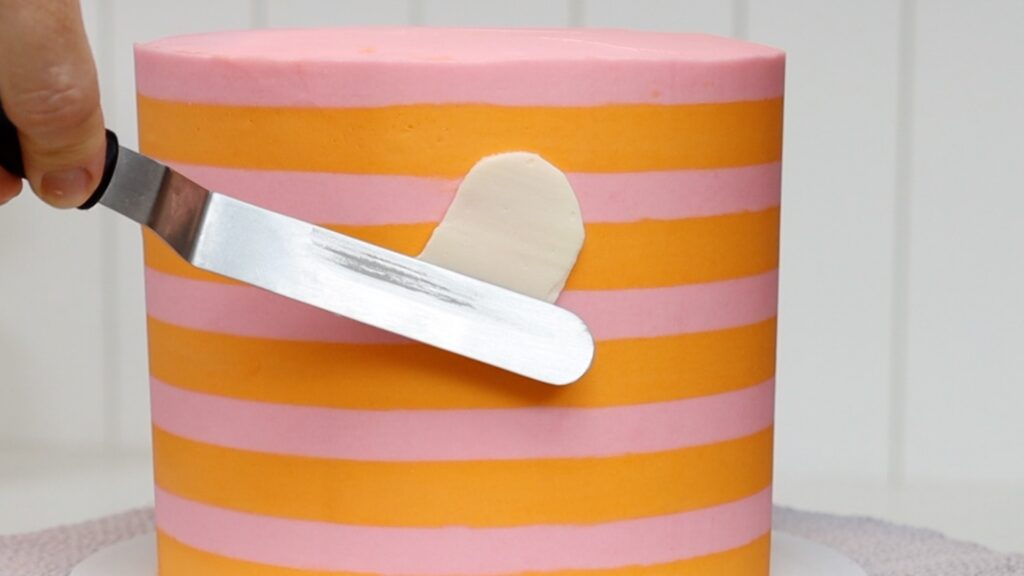
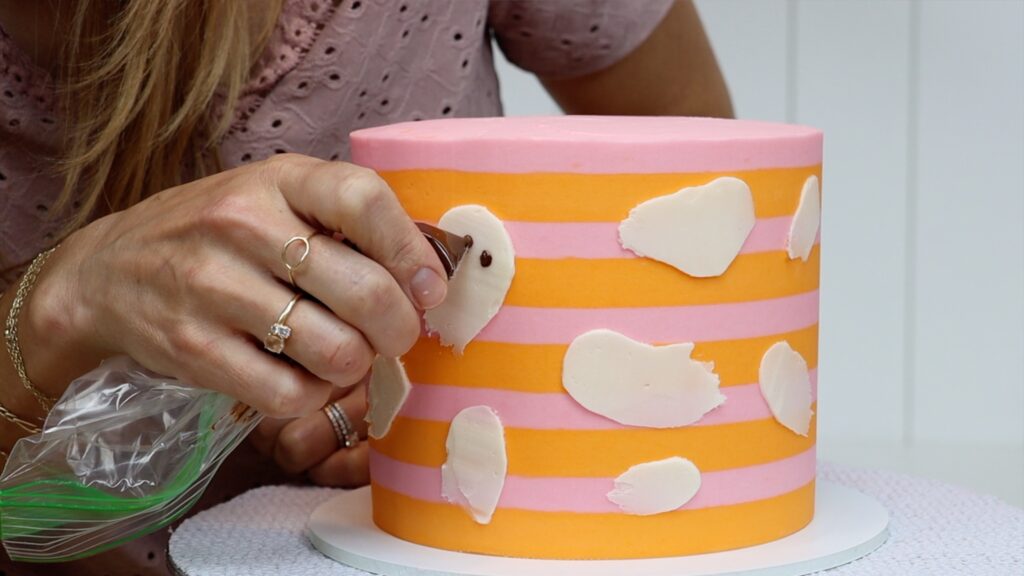
The face is easy with shapes cut out of parchment or wax paper to make stencils. Spread frosting over them and then peel them off to make neat shapes. I used a petal piping to carve out a smile.
Pipe white details onto the eyes with plain white buttercream. Pipe more chocolate buttercream for fur on top of the cake, between the antlers and ears. To make this more of a birthday cake you could add a party hat!
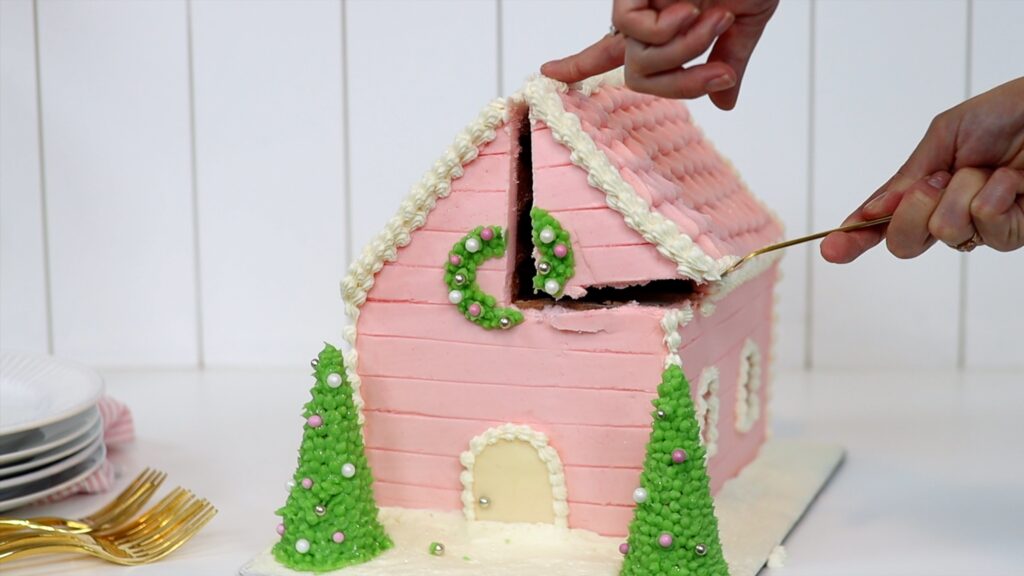
#9 Make a Christmas themed cake as a December birthday cake
Embrace the season with a Christmas themed cake like this gingerbread house cake. Admittedly, it has nothing to do with birthdays but I’m sure your time and effort will be appreciated! If the person loves cake then I’m sure they won’t mind what shape it is.
#10 Make a party themed cake
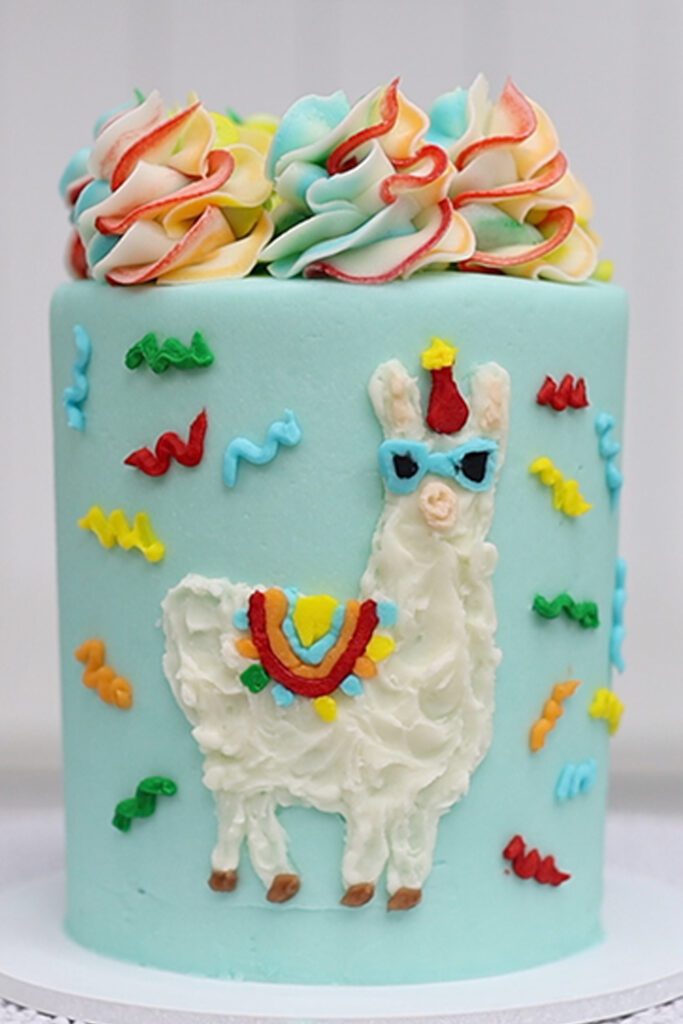
For a New Year's Eve birthday, make this fun party llama birthday cake!
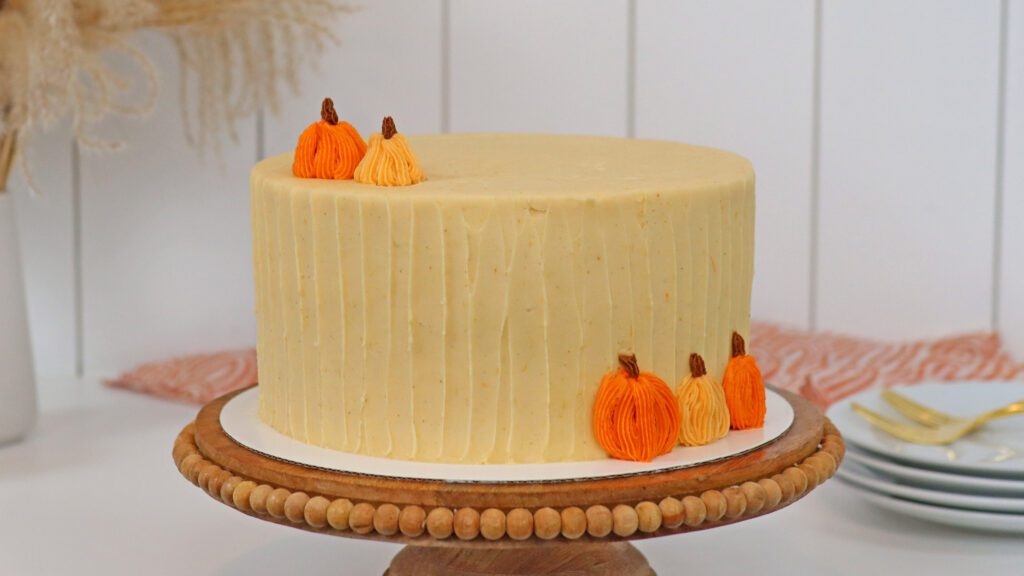
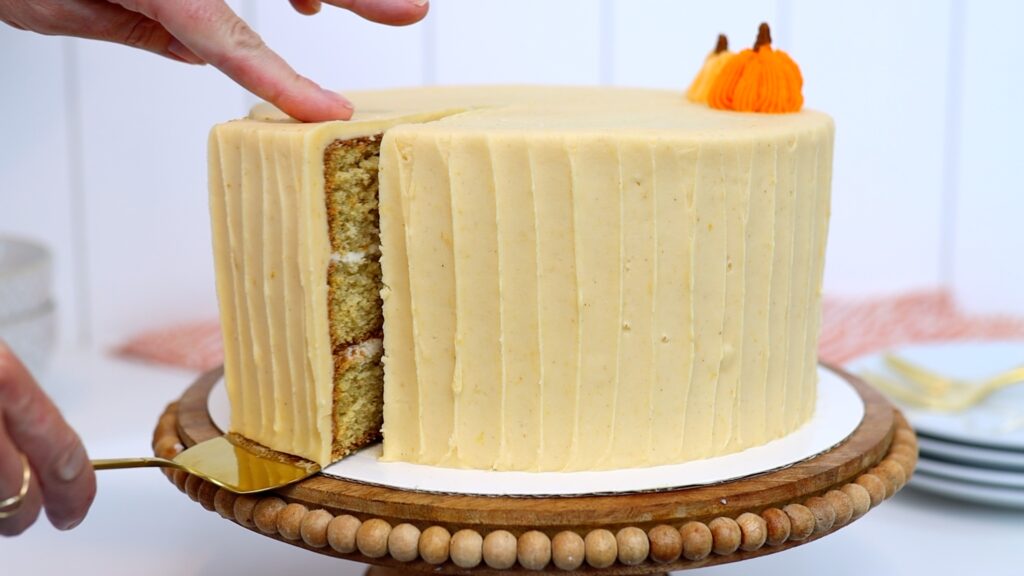
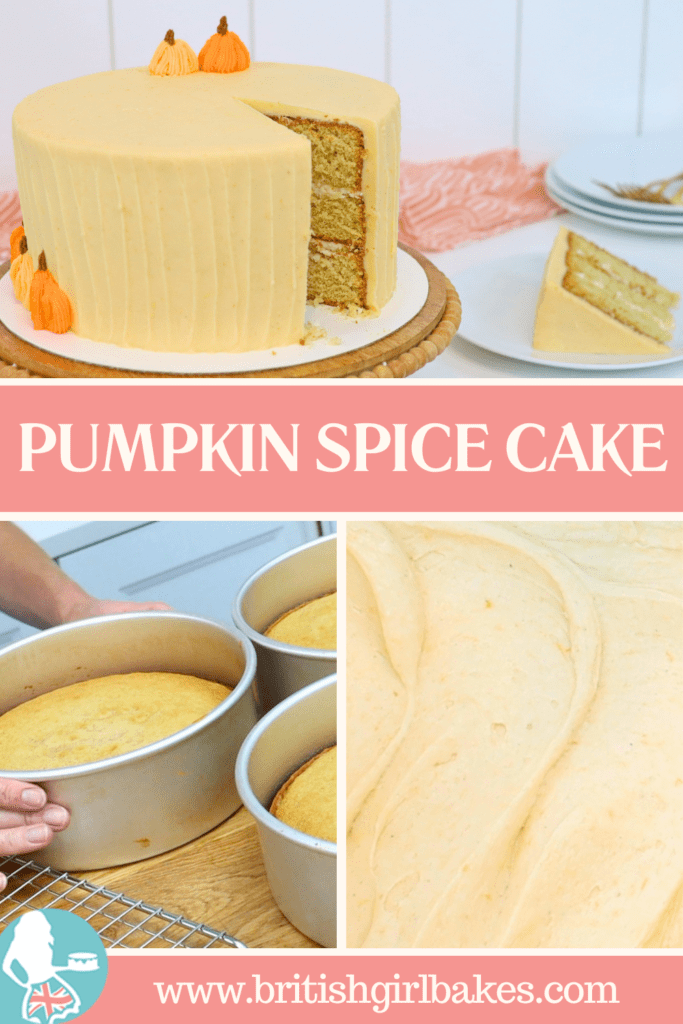
This pumpkin spice cake has buttery vanilla cake layers, not-too-sweet cream cheese buttercream filling and lightly spiced pumpkin buttercream frosting. YUM! And I can’t wait to show you how to make these buttercream pumpkins!
Buttery cake layers
You'll only need two quick recipes to make this easy pumpkin spice cake. Start with the cake recipe and while the cakes are cooling you'll make buttercream for the filling and frosting.
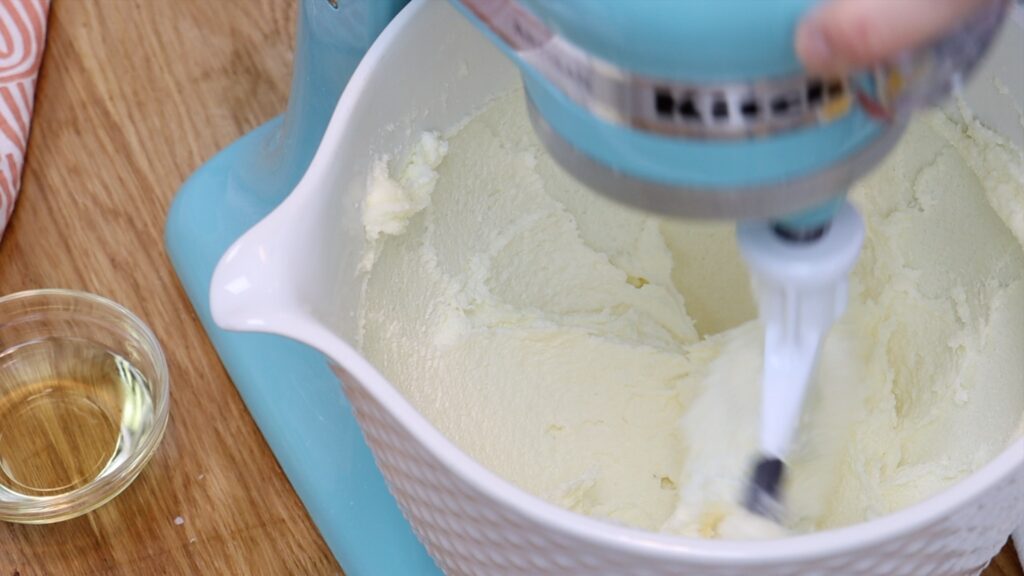
The vanilla cake starts with butter and sugar, creamed together for a few minutes. The mixture should look light and creamy like this:
All of your ingredients should be at room temperature so that they mix together easily. Add eggs, vanilla for richness, and then buttermilk and oil to make it really moist. Finish with the dry ingredients: flour, pumpkin pie spice, baking powder, baking soda and salt. You'll find the full recipe below and you can toggle between measuring cups and grams for the ingredients!
Divide the batter between three 8 inch pans and bake at 325F or 160C for 35 minutes. The cake should bounce back up when you poke it. If you divide the batter between two pans instead, the cakes will take about 10 minutes longer to bake. Let the cakes cool in their pans for 10 minutes and then turn them out onto a wire rack.
Buttercream filling and frosting for the pumpkin spice cake
For the filling and frosting, start with my 4 Minute Buttercream. The ingredients are just butter, icing sugar or powdered sugar, vanilla and salt. Normally you’d add milk to thin this out but don’t do that for this cake. Mix for 4 minutes and it will be quite thick or stiff, which is perfect!
Scoop out one cup and add 2 tablespoons of cream cheese at room temperature. Stir it together and it will get looser or runnier. This is why you skip the milk for this recipe - you don’t want it to be too runny. Spread some onto the middle of a cake board or plate and press your first cake layer down onto it. The buttercream will hold the cake still while you frost it.
Spoon half of the cream cheese buttercream onto the top of the cake. Spread it with an offset spatula or a spoon right up to the edges. Then position the next cake layer on top. Another layer of cream cheese buttercream and then the final cake layer.
It's important that the filling sets before you frost the cake, otherwise the layers will slide around. Put the cake into the fridge for 30 minutes or the freezer for 15 minutes to chill and set. Meanwhile, make the pumpkin frosting with the rest of the buttercream. Add pumpkin puree and pumpkin pie spice and mix together. You can make your own pumpkin pie spice with cinnamon, ginger, nutmeg, cloves and allspice. If you don't have those, just use cinnamon instead. I love the colour of this pumpkin buttercream!
How to frost this pumpkin spice cake
Take your cake out of the fridge or freezer and spoon about half of the buttercream on top. Spread it to cover the top of the cake, pushing it over the edges. Hold your offset spatula or palette knife at a 45 degree angle and spin the cake to smooth the frosting.
For the sides, spread the frosting by moving your offset spatula or palette knife from side to side. Completely cover the cake so there’s no naked cake showing through. This is a crumb coat - the first layer of frosting to trap any crumbs that come off the cake. This is much easier with a cold cake because room temperature cake is very crumbly.
Use the side of your offset spatula or palette knife or a cake comb to smooth this frosting. It doesn’t need to be perfect because it's going to be covered up soon. Next, put the cake in the fridge for 30 minutes or the freezer for 15 minutes to set this frosting. For more details on how to frost a cake, check out this tutorial on how to frost a cake.
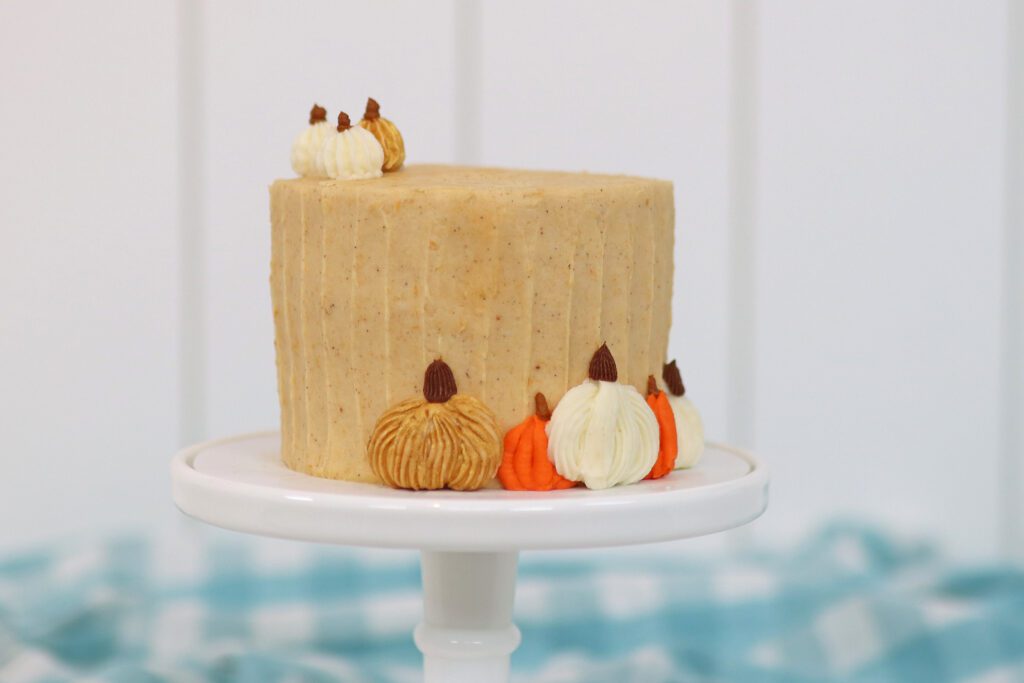
Cover the pumpkin spice buttercream while you’re not using it so it doesn’t dry out and crust. When the crumb coat has set, cover the cake with the rest of the pumpkin buttercream. Smooth it the same way and then add some details to jazz it up. Read on for three rustic frosting ideas and how to pipe buttercream pumpkins!
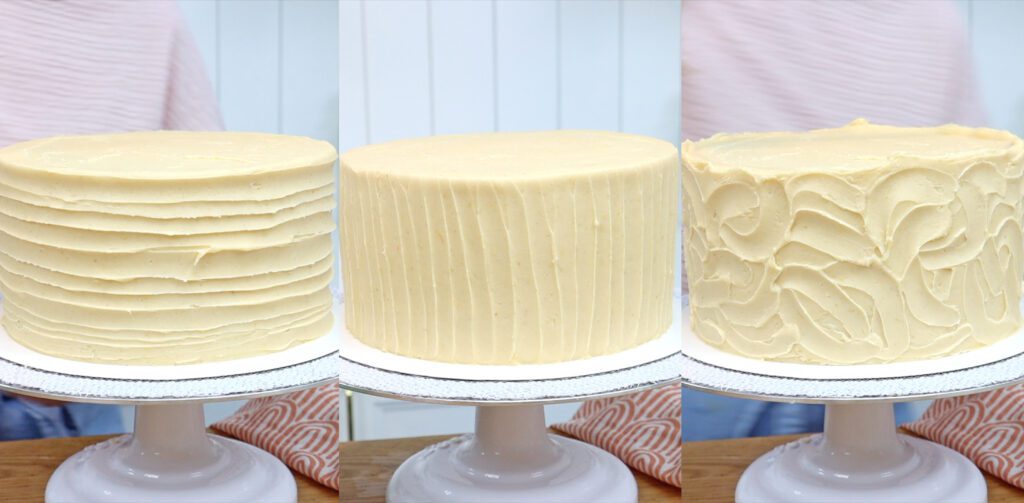
Use a spoon to create three different rustic textures
With a spoon you can create all sorts of rustic textured frosting. Hold the spoon sideways and press the back against the frosting and spin the cake to make grooves going around the cake. Drag the spoon slowly upwards to cover the whole cake with texture.
For another rustic texture, hold the spoon vertically and start at the bottom, dragging the spoon gently upwards.
Or curve the spoon around in little arc motions. These rustic textures are great because nothing needs to be precise or neat! For any of them, leave the top uneven or level it by swiping sideways with your offset spatula or palette knife. Check out this tutorial for more cake decorating ideas using kitchen utensils!
How to pipe pumpkins with buttercream
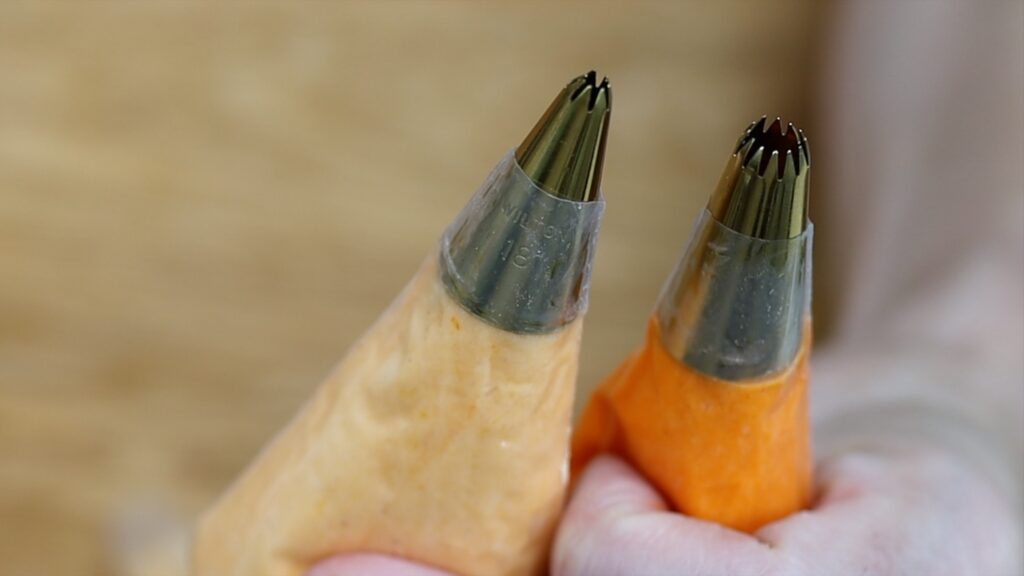
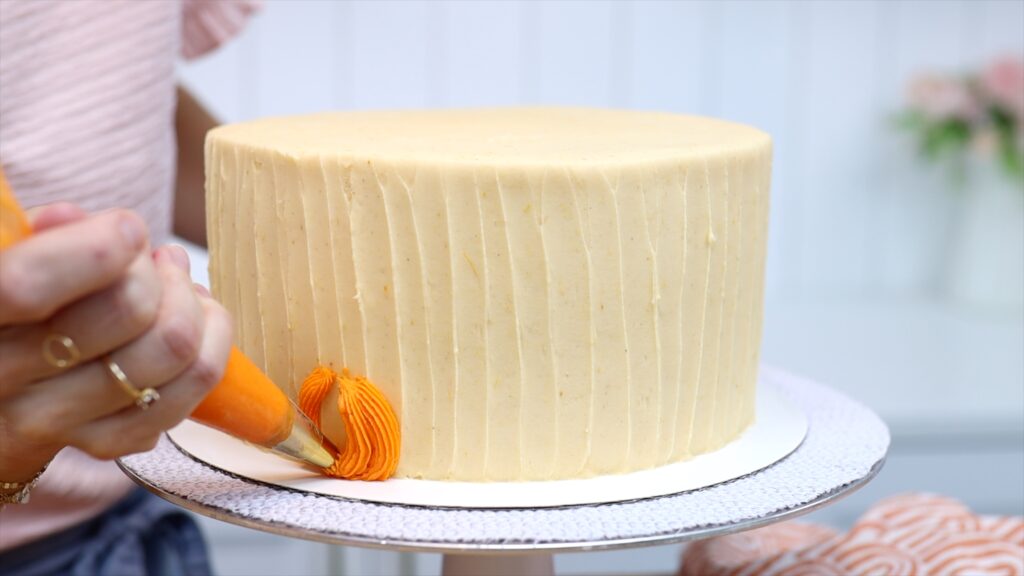
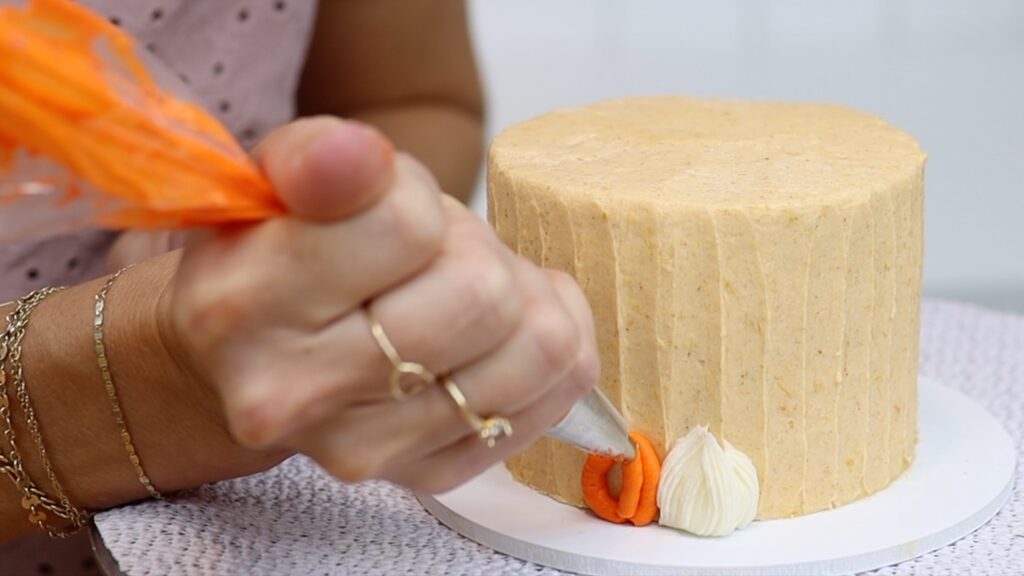
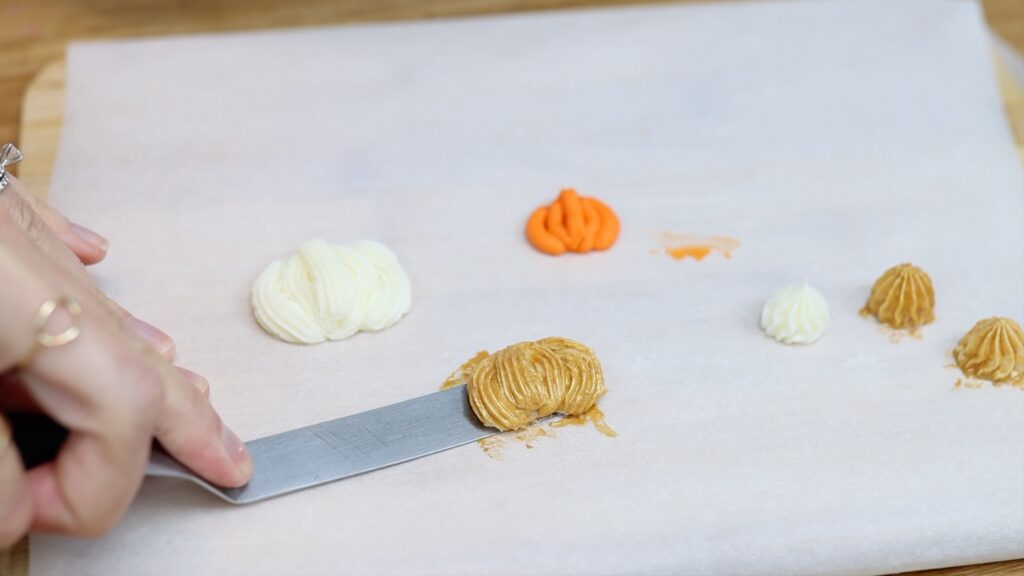
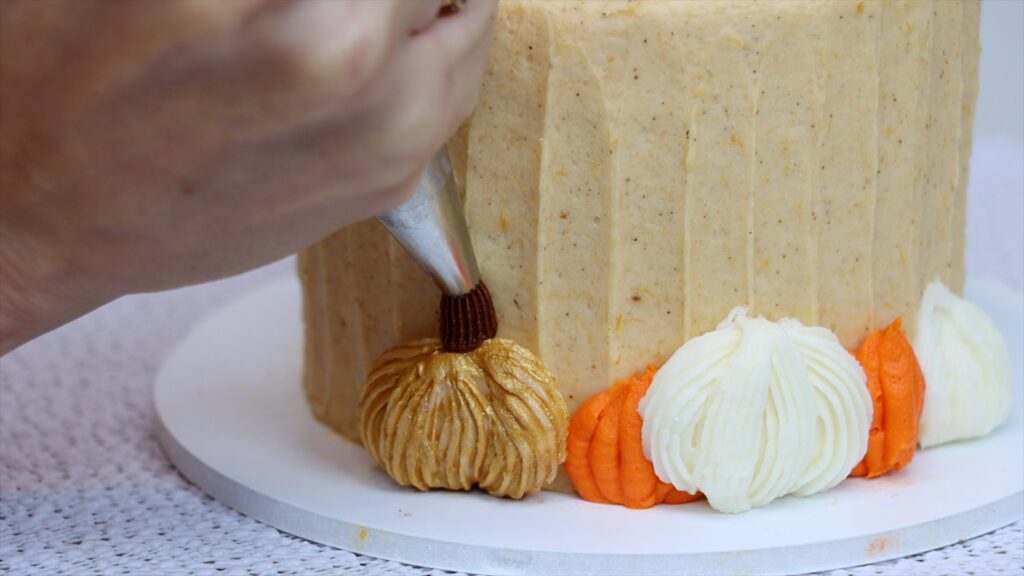
Make pretty piped pumpkins with a piping bag and any star shaped piping tip. I used a #32 and a #18. Add a drop of orange food colouring to the leftover pumpkin buttercream or make a few different shades. Put the tinted buttercream into a piping bag and pipe two curves for the outer edges of a pumpkin.
Work your way in towards the middle with smaller curves. By piping the lines in this order you’ll make the pumpkin appear more rounded.
Try different sizes of pumpkins and you can experiment with different piping tips too. To make pumpkins on top of the cake, squeeze out a blob and then pipe curved lines around it.
For the stems or stalks you'll need brown buttercream. Squeeze out any buttercream left in the piping bag and add brown colouring or melted chocolate. Switch to a piping bag with a small round or star piping tip like a #4 or #16. Pipe little lines going up from each pumpkin, pausing at the top while still squeezing. This makes a wide top of the stem or stalk, instead of leaving a point or peak.
How to store and serve this pumpkin spice cake
You can keep this pumpkin spice cake in the fridge for two or three days. Make sure you take it out 2 hours before you serve it so the cake and buttercream come to room temperature. That’s when they taste the best!
If you have any leftovers, cover the cut sides of the cake with cling film or Saran Wrap. Push the plastic firmly against the cake so it doesn't dry out.
Tell me in the comments if you’re going to make this cake! And remember to save this recipe to Pinterest!
Buttery spiced vanilla cake is layered with not-too-sweet cream cheese filling and frosted with lightly spiced pumpkin buttercream.
Ingredients
UnitsScale
For the cake:
1 1/2cups unsalted butter
2cups white sugar (granulated sugar)
6 eggs
1 tablespoon vanilla extract
3/4cup buttermilk
3 tablespoons vegetable oil
3 1/2cups plain flour (all-purpose flour)
1 tablespoon baking powder
1/2 tablespoon baking soda
1/2 teaspoon salt
1 teaspoon pumpkin pie spice or cinnamon
For the filling and frosting:
2 1/2cupsunsalted butter at room temperature
2lbpowdered sugar
1/2 teaspoon salt
1/2 tablespoon vanilla extract
2 tablespoons cream cheese
1/4cuppumpkin puree
1/8 teaspoon pumpkin spice or cinnamon
Instructions
To make the cake layers:
Using a mixer with a beater/paddle attachment (not a whisk), beat room temperature butter and sugar on medium speed until pale and creamy, about 3 minutes. Scrape down to the bottom of the bowl once during mixing to make sure no butter or sugar is stuck at the bottom.
Add room temperature eggs one at a time, mixing on the lowest speed after each addition for 30 seconds. Scrape down to the bottom of the bowl to make sure everything is incorporated before adding the next egg.
Add vanilla and mix for about 30 seconds to combine. Add room temperature buttermilk and oil and mix on the lowest speed to incorporate.
In a bowl, sift flour, baking soda, baking powder, salt and pumpkin pie spice or cinnamon. Add to the mixing bowl and mix on lowest speed to incorporate, scraping down to the bottom of the mixing bowl to check that batter is evenly mixed.
Grease three 8" baking pans with non-stick oil spray or butter. Divide batter equally between the cake pans.
Bake at 160ºC or 325ºF for 35 minutes or until the cake bounces back up when you poke it.
Leave cakes to cool in their pans for 10 minutes. Use a spatula to loosen the cakes from the edges of the pans and then turn onto a wire cooling rack. Leave to cool completely.
Optionally, when the cakes have cooled you can use a serrated knife like a bread knife to trim off any domed tops of the cake layers to leave them level.
To make the buttercream filling and frosting:
Take butter and cream cheese out of the fridge 2-4 hours before making this. Sift the sugar to remove any lumps and check that the butter and cream cheese are at room temperature.
In a mixer with a beater (paddle) attachment, mix butter and a quarter of the powdered sugar on the lowest speed until incorporated, about one minute.
Scrape down to the bottom of the mixing bowl with a spatula to loosen any butter and sugar and add the next quarter of powdered sugar and mix for another minute on low.
Scrape down to the bottom of the bowl, add another quarter of the powdered sugar, mix for one minute on low, scrape, and add the final quarter of the powdered sugar and salt. Mix for one more minute on low, adding the vanilla once everything is mixed together and continuing to mix until it's incorporated.
Scoop about 1 cup of the buttercream into a small bowl. Add cream cheese and stir until combined. Cover the bowl with cling film or Saran Wrap until you're ready to assemble the cake.
Add pumpkin puree and pumpkin pie spice or cinnamon to the rest of the buttercream and stir until combined. Cover and set aside.
To put the pumpkin spice cake together:
Spread a bit of cream cheese buttercream onto the middle of a cake board or plate and press your first cake layer down to attach it. Spread cream cheese filling onto the top of the cake and then place another cake layer on top. Repeat with another layer of filling and the final cake layer.
Put the cake in the fridge for 30 minutes or the freezer for 15 minutes to chill and set. Then spoon half of the pumpkin buttercream on top and spread with an offset spatula or palette knife to cover the cake. Use a straight edges cake comb or frosting smoother to smooth the frosting but it doesn't need to be perfect yet! Chill in the fridge for another 30 minutes or freezer for 15 minutes to set this crumb coat of frosting.
Spoon the rest of the pumpkin buttercream onto the cake and spread to cover the cake. Smooth with a cake comb and optionally, add texture with the back of a spoon.
To decorate the cake with pumpkins, add orange food colouring to the leftover pumpkin buttercream and spoon into a piping bag fitted with a small star shaped tip e.g. #32. Starting at the bottom of the cake, pipe two curves for the outer edges of a pumpkin. Pipe curves within those, working towards the middle of the pumpkin. For pumpkins on the top of the cake, pipe a blob of buttercream and then pipe curves to cover that. For stems or stalks, add brown food colouring or melted chocolate to the leftover orange buttercream and spoon into a piping bag fitted with a small round tip e.g #4 or small star tip e.g. #16. Pipe a line on top of each pumpkin.
You can refrigerate this cake for 2-3 days but take out 2 hours before serving so that the cake comes to room temperature.
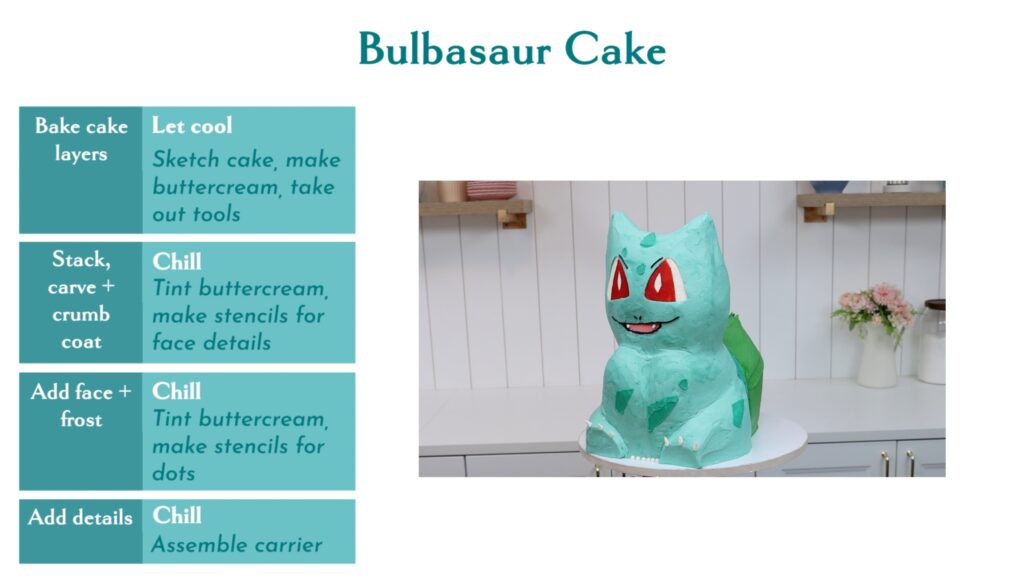
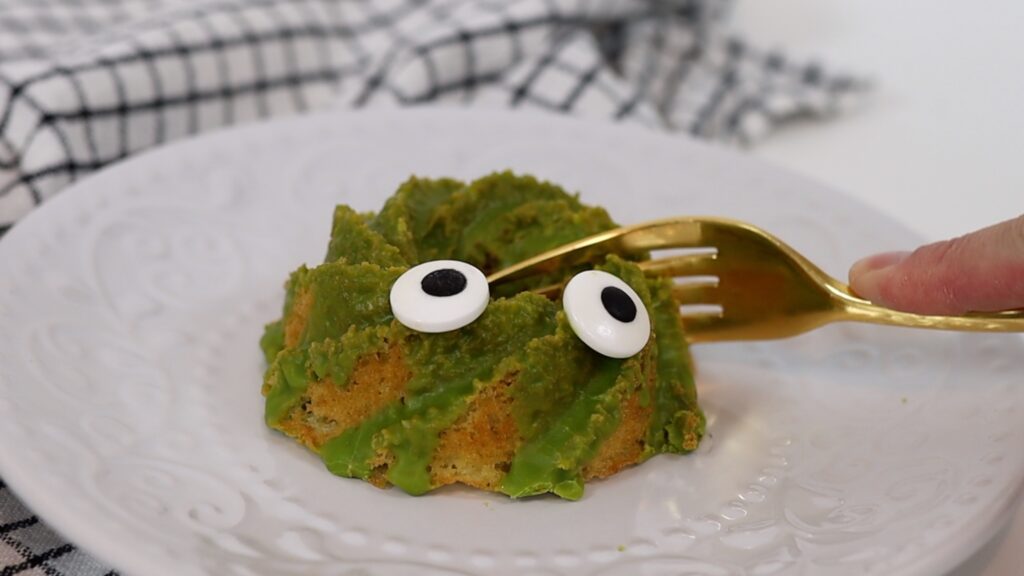
Let's make this cute buttercream Bulbasaur cake without fondant. The only special tools you'll need are parchment or wax paper and some straws.
Bake the Bulbasaur cake layers
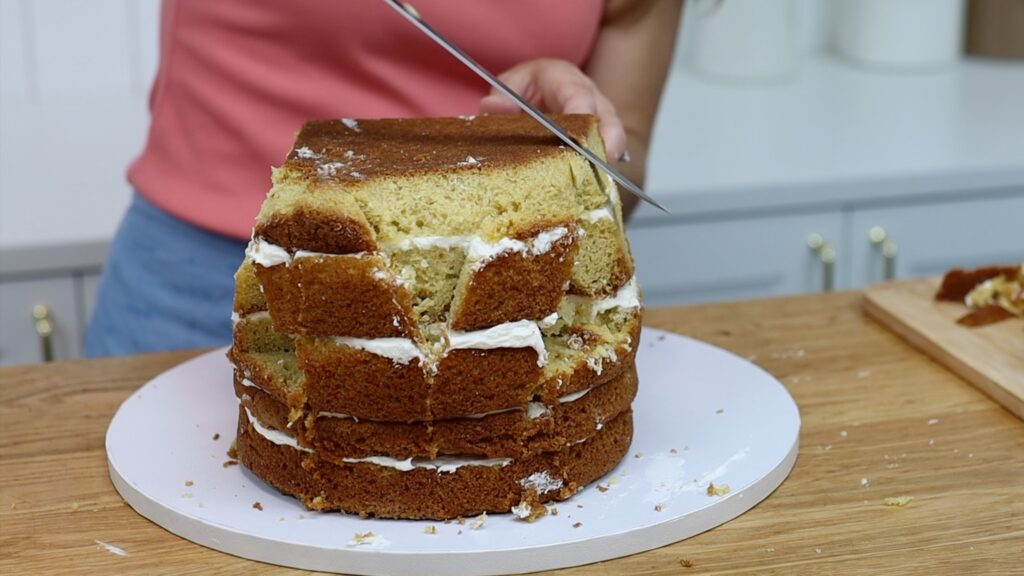
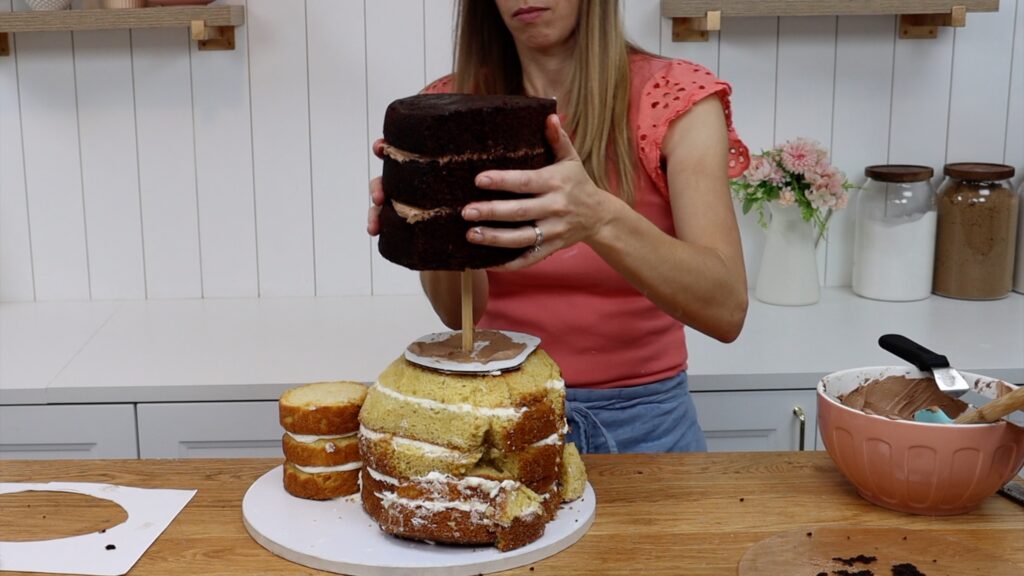
Of course, the first step is to bake your cakes. You'll need a 4 inch cake and two 8 inch cakes to make this Bulbasaur cake. I baked both vanilla and chocolate to offer different flavours for the top and bottom half of the cake. The recipes are at the end of this tutorial.
If you're not going to serve the cake on the same day I really recommend using simple syrup. To make simple syrup, pour half a cup of water and half a cup of white sugar into a pan. Bring to a simmer so that the sugar dissolves. After the syrup cools, drizzle it with a squeezy bottle or use a pastry brush.
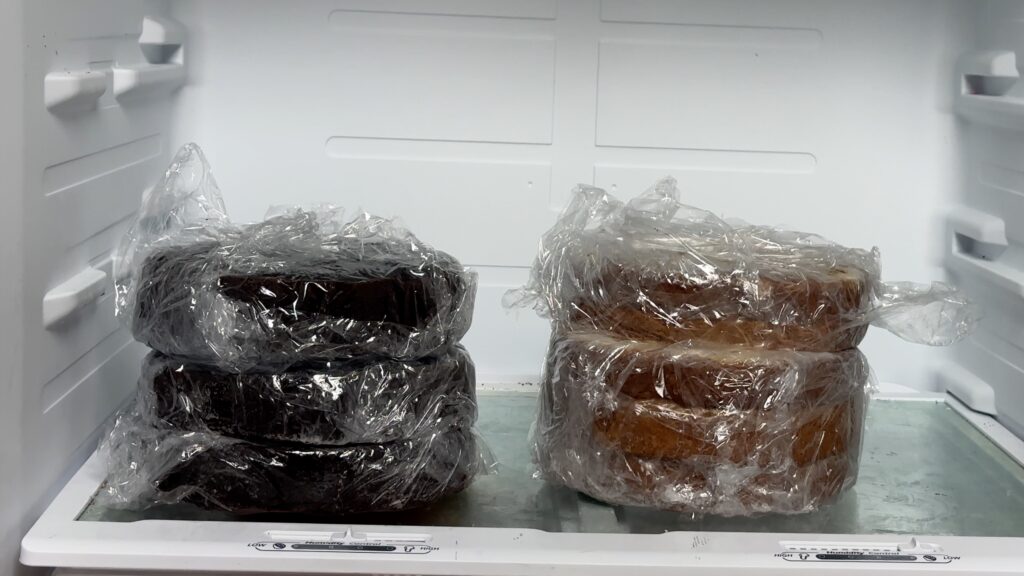
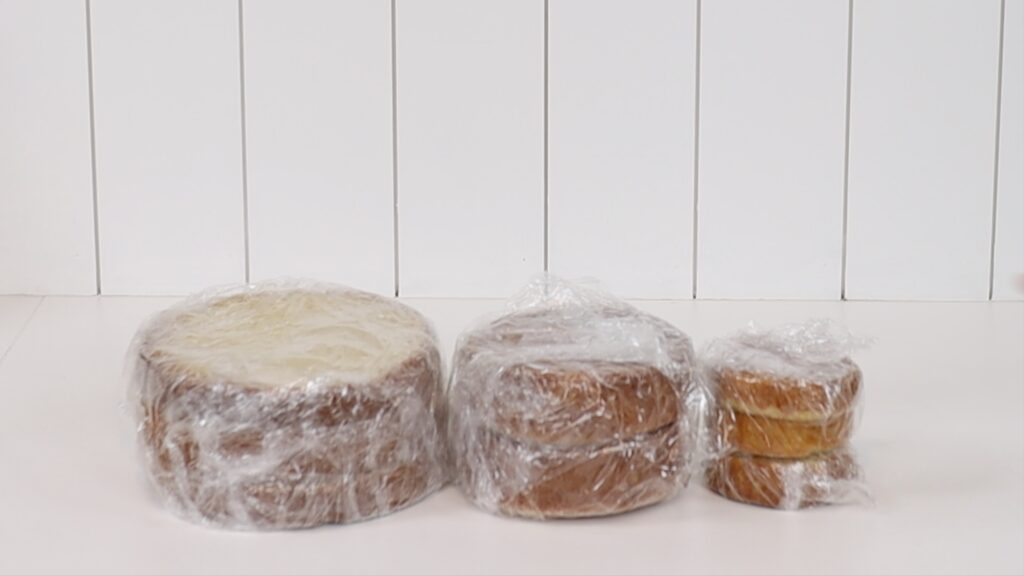
Wrap the layers in cling film or Saran Wrap and chill them before assembling your cake. You can put them in the fridge for an hour or the freezer for 30 minutes. If you choose to bake your cake layers in advance and freeze them, check out this tutorial on how to freeze cakes.
For the filling and frosting I'm using my 4 Minute Buttercream. The recipes for all of these are at the bottom of this tutorial.
Make a template for your Bulbasaur cake
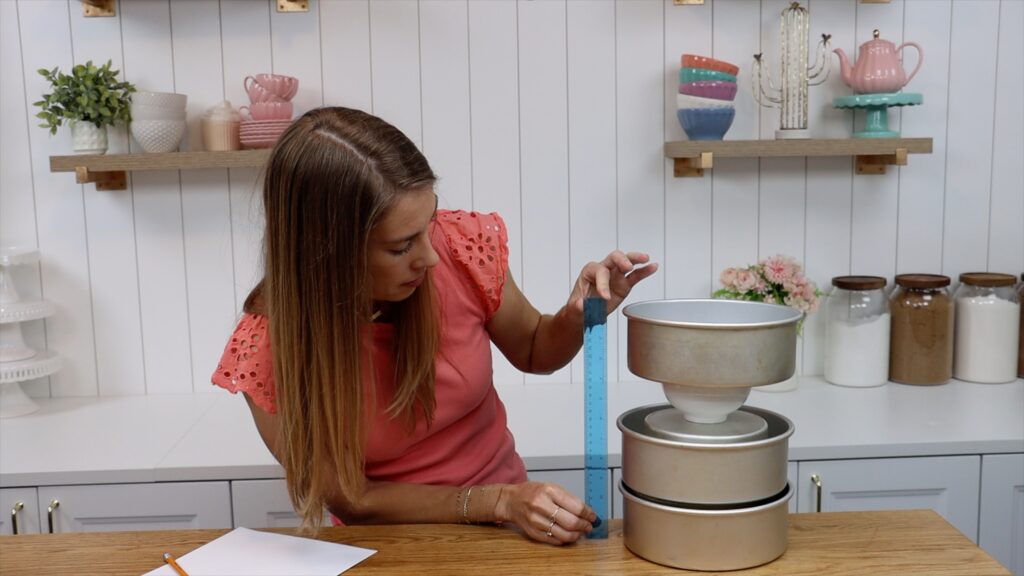
Before assembling and carving the Bulbasaur cake you'll need a template. I like to do this by setting up a fake cake using the pans I baked my cake layers in. I've used a bowl to prop up a pan the pile is the same height as the cake will be.
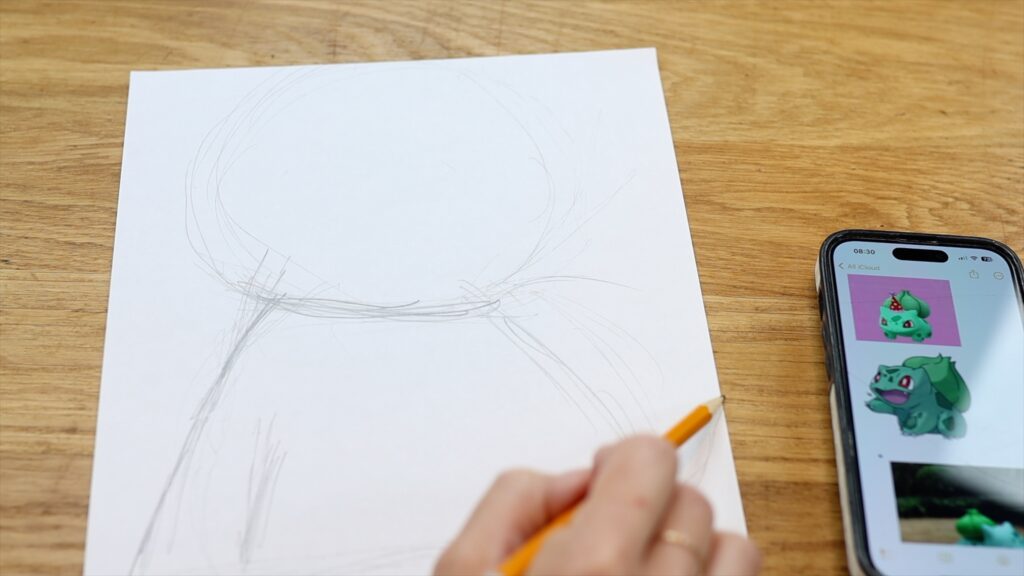
This Bulbasaur cake will be about 8 inches wide and 11 inches high. This is almost the same as a piece of printer paper, plus the green plant bulb on the back. To sketch Bulbasaur I'm using pictures from a Google search as references. Choose images of different angles to show you what each side of Bulbasaur looks like. When you sketch Bulbasaur, the body should fit within the piece paper. The green plant bulb doesn't need to because that will be made from the little 4 inch cake.
Draw the outline from three angles: the front, the side, and the top of the head. Measure the head by tracing the width and depth on your front and side view drawings.
These sketches don't have to be super accurate because they're just guidelines to use when you're carving. Once you have your sketches it's time to stack the cakes.
Assemble the bottom cake
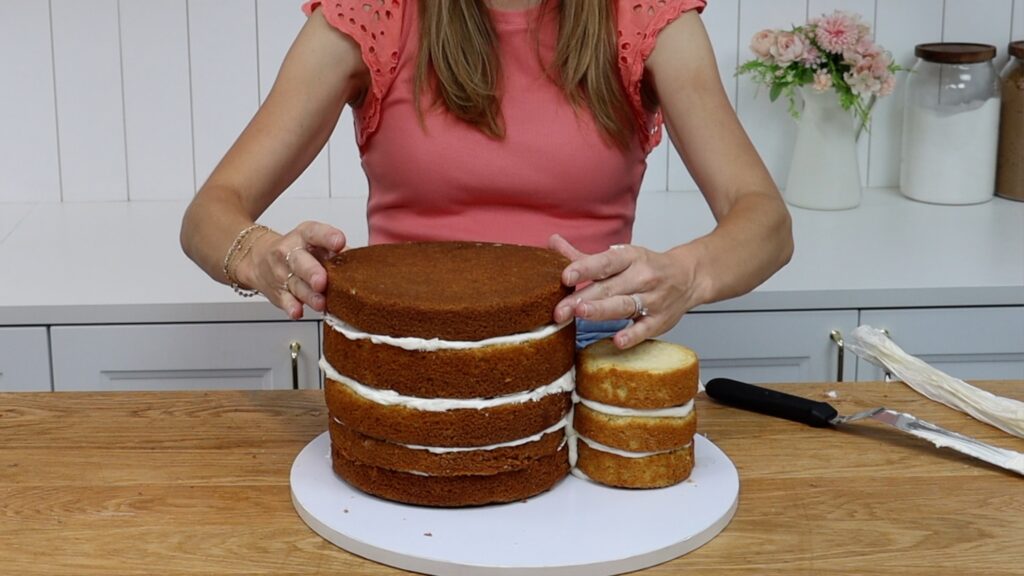
To support the weight of the Bulbasaur cake you'll need a cake drum, which is a thick cake board. Choose one at least 14 inches wide. If you don't have one you can glue together four cardboard cake boards to make a thicker board. Take your cake layers out of the fridge or freezer and stack the 8 inch cakes on the board. Slide them off-center to make space for the 4 inch cake behind. Now pipe or spread a dot of buttercream in the middle of where the 8 inch layers will go. Press your first 8 inch cake layer down onto it.
Then pipe or spread buttercream to cover the first layer and repeat with the rest of the 8 inch vanilla cake layers. You're stacking the bottom half of the Bulbasaur cake, which will be the body.
Instead of buttercream filling you can use any other filling. You should still pipe the outer ring of buttercream, which will act as a wall to hold in runny fillings like jam or caramel.
Next add the 4 inch layers, which are the beginning of the plant bulb on Bulbasaur's back. Attach the first 4 inch layer with a dot of buttercream on the cakeboard. Add another dot against the 8 inch layer to stick the body and the bulb to each other. Repeat with the rest of your 4 inch layers. The rest of the bulb will be made with the cake carved off the body and head later.
Carve Bulbasaur’s body
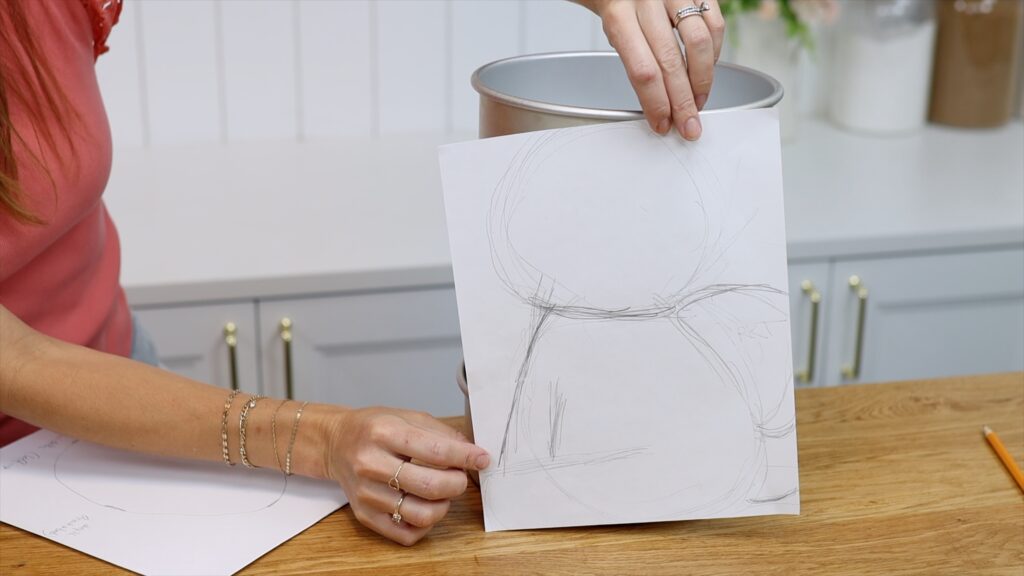
To carve the cake so far, hold up the sketch of the front view. It's easiest to cut along the outline first, to take away the rest of the paper.
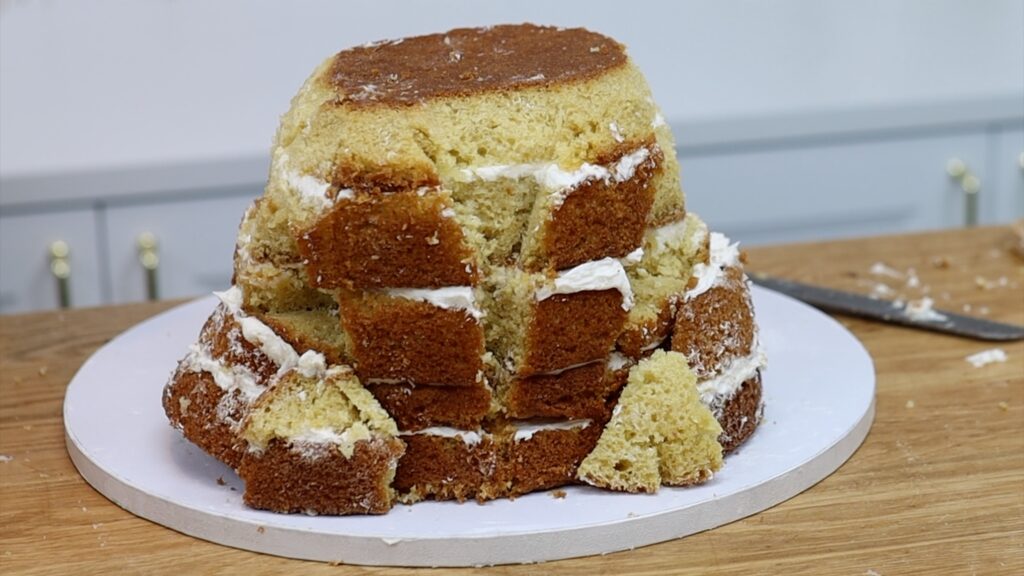
Cut diagonally down from the top of each side to trim off two chunks of cake. This will create the approximate shape of Bulbasaur's body. Save these cut-offs for later! Do the same for the side view, carving to make a slope down the top of the back.
Then cut out smaller pieces to create the details. I cut two triangles for the gaps between the outsides of the arms. A third triangle created the gap in between the arms.
When you've made the general shape of the body, trim around any angular parts to make them curved or rounded. Now the body will start to come into being.
For the legs you'll use the first two chunks you cut off at the beginning. Pipe or spread buttercream where they're going to go and then press the chunks of cakes into that buttercream, which will act as glue to attach them.
For the feet, pipe a bit more buttercream onto the front of each leg. Then choose a triangular-shaped piece for each foot. If you don't have a piece the right size you can attach two pieces, stuck together with more buttercream.
When you cover the body with buttercream, the frosting will give the body a more precise, accurate shape.
Before creating the bulb at the back you'll need to carve the head so that you can use those carvings to build up the bulb.
Add supports to the Bulbasaur cake
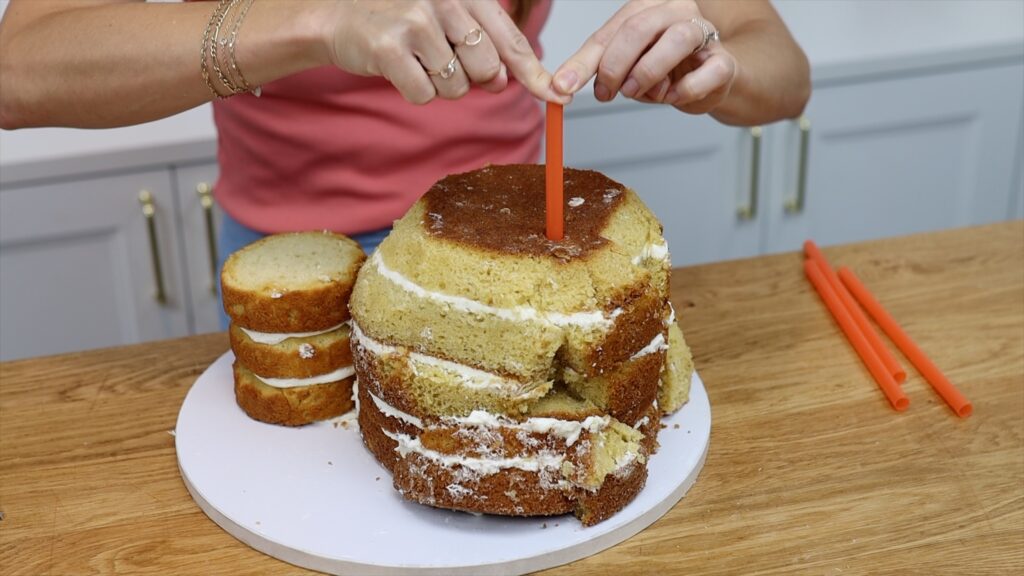
You'll need a 6 or 7 inch cardboard cake board and some boba straws for this next part. Cut the board to be the size and shape of the top of the body. The head will sit on this board. Boba straws will act as supports to hold the board up. Boba straws are wider and stronger than regular straws.
Position a straw about an inch from the edge of the top of the cake. Push all the way down into the cake until you feel it hit the cake drum at the bottom. Then pinch it where it sticks out of the cake and pull it up and cut it there. Now it's exactly the same height as the cake.
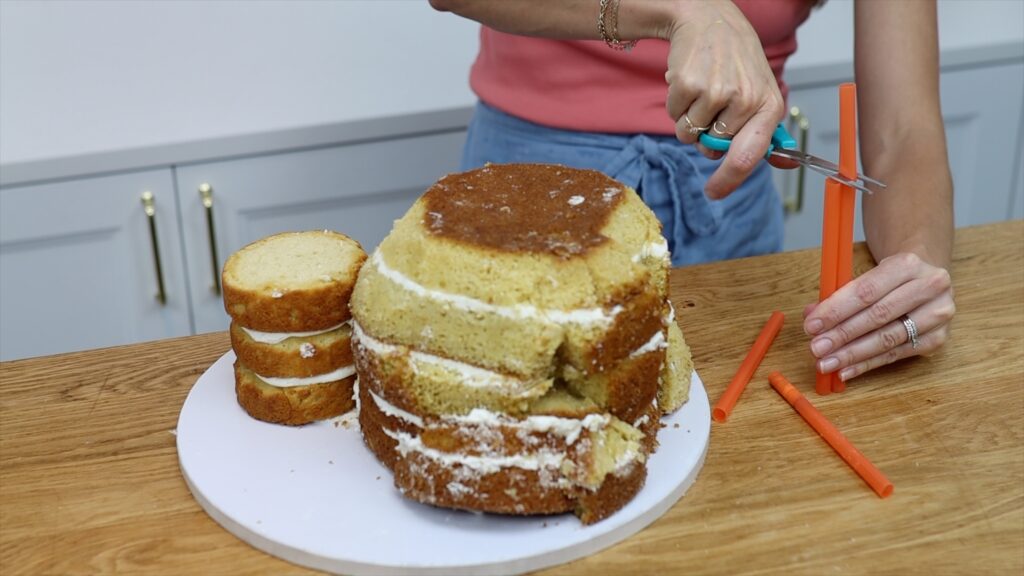
Hold this straw against the other three straws and use it to measure and cut them the same height. These straws will prop up the cake board with the head on top so it doesn't sink down into the body.
Push the first straw back into the cake where it was before and then push the other three in. As you push, check the straw from different angles to make sure it's straight and not at an angle. A straight support is much stronger than a leaning one. Make a square formation of straws with each one about an inch from the edge of the cake. Pipe or spread a dot of buttercream over each straw.
Optionally, cut a hole about half an inch wide in the middle of the board by poking a scissor blade through it. This is a good idea if the cake is going to be driven anywhere. I'll show you what to do with this hole later. Then press down the cake board that you cut. Pick the Bulbasaur cake up and put it into the fridge to chill before you add the head. When the cake is cold it will be firmer and sturdier.
Assemble Bulbasaur’s head
Bulbasaur's head will be made out of chocolate cake and chocolate buttercream. To make chocolate buttercream, add melted chocolate to two cups of the buttercream. Also add cocoa powder mixed with just enough water to make a thin paste. This will make the buttercream super chocolatey.
While the bottom half of the cake is still in the fridge, stack the chocolate layers. This cake will become the head. Alternate cake layers with the chocolate buttercream as filling or use whatever other filling you like.
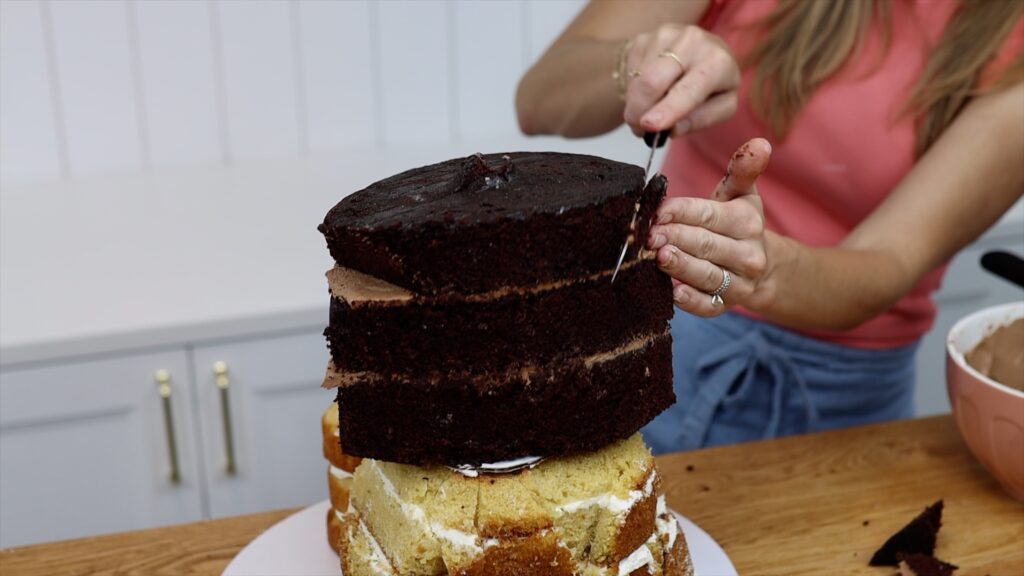
Carve Bulbasaur's head
Use the sketch of the top view of Bulbasaur's head to carve this cake. Push the sketch to one side of the cake instead of placing it in the middle. Cut around it to give you the shape of the head at its widest part. You'll trim it to shape it later.
Take Bulbasaur's body out of the fridge when you're ready to stack the head on top. If you're going to transport the cake, push a wooden dowel through the hole you cut in the cake board. Measure the height of the cake and cut it just a tiny bit shorter. This will stop the top of the cake sliding around in the car. You can buy the dowels from cake decorating or craft stores. If the cake isn't going anywhere skip the dowel.
Spread some chocolate buttercream on top of the cakeboard to act as glue to attach the head. Then lower the chocolate cake down onto the dowel to center it on top of the board.
Now it's time to carve the head, which is much simpler than the body. Cut a diagonal chunk off the top of each side of the first layer, carving down and inwards. Then cut diagonally upwards from the bottom of the middle layer up to the top layer.
Then use little sawing motions to make the head curve around at the top and the bottom.
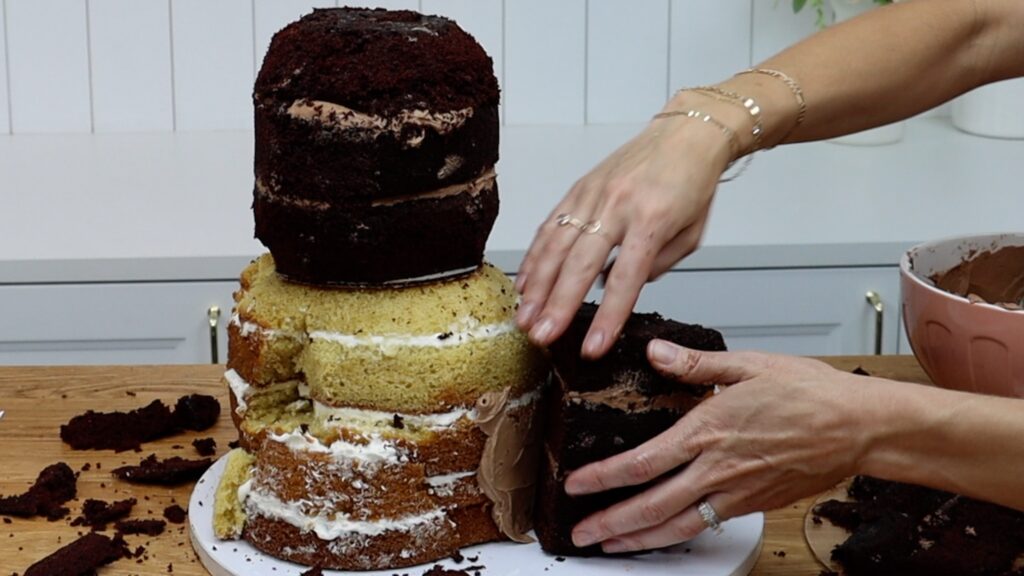
Shape the bulb and ears
Next you'll need the rest of the chocolate cake that you cut off when you trimmed around the sketch of the top of the head. Let's call it the chocolate cake leftovers, so that you know what I'm talking about later. Make two cuts to divide it into three pieces, which you'll use to make the bulb shape. Start with the two outer pieces, attaching those onto each side of the 4 inch cake. Use buttercream as glue to attach them.
Then cut the middle section of the chocolate cake leftovers in half. Attach each of those pieces (using buttercream) next to the body to fill out the bulb shape.
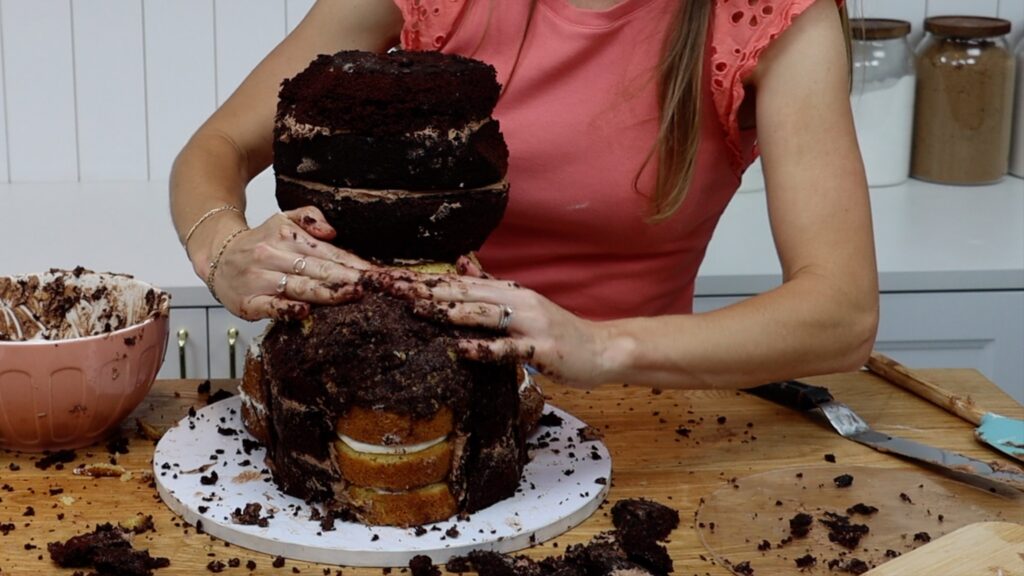
For the tip of the bulb and the pointed ears, crumble up the rest of the cake carvings. Mix them with just enough buttercream to hold the crumbs together. The mixture should feel like Play-Doh. Push the mixture onto the top of the bulb to make it rounded with its tip pointing up at the back. Then use little sawing motions to carve the cake layers of the bulb so it's not so angular.
For the ears, pipe or spread a dot of buttercream where you want each one to go. Roll two balls of the cake and frosting mixture a little bigger than a golf ball. Press them into the head and mold them with your fingers to make the ears. When the buttercream sets it will hold the ears in place so that they're sturdy enough to frost.
Put the Bulbasaur cake back into the fridge for 30 minutes to an hour to set the buttercream. When the cake gets cold, it will firm up before you frost it.
Crumb coat the Bulbasaur cake
You'll need about 5 cups of buttercream or 1.2 kg for the crumb coat. The crumb coat is much easier with a thin consistency of buttercream rather than when it's stiff. Add some milk until you can stir the buttercream easily and it looks smooth. Use a small offset spatula or palette knife to spread the buttercream all over the cake.
You need to completely cover the cake so there's no naked cake exposed. This layer of frosting is going to trap any crumbs that come off the cake. After this layer sets, those crumbs won't be able to get into the next layer of frosting.
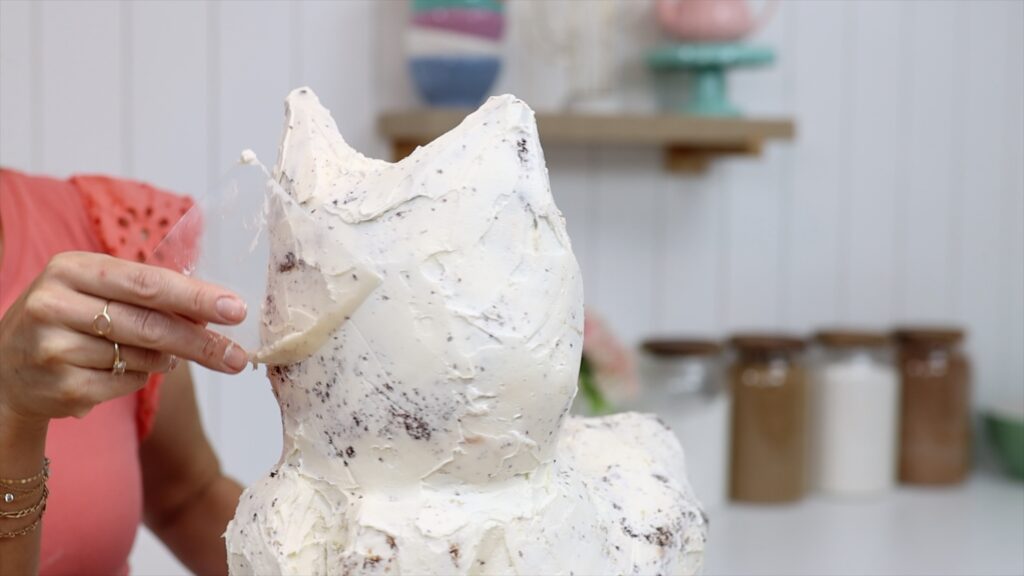
The crumb coat doesn't need to be perfectly smooth because it's going to be covered up soon. But you don't want any big bumps or bulges of buttercream because those could poke through the final layer of frosting. Try to get the crumb coat fairly smooth, which you can do a few different ways. You can use a small offset spatula or cut a small piece of acetate.
Prepare your materials
Put the Bulbasaur cake back into the fridge for 30 minutes to an hour to set the crumb coat. Meanwhile, set aside one cup of buttercream and tint the rest turquoise for the body. You'll use the leftovers to tint darker for the teal markings on the body and also for the green bulb.
For turquoise you can use turquoise gel or sky blue with a tiny bit of green. I like to add a small amount of avocado green or brown to make it less bright.
With the cup of white buttercream you set aside, get two little bowls and put about 2 tablespoons into each. To one of the bowls add a tiny drop of red to make pink for Bulbasaur's mouth. Add a few drops of red to the other bowl to make red for the eyes.
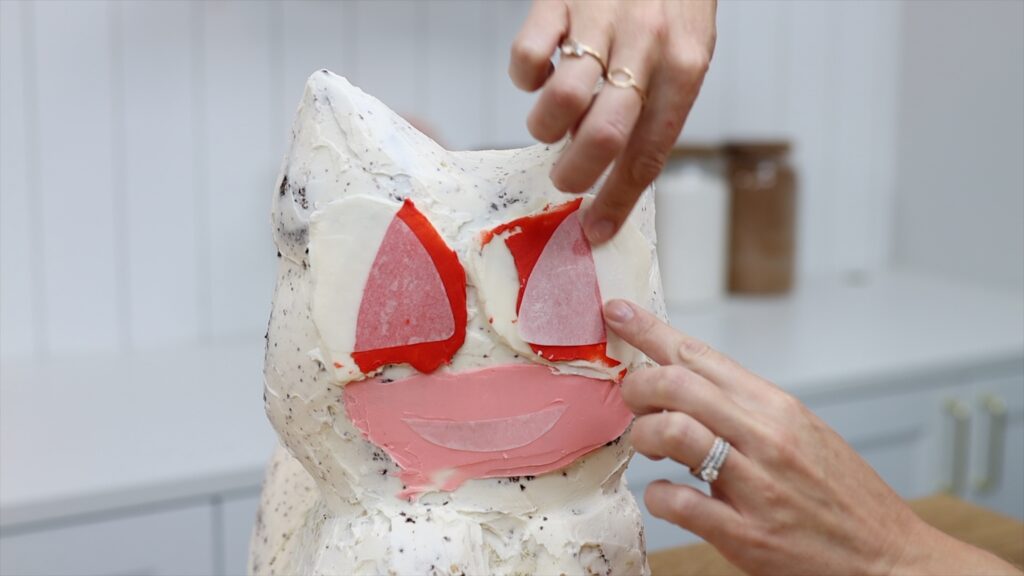
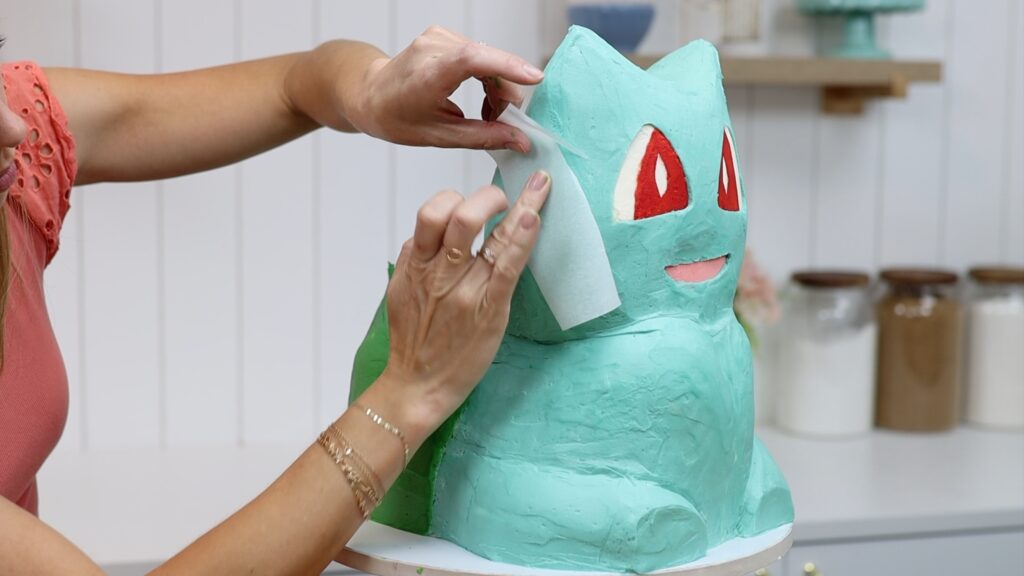
Draw a triangle onto parchment or wax paper for Bulbasaur's eye. Cut out two of these and also the pink part of Bulbasaur's mouth. Then take your cake out of the fridge.
Add some details to Bulbasaur
Spread pink frosting where you want the mouth to go and white frosting where you want the eyes to go. You might be able to see dark coloured cake crumbs through the white frosting and if you can, spread on another layer until it covers up the cake underneath.
Then press the parchment eyes and mouth onto the patches of frosting. My 5-year-old made sure he told me me that I made Bulbasaur's eyes too close together! Chill the cake for about 30 minutes to set this frosting and then peel the parchment eyes off.
Use another two pieces of parchment cut in a curve shape as stencils to cover up the outer halves of the eyes. These will stay white and the rest will be red. Also cut two little ellipses or pointed ovals to be the reflections within the red eyes. Now spread the red buttercream over the eyes and peel the curved parchment off.
Then cover the entire eye with the parchment triangle you cut out earlier. You'll peel the ellipses or pointed ovals off later. Scrape away any white or red or pink buttercream that's sticking out around the parchment eyes and mouth.
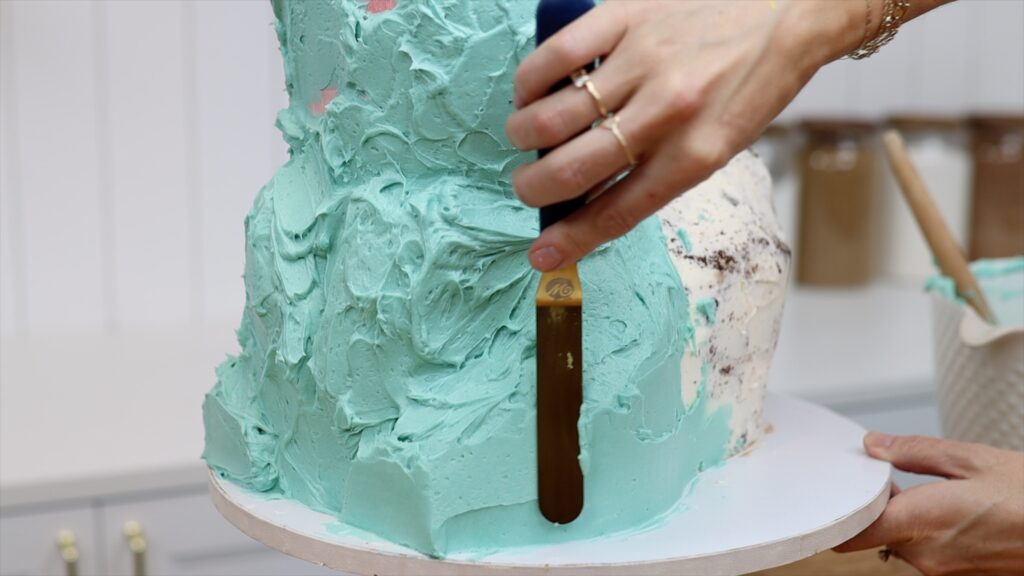
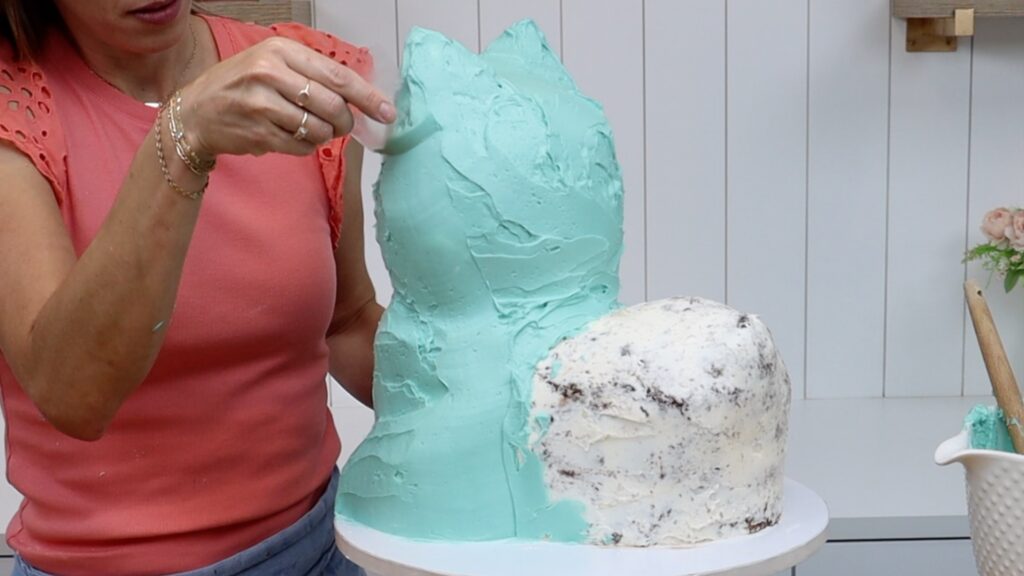
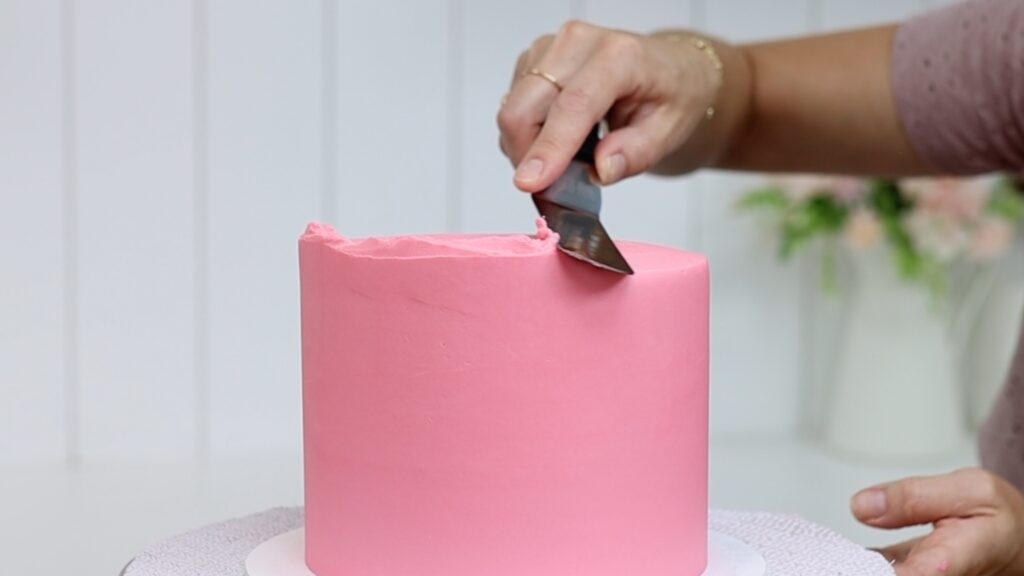
Frost the Bulbasaur cake
Frost the body and head of the Bulbasaur cake with your turquoise buttercream. The buttercream eyes and mouth will be firm because they're on top of cold buttercream and cake. You can spread over them without damaging those details.
The next part is definitely the most time consuming stage! Smooth this turquoise buttercream. You can use your offset spatula, which will smooth the frosting that the blade scrapes over. But it will leave a trail of texture along both edges of the blade. The other option is to use a small piece of acetate. This works really well for sculpted or carved cakes because it curves around the cake. The acetate will create smooth, rounded shapes. Since it's so thin it doesn't leave the trails of texture that an offset spatula does.
Acetate will pick up buttercream as you smooth, which you'll have to scrape off into your bowl of frosting. Wipe the acetate clean before using it again. This process is slower with acetate than with an offset spatula. I think the quickest smoothing technique with the neatest results is to use an offset spatula first and then acetate.
Get the frosting as smooth as you can with the spatula and then use the acetate to get it even smoother. Since the frosting is already quite smooth, the acetate won't pull off as much buttercream so you won't need to clean it as often compared to skipping the offset spatula stage and going straight in with the acetate.
Just to set your expectations, spreading and smoothing this turquoise buttercream took me 49 minutes. Make sure you give yourself enough time for this part!
Frost Bulbasaur's bulb
Chill the Bulbasaur cake again in the fridge for 15 to 30 minutes to set this turquoise frosting. Then to get the parchment off the eyes, use a toothpick to scrape gently from the middle of the eye outwards. You'll feel the smooth, firm surface of the parchment underneath your toothpick. When that surface changes, you've come to the edge of the parchment. Use your toothpick to pry up the edge of the parchment. Then pinch it and peel it away from the cake. Do the same for the mouth and also for the white reflections within the eyes.
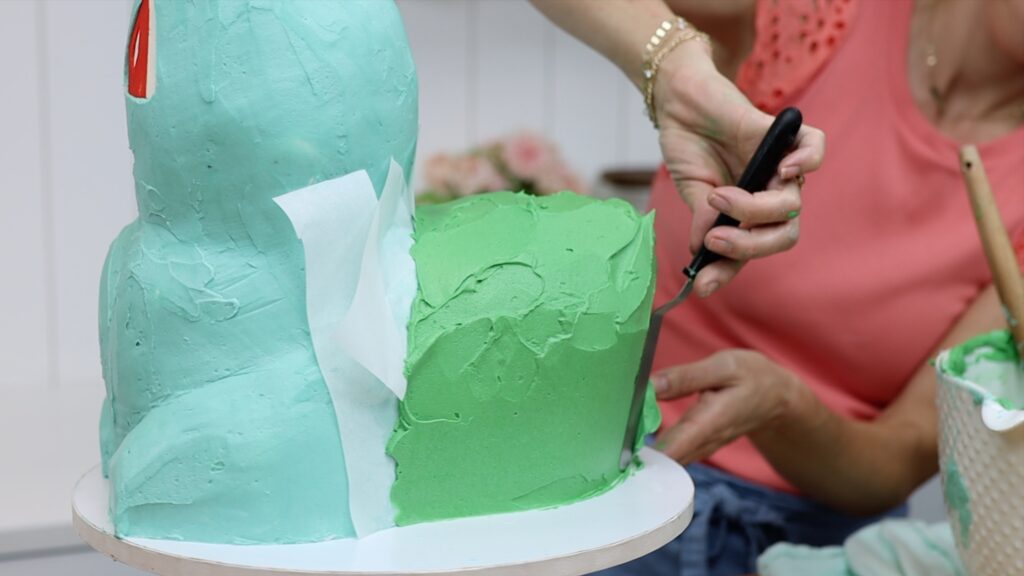
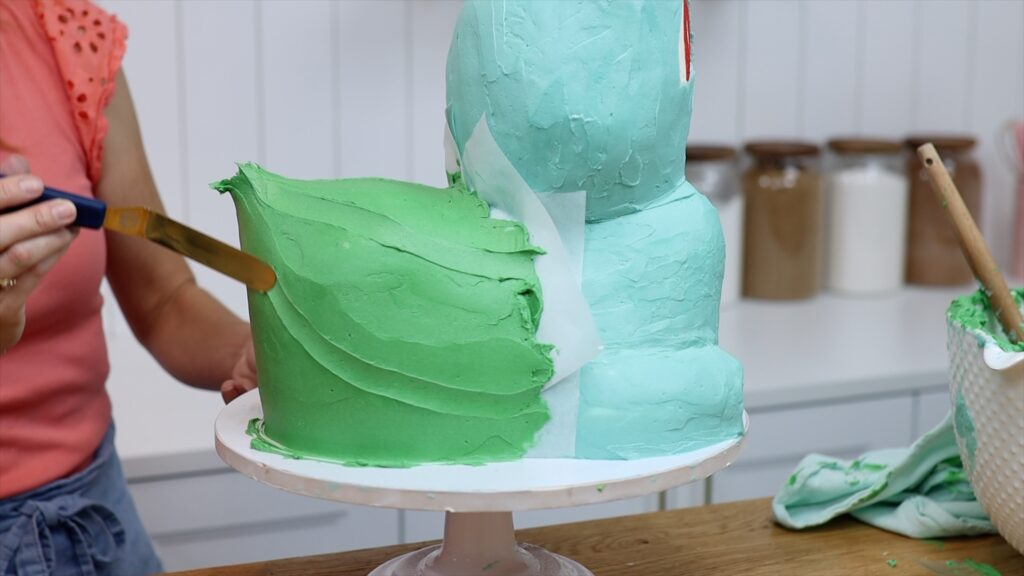
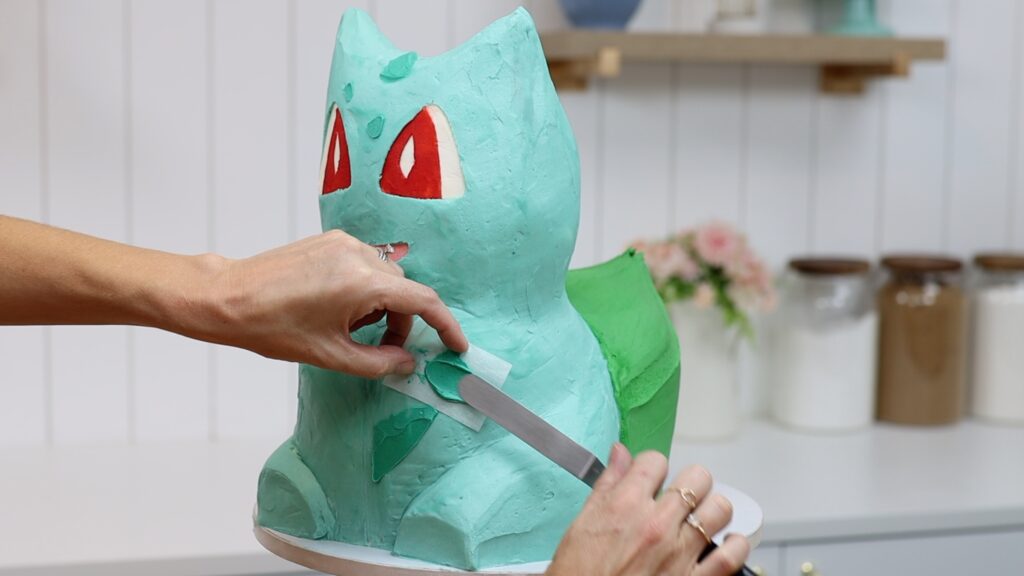
Set aside about a 1/4 of a cup of turquoise buttercream for the teal skin markings. Tint the rest to be a bright green, which you'll use to frost the bulb. But first, use strips of parchment to cover up the turquoise body along the join of the body and the bulb. This will keep the green frosting off the body so that it only covers the plant bulb. Smooth this using you offset spatula or acetate or both.
To create the curves of the bulb, use an offset spatula dipped in warm water to mark out the different sections. Or to make deeper grooves, spread the buttercream more thickly and then use acetate to carve it out between each section.
Pinch the edge of each parchment strip and peel it away from the cake.
To get the frosting even smoother, put the Bulbasaur cake back into the fridge for 30 minutes to set the frosting. Then press a piece of parchment paper over any texture and rub against it with your fingers. You'll flatten the buttercream underneath to leave it smooth.
Add more details to the Bulbasaur cake
For the final details, add more blue and green gel to the little bowl of turquoise frosting you set aside. You're aiming for a teal that's darker than the body. Use a few small pieces of parchment paper to cut out the markings on Bulbasaur's face and body. One by one, press them against the cake and spread the teal buttercream over them. Scrape a few times with your offset spatula to take off the excess frosting, leaving a thin, smooth layer behind.
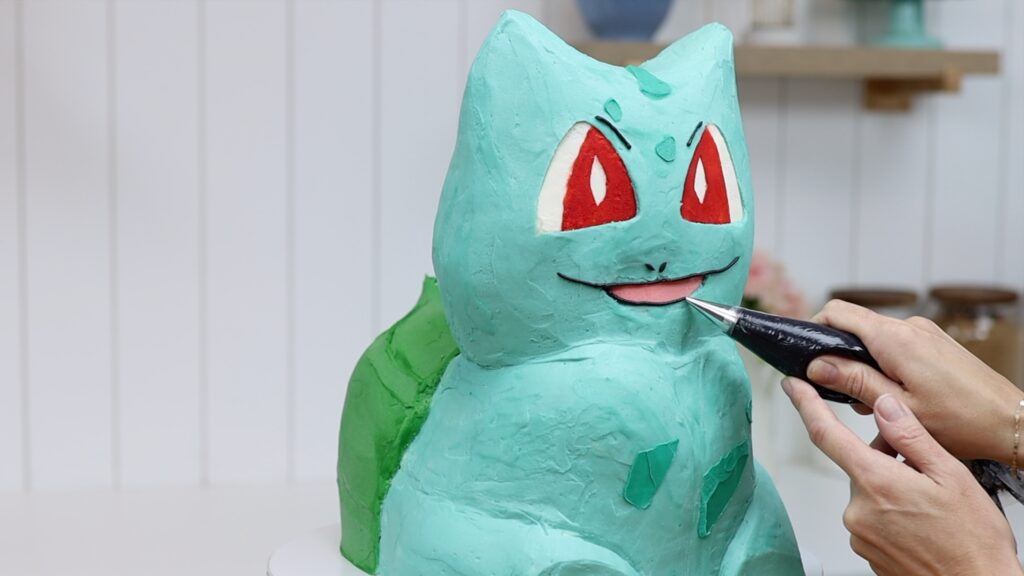
For the line details on the face, tint about 2 tablespoons of the leftover green buttercream using black gel. Put it into a piping bag with a small round piping tip like a #3. Pipe the eyebrows and the nostrils and also outline the mouth to make a smile or other expression. If you're new to piping, check out my tutorial on 15 piping hacks!
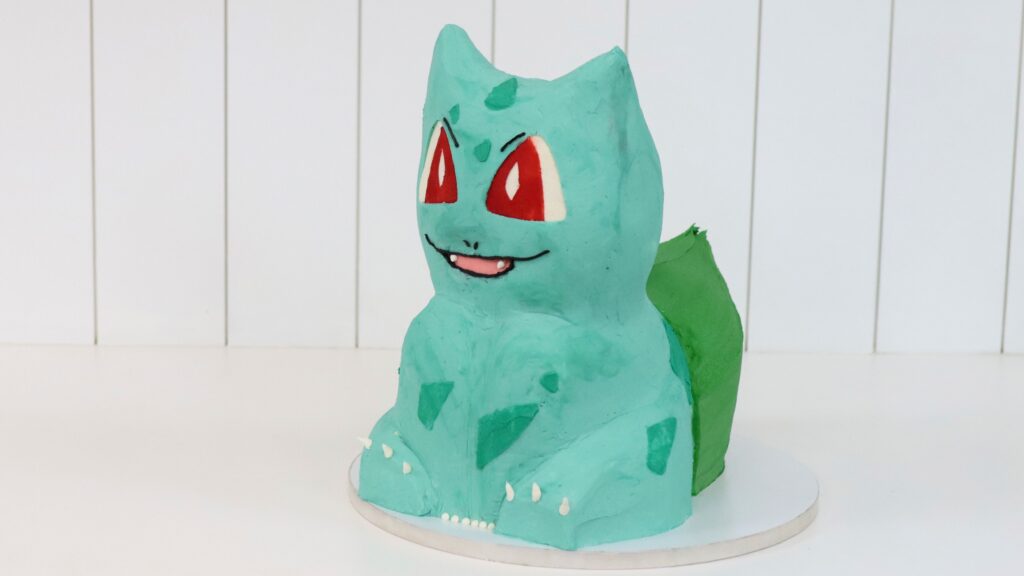
Finally, use the leftover white buttercream in a piping bag with a medium round tip like a #8. Pipe the nails or claws on the feet and hands and also the teeth.
How to store and transport this Bulbasaur cake
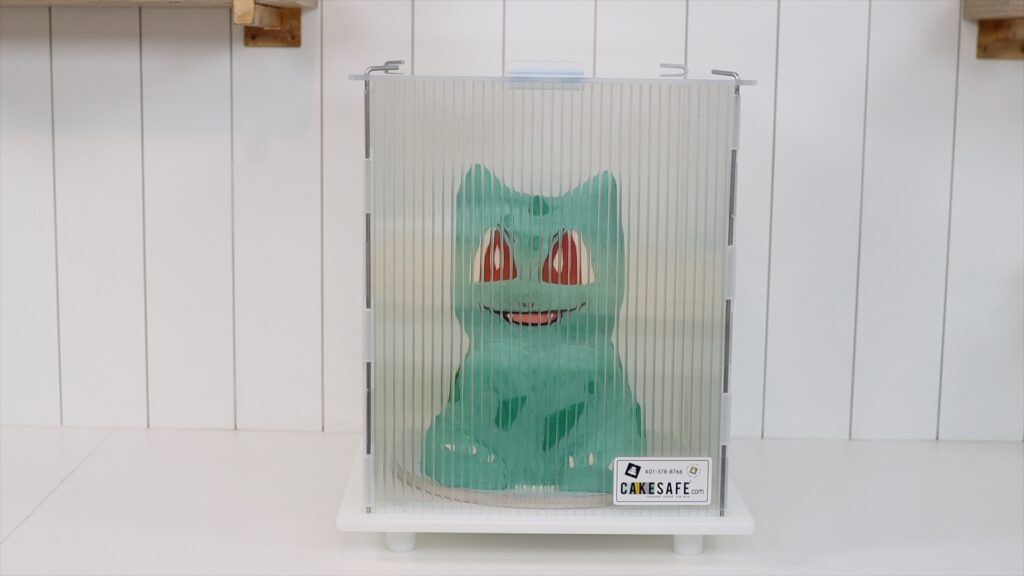
Keep this Bulbasaur cake in the fridge to keep the cake and buttercream firm and stable. Take it out just before you transport it, if you're taking it somewhere else to serve. For transportation it's really important to keep this Bulbasaur cake on a flat surface. The flat surface combined with the central dowel and the buttercream you spread on the cake board will prevent the cake from sliding around.
This is a Cake Safe, which comes with a central dowel that I didn't use because I'd already added one.
Place the cake somewhere flat in the car, ideally in the boot or trunk. Another option is the footwell in front of the passenger seat. If you're not taking the cake anywhere, take it out of the fridge about 2 hours before you serve it. This gives the cake and buttercream time to come to room temperature, when it tastes the best.
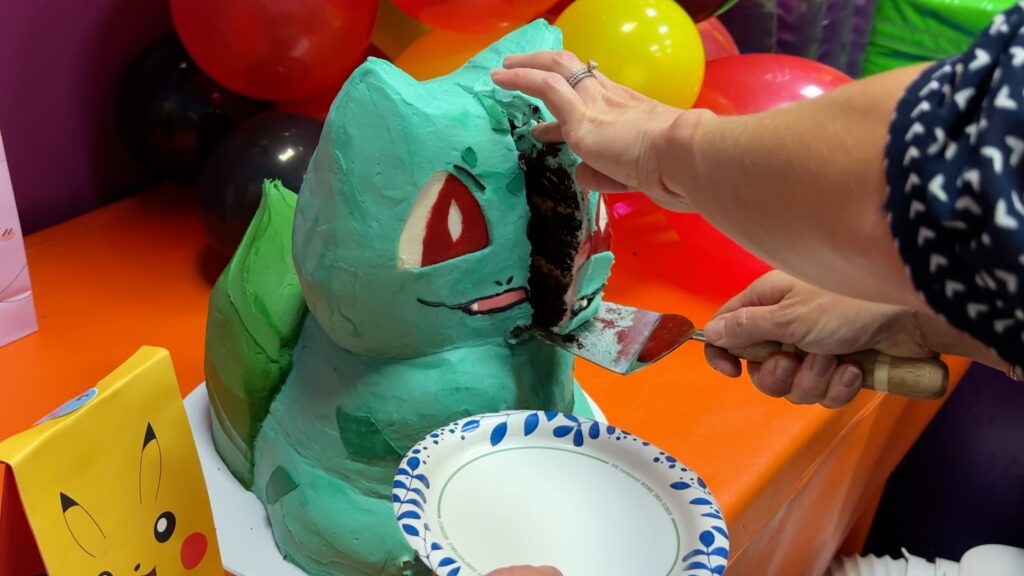
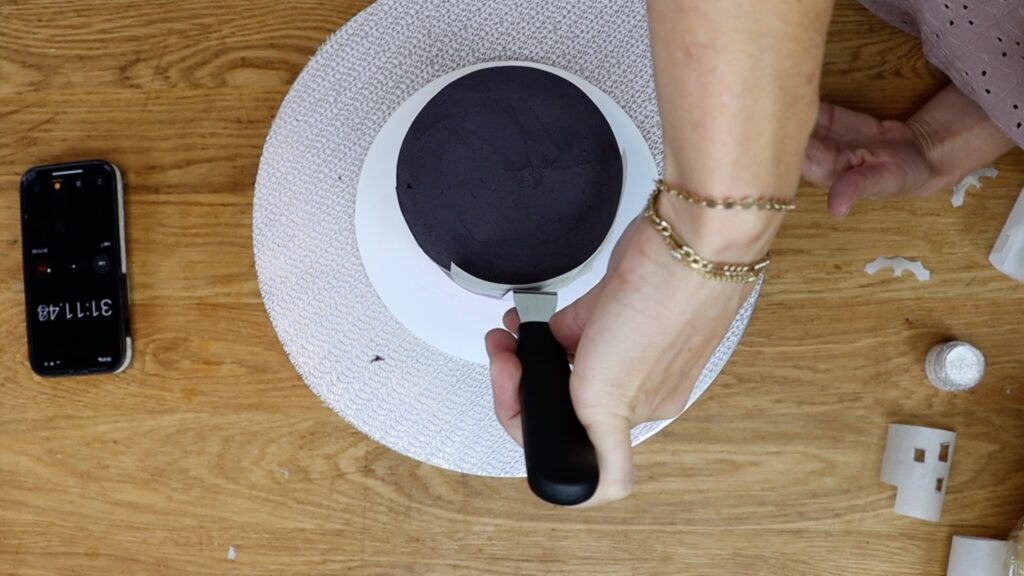
How to serve a sculpted cake
Serving this cake is really straightforward. Start at the top, cutting down into the head and you'll feel the knife hit the cakeboard under the head. Slide your cake slicer or server in there just above the cakeboard to lift the slice out. Serve the whole top half of the cake like this.
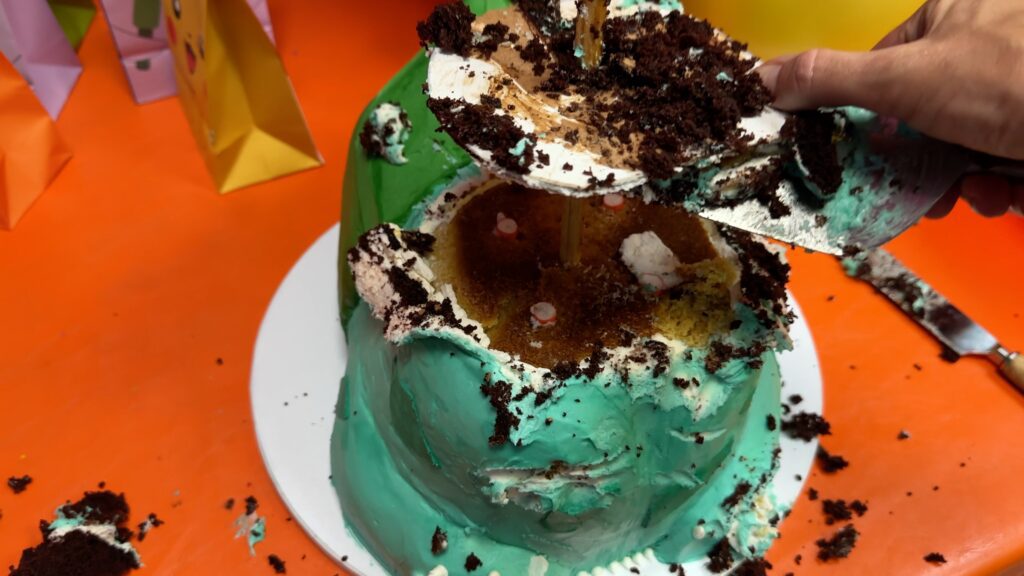
When you've sliced all of that, lift up the cake board that was in the middle of the cake. Now serve the bottom half of the cake.
You can serve about 60 people with this cake. We cut up the leftovers and kept them in a tupperware in the fridge to enjoy for the next week. You could freeze them for up to two months.
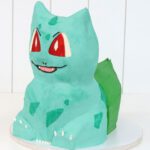
So, that's it! Everything you need to know to make a buttercream Bulbasaur cake with no fondant. Ask me any questions in the comments or tell me which character you'd like to see next! And visit my cake school to learn hundreds more cake decorating techniques!
Make this buttercream Bulbasaur cake without fondant and with no fancy tools!
Ingredients
UnitsScale
For the vanilla cakes:
1 3/4cups unsalted butter
2 1/3cups white sugar (granulated sugar)
7 eggs
1 tablespoon vanilla extract
1cupbuttermilk
1/4 cup vegetable oil
4cups plain flour (all-purpose flour)
1 tablespoon baking powder
3/4 tablespoon baking soda
1/2 teaspoon salt
For the chocolate cake:
2 1/2cups warm water
1 1/4cups cocoa powder
1 1/4cups unsalted butter
3cups white sugar
5 eggs
2 1/2 teaspoons vanilla extract
3 1/3cups plain flour
1/2 teaspoon baking powder
2 1/2 teaspoons baking soda
1/4 teaspoon salt
For the buttercream:
3 3/4cups unsalted butter at room temperature
3lb powdered sugar
3/4 teaspoon salt
2 teaspoons vanilla extract
1/4 - 1/2 cup cream or milk
Instructions
To make the vanilla cakes:
Using a mixer with a beater/paddle attachment, beat room temperature butter and sugar on medium speed until pale and creamy, about 2 minutes. Scrape down to the bottom of the bowl once during mixing to make sure no butter or sugar is stuck at the bottom.
Add eggs one at a time, mixing on the lowest speed after each addition for 30 seconds. Scrape down to the bottom of the bowl to make sure everything is incorporated before adding the next egg.
Add vanilla and mix for about 30 seconds to combine.
In a small bowl or measuring jug, mix room temperature buttermilk and oil. Add half to the butter mixture and mix on lowest speed to incorporate.
In a bowl, sift flour, baking soda, baking powder and salt. Add half of the flour mixture to the mixing bowl and mix on lowest speed to incorporate, scraping down to the bottom of the mixing bowl to check that batter is evenly mixed. Repeat with the remaining buttermilk mixture and then finish with the remaining flour mixture.
Grease three 8" baking pans and three 4" pans with non-stick oil spray or butter. Divide batter between the cake pans.
Bake at 160ºC or 325ºF. The 8 inch layers will take 38 minutes, or until a toothpick inserted into the middle of the cake comes out clean. The 4 inch layers will take 21 minutes.
Leave cakes to cool in their pans for 10 minutes. Use a spatula to loosen the cakes from the edges of the pans and then turn onto a wire cooling rack. Leave to cool completely and then wrap in plastic and refrigerate for at least 1 hour.
To make the chocolate cake:
In a bowl, whisk together warm water and cocoa powder until the cocoa has dissolved. Set aside to come to room temperature.
In a mixer with a beater/paddle attachment, mix butter with sugar on medium speed until pale and creamy, about two minutes. Scrape down to the bottom of the bowl once during mixing to make sure no butter is stuck at the bottom.
Add eggs one at a time, mixing on the lowest speed after each addition until incorporated, about 30 seconds.
Add vanilla and mix on lowest speed for about 30 seconds to combine.
In a bowl sift flour, baking soda, baking powder and salt. Add a third of the flour mixture to the mixing bowl and mix on lowest speed to incorporate.
Add half of the cocoa mixture to the mixing bowl and mix on lowest speed to incorporate. Repeat with another third of the flour mixture, then the remaining cocoa powder mixture, and then the remaining flour mixture. Mix just until the ingredients are combined.
Grease the inside (base and sides) of three 8" pans with non-stick spray, butter or oil. Divide batter between the cake pans.
Bake at 175ºC or 350ºF for 38 minutes, or until a toothpick inserted into the middle of the cake comes out clean.
Let cakes cool in their pans for 10 minutes. Use a spatula to loosen cake from the edges of the cake pan and then turn onto a wire cooling rack. Leave to cool completely and then wrap in plastic and refrigerate for at least 1 hour.
To make the buttercream:
Sift the sugar to remove any lumps and check that the butter is at room temperature - you should be able to slice through it easily with a spatula.
In a mixer with a beater/paddle attachment, mix butter for a few seconds until smooth. Add a quarterof the powdered sugar and salt and mix on the lowest speed until incorporated, about one minute.
Scrape down to the bottom of the mixing bowl with a spatula to loosen any butter and sugar and add the next quarter of powdered sugar and mix for another minute on low.
Scrape down to the bottom of the bowl, add another quarter of the powdered sugar, mix for one minute on low, scrape, and add the final quarter of the powdered sugar. Mix for one more minute on low, adding the vanilla once everything is mixed together and continuing to mix until it's incorporated.
Add the milk or cream and mix for about 30 seconds until it's combined with the buttercream. Check the consistency and add more milk or cream a tablespoon at a time until the buttercream is smooth and easily stirred.
Cover the bowl tightly with plastic wrap e.g. cling film/Saran Wrap.
To assemble, carve and frost the cake:
Please refer to the detailed tutorial above! You'll find step by step instructions along with photos of each step. If you have any questions, please ask them in the comments section below!
To store, transport and serve the cake:
Store the cake in the fridge until transporting or until 2 hours before serving.
If transporting, place the cake on a flat surface like the boot or trunk, or in the footwell of the passenger seat.
To serve the cake, slice the head first. You'll feel the knife hit the cake board in the middle of the cake. Slide your knife or a cake slice or cake server into the cake just above the board to remove each slice of cake. After serving the head, lift up the cake board from the middle of the cake and serve the bottom half of the cake.
I started my cake career making fondant cakes and a few years later switched to exclusively buttercream cake decorating. Yes, you can make sculpted, realistic designs using fondant. But here are 10 buttercream cake decorating techniques that I think are better than fondant!
#1 Piping
With buttercream you can create all kinds of texture with just a piping bag and a piping tip. Vintage or Lambeth cakes are really trendy at the moment:
Or try Russian tips to pipe every petals of each flower with a single squeeze of the piping bag. Piping buttercream is not only a quick technique, it's also a beautiful one. It takes both simple or intricate elaborate cakes to the next level.
#2 Carved buttercream cake decorating
Did you know that you can carve buttercream? When buttercream chills in the fridge it gets firm so you can layer different colours on top of each other. Then use a piping tip or carving tool dipped into warm water to slice through the outer layer of buttercream. You'll reveal the layers below, creating colourful and dimensional patterns and shapes.
#3 Painting on buttercream
Another surprising technique that works on buttercream is painting. Use gel colours and a paintbrush on buttercream that's been in the fridge for at least an hour to set. When it's cold and firm, it doesn't blend with the gel paints.
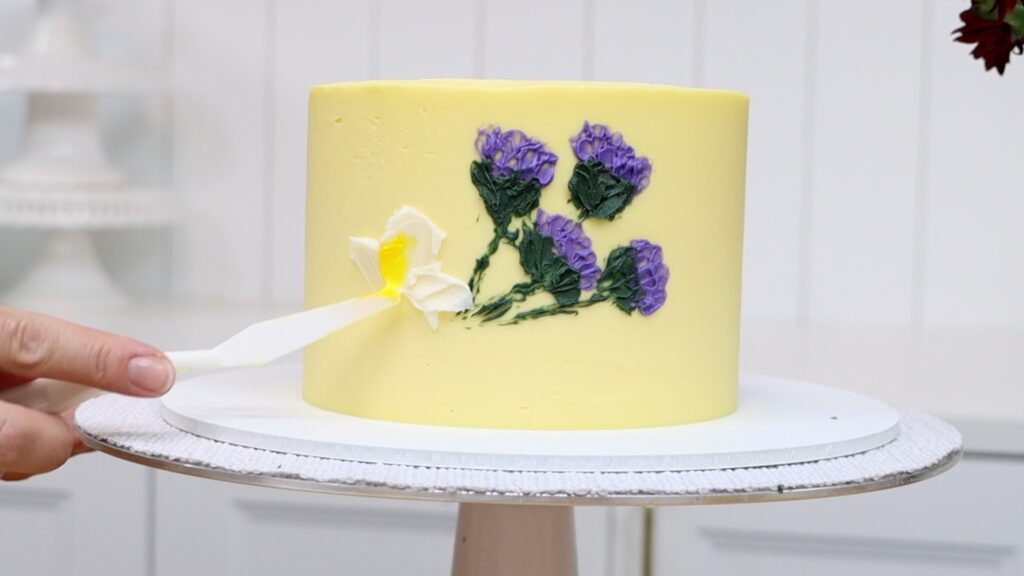
Or try your hand at the buttercream version of oil painting. Use a palette knife or a tapered offset spatula to layer buttercream colours. You'll create a textured painting like on this floral cake:
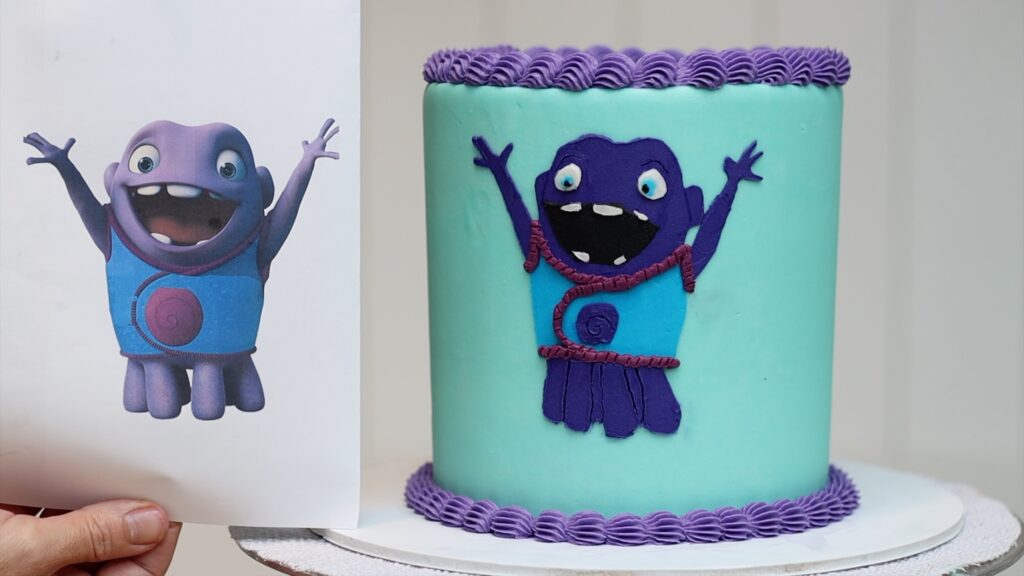
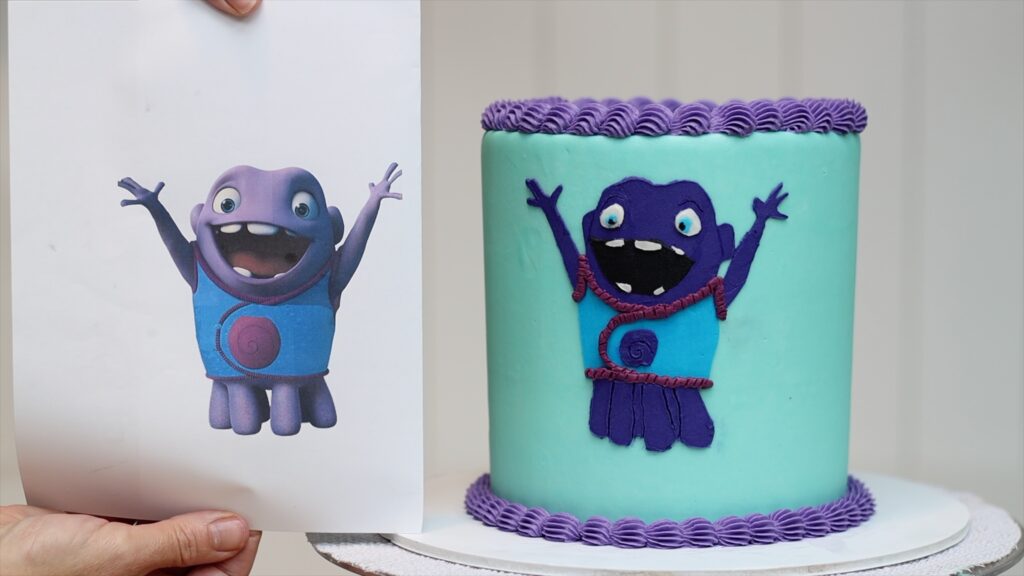
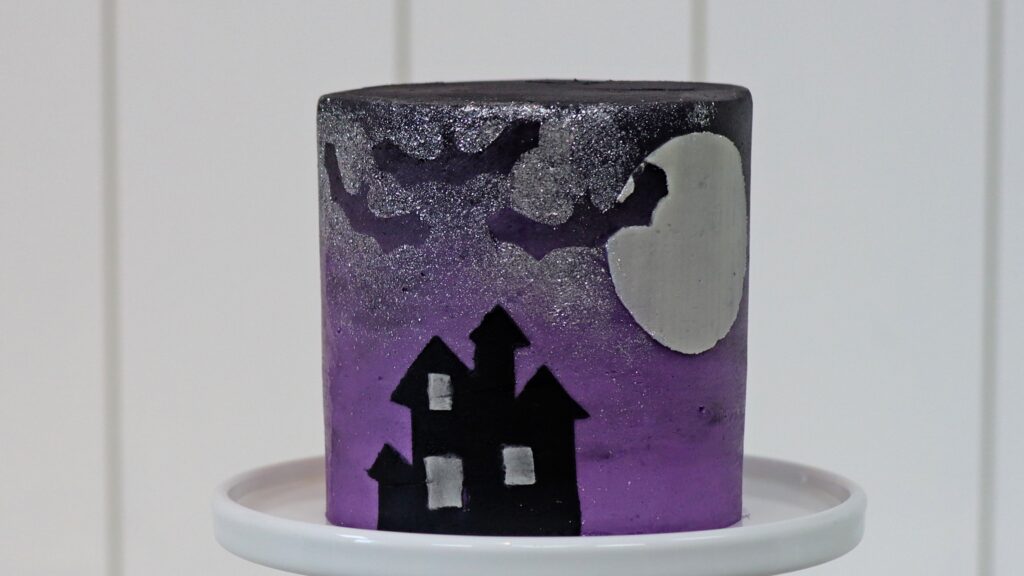
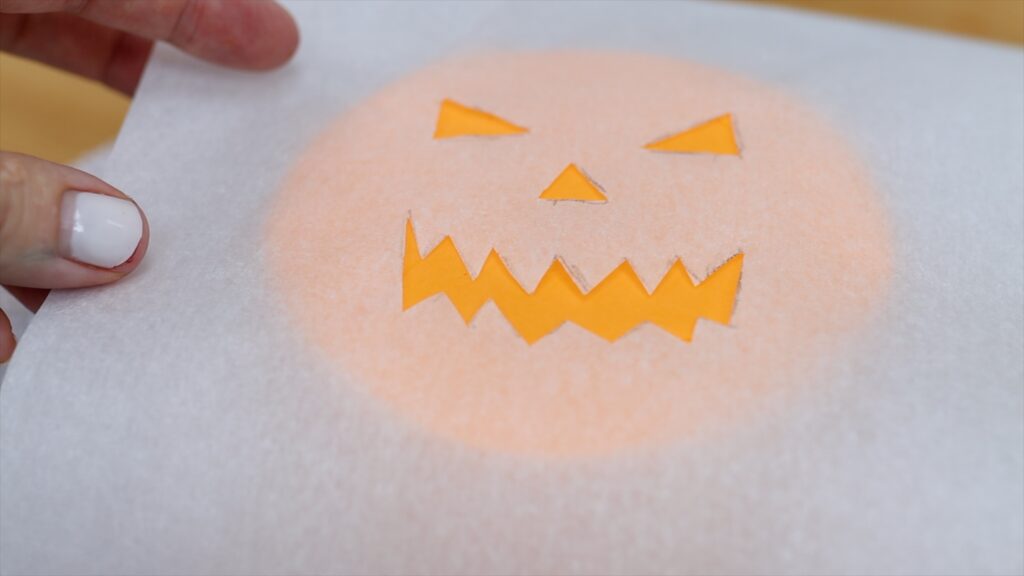
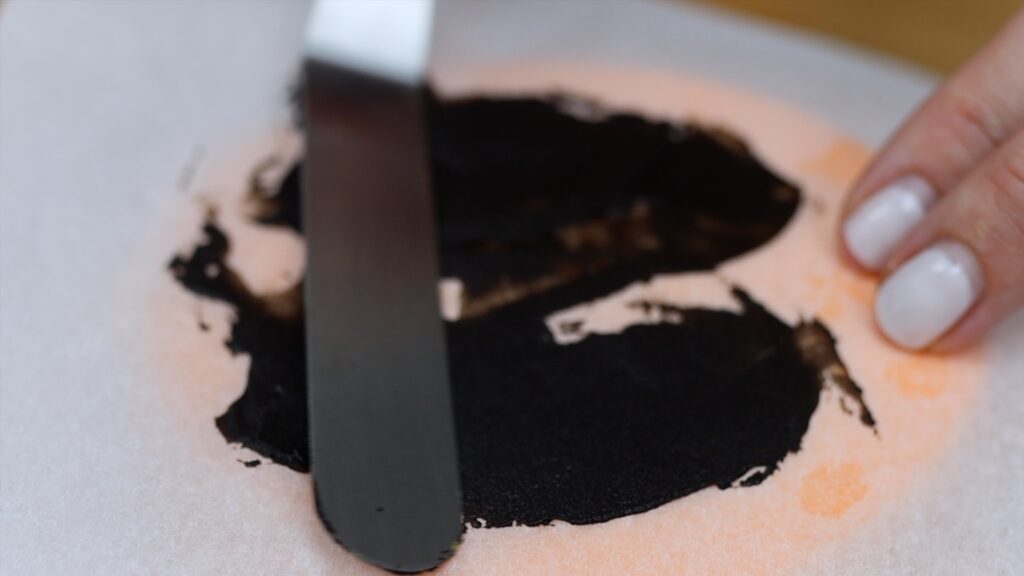
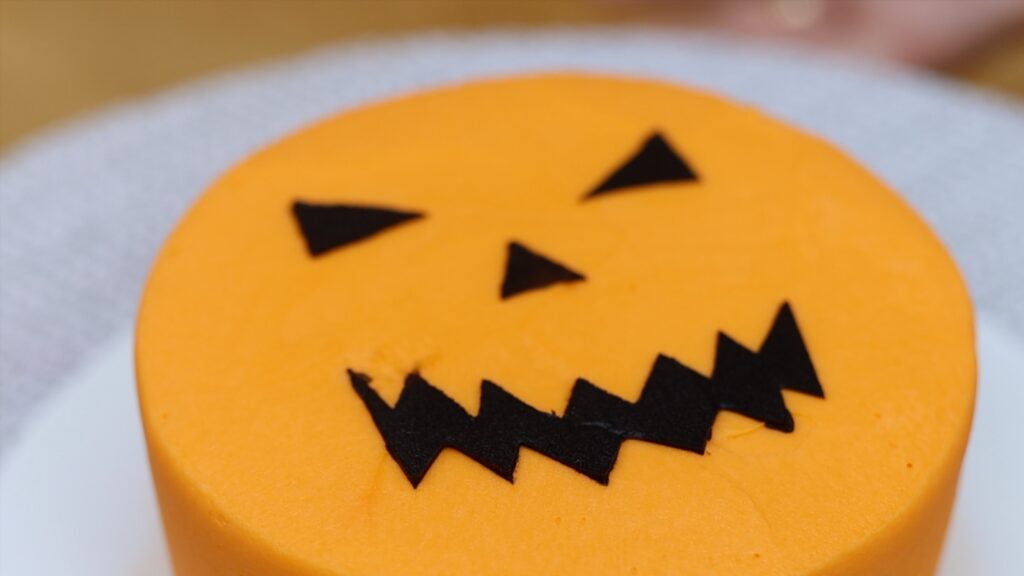
#4 Character cakes using homemade stencils
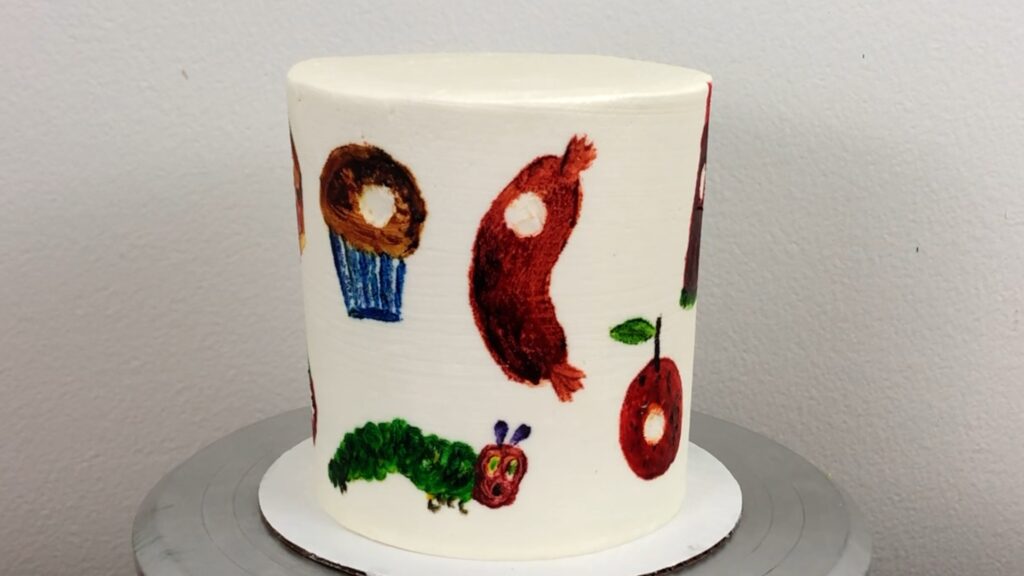
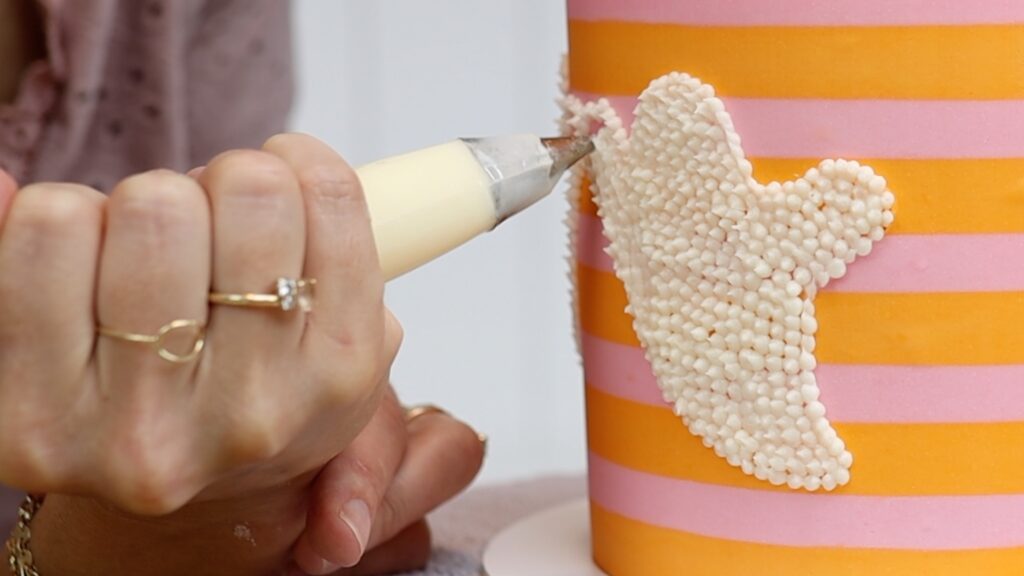
With fondant you can model figures to make 3D characters like Paw Patrol or the Ninja Turtles or Minions. But my favourite characters are cheaper and quicker and more recognizable! With just a few pieces of parchment or wax paper you can make your own stencils. Trace an image one colour at a time to make an identical version of the character. You'll layer these to make characters.
The trick here is to make sure each layer of buttercream sets. Chill the cake in the fridge for 30 minutes or the freezer for 15 minutes before applying the next stencil. With this technique you can make accurate and delicious buttercream representations of characters.
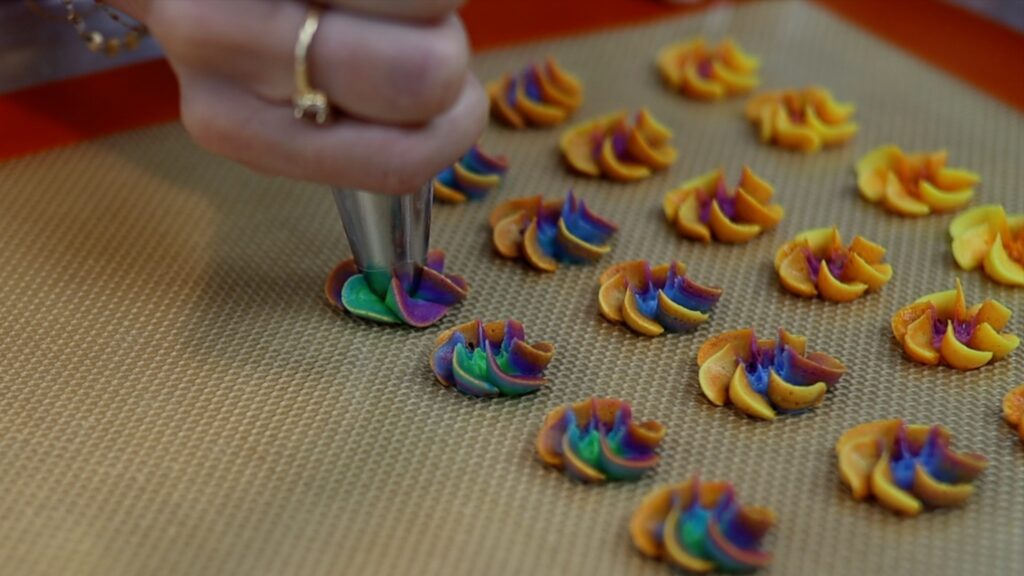
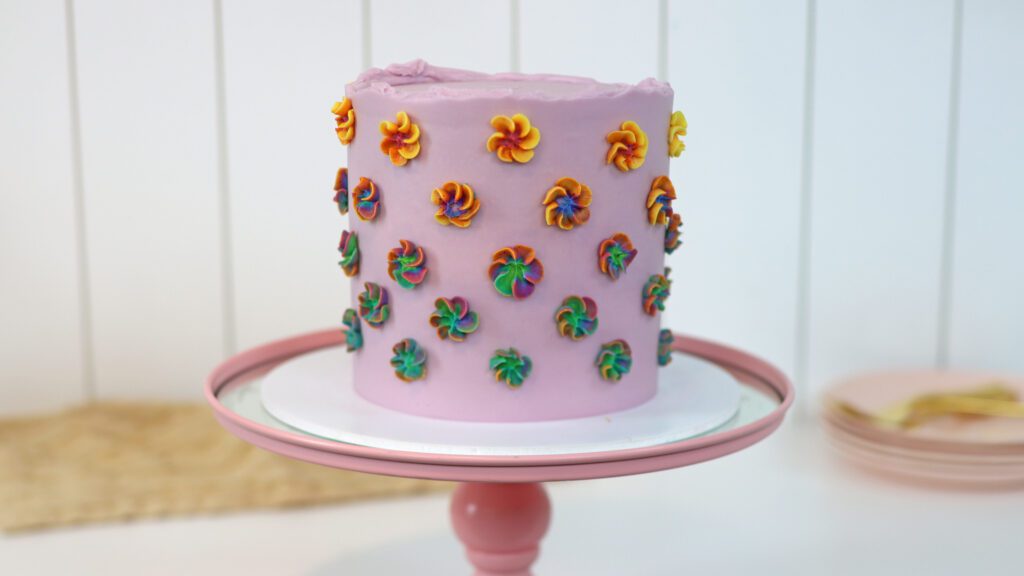
#5 Buttercream flowers
You can make fondant flowers with a stamp but make them even faster with buttercream and a piping tip. This is a 2D, which is a closed flower tip.
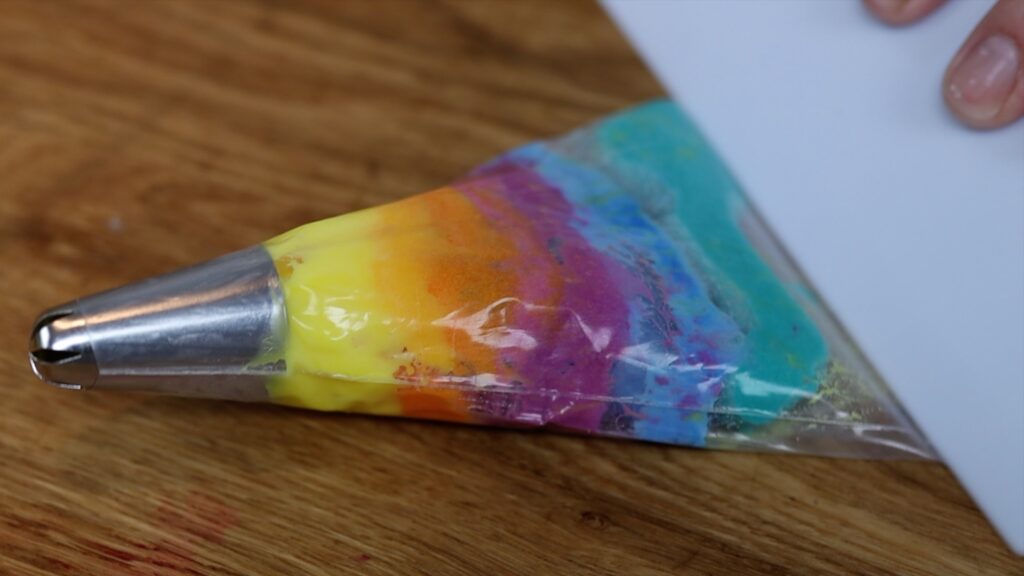
With just a squeeze and a twist of your wrist you'll make these gorgeous flowers. By layering different colours in your piping bag you can create all sorts of colourful effects!
Put the flowers in the freezer for 5 minutes to chill them and then press them onto your cake.
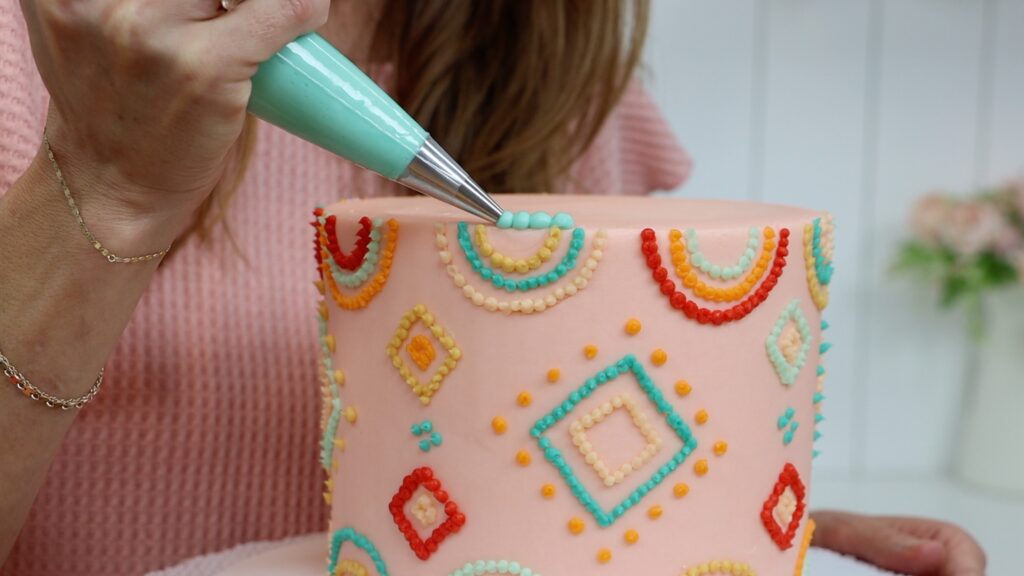
#6 Buttercream borders on cakes
To make beaded borders with fondant you need to roll tens or hundreds or thousands of identically sized balls. And then attach each one individually to the cake. The buttercream equivalent is... you guessed it! Faster and easier. Put buttercream in a piping bag and squeeze the bag to push the buttercream out. After it bulges to form a ball, swipe the piping bag away, leaving a tail on the dot. Cover up the tail with the next dot.
With buttercream you can pipe bottom borders but also borders on top of the cake like this trendy rope border. Borders on top of the cake add height and colour and texture. They're such a pretty way to finish off a cake!
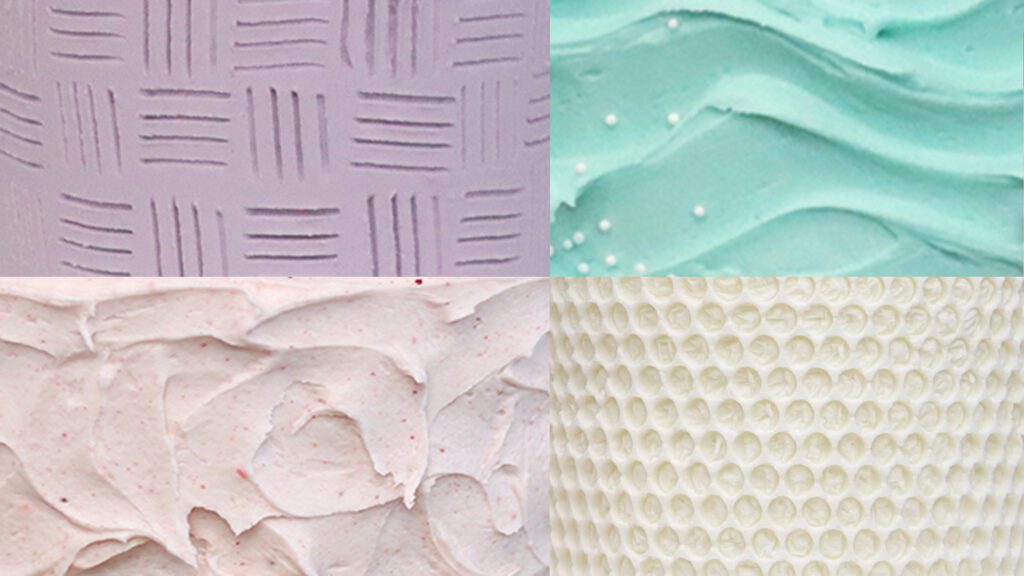
#7 Buttercream cake decorating without tools
Buttercream cake decorating is unique because you can do it without tools. Fondant, on the other hand, requires specialist tools like silicon rolling pins and fondant smoothers and cutting tools. Decorate buttercream with household utensils like a spoon, a fork, a ruler, a spatula, a Ziploc bag and even bubble wrap for stunning results!
#8 Texture using cake combs
With a cake comb you can create perfectly smooth buttercream frosting. Or imprint any texture you like using a textured cake comb. This technique is not possible on fondant. It's the same technique as smoothing frosting, which means there are no new skills to learn. It adds detail to a cake in just one to two minutes!
#9 Wrapped buttercream cakes
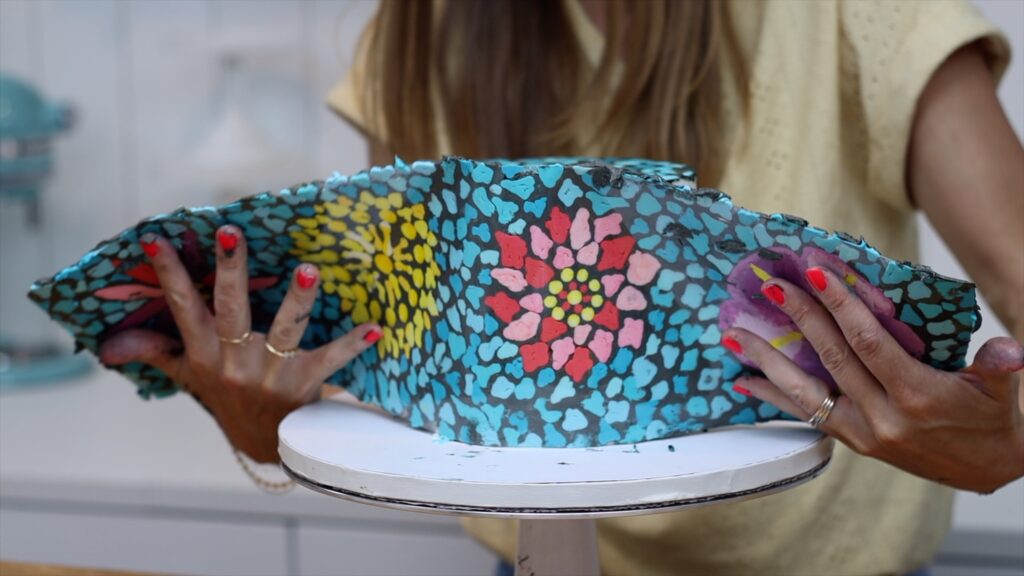
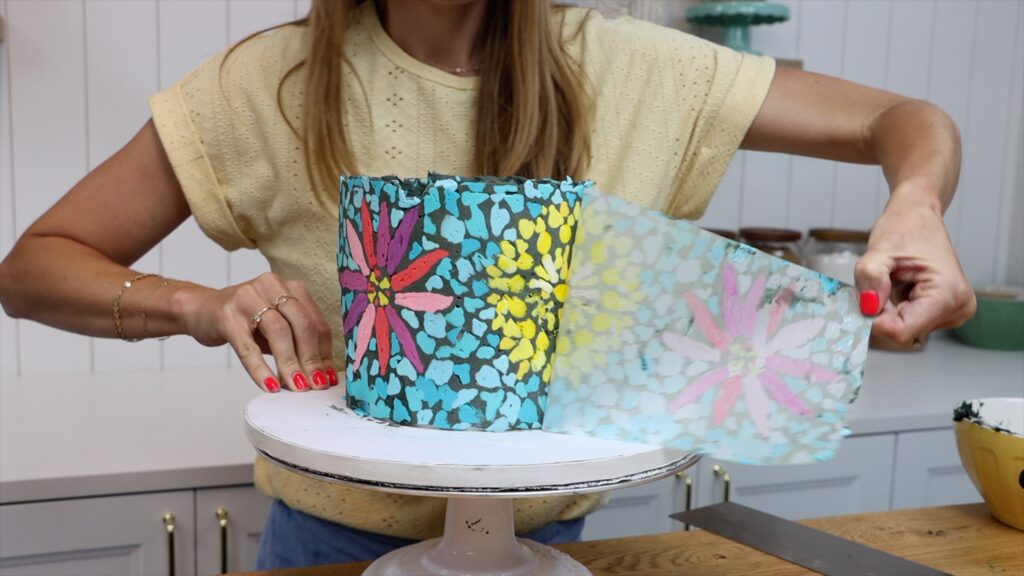
Buttercream cakes can be wrapped with very detailed buttercream designs. Start by piping onto acetate or parchment paper, tracing a drawing or printed image if you like.
Then transfer it onto a cake covered with a thin layer of buttercream frosting. The design will sit flat against that frosting. Check out my details tutorial on how to use this technique to make a mosaic cake like this:
You can also do this with melted chocolate, which will attach to buttercream frosting on a cake. Both buttercream and chocolate wraps add delicious detail that will make everyone wonder how you achieved the attention-grabbing effect.
#10 Sprinkles for buttercream cake decorating
Sprinkles are great on buttercream because they're easy to attach. Just press them gently against soft buttercream or more firmly against buttercream that's set. You can use sprinkles to add colour, to match a colour scheme, to outline shapes or even to cover a cake completely. And they make for an insanely quick and easy but eye-catching border.
So, which buttercream technique is your favourite or is there a fondant technique you'd love to find a buttercream replacement for? Tell me in the comments and to learn hundreds more buttercream cake decorating techniques visit my cake school. Try out my All You Can Cake membership for access to everything on my cake school with a 7-Day free trial! See you there!
These 10 cake hacks to save time will make it less stressful and less time-consuming to make a cake, frost it, and decorate it!
1. Cake hacks to save time with multiple cakes
Save time when you’re making several cakes by doing the same stage for every cake. Then move onto the next stage for all of the cakes.
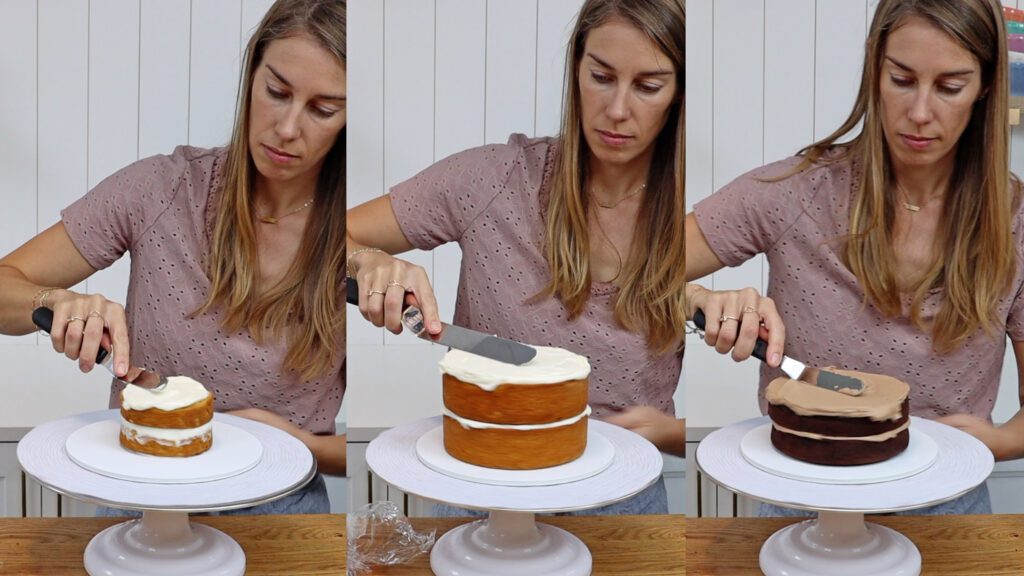
The first step would be to bake all of your cake layers and make all of your fillings and frostings. I make almost every filling and frosting out of my 4 Minute Buttercream! It can be flavoured with all sorts of ingredients like cream cheese, melted marshmallow, or chocolate.
Then assemble every cake and then crumb coat every cake. This way you’ll work much faster because you take out and put away the tools for each stage only once. Also, when you're in the swing of frosting a cake you’ll frost the second cake much faster. And the third cake even faster!
While some cakes are in the fridge to set the crumb coat, frost anothercake so there’s no waiting time. Finally, final coat every cake one after the other, before you do the decorations for every cake. You’ll save so much time this way!
2. Use and reuse buttercream
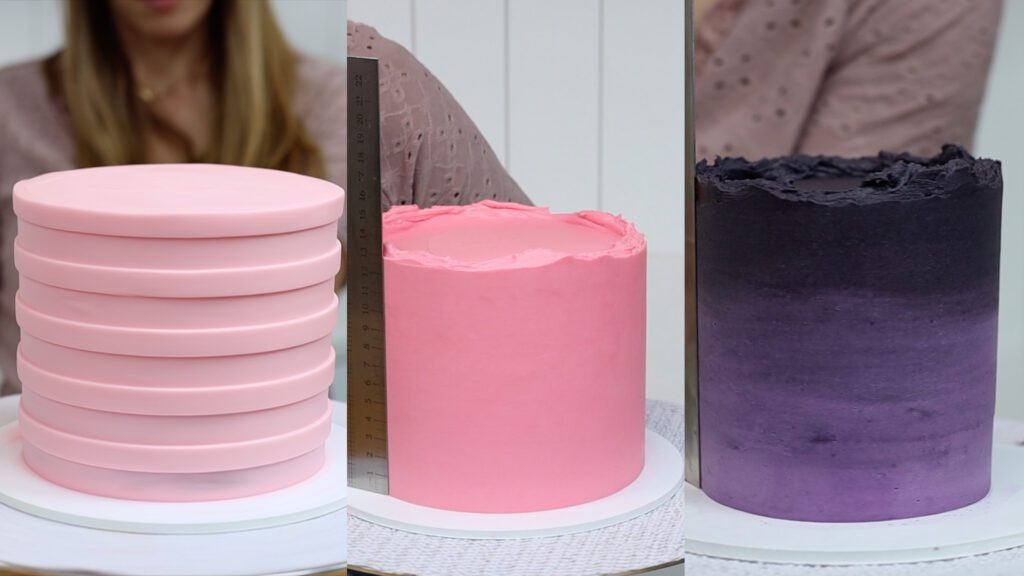
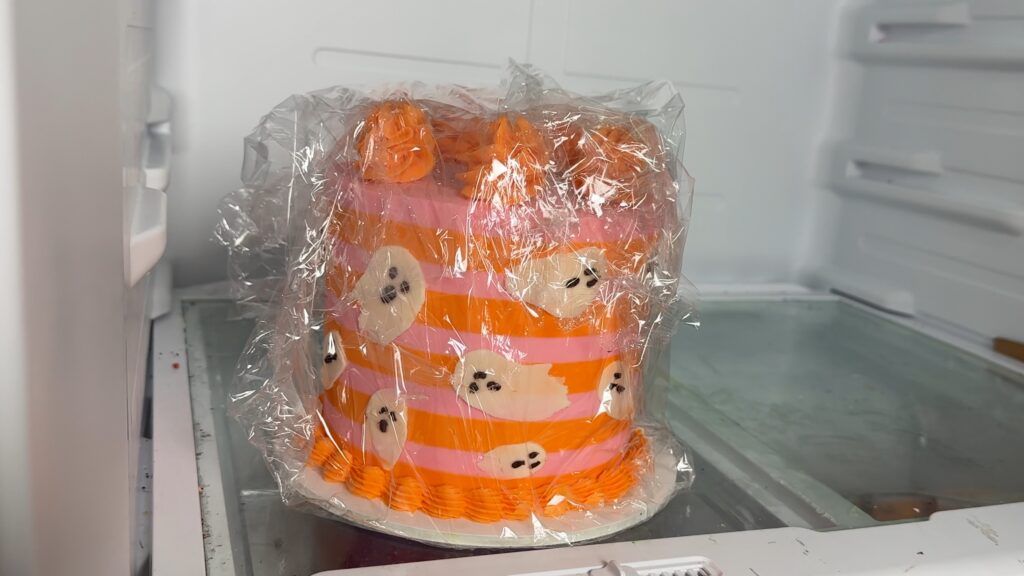
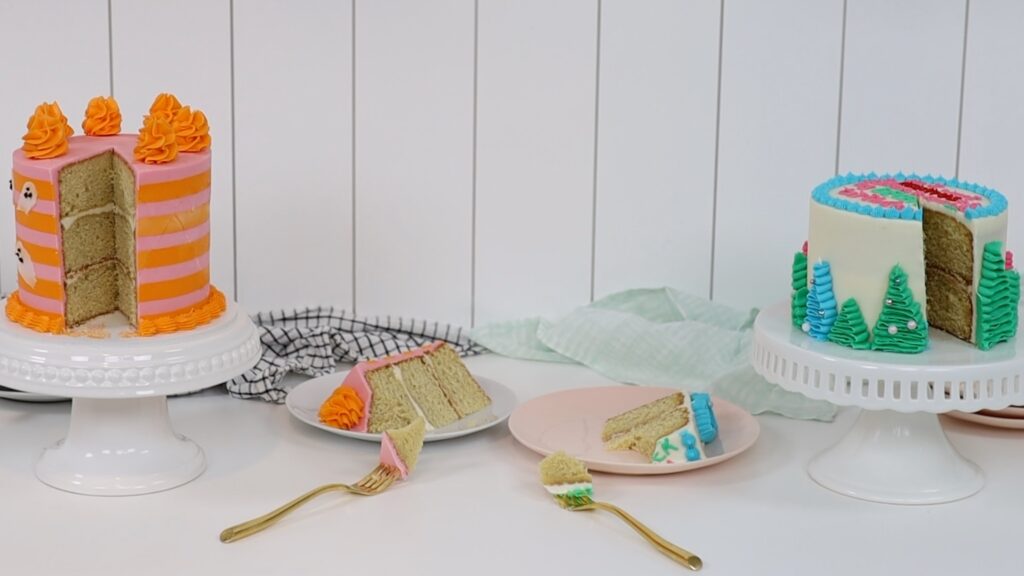
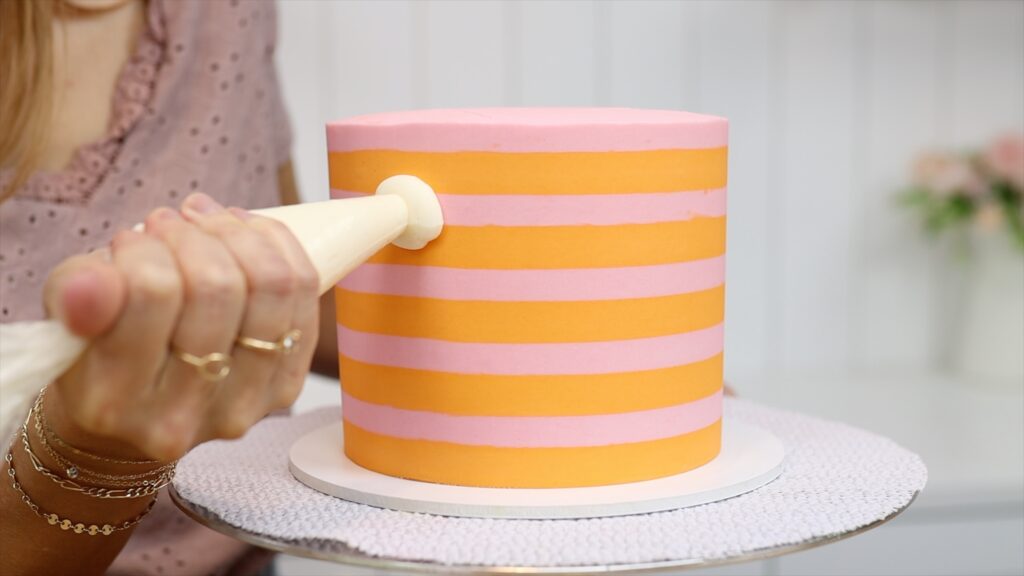
To make different colours of frosting, start by spooning some buttercream into a separate bowl. Tint it the lightest colour you’ll need. Frost your cake and then add more gel to the leftovers to make the next colour.
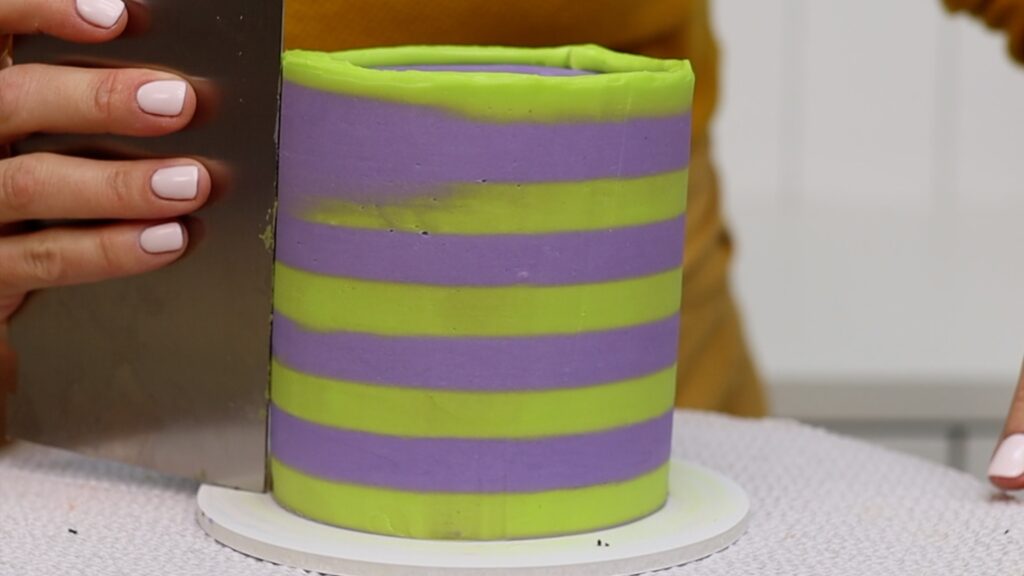
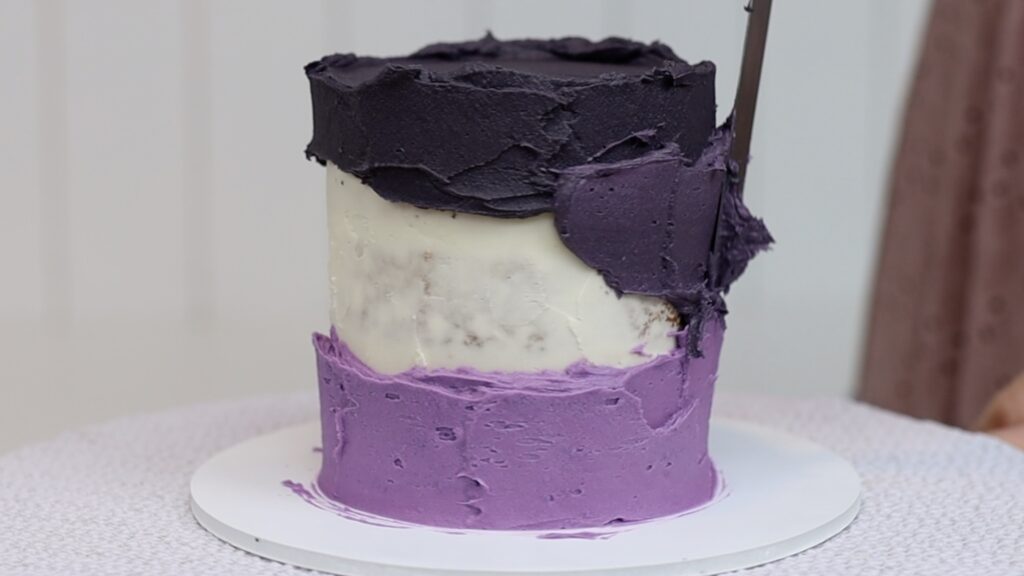
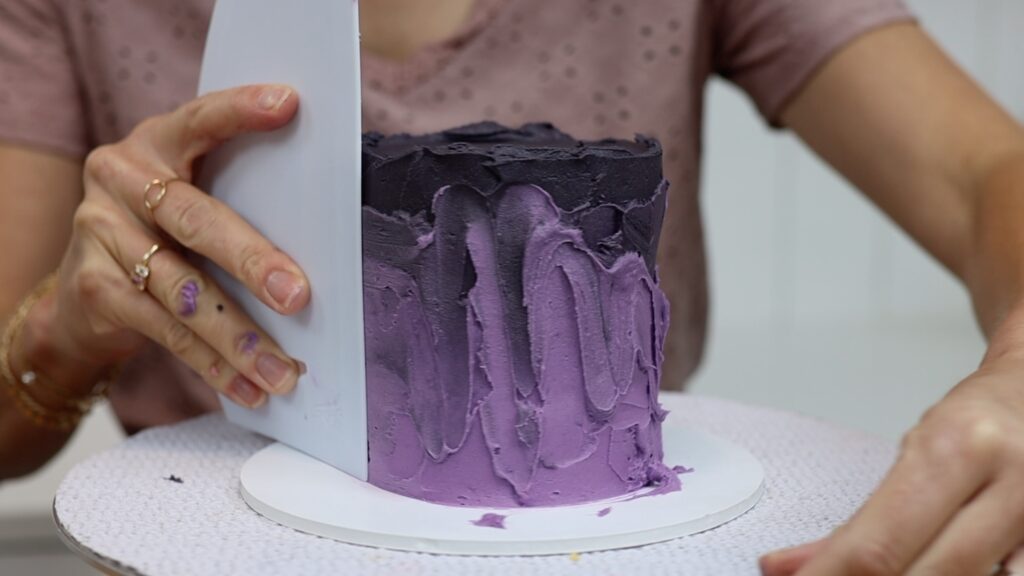
In the photos below, I started with pale pink buttercream for a striped cake. Then I added more pink to frost the next cake. Finally, I divided the leftover dark pink buttercream between two bowls. I added purple to one and black to the other, to make ombre frosting.
By getting darker each time, you save time by not needing to wash bowls or spatulas.
3. Save leftover buttercream
Here's another tip for buttercream. Don't try to guess exactly how much you’ll need of each colour because leftovers are ok! So if in doubt, make a little bit more that you think you'll need. It’s difficult andtime consuming to try to tint more buttercream to match a colour you’ve already used. On the other hand, having leftovers is actually a time saver!
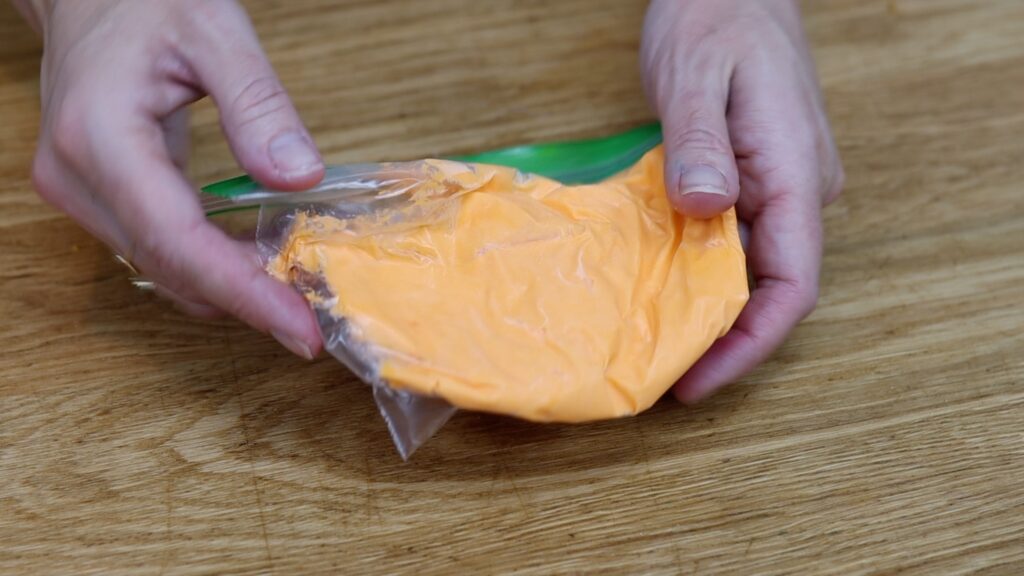
Leftovers will save you time when you make your next cake in the future. Freeze leftover buttercream in a sealed bag like a ziplock bag for up to 2 months! To thaw it, take it out the night before and by the morning it will have come to room temperature. Cut a corner off the bag and squeeze the buttercream into a bowl. Add more colour if you want to re-tint it. Then stir it quite aggressively to knock out any air bubbles, which tend to appear when the buttercream changes temperature. Now this leftover buttercream is ready to use for your next cake!
4. Take your time to save time!
Don’t rush any part of making a cake. You’ll have to scrape and start again! Save time by taking your time to do it carefully and neatly the first time.
For example, I didn’t chill this cake for long enough before adding the neon green stripes. The purple stripes didn’t set properly and they blended into the green stripes to make a mess. I had to scrape the cake and start again. I would have saved time by not rushing.
If you notice your buttercream is the wrong consistency, don’t try to frost the cake. You’ll spend a lot more time trying to get it neat! Instead, fix it now. If it’s too stiff, scoop up a third of the buttercream and microwave it for 10 seconds. The butter will start to melt, like this:
Stir this back into your main bowl of buttercream and after mixing, it will be smooth with no air bubbles. It will spread onto the cake like a dream!
5. Choose the right tools
Use the right tool for each step of making a cake. For example, a tiny offset spatula is great for mini cakes and stencils. But to frost a 6 inch cake, the same spatula will take forever!
Switch to a bigger offset spatula and finish in half of the time.
Using the right tool will also make your cakes neater. For example, this little offset spatula will flatten the top edge of a cake but it's not the best choice. With a bigger spatula I can not only flatten the top edge faster, but also make it neater, by doing larger sections at a time which makes the top edge more level.
6. Set a timer
When you’re working on a cake, set a timer and challenge yourself to finish a step within that time. You’ll find yourself focusing all of your attention on the cake while that timer is running. Without the timer you might check your phone messages, email, water the plant, start the laundry, and so on.
I find a timer most effective when there are several stages to a decoration. For example, to frost a cake, re-tint the leftover buttercream, make stencils, and add edible glitter. With multiple steps like these, the timer pushes you on to the next step without pausing for a distraction. I don’t recommend timing a single step, like piping. The timer will make you rush and the decorations won’t be as neat.
7. Use a 'throw-away' and 'dirty' tub
These cake hacks to save time are useful if you make cakes far away from the sink and rubbish bin or garbage. Use a “dirty” and “throw away” tub or bowl to tidy up as you go. This will avoid a huge mess to clean up at the end of the cake decorating process. Throw piping tips, spatulas, bowls, and anything else dirty into one tub to later carry to the sink. Into the other tub, toss anything that you'll throw away later. With a clean workspace you'll make cakes faster and also reduce clean-up time.
8. Plan your cake strategically
For baking, my mum taught me to take out all of the ingredients before you start. This way you know that you have everything you need. But I don’t do this for cake decorating because there are so many “waiting periods”. While the buttercream is mixing, while the frosting is setting in the fridge or freezer, while an ingredient like melted chocolate or a drip is cooling before you can use it… These are perfect windows to find whatever you need for the next stage of your decorating process. Here's an example of what this might look like:
I think the most efficient way is to plan your strategy ahead of time. Make a list of the steps for your cake and include any pauses or waiting periods. Also include what to do in those pauses. This way you'll be as productive as possible and decorate your cake as efficiently and as possible.
9. Save time on character cakes
There are several options for character cakes and some take longer than others. You can sculpt a cake, which is the most time consuming option. Or you can use layered stencils to make a flat image of the character. This also takes a long time because you have to chill to cake in between each colour. Check out this tutorial on how to make character cakes with layered stencils, like on the cake below:
Another time consuming option is to make fondant figures. The process is fun but tedious and will almost always take longer than you expect!
To save time, use toy figures as cake toppers. Spread buttercream or melted chocolate as glue to attach figures to buttercream frosting. This is the quickest option and honestly, the toy topper will probably have the best resemblance to the character!
10. Use the freezer
Save time in the days before a cake is due by preparing part or of the cake in advance!
You can bake cake layers up to two months in advance. After they cool, wrap them in two layers of plastic wrap like cling film or Saran Wrap. Then freeze them for up to two months. Move them to the fridge the night before you’re ready to assemble and frost and decorate your cake.
Or make and frost and even decorate your cake and then freeze it. Put it unwrapped into the freezer for an hour to chill and set the frosting and decorations. Then wrap it in two layers of plastic wrap and then put it back into the freezer. Move it to the fridge to thaw gradually the night before you serve it. Then two hours before you serve it, take it out and unwrap it straight away. It's important to unwrap it while the frosting is still cold and firm so you don’t damage it.
When a previously frozen cake comes to room temperature it will taste just as good as if you’d baked it that day. Let’s do a blind taste test! One of these forks has a piece of cake that I baked and frosted this morning. The other has a piece from a cake that’s been in the freezer for a few weeks. I put it into the fridge last night and it's been sitting on the counter for about two hours. Both cakes are now at room temperature. Which tastes better?
My sons volunteered to help me with the taste test. They fed me (blindfolded) each piece of cake. I honestly couldn't taste the difference between the two pieces!
I hope these 10 cake hacks to save time will help speed up your cake decorating. For more tips and tricks, visit my cake school where you’ll learn hundreds of cake decorating techniques and designs.
Here are 10 easy ideas for Halloween cake decorations. You don’t need any cake decorating experience for these and you can even do some of them with kids!
Haunted house cake
All you need is parchment paper or wax paper for these first Halloween cake decorations.Start by making an eery purple sky with your frosting. Tinting buttercream purple and then put half into another bowl and add a few drops of black to make grey. Spread the grey buttercream onto the top of the cake and smooth it. Then spread it around the top of the sides of the cake, too. Spread purple around the bottom of the cake, leaving the middle empty for now. Then mix the leftover purple and grey buttercream together and spread thatover the middle.
Press your spatula lightly into the frosting and drag it up and down as you spin the cake. You'll leave zig zag textured imprinted into the frosting. These blend the colours together so that you don’t end up with stripes of colour around the cake. Smooth the frosting with a cake comb to make ombre frosting.
You can leave the top edge uneven, which is trendy at the moment, or flatten it. To flatten it, swipe sideways with your spatula to lift off the excess frosting. Now put the cake in the fridge for about an hour to chill and set the frosting. Meanwhile, I'll show you how to make stencils using parchment paper or wax paper.
Make stencils for a haunted house Halloween cake
Draw a bat silhouette onto a strip of paper and fold the paper a few times before you cut it out. Now you'll have a few identical bats. You don’t need the surrounding paper for this.
For the next stencils you’ll do the opposite. Draw the outline of a haunted house, cutting along the bottom edge so that the house sits at the base of the cake. Then cut the house out and throw that away but keep the surrounding paper. This will be your stencil.
I drew a few windows and cut those out of another piece of paper. This is an extra step that you can skip if you’re in a rush. The house will still look haunted without them! Trace around something round like a bottle to make a circle for a moon stencil, too.
Use homemade stencils to make Halloween cake decorations
Now you’re going to apply these in 3 stages. Start with the bats, pressing them onto the cake on the darkest grey frosting, towards the top, and they’ll stick because the warmth of your fingers will soften the cold buttercream to make it lightly sticky as you push against the bats.
They press the moon stencil on, so that it overlaps one of the bats. Pipe or spread white buttercream over the stencil, scraping over it a few times to flatten and smooth the frosting, and then peel the moon stencil off.
Next, use edible glitter and a wide powder brush to gently dab the frosting over the bats so that there’s quite a lot all around them.
Then slide your spatula or a toothpick under each bat to peel it off and it will look like the bats are flying in the moonlight!
Now wrap the haunted house stencil around the cake, and you want this to wrap really tightly since the bottom edge is cut so use pins to attach both sides to the cake. Add a drop of black to your leftover grey buttercream and spread this colour over the haunted house stencil and then scrape over it once or twice so that the black buttercream is smooth.
Pull the pins out of the cake and peel the stencil off and voila! If you’re adding windows, put the cake into the fridge for 15 minutes to set the ouse and then press the final stencil onto the house, lining it up so that the windows are in the right places, and then peel then spread white buttercream over the windows. Scrape off the excess.
Peel the stencil off, and scrape off any smudges using a toothpick and since the black frosting of the haunted house has chills dead set, you won’t damage that when you scrape off any white smudges. This cake design is so simple to make but with the glitter it looks so fancy!
Spreadable ghosts
For this next cake I’m using non-traditional Halloween colours, with pale pink and orange, which I LOVE but for this design you can use any colour or colours - plain orange, orange and black stripes, whatever!
How to make buttercream ghosts
The two important things are to use buttercream that isn’t very stiff, so add a splash of milk to thin it out until you can stir it easily like this, and spoon it into a piping bag. The second important thing is to chill the cake in the fridge for at least an hour before you pipe onto it.
Squeeze a blob of white buttercream onto the cake and then use a spatula to gently spread it in any direction. You’re making floating ghosts on the cake. They don’t all need to be identical so pipe different sized blobs before you spread them, and go in different direction so the ghosts are flying to the left, right, up, down…
Make ghosts faces with chocolate
When you finish making the bodies, melt some chocolate chips and put them into a sandwich bag like a ziplock bag and cut a tiny piece off one corner. Squeeze the bag to pipe two eyes and a mouth onto each ghost. If the chocolate pulls away with the bag, use a toothpick to nudge it flat against the cake.
You could add black oil based gel to the chocolate to make it black instead of brown, but with semi sweet or dark chocolate like this, against the lighter colours - pink and orange and white - the dark brown looks almost black.
The trick to melting chocolate without it seizing and becoming grainy or getting that white.. haze when it sets, is to heat it slowly and gently, so if you use the microwave choose 50% power for 30 seconds at a time, stirring before repeating, until the chocolate is smooth.
If you're looking for more ideas for ghost Halloween cake decorations, move on to the next cake!
Piped ghosts
For more detailed ghosts or any other figures, use the pointillist technique. You'll outline a shape on your cake using a cookie cutter, or draw it with a toothpick.
Then fill it in with tiny dots by using a small round piping tip like a #3. Your dots will look the neatest if you pipe in rows.
This dotted effect is so unique and easy to make look neat even if it’s your first time doing it! This technique is a bit time consuming but I love the result!
The consistency of your buttercream is really important for this. If it’s too stiff you’ll have to squeeze the bag really hard to pipe the dots and your wrist will start aching almost immediately.
Switch colours to add more details, for a simple design like this or a more elaborate one like this:
This is one of the cakes from my Layer Up program, which has 14 hours of video module teaching hundreds of cake decorating techniques and designs! Start a FREE 7 day trial of my cake school to try it out risk free!
So, which ghosts do you prefer - swooshed or pointillist? Tell me in the comment!
'Boo' Halloween cake topper
Make easy Halloween cake toppers with melted chocolate in a sandwich bag with the corner cut off. Write whatever word you like, keeping in mind that the thicker the letters, the better. Press a toothpick into each letter so that it sticks out at the bottom.
Then pour sprinkles on top. The sprinkles will stick to the melted chocolate but when they set, after about 30 minutes in the fridge, you can lift the letters up and poke the toothpicks into a cake to make a delicious cake topper!
Halloween messages on cakes
To write alonger Halloween message, use buttercream that’s thinned out with a bit of milk so that you can pipe it with a small round tip and the lines won’t break apart.
If you struggle to pipe letters with lines, which does take a bit of practice, use the pointillist technique. This is the same techniques I used for the second style of ghosts. You'll pipe dots to form your letters, which gives you more time to form the letters.
It's best to chill your cake before you start piping your message. This way, if you pipe anything you don’t like you can scrape it off with your offset spatula and start again!
Monster Halloween cake decorations
To make cute little monsters, layer a cake or I’ll show you how to do this with cupcakes in a second. Pop it into the freezer for 10 minutes or the fridge for 30 minutes and then use a serrated knife like a bread knife to trim around the top to make a dome.
Spread a thin layer of frosting to cover the cake, to stop it from drying out. You can use plain white buttercream or a flavour like chocolate or the same colour as the monster’s fur is going to be. By chilling the cake before this it will stay firm instead of leaning or toppling over as you trim it and frost it, and it will also be a lot less crumbly.
Now put buttercream for the fur into a piping bag with any star shaped tip, like this 4B or a 1M, or a grass tip like this:
Start at the bottom of the cake, squeezing to push out the fur. Then release your pressure on the piping bag as you pull away so that the buttercream pulls away neatly.
Work your way up to the top of the cake. Piping from the bottom to the top is a good idea for two reasons. Firstly, so that you can see what you’re doing, because if you start at the top, by the time you get to the bottom you’ll have to crouch down to see where you’re piping. And secondly, for fur piped with a grass tip, each row of fur will overlap the row below, so by starting at the very bottom you’ll create this shaggy effect.
Straight after piping the fur, while the frosting is still soft and sticky, cut mini marshmallows in half and press a toothpick through the middle of each half.
Push a mini chocolate chip into that hole and you have an eyeball! Press the eyeballs into the monster’s fur to complete the monster.
Monster cupcakes
You can do this with cupcakes instead, which is a fun activity with kids. To make it easier, use an elastic band or a strong clip to pinch the piping bag at the top. This makes it easier to squeeze the buttercream out through the piping tip.
With a few drops of colour and some mini marshmallows and mini chocolate chips, you can make these fun Halloween cupcakes in just a few minutes!
Mini bundt cake monsters
Another easy monster option is to use a donut or mini bundt cake mold. Use a cupcake recipe and spoon or pipe cake batter into it. Bake for the same time as cupcakes.
After they cool, make a drip by measuring 1 cup of white chocolate chips. Heat 1/3 of a cup of heavy cream or double cream until it starts to bubble and pour the hot cream over the chocolate. Push all of the chocolate underneath the cream and let it sit for the minute and then stir it until it’s smooth. Then add oil-based colour. I used yellow and blue to make green.
Don’t use water based colours that you’d use for buttercream because it can make the chocolate seize.
When it cools to room temperature, do a test drip on the side of the bowl and you’re looking for a thick, slow drip. Spoon this over the cakes.
It’s best to chill the cakes first for a few minutes int he fridge or freezer. Cold cake will help the drip stop dripping. Push in some candy eyes balls and it’s done! Another fun one to make with kids.
Pumpkin patch cake
Now let’s make some pumpkins! Use a star shaped piping tip like this #32 tip or a medium round tip like a #8. Start on the edges and work your way in, to make the pumpkins look more rounded and realistic.
Now for the fun part that will grab everyone’s attention. Pipe a few pumpkins onto parchment paper or wax paper and freeze for 10 minutes to chill and harden. Then brush them with edible gold paint, getting into all of the grooves to cover them completely or just painting some accents.
Lift them up and press them onto your cake to make gold buttercream pumpkins!
Pipe stems using brown buttercream or chocolate buttercream and a small star shaped tip or round tip. This makes such a cozy fall or autumn themed cake!
Jack-o-lantern Halloween cake decorations
To make a pumpkin that’s a jack-o-lantern, frost your cake and put it into the fridge for at least an hour. Draw a face onto parchment or wax paper and cut out the features, leaving the rest of the paper intact. Press it down onto the cold cake.
Spread black frosting over the top, scraping a few times to leave a thin, flat layer.
Then peel off the stencil and you have a jack-o-lantern cake that took you two minutes to decorate!
Which cake would you choose to eat? Which one would you make? Tell me in the comments and visit my cake school to learn hundreds of other cake designs and cake decorating techniques!
From the moment I got engaged I started thinking about how to make a wedding cake for my own wedding. It turns out there’s a lot more to making wedding cakes than you might expect! So here are 10 tips to help you successfully make a wedding cake.
1. Do a wedding cake tasting
Of course wedding cakes need to be beautiful but they also need to taste delicious! So before the big day it’s important that the couple taste different options of cakes, fillings and flavors.
When I had a cake shop I offered cupcake versions of my cake menu for customers to try. For wedding cakes I made mini cakes of each flavour. They're more time consuming to make than cupcakes but I Leo them because they're more formal. They’re also a more accurate representation of the cake to filling to frosting ratio.
If you make lots of wedding cakes and do lots of tastings, you might choose to offer slices instead. To do this, bake a full cake of each flavour and slice those. You can give couples a slice of each flavour and then freeze the rest for the next tasting. To do this, wrap each slice in two layers of cling film or plastic wrap to protect them in the freezer. Move slices to the fridge 24 hours before serving and to room temperature an hour before.
2. Create a timeline for how to make a wedding cake
Once you know the date of the wedding and the details of the cake, you’ll need to establish a timeline. Wedding cakes can take days to make depending on the flavours, size, and decorations!
You’ll need to shop for all of your ingredients to make your cakes, fillings and frostings. Then a few days before the wedding you might make your fillings and frostings. My 4 Minute Buttercream can be refrigerated for 2 weeks so you can make it earlier if you prefer.
Baking a tier cake can take several hours so you might set aside a full day for that. Assembling, frosting and stacking a tier cake might take a full day, too!
Include any cake decorating steps in your timeline as well. Some decorations can be added in advance, like stencil details or piping. Others are best added the day of the wedding, for example fresh flowers. More on decorations and fresh flowers later!
3. Make tiers of equal heights
For tier cakes you’ll typically want every tier to be the same height. This is easiest to get right before you assemble the cakes. Stack the layers for each tier side by side to check they’re all the same height.
Of any of the tiers are taller than the others, trim those layers using a serrated knife. Then line them up again to check that they're all the same height.
4. Use simple syrup!
Wedding cakes are usually made several days before an event, since they take so long to make. For cakes served more than a day after baking I really recommend using simple syrup. This keeps cakes moist - it doesn’t make them soggy, and it also won’t make a dry cake moist! It just prolongs the fresh texture of a cake.
To make simple syrup you'll need equal parts of water and sugar. For a tier cake one or two cups of each should be enough. Bring the mixture to a simmer over medium heat to dissolve the sugar and then let it cool. That’s it! You can drizzle the syrup over your cake layers with a squeeze bottle or use a pastry brush. Pay special attention to the edges of the cakes because those will dry out the quickest.
5. How to make a wedding cake white
Wedding cakes are traditionally white, which can be problematic for buttercream made with butter, which is yellow! You have a few options to make buttercream white. Firstly, you can add violet gel, which will cancel out the yellow tint with just a tiny amount. Dipping a toothpick into the bottle is the safest choice and then drag the toothpick through your buttercream. I don't recommend trying to squeeze a small drop from a bottle of gel or liquid colour. If the drop is too big it can turn your whole batch of buttercream purple!
If the cake is going to be on a white tablecloth you'll need your buttercream to be even whiter. Even slightly off-white buttercream will look yellow compared to a bright white background:
For even whiter buttercream, use vegetable shortening like Crisco or Trex. You can substitute the butter with exactly the same amount of shortening.
As a bonus, using shortening in your buttercream will make it more stable than butter. This is helpful if the wedding is outside in warm weather and you don’t want your cake to melt.
A third option is to use half butter for its flavour and half shortening for its whiteness.
6. Practice the decorations
It’s definitely a good idea to practice any decorations before making the actual wedding cake. This doesn't mean you have to make an exact replica as a trial run. That would be a massive waste of time and ingredients. Instead, you can practice each element on different cakes, assuming you have months to prepare for the wedding cake!
Practice stacking another tier cake or ideally several until you feel really confident. Practice using cake stencils or any other techniques you'll use on your wedding cake. Piped details should be practiced too. You’ll learn the amount of pressure you need to use when you squeeze the piping bag, the wrist motion, the position that’s most comfortable for you, and so on. You don't want to try figuring these things out on the day you decorate your wedding cake!
My very first wedding cake was for one of my best friends and I had never made a tier cake before. I practiced stacking on a tea party cake for another friend and this snowman cake:
7. Use cake dummies for extra tiers
Here's a solution for cakes that are too big. Sometimes people want a multiple tier cake for their very small wedding. In these situations cake dummies are really useful to prevent huge amounts of uneaten cake, and also to save money! Use these fake cakes for extra tiers, decorating them as if they were really cake. No one will ever know what’s really inside!
8. How to make a wedding cake with fresh flowers
For fresh flowers, wait until the day of the wedding if possible so that the flowers don’t wilt. Trim the stems so they're one to two inches long for each flower. Group flowers together in little bunches and wrap the straws in plastic wrap or cling film. This will prevent floral juices leaking out into your cake.
Poke them into straws like wide boba straws and then push them into the cake. Using scissors at the end will help you push them all the way into the cake. You can buy these flower cake spikes instead, for a shortcut!
9. Chill and transport a wedding cake
Refrigerate cakes until you transport them to the wedding venue. This keeps the frosting firm and the tiers stable enough for the journey. When you transport the cake, choose a flat surface like the boot or trunk of the car. The footwell in front of the passenger seat is also a good option. Don't place the cake on any of the seats in the car because those are sloped at an incline. For tier cakes it’s especially important to be on a flat surface to avoid leaning or toppling over!
10. How to price a wedding cake
As you can see, making a wedding cake is a lot of work. If this isn’t a gift, make sure you price your wedding cakes to make a profit instead of losing money! I have a very detailed FREE tutorial on how to price your cakes with all of the information you’ll need. I also have a free cost calculator to help you set your prices to make a profit.
I’ve helped over 20,000 people improve their cake decorating skills on my cake school and lots of them have made wedding cakes for themselves, their friends and family members, or for customers. If you would like to improve your cake decorating skills, join my All You Can Cake membership to access all of my online courses and to ask me any questions you have, directly.