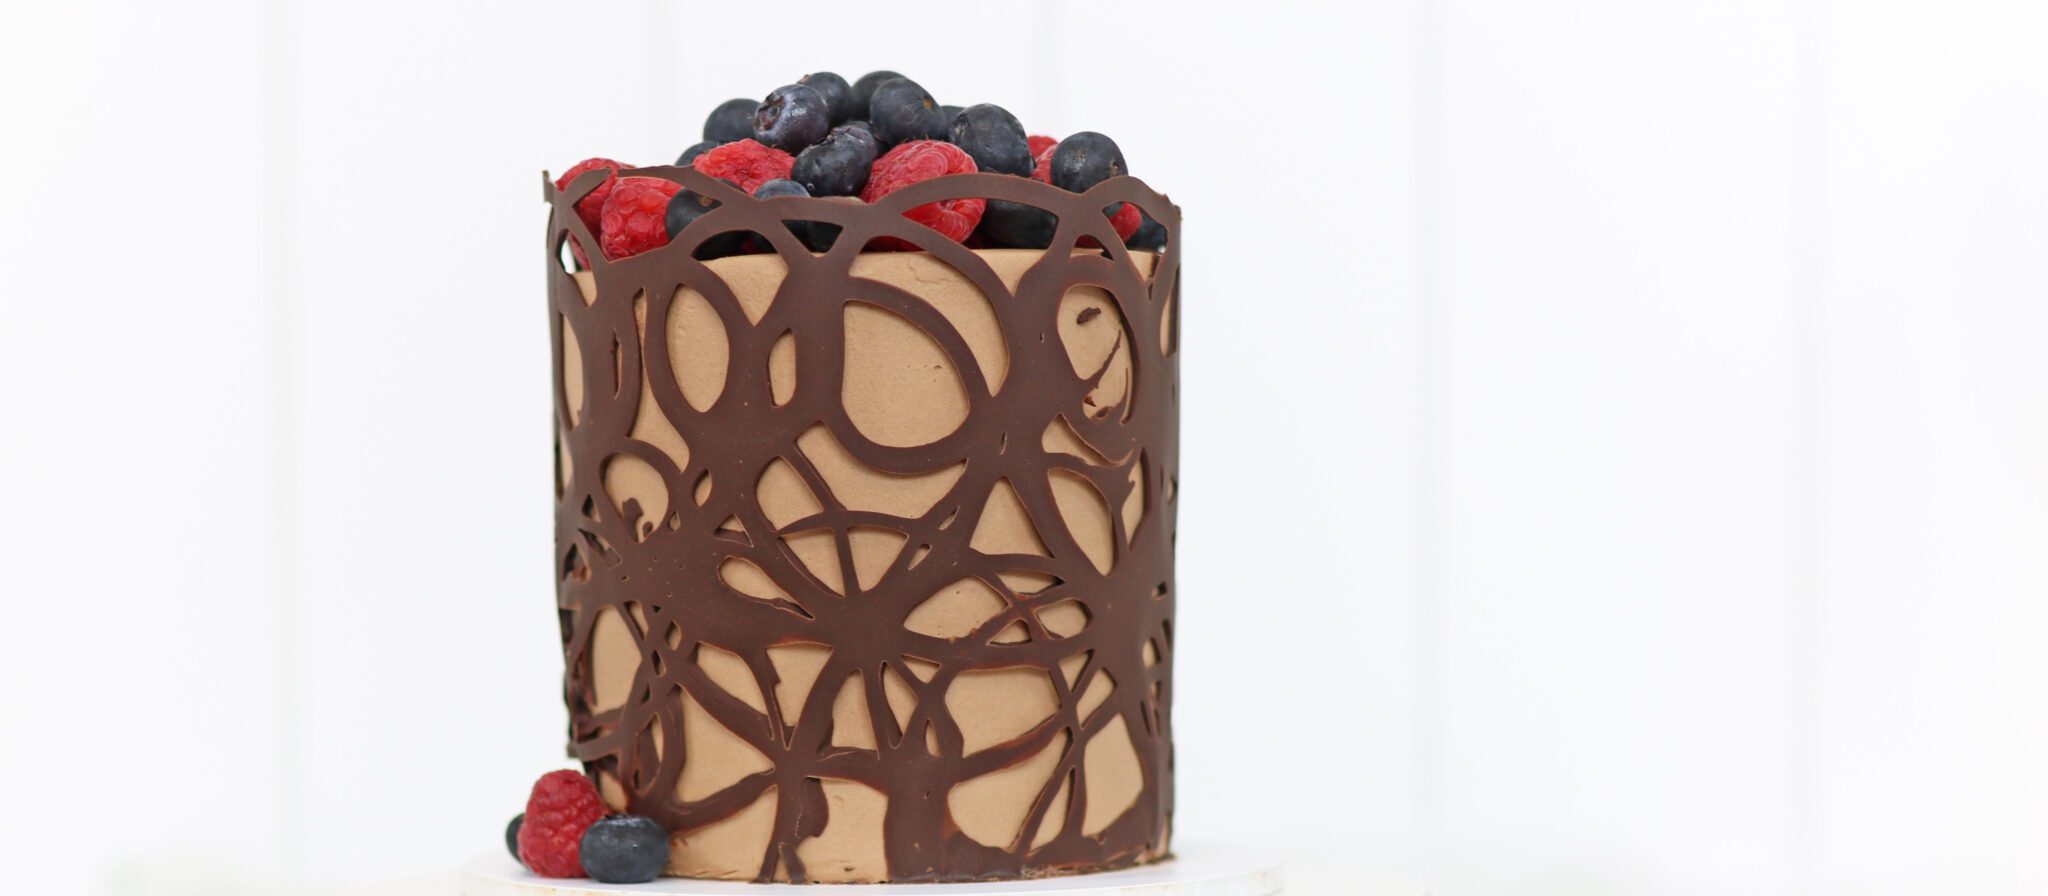
This chocolate collar cake design will make everyone ask how you did it and the secret is surprisingly simple, once you know a few tricks!
Let’s break the technique down into four steps.
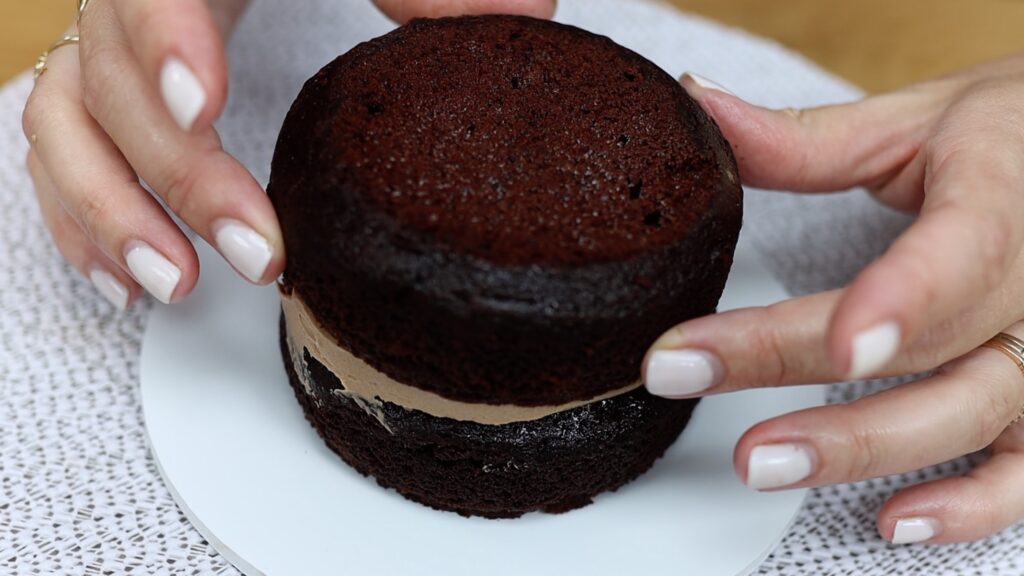
Starting with the basics, assembling a straight cake with give you the best results with this technique. Take your time to line each cake lay directly over the layer below so that the cake doesn't lean. Chilling the cake for fifteen minutes in the freezer or thirty minutes in the fridge will set the filling to hold the layers in place while you frost them. This way, they won’t slide or wobble around when you spread and smooth the frosting.
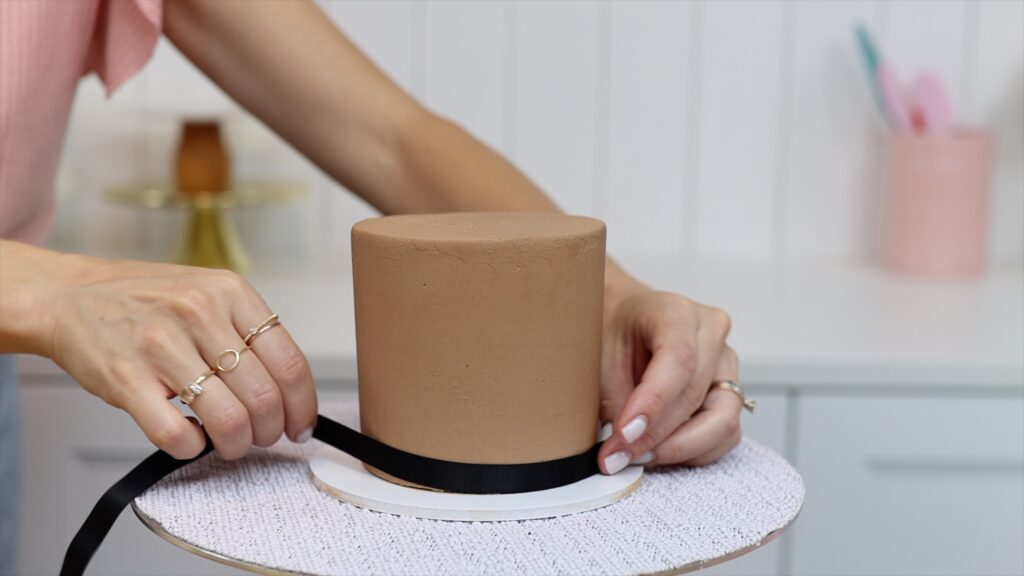
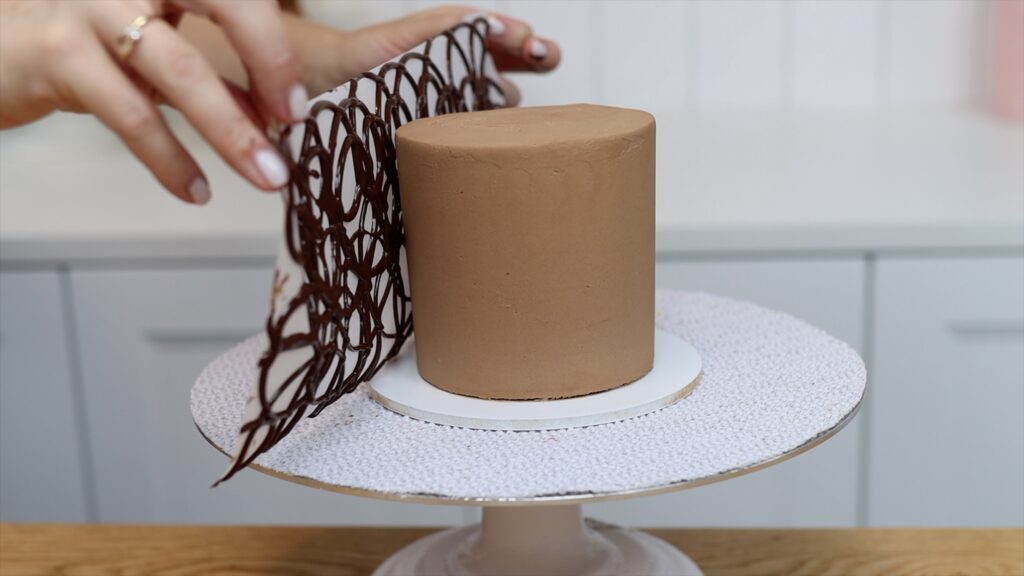
Chill the cake to set the frosting, which takes about an hour in the fridge. Wrap a ribbon or string around the cake to measure the circumference and also the height of the cake. Then place that on a piece of parchment or wax or baking paper and cut the paper so it’s the same length as the ribbon. For the height, about an inch taller than the cake is ideal. Now put the cake back in the fridge.

To make a design you’ll need melted chocolate. Melting chocolate is something people tend to struggle with but here are two tricks. First, only heat the chocolate for thirty seconds at a time in a microwave. Secondly, adjust the power to 80% to heat it gently so that it doesn’t burn or seize. When you take it out of the microwave, stir the chocolate to spread the heat since microwaves tend to create hot spots. Then heat for another thirty seconds, also at 80% power. Stir until the chocolate is smooth with no lumps.
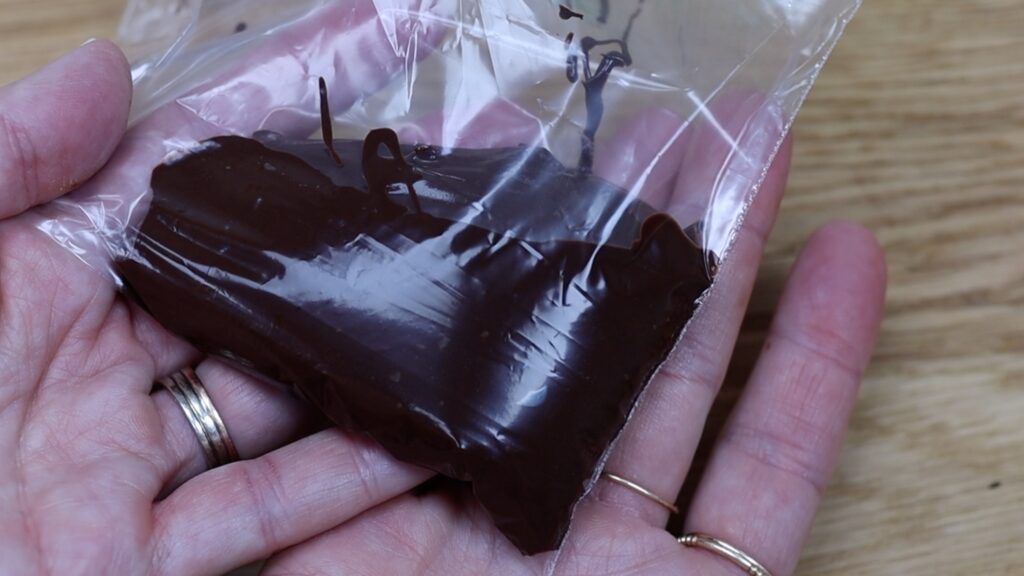
Pour it into a sandwich bag and cut a tiny piece off one of the bottom corners of the bag. You'll squeeze the chocolate through this hole. If the hole is too small your chocolate won’t pipe in smooth lines, like the chocolate on the right in the photo below. Also, the lines will be so thin that they’ll be very fragile. Look at the difference between that and the chocolate on the left. I cut a little bit more off the corner for those and the lines are thicker and smoother and neater.

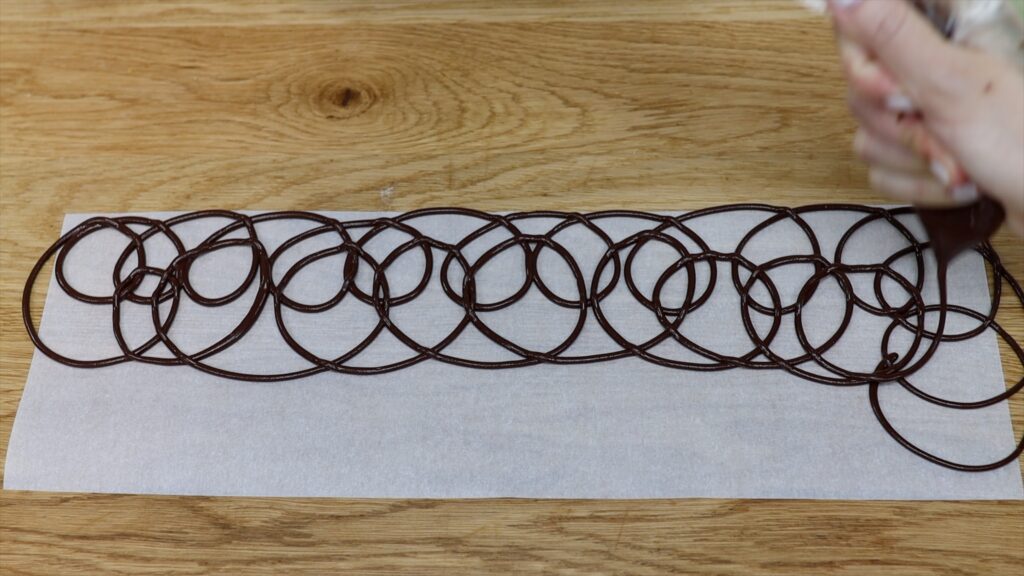
Cover your paper with loops or whatever design you want to create, keeping in mind that the closer the lines or loops or squiggles are to each other, the stronger the chocolate collar is going to be.
Take your cake out of the fridge and lift the chocolate design up straight away, before the chocolate sets. Lower it down to the cake, resting the bottom edge of the paper on the cake board so that the design goes all the way to the bottom of the cake, and wrap it around the cake to attach it to the frosting.
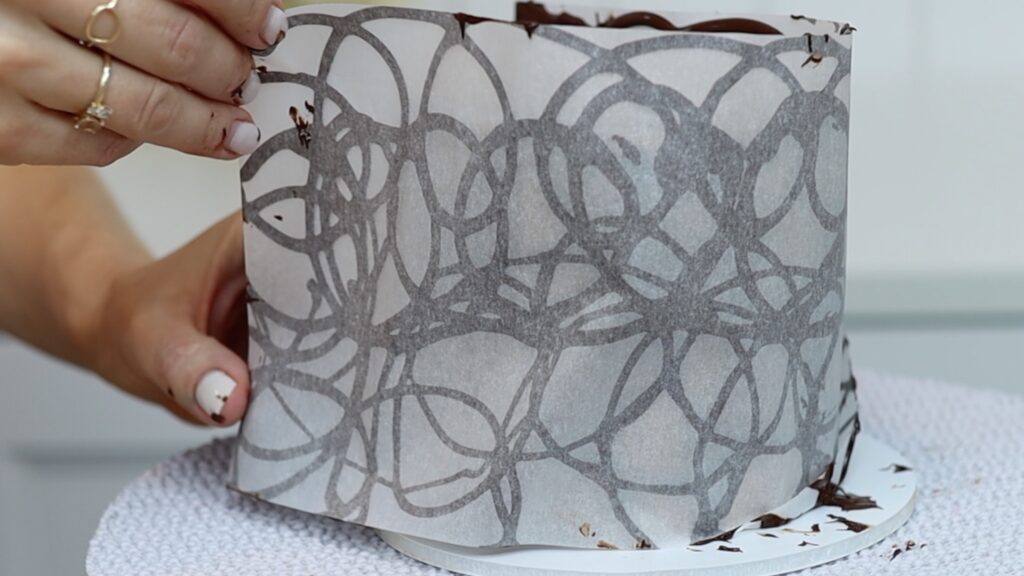
If you can do this without getting chocolate all over your hands, please tell me your secret in the comments! The paper will overlap itself where the beginning meets the end and that’s fine. Put the whole cake back in the fridge for an hour to set the chocolate.
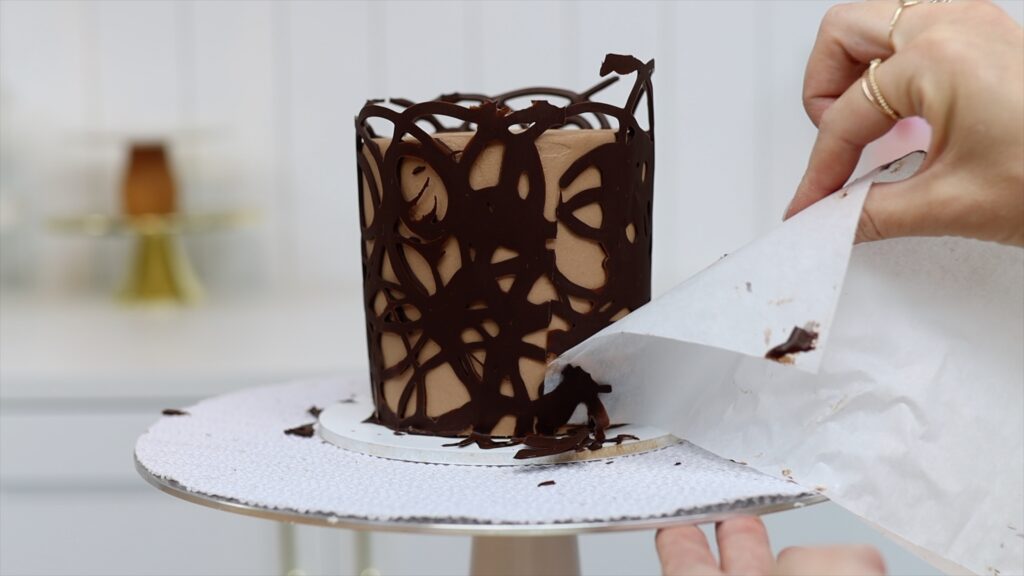
After the chocolate sets, pinch the top corner and slowly peel the paper away from the cake. I love unwrapping and exposing the chocolate collar cake underneath!
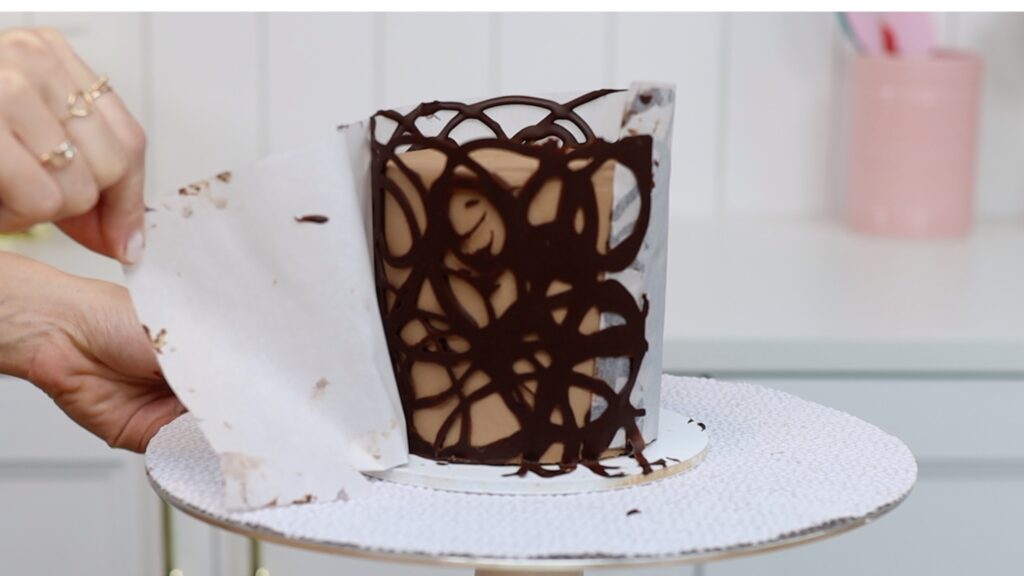
The paper will stick where the overlap was so for that, peel downwards to snap off the excess chocolate and leave a neat seam along the join of the design.
To tidy up the cake board, use a sharp knife or the edge of your
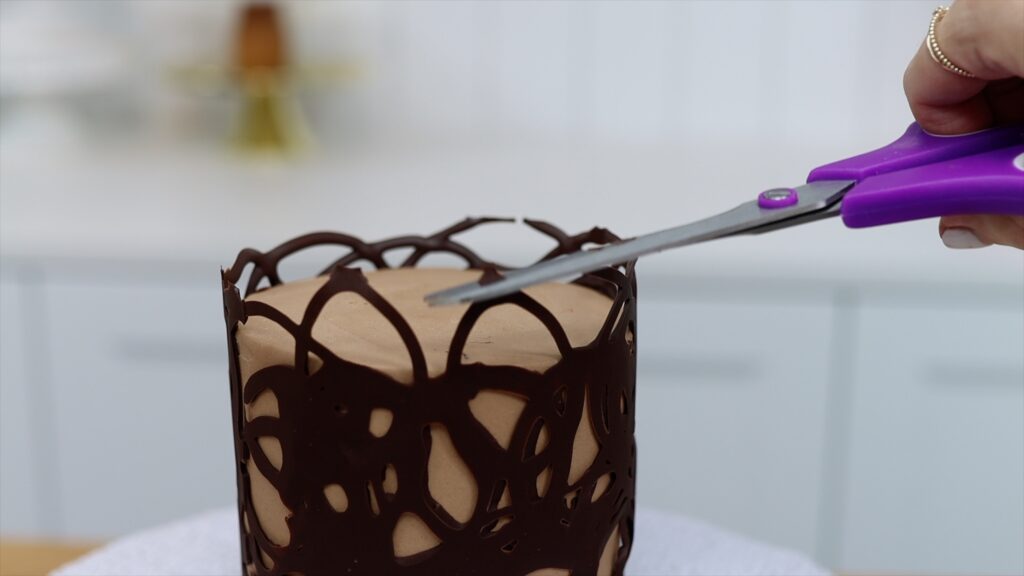
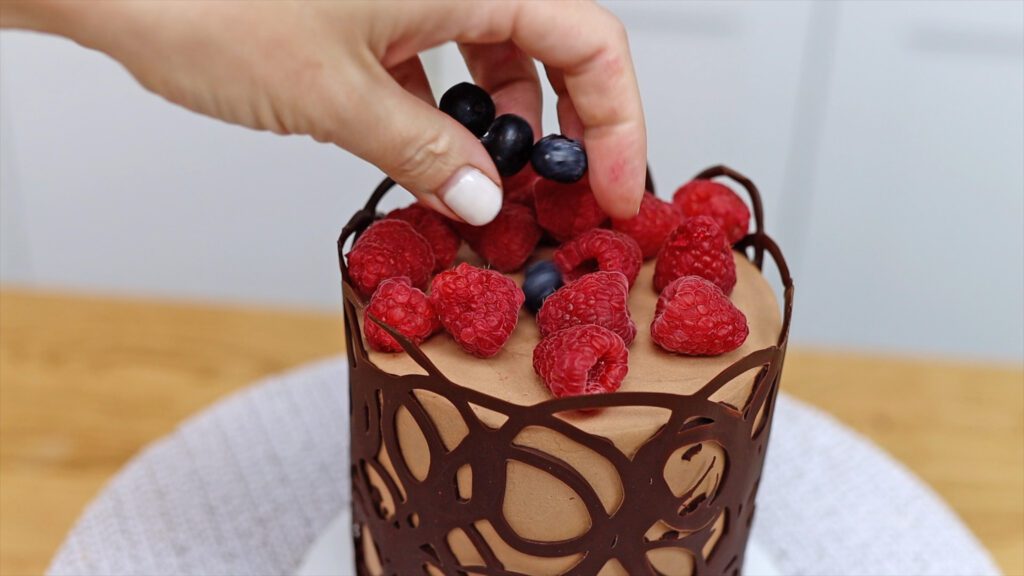
I don’t recommend wrapping a design any more than an inch above the top of the cake because the chocolate can droop at room temperature. The chocolate sticking up creates a wall which you can fill with fruit, chocolate truffles, flowers, or any other decorations you like!
If it’s hot, it’s best to store the cake in the fridge to keep the chocolate design stable.
It's easiest to serve a chocolate collar cake when it's at room temperature. If the cake has been in the fridge, take it out an hour or two before you serve it so that the chocolate collar softens. The cake and frosting will taste better at room temperature, too. Run your knife under hot water before you cut into the cake for the neatest slices.
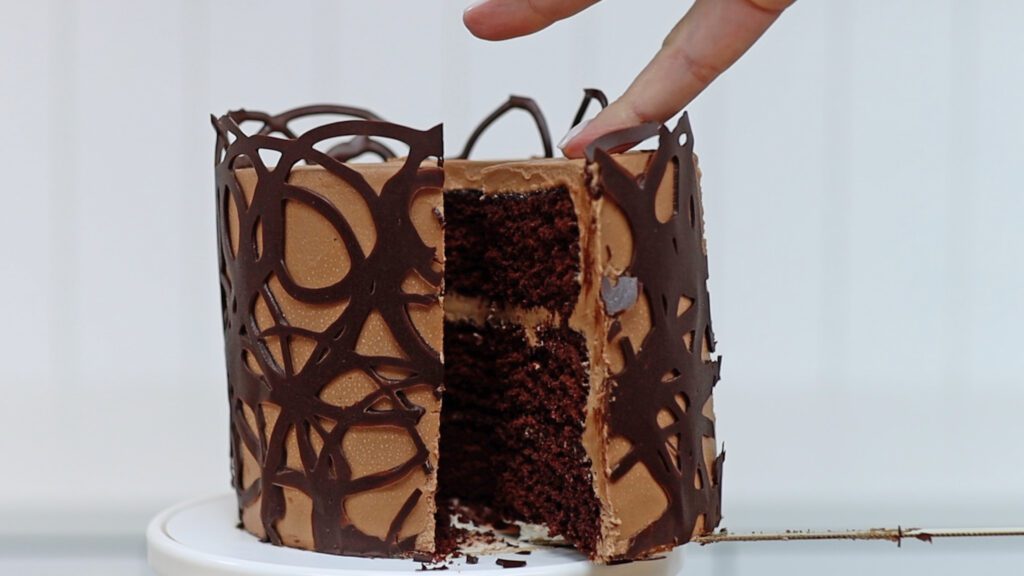
This is my perfect chocolate cake with my best chocolate buttercream and the combination is incredible!
You can also watch a video of how to make a chocolate collar cake.


