In this tutorial I’m going to show you how to make chocolate sails 5 different ways to decorate your cakes, including baskets and shards. I’ll start with the basics of using semisweet chocolate, white chocolate and candy melts to make baskets and sails and then show you some fun variations like rainbow marbled sails with sprinkle rims, and textured sails. If you prefer to watch a video of this tutorial, scroll to the bottom of the page.
To make all of these you’ll need parchment paper or wax paper. For this first example I’m going to use Wilton candy melts but chocolate works in the same way.

To choose the amount I dump a pile on the parchment, spreading them around to more or less cover the area I want to turn into a decoration.

I heat candy melts at 50% power in the microwave for 1 minute at a time so that they don’t burn or seize. Stir them until they’re smooth and then pour them onto the parchment.

Spread them around with an

Next, choose what shape you want to use to mold the sail as it dries. I’m going to turn this into a basket-shaped decoration by placing the parchment paper inside a bowl so that the sides curve up. It’s important to do this immediately after spreading it, so that it hasn’t started to set and it won’t crack when you move it around.

Make sure that different sides of the decoration don’t touch each other, unless you want them to stick together, because if you pull them apart you’ll damage the smoothness of the surface.

You can let the sail dry upside down instead, by draping it over a glass or bottle or other tall object, like this bottle. You can leave this to set at room temperature for about an hour, depending on the temperature and humidity, or you can put it in the fridge for 30 minutes.

Then lift the parchment out of the bowl and gently peel it back from the decoration.

If there are any little lines of chocolate or candy melts sticking up above the edge of the decoration you can break them off with your fingers or you can dip a sharp knife in hot water and carefully glide the knife along the edge to smooth it out.

The way you attach the decoration to a cake depends on the surface of the cake. For this one, I’ve covered the cake in a ganache marble drip which is still sticky so I can press my decoration gently on top of it to secure it. I’ll show you a few different methods with other cakes later in this tutorial.

To use chocolate instead of candy melts you’ll also need parchment paper. Add texture to your sail by scrunching the parchment up and then opening it, or to give it movement by folding the parchment into a fan shape by creasing it in accordion style folds. At this point, the folds or creases are just guidelines for later, so it’s fine if the parchment flattens itself after you’ve creased it.

Melt the chocolate in the microwave for 1 minute at a time at 60% power so that you don’t make the chocolate seize. Now spread the melted chocolate onto the parchment paper, trying to keep the thickness the same all over and gliding your spatula from side to side, swiping it off at a angle inside of lifting it straight up so that the chocolate is nice and smooth.

Next, use the folds or creases you made earlier to re-shape the parchment. It’s much easier to do this if you’ve already creased the parchment before spreading on the chocolate, since you can’t touch much of the parchment now that it’s covered with sticky melted chocolate.

Use paper clips to pin the parchment folds in place. Let the chocolate set at room temperature or in the fridge and then pull off the paper clips and peel the parchment paper away from the chocolate.

Chocolate is much more fragile and soft than candy melts so it breaks easily, especially if you’ve spread it quite thinly, so it’s a good idea to spread chocolate thicker than you think you should. If your sail breaks you can melt the chocolate again and make another sail.

Semi-sweet chocolate works exactly the same way. Melt the chocolate at 60% power and spread it onto parchment and the shape it. Use a bowl to make a basket or a folded piece of parchment to make a fan, using paperclips to hold the parchment in its shape.

Now let it set. I always do this in the fridge because it’s quicker than at room temperature and I’m impatient to see how the decoration turns out! Then pull off the paper clips and peel off the parchment.

If it’s difficult to peel it off, the chocolate probably hasn’t completely set, so put it back in the fridge for a bit longer and try again.

This sail that I put inside a bowl to set broke as I peeled it from the parchment so I’m trimming the sides and using just the middle part. Instead, you could cut it up into smaller sails to place in a cluster on a cake.

The ganache frosting on this cake has set so it’s not sticky like the drip on the previous cake. To attach the sails I’m piping some ganache swirls on top of the cake to act as glue. I’m using an 8B piping tip, which is an open star, but any star shaped tip will work well for swirls.

Straight after piping the swirls, which they’re still sticky, I’m pressing the chocolate sails into them. I’ll put the cake back into the fridge to set the swirls so that the sails are secured into them.

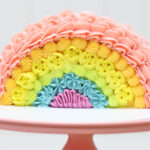
Now for some fun variations, starting with a marbled rainbow sail. I’m using Candy Melts for this but you could use white chocolate instead, melting it and then adding gel colours in small quantities because they’re very concentrate so you don’t need much.

Stir the melted candy melts or chocolate until they’re smooth, or if you’re using very small quantities like I am you can use a spoon to press down on the melted candy melts instead of stirring them.

Spoon each colour onto a piece of parchment paper to make whatever shape you like. The chocolate or candy melt shape will be thick and bumpy at this point.

Lift the sides of the parchment and jiggle it around to make the candy melts spread out and to thin out the coverage.

To marble the colours, using the end of a spoon to draw any design to swirl them together slightly.

To create a sprinkle rim pour sprinkles around the sail, trying not to get any in the middle of the sail. I’m using tiny nonpareil sprinkles. Then either lift up the edges of the parchment paper to make the sprinkles fall down towards the middle of the parchment, where they stick to the edges of the sail, or you can push them towards the edges of the sail with your fingers.

Leave the sail to set at room temperature or speed up the process in the fridge and then peel it away from the parchment. Check both sides to choose your favourite, which you’ll place to face the front of your cake.

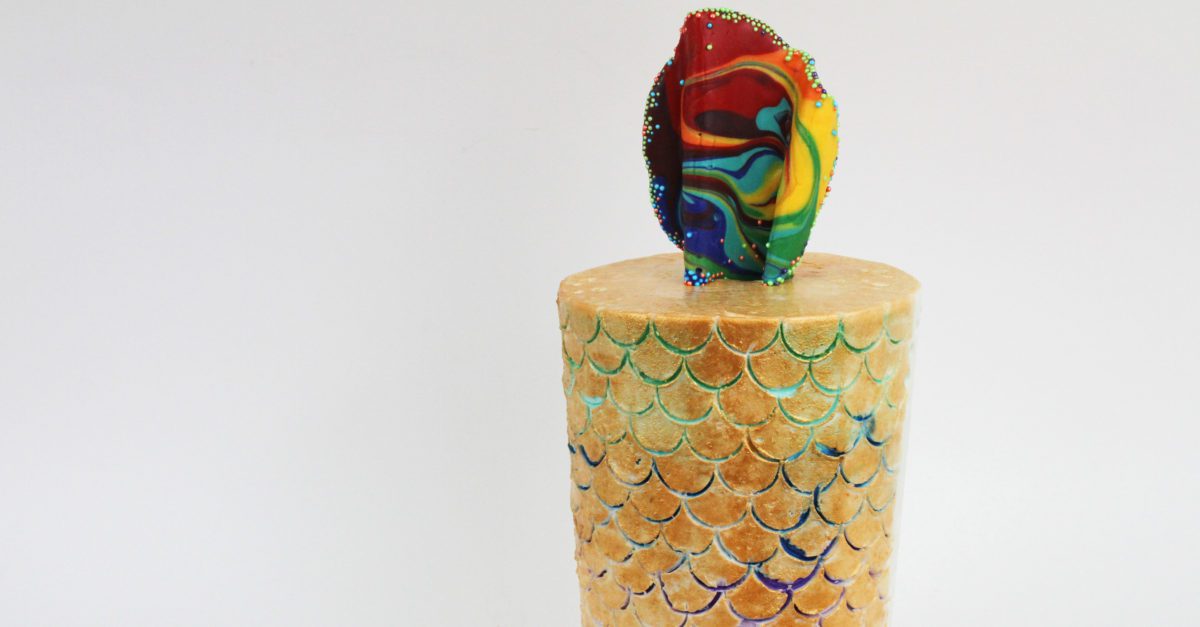
If your sail is quite thick it will be strong enough to push directly into your cake. If it’s thin and fragile you can pipe some frosting onto the cake to attach it instead. To push your sail into your cake, it’s easiest if the cake is at room temperature so if your cake is in the fridge, take it out about an hour before doing this. Then hold the sail above the cake and push firmly down to wedge it into the frosting.

To cut a cake decorated with a sail, just lift the sail off! It will probably pull some frosting with it if the cake has been chilled, but no one will notice after you’ve cut the cake.

I teach how to decorate this cake with carved rainbow mermaid scales in my online course on Buttercream Cake Carving.

Now for some shards, which I’m going to make with both chocolate and candy melts, to resemble leaves on a camouflage cake. Drop a spoonful of melted chocolate or candy melts onto parchment paper. Straight away, use the back of the spoon to swipe it a few times to thin it out and make it longer.

Chill these so that they set. To attach them to a cake, either press them straight into the frosting of a just-frosted cake, while the frosting is still soft and sticky, or if your frosting has set I’ll show you two ways how to attach them.

To place the shards on the top of the cake, if the frosting on the cake has set you’ll need something sticky to attach them to. Pipe some buttercream swirls with a star tip like a 1M tip wherever you want to place the shards.

The press the shards into the swirls of buttercream. When these swirls set, they’re secure the chocolate shards in place on the cake. This camouflage cake design required chilling the cake so I also needed a way to attach my chocolate shards to the side of the cake.

To attach the shards to the sides, pipe a tiny bit of buttercream out of your piping bag, just enough to make a small dot (or a star shape for me, because I’m still using my star tip). While this buttercream is still sticky, press the shards against it.

You can layer shards by piping a dot of buttercream onto a shard that’s already attached to the cake, and then press on another shard on the dot of buttercream. Click here for the tutorial on how to decorate this camouflage cake.

If you want to imprint a texture into your sails you can use bubble wrap. First wash it with hot soapy water and dry it well. spread your chocolate or candy melts onto the textured side.

Just as with parchment paper, let the chocolate set and then peel it off. When you turn the sail over, you’ll see the pretty texture on the other side!

If the sails aren’t very thick, to prevent them breaking as you push them into the cake you can first cut a pathway for the sails in the frosting. This works if the frosting has set so isn’t stick anymore. Hold the sail where you want to put it and draw a line along the bottom edge.

Then press the sails into the lines you’ve cut, pushing down to wedge them in the cake so that they won’t fall over when you move the cake.

Click here for my tutorial on how to achieve the bubble wrap effect on frosting.

I hope I’ve given you some fun ideas for different ways to make chocolate sails. I’d love to see your versions so if you put any photos of them on instagram, please tag me @britishgirlbakes!

Here’s the video version of this tutorial: