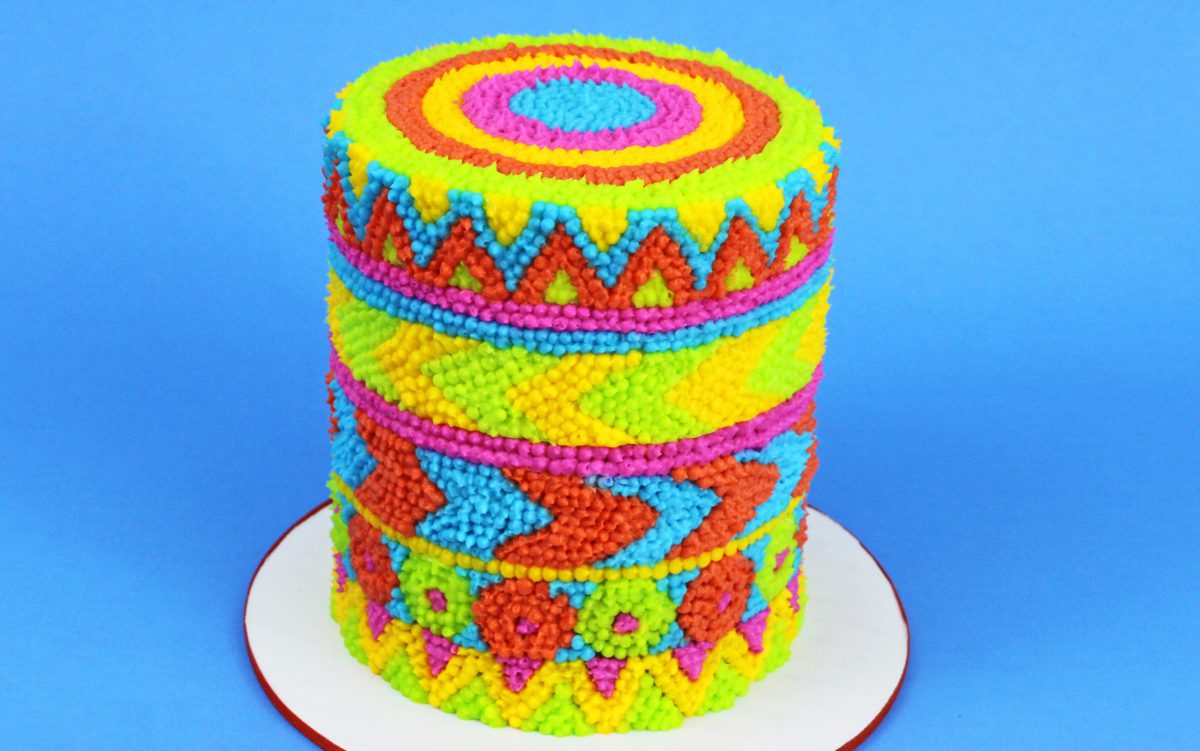
Trending cake styles going into 2021 feature bright and cheerful, hopeful colours, shrinking cakes with growing decorations, prints stolen from fashion trends, and techniques using just basic kitchen tools and pantry ingredients for surprisingly intricate designs. If you prefer to watch a video of this tutorial, scroll to the bottom of the page.
#1. Bright and bold colours
This is going to be a year for bright and bold colour combinations including neon colours and rainbows but not limited to them. Think happy, cheerful colours, moving away from the striking but quite ominous black cakes that were popular for a while in 2020.
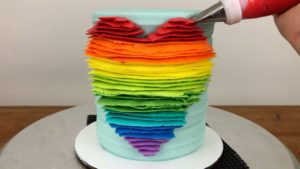
To make rainbow swirls, pipe strips of each colour onto a piece of cling film or Saran Wrap and then roll in up into a log and cut one end off, dropping that end down into a piping bag fitted with a star tip like a 1M tip.
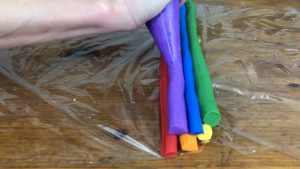
Then pipe your swirls and hold your bag in the same position for each swirl so that the colours face the same way all the way around the cake.
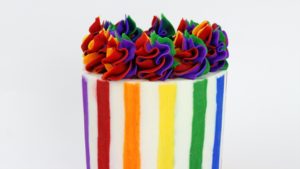
To achieve really bold colours use gels, which are very concentrated so with just a few drops you can get intense colours without affecting the consistency of your frosting.
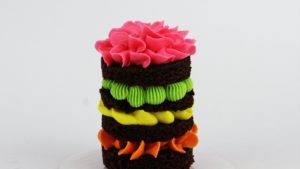
I teach how to tint buttercream and share the drop count for 43 colours in my online course on the Basics of Buttercream, which also includes how to make silky smooth buttercream every time, troubleshooting, storing, and using it for various techniques.
#2. Jelly Cakes
Jelly can be used create an underwater effect and cakes can be partially or completely covered with jelly to create oceans or aquariums.
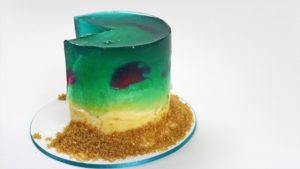
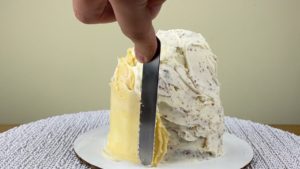
To create an under the sea cake, first carve and frost your cake using yellow buttercream to make it look like sand or you can use ganache if you prefer.
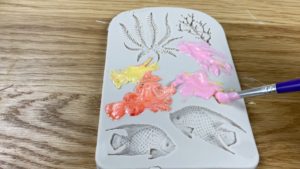
Create any creatures or plants or other decorations you want to put in the jelly. This is quickest with a silicone mold and you can spoon coloured jelly into the shapes or use melted white chocolate tinted with gel colours, brushing it into the shapes in the mold using a paintbrush.
Wrap your cake in acetate within a springform pan wrapped with cling film or Saran Wrap to stop the jelly leaking and then arrange your decorations and pour the jelly in.
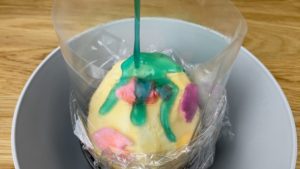
Let it set and then peel off the acetate! I have a detailed tutorial on how to make an under the sea jelly cake if you want to try it.
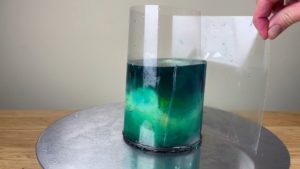
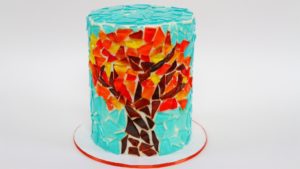
Some jelly island cakes have started to emerge and since jelly is so easy to make and the transparent effect is so striking, I think we’ll see some stunning jelly cakes in 2021 and I think it will be used to mimic more than just water, like colourful stained glass cakes.
#3. Leopard print
Leopard print is already trending in fashion but it’s coming to the cake world! I think we’ll see all sorts of animal print but particularly leopard print cake designs incorporated into frosting, toppers, and other details.
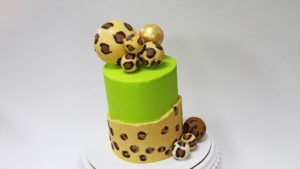
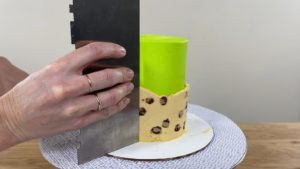
For quick leopard print frosting, cut a piece of acetate that’s long enough to wrap around your cake and pipe random squiggles of buttercream onto it for the leopard spots.
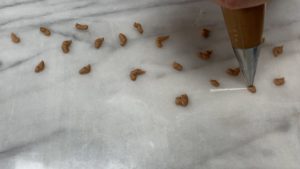
Pipe a darker colour around the dots or just use a larger round tip to pipe blobs of buttercream over the top of the first colour you piped, not completely covering the first colour so that the outline is random and irregular.
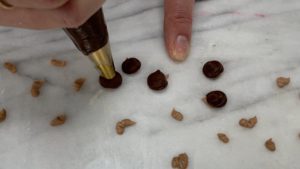
Put the acetate in the fridge for about 30 minutes to chill and set the dots. Spread your frosting colour on top, completely covering the acetate if you want to frost the whole cake with leopard print or just do a section of frosting as an accent.
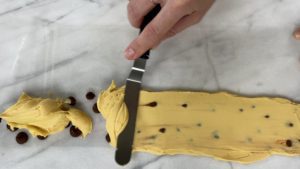
Smooth the buttercream with your

Chill the cake in the fridge for another 30 minutes and then peel the acetate off to reveal neat and smooth leopard print frosting! You can scrape around the frosting with a frosting smoother to even out any imperfections.
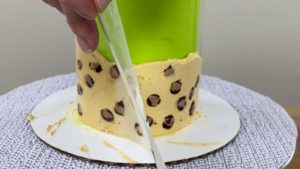
You can do this with parchment paper instead but acetate is thicker and sturdier so it makes the frosting a bit smoother and neater.
#4. Textured frosting
Textured frosting was BIG in 2020 and cakes moved away from rustic, uneven texture created with an
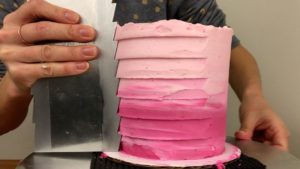
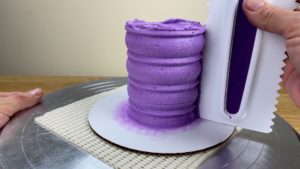
Texture isn’t going anywhere in 2021 but expect to see it taken to the next level with double texture, which you can create by chilling your first layer of textured frosting before applying your second layer.
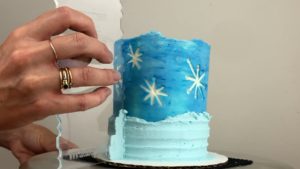
For neatly textured cakes, start with a smooth layer of frosting and make sure the sides of your cake and straight, so the grooves of the textured cake comb will imprint the cake evenly up and down the sides of the cake.
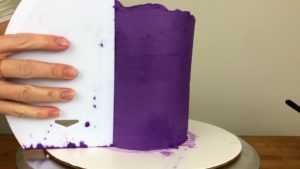
Go around the cake several times with your textured comb, pressing the comb down on the cake board to keep it straight and as you go, touch up any gaps in the texture by spreading on more frosting and then go over that area again with your comb.
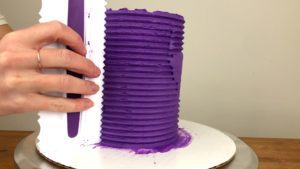
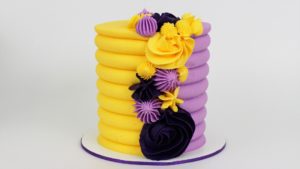
I think we’ll see cakes with half and half texture, where the frosting is divided down the middle or at a diagonal. I teach how to create half and half cakes on my online cake school.
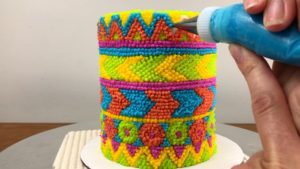
Another texture that’s growing in popularity is pointillism, where designs are piped onto cakes with hundreds or thousands of tiny dots of frosting. It’s a simple concept and fairly easy to execute but the result can be truly jaw-dropping!
#5. Square cakes
I’ve been seeing more and more square cakes, which are instantly eye-catching with their sharp angles and smooth flat sides.

They’re even more impressive to cake decorators, who know just how time consuming it can be to frost a square cake compared to a round one!
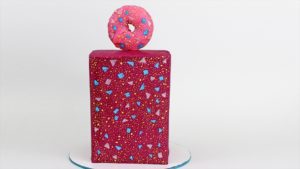
Having 4 distinct sides on a square cake allows you to easily divide your cake into different themes or techniques and having flat sides instead of the curved sides on a round cake make it easier to apply buttercream transfers, icing sheets, and stencils.
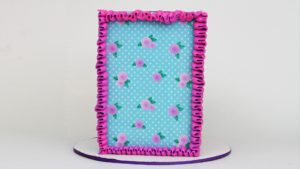
If you’re intimidated by these angular beauties, don’t be – try my cardboard box method for a free and stress-free method to get perfect results every time!
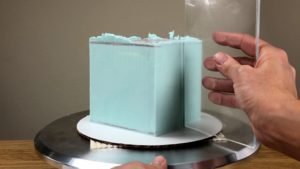
#6. Mini cakes
After social downsizing in 2020, cakes are downsizing too! Perfect for small gatherings or to sweeten up a quiet night at home, mini cakes are just enough cake AND they’re adorable!
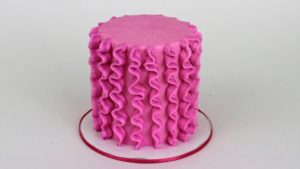
To make these, use a mini cake pan or cut the layers out of bigger cake layers using a round cookie cutter, or you can even turn cupcakes into mini cakes!
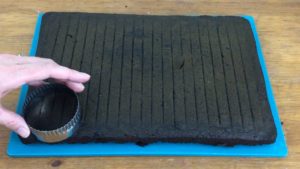
There are a few secrets to frosting mini cakes frustration-free, without them toppling over or sliding around and I have a full tutorial covering the whole process but the most important parts are:
1) Use a dollop of frosting to secure the cake to a cake board
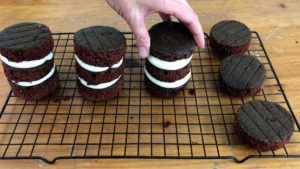
2) Chill your cake layers so they firm up before you attempt to frost them
3) Use a loose consistency of buttercream, less stiff than normal, so that it glides easily over the cake as you spread it on and smooth it.
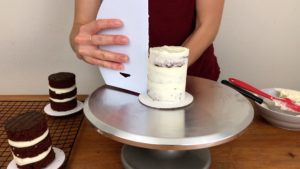
As well as being the perfect size for one person or a couple, mini cakes are also a great way to experiment with cake decorating techniques without wasting large amounts of cake and frosting!
#7. Oversized cake toppers
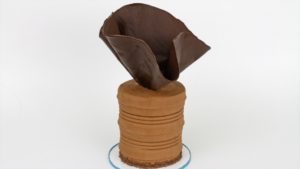
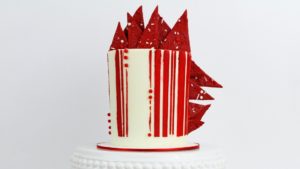
Just because cakes are getting smaller, doesn’t mean the decorations have to. Expect to see larger than life cake toppers in 2021: top-heavy sails made with chocolate or sugar, cookie cutter chocolate shapes, or made with brownies or cookies, donuts!
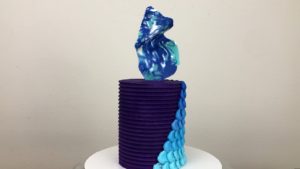
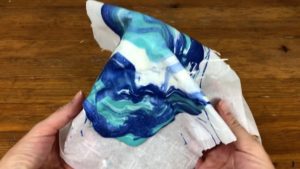
To make a dramatic chocolate sail, melt chocolate or candy melts and then pour them onto parchment paper or a silicone mat, or you can drizzle different colours to create a marbled effect.
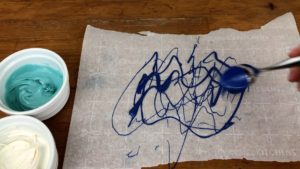
Drape it over a bottle or bowl and wait for it to set, or put it in the fridge or freezer to speed up the process. Peel the paper away from the chocolate and press the sail into the top of a cake.
For softer baked toppers like brownies or donuts you can push paper straws into them and use those to attach them to a cake. Make sure the straw goes all the way down to the bottom of the cake for the most stability.
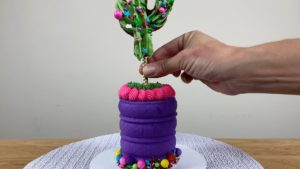
For meringues or cookies, insert a paper straw or lollipop stick before baking and after cooling, trim the straw if necessary and then insert into your cake.
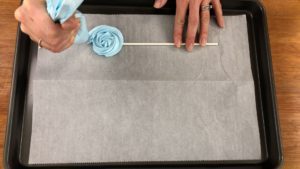
Another way to attach toppers is to pipe some swirls of frosting on top of the cake and press the topper into them, and when the frosting sets it will secure the topper in place.
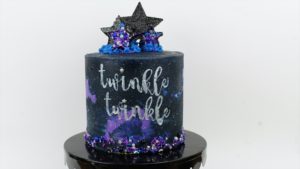
#8. Spherical cake decorations
With the hot chocolate bomb trend of 2020, anyone who made them has a sphere mold or several of different sizes, and as the hot chocolate bomb trend inevitably dies I think we’ll be seeing those molds repurposed in lots of unique ways.
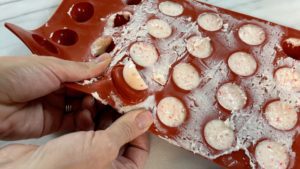
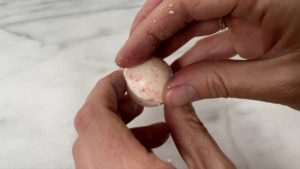
Forget about the marshmallow filling, you can just fill the mold with melted chocolate, attach two halves together by dropping one half onto a hot plate or pan to melt the surface, and you’ve got a pretty round chocolate!
Add a pattern or design by painting it onto the mold with coloured chocolate. Create different shades of brown chocolate by mixing different quantities of white and semisweet chocolate or add gel colours to white chocolate.
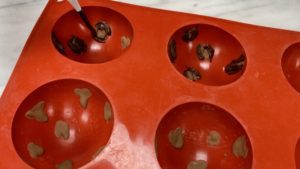
Let the design set for 30 minutes or put it in the fridge for 10 minutes and then add more melted chocolate over the top, spreading it with the back of a spoon or a paintbrush to cover the whole mold. Let it set again and pop it out of the mold!
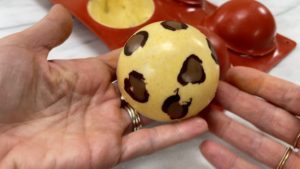
I’m confident we’ll see a lot of spherical chocolate toppers on cakes, in all sorts of colours and patterns, placed on swirls of frosting or creating gravity defying sculptures on top of cakes.
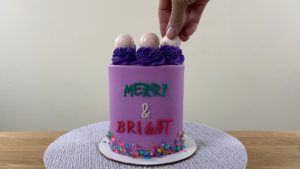
Combine three trends with leopard print and an oversized topper made with a hot chocolate bomb mold!
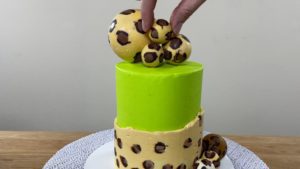
I’m sure we’ll see the molds used to create balloons on cakes, planets on space themed cakes, and lots of other clever decorative ideas.
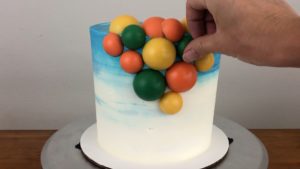
#9. Resourceful cake designs
People learned to be really resourceful in 2020, and I think we’ll see that reflected in 2021 with cake designs created without cake decorating tools, or at least very minimal tools.
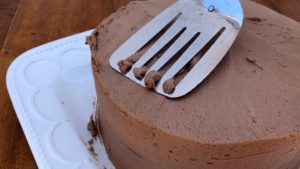
With the rise of home bakers in 2020 who couldn’t, or didn’t want to, rush out and buy a bunch of tools for a new hobby, we’ve seen the popularity of makeshift turntables using microwave wheels and even cooking spatulas to smooth frosting!
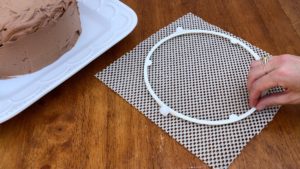
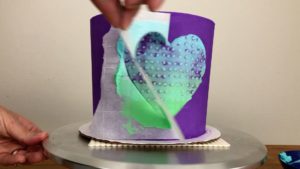
I think people will be using basic materials like parchment paper to make homemade stencils as well as parchment paper cake wraps, and if you’re looking for ideas I have a tutorial with 6 ways to use parchment paper to decorate cakes.
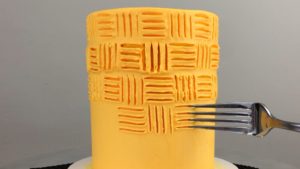
Another example of a resourceful cake technique is creating texture with kitchen utensils like cutlery: forks, spoons, knives, even chopsticks!
As well as cakes made and decorated with the tools available, I think we’ll see an increase in cakes featuring pantry staple ingredients like marshmallows, cookies, and chocolate chips instead of special materials like icing sheets or isomalt.
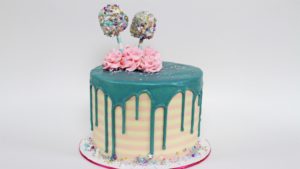
Check out my tutorial on 10 ways to use chocolate chips to decorate cakes for ideas of all of the things you can do with a simple ingredient! You’d be surprised by how elaborate and intricate cakes can be using the most basic tools, materials and ingredients.
#10. Sprinkles
Sprinkle designs have been gaining momentum over the last 2 or 3 years and with the growing availability of colorful, metallic, and thematic sprinkle blends.
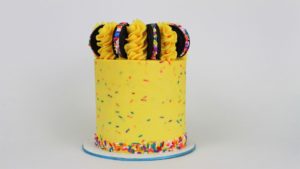
We’ve seen increasingly creative uses of them to decorate cakes that are shared on social media to inspire other sprinkle fanatics, so I think sprinkle cakes are here to stay!
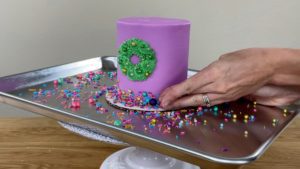
Try pressing them into the bottom of a cake to make a colourful border, using a tray or baking sheet under your cake to catch any stray sprinkles so that they don’t go everywhere!
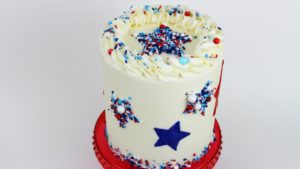
Spread buttercream over a stencil and before peeling the stencil off, while the buttercream on it is still sticky, press sprinkles into it and peel the stencil off to reveal a sprinkled shape.
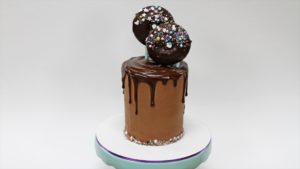
Add sprinkles to your homemade lollipops or other cake toppers like frosted cookies, brownies, or donuts for some extra sparkle!
If you’d like to learn new techniques and cake decorating ideas, check out my free online course on 10 Frosting Techniques. I have LOTS of other courses and classes and if you join my Club you’ll get access to every class, including all future classes that I add, so you can keep on top of all of the cake trends, get inspired with new cake designs and learn new techniques!

You’ll also be able to join my members-only live cake demonstrations, where you can vote for the cake I demonstrate and you can ask me any questions you have! Visit my online cake school for more information – I hope to see you there!
Here’s the video version of this tutorial:
